'91 RT4WD -AK Style- Build Thread
Alrighty, where do I start.
I guess I'll go ahead and fully introduce myself, My name is Jason and I have lived in Seward, Alaska since the day I was born. I am currently employed as an Apprentice Diesel/Heavy Equipment Mechanic by a construction outfit in Prudhoe Bay, Alaska. Since my work schedule is 4 weeks on 2 weeks off this build thread is going to be a bit of a "Stop Go Stop Go" ordeal.
Originally I started out with a '90 CRX with a bone stock DOHC ZC engine I bought when I was 15, and unfortunately being of that age i riced the shit out of that thing. The engine i am running in my wagon is the same one i built when i was 17.
The Beginning: 2008 (High School)
I realize this is a wagon only section but to start from the beginning I'm gonna throw in this picture of....
"Rex" back in 2008
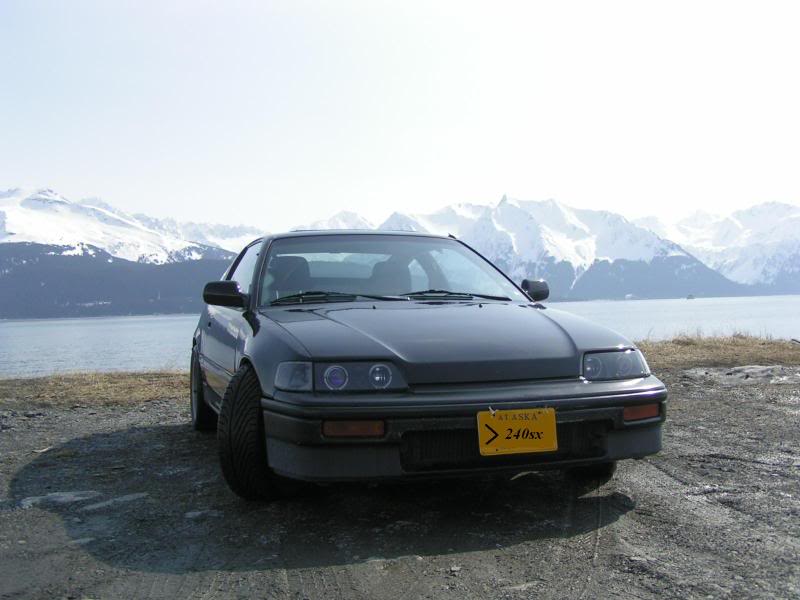
And this is the spark that set off a still burning chain reaction of money/time spending
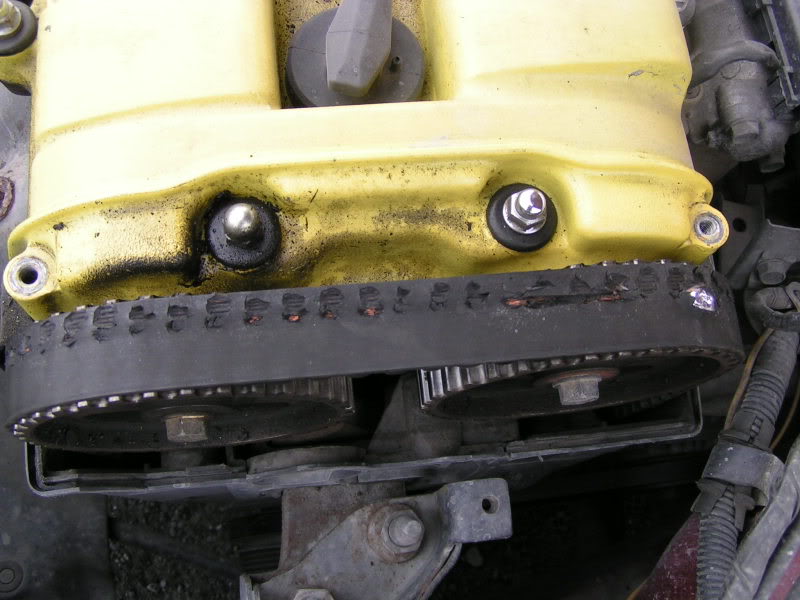
The first time i pulled an engine
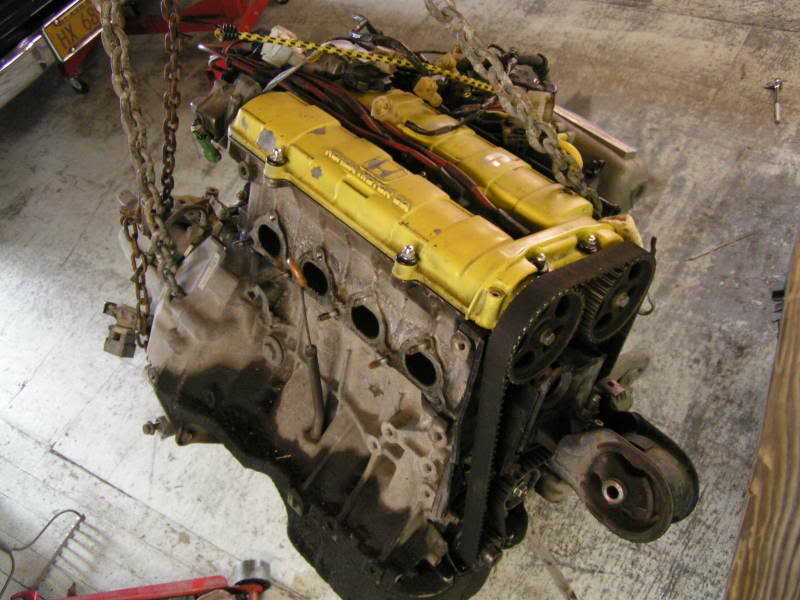
the timing belt didnt hurt the engine, it just seemed like a good excuse for one of these T.L.D.s (tricky little dealys)
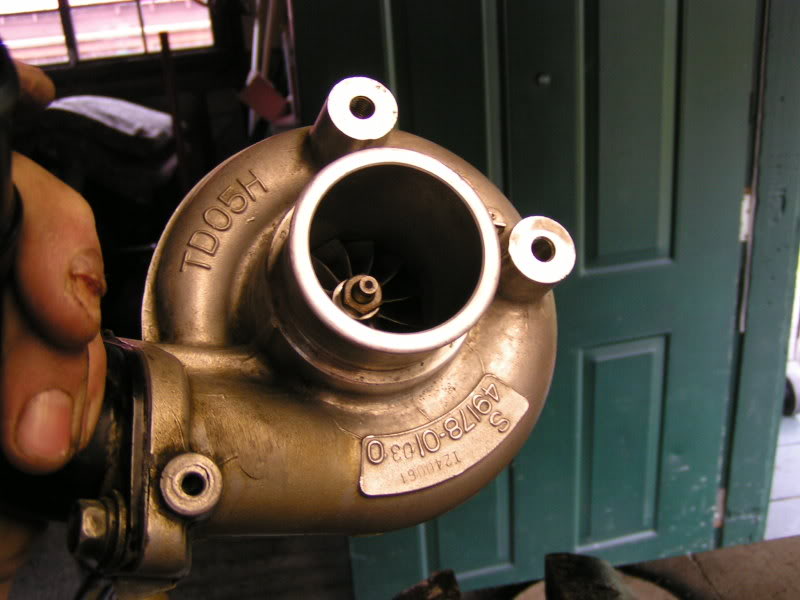
some of you might recognize that as a 1g eclipse/talon turbo, i was initially going to run this with a MAP fooler and hf manifold with adapter.
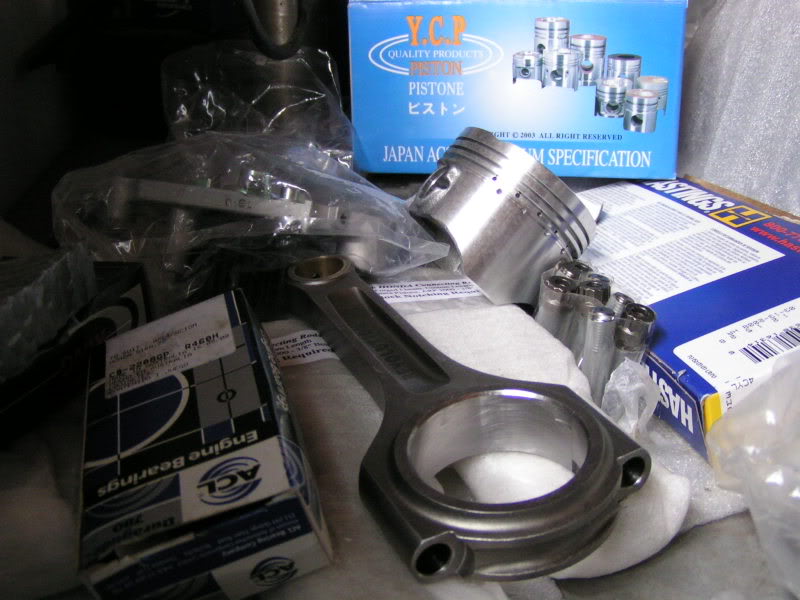
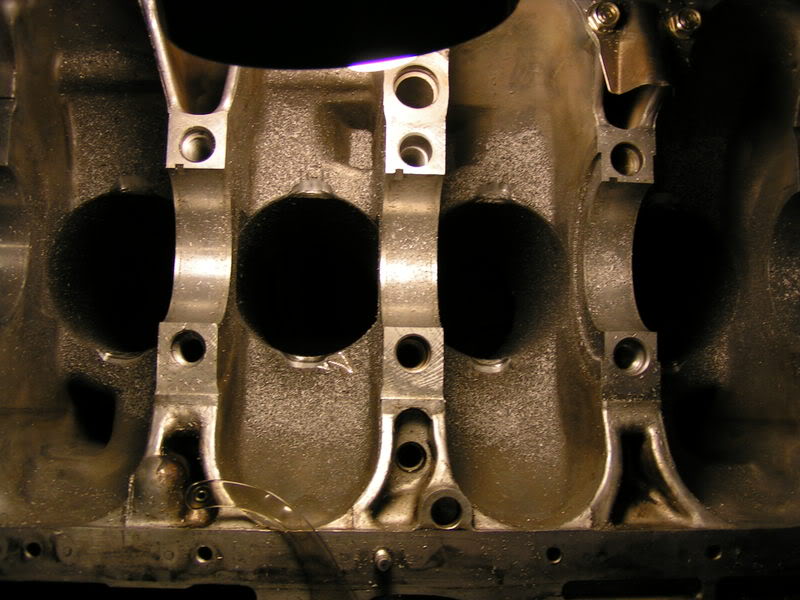
but first I'll need a rotating assembly...
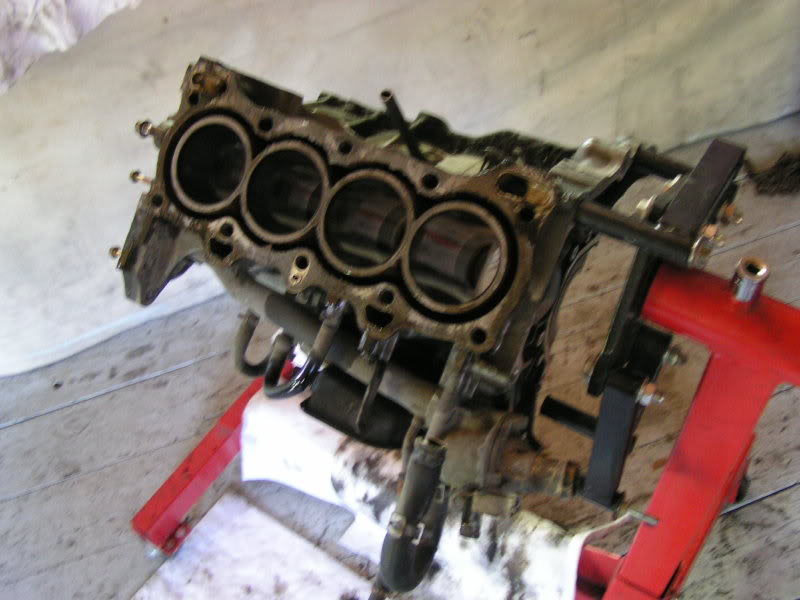
Clearance cuts for the bigger rods
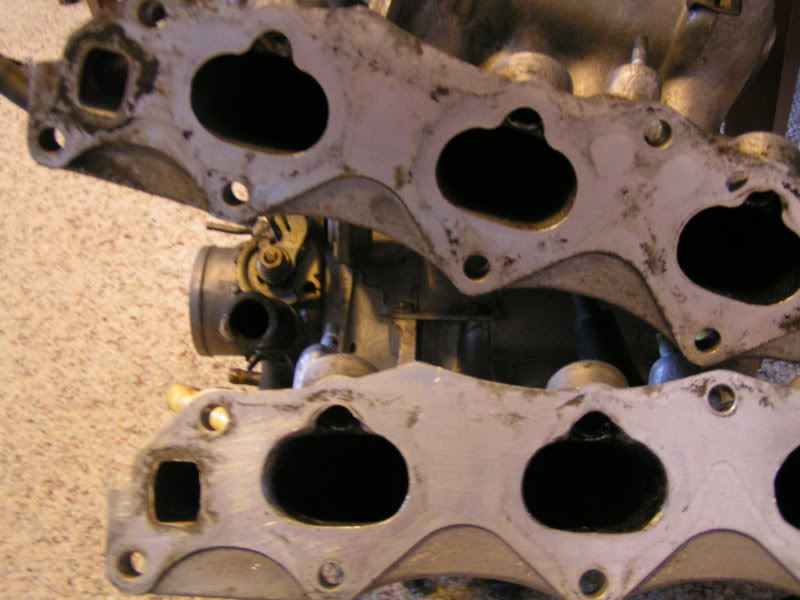
Port matching
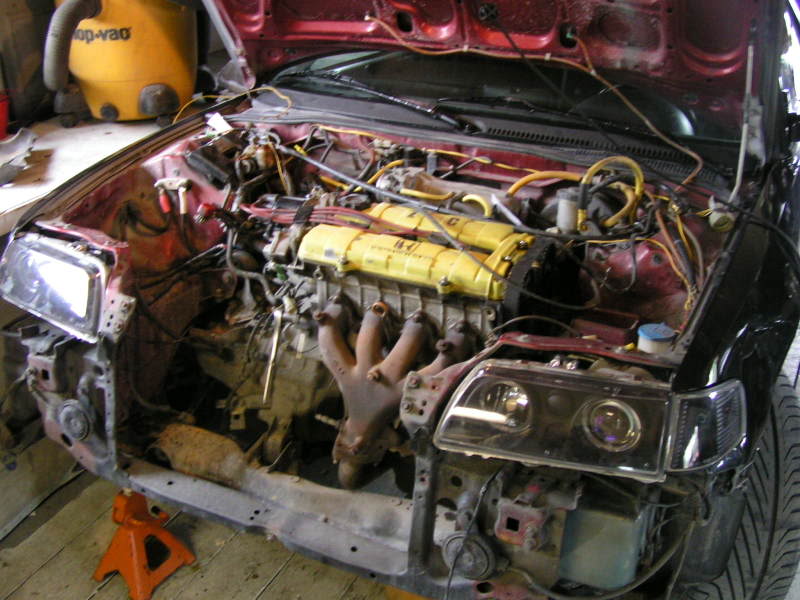
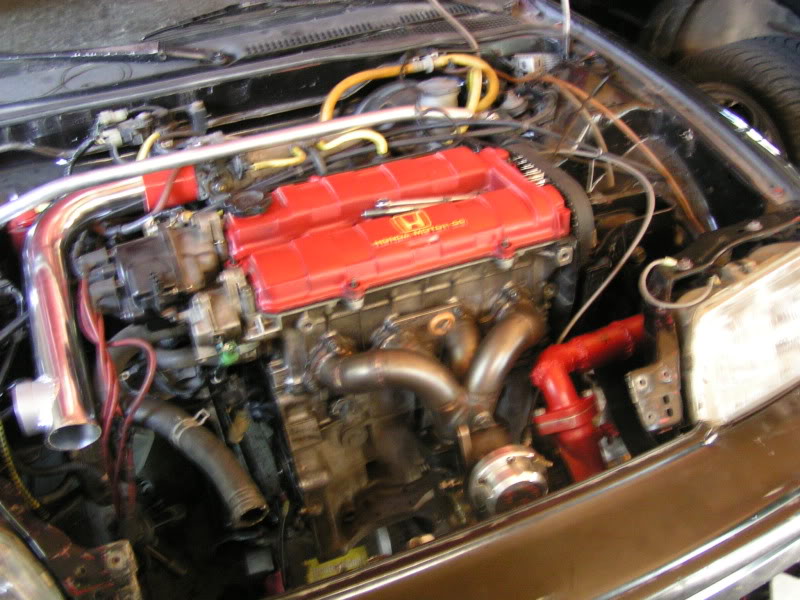
I really dont have any pics from the intall but here she is in the CRX (Hang on, the wagon is coming)
By the time i finished the bottom end i had purchased a second hand turbo, i had it so briefly i dont even remeber what it was but i know it was a little bit bigger than a tdo5h.
I'll put the full Specs of my current setup at the bottom of the post.
The CRX Never really ran right, it was however a HUGE learning experiance and really helped me hone my skills and make my mistakes so I didnt mess up on......
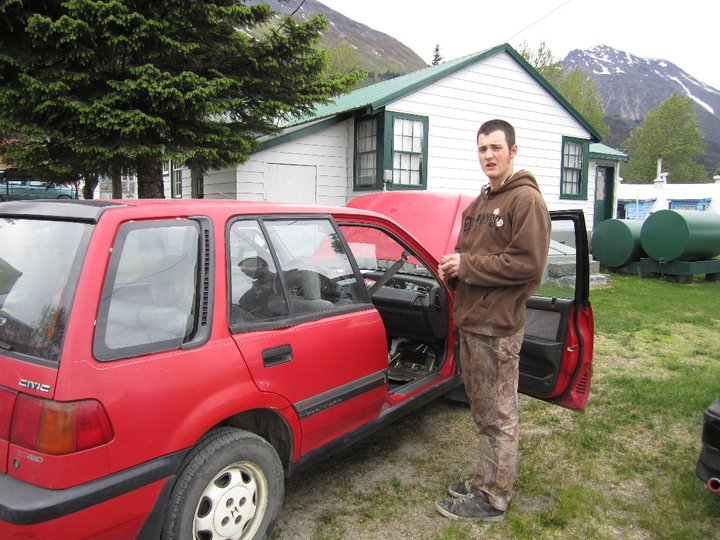
Spring 2011: "Lydya" '91 RT4WD
I Do not have a picture of the day i bought this rig.
I picked this one up for $750 in pretty decent condition. Now you must understand that decent in Alaska is like super shitty in the lower 48, there is minimal rust but NO clear coat left, a couple missing trim pieces and the typical dents. Also the windshield is cracked, but that's pretty standard up here. the rear driveline has a bad u-joint so it hasnt been installed since iv'e owned it. I drove the car home from Anchorage (120mi) with a clean title. The d16a6 from this rig went in the CRX and I sold it. It took me about a day to put the engine in and get her up and running.
shiny new turbocharger.

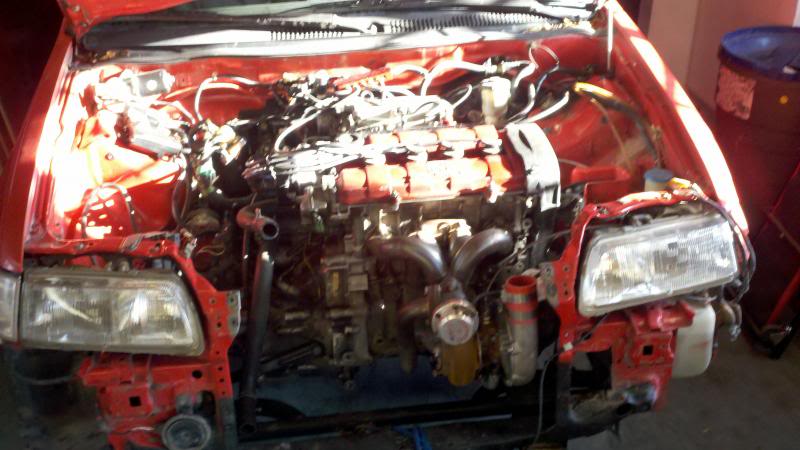
pretty decent day outside for some wiring
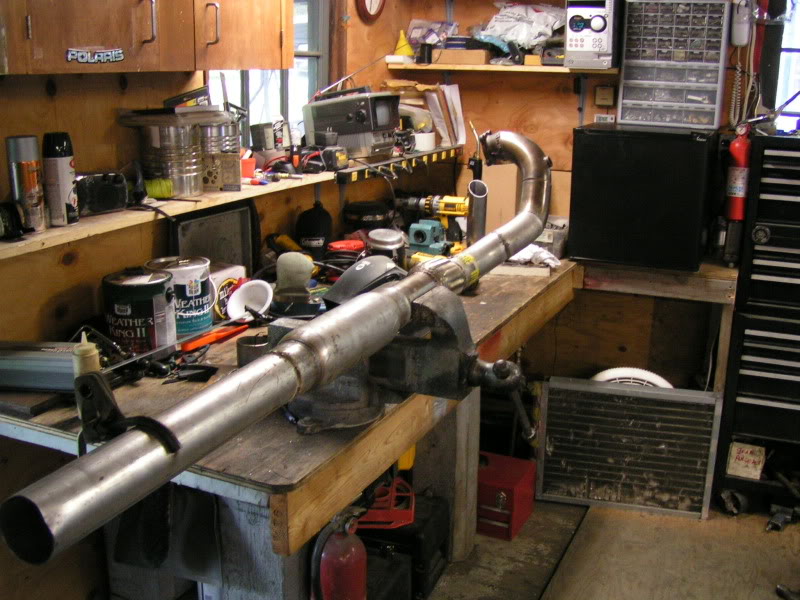
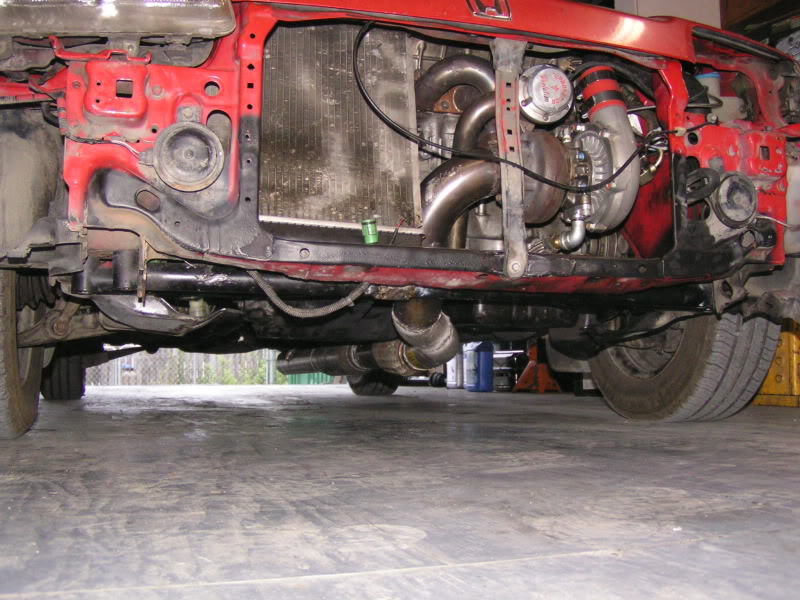
custom built 3" turbo back exhaust
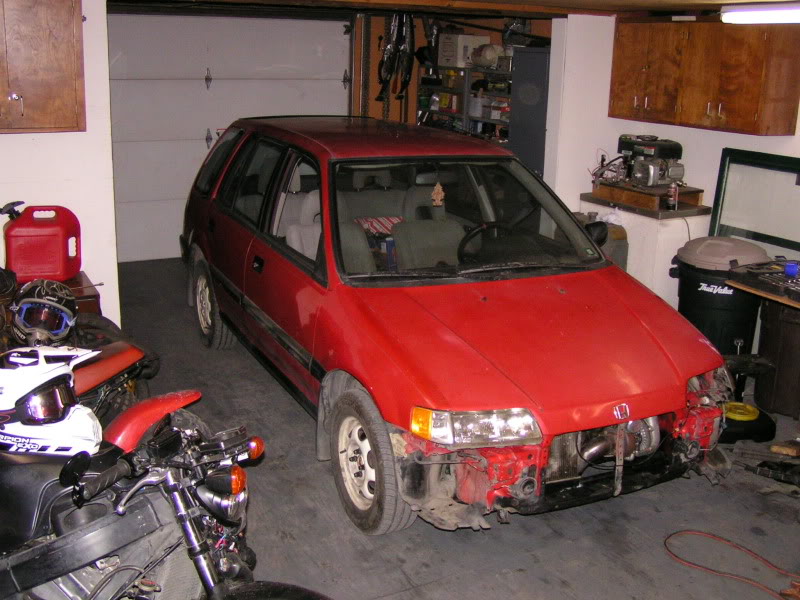
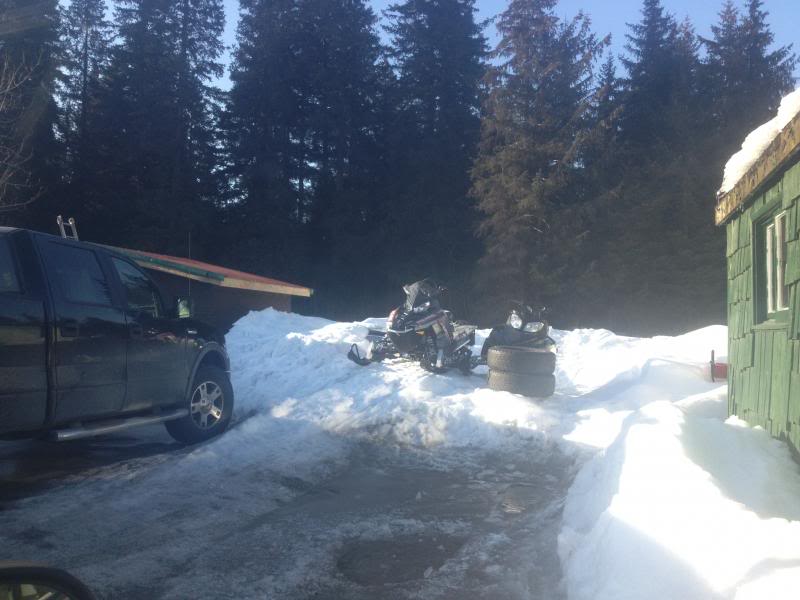
Here's how she spent winter 2012 unfortunately, shes sitting next to my '76 Nova (Hint: the Nova is parked in front of my truck) :-(
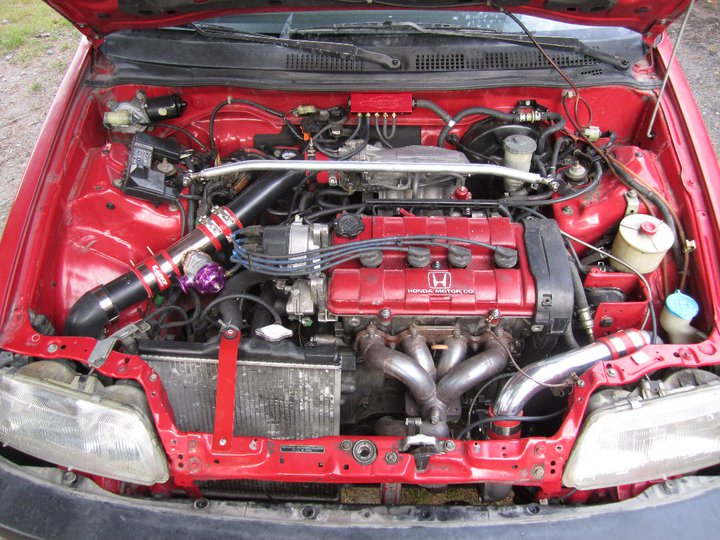
this is the most recent pic i have
Today: Back At It Again
Current Setup: (what i can remember)
Engine: DOHC ZC
Bottom End:
75mm Vitara pistons
"Revolution" custom length shot-peened forged h-beam rods
ARP rod bolts
Golden Eagle block guard
New bearings and Blueprinted.
Top End:
Cometic metal head gasket
Hand Ported by PIE-R in Anchorage, Alaska
new valve seals
port matched intake manifold
port matched turbo manifold
Turbo:
RC Autoworks Stainless mini ram manifold
Garrett T3/T4 50 Trim .48 A/R purchased new
Mishimoto z-line intercooler
Turbonetics Evolution waste gate (open dump under engine) 15 PSI
ebay piping
Greddy knock off BOV
Apexi dry air filter
Electronics and Fuel:
Neptune RTP in Xenocron socketed P72 (Moates Demon Board)
RC 650cc Injectors
NGK plugs and wires
GM 3bar MAP sensor
Innovate MTX-L wideband
Suspension:
Jim Fab traction bar
Custom broken spring on RF
Brakes:
Iron Oxide coated rotors
end
That really is all i can remember at the moment i know there is more.
honestly i hate to say it but i lost interest for awhile and actually had this on Craigslist for a little while, must've been too busy drinking or screwing off in the woods. now i just kinda fell back in love and decided to go for broke.
i have alot of plans for this rig, 2 more weeks and then i can go work on it, cant wait. I'm gonna budget myself $1500 every hitch (one work rotation) that should be enough to make something happen every time i come home.
as far as my plans? words are cheap, just wait, ill just show you what iv'e got in my head. I will say that when it comes to suspension some one had the idea first, up is better than down.
peace,
Jaudette
I guess I'll go ahead and fully introduce myself, My name is Jason and I have lived in Seward, Alaska since the day I was born. I am currently employed as an Apprentice Diesel/Heavy Equipment Mechanic by a construction outfit in Prudhoe Bay, Alaska. Since my work schedule is 4 weeks on 2 weeks off this build thread is going to be a bit of a "Stop Go Stop Go" ordeal.
Originally I started out with a '90 CRX with a bone stock DOHC ZC engine I bought when I was 15, and unfortunately being of that age i riced the shit out of that thing. The engine i am running in my wagon is the same one i built when i was 17.
The Beginning: 2008 (High School)
I realize this is a wagon only section but to start from the beginning I'm gonna throw in this picture of....
"Rex" back in 2008


And this is the spark that set off a still burning chain reaction of money/time spending

The first time i pulled an engine


the timing belt didnt hurt the engine, it just seemed like a good excuse for one of these T.L.D.s (tricky little dealys)

some of you might recognize that as a 1g eclipse/talon turbo, i was initially going to run this with a MAP fooler and hf manifold with adapter.
but first I'll need a rotating assembly...


Clearance cuts for the bigger rods

Port matching

I really dont have any pics from the intall but here she is in the CRX (Hang on, the wagon is coming)

By the time i finished the bottom end i had purchased a second hand turbo, i had it so briefly i dont even remeber what it was but i know it was a little bit bigger than a tdo5h.
I'll put the full Specs of my current setup at the bottom of the post.
The CRX Never really ran right, it was however a HUGE learning experiance and really helped me hone my skills and make my mistakes so I didnt mess up on......
Spring 2011: "Lydya" '91 RT4WD
I Do not have a picture of the day i bought this rig.
I picked this one up for $750 in pretty decent condition. Now you must understand that decent in Alaska is like super shitty in the lower 48, there is minimal rust but NO clear coat left, a couple missing trim pieces and the typical dents. Also the windshield is cracked, but that's pretty standard up here. the rear driveline has a bad u-joint so it hasnt been installed since iv'e owned it. I drove the car home from Anchorage (120mi) with a clean title. The d16a6 from this rig went in the CRX and I sold it. It took me about a day to put the engine in and get her up and running.
shiny new turbocharger.


pretty decent day outside for some wiring

custom built 3" turbo back exhaust


Here's how she spent winter 2012 unfortunately, shes sitting next to my '76 Nova (Hint: the Nova is parked in front of my truck) :-(

this is the most recent pic i have

Today: Back At It Again
Current Setup: (what i can remember)
Engine: DOHC ZC
Bottom End:
75mm Vitara pistons
"Revolution" custom length shot-peened forged h-beam rods
ARP rod bolts
Golden Eagle block guard
New bearings and Blueprinted.
Top End:
Cometic metal head gasket
Hand Ported by PIE-R in Anchorage, Alaska
new valve seals
port matched intake manifold
port matched turbo manifold
Turbo:
RC Autoworks Stainless mini ram manifold
Garrett T3/T4 50 Trim .48 A/R purchased new
Mishimoto z-line intercooler
Turbonetics Evolution waste gate (open dump under engine) 15 PSI
ebay piping
Greddy knock off BOV
Apexi dry air filter
Electronics and Fuel:
Neptune RTP in Xenocron socketed P72 (Moates Demon Board)
RC 650cc Injectors
NGK plugs and wires
GM 3bar MAP sensor
Innovate MTX-L wideband
Suspension:
Jim Fab traction bar
Custom broken spring on RF
Brakes:
Iron Oxide coated rotors
end
That really is all i can remember at the moment i know there is more.
honestly i hate to say it but i lost interest for awhile and actually had this on Craigslist for a little while, must've been too busy drinking or screwing off in the woods. now i just kinda fell back in love and decided to go for broke.
i have alot of plans for this rig, 2 more weeks and then i can go work on it, cant wait. I'm gonna budget myself $1500 every hitch (one work rotation) that should be enough to make something happen every time i come home.
as far as my plans? words are cheap, just wait, ill just show you what iv'e got in my head. I will say that when it comes to suspension some one had the idea first, up is better than down.
peace,
Jaudette
Comments
Spec 6 pad sprung puck w/ pressure plate
and
Whats on the shelf:
Full energy suspension bushing kit
AEM 320 LPH fuel pump
mishimoto aluminum half size radiator
mishimoto silicone 11 piece hose kit
HKS SSQV 4 BOV
new intercooler piping
3' morse push/pull cable
various oil fittings to eliminate sandwich adapter
Hurst T-handle shift knob
also i beat a nissan s13 with an rb25t swap from a dig
I've considered putting a turbo setup in my RT, I went supercharger because I wanted the power down low. Now that I've driven it a while, I don't think the lag will be that bad an issue.
Look into spacered tophats or machined strut spacers for your lift. The "dummies" method is more trouble and doesn't work as well in my opinion.
You ought to be able to make things happen, throwing 1500 a month at it!
...o yeah, im in a diesel shop.
so with a little bit of -8 Weatherhead Weatherfrost hose and some JIC fittings i think this fits the definition of overkill seeing as its made for oil and rated to -35f and 4500psi.
for now i left it long until i can get it home and cut it to fit then crimp the other end on. then its just a matter of welding the fitting to my oil pan.
also i was messing around in the weld bay during break and came up with this from (no joke) the scrap bin.
it certainly looks like a scrap bin ordeal, imagine that with a morse push/pull cable and a t-handle shift knob on top, and for style, under a shift boot. i dont know if this will work yet, its for the 4wd shift for on the back of the trans, it really depends on whether or not there are detents in the tranny. at any rate ill probably build a prettier one if it works out, if not no big loss.
thats all i got for now.
so first things, new shift knob
and then the bullshit started, i probably could have done 2 truck drivelines in the tike it took me with this little devil
the issue being the recessed caps
so i stuck the driveline in and must say this thing is quite a riot now that it doesnt just sit there and burn the tires:smug:
so on to slightly more recent things, heres a quick pic from today
and then a most unfortunate turn of events involved some barn yard animals pulling my engine
so here she sits for tonight, just the mounts left, i have to make a run to Chugiak tomorrow to pick up my next project so ill keep ya'll posted
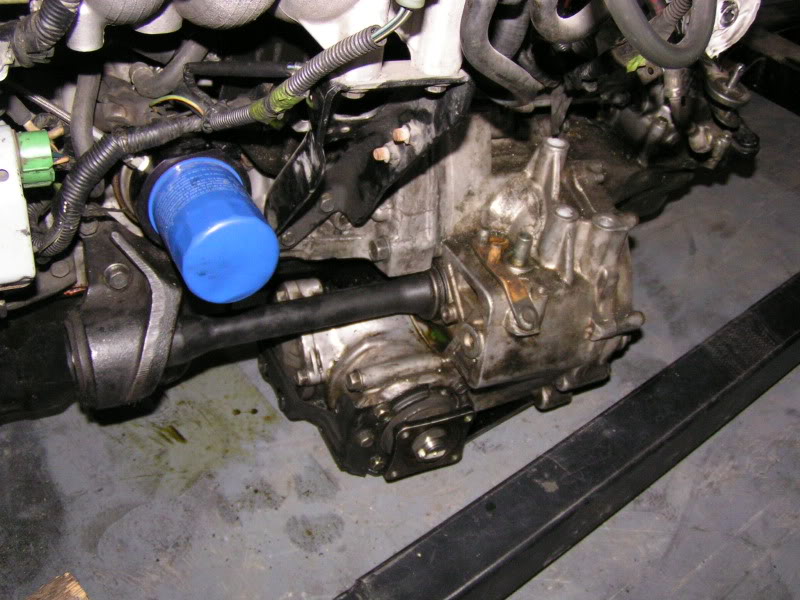
...but that's a thread for the other forum. got a bit of progress done this evening, finished pulling the engine and got to work on the oil system, i have never been a fan of sandwich adapters so i went ahead and got rid of that setup. To convert the oil port from -28BSP to -27NPT I just ran a tap in. I know this is taboo to alot of folks, but i guess we'll find out soon enough. I did cover the tap in really heavy grease to catch the shavings which worked quite exceptionally, I'm comfortable with the outcome. here's a pic of the "manifold", i used steel Aeroquip 1/8 NPT running tees, an autometer 18psi switch for the idiot light and left myself an extra port for a pressure gauge down the road.
It was a tight fit, i had to re-clock the oil cooler to clear it. also replaced the coolant lines with silicone (thanks Mishimoto).
now that that's taken care of time to replace my leaking pan gasket and install the new oil return line.
here's the new 1/2NPT to -8JIC fitting
and now for the pan itself
I could literally write an essay on how much this welder pisses me off but its all i have at my disposal for the time being. a little tap voltage rosin core, I'm definitely looking to upgrade to gas shielded before too long.
I'm happy enough with the outcome.........its not gonna leak, haha. And a little rustoleum paint never hurts.
thats where I'm at for a few days, ill be gone all weekend. Two things are bothering me though, my clutch is glazed and this turbo has borderline excessive shaft play.......after only 500 miles, starting to think I need a larger supply line. a little 120 grit sand paper will do the clutch wonders since i don't have time to wait for a new one to get here...... we have a saying "She'll ride"
i guess ill catch up on monday or tuesday
next on the list, removing the cam position sensor from the previous obd0 setup.
replaced with a cam seal from Skunk2
here is the oil return installed, it looks like its more fittings than hose haha
so that about does it for the engine...
heres my new radiator with low pro fan
and here she is for today, do notice where the intercooler is resting, thats my next item on the list.
hit her hard for a few hours today, started building the strut tower/intercooler mount. im using 1.5" square stock and 3/16" x 1.5" flat bar.
the space between the mounting ears and the intercooler will be filled with rubber grommets, rubber mounting is always a good call in my opinion, especially when its steel to aluminum.
the charge pipe off the turbo i had a buddy of mine tig weld or me, it cost me a half rack of coors but i think its worth it for the quality. i ordered the aluminum bends and silicone couplers from Treadstone performance and to say the least i will be doing business with them in the future, its top notch stuff. the only thing i can forsee being an issue is the 180* elbow to the throttle body is such a tight radius i might wind up going with a cast aluminum elbow from cxracing.
thats it for today, i need to find my mounts from an old strut bar i have lying around somewhere, im planning on tying the i/c bracket to the mounts and possibly triangulating to the fire wall. but that little strut bar is being one elusive S.O.B., thats what i get for having such a messy shop.
Though Evo rally cars always had front mount, most others (Subaru, Toyota Celica, Pulsar GTIR etc) were top mount
this is about it for the next 4 weeks, back to work.
later
this is bad ass
my buddy has been throwing around the idea to do a top mount. but all the wrx stuff i had did not fit too good.
i like how you mounted it looks strong. summer idling will get it heat soaked but it is the first top mount wagovan.
and that is a good point about idling, not so much an issue up here but I am planning on doing the "Tour de' USA" once this rig is done.
heres a quick update, the brake fluid reservoir was too tall to clear the intercooler so I had to shorten it a little bit. Here's the chunk i took out of the middle
this turned out pretty good, it's solid
all done, cant even tell, i did lose the float switch function but oh well, just have to keep checkin it every oil change.
im looking for a bit of input on part selection. 1 week down and 3 to go at work so I guess it's time to order some parts :-). im looking to get adjustable suspension links and found blackworks racing for the rear toe and camber, yea or nay on these? Anyone running them? It's gonna be skunk2 for the front camber. Also I'm looking into altering my stock pcv system for the turbo setup and stumbled across an article about exhaust scavenging, anyone done this to a turbo rig? It looks like I can just run a catch can with an extra bung coming off the lid routed to the exhaust.
and as for suspension I'm planning on cutting out flanges from 1/4 steel for the struts to bolt to, putting 2 1/2 inches of schedule 120 pipe on top and welding on another flange to bolt to the body. I'm leaning toward stock replacement for the struts/springs as I'm planning on making this my daily driver (putting gas in a 5.4l v8 gets old when you're paying over 4.70 a gallon). Sound half reasonable? Any words from some of the more experienced *cough* bam bam *cough* members?
back from another 4 weeks in the frozen hell known as Prudhoe Bay, and got a pile of parts with 2 weeks to install. life is good.
DRMORTY is running 1 3/4" spacers on his 2wd auto Mad Max, maybe he'll chime in.
On the rear, I really can't explain why I have 3 1/4" total lift to level it with the 1 1/2" in front... Maybe because of the added plunge in the polyurethane RTA bushings? I'm even considering another 1/2" in back.