RT4wd EF carrier bearings / center bearings / driveline vibration SOLVED
 mr_sp33
Wagonist
Hi Everyone.
As anyone who owns an RT4wd wagon is probably aware, driveline vibrations are the devil. Luckily Rockford Driveline came to the party and now sell replacement U joints (430-10C is the part number), however that only solved part of the problem.
First, a bit of an explanation of what's going on. This 3 piece prop shaft is designed to be inline, where there is no designed angle of the U joints. Over time, this causes the needle bearings inside the caps of the U joint to wear a notch on the point where they spend all of their time positioned. This isn't a big deal, until you consider that the carrier bearing housings also sag over time, or in more extreme cases can tear. This creates an angle at the U joint, which means the u joint no longer spends all of its time on center, instead it 'pops' in and out of its worn center position and creates a nasty vibration. Also if the center bearing has sagged to the point where it's no longer suspended by the rubber (instead the inner section is touching the outer section) then the vibrations become much more noticeable.
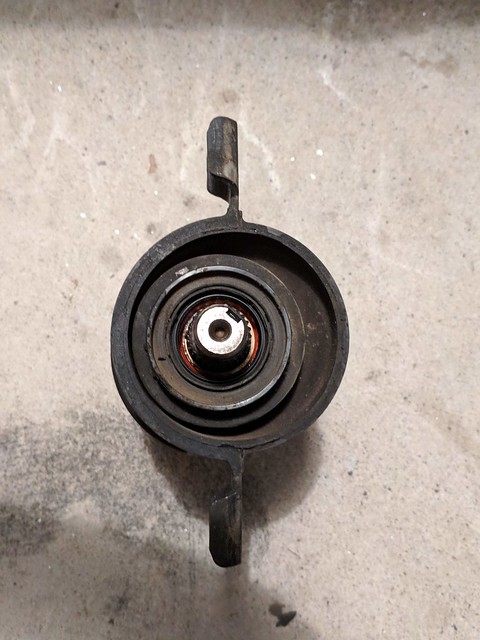
Here's an example of a worn out carrier bearing housing:

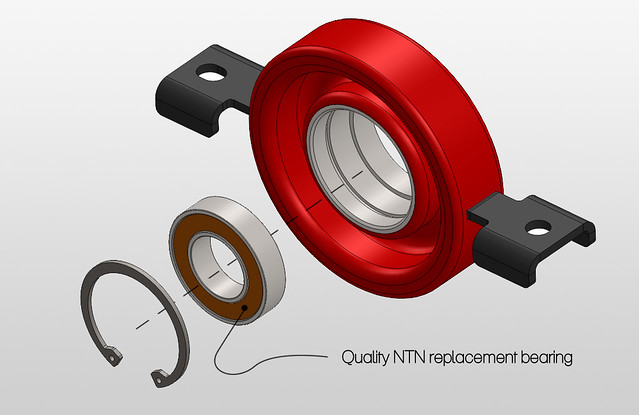
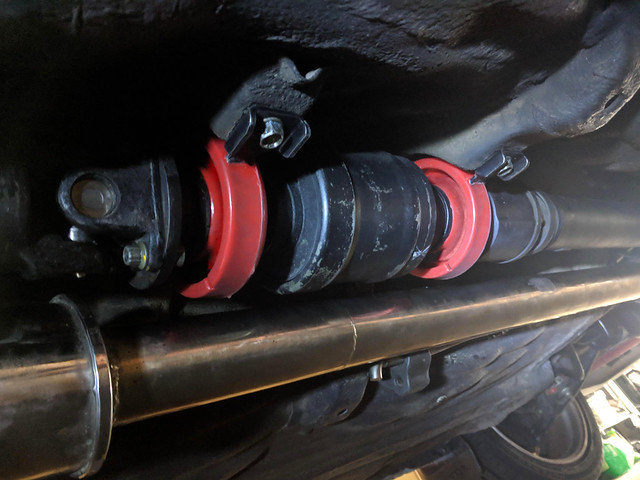
So there's two things here. Replace the U joints to remove the worn needle bearings, and replace the carrier bearing housing to re align your prop shaft angles. Unfortunately your only option for the carrier bearing housing was to find another used less clapped out example, now you have the choice to instead buy a set of these:


To purchase a set, please see below sale thread:
https://www.civicwagon.com/showthread.php?21001-EF-RT4WD-carrier-bearings&p=237705#post237705
As anyone who owns an RT4wd wagon is probably aware, driveline vibrations are the devil. Luckily Rockford Driveline came to the party and now sell replacement U joints (430-10C is the part number), however that only solved part of the problem.
First, a bit of an explanation of what's going on. This 3 piece prop shaft is designed to be inline, where there is no designed angle of the U joints. Over time, this causes the needle bearings inside the caps of the U joint to wear a notch on the point where they spend all of their time positioned. This isn't a big deal, until you consider that the carrier bearing housings also sag over time, or in more extreme cases can tear. This creates an angle at the U joint, which means the u joint no longer spends all of its time on center, instead it 'pops' in and out of its worn center position and creates a nasty vibration. Also if the center bearing has sagged to the point where it's no longer suspended by the rubber (instead the inner section is touching the outer section) then the vibrations become much more noticeable.
Here's an example of a worn out carrier bearing housing:

So there's two things here. Replace the U joints to remove the worn needle bearings, and replace the carrier bearing housing to re align your prop shaft angles. Unfortunately your only option for the carrier bearing housing was to find another used less clapped out example, now you have the choice to instead buy a set of these:


To purchase a set, please see below sale thread:
https://www.civicwagon.com/showthread.php?21001-EF-RT4WD-carrier-bearings&p=237705#post237705
Comments
I'll update this post with payment details when they're in stock and ready to ship.
Thanks for the interest!
Still waiting on a couple more bits but they're coming along...
Also, housing assembled... Off to powdercoat next:
No probs, i've sent you a PM.
My vacuum degassing chamber arrived. Set it up and had a go and worked good. This is to remove some small bubbles i was noticing that rose to the surface of the prototype ones i did early on while it was setting.
Couple of pics of it pulling bubbles out of the urethane:
I've got a retaining ring that needs to be welded to the CNC'd inner housings which has been delayed (was hoping to get them done this weekend, but the tooling broke unexpectedly and i'm getting them laser cut instead).
So casting will start this time next week instead of this weekend as expected.
Apologies guys!
If you're not aware, polyurethane will bond to just about anything, but the quality of the bond depends on a lot things. Through trial and error and getting feedback from various companies tech staff, I've managed to achieve a bond that exceeds the strength of the polyurethane.
Of course, this is only part of the design. Both the inner and outer housings are overmolded in such a way that they both have mechanical bonds which also secure the molded urethane to each housing.
The first two images show a less successful bond, where the urethane is stronger than the adhesion which means it can be delaminated by pulling it off. The last image shows the bond strength is better than the urethane and can not be removed without destroying the urethane. This was achieved by careful surface prep of the steel, a bonding primer, a bonding agent and then laying the urethane over the top.
Here's number 1:
The urethane takes about a day to set enough to de mold, so i'm casting about 1 per day from now. First 2 sets to be shipped next Monday, and the third a couple of days after that.
Watch this space
Thanks guys, pretty happy with how they're turning out. Looking forward to sending them out.
Sure is, check the first post and shoot me a PM with your address and i can get you a quote with shipping. :cool:
One thing i'll note is that there are still a few small air bubbles that seem to be introduced when it's poured and rise when it sets, i just can't seem to avoid them (even with degassing). They're only small so they wont affect performance but you'll notice them on the top side of the casting.
Super keen to send these out
I can't wait to get some feed back from these folks on fitment, etc.!