Skidmark - my '89 civic wagon 2wd
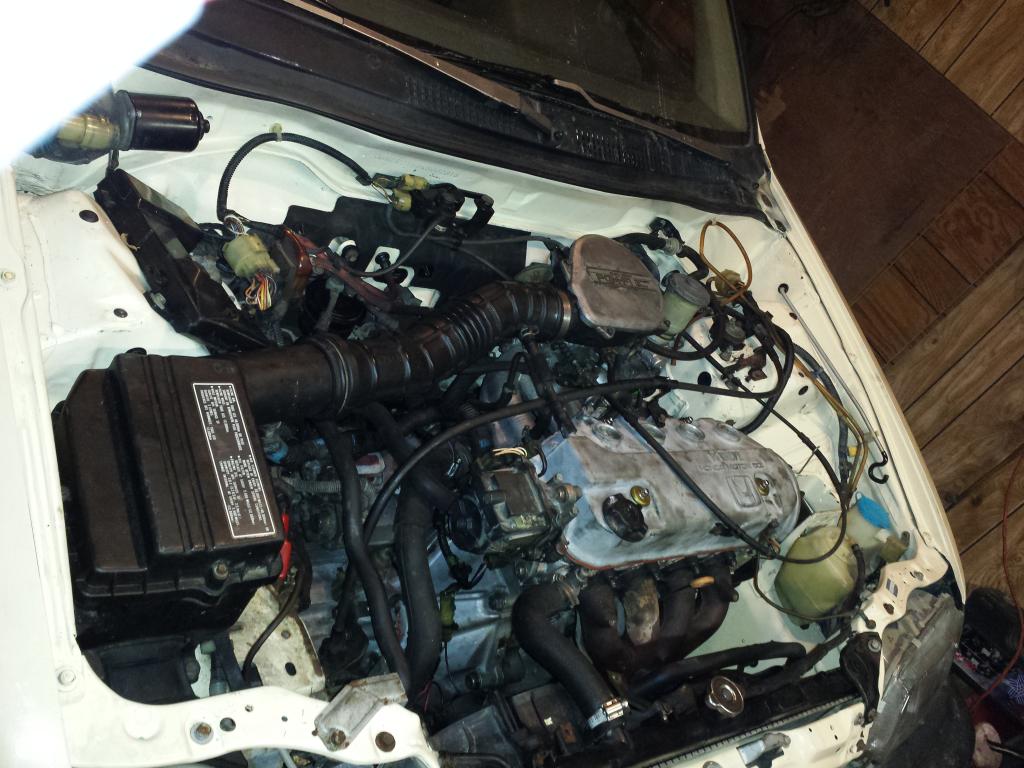
:cool: This is my 1989 honda civic wagon 2wd, factory manual with A/C! Her name is Skidmark she looked like this when I picked her up...
Everything was there, pretty darn clean, and only $600!!! (It took about $1000 to get her home, between truck and trailer rental and gas). Car was supposedly running when parked a few years ago, and all the pics looked really clean - I jumped into my first "from scratch" build.
Picked her up a few months back, and I've had a few issues with her since, I'll go ahead and fill everybody here in...
-Towed her home ( 2 flats, no battery, no clue as to other issues- yet)
-Installed battery & discovered bad "rubber"at clutch pedal for starter interlock switch - she started right up!
-Took care of brakes, rotors, tie rod ends, ball joints, oil change, fluids flushed, etc.. (25 year - maintenance interval:p)
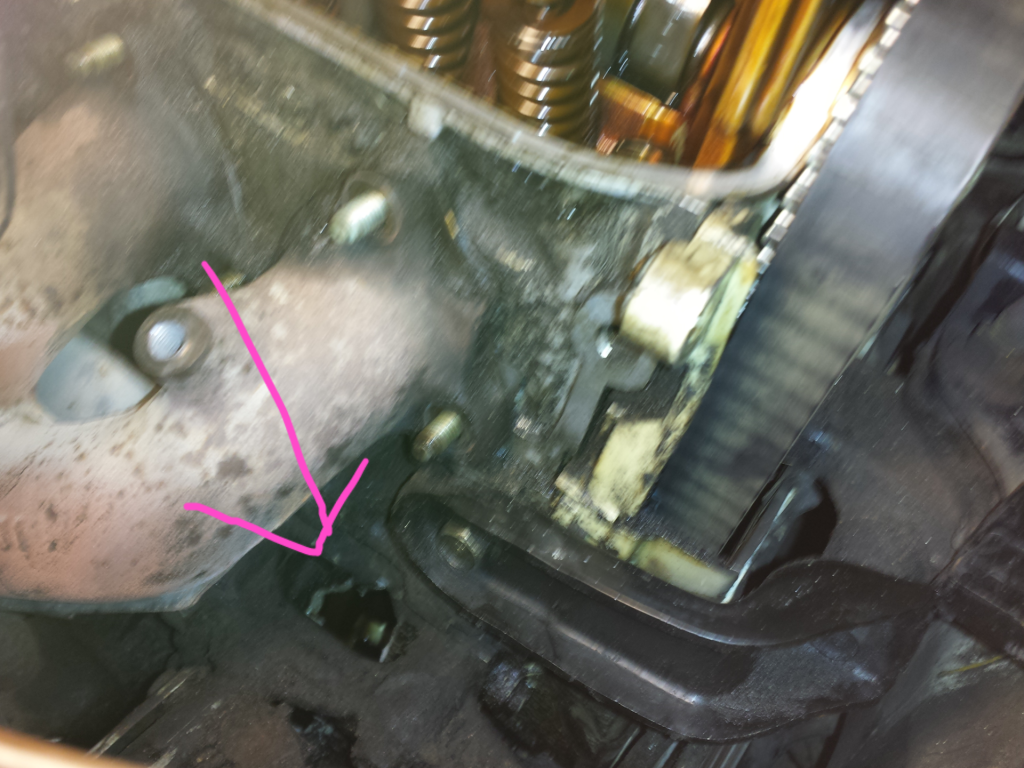
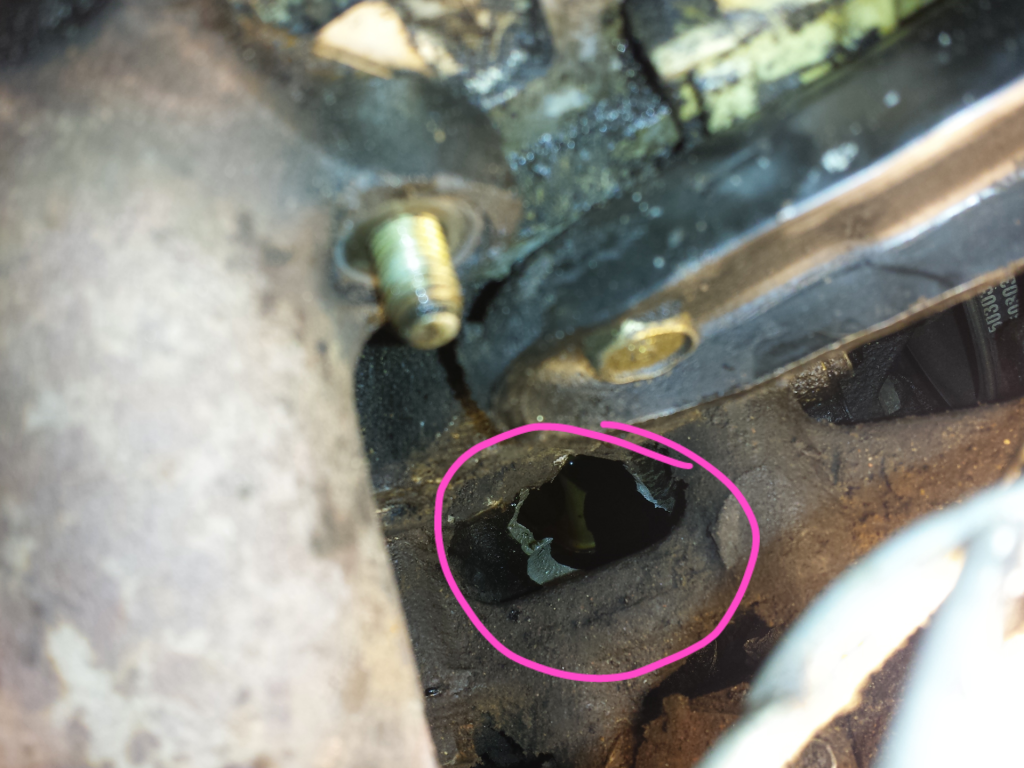
-Drove around for a few days and it committed suicide!!! Broke a rod and punched a hole in the front and back of the block!!!
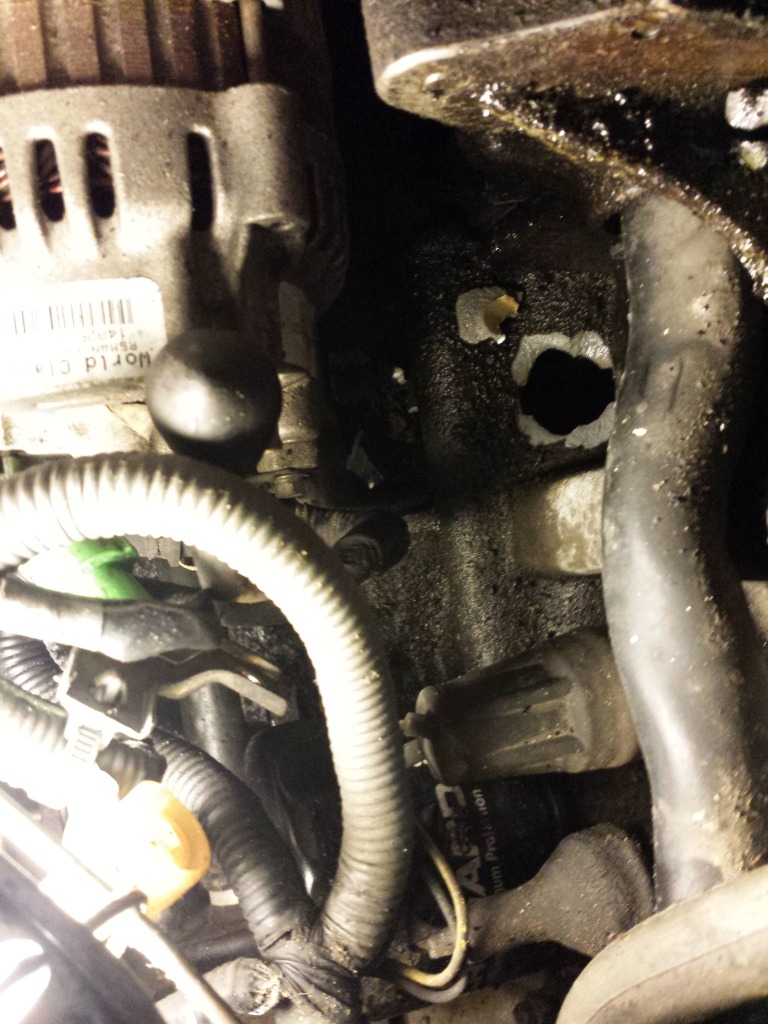
Backside of the block, by the alternator popped as well:
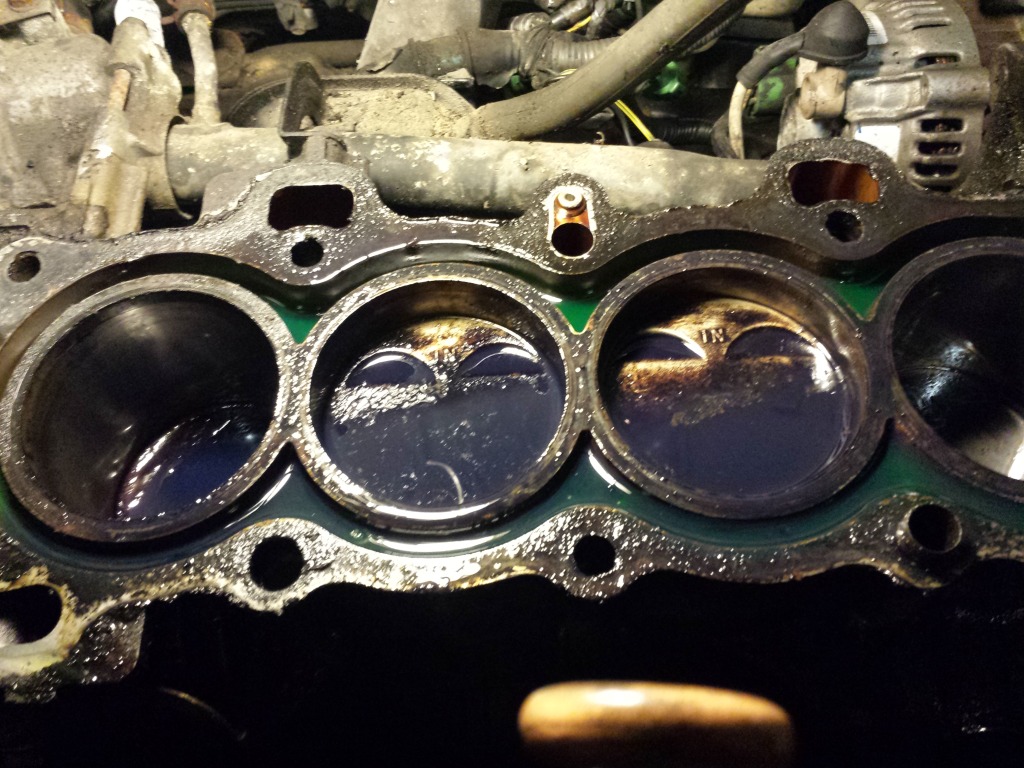
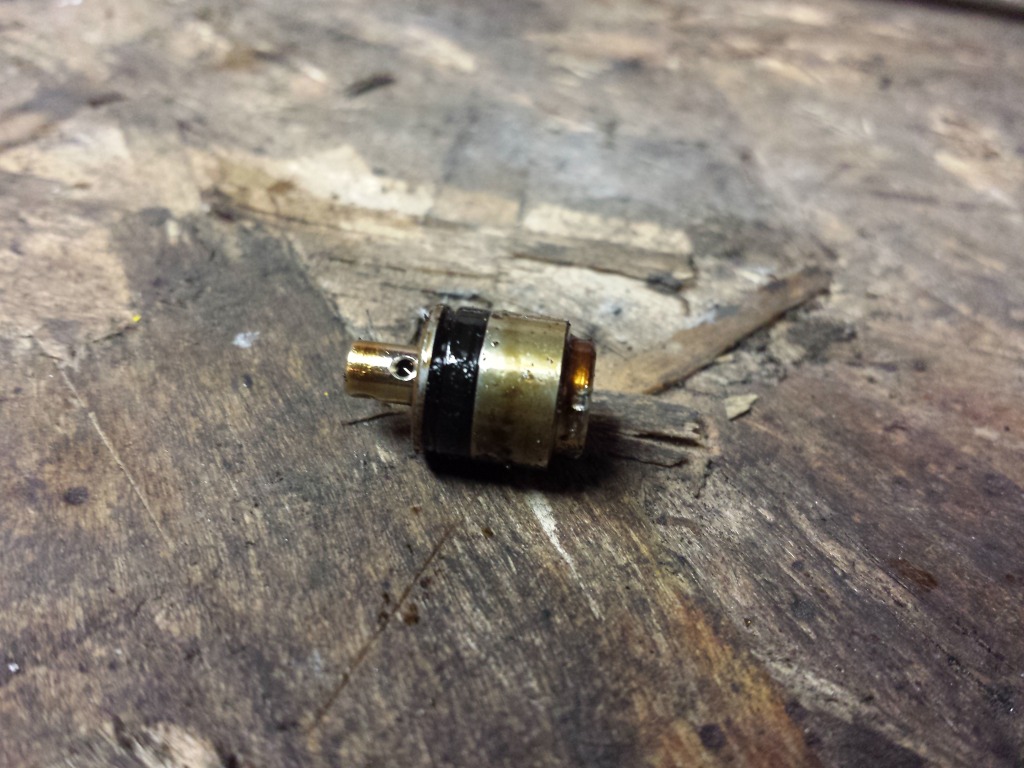
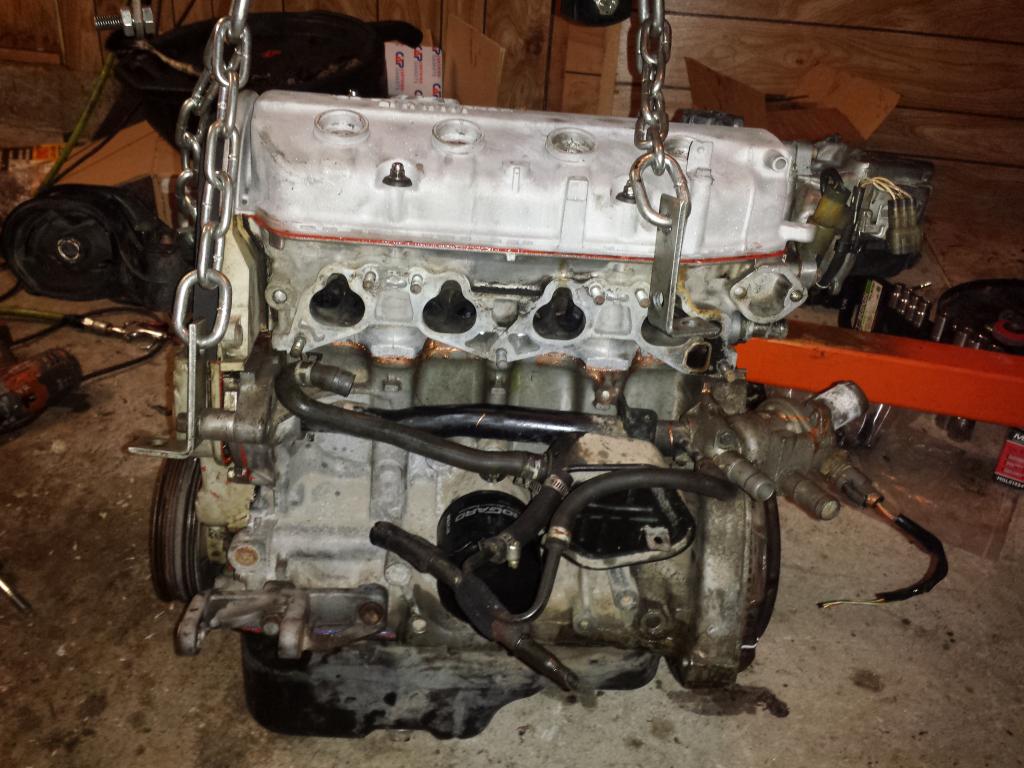
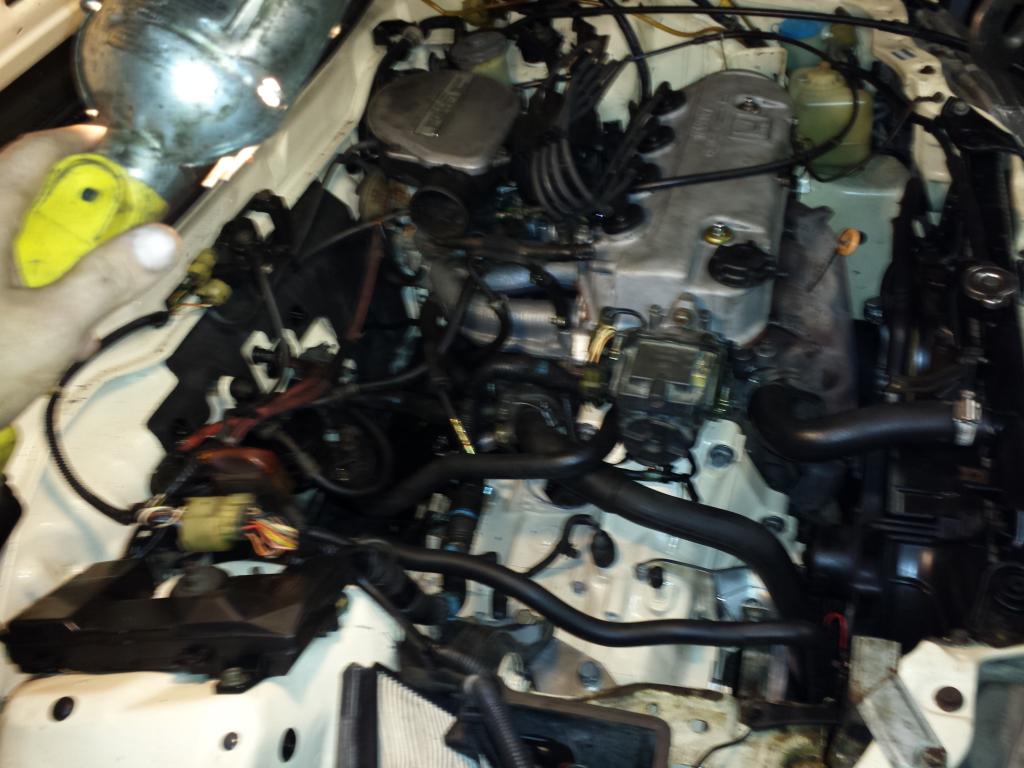
So, wanting to drive her, but not ready for the MPFI conversion, I swapped in a block from a d16z6 and learned all about honda's 'oil control jet" system. this regulates oil flow to the head from the oil pump.
VTEC MOTORS HAVE THIS IN THE HEAD, NON VTEC MOTOS HAVE THIS IN THE BLOCK!! My combination of vtec block and non vtec head would have meant no oil control jet. bad idea. So i took the oil control jet from the dead non vtec block, measured it, and DRILLED THE VTEC BLOCK TO ACCEPT THE JET!!
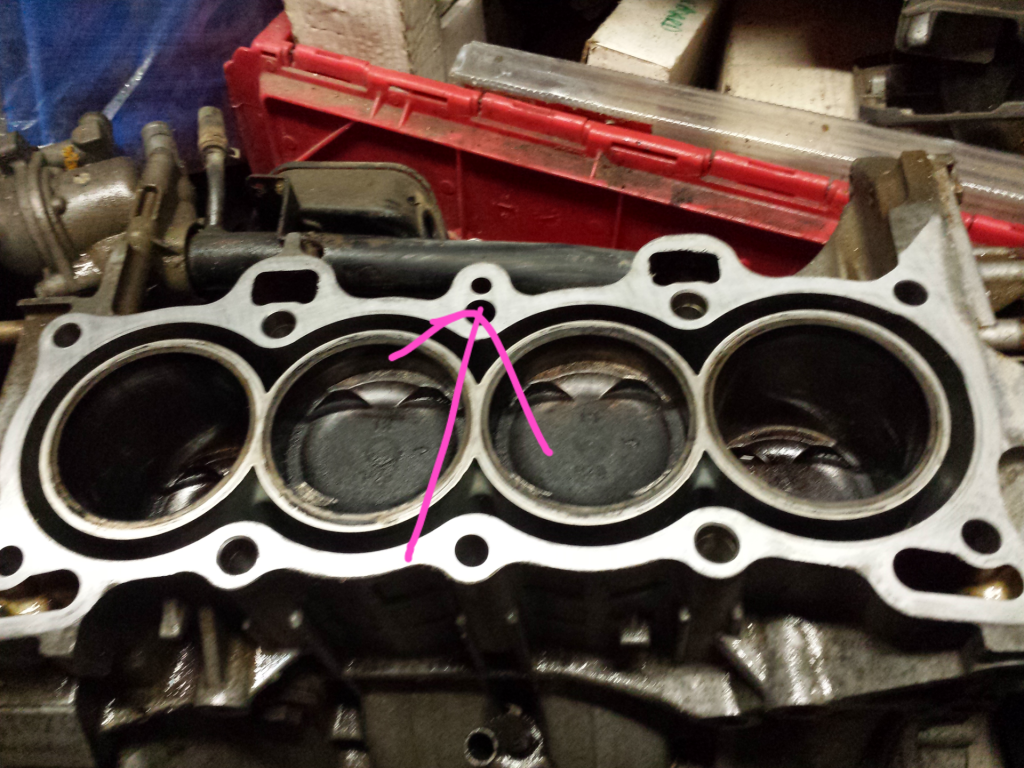
Shiny thingie between cylinders 2&3 is the oil control jet:
had to drill the "donor" block out in the same location
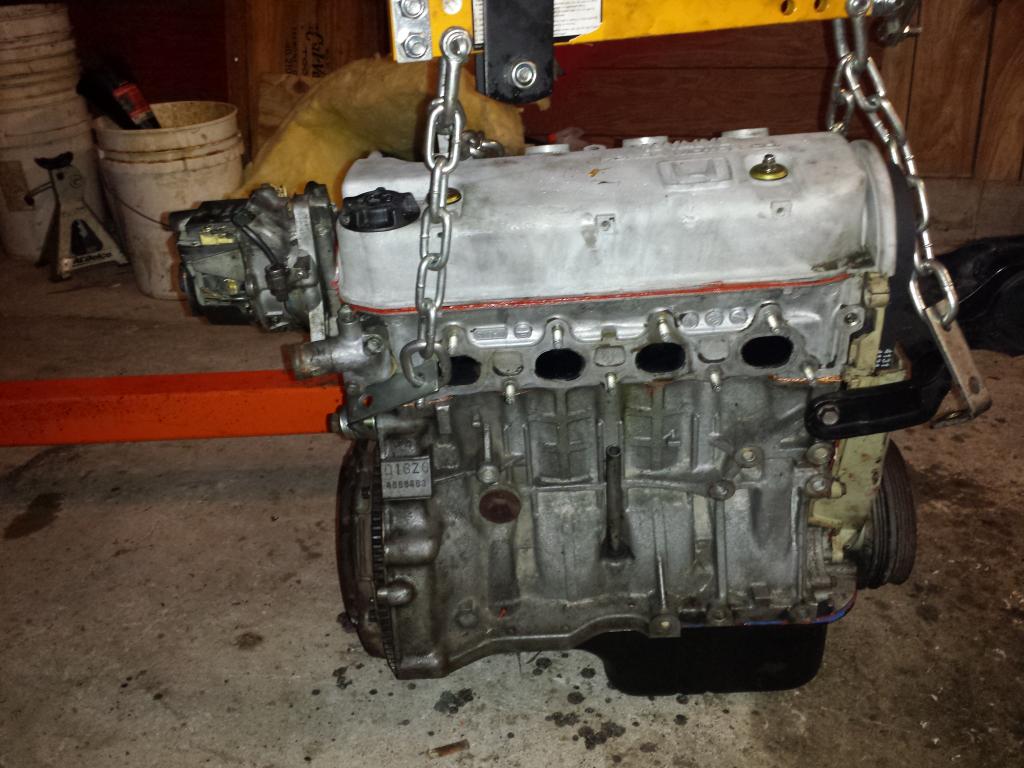
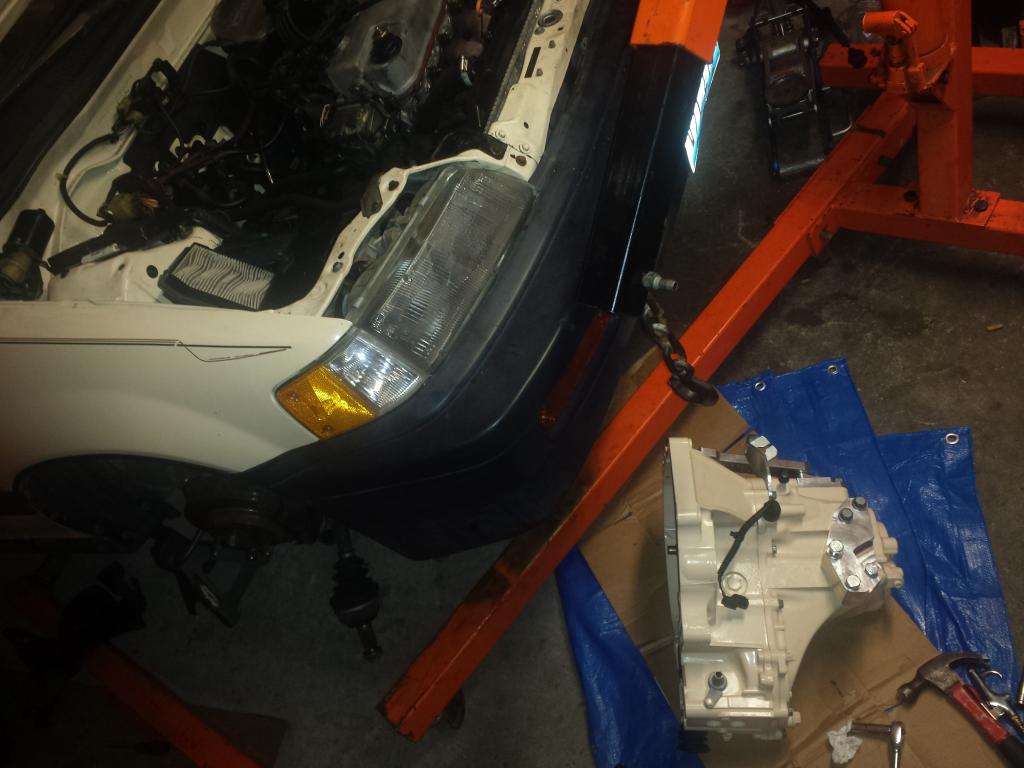
sandblasted the valve cover, new gaskets top to bottom, motor ready to go back in (not my dream turbo motor, but that wil come!)
front:
back:
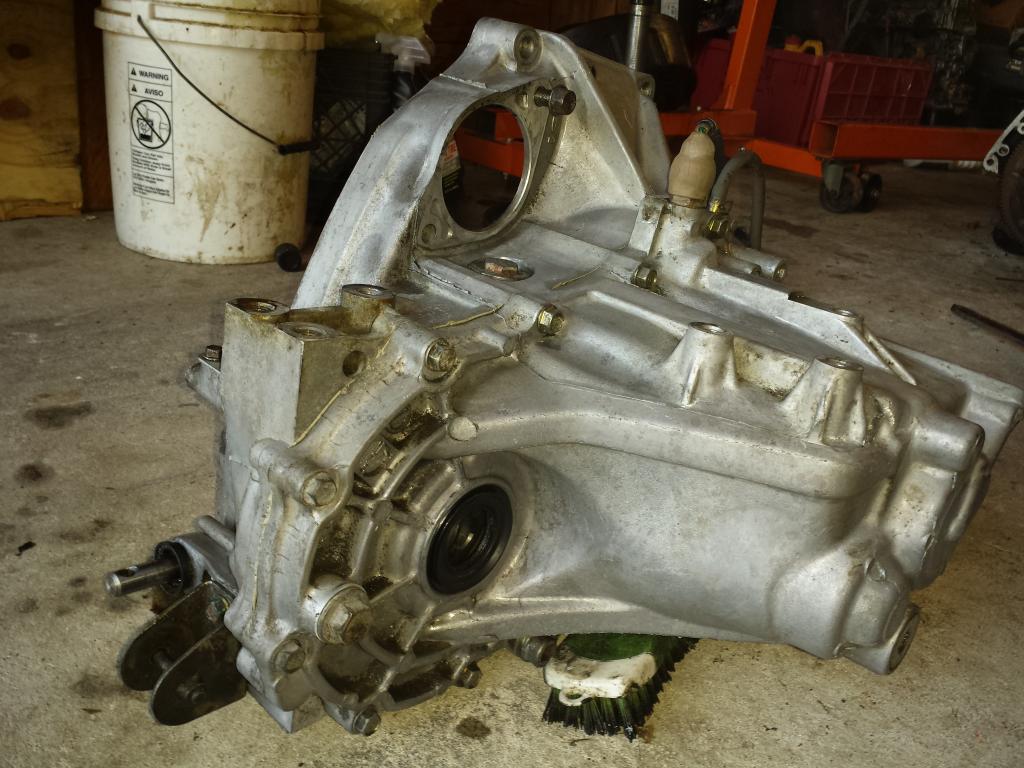
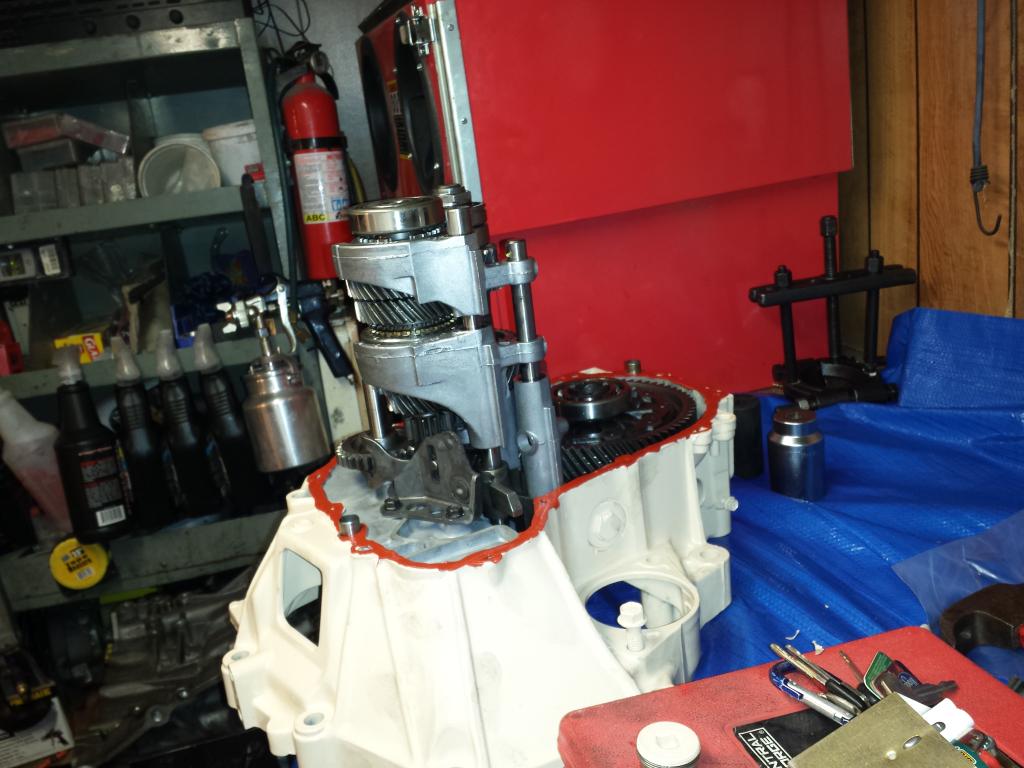
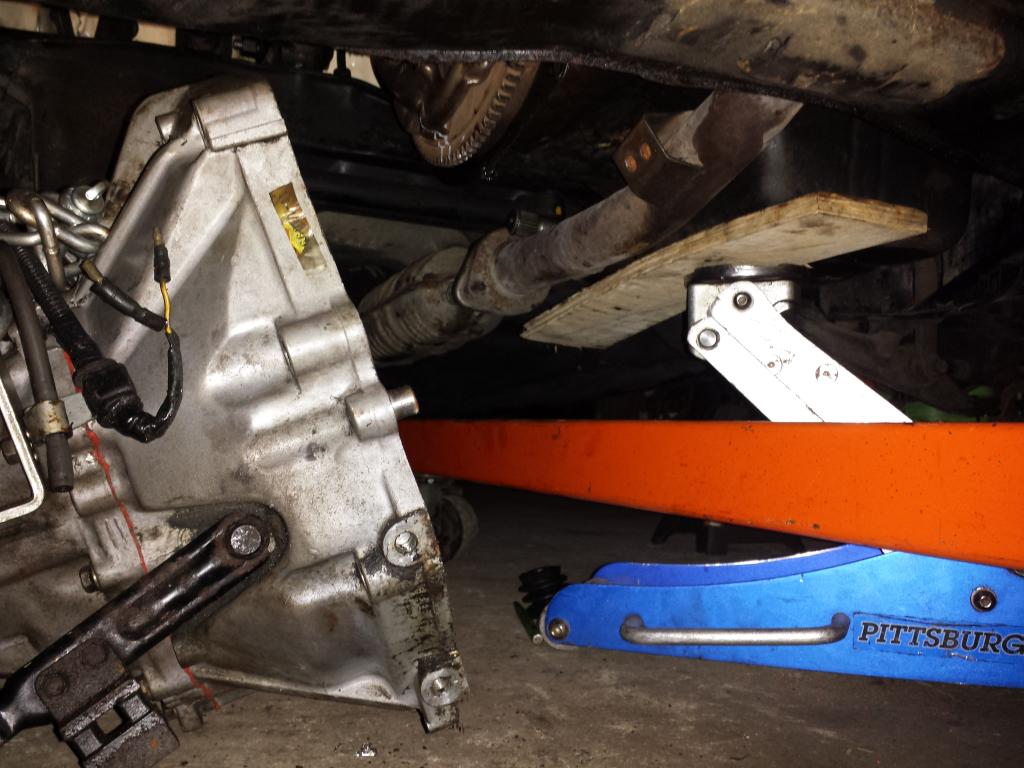
Also rebuilt the '89 tranny before slapping it back in (kept the '89 flywheel & clutch to avoid headaches) cleaned up nice!
Got everything put back together (no A/C)
That got Skiddy back on the road. Then I wanted better fuel economy, so I started getting my VX tranny ready (VX tranny is about 2000rpm @ 60mph compared to '89 stock ~ 2700rpm @60 mph) almost as long -a- gears as the CRX HF . Got it powdercoated to the perfect color:
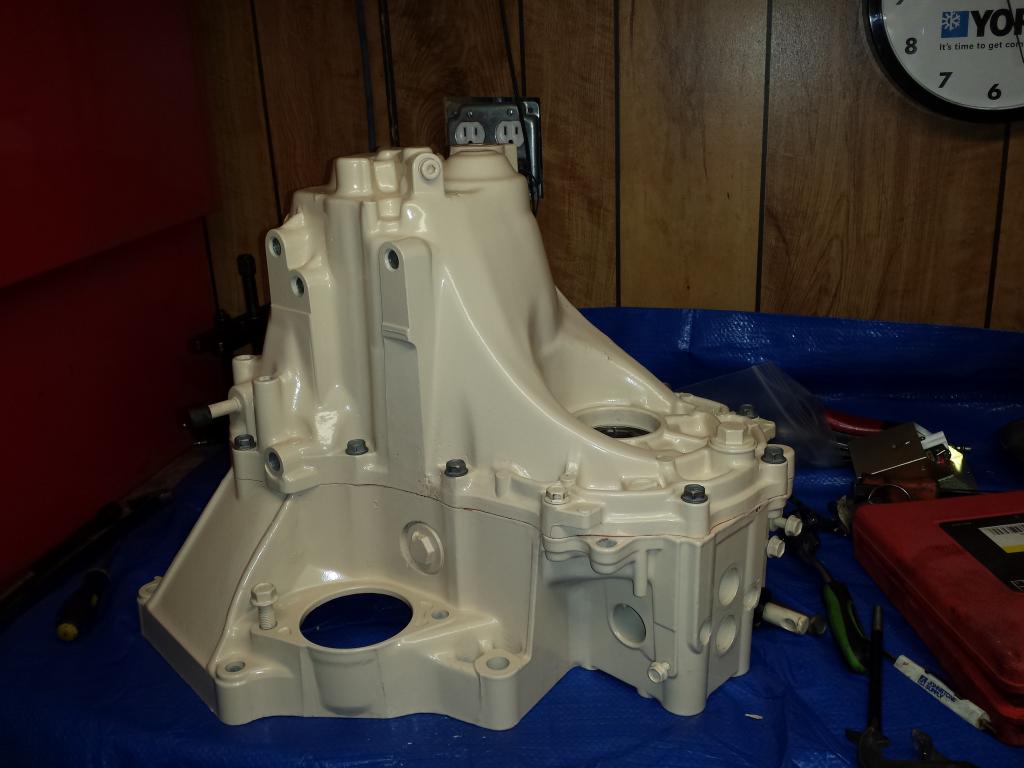
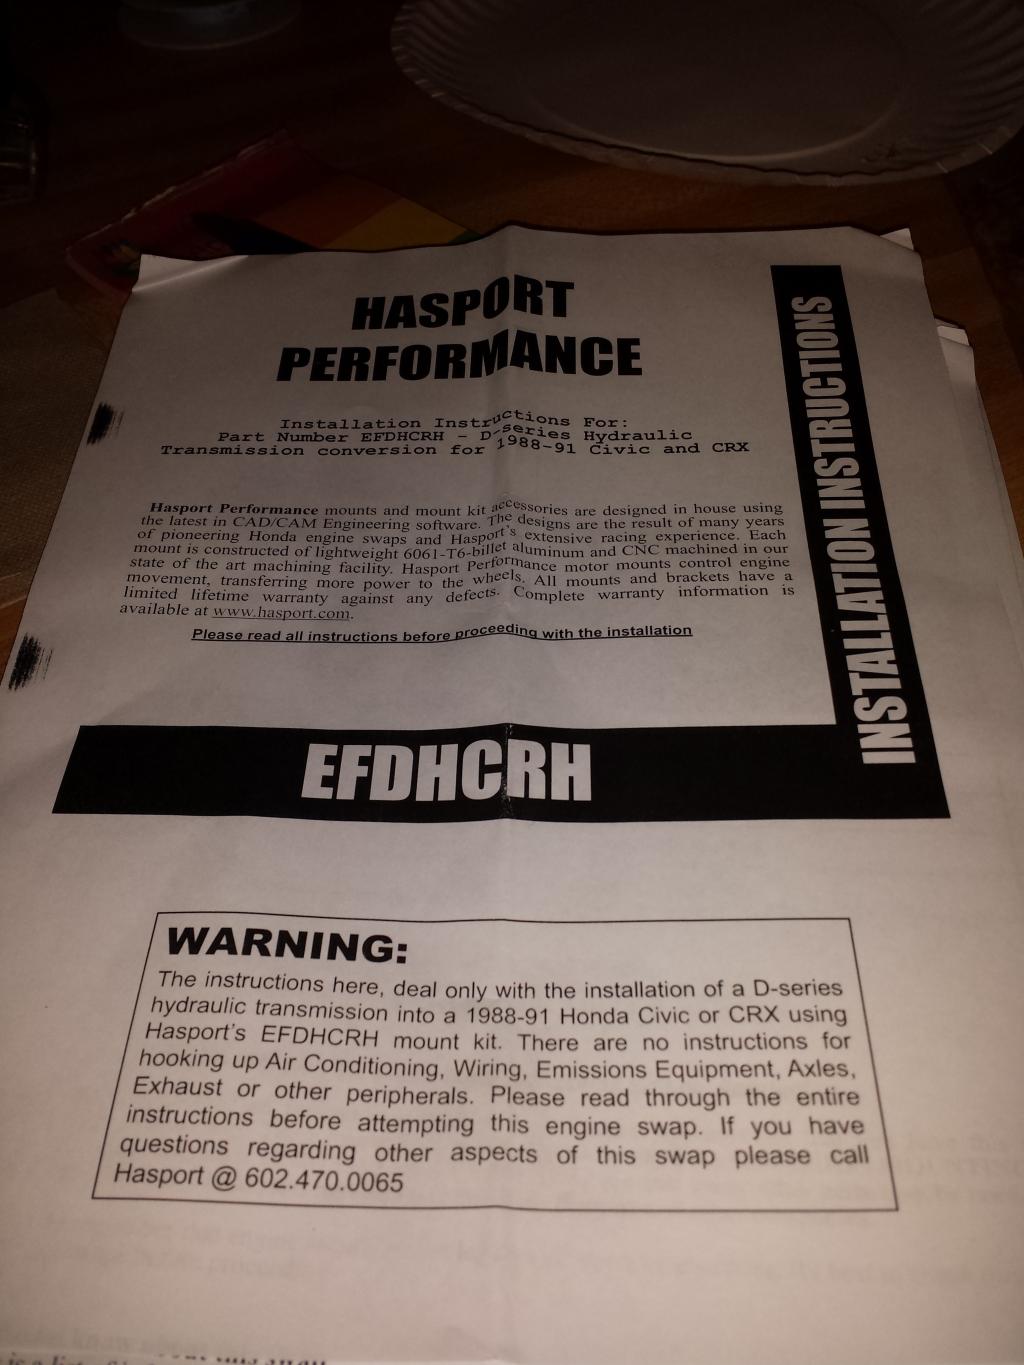
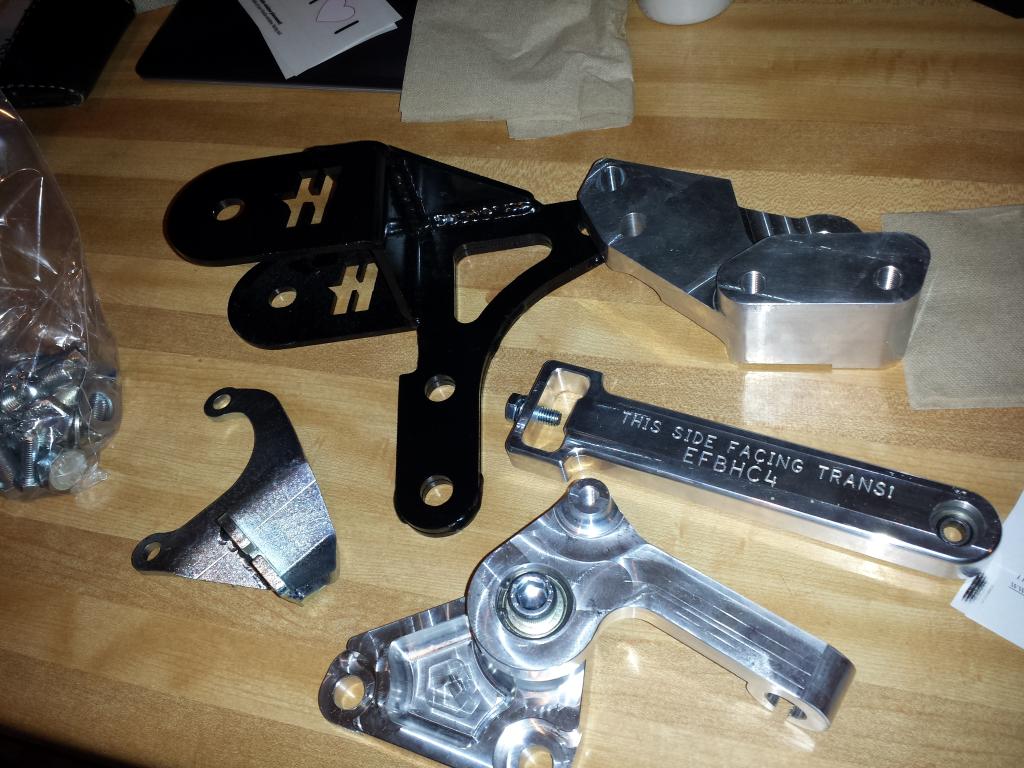
Would not have been possible without the HASPORT cable/hydro conversion kit (absolutely love keeping the cable clutch!)
SoI pulled out my recently-rebuilt '89 tranny and did the old swap-a-roonie again!
out with the old:
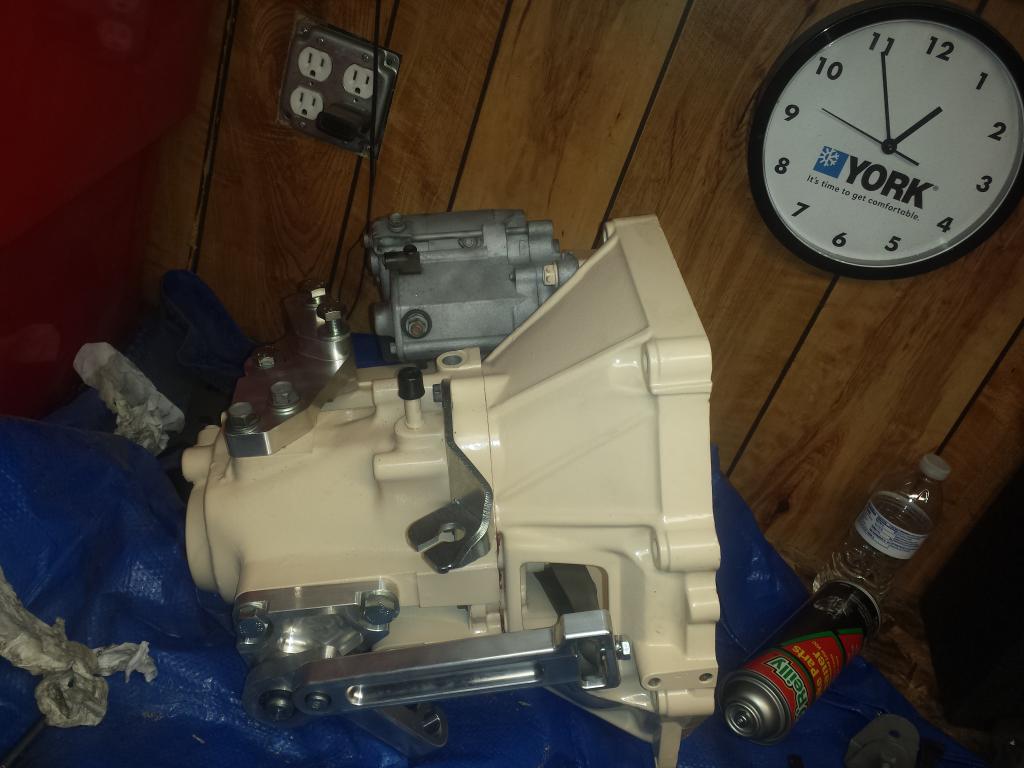
in with the new!
That color! IT MATCHES!!! I'm SO IMPRESSED!! Time to get betterMPG's with lower highway rpm's :encouragement:
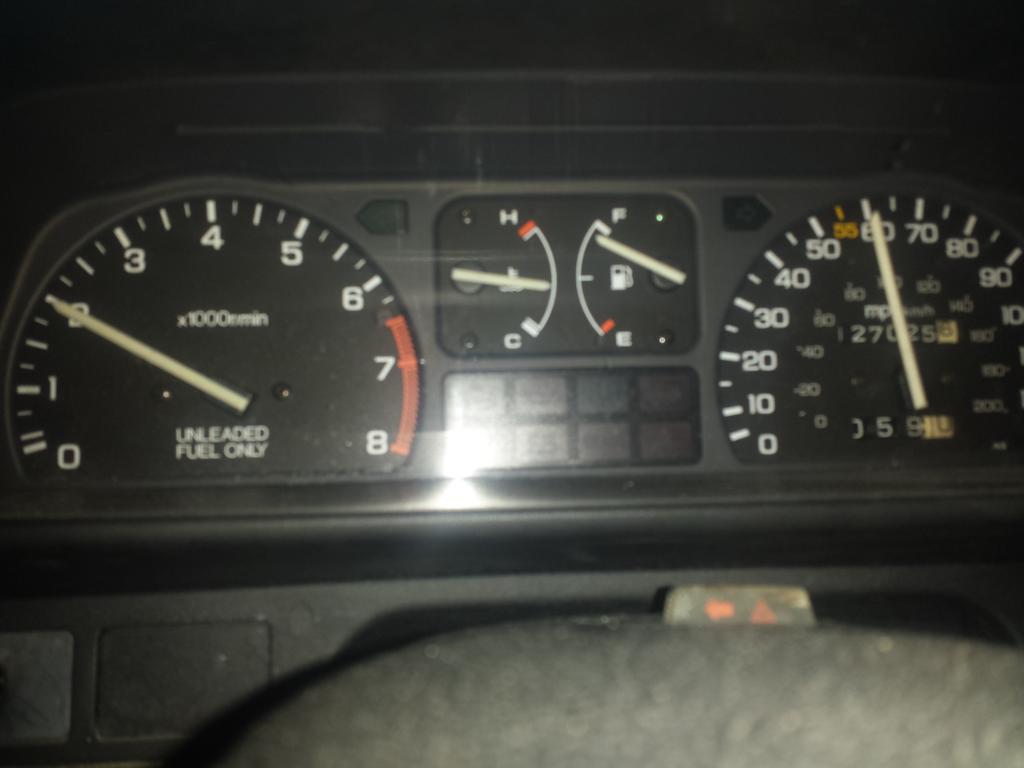
old 60 mph cruise:
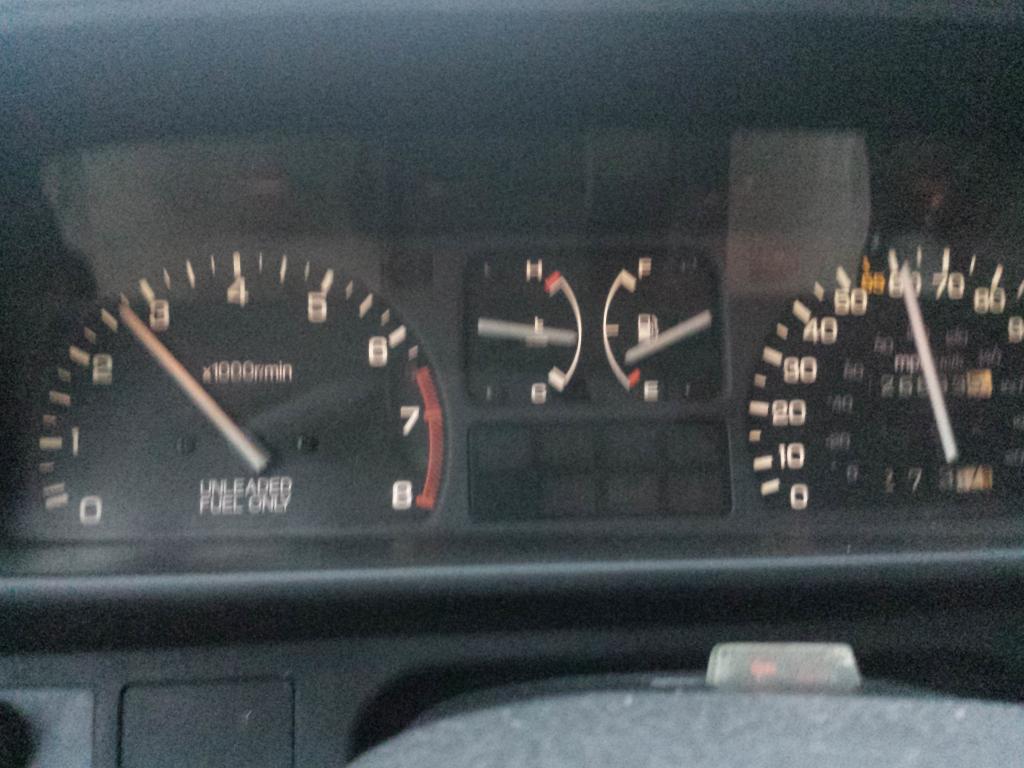
NEW 60mph cruise:
I'm tired of clicking for tonight! I'll share the speaker pods install (followed a how to thread from civicwagon.com), radio, and future plans tomorrow!
Thanks for reading my rediculously long first post - if anybody's got questions or wants to see more pics or info, chime in!
Thanks,
Victor
Everything was there, pretty darn clean, and only $600!!! (It took about $1000 to get her home, between truck and trailer rental and gas). Car was supposedly running when parked a few years ago, and all the pics looked really clean - I jumped into my first "from scratch" build.
Picked her up a few months back, and I've had a few issues with her since, I'll go ahead and fill everybody here in...
-Towed her home ( 2 flats, no battery, no clue as to other issues- yet)
-Installed battery & discovered bad "rubber"at clutch pedal for starter interlock switch - she started right up!
-Took care of brakes, rotors, tie rod ends, ball joints, oil change, fluids flushed, etc.. (25 year - maintenance interval:p)
-Drove around for a few days and it committed suicide!!! Broke a rod and punched a hole in the front and back of the block!!!
Backside of the block, by the alternator popped as well:
So, wanting to drive her, but not ready for the MPFI conversion, I swapped in a block from a d16z6 and learned all about honda's 'oil control jet" system. this regulates oil flow to the head from the oil pump.
VTEC MOTORS HAVE THIS IN THE HEAD, NON VTEC MOTOS HAVE THIS IN THE BLOCK!! My combination of vtec block and non vtec head would have meant no oil control jet. bad idea. So i took the oil control jet from the dead non vtec block, measured it, and DRILLED THE VTEC BLOCK TO ACCEPT THE JET!!
Shiny thingie between cylinders 2&3 is the oil control jet:
had to drill the "donor" block out in the same location
sandblasted the valve cover, new gaskets top to bottom, motor ready to go back in (not my dream turbo motor, but that wil come!)
front:
back:
Also rebuilt the '89 tranny before slapping it back in (kept the '89 flywheel & clutch to avoid headaches) cleaned up nice!
Got everything put back together (no A/C)
That got Skiddy back on the road. Then I wanted better fuel economy, so I started getting my VX tranny ready (VX tranny is about 2000rpm @ 60mph compared to '89 stock ~ 2700rpm @60 mph) almost as long -a- gears as the CRX HF . Got it powdercoated to the perfect color:
Would not have been possible without the HASPORT cable/hydro conversion kit (absolutely love keeping the cable clutch!)
SoI pulled out my recently-rebuilt '89 tranny and did the old swap-a-roonie again!
out with the old:
in with the new!
That color! IT MATCHES!!! I'm SO IMPRESSED!! Time to get betterMPG's with lower highway rpm's :encouragement:
old 60 mph cruise:
NEW 60mph cruise:
I'm tired of clicking for tonight! I'll share the speaker pods install (followed a how to thread from civicwagon.com), radio, and future plans tomorrow!
Thanks for reading my rediculously long first post - if anybody's got questions or wants to see more pics or info, chime in!
Thanks,
Victor
Comments
Thanks man! I love these wagons, couldn't pass it up. .
Here's the speaker pods:
Found an ugly set of speaker pods online (the guy selling them wasn't cool either) and couldn't make a deal:mad:
Kept looking around and found a set listed as 91 hatchback speaker pods that looked pretty decent from what the ONE picture online showed. The seller said it would come with the mounting brackets, bolts, and factory wire extensions - for $15 more than the ugly ones:thumbup:!
My buddy OG VX said I could make it fit, so I bought them:cool:
This is what came in the mail:
First thoughts - man, these things are tiny! But It fits the look, the color is spot - on, Stock connections and brackets, and IF THEY WERE FOR A 91 HATCH, THEY FIT MY 89 WAGON PERFECTLY:thumbup: So I basically followed this write - up from civicwagon: [EE/EY/EF] Installation of OEM Rear Optional Speaker Pods
I followed the directions enough to get the general idea anyway:p Once I got the pods mounted (top halves) you got to check this out
Tied the wires on and soldered / heat shrunk connections inside the pods:
Put the bottoms on the pods and ready for some tunes!!
Up next: coilovers!
Thanks,
Victor
Tax return came in, and this is what I got for Skiddy - coilovers!
They have a 90 day warranty, and you can buy an additional year for $100
So, down to business. I started in the front. Separated the old stuff from the lower fork (not sure about the name, it reaches around the CV axle) and took it off the lower arm for clearance. Unbolted the tops, nice and easy. Pulled the old and did a side - by - side:
Nice. You can just see the new brake line clips in the bottom of the pic above. Then I slipped the new baby in place and tied her to her fork at the bottom and bolted the top tight (shouldn't forget to mention picking that part of the suspension up with the jack to "pre-tension" bushings before tightening is always a good idea:thumbup:) That blue looks so beautifully wrong against the cream:cool:
That's about all it takes to do the front (air tools help)! Here's a before and after of the front while still on jackstands.
Before:
After:
Then, it's on to the back. The tops came out (just under the new seaker pods out back) without a fight. The hard part was getting the old bottom bolts out. They were seized into the sleeves on the bushings at the lower control arms. I had to CUT the mounting "arms" off the bottoms of the old shocks to get them out, and after lots of fighting - the bolts still weren't coming off.
I didn't have this problem when I lowered the Minion, because I bought new lower control arms. I cut the shocks off and threw the old LCA's away. I must have forgotten. Totally screwed myself.
Feeling defeated, I called every local auto parts store (even DUMBOZONE) to learn that NOBODY had lower control arms on the shelf (loves them OLD SKOOL rides:p). Then I decided that the damn bolts would have to be pressed out. Back into the garage!
The new plan was to use my ball-joint press to push the bolts out of the lower control arm bushings. I got the bolt to move, and hit it with "love juice", and worked it back and forth a few times with the press, and was finally able to punch it out! (with my new plan of attack, the other side was a breeze! This is a good trick I won't soon forget)...
So, this is the evil piece of siezed up nastiness that held me up for EVER...
And this is the Evil hole that looks so benign now.....
Finally able to bolt the rears in place from the top and close the rear hatch...
Went to the hardware store for new bolts for the bottom (somebody must have cut them or something) This is the new plan. Strongest bolt that size (metric - weird strength grade number). Lock washers and double nut on the bolt...
That's why the bottom looks like this now...
That makes front and back done! Let's take a looksie:
This is a pic from before I got Skiddy, and then I tried to show the same part of the car today...
SEXINESS!! I LOVE YOU, SKIDDY!!!!!!
I've only taken her around the block once, and it was glorious! I won't consider comparing it to the 25 year old suspension that was. Giggity.
Thanks,
Victor
Be sure to get an alignment - you've got tire shredding amounts toe-out right now.
Those are wagon speaker pods, BTW. Nice find.
Some people argue that mating a long-geared trans to an engine/ecu that wasn't designed for it can actually hurt MPG, not help it. I've seen very few real-world before/after swap numbers, however. So, I'm interested in your actual observed MPG with the VX trans.
Thanks, jpciii
I'll gladly take "dumb luck" on the pods - first time's a charm, and ignorance is bliss!
Alignment, yes. But first, I've got to get my adjustable camber goodies installed for the front and rear. I've got 3 washers stacked between the body and rear camber arms, so the rear's pretty close, but the fronts are a mile off. Parts just came in this afternoon, I'll be mirroring my ecomodder.com thread for Skiddy here with the camber adjustment install and initial camber settings.
As far as mpg's go, right now my current best (tank) average is 34.24 mpg's (301.3miles / 8.799gallons = 34.24mpg's). I keep track of my mpg's on the other site (more crucial for my high mpg car, 96 civic 4dr), but this is Skiddy's fuel log to date. If you want to read about my high mpg car, the Minion, go over to ecomodder and scroll down the front page to Skiddy's thread. Under my avatar, you can see my other vechicles listed. Minion's also running a VX tranny with a d15b DUAL VTEC JDM lean burn motor. Personal best in the Minion is 52.85mpg. 4 doors, full interior, power steering AND a/c connected (also lowered___scraping low)...
Actually, I've got a buddy on the other site with an EF wagon as well, and he's running an HF trans (taller gearing than VX, and cable clutch - drop in replacement for the wagon's), and done a 16v>8v modification to his head for more low end torque (better swirl?) and he gets mpg's that make my 50mpg Minion jealous. I'm pretty sure he' running a stock ECU as well.
But Skiddy is BEGGING me for a turbo motor, and I'm not about to let her down. That motor isn't built yet, but I do have it....
Skiddy's current motor is only half stock (obd1 block - d16z6) obd0 head - full DPFI still in place. The old block just comitted suicide in my driveway when I went to crank her over one morning. She broke a rod and knocked holes in the '89 block front and back. That was all better documented on the ecomodder website (before I joined civicwagon.com). This motor combination as I'm driving it now has LOTS less compression than stock, but does get a little "surge" when pushing her past 2500rpm or so.
I'm still running the stock ECU for now, and I'm currently 8.9% above the EPA combined rating of 28mpg. Just made my best tank 2 days ago, and I'm sure there's still room for improvement. I use a hand throttle control when I cruise on the highway, and the recent lowering seems to have furthered my mpg's...
I'll be back tomorrow hopefuly with pics on the camber goodies to share!
Thanks,
Victor
For alignment check out firestone, there are a few guys on here who have gotten the lifetime alignment, if you're tweaking your setup at all it's worth it. Every 6 months or so you can take it back in and they'll align it for free. When I bought mine it was $160. Hell that's cheaper than getting a 3 year alignment at NTB.
For the chewed up pods you're talking about is it the guy who's been trying for months to get $100 out of em off ebay? If so, yeah, that guy is a total tool.
Thanks, greenteagod!
My buddy gets the powder coating done for me at his work for pennies! I have to get it all prepped and heat taped, and it's all professionally handled from there! The secret to running a Hydro tranny in an ef Honda is the hasport conversion kit!
Are you looking for more go, or better mpg with the 5th gear swap? Have you considered just swapping out the pinion and whole final drive from, say an HF for economy or an SI for speed? They should all be interchangeable,as long as they're all EF. (Should all be interchangeable thru the end of the d-series motor for Manual, IIRC)
I'm definitely going to find out about this alignment deal, that would be awesome!
And yes,those pods that looked like a 16 year old was trying to make the holes bigger with a pair of pliers? They started out at at least $150. Saw them drop to $115 and made an offer. Then I learned What a tool that dude was! Agreed! I'd post our communications, but after my offer and note, his reply was basically just butthurt and profanity. Not worth repeating. I got lucky with my set of pods, for sure.
Thanks,
Victor
Dude, I absolutely love the cable/hydro setup! I installed the VX tranny on 12/23/14, about 1500 miles ago I've been driving only Skiddy for about the last week, and I finally got into my 96 civic (Minion) and her hydro clutch felt "squishy" in the pedal today after driving that cable for the last week. I totally recommend doing it, especially with a supercharger. Everything I remember reading said that the hydraulic tranny was better set up to handle power versus the cable trannies.
At that point, the conversion is the best way to go - you get the stout hydraulic tranny, and the precise feel of the cable VS the squish in a hydro. Looking at it in the pics, it also looks like you've got compound leverage with the conversion's pivot setup. The clutch pedal feels the same as it did with the '89 tranny!
Initially I was going to convert the cable on my own, and set it up so that the cable would "pull" the shift fork from the right, rather than push it from the left like the hydro's plunger would have done, and just fabricate a bracket to make it work. The kit had it all figured out, complete with motor mounts.
My biggest warning to you with regard to this kit is the rear trans mount gets moved over in the conversion, and you go from three bolts on the stock mount to TWO. Since the conversion is for a CRX, I'm not sure if the CRX has another nut welded into the support that the wagons don't or what, But before my turbo motor goes in, that mount needs THREE BOLTS, and that may require a little welding / fabrication ( no big deal really, but full disclosure - ya know?:cool:)
Tomorrow is Wagon Wednesday! Skiddy's going to work tomorrow. We'll take a few pics and show off her new rims and tires. Still haven't done the camber kit. This weekend would be nice...
Thanks,
Victor
I've got a bit of a sickness with the Hondas, and the Wagon is where it's at! Gotta make it good as new. This one's got to be pretty. She's got too much class to be allowed to rot. I just need time, she's not for sale.:cool: ..
Thanks,
Victor
Skiddy's happy!
Happy Wagon Wednesday!
Thanks,
Victor
Started out back, the old camber arm in place:
I had already had the bolts to the body out, but the bolt into the rear assembly had me a little worried. Hit it with a little love juice, and the bolts let right go! I was ready for a fight there, after the bolts on the lower control arm bushings gave me a solid fight
Old and new side by side:
New camber arm in place:
The rears were relatively simple to get done! Then I moved on to the front. I've had bad luck with ebay cheapos for front upper control arms with the minion (lesson leared), and decided to do this instead. I't a copy of the moog adjustables, made by the same folks I got the coilovers from, it bacisally replaces the upper control arm's bushing and makes it adjustable:
That takes the front's upper control arms from this:
To this!
I didn't even separate the upper ball joint (it seemed ok:D), just spun the arm around to get get old bushings out and new ones in:
Then it was off to the alignment rack! Happy times! Until the alignment dude said Skiddy needed an inner tie rod end, and told me how much extra that would cost ($79 for the part, $101 for labor) I then asked if they saw anything else that needed attention - he said no, and that the parts weren't available today (yesterday). Good. I wouldn't have to break his heart telling him about the MOOG inner tie rod end SET I got at advanced for $35 (they messed up telling me they had 2 in stock, so I had to wait and got them at cost!)
Inner tie rods are here now, but I'm comfy in the house clicking on the internet..
There's always tomorrow the procrastinator said! But today is always yesterday's tomorrow, What to do, what to do?
I'll probably be in the garage!
Thanks,
Victor
Thanks! My pleasure, I assure you!
More progress YES! I'm slowly picking away at things. This summer should be awesome!
Thanks,
Victor
When i was under there adjusting the camber out a little more, it looked like I was rubbing the upper control arms on the inner fender well. I ground some meat out of the way. .
I had to spray undercoating on everything to prevent cancer, of course. .
So now I'm ready to go for an alignment a second time. This one should be it! I'm ready like SpongeBob.
Thanks,
Victor
Thanks! I'm trying to keep it moving along. Sometimes life gets in the way, sometimes it's just not my day. Hopefully I'll get Skiddy on a rack tomorrow morning at farm&fleet. That will have her road worthy again
Thanks,
Victor
No rust in my wagon as of now and I would like to keep it that way!!!
My sentiments exactly - Skiddy's too good of a base to start from. Anything less would be sacrilege...
Thanks! It's a good time, and I can't say no to Skiddy.....
Great! I'm very happy with them. A little firm, but Skiddy handles like a boss now! Feels a lot better after the alignment.
LOL! Thanks - I'm pretty sure I get what you're saying!
Thanks for the support you guys! I've got a little something up my sleeve that I've been working on this week and I can't wait to share! If I ever get out of the garage, I'll make a new post and put up some pics as well........
Thanks,
Victor
Yes. I bought her from a family in Angola, IL pretty shure that was the town (downstate, almost went to missouri to get her). Now she's in the Quad cities. Illinois/Iowa area in Sterling
Thanks,
Victor
In search of potato, Skiddy would require power door locks. So be it. I got the acuator set with the wiring and goodies. The actual motors were a breeze to install. The wiring, however was not in the least, especially the rear doors. So much that I won't even cover the motor install, basically just the boots!
I knew I would need some kind of wire boots for the rear doors, since manual windows and locks on rears, and speakers are in the rear cargo area, not the rear doors. Looked at stuff like this on the interweb:
Didn't like the options/costs available, that only left me one option - junkyard
First thing was to make a template for the lower penetration (giggity) into the door, like this.
Then onto the tracing and hole extendification.
Looking good so far...
Also made a template for the top out of clear hard plastic:
So that I could lay out the hole on the center pillar:
Also looking good so far..
Rear doors' boots complete! I shouldn't have to mention that ALL of my wiring connections have been soldered/heat shrunk, but they are..
The front boots only needed some modification to play nice with the new goodies. Biggest problem up front was in the driver's boot, adding 5 MORE WIRES!! The driver's lock is the "master" to this set - if you lock the master, all doors lock. I'll just show the master side, there are more prety colors to look at...
I had to feed the wires individually into the boots, but once thru, I notched a little room for my wiring to go thru next to the stock connection, but inside the boot. Makes more sense when you look from inside the door..
Now I have 7 conductors thru the driver door's boot! 5 for the master lock, and 2 for the speaker..
Upgraded front boot:
This is an incredible amount of work! I'm freaking tired! But, for all my hard work, I'm very happy!
Only problem is that it's not done! Still have to get from the remote harness to the doors, pull more interior out to run the wires proper like, etc.etc..
And the interior of the doors, with the holes in the plastic sheeting/insulation on the door skins bothers me. I'm going to end up re-skinning the doors with something before they get put back together. I won't be able to sleep at night without it.....
Might see another Wagon Wednesday come and go before another cruise, but It will be worth it:thumbup:
Thanks,
Victor
With the OCD comment out there, I'd better back it up you might be thinking to yourself.
OK WATCH THIS:D
"window insulator kit" - that's a funny way to spell "custom inner door skin kit" I'm not an english teacher, oh well. I didn't like the tape from the kit, I used silicone instead. I'll shrink it once its all cured, so on with the pictures...
I ran out of red after the first door, but I'm sure you all get the concept. This should help keep noise and drafts to a minimum, at least.
Time to clean everything and start with the reassmbly, but not tonight!
Thanks,
Victor
Thanks! Yeah, I've been wanting to do the power locks from day one, I just needed a little motivation. Once i get going though -look out!
I'm still dreaming of making Skidmarks with the gas pedal. For now I can only make them with the brakes...
Thanks,
Victor