POR15, PORPatch and Powermesh DIY
 bkmc24
Senior Wagonist
bkmc24
Senior Wagonist
So this week I have dedicated a lot of my time to doing body work for the wagon. First things first was the rust. I didn't cover all of the rust but the majority of it was in one corner. I used the products in the title to hopefully solve my issues.
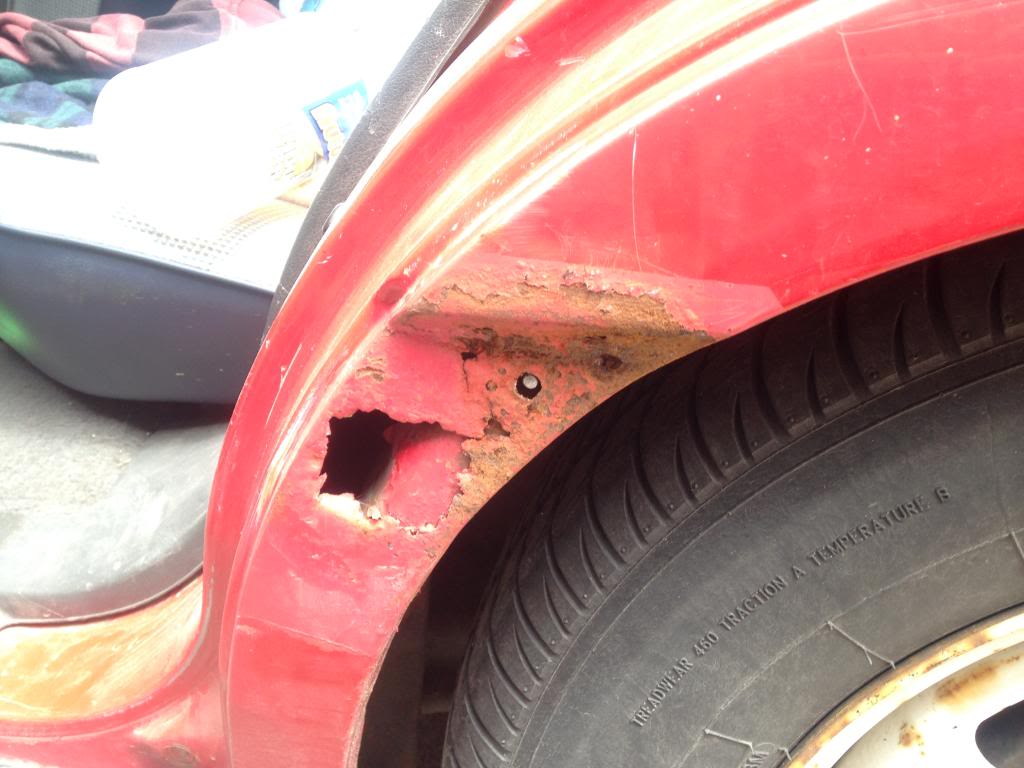
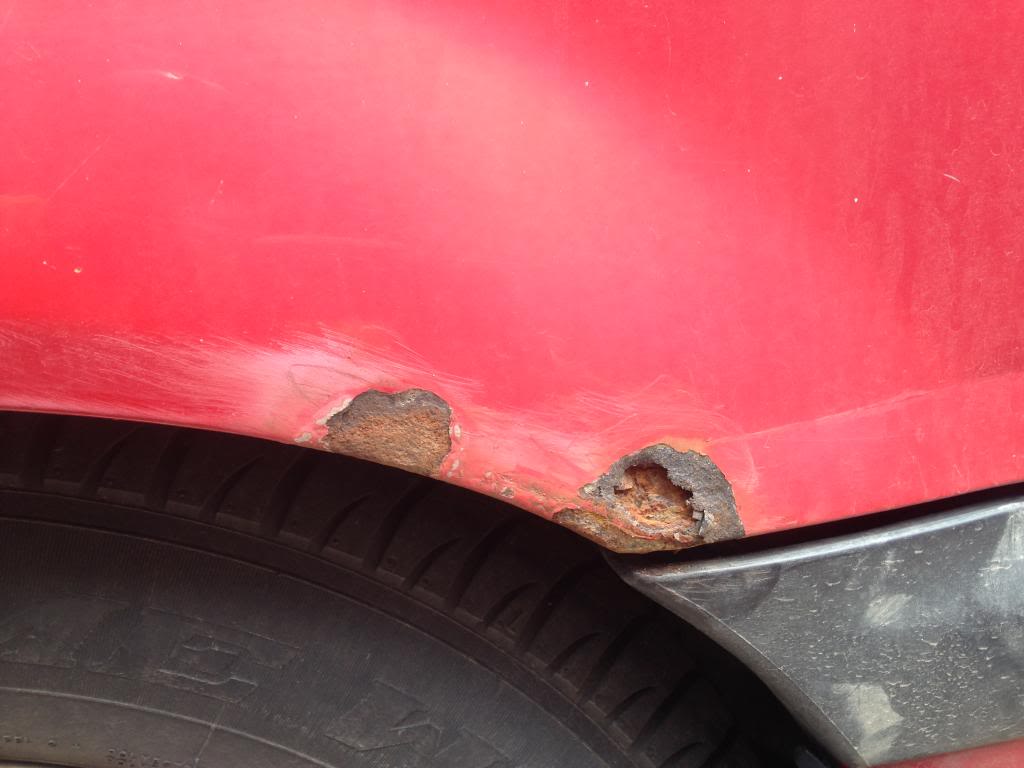
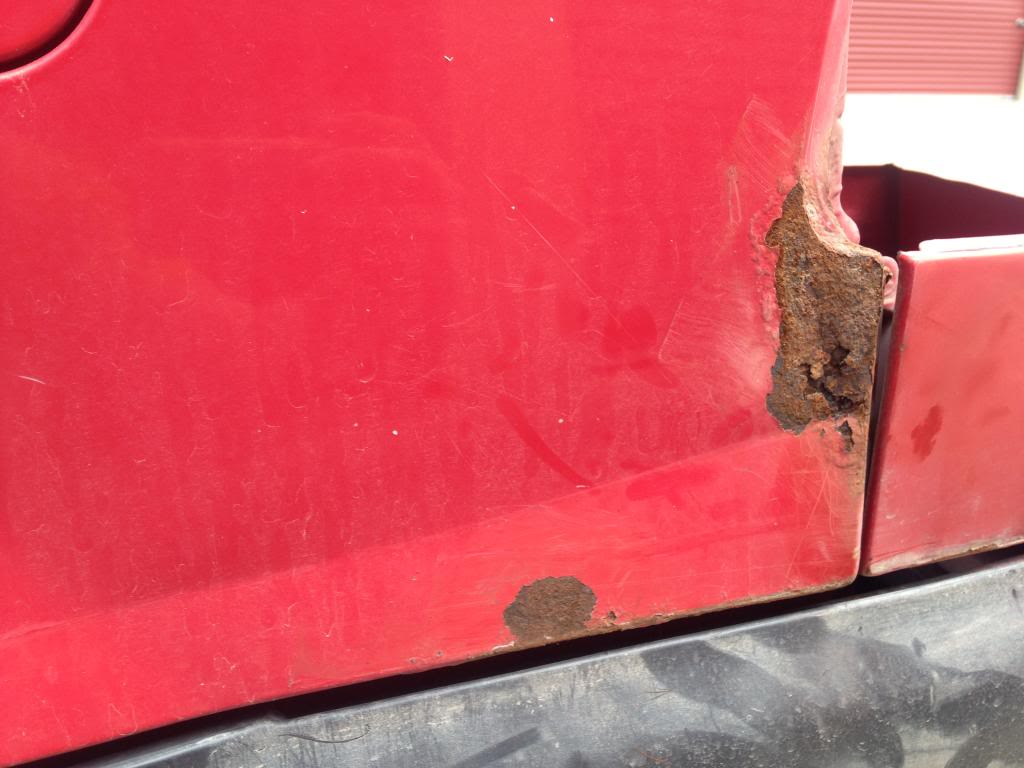

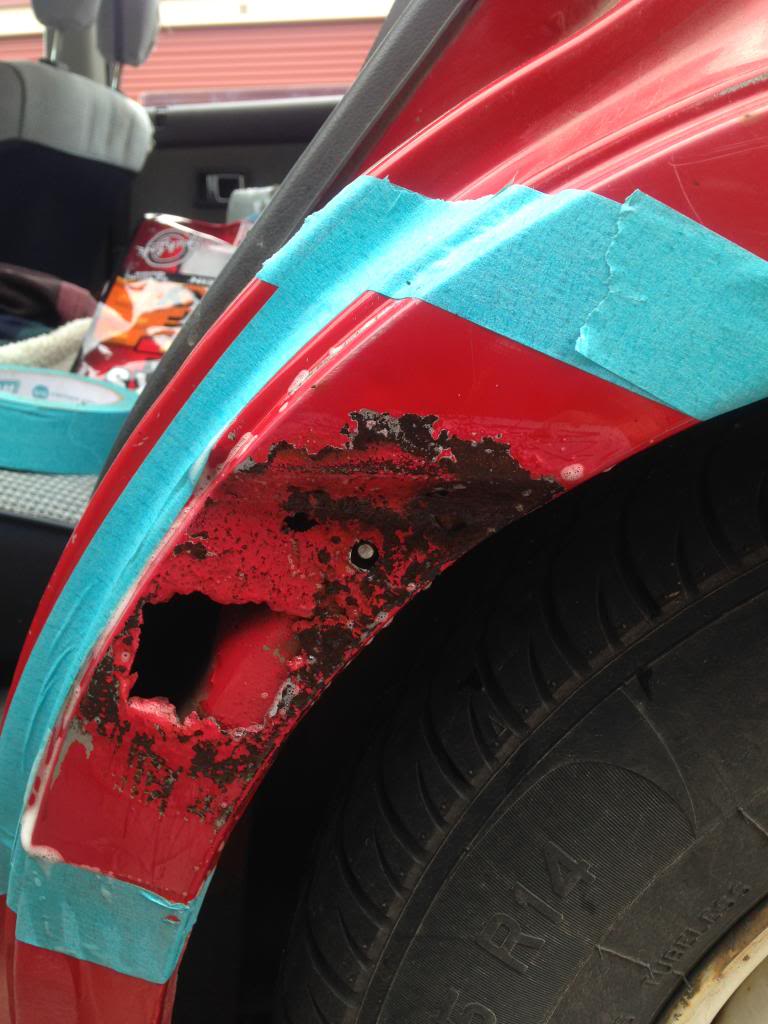
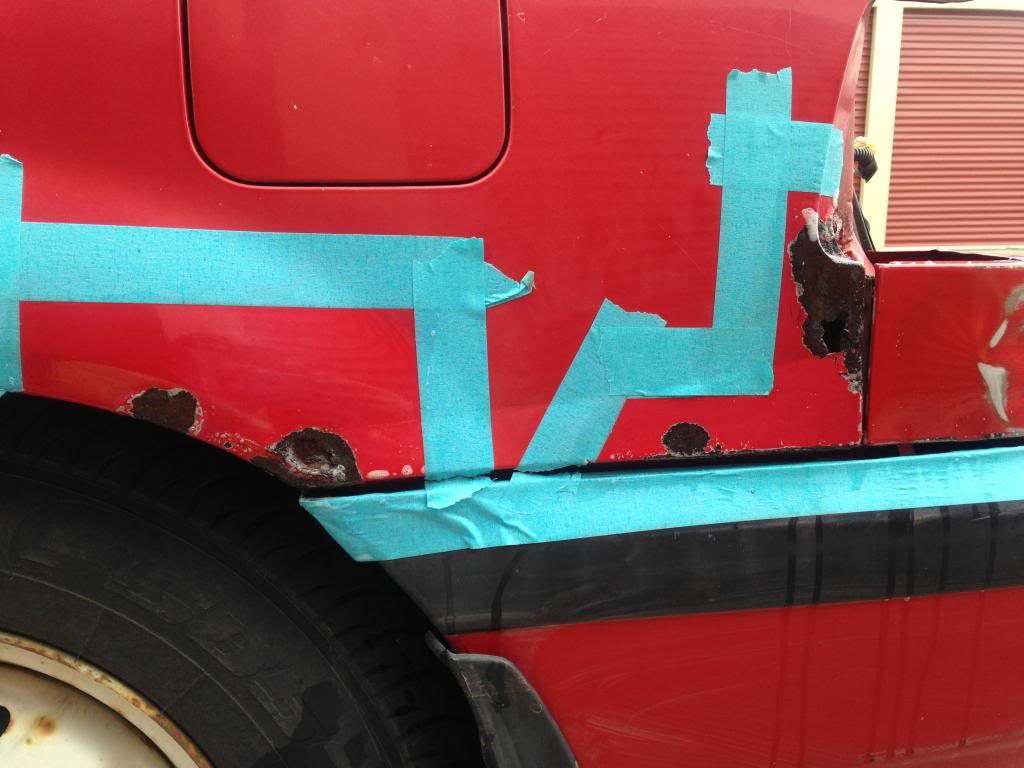
These are all drivers side, behind the rear door and back to the typical tail light spots. I scraped away at loose paint and rust flakes to expose everything I could find to know what I was working with.
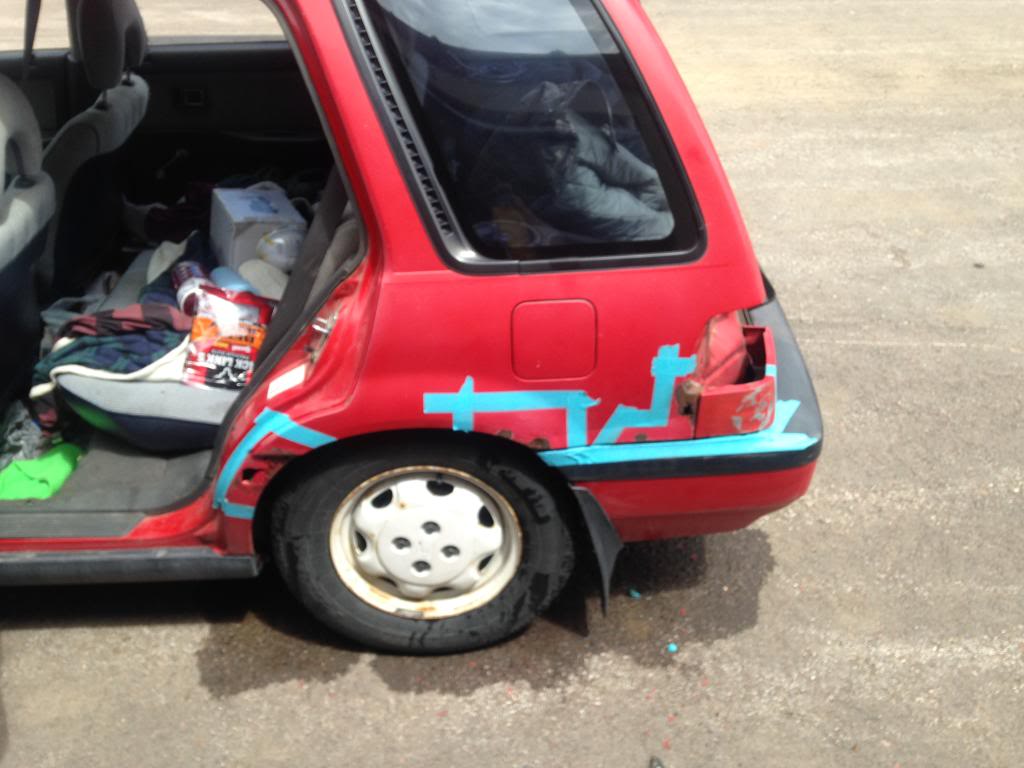
I then masked all of the spots off as to how I wanted to paint them so it wasn't huge sloppy looking mess. I believe this was also after I had sanded areas down for the paint to be scuffed, used marine clean and rinsed it off with water.
[FONT=Verdana, Arial, Tahoma, Calibri, Geneva, sans-serif] [/FONT]
5:1 water:marine clean
After marine clean and rinsing, you are to use the metal prep and apply it in numerous different options. I used the supplied foam brush to brush it on all of the spots. You are supposed to keep all intended areas wet for 15-30 minutes depending on rust amount or surface type. I did mine for 30 minutes.
Only two pics because I didn't want to mess up lol.
So once marine clean has been sitting for however long you chose, you rinse it off thoroughly with water and allow it to dry entirely. I let mine sit for about 30 minutes.
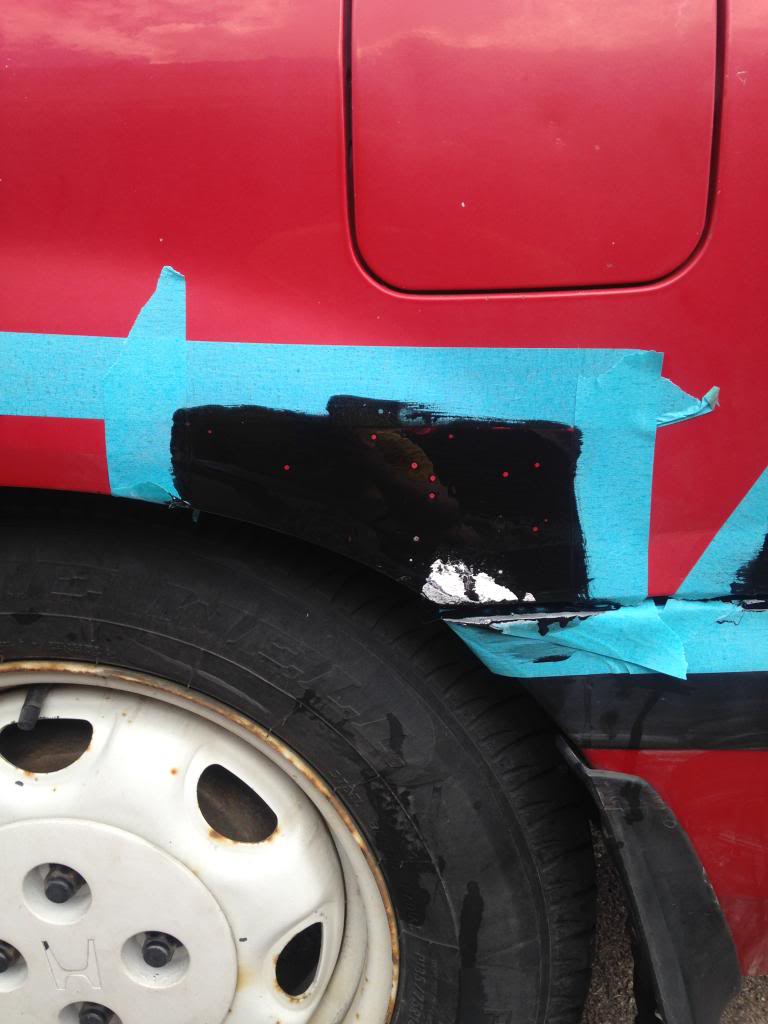
Then comes the application. I poured some POR15 into a lid and sealed the can with a plastic bag in between the lid and can so it doesn't seal itself shut. I have no pictures of the application but its simple. You use a small paint brush and coat the areas with one coat.
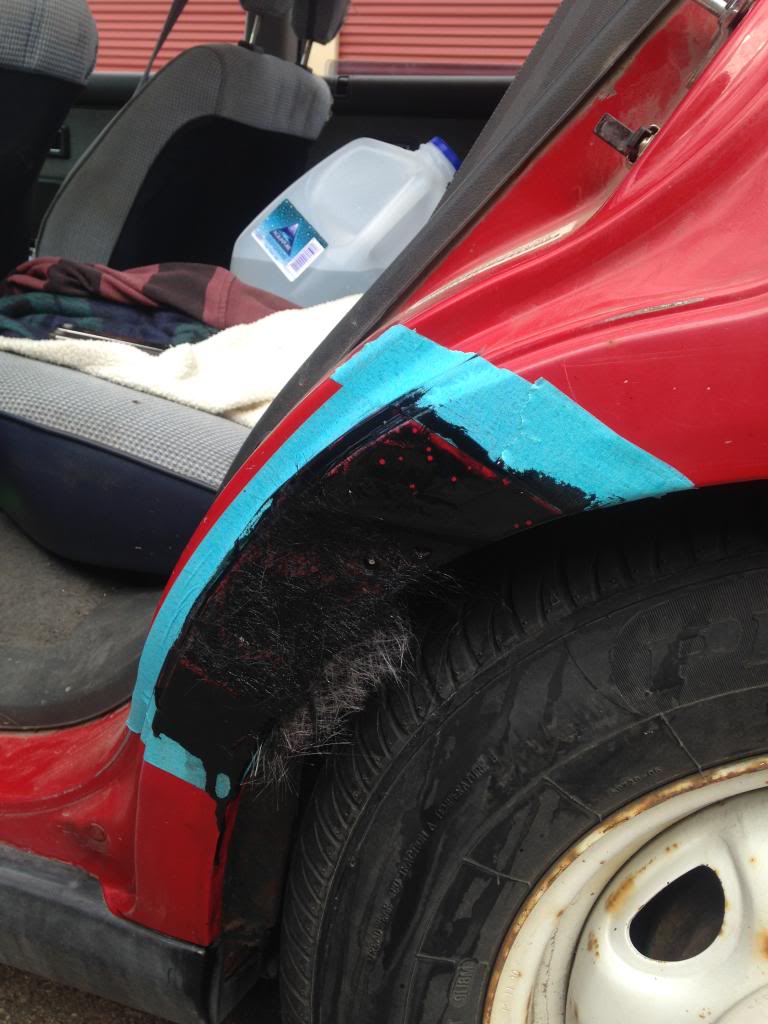
I also used powermesh to cover the holes and didn't get pictures applying it, but you stick it on over the first coat of POR and then saturate it with POR as well. This shit was really hard to work with and annoying as hell. Mine looks like crap because of that.
PORPatch will be in one of the following pictures. (the white goop) It was applied into a hole that hand't rusted through and was just a pocket. Went in as simple as a runny putty and smoothed over decently. This stuff takes FOREVER to cure (96 hours....) whereas the POR15 takes about 6.
I made the mistake of trying to cover it too thick and it was very runny. One simple coat will do, don't overthink it.
Another mistake I made was cleaning the interior a bit while I waited and made the POR Fish eye.

All in all it was a nice learning experience. I have a few more places that I intend to coat with POR15 and try to rework some of the spots I already did tomorrow so it it fully covered without fisheye or anything.
Tips:
-wear gloves the entire time
-wear clothing that you really don't care about
-have a mask for when you are painting and playing with the powermesh
-take your time and prep well. Prep is the key to using this product.
-tape of areas so you don't mess up elsewhere.
-enjoy.
I'll post pictures tomorrow of the cured-ish product and my extra progress.


These are all drivers side, behind the rear door and back to the typical tail light spots. I scraped away at loose paint and rust flakes to expose everything I could find to know what I was working with.

I then masked all of the spots off as to how I wanted to paint them so it wasn't huge sloppy looking mess. I believe this was also after I had sanded areas down for the paint to be scuffed, used marine clean and rinsed it off with water.
[FONT=Verdana, Arial, Tahoma, Calibri, Geneva, sans-serif]
 [/FONT]
5:1 water:marine clean
After marine clean and rinsing, you are to use the metal prep and apply it in numerous different options. I used the supplied foam brush to brush it on all of the spots. You are supposed to keep all intended areas wet for 15-30 minutes depending on rust amount or surface type. I did mine for 30 minutes.


Only two pics because I didn't want to mess up lol.
So once marine clean has been sitting for however long you chose, you rinse it off thoroughly with water and allow it to dry entirely. I let mine sit for about 30 minutes.
Then comes the application. I poured some POR15 into a lid and sealed the can with a plastic bag in between the lid and can so it doesn't seal itself shut. I have no pictures of the application but its simple. You use a small paint brush and coat the areas with one coat.
I also used powermesh to cover the holes and didn't get pictures applying it, but you stick it on over the first coat of POR and then saturate it with POR as well. This shit was really hard to work with and annoying as hell. Mine looks like crap because of that.
PORPatch will be in one of the following pictures. (the white goop) It was applied into a hole that hand't rusted through and was just a pocket. Went in as simple as a runny putty and smoothed over decently. This stuff takes FOREVER to cure (96 hours....) whereas the POR15 takes about 6.
I made the mistake of trying to cover it too thick and it was very runny. One simple coat will do, don't overthink it.
Another mistake I made was cleaning the interior a bit while I waited and made the POR Fish eye.


All in all it was a nice learning experience. I have a few more places that I intend to coat with POR15 and try to rework some of the spots I already did tomorrow so it it fully covered without fisheye or anything.
Tips:
-wear gloves the entire time
-wear clothing that you really don't care about
-have a mask for when you are painting and playing with the powermesh
-take your time and prep well. Prep is the key to using this product.
-tape of areas so you don't mess up elsewhere.
-enjoy.
I'll post pictures tomorrow of the cured-ish product and my extra progress.
Comments
Tape peeled and it has had time to cure. Shockingly shiny..you can see the powermesh better as well as the PORPatch.
Thinking I only had surface rust near the windshield to this was quite the surprise....you can see holes on the drivers side all over and one or so on the passenger side. Click the image for the video.
My solution was PORPatch the inside channel and POR15 the outside pillar to prevent spreading..