HOW-TO: Accord or CRX HVAC Control Swap
 Speed Phreak
New Wagonist
Speed Phreak
New Wagonist
All;
I hate the lever controls in the early 90 era Civics, I always have. A year or so ago I did an Accord HVAC control panel swap into my EE2, which is similar to the push button style CRX HVAC controls. IMO either is a classy upgrade to any of the lever action civics of that era. I did a CRX HVAC swap into a hatch I previously owned and it made a world of difference. However the CRX HVAC controls are pretty prone to breaking at the hot/cold selector and are tough to find or expensive when you do.
For my wagon I went with the 90-93 Accord HVAC option since they are pretty easy to find(10$ at the local u-pull-it) and fit in the DIN sized spot the same as the CRX/Civic HVAC control units. This How-To will focus on my experience with the Accord swap in, HOWEVER much of this process also applies to swapping in the CRX controls if you're lucky enough to find them intact. The CRX swap requires less custom modification for those not comfortable with things like epoxy, solder and zip-ties. However you cannot mix the HVAC controls or wiring: Pick one and go with it. the CRX controls are easier to install, but the Accord controls are cheaper(normally).
Some inspiration/help for this swap came from the article/document over on the CRX community;
http://www.crxcommunity.com/viewtopic.php?f=10&t=26741
This is a long walk through so be prepared to plan ahead for the job. It took me 2 sittings to finish my conversion at about 3~4 hours per day, however I don't have to luxury of a decent work space at my current residence. Realistically those of you with a garage to work out of and some competence could probably do it faster, most likely in a day. You'll need the following components:
From a 90-93 Accord or 88-91 CRX:
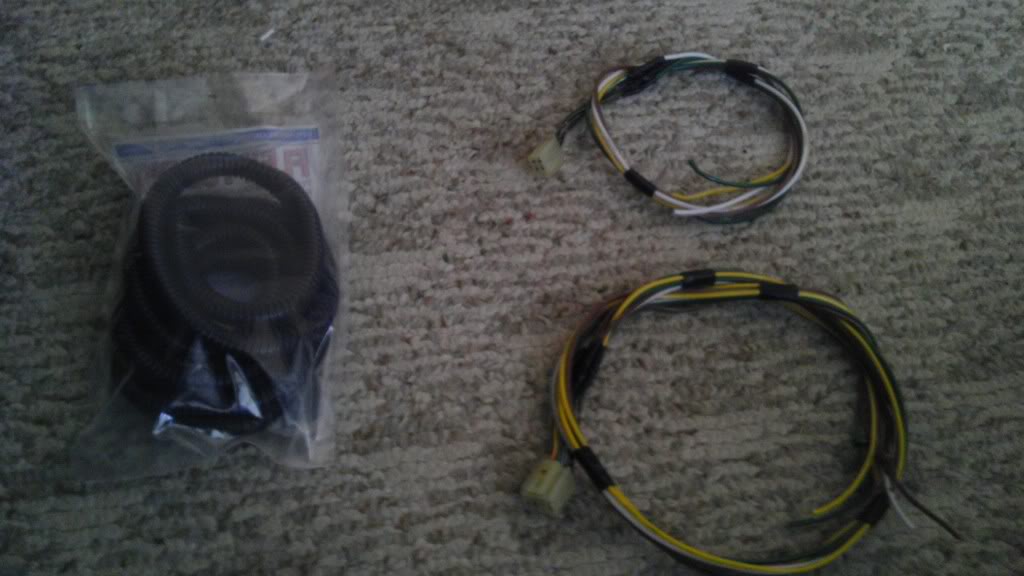
- HVAC controls + harness pig tails (at least 6")
- *Optional for Accord HVAC* - The Fan speed resistor located in the blower box + pigtail. Accord HVAC controls have 5-speeds versus the standard 4-speeds of the Civic/CRX controls. To use all 5 speeds on the HVAC you'll need to grab this, however it's not necessarily required. I'm a little OCD about non-functional buttons/switches so I added it to my build and the How-To also documents this process for those interested
From a 88-91 CRX:
- CRX electric HVAC stepper motors: One is located on top of the Fresh/Recir box(behind the glove box) and the other attached to the mixer/air director valve under the dash(left side near the gas pedal). Both are green in color and make sure you clip the harness for a pigtail to make wiring it in easier later.
- Grab all the push rods/mechanical parts connected to the CRX stepper motors. You may not need'm but it's better than if you don't have them.
- The stepper motor's bolt straight to the Civic air ducting, no rigged up mounting required.
Important Preliminary Build Notes:
You will need to make a sub-harness to connect the HVAC controls to the stepper motors and optionally the 5-way accord blower resistor if you choose to do this option. This is required for using the Accord or CRX HVAC controls. This is why it's important to grab the harness and clip off some pig tails from your donor cars. Those of you that have ALL CRX COMPONENTS you will have an easier time swapping parts over and wiring since the chassis are similar and the wiring will be pretty much color for color. The Accord HVAC unit requires some custom mounting of the HVAC controls with some additional color matching on the wiring.
Further notes: I have about $50 invested in the parts from local yard, wiring and a couple of new knobs from Honda at this point for the Accord swap. That's total cost. Last time I saw a new/good CRX HVAC control on ebay it was $200-ish, and I haven't seen a viable one in the junk yard in a long time.
Prepping for the Conversion(Accord)
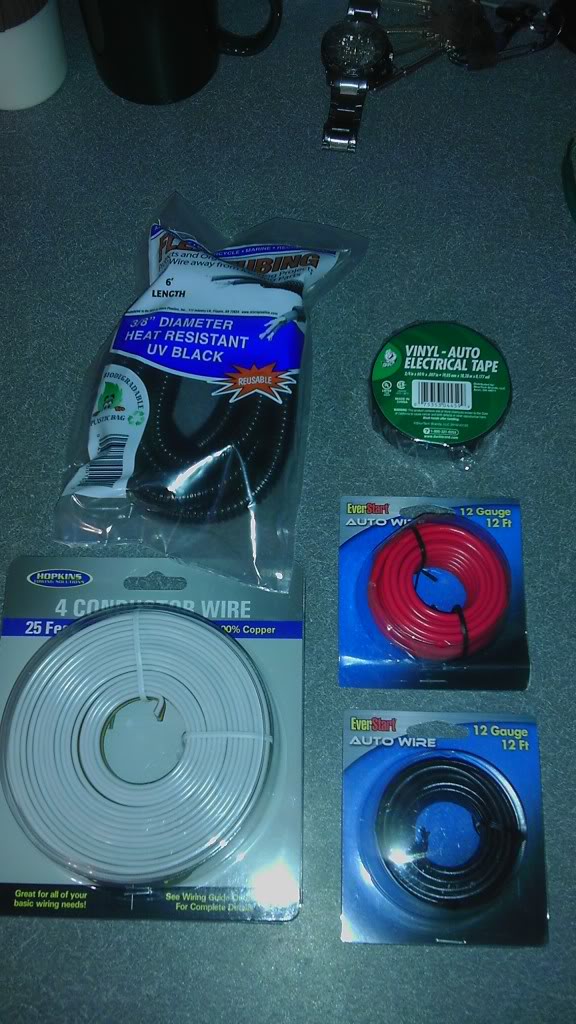
Wiring supplies, soldering iron and heat shrink not pictured.
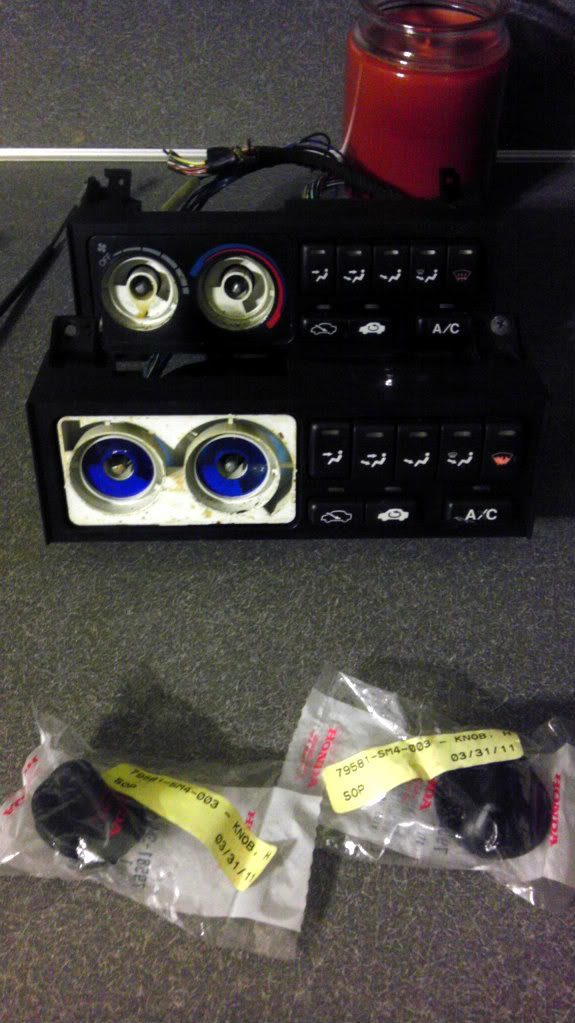
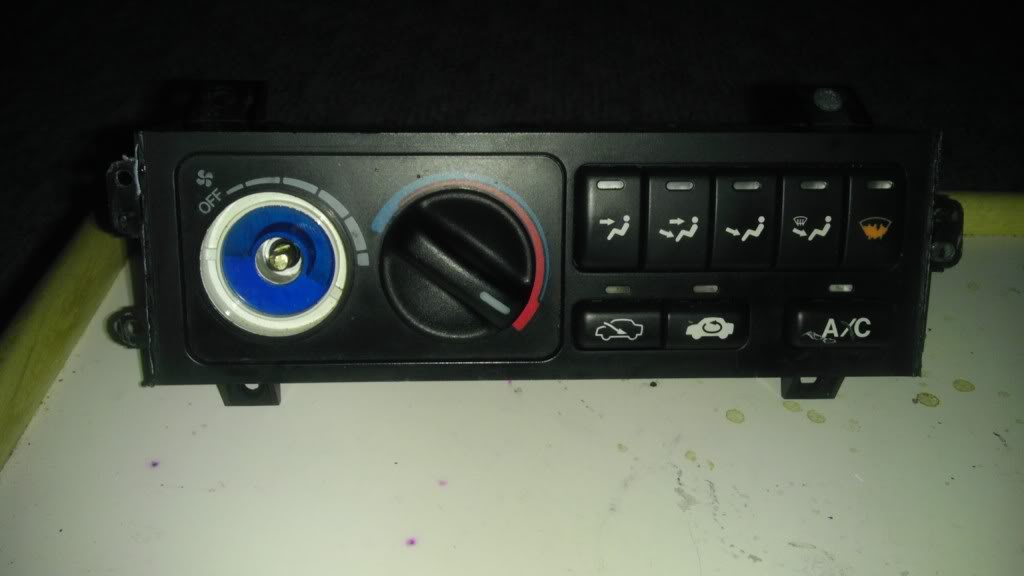
2 used Accord HVAC controls, with wiring pigtails. Factory knobs are a rare commodity apparently, had to order 2 new from Honda.
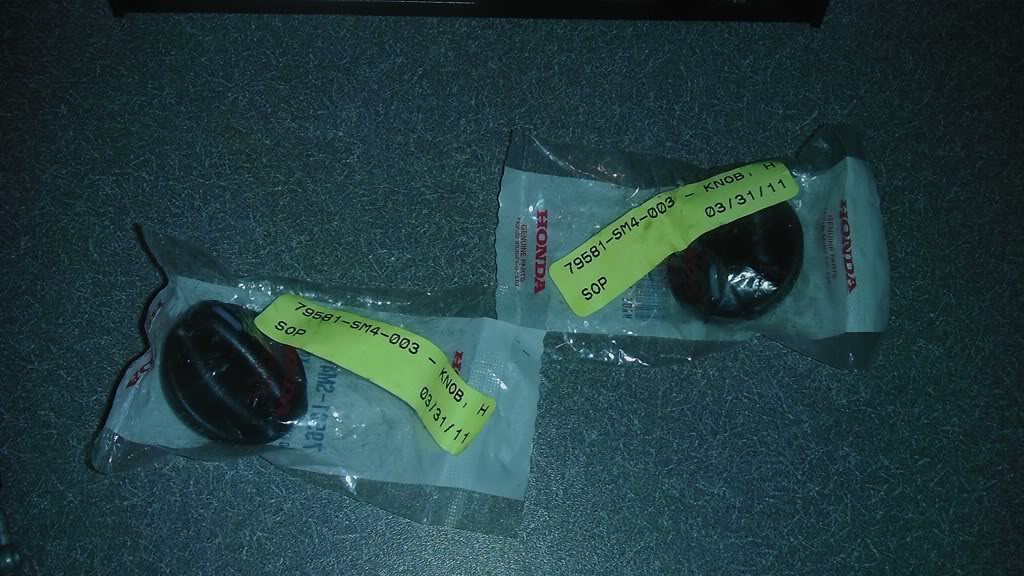
Close up of the part-number if anyone needs them
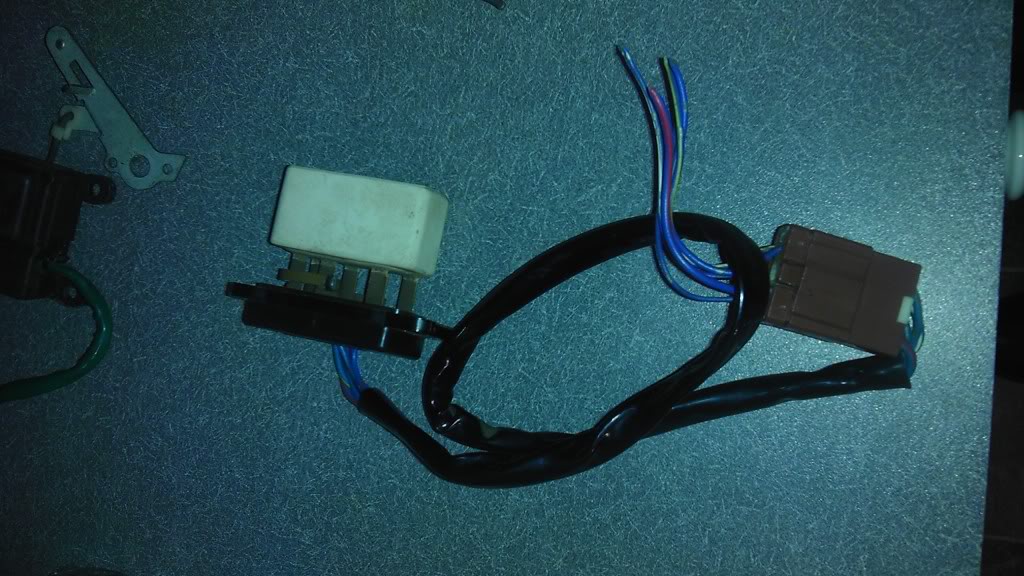
Accord HVAC controls have 5 fan speeds, where the Civics only have 4. I'll be wiring in the matched Accord fan speed resistor in the factory Civic location to maintain this function. Accord fan speed resistor with wiring harness is buried in the accord blower motor assembly and somewhat a pain to remove. One can be purchased new, but the matched wiring harness plug wouldn't be included.
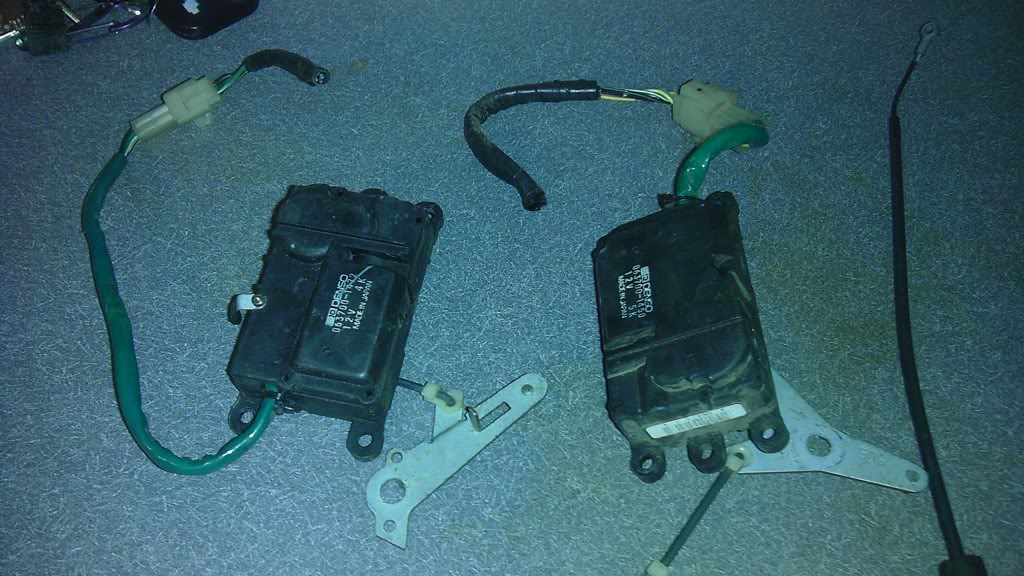
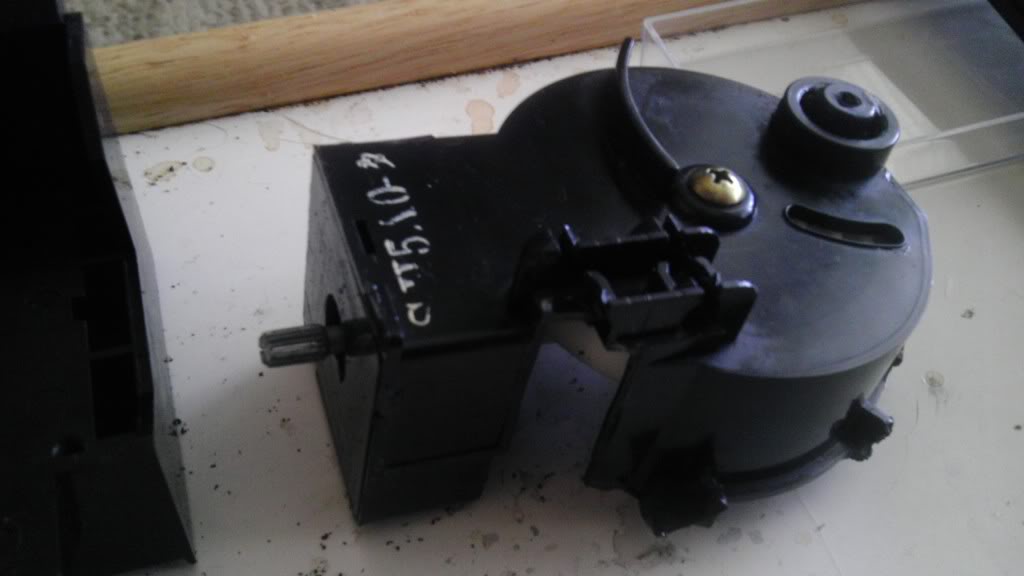
To make the entire push button assembly function properly a set of CRX HVAC stepper motors will be needed. These can be fairly easy to come by on most wrecked CRX's. No one bothers to remove them, unlike the much vaunted CRX HVAC control. On the left is the Fresh/Reric stepper and on the right is the vent selector.
GETTING STARTED:
Console, radio, and glovebox/trim need to be removed:
Backside of the factory HVAC controls
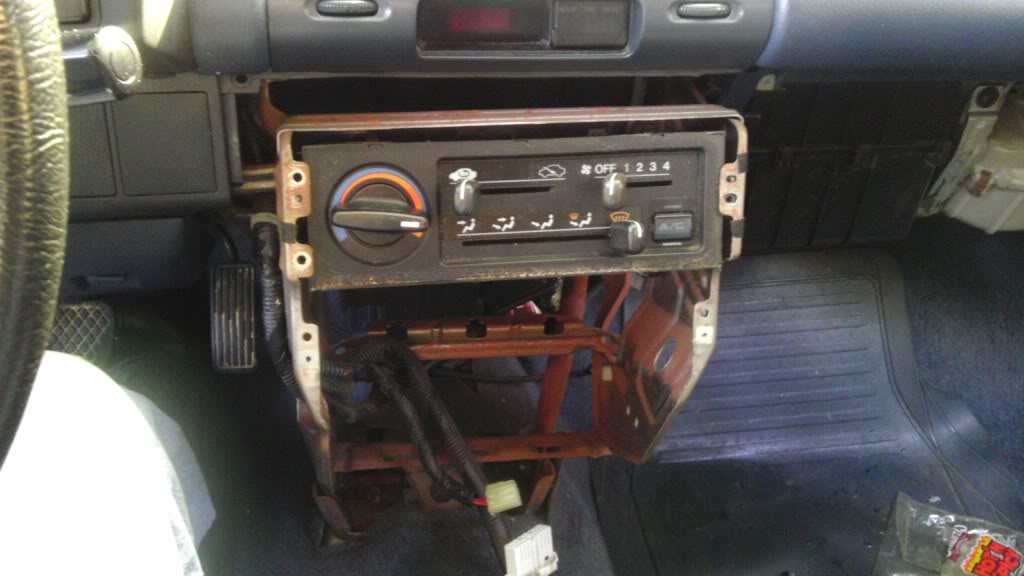
Buh Bye stock
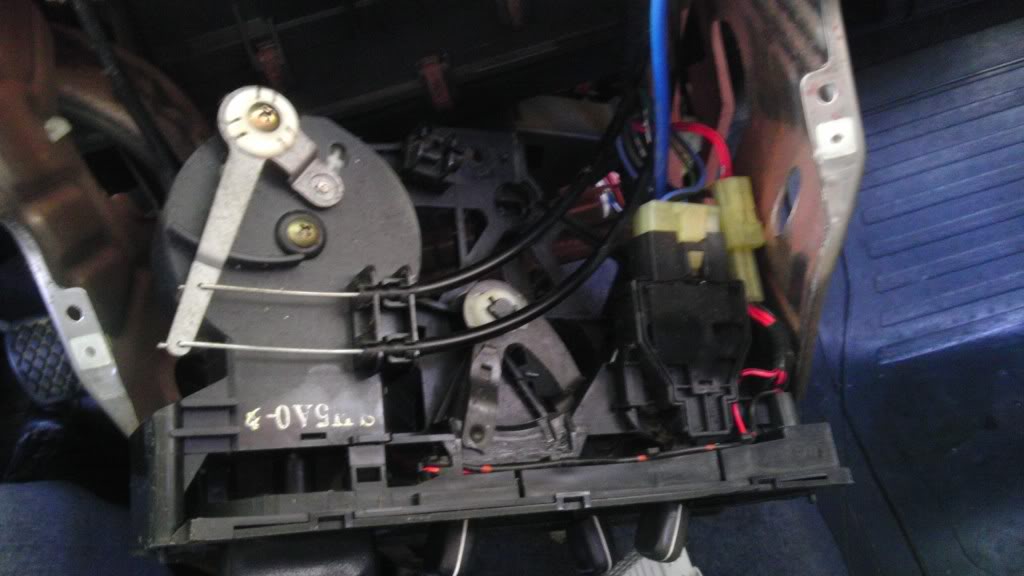
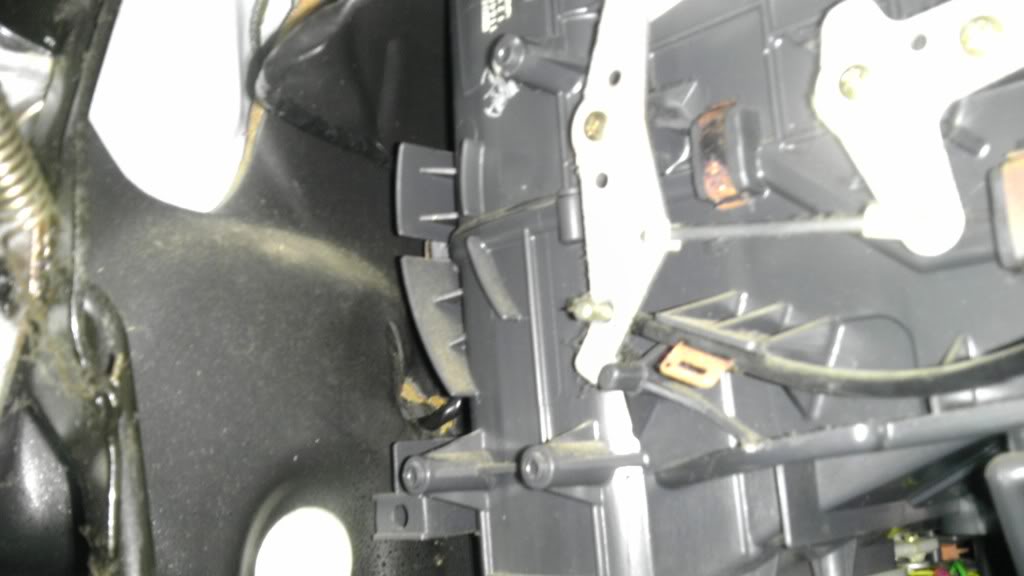
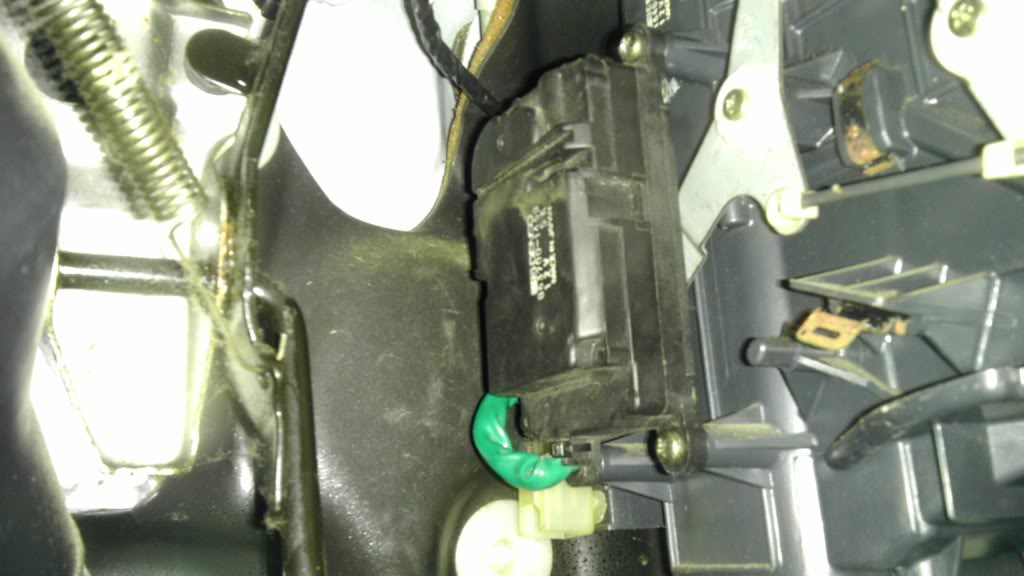
Behind the glove box for the vent/recirc stepper motor install. Pictured is the factor wagon cable pull still installed. You will need to unhook and remove the cable.
Vent/Recirc stepper motor, note the actuator arms are the same between the 2. CRX is variant is still attached to the stepper.
Stepper Motor in place, it's held in place with only 1 screw but it's steady. More screws would require removing the whole blower motor box assembly.
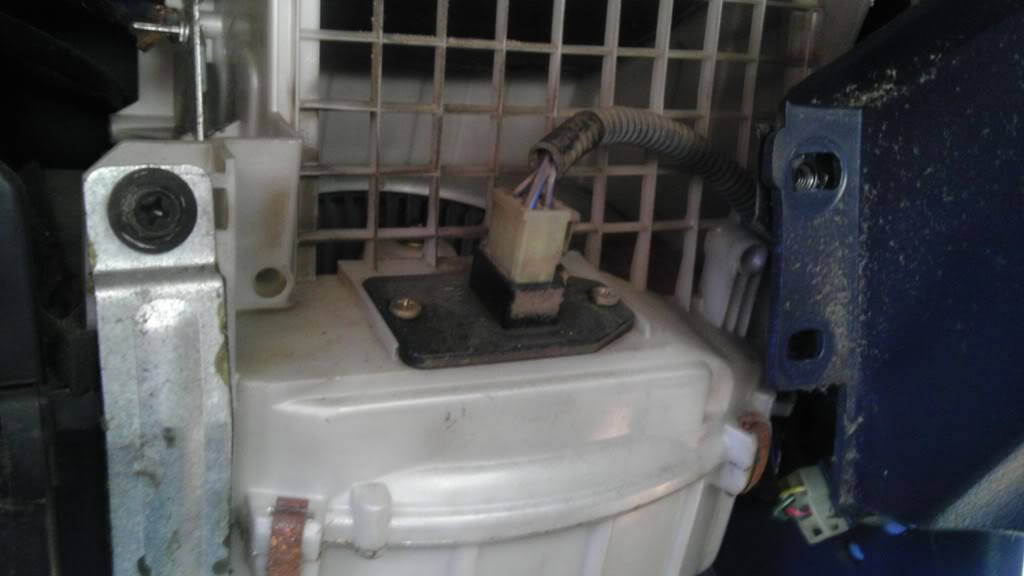
Factory blower resistor, this unit is what controls fan speed. I will be swapping in the Accord unit since I want to have all 5 fan speeds associated with the Accord HVAC controls. The Civic one can be re-sued with the factory wiring but you'll only get 4 speeds like a stock HVAC control. If using the civic resistor assembly you can skip the next 5 or so photos about mounting/wiring the Accord unit.
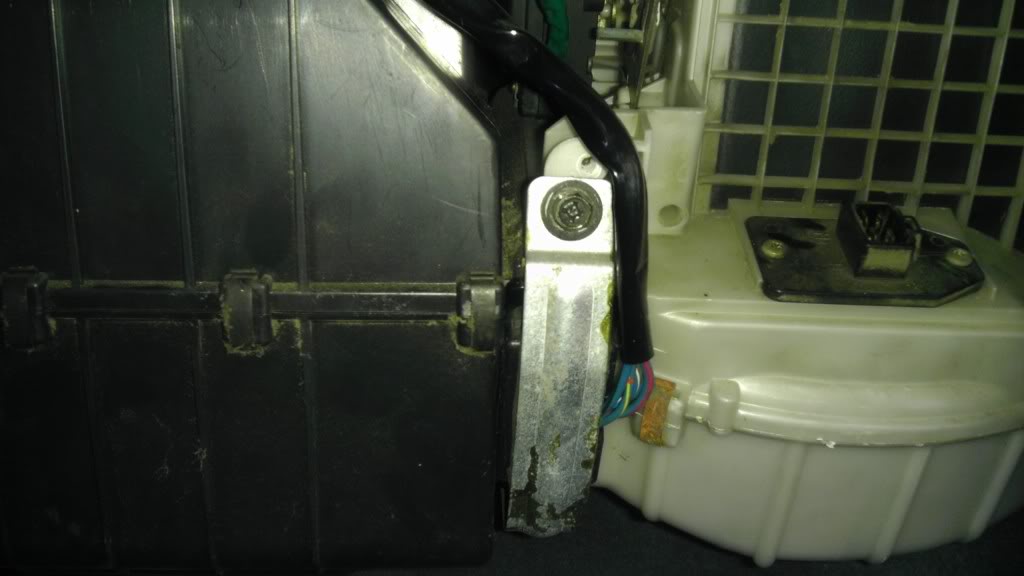
The accord resistor is larger than the civic one, so it will not fit in the factory location and some creative mounting must be undertaking. The fan resistor MUST be in the vent/air track to stay cool during operation. Here was my solution, your mileage may vary.
1) Removed the brace strap between the blower motor box(white) and the A/C core box(black)
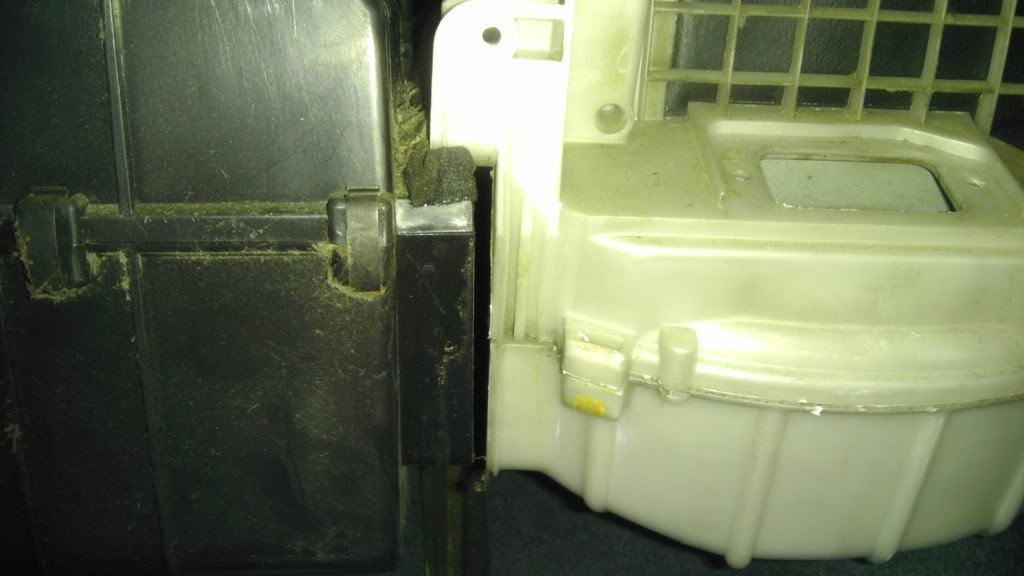
2) Notched out the black box since it's plastic is thinner than the material on the white box.
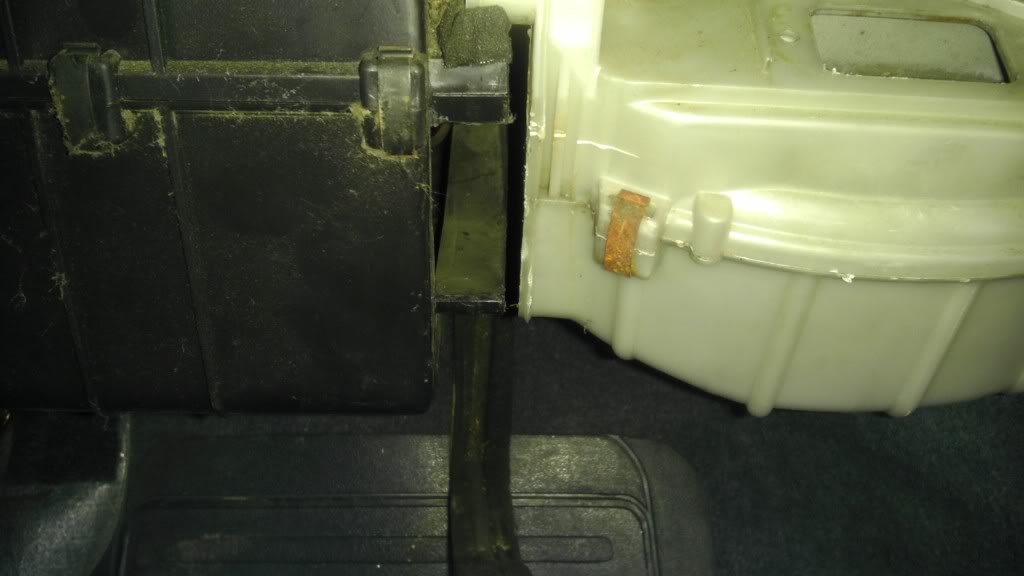
3) Test fit for clearance, taking the cut-out all the way to the junction as shown pretty much makes it perfectly.
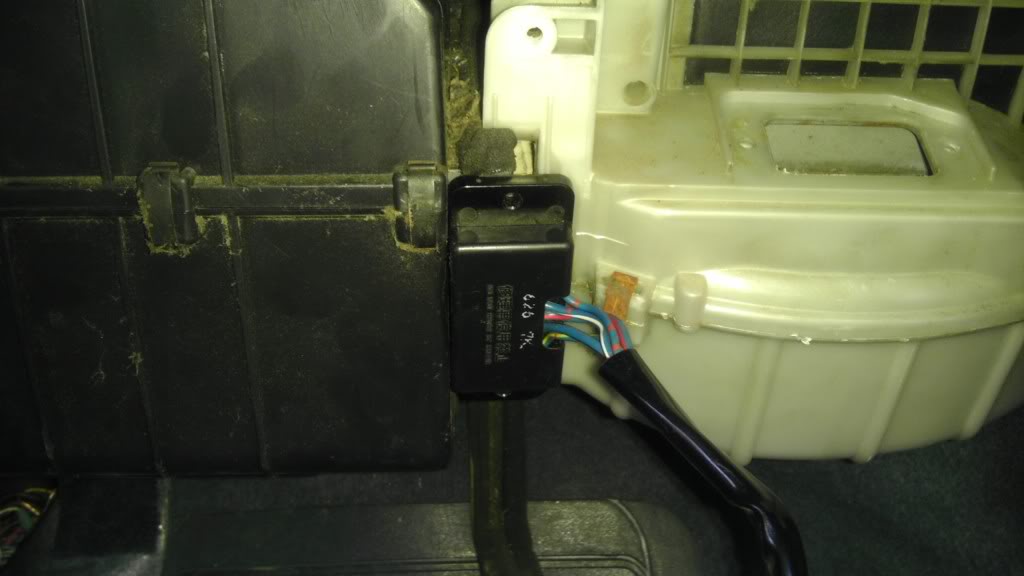
4) Mounted and strapped back like factory. I had to relocate the hold-down screw a little lower than factory.
That's it for the passenger side, I routed the stepper motor and Accord resistor wiring above the black A/C box and into the console area. Sorry forgot to take a picture of this. Now it's time to examine and mount the air director stepper motor. This is located under the driver's side of the dash, near the accelerator pedal.
Here is the factory lever/pivot assembly with the cable attached as it would be stock. To remove the factory HVAC controls you'll have to disconnect this cable and the one on the vent/recric control.
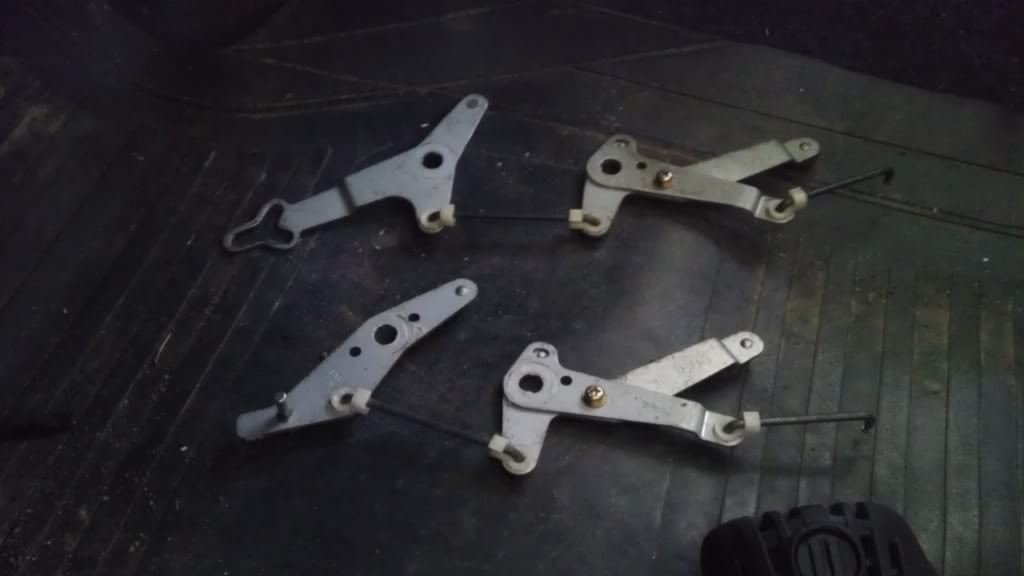
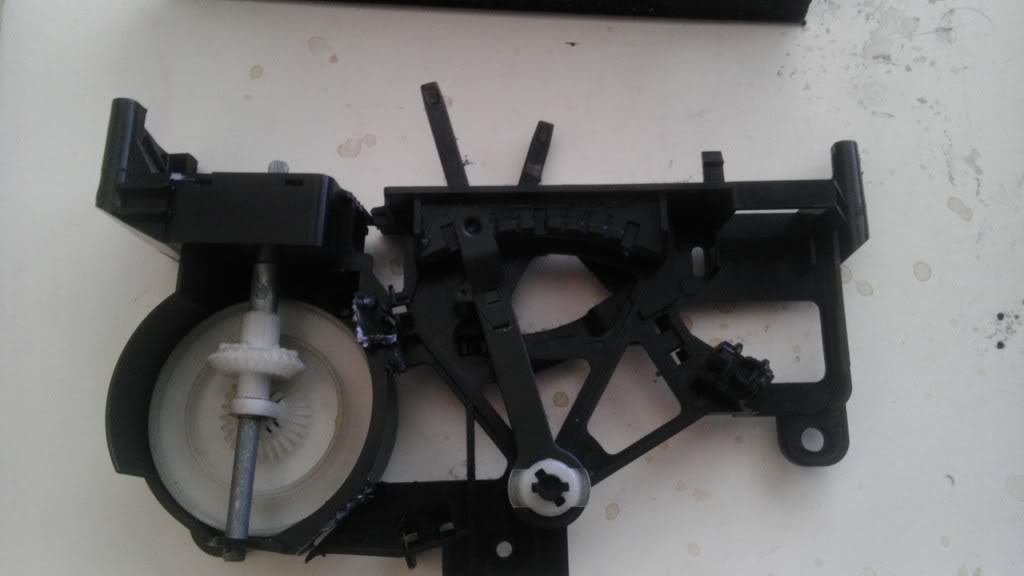
Stock Civic/Wagon Lever/pivot assembly(bottom), CRX variant on top. Note the differences, the rear bracket is the only one that needs to be swapped. I had the whole assembly, so I just changed it outright. Be gentle removing these assemblies as the plastic can be fragile, use a pick tool or a fingernail to release the plastic clips.
CRX assembly installed
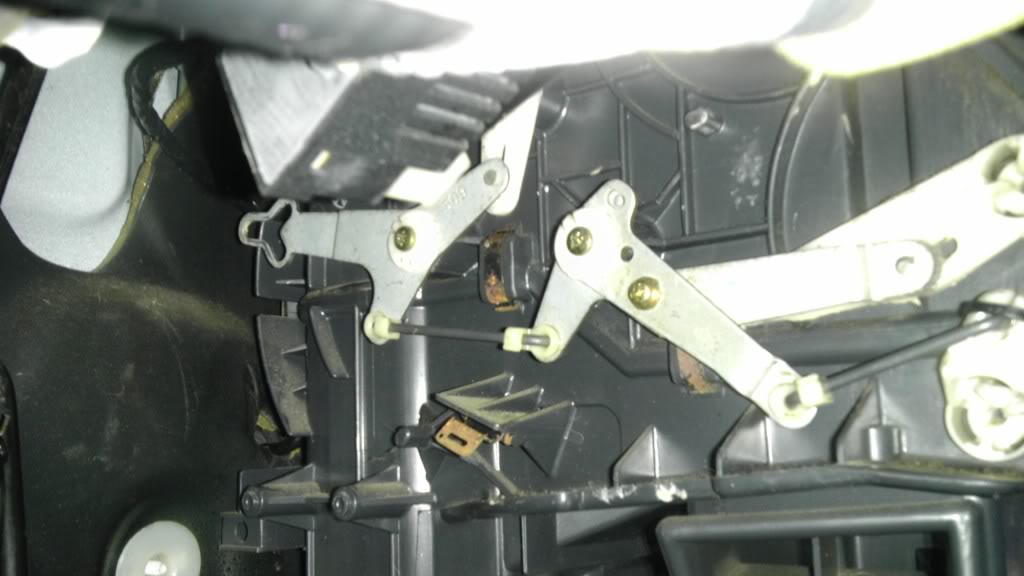
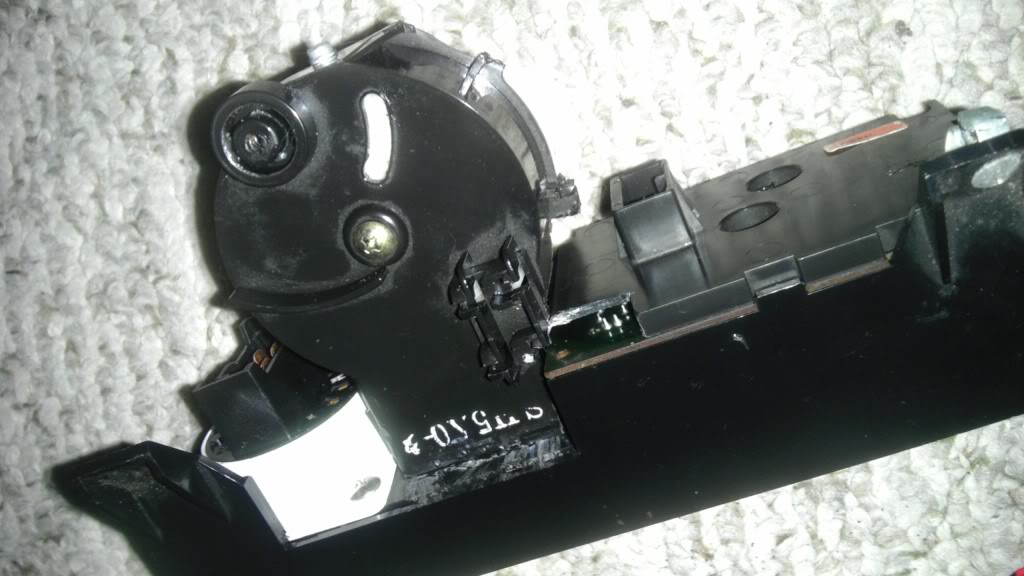
Stepper motor installed overtop of the lever/pivot assembly.
Some stumbling points on actually mounting the Accord HVAC are as follows(disregard if using a CRX HVAC Control).
1) Cold/Hot cable pull assembly has 1 cable *push* versus the Civic/CRX double cable *pull* setup. The accord unit uses 1 less cable and effectively works backwards when compared to a Civic/CRX assembly. Will need to rig up a solution, i'm opting to trim the Civic cable assembly off of the factory civic HVAC and mod it to work.
2) Accord HVAC mounts drastically different from civic. Going to transplant Civic HVAC mounting points to Accord unit.
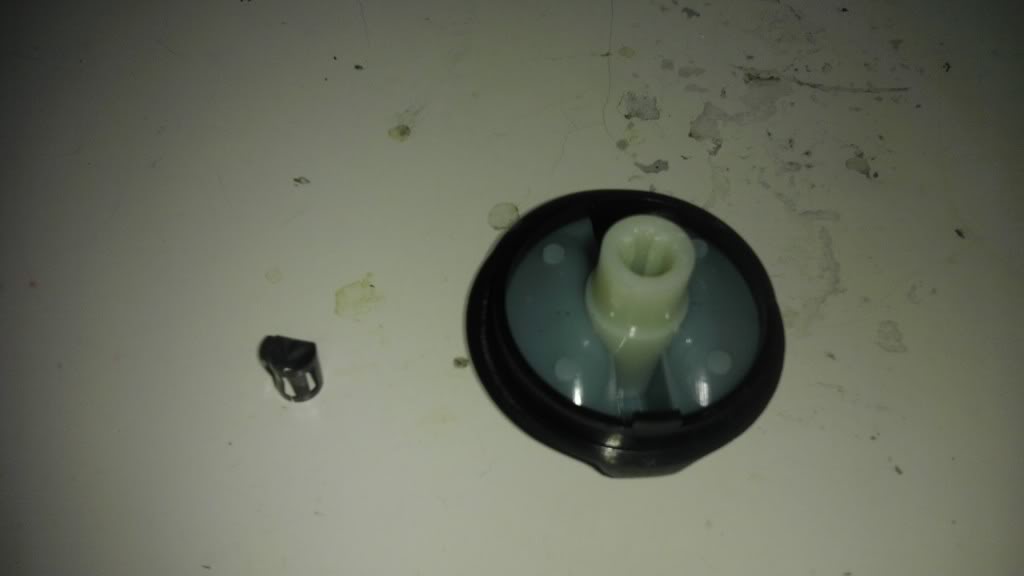
Factory HVAC lever assembly, front plate removed.
Trimmed hot/cold selector off and profiled it to fit properly on the Accord unit.
Civic temperature selector super glued in place on the Accord HVAC unit. Note the section on the Accord unit I had to trim, you can see the exposed green PCB.
Accord knob doesn't exactly fix on the Civic temp control, had to remove the metal sleeve for the knob to install properly.
Mounting flanges trimmed from Civic HVAC
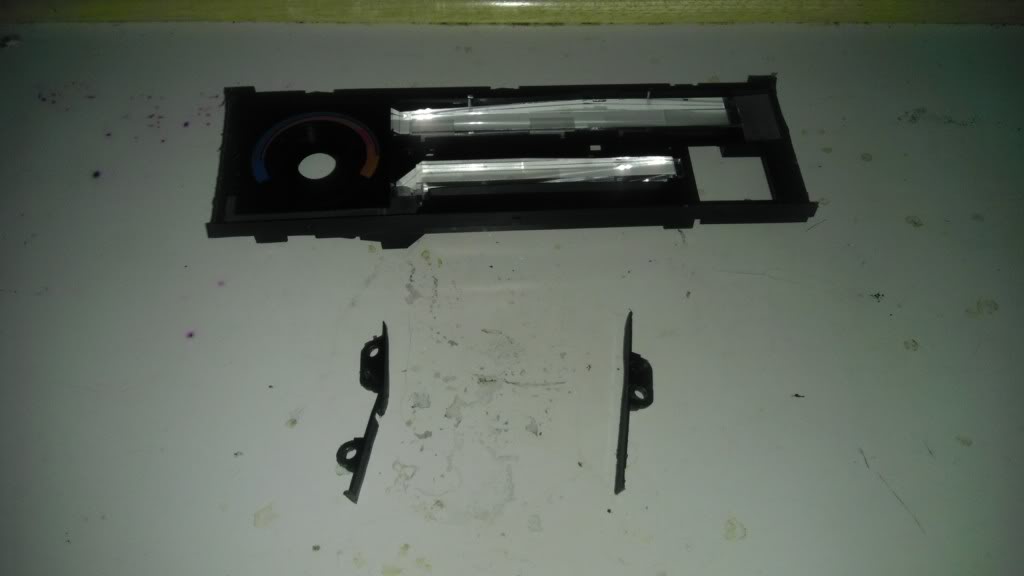
Glued to Accord HVAC
Now the fun part....wiring and mounting. This will be similar to the CRX -> Accord swap mentioned on the CRX community article. However only some parts will be similar since I have to effectively add the CRX stepper motors and wire custom sub-harness back to the HVAC unit. Also the CRX-> Accord walk through doesn't account for the Accord fan speed resistor I added into my install.
Helpful Note: To build nice sub-harnesses use solder and shrink swap this will cut down on space consumed by crimp connectors and provide a better/longer lasting connection. Also planning ahead by pre-routing a single peice of wire for accurate length measurements helps for a clean install. This will provide you with an easy way to cut and construct most of your sub-harness outside of the vehicle.
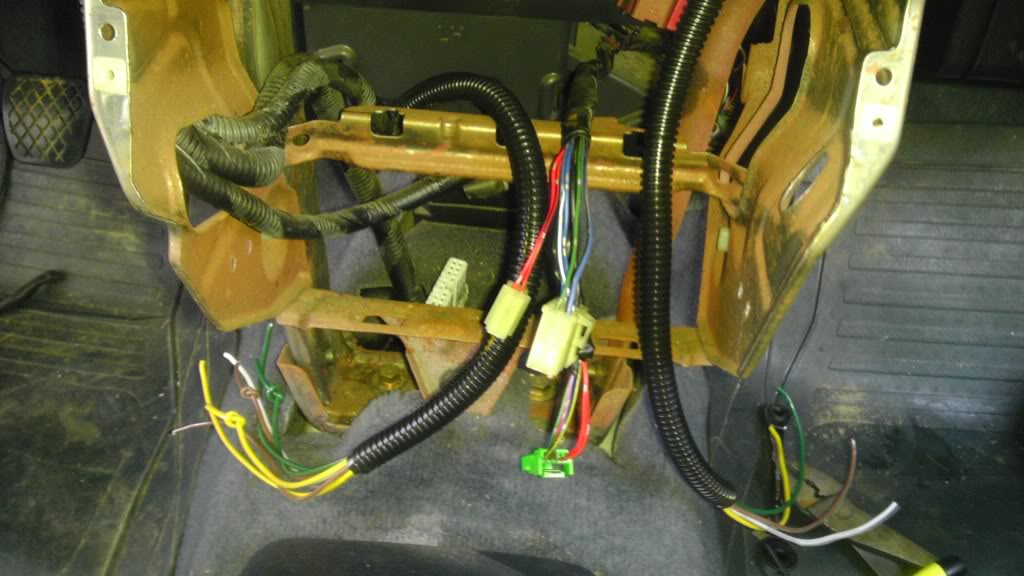
Stepper motor sub-harness assembled, these will connect the vent/recric and level selector stepper motors that were installed previously.
Sub-harness installed and pulled into the HVAC/Radio cavity.
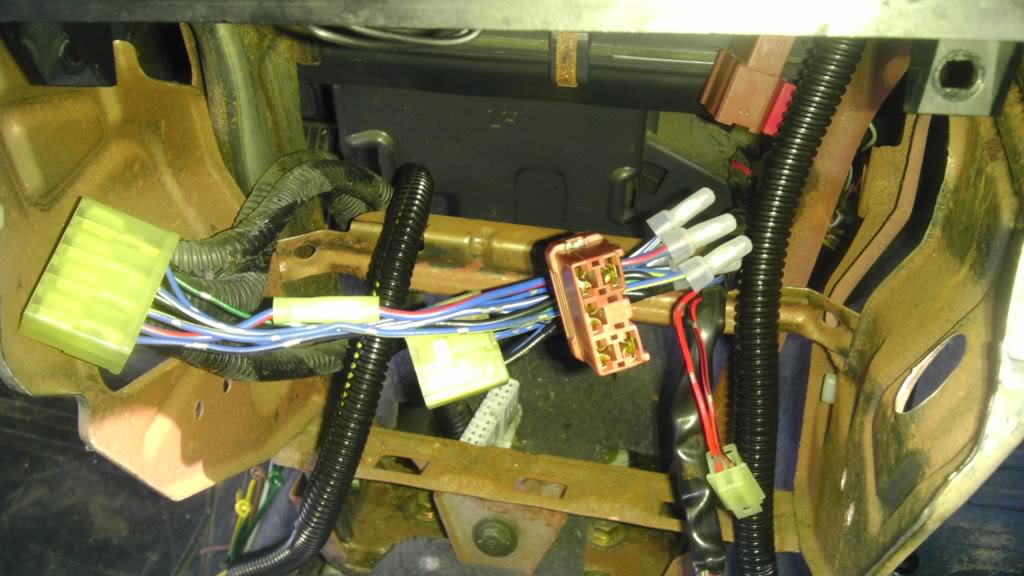
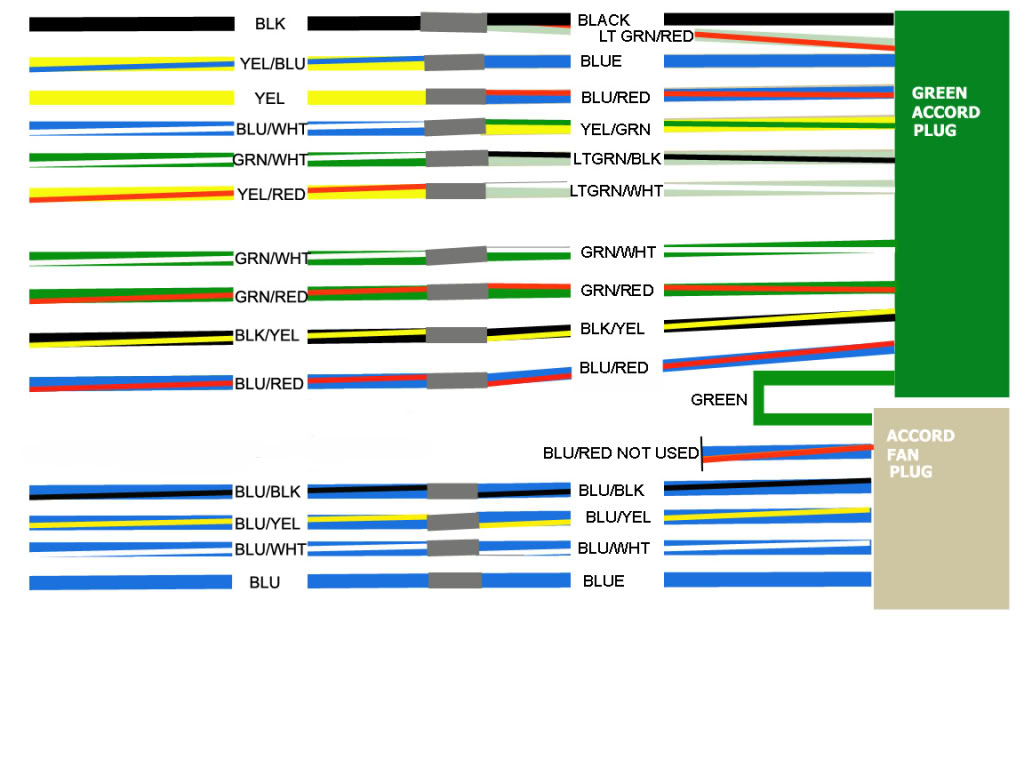
Blower/Fan Speed harness wired in. Since this is different that the walk-through I'll mention the following differences: (Again skip if using CRX controls or civic fan speed resistor)
Note: At this point the CRX HVAC controls are basically wired color to color as dictated by your sub-harness connections and is relatively straight forward.
1) Wire Accord fan resistor harness direct color for color to the fan speed plug on the Accord HVAC. Leave the Blue/Red wires until the next step.
2) Cut large Blue/Black from the factory Civic harness and wire it to the large Blue/Red Wires. The Blue/Black wire is the 12V feed for the blower motor, unless you complete this step, you won't have any fan action.
3) Wire small green wire on the Accord fan speed plug to small Green wire on the Civic fan harness.
4) Wire small black wire on the Accord fan speed plug to small black wire on the Civic fan harness.
5) The stepper motor sub-harness will have 2-extra wires each, Black/Yellow and a Black wire.
5a)The Black/Yellow wire(s) can be wired into the Black/Yellow found on the factor Civic green plug. This is the 12V ignition feed for the stepper motors.
5b)The Black wire(s) will need to be grounded, I chose to ground mine to the accessory/cigarette lighter harness blow the radio.
6) The rest of the wiring is pretty much as described in the CRX conversion
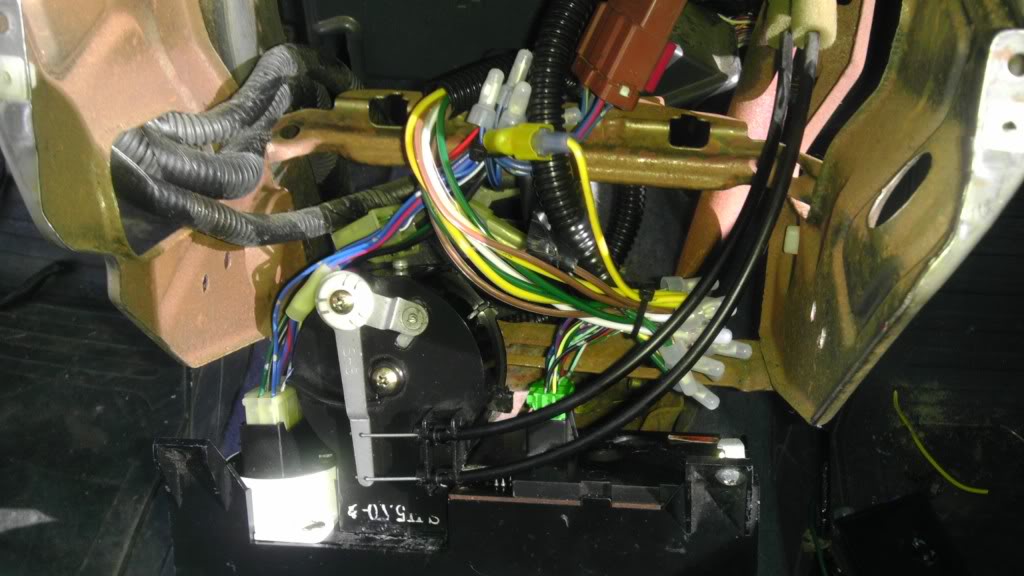
All harness wired and attached to HVAC assembly.
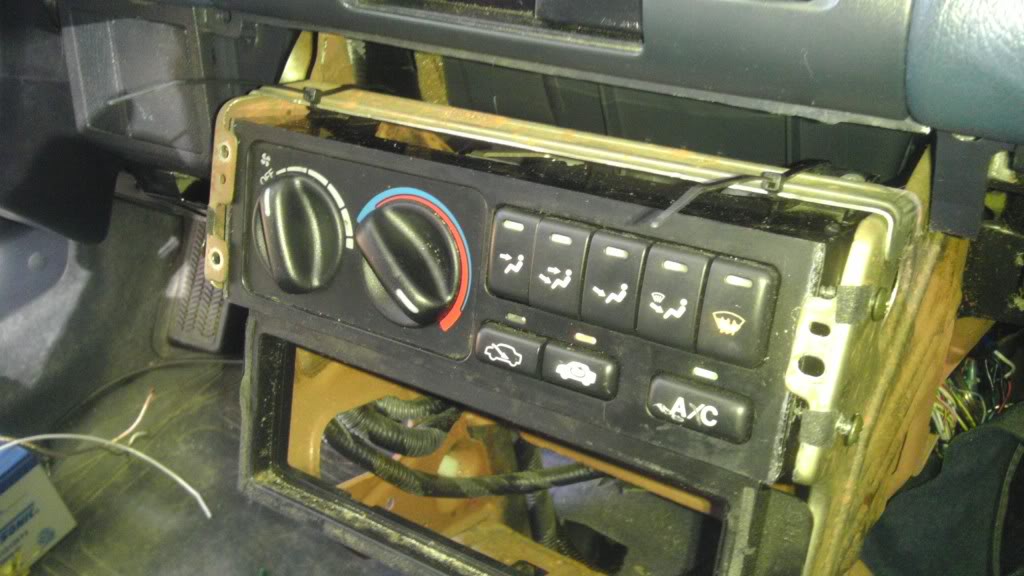
HVAC mounted. Note my Civic mounting tab solution didn't survive the test fitting and wiring procedures. If I would've pulled it all back out and used some epoxy on the tabs it would've held fine. I had to resort to using screws and zip-ties like any effective shady tree engineer would. The CRX HVAC control mounts direct to the frame and no custom work is required here.
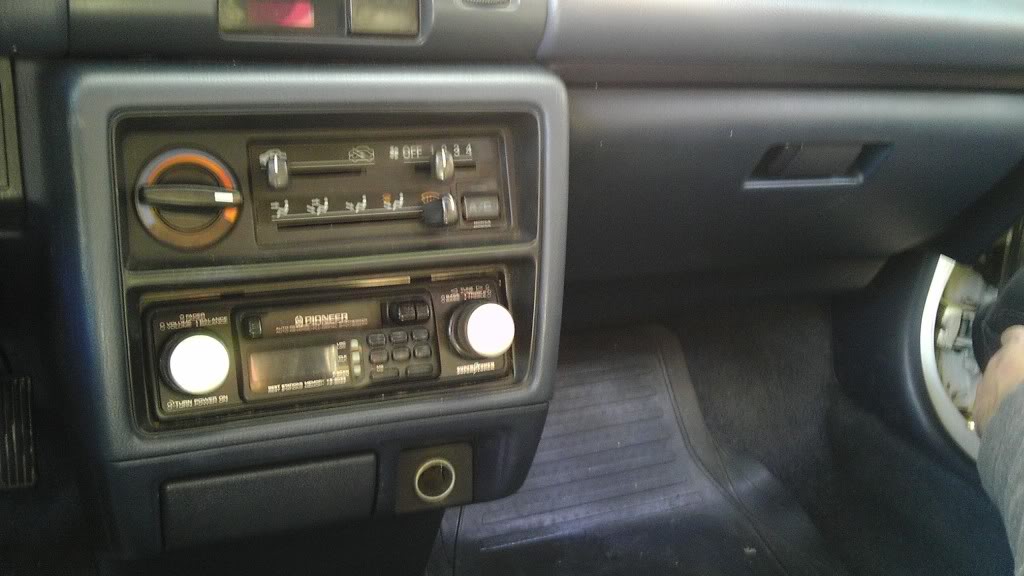
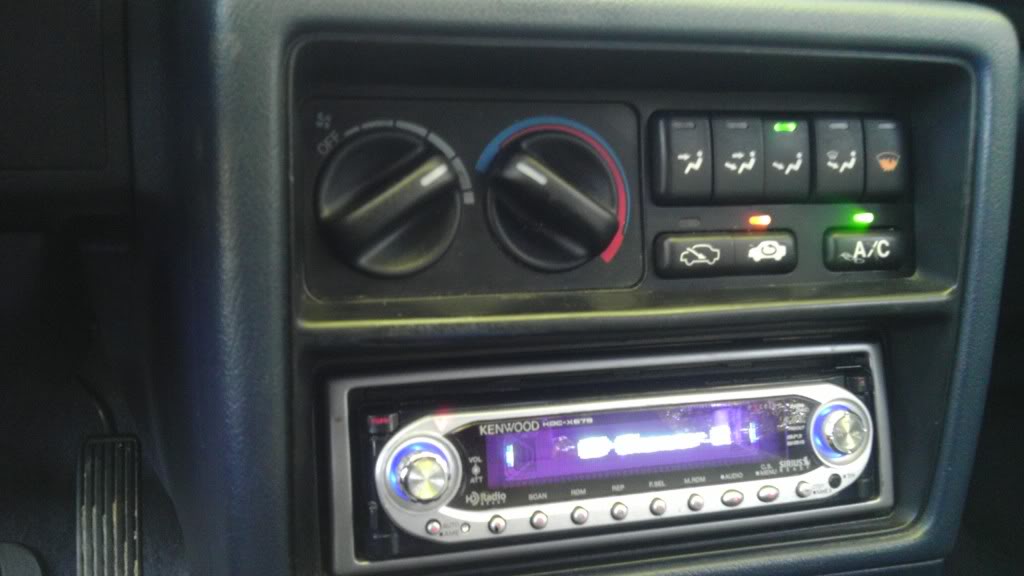
Finished and everything pretty again...added new-ish radio while I was at it.
Welp questions and comments welcome I suppose.... Or I'll just sit back an wait for the TL;DR's to start pouring in.
Cheers.
I hate the lever controls in the early 90 era Civics, I always have. A year or so ago I did an Accord HVAC control panel swap into my EE2, which is similar to the push button style CRX HVAC controls. IMO either is a classy upgrade to any of the lever action civics of that era. I did a CRX HVAC swap into a hatch I previously owned and it made a world of difference. However the CRX HVAC controls are pretty prone to breaking at the hot/cold selector and are tough to find or expensive when you do.
For my wagon I went with the 90-93 Accord HVAC option since they are pretty easy to find(10$ at the local u-pull-it) and fit in the DIN sized spot the same as the CRX/Civic HVAC control units. This How-To will focus on my experience with the Accord swap in, HOWEVER much of this process also applies to swapping in the CRX controls if you're lucky enough to find them intact. The CRX swap requires less custom modification for those not comfortable with things like epoxy, solder and zip-ties. However you cannot mix the HVAC controls or wiring: Pick one and go with it. the CRX controls are easier to install, but the Accord controls are cheaper(normally).
Some inspiration/help for this swap came from the article/document over on the CRX community;
http://www.crxcommunity.com/viewtopic.php?f=10&t=26741
This is a long walk through so be prepared to plan ahead for the job. It took me 2 sittings to finish my conversion at about 3~4 hours per day, however I don't have to luxury of a decent work space at my current residence. Realistically those of you with a garage to work out of and some competence could probably do it faster, most likely in a day. You'll need the following components:
From a 90-93 Accord or 88-91 CRX:
- HVAC controls + harness pig tails (at least 6")
- *Optional for Accord HVAC* - The Fan speed resistor located in the blower box + pigtail. Accord HVAC controls have 5-speeds versus the standard 4-speeds of the Civic/CRX controls. To use all 5 speeds on the HVAC you'll need to grab this, however it's not necessarily required. I'm a little OCD about non-functional buttons/switches so I added it to my build and the How-To also documents this process for those interested
From a 88-91 CRX:
- CRX electric HVAC stepper motors: One is located on top of the Fresh/Recir box(behind the glove box) and the other attached to the mixer/air director valve under the dash(left side near the gas pedal). Both are green in color and make sure you clip the harness for a pigtail to make wiring it in easier later.
- Grab all the push rods/mechanical parts connected to the CRX stepper motors. You may not need'm but it's better than if you don't have them.
- The stepper motor's bolt straight to the Civic air ducting, no rigged up mounting required.
Important Preliminary Build Notes:
You will need to make a sub-harness to connect the HVAC controls to the stepper motors and optionally the 5-way accord blower resistor if you choose to do this option. This is required for using the Accord or CRX HVAC controls. This is why it's important to grab the harness and clip off some pig tails from your donor cars. Those of you that have ALL CRX COMPONENTS you will have an easier time swapping parts over and wiring since the chassis are similar and the wiring will be pretty much color for color. The Accord HVAC unit requires some custom mounting of the HVAC controls with some additional color matching on the wiring.
Further notes: I have about $50 invested in the parts from local yard, wiring and a couple of new knobs from Honda at this point for the Accord swap. That's total cost. Last time I saw a new/good CRX HVAC control on ebay it was $200-ish, and I haven't seen a viable one in the junk yard in a long time.
Prepping for the Conversion(Accord)
Wiring supplies, soldering iron and heat shrink not pictured.
2 used Accord HVAC controls, with wiring pigtails. Factory knobs are a rare commodity apparently, had to order 2 new from Honda.
Close up of the part-number if anyone needs them
Accord HVAC controls have 5 fan speeds, where the Civics only have 4. I'll be wiring in the matched Accord fan speed resistor in the factory Civic location to maintain this function. Accord fan speed resistor with wiring harness is buried in the accord blower motor assembly and somewhat a pain to remove. One can be purchased new, but the matched wiring harness plug wouldn't be included.
To make the entire push button assembly function properly a set of CRX HVAC stepper motors will be needed. These can be fairly easy to come by on most wrecked CRX's. No one bothers to remove them, unlike the much vaunted CRX HVAC control. On the left is the Fresh/Reric stepper and on the right is the vent selector.
GETTING STARTED:
Console, radio, and glovebox/trim need to be removed:
Backside of the factory HVAC controls
Buh Bye stock
Behind the glove box for the vent/recirc stepper motor install. Pictured is the factor wagon cable pull still installed. You will need to unhook and remove the cable.
Vent/Recirc stepper motor, note the actuator arms are the same between the 2. CRX is variant is still attached to the stepper.
Stepper Motor in place, it's held in place with only 1 screw but it's steady. More screws would require removing the whole blower motor box assembly.
Factory blower resistor, this unit is what controls fan speed. I will be swapping in the Accord unit since I want to have all 5 fan speeds associated with the Accord HVAC controls. The Civic one can be re-sued with the factory wiring but you'll only get 4 speeds like a stock HVAC control. If using the civic resistor assembly you can skip the next 5 or so photos about mounting/wiring the Accord unit.
The accord resistor is larger than the civic one, so it will not fit in the factory location and some creative mounting must be undertaking. The fan resistor MUST be in the vent/air track to stay cool during operation. Here was my solution, your mileage may vary.
1) Removed the brace strap between the blower motor box(white) and the A/C core box(black)
2) Notched out the black box since it's plastic is thinner than the material on the white box.
3) Test fit for clearance, taking the cut-out all the way to the junction as shown pretty much makes it perfectly.
4) Mounted and strapped back like factory. I had to relocate the hold-down screw a little lower than factory.
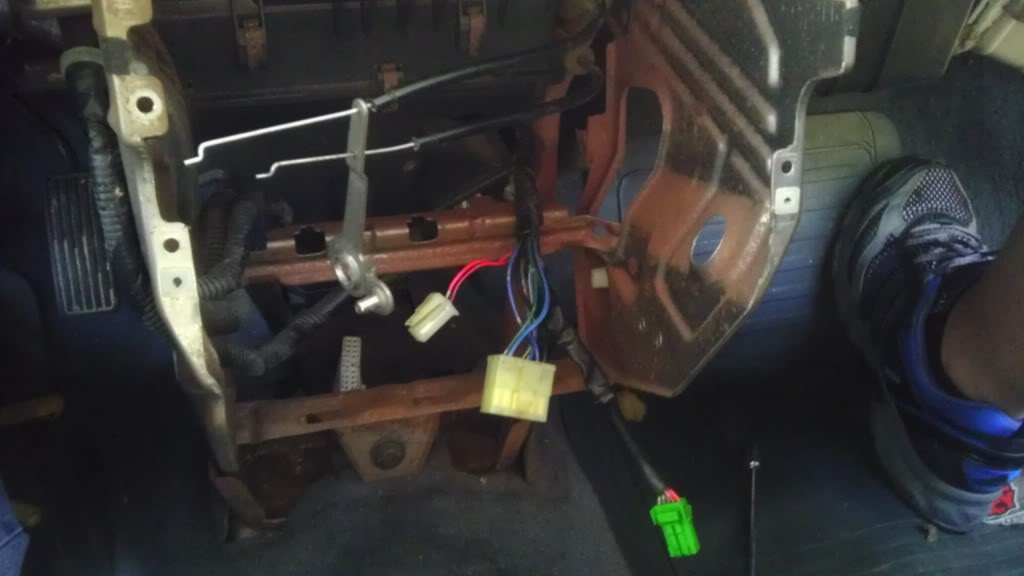
That's it for the passenger side, I routed the stepper motor and Accord resistor wiring above the black A/C box and into the console area. Sorry forgot to take a picture of this. Now it's time to examine and mount the air director stepper motor. This is located under the driver's side of the dash, near the accelerator pedal.
Here is the factory lever/pivot assembly with the cable attached as it would be stock. To remove the factory HVAC controls you'll have to disconnect this cable and the one on the vent/recric control.
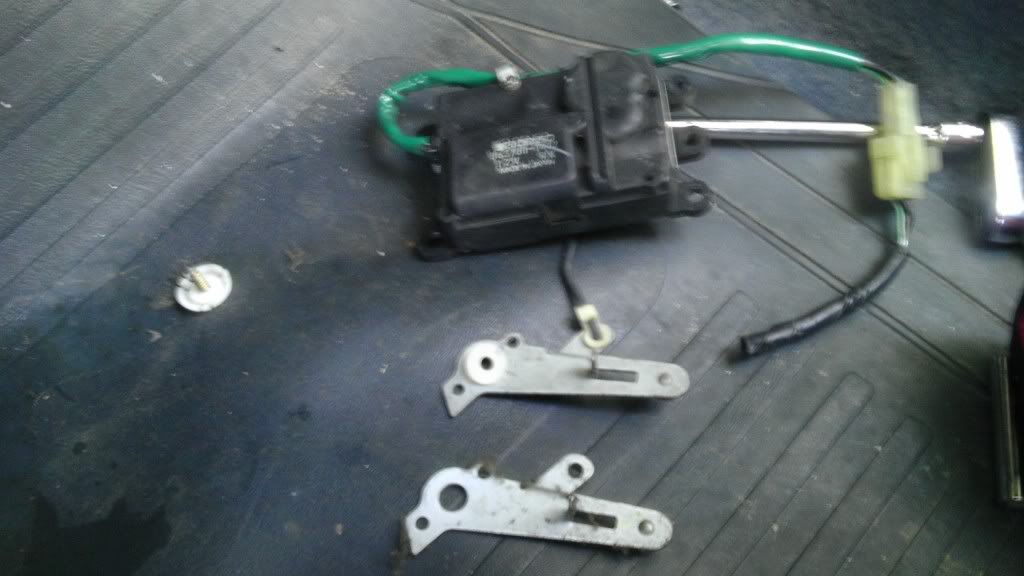
Stock Civic/Wagon Lever/pivot assembly(bottom), CRX variant on top. Note the differences, the rear bracket is the only one that needs to be swapped. I had the whole assembly, so I just changed it outright. Be gentle removing these assemblies as the plastic can be fragile, use a pick tool or a fingernail to release the plastic clips.
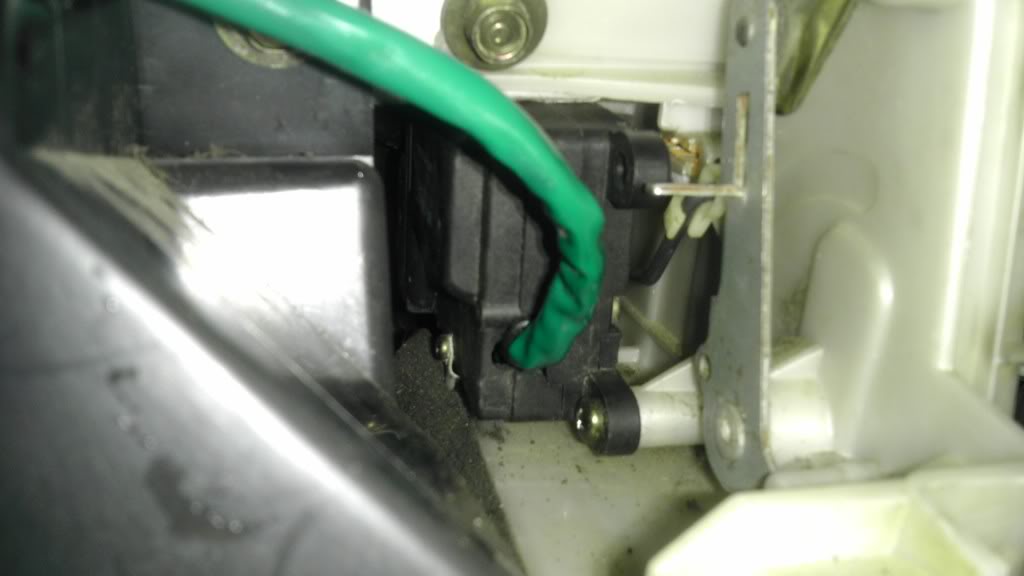
CRX assembly installed
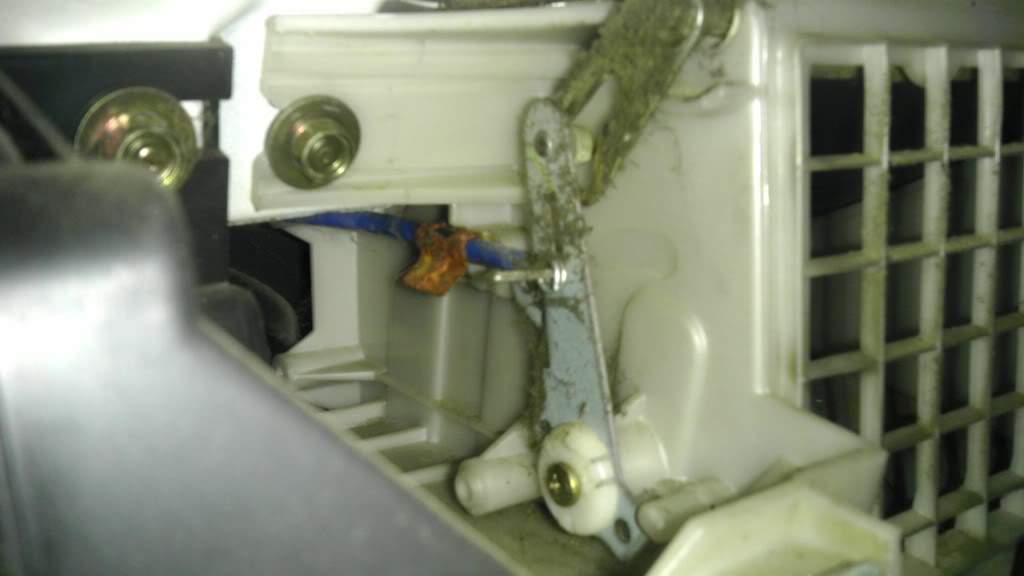
Stepper motor installed overtop of the lever/pivot assembly.
Some stumbling points on actually mounting the Accord HVAC are as follows(disregard if using a CRX HVAC Control).
1) Cold/Hot cable pull assembly has 1 cable *push* versus the Civic/CRX double cable *pull* setup. The accord unit uses 1 less cable and effectively works backwards when compared to a Civic/CRX assembly. Will need to rig up a solution, i'm opting to trim the Civic cable assembly off of the factory civic HVAC and mod it to work.
2) Accord HVAC mounts drastically different from civic. Going to transplant Civic HVAC mounting points to Accord unit.
Factory HVAC lever assembly, front plate removed.
Trimmed hot/cold selector off and profiled it to fit properly on the Accord unit.
Civic temperature selector super glued in place on the Accord HVAC unit. Note the section on the Accord unit I had to trim, you can see the exposed green PCB.
Accord knob doesn't exactly fix on the Civic temp control, had to remove the metal sleeve for the knob to install properly.
Mounting flanges trimmed from Civic HVAC
Glued to Accord HVAC
Now the fun part....wiring and mounting. This will be similar to the CRX -> Accord swap mentioned on the CRX community article. However only some parts will be similar since I have to effectively add the CRX stepper motors and wire custom sub-harness back to the HVAC unit. Also the CRX-> Accord walk through doesn't account for the Accord fan speed resistor I added into my install.
Helpful Note: To build nice sub-harnesses use solder and shrink swap this will cut down on space consumed by crimp connectors and provide a better/longer lasting connection. Also planning ahead by pre-routing a single peice of wire for accurate length measurements helps for a clean install. This will provide you with an easy way to cut and construct most of your sub-harness outside of the vehicle.
Stepper motor sub-harness assembled, these will connect the vent/recric and level selector stepper motors that were installed previously.
Sub-harness installed and pulled into the HVAC/Radio cavity.
Blower/Fan Speed harness wired in. Since this is different that the walk-through I'll mention the following differences: (Again skip if using CRX controls or civic fan speed resistor)
Note: At this point the CRX HVAC controls are basically wired color to color as dictated by your sub-harness connections and is relatively straight forward.
1) Wire Accord fan resistor harness direct color for color to the fan speed plug on the Accord HVAC. Leave the Blue/Red wires until the next step.
2) Cut large Blue/Black from the factory Civic harness and wire it to the large Blue/Red Wires. The Blue/Black wire is the 12V feed for the blower motor, unless you complete this step, you won't have any fan action.
3) Wire small green wire on the Accord fan speed plug to small Green wire on the Civic fan harness.
4) Wire small black wire on the Accord fan speed plug to small black wire on the Civic fan harness.
5) The stepper motor sub-harness will have 2-extra wires each, Black/Yellow and a Black wire.
5a)The Black/Yellow wire(s) can be wired into the Black/Yellow found on the factor Civic green plug. This is the 12V ignition feed for the stepper motors.
5b)The Black wire(s) will need to be grounded, I chose to ground mine to the accessory/cigarette lighter harness blow the radio.
6) The rest of the wiring is pretty much as described in the CRX conversion
All harness wired and attached to HVAC assembly.
HVAC mounted. Note my Civic mounting tab solution didn't survive the test fitting and wiring procedures. If I would've pulled it all back out and used some epoxy on the tabs it would've held fine. I had to resort to using screws and zip-ties like any effective shady tree engineer would. The CRX HVAC control mounts direct to the frame and no custom work is required here.
Finished and everything pretty again...added new-ish radio while I was at it.
Welp questions and comments welcome I suppose.... Or I'll just sit back an wait for the TL;DR's to start pouring in.
Cheers.
Comments