Viscous Coupler Rebuild
 Vtec_Shuttle
Wagonist
Vtec_Shuttle
Wagonist
Hey how’s it going everyone, I finally took the time to rebuild my Viscous Coupler. I haven’t seen a write up on it only some videos (Dash N Cars YouTube channel) so might as well take the time to do so, this was my second time rebuilding a Viscous Coupler. There’s couple ways to clean the disc’s one by one (which takes a long time I did this cause I wanted to make sure I was doing it correctly) or throw them all in a oil drain Pan and soak all of them with penetration oil while cleaning the VC casing, top cap install new bearing, O rings that’s all up to you.
Tools you’ll need
For the Driveshaft/Viscous Coupler
•Ratchet
•17mm Socket
•14mm Socket
•12mm Socket
•10mm 12 point Wrench
•32mm Socket
•Pry Bar
•Snap Ring Pliers internal/external
•Pulley puller
•Blind hole bearing puller
•Hook/Pick tool
•6 point Torx bit
•access to a press if you can
•Brake cleaner a lot of it or some other penetration oil
Parts you’ll need
McMaster.com
•Quad Rings Part # 90025K405
•Large O Ring Part # 9262K778
Ebay or Amazon or anywhere else you can find them
•Ball Bearing 6005LU or 6005LLB (quantity one)
•Needle Nose Dimension 38x48x15 (quantity one)
•Fluid from Instagram Turbo_2nr (if you want to save time you can buy a full rebuilt kit instead on his Instagram) Turbo2nrs.com
First things first take the driveshaft off.
Second dissemble the Viscous Coupler from the Dirveshaft
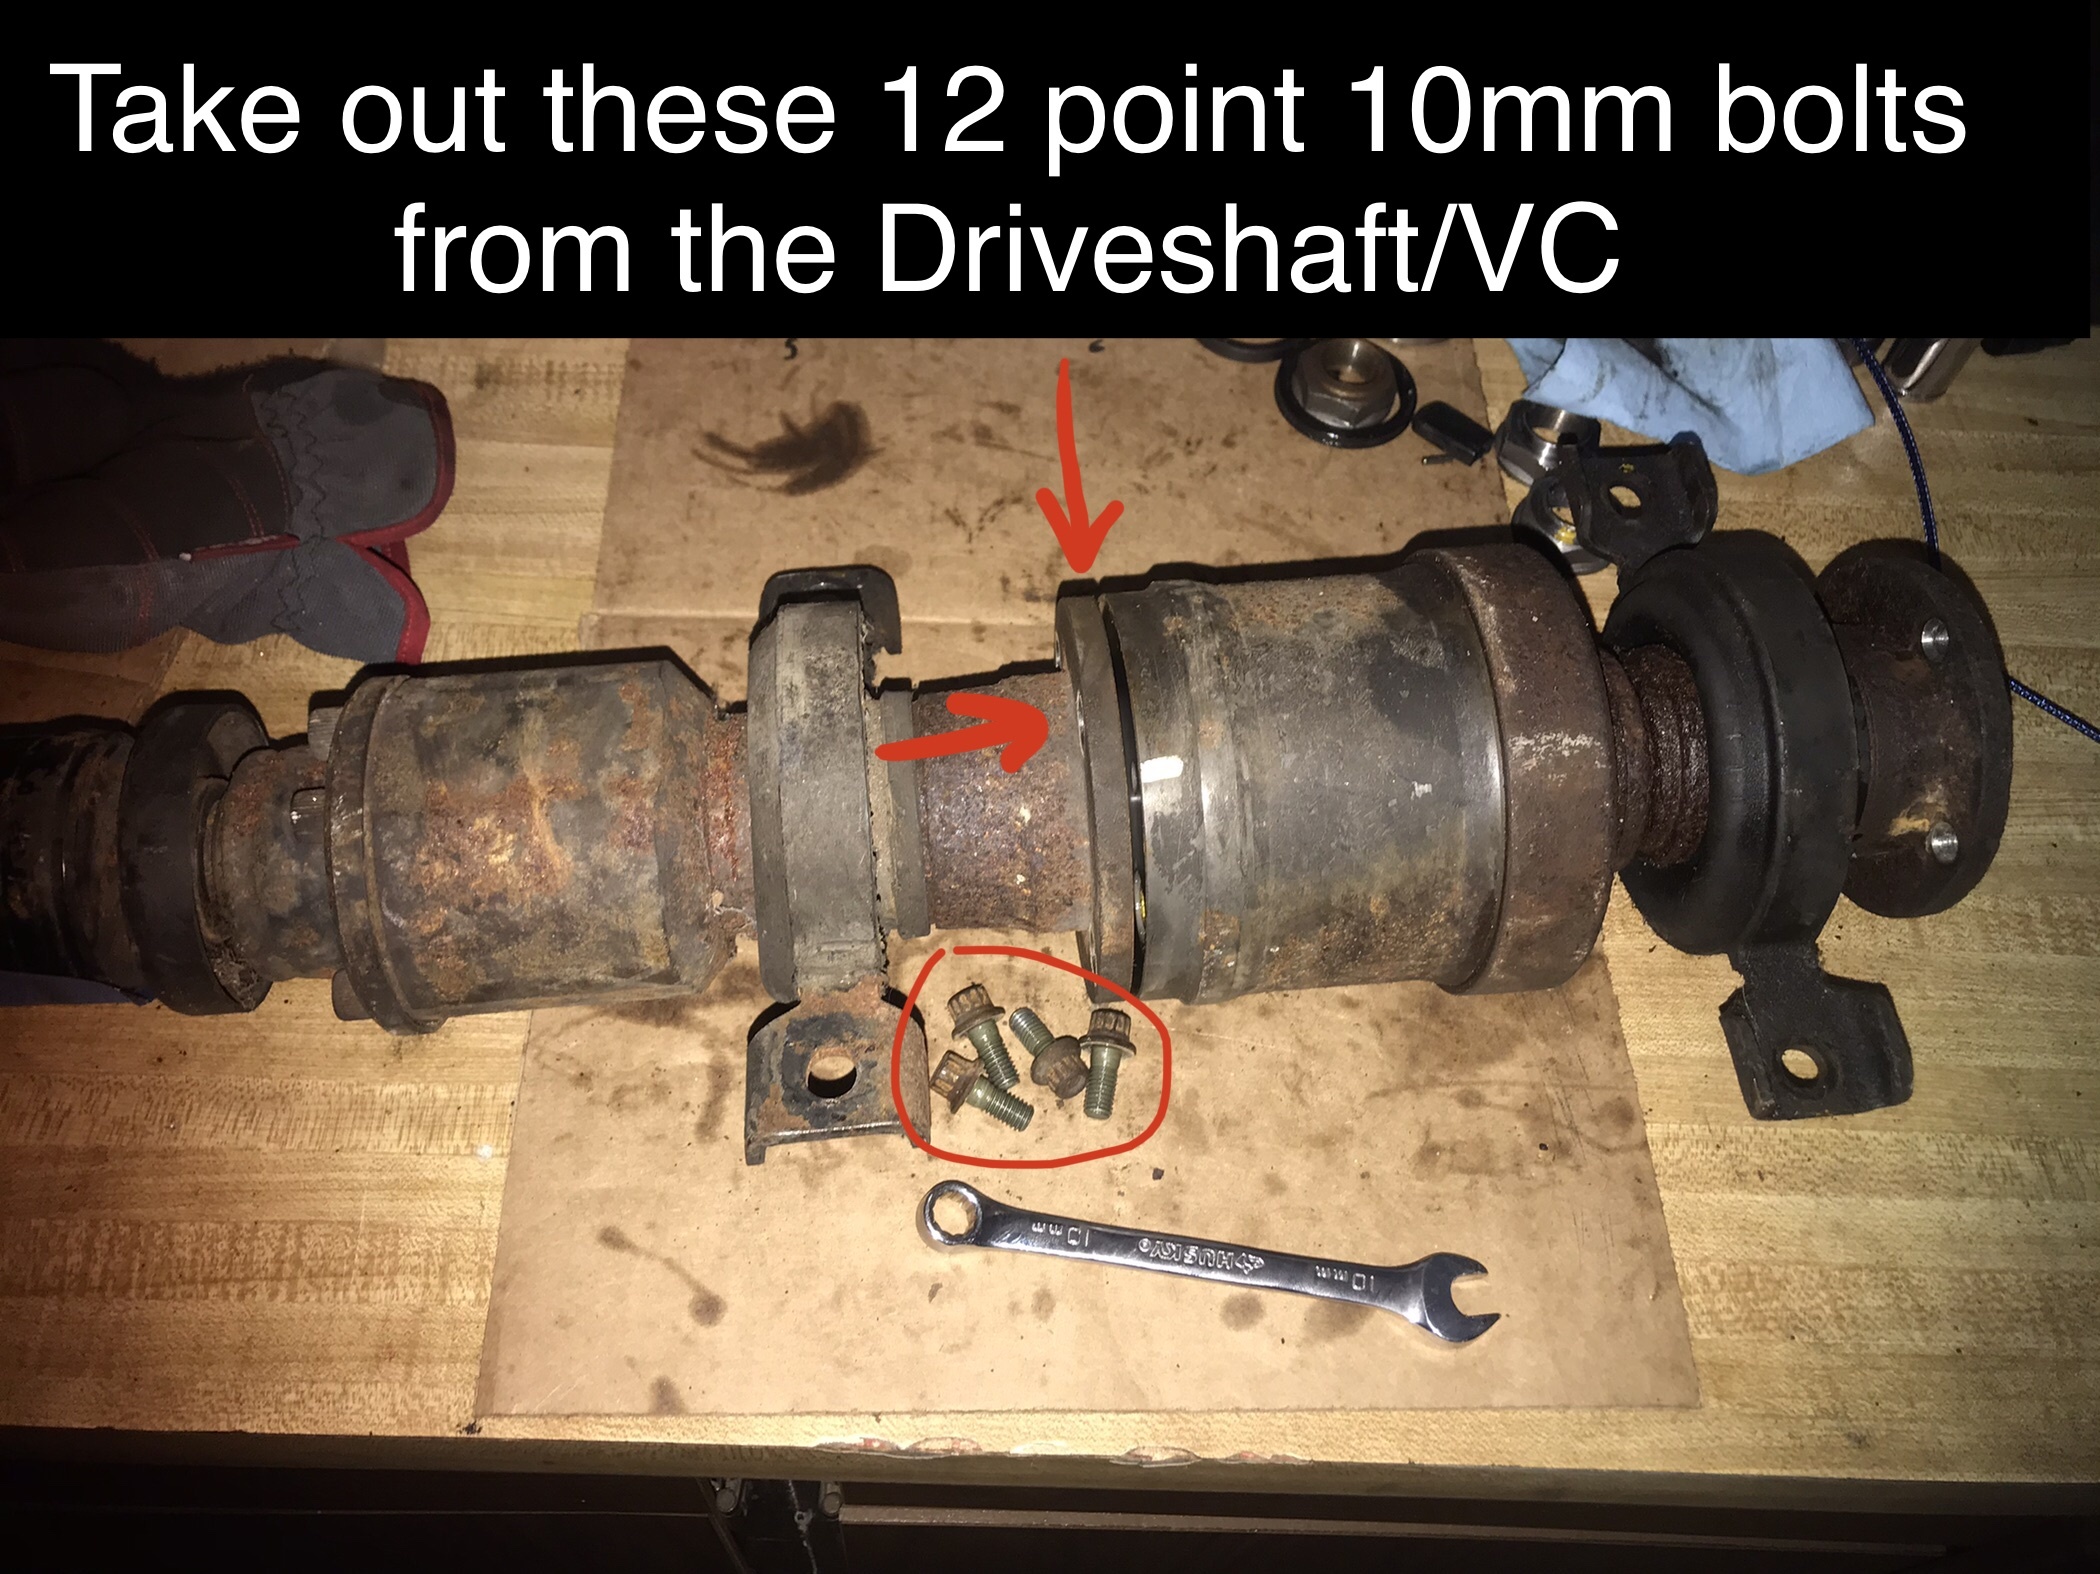

Once you take off the 10mm 12point bolts stand the VC up and unbolt the 32mm nut that’s holding the carrier bearing

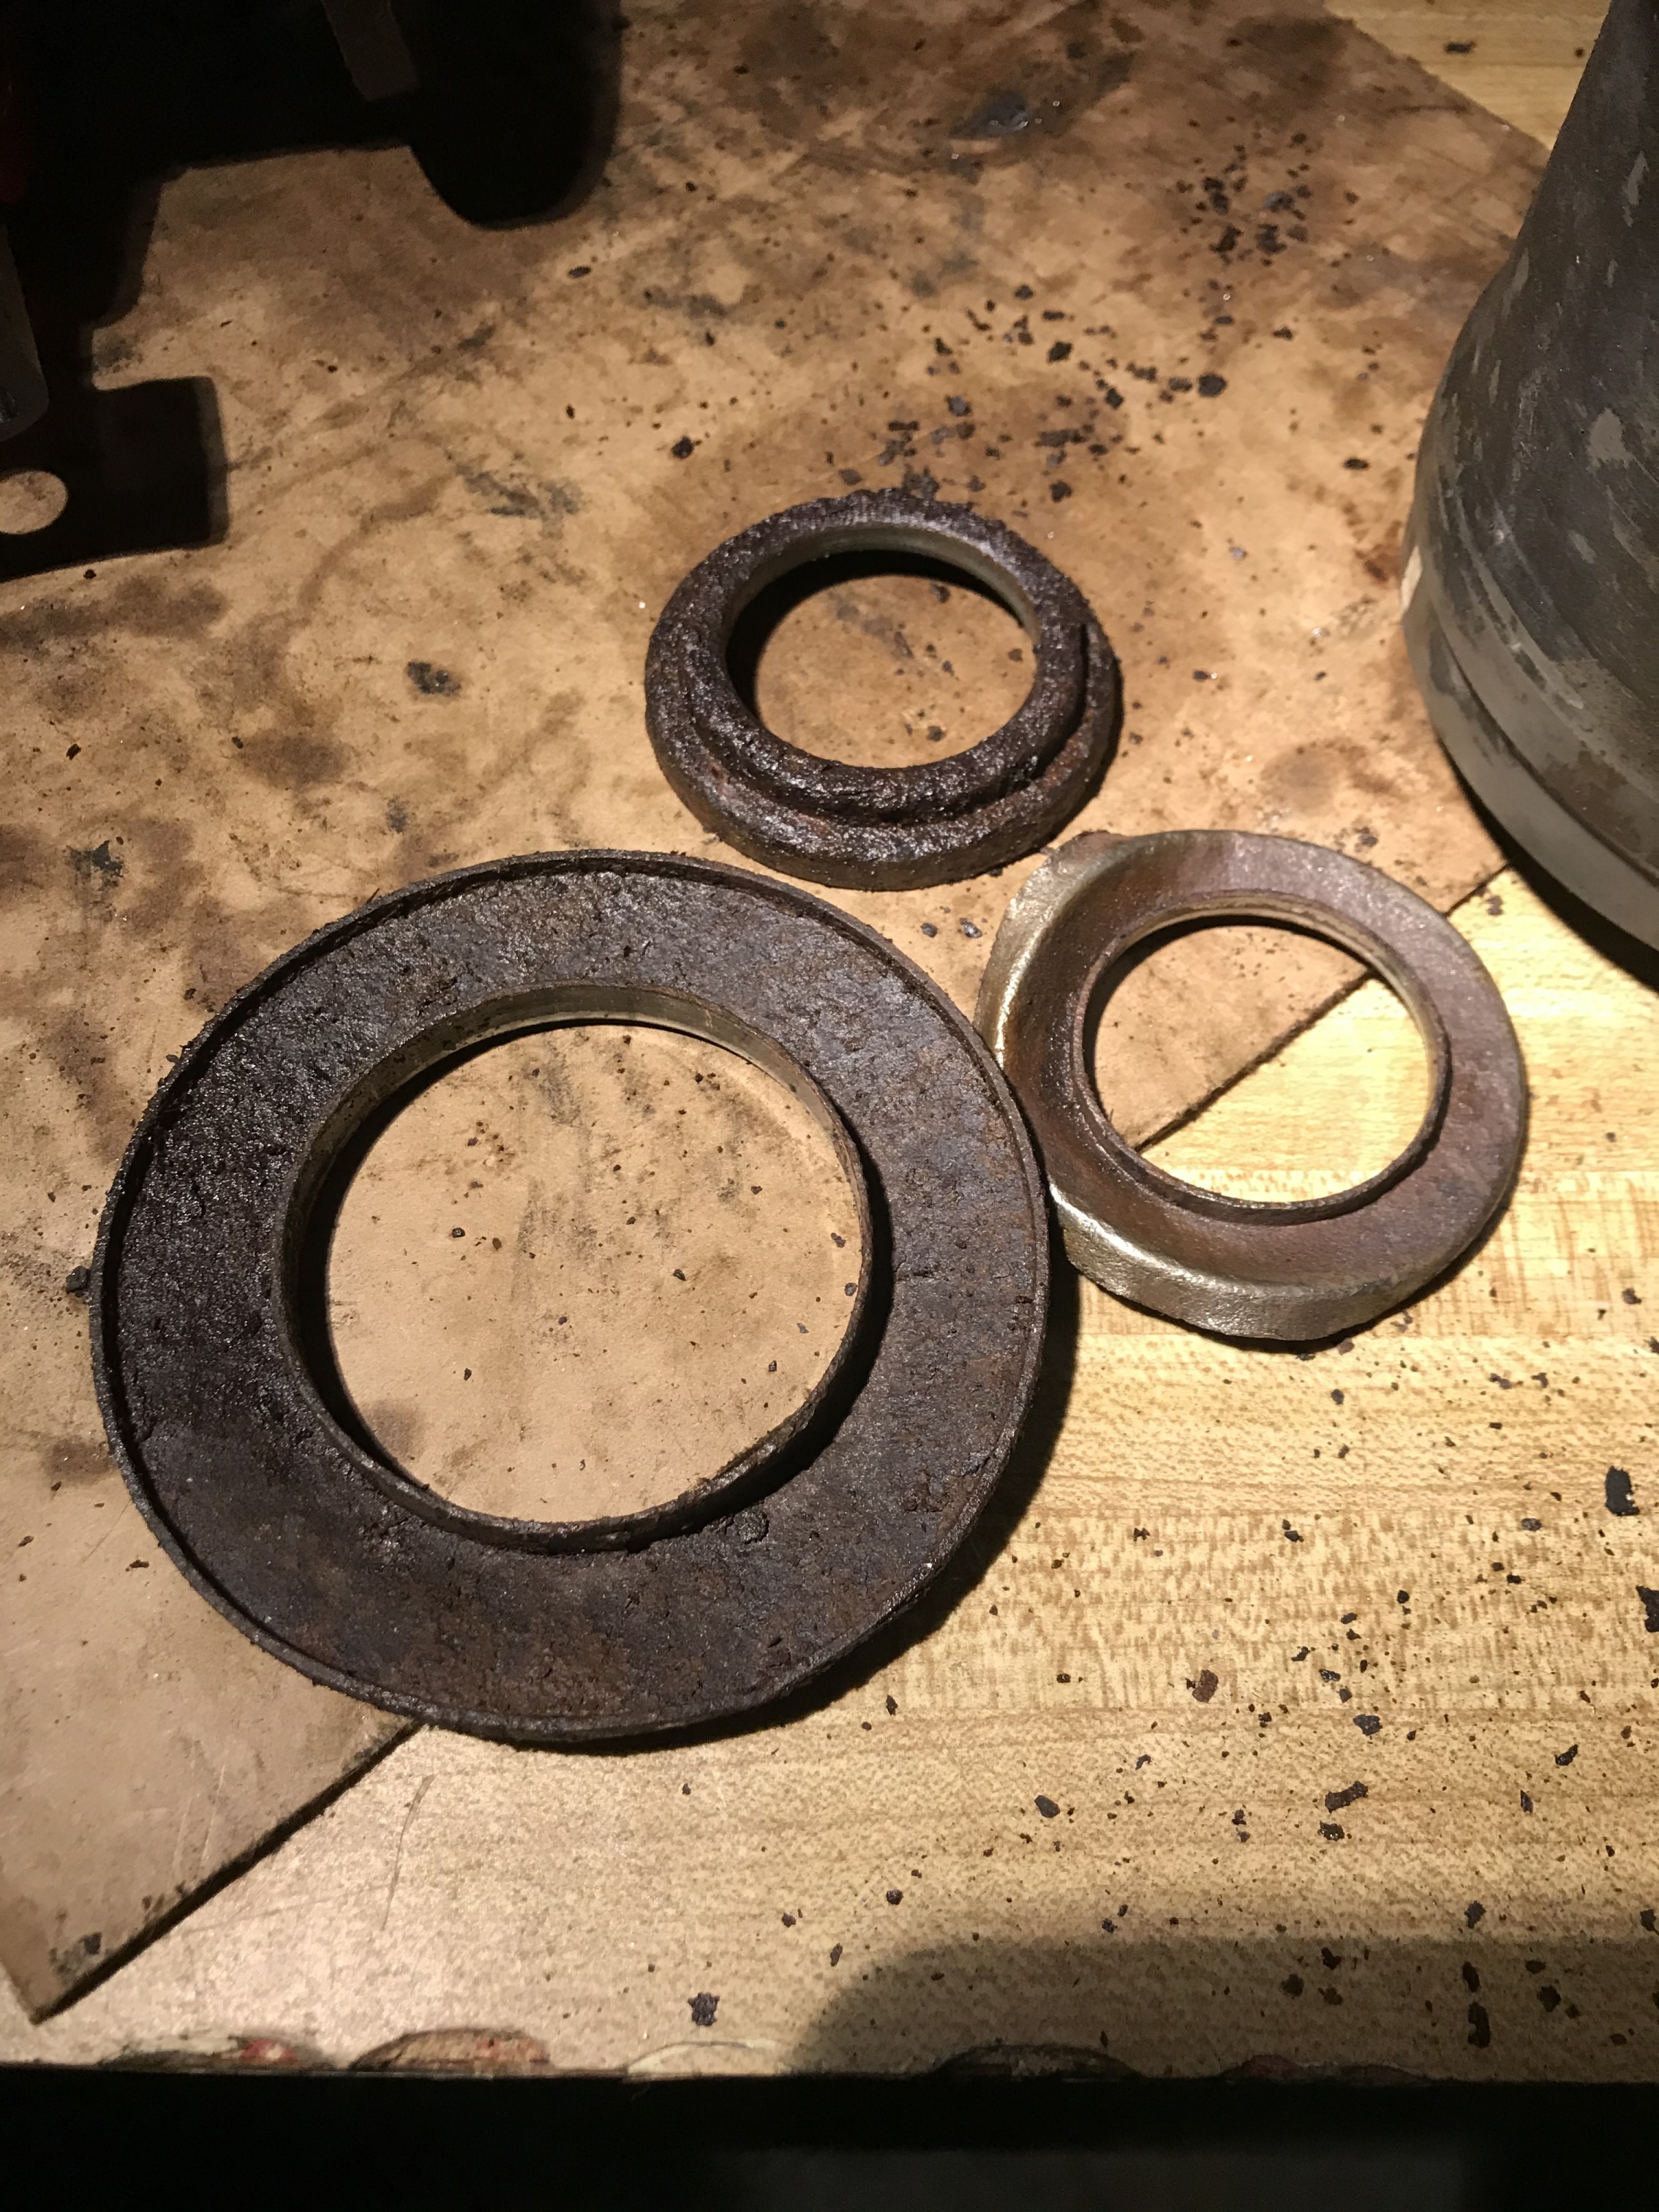
once that 32mm nut is taken out use a pulley puller to get the flange, carrier bearing and shields off the VC make sure to use B’laster or some other type of penetration oil

use Some type of penetration oil, these are The shields that need to get taken off the shaft


Soak clean repeat with the penetration oil, you may need a lot depending how rusty it is, I let it sit for couple days cleaned off the rust as much as I can

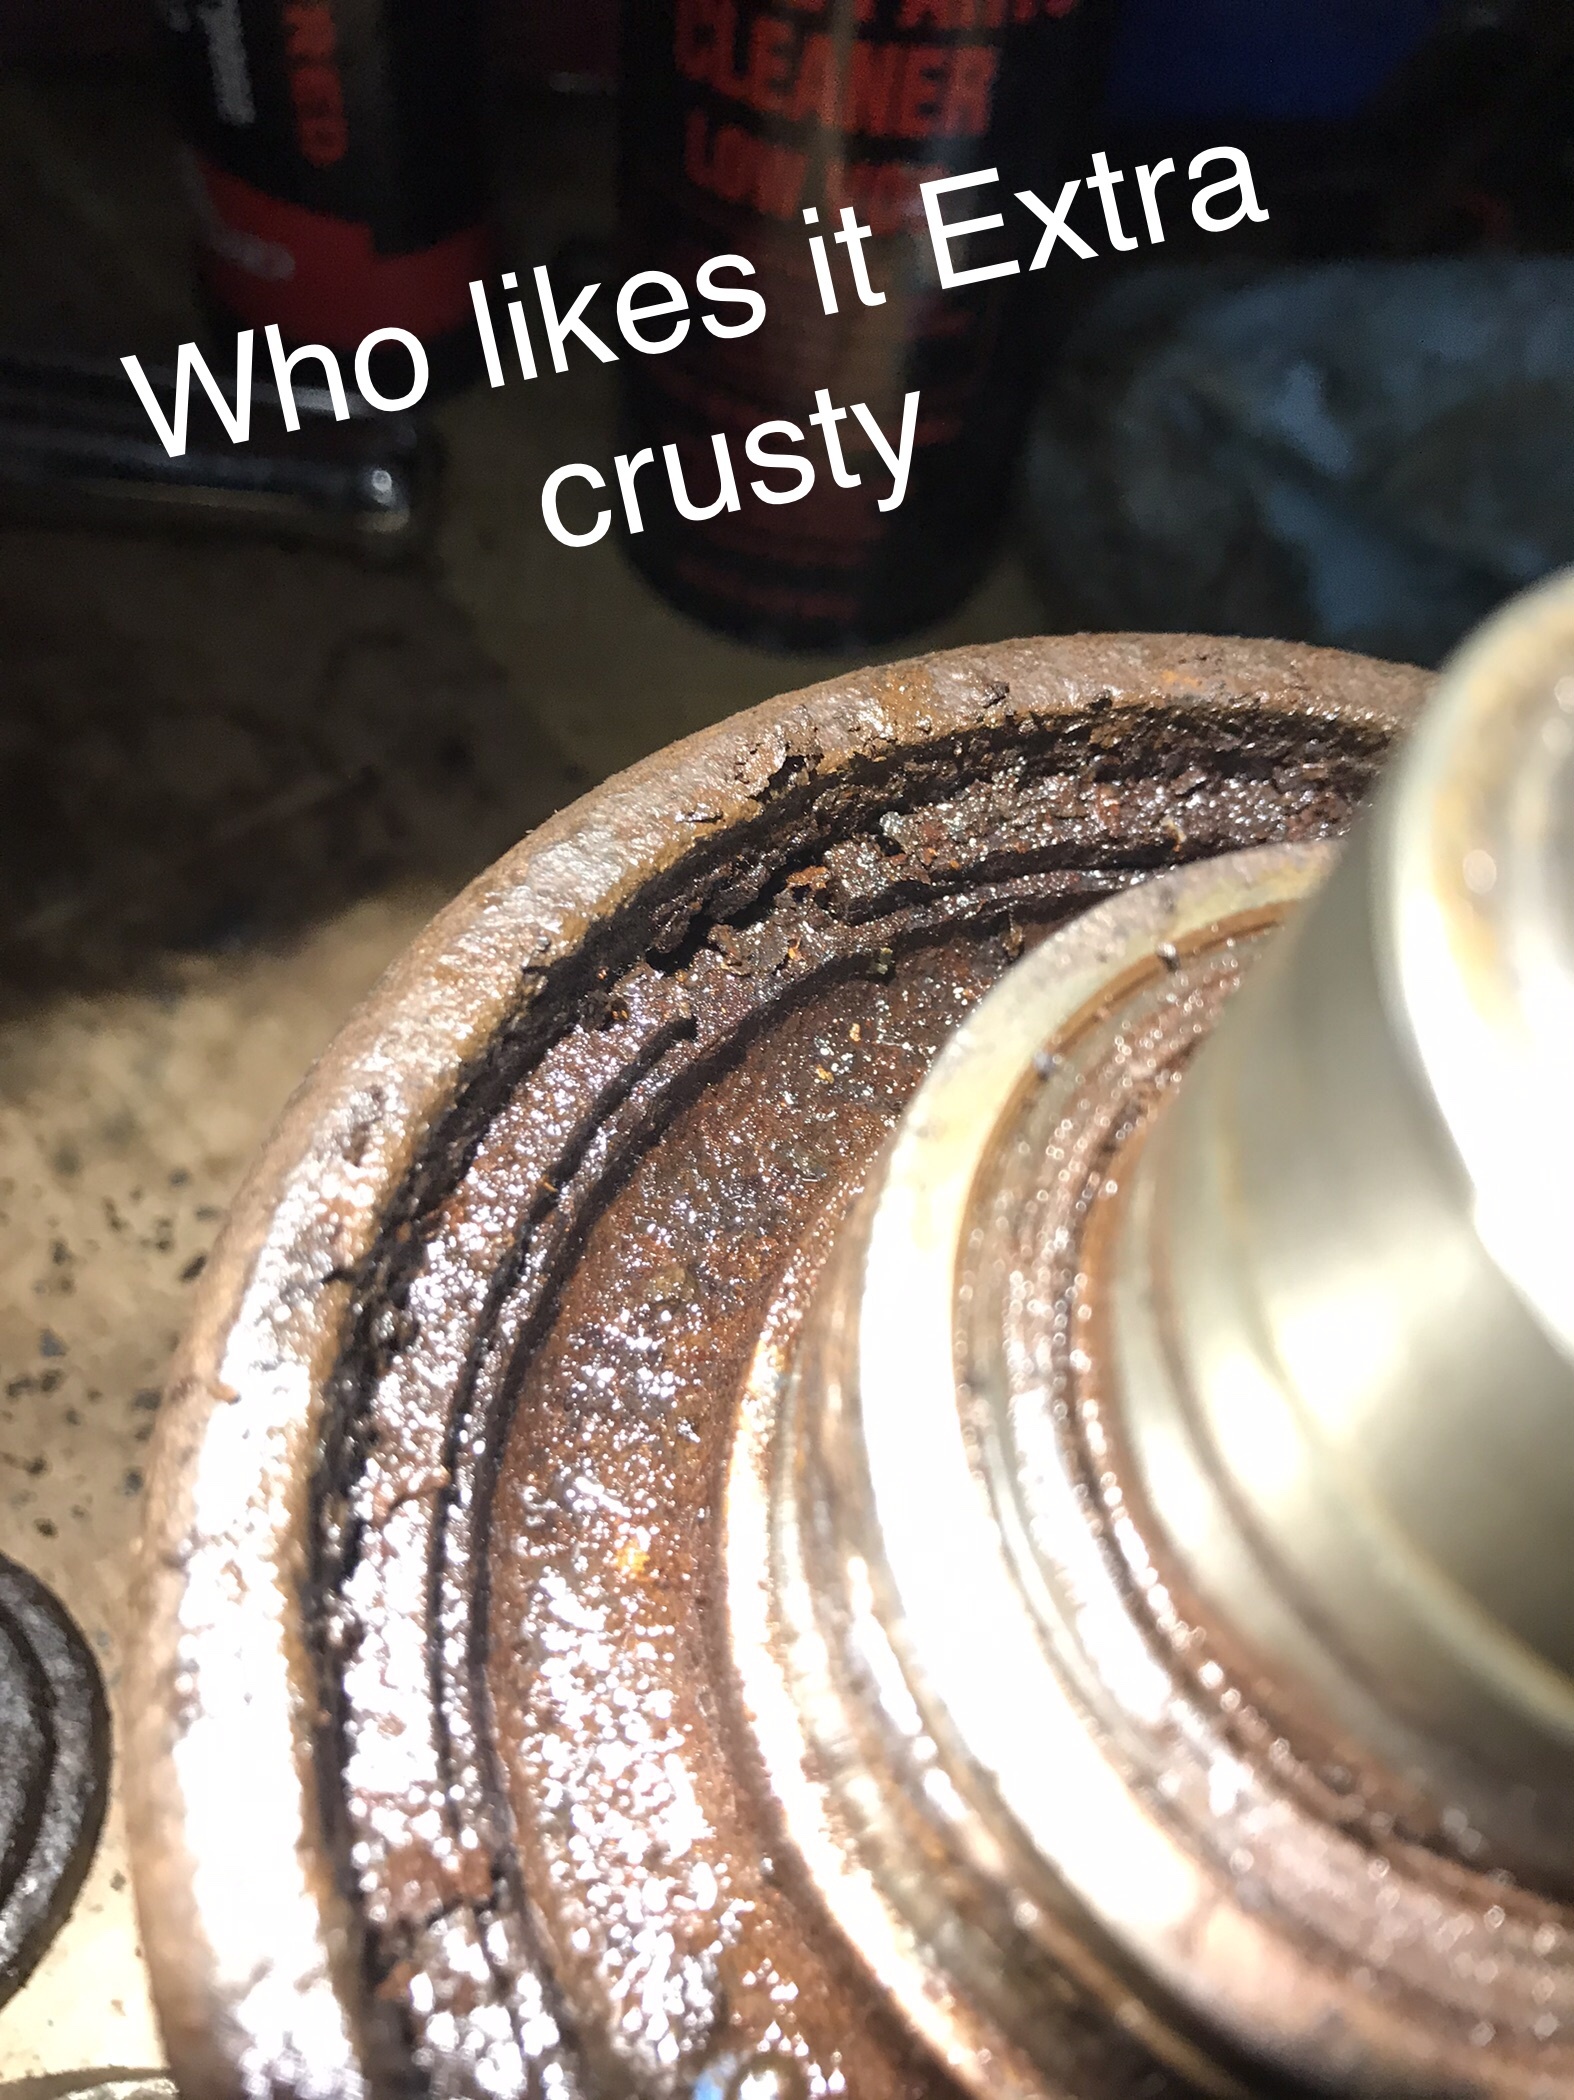

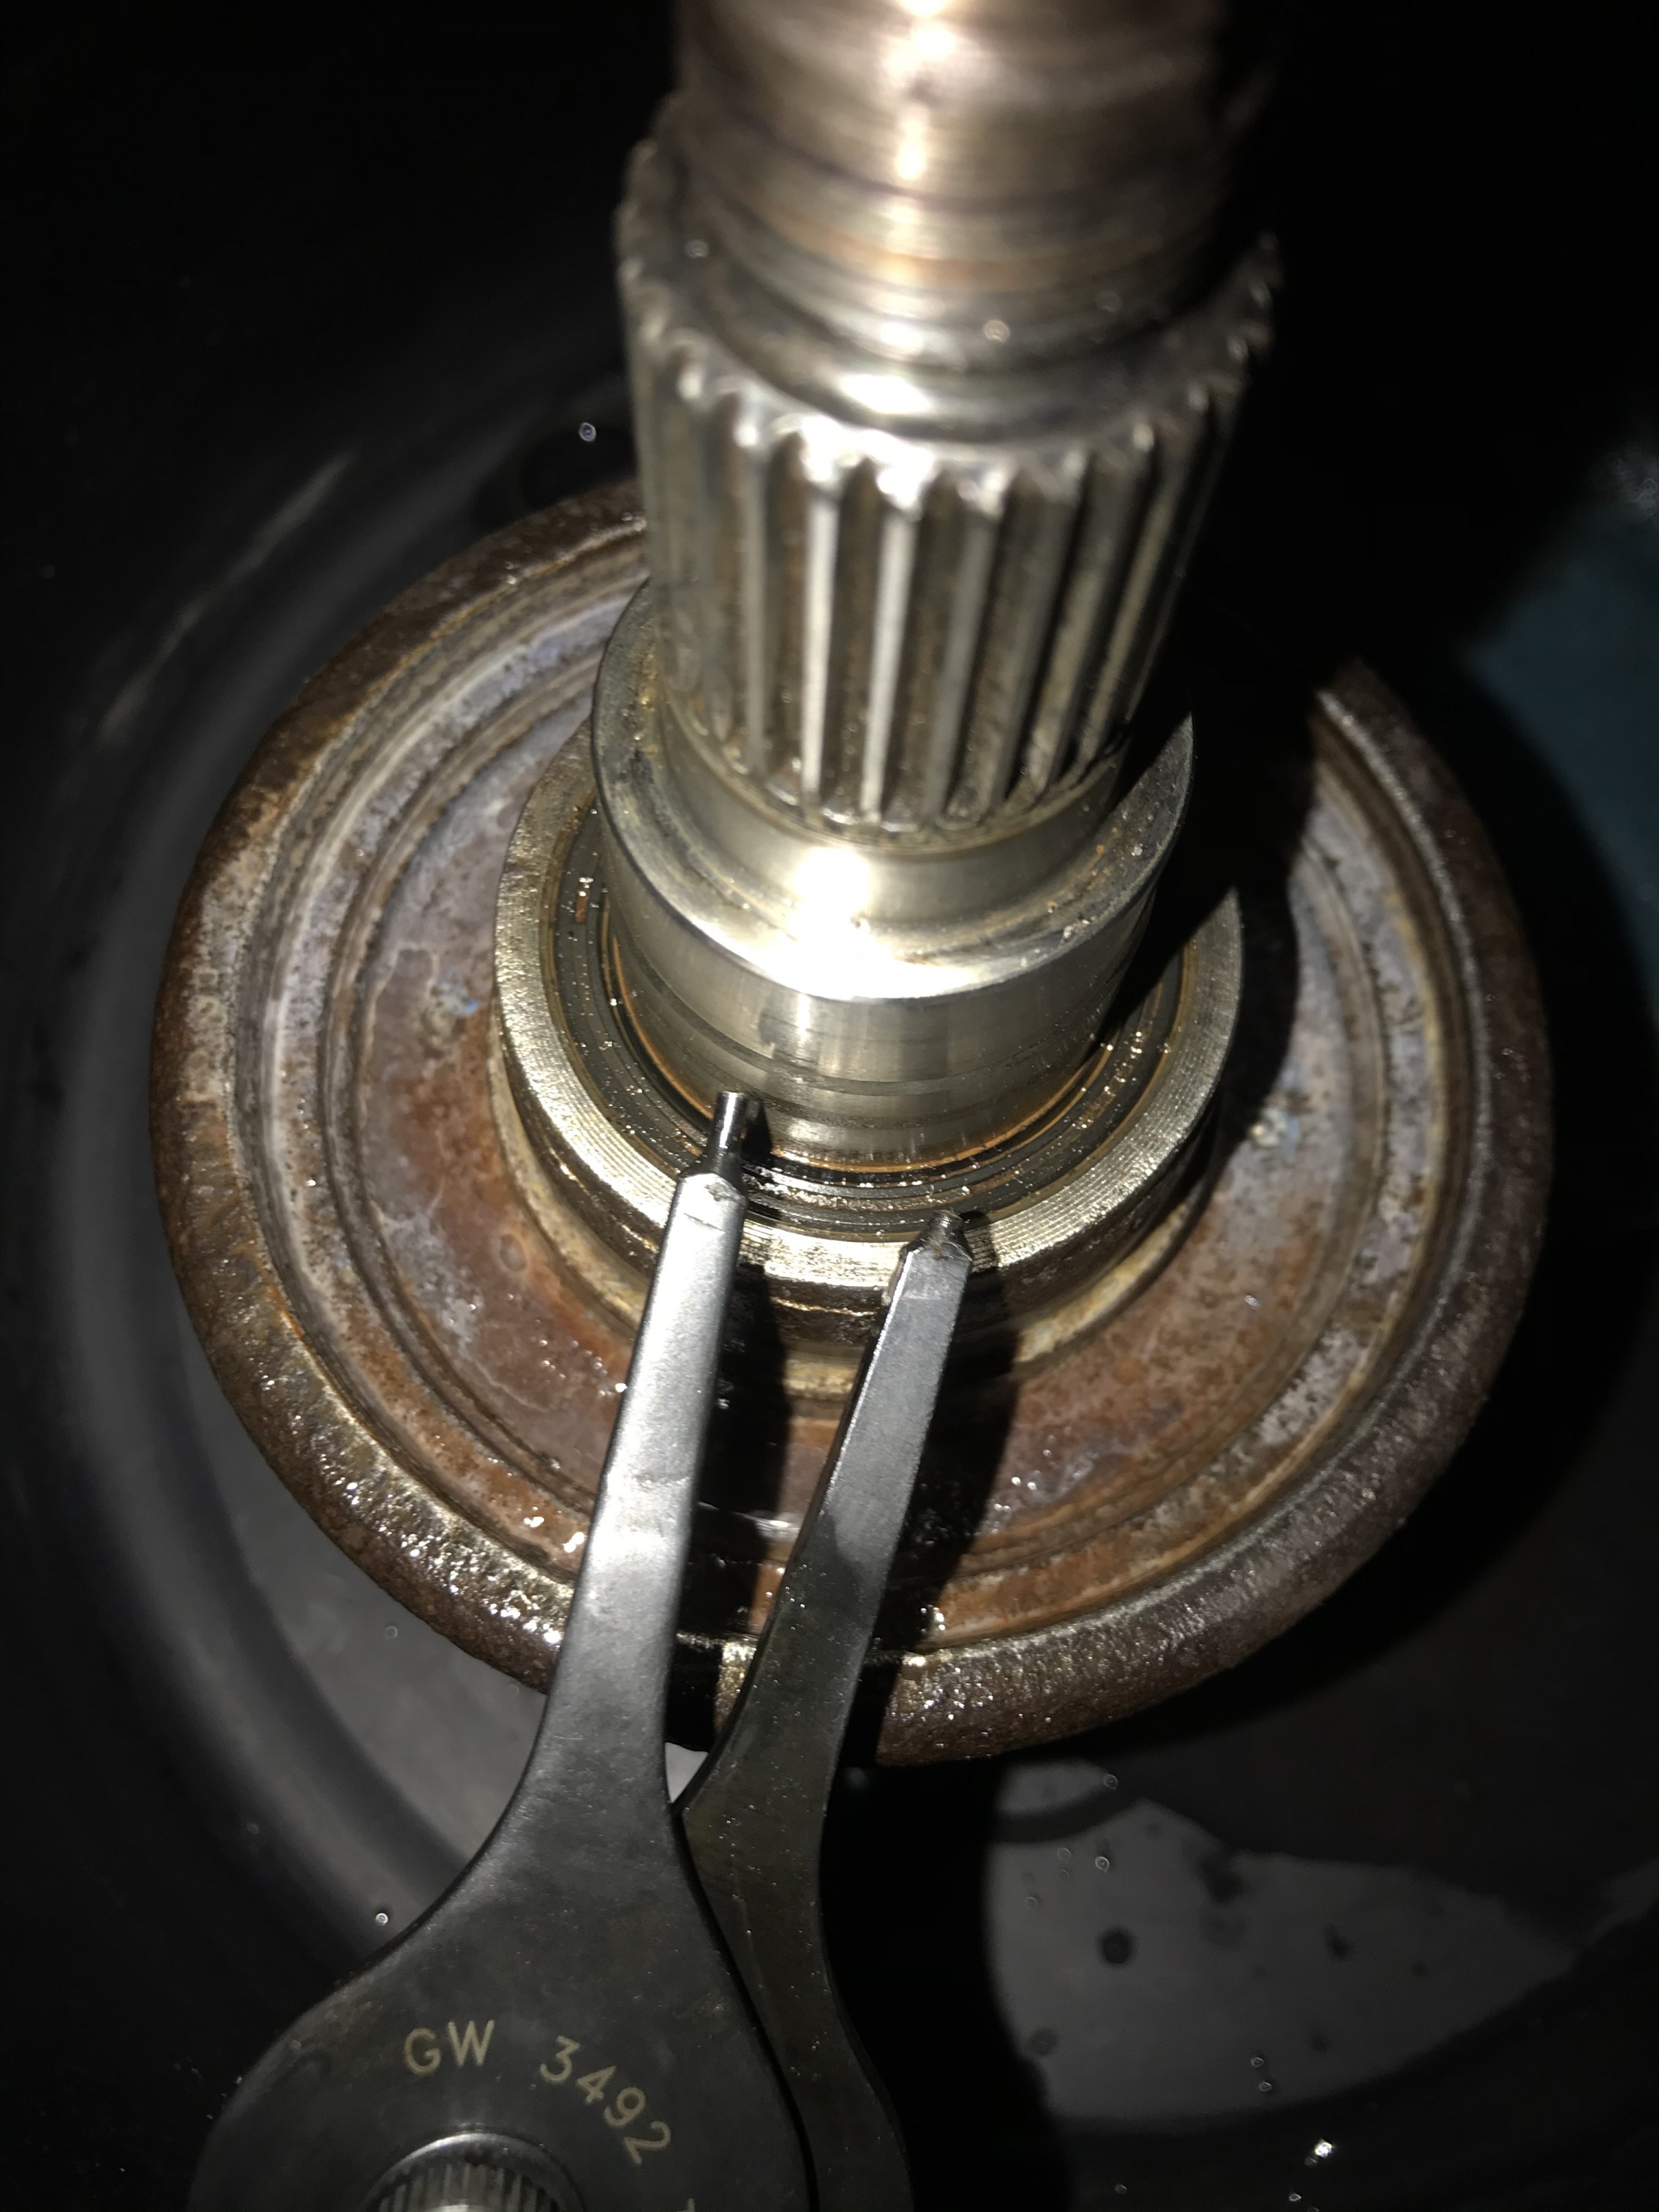
I went to take off the main snap ring but it was seized on there really good no matter how much penetration oil i used, i also used a torch to try to loosen it, it wasn’t budging at all I needed a little extra help from a coworker who torched the snap ring used a punch with a hammer to try to move it out of place then he got pliers squeezed them and used the hammer to give it a little extra it finally broke loose
Once finally out I turned the VC over use snap ring pliers to remove the snap rings


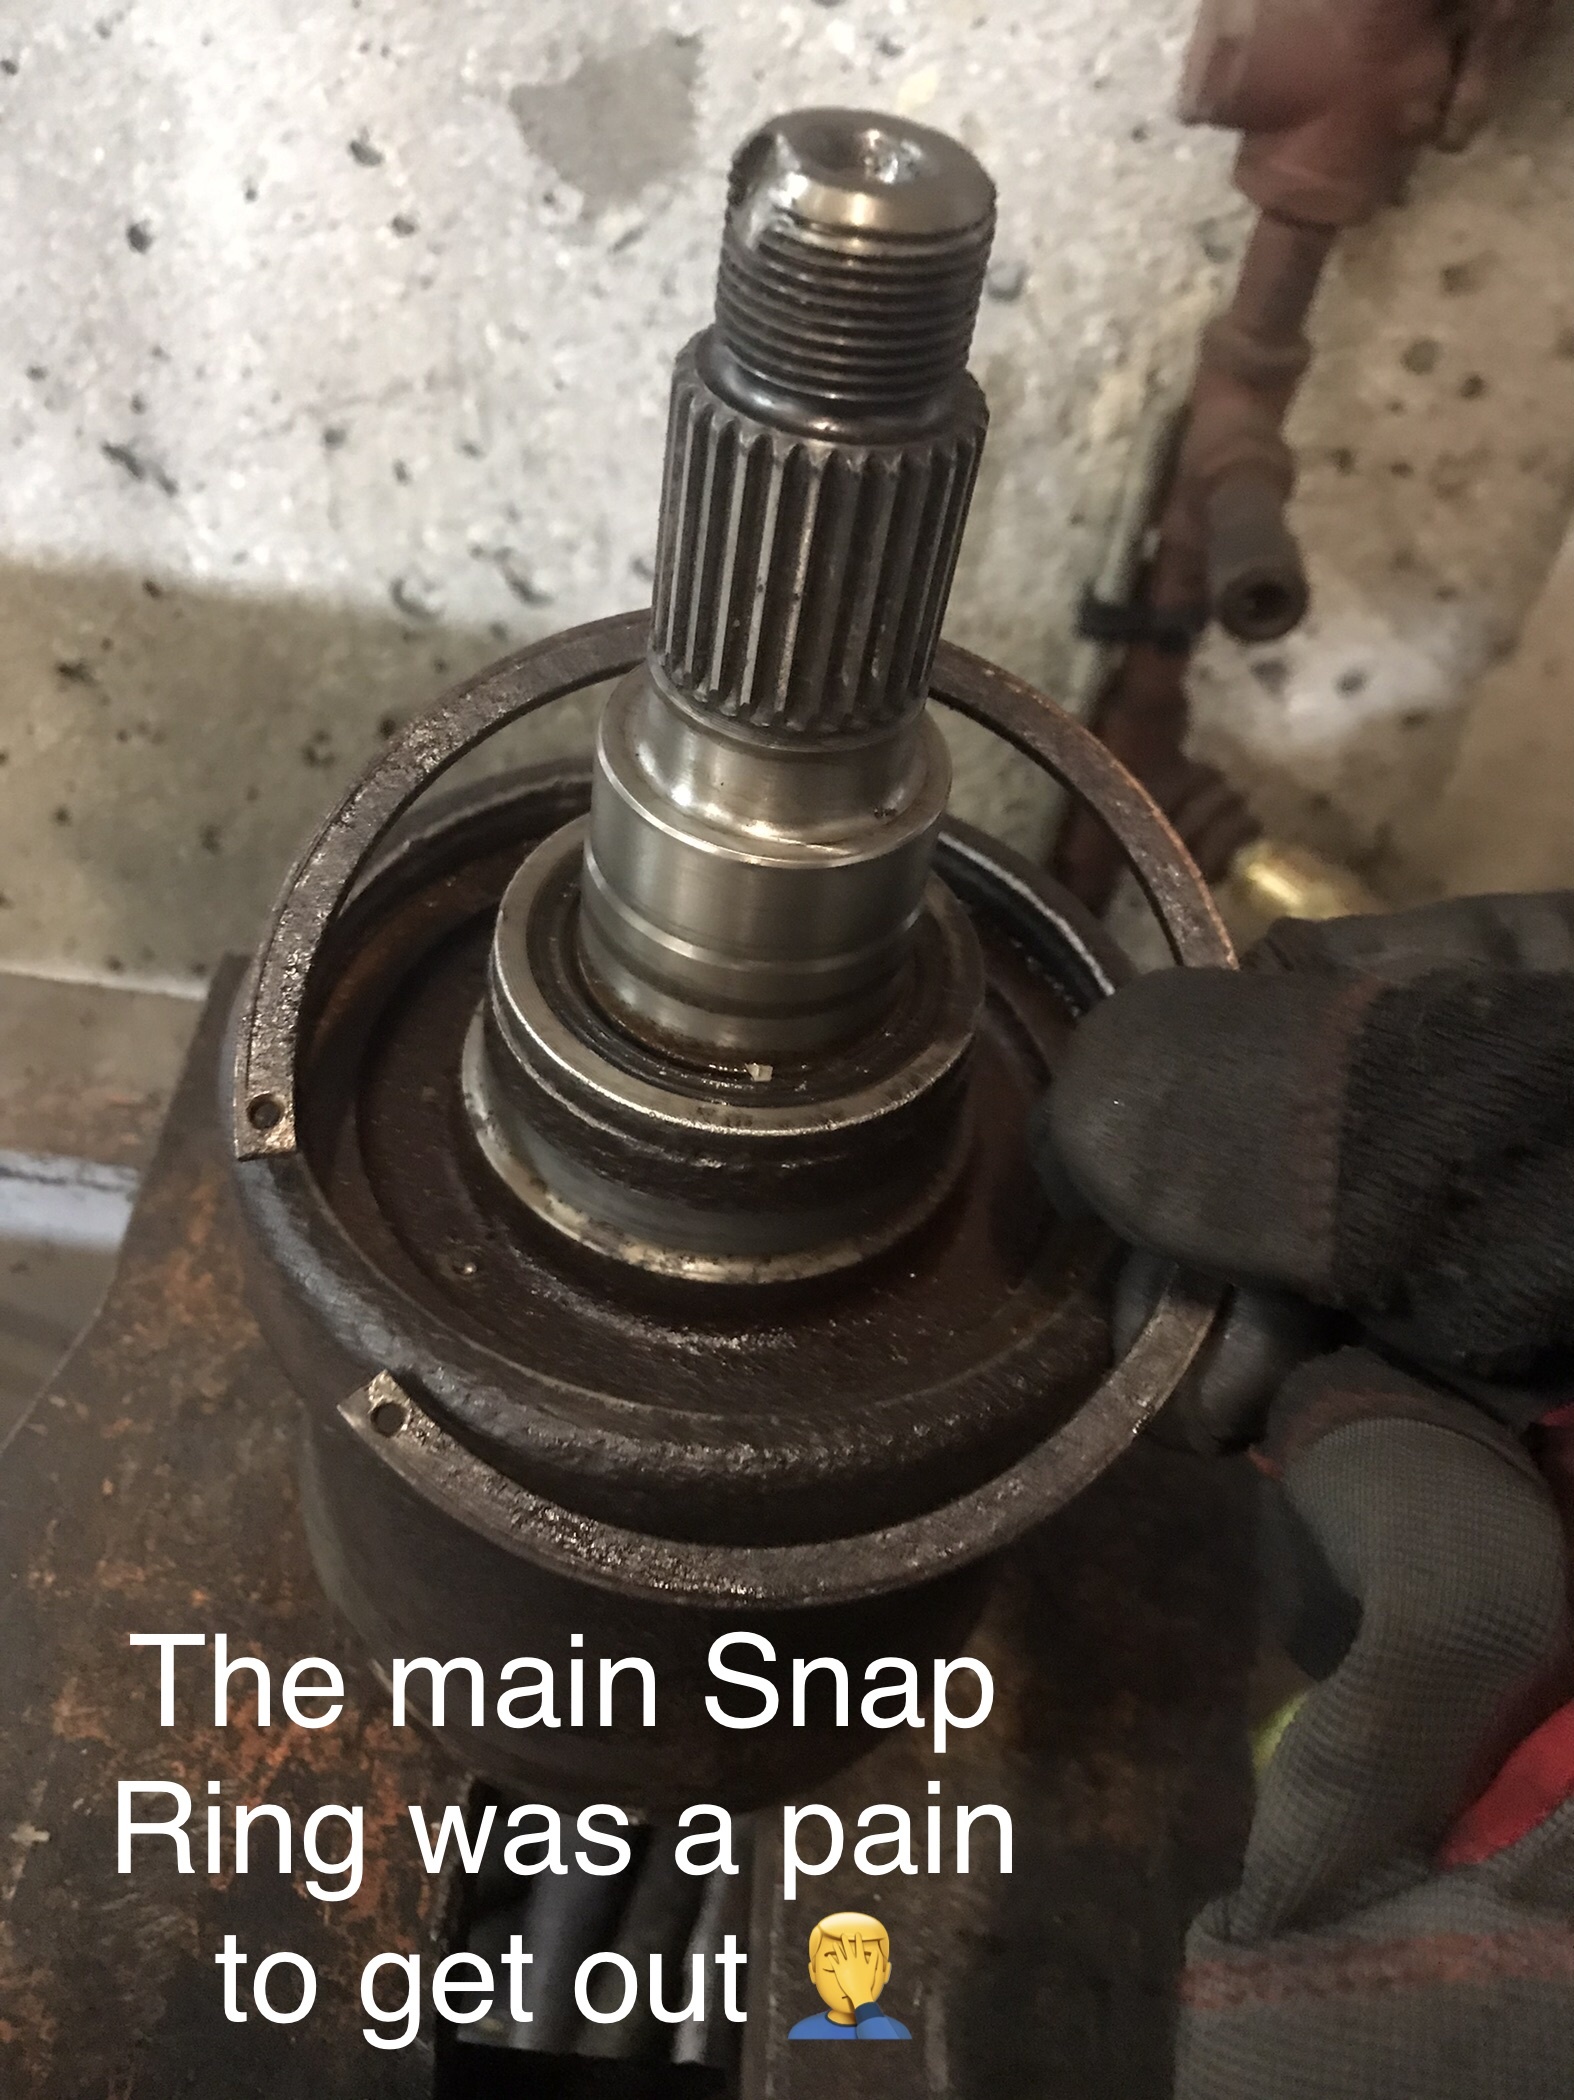
Once the snap rings are out. If you can’t pull the shaft out by hand use a press to push the shaft out from the bottom of the VC be careful get ready for it to come out and make sure to catch it. It will slip out fast almost lost it myself.


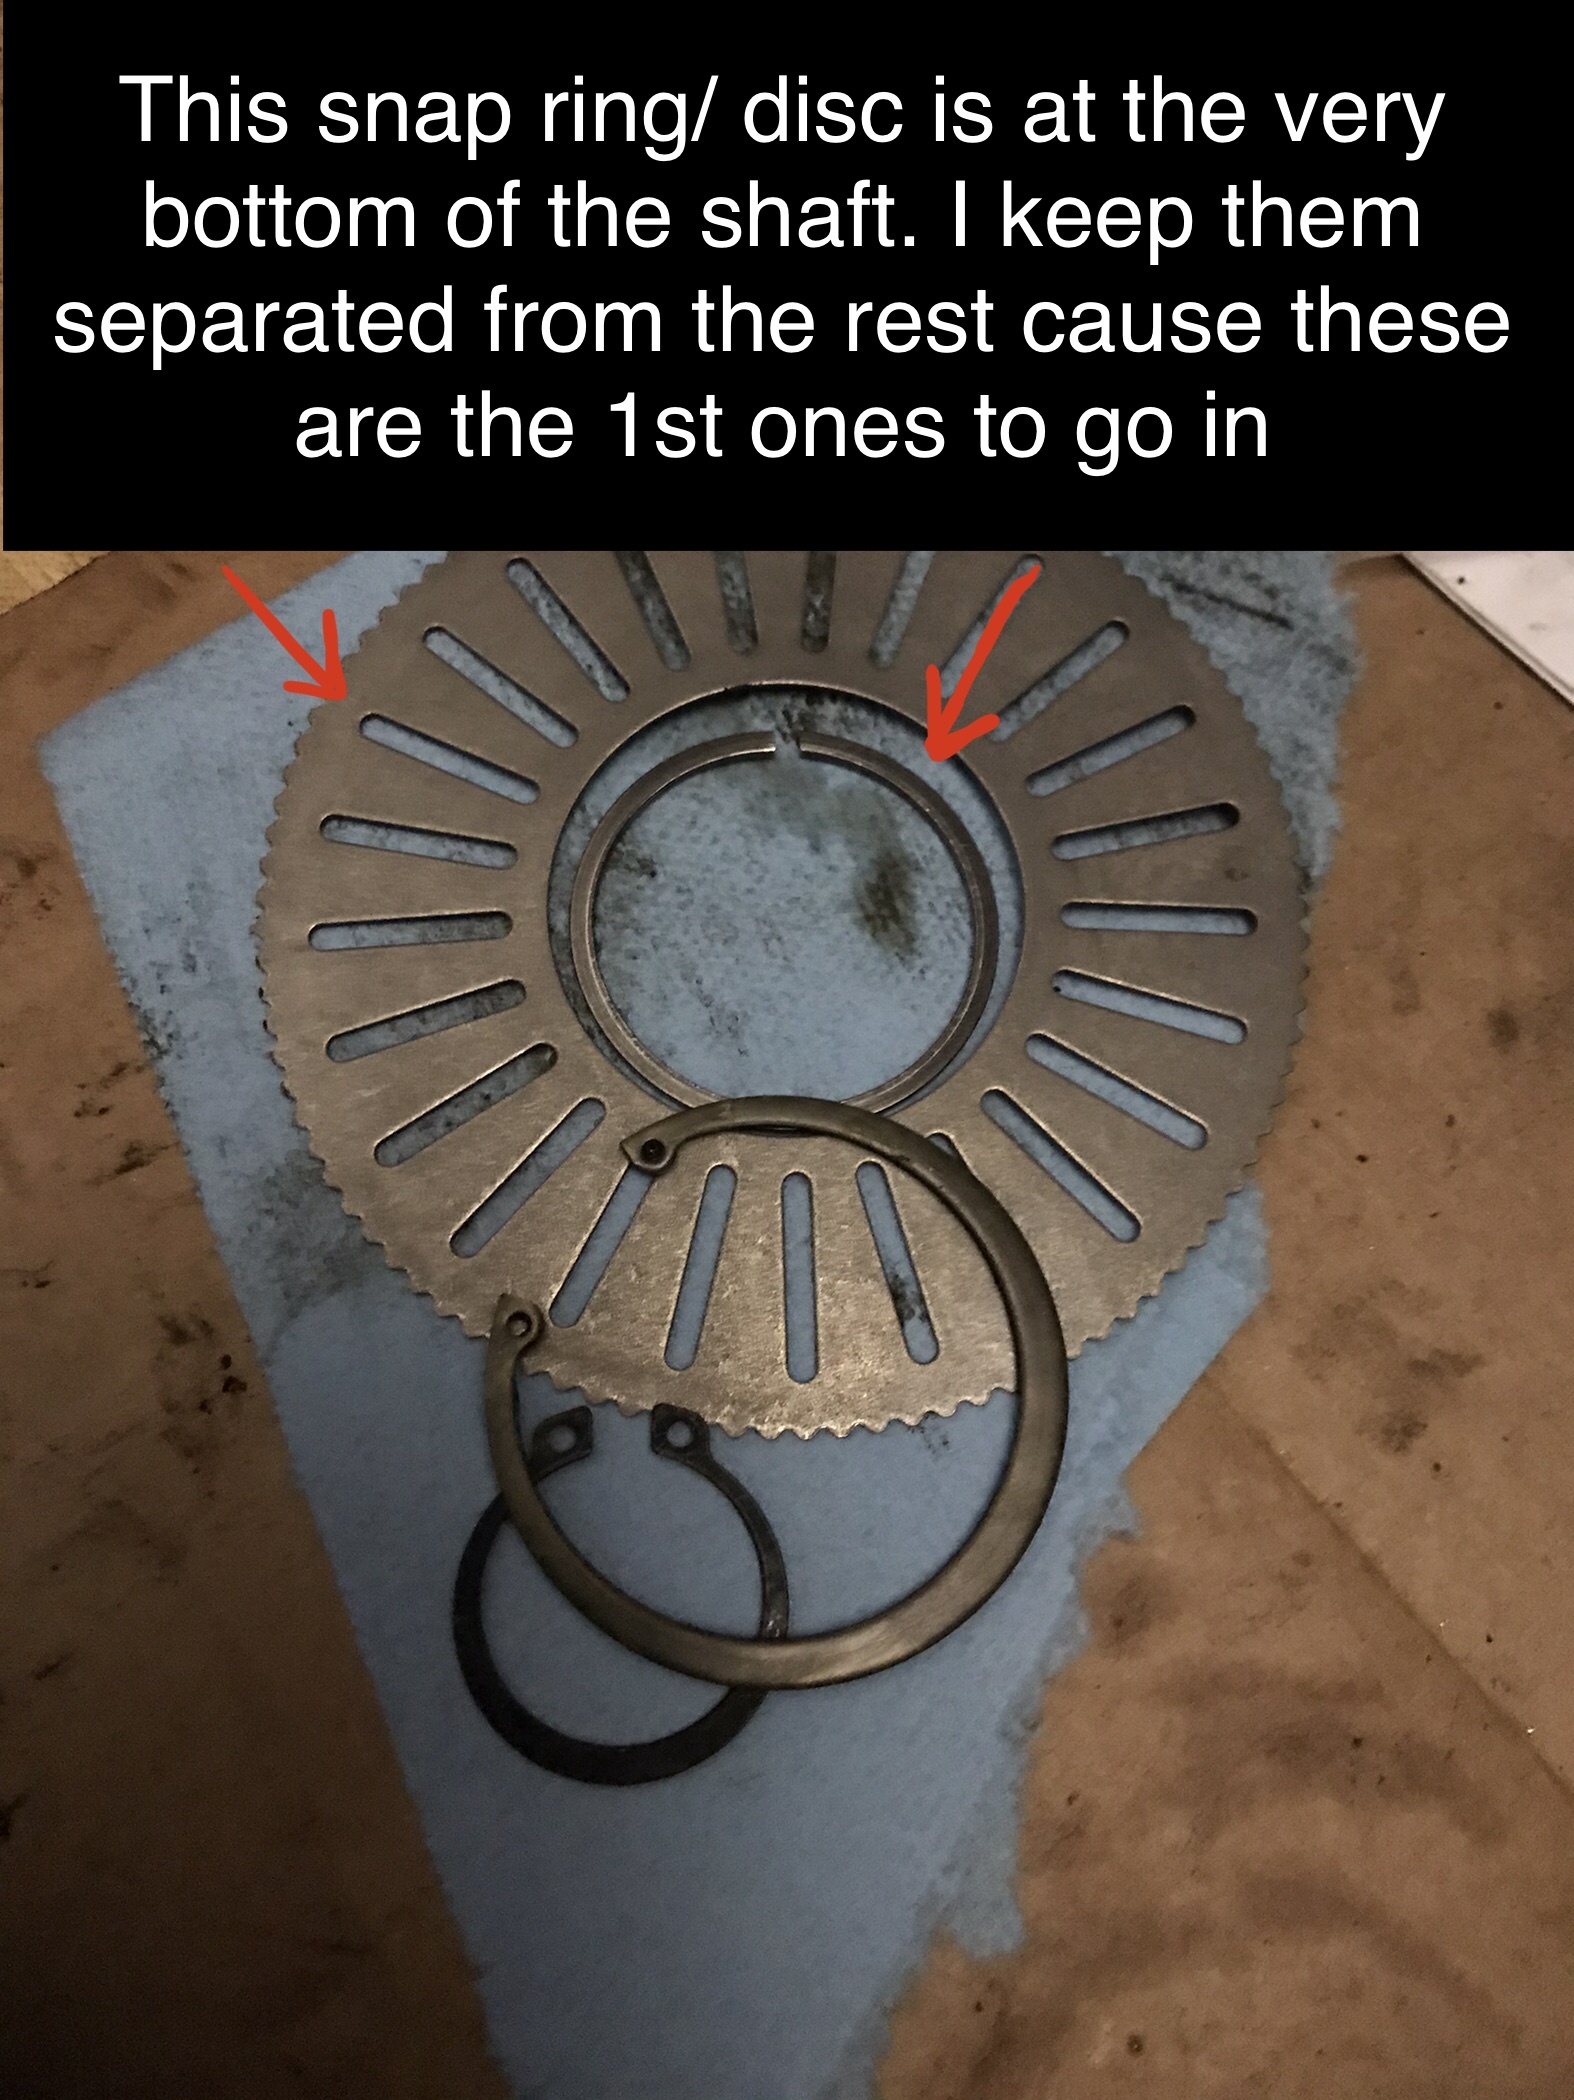
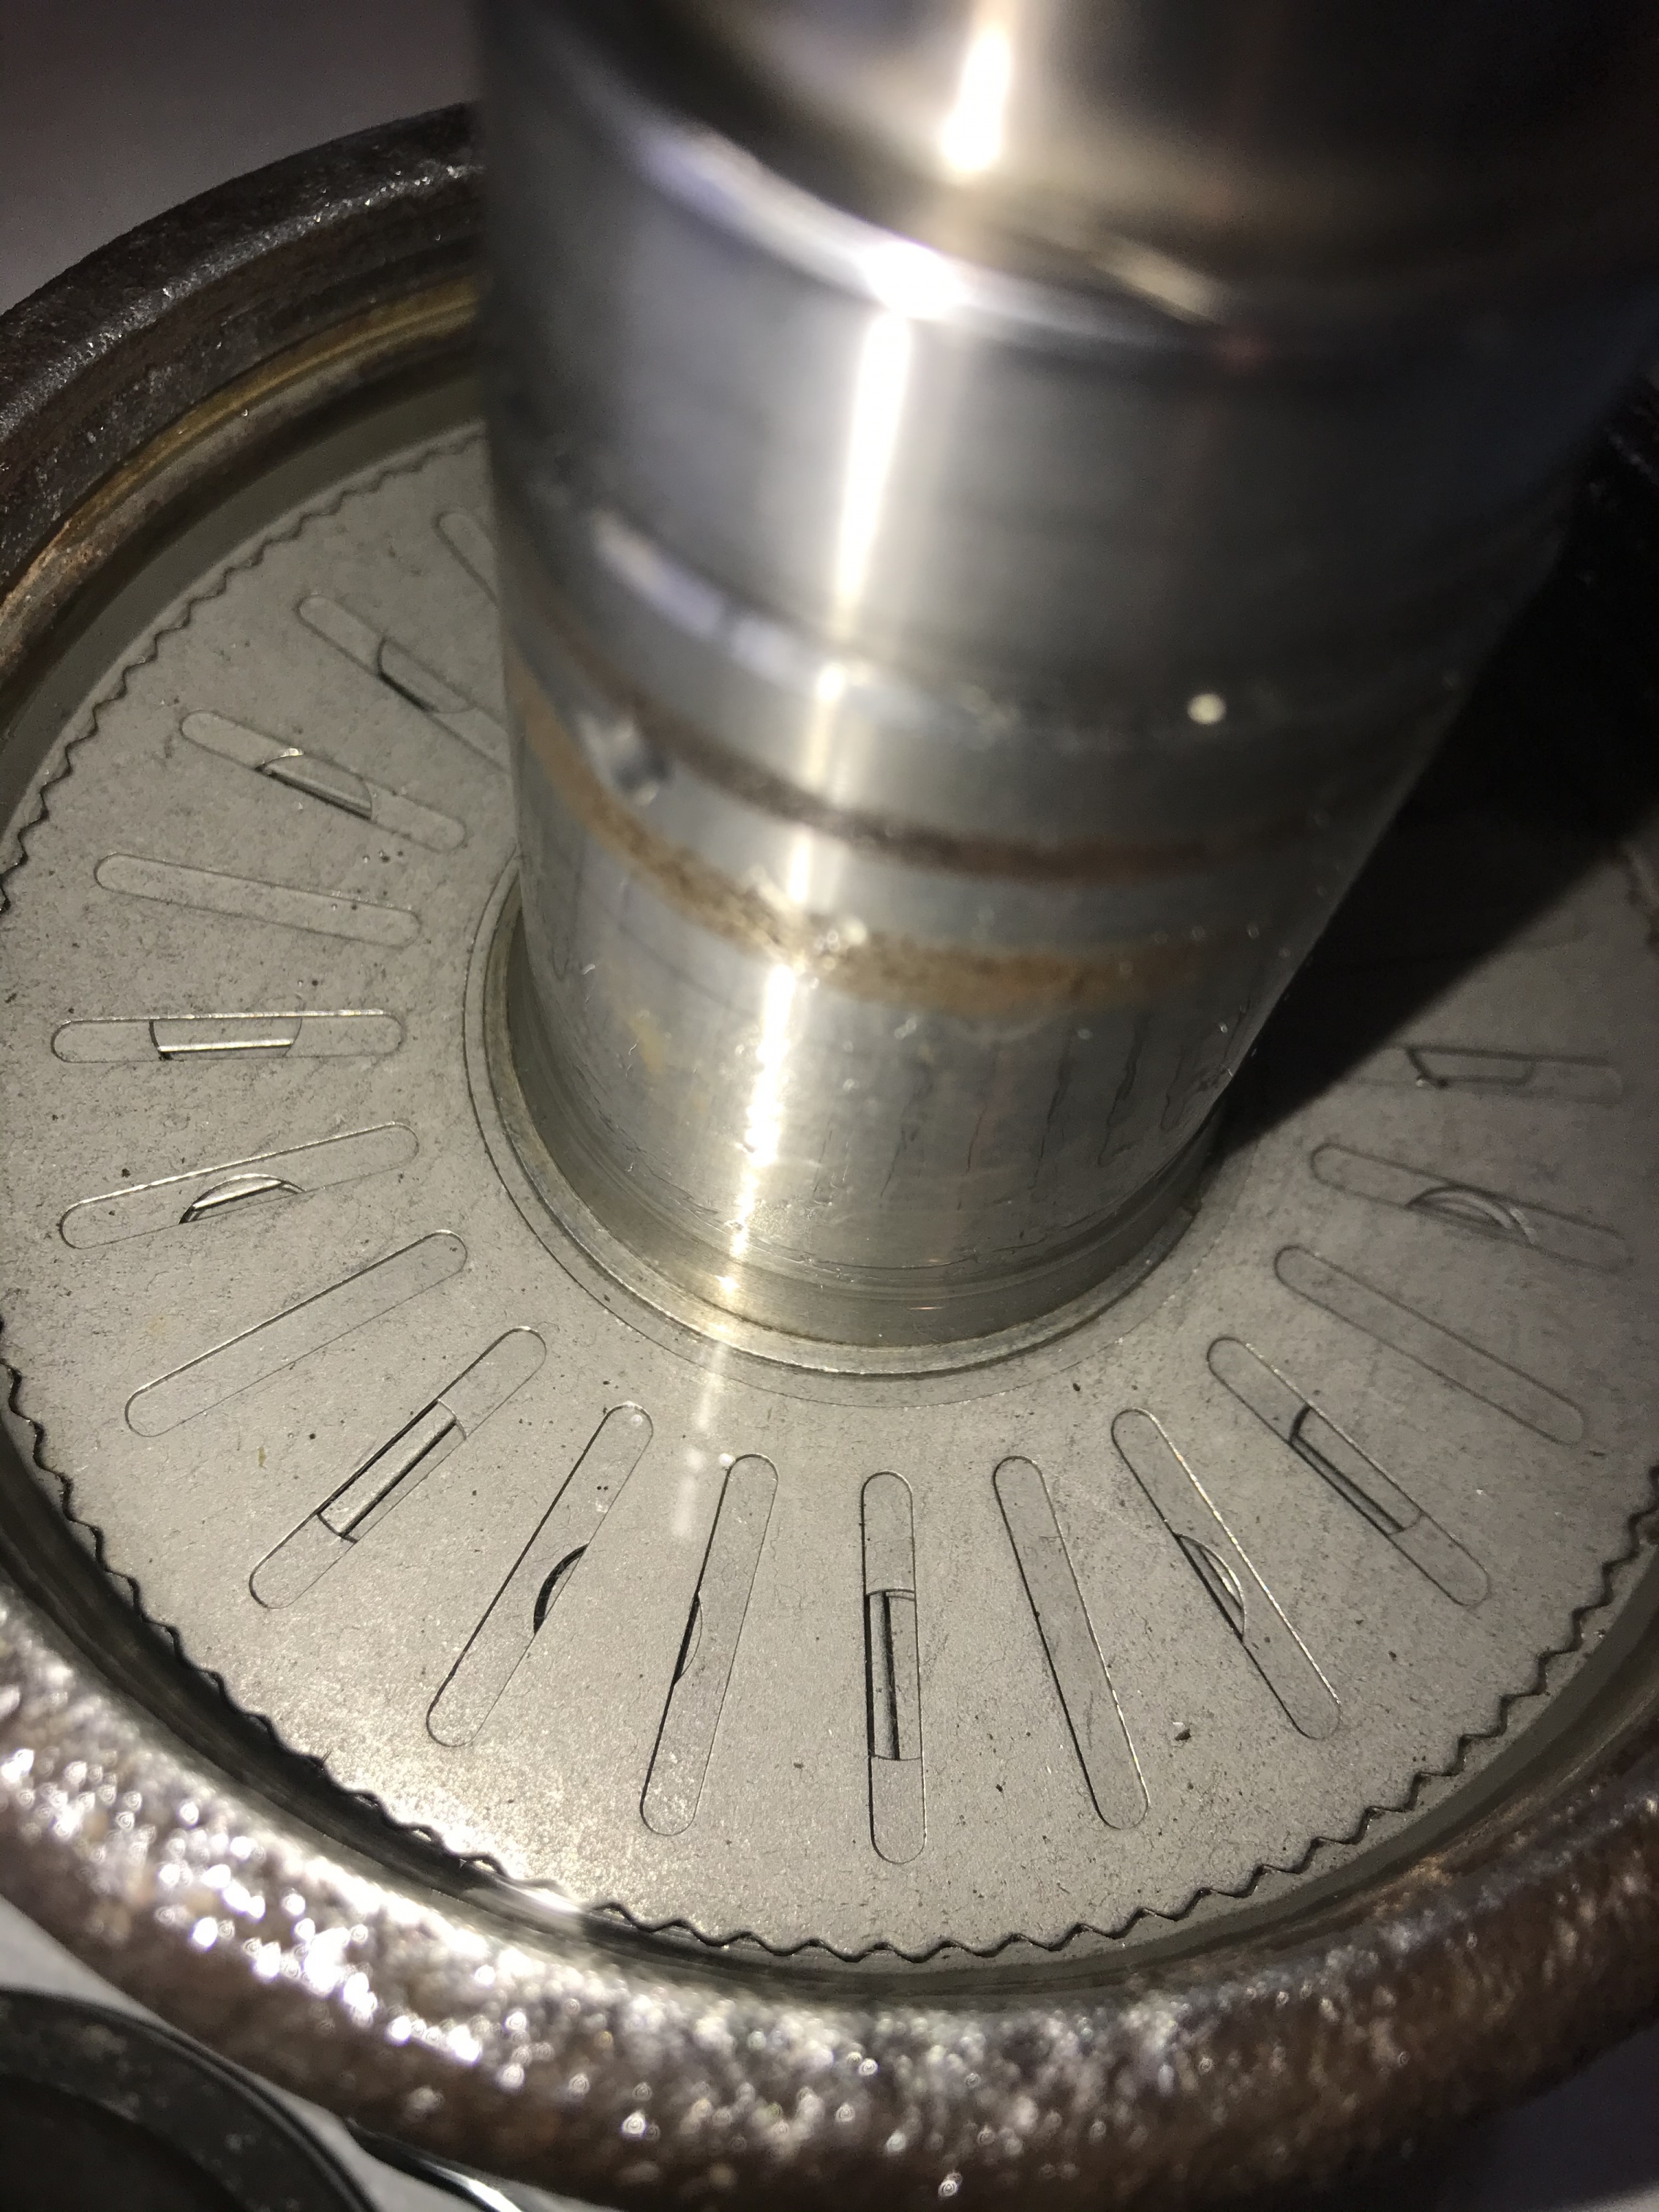
Once the shaft is out look on the bottom of the VC and you’ll see a single free disc take it out clean it set it on the side (this disc will be the 1st one back in the VC once that times comes)

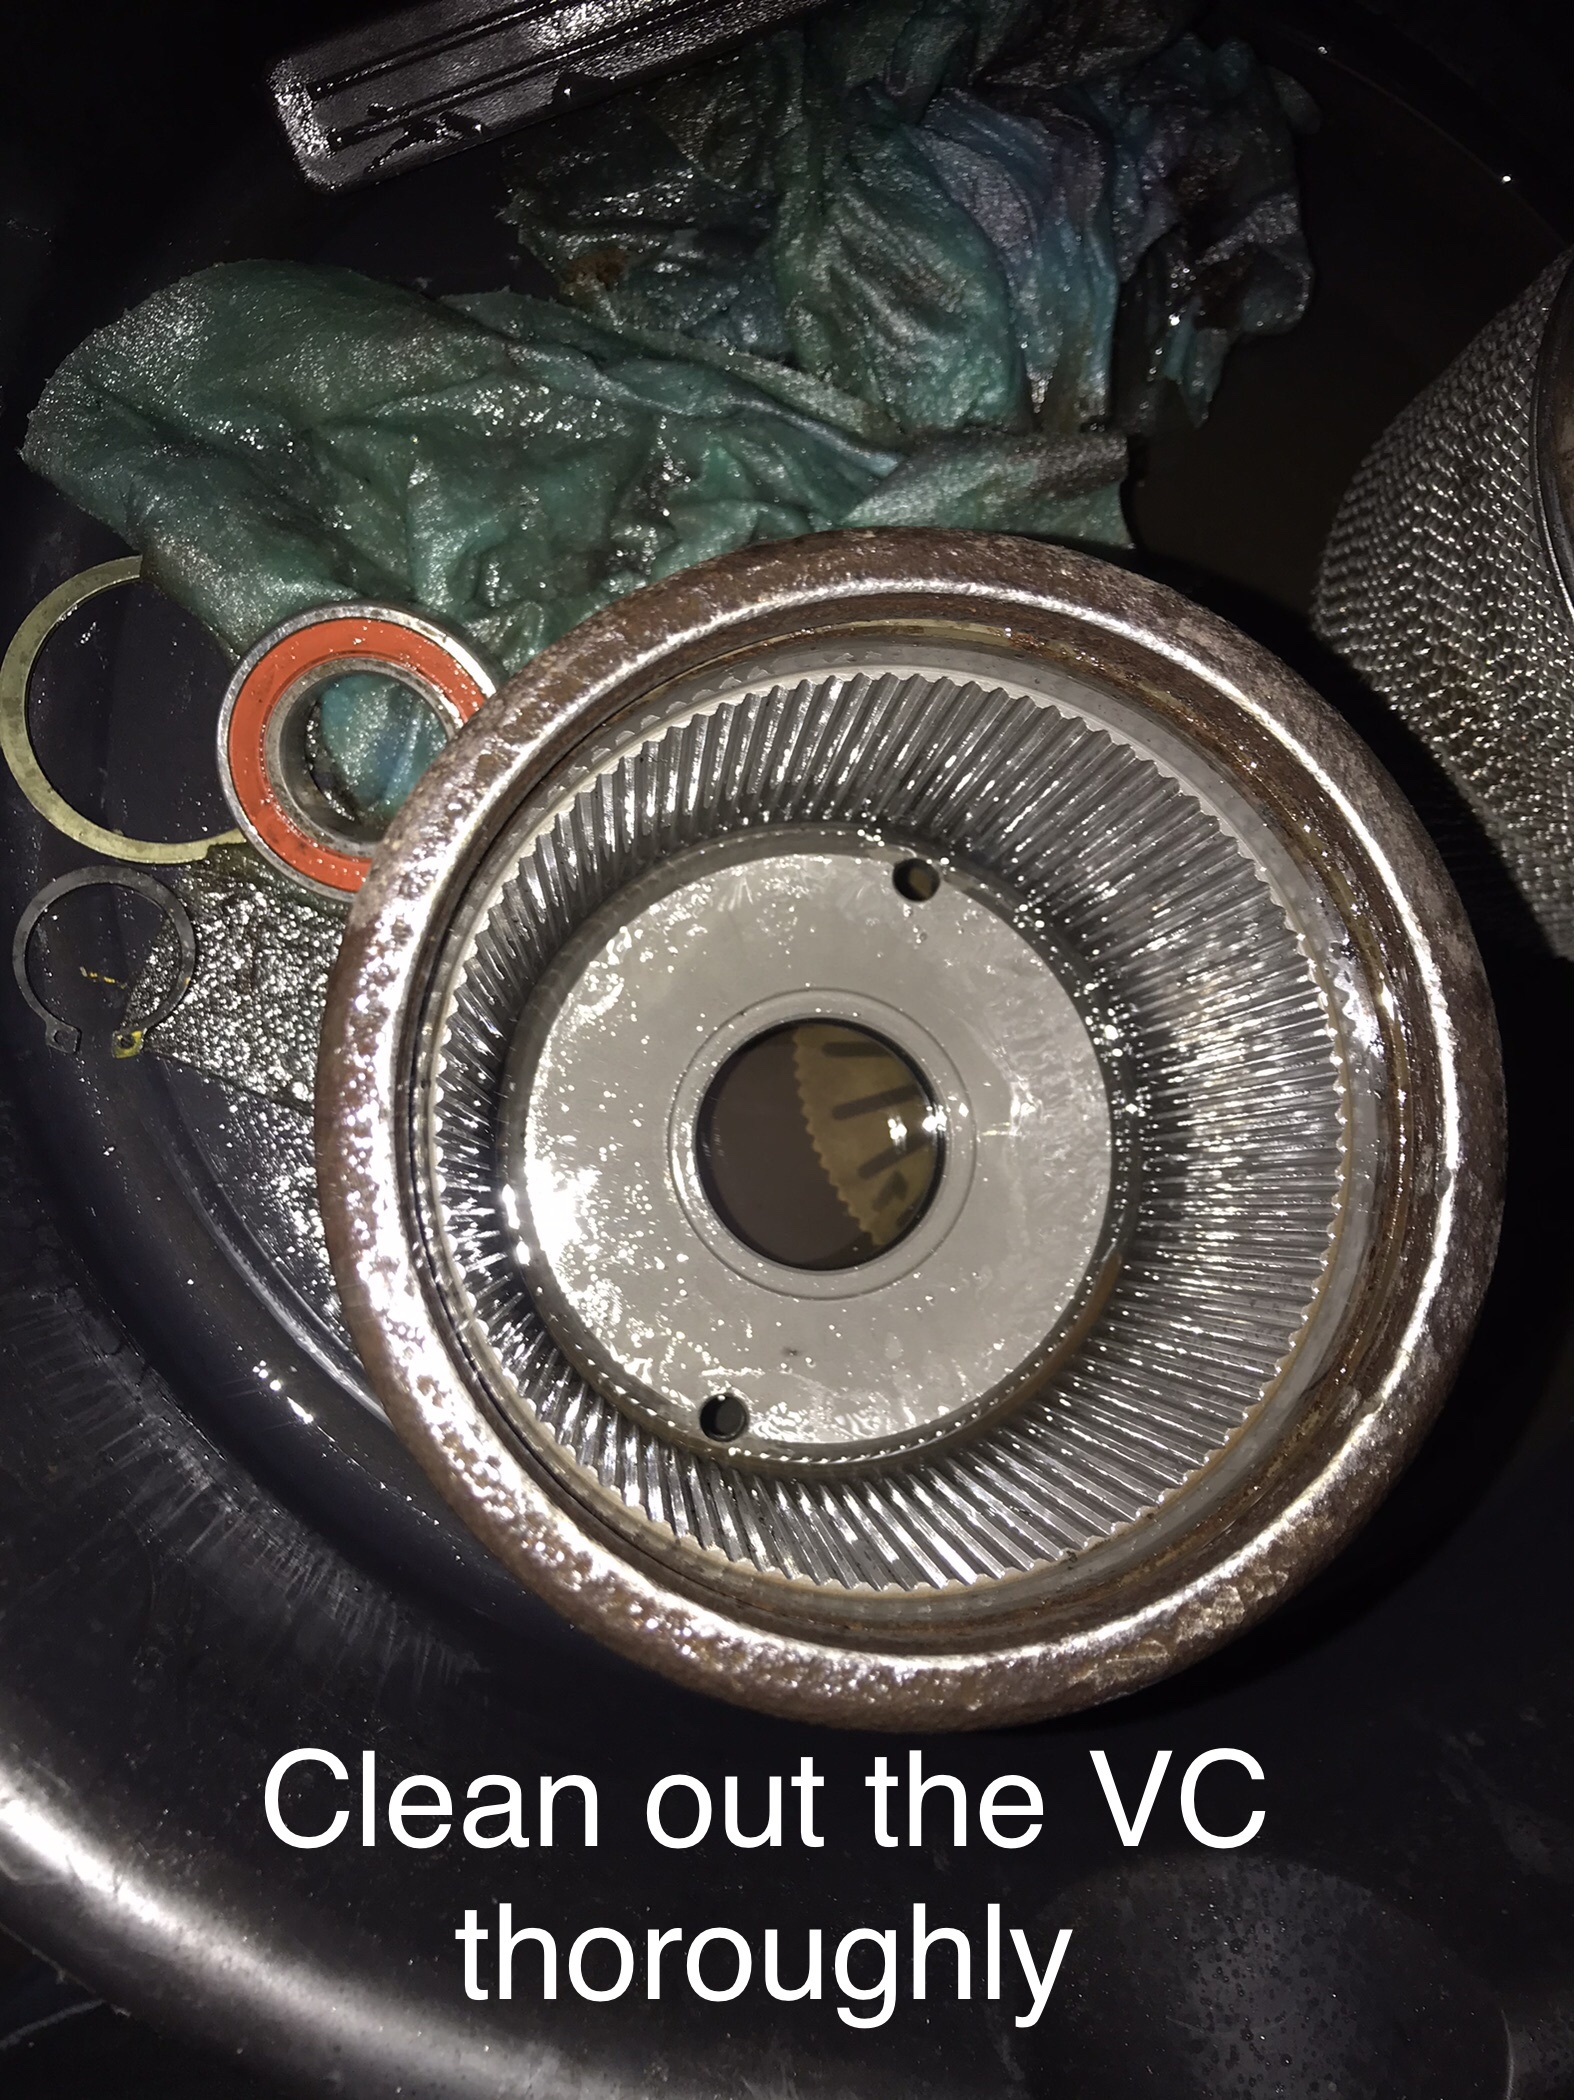
Once you set that single disc on the side remove the ball bearing, O ring and the 6 point torx screw Make sure to clean the VC thoroughly and make sure it’s clean

Now that the VC is clean and new o ring, bearing, 6 point Torx screw and snap ring are in set it aside and move to the shaft

Look on the bottom of the shaft you’ll see a snap ring take it off and the Disc will be free to slide out

put that snap ring next to the single free disc that was at the bottom of the VC (there will be two sets one is at the bottom of the shaft of the VC and the other is on top of the shaft of VC make sure you separate them)

Time to take out the disc from the shaft some disc might get stuck on the top of the shaft make sure you have all disc out, The disc that you see in the bottom picture is a single free flouting like the other one that was in the bottom of the VC, take that disc set it to the side that’ll be the last one to be put in.

There’s another snap ring on top of the shaft take that out and put it next to the disc that you just put aside

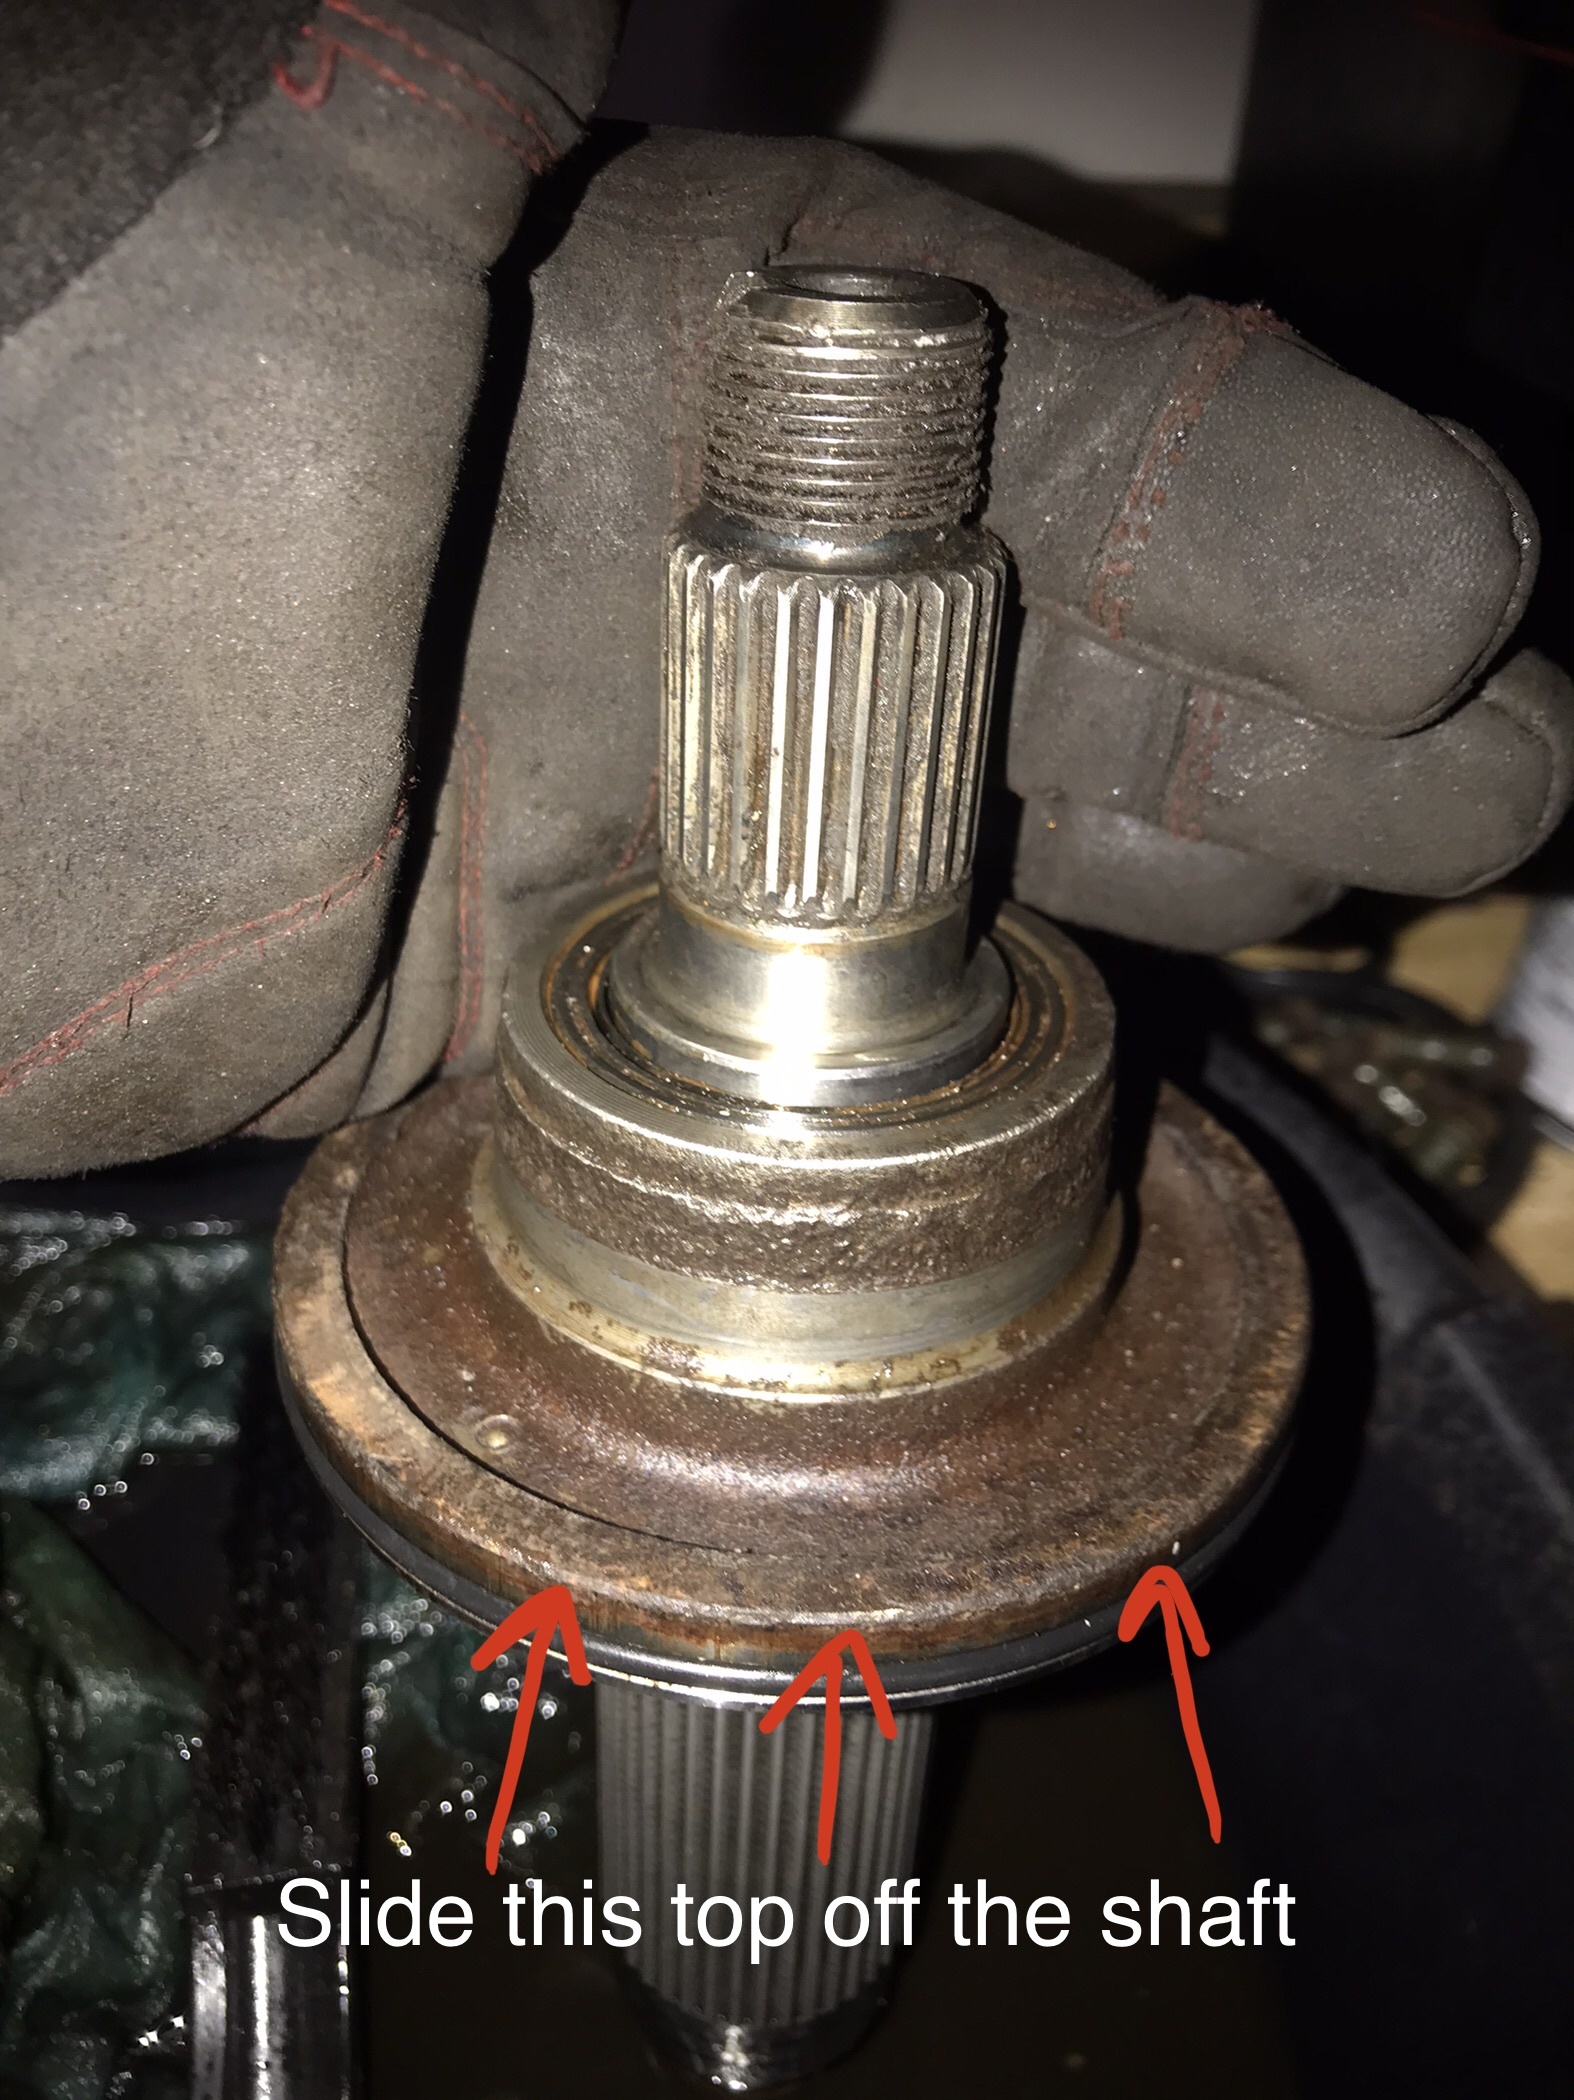
Now take the top off the shaft, it should just pop off with ease
when you get the top off start to remove the three O rings and needle nose bearing


Make sure to take out the snap ring from the top of the needle bearing, remove the needle nose bearing with the blind bearing puller

blind bearing puller is a little tricky to install under the needle nose bearing

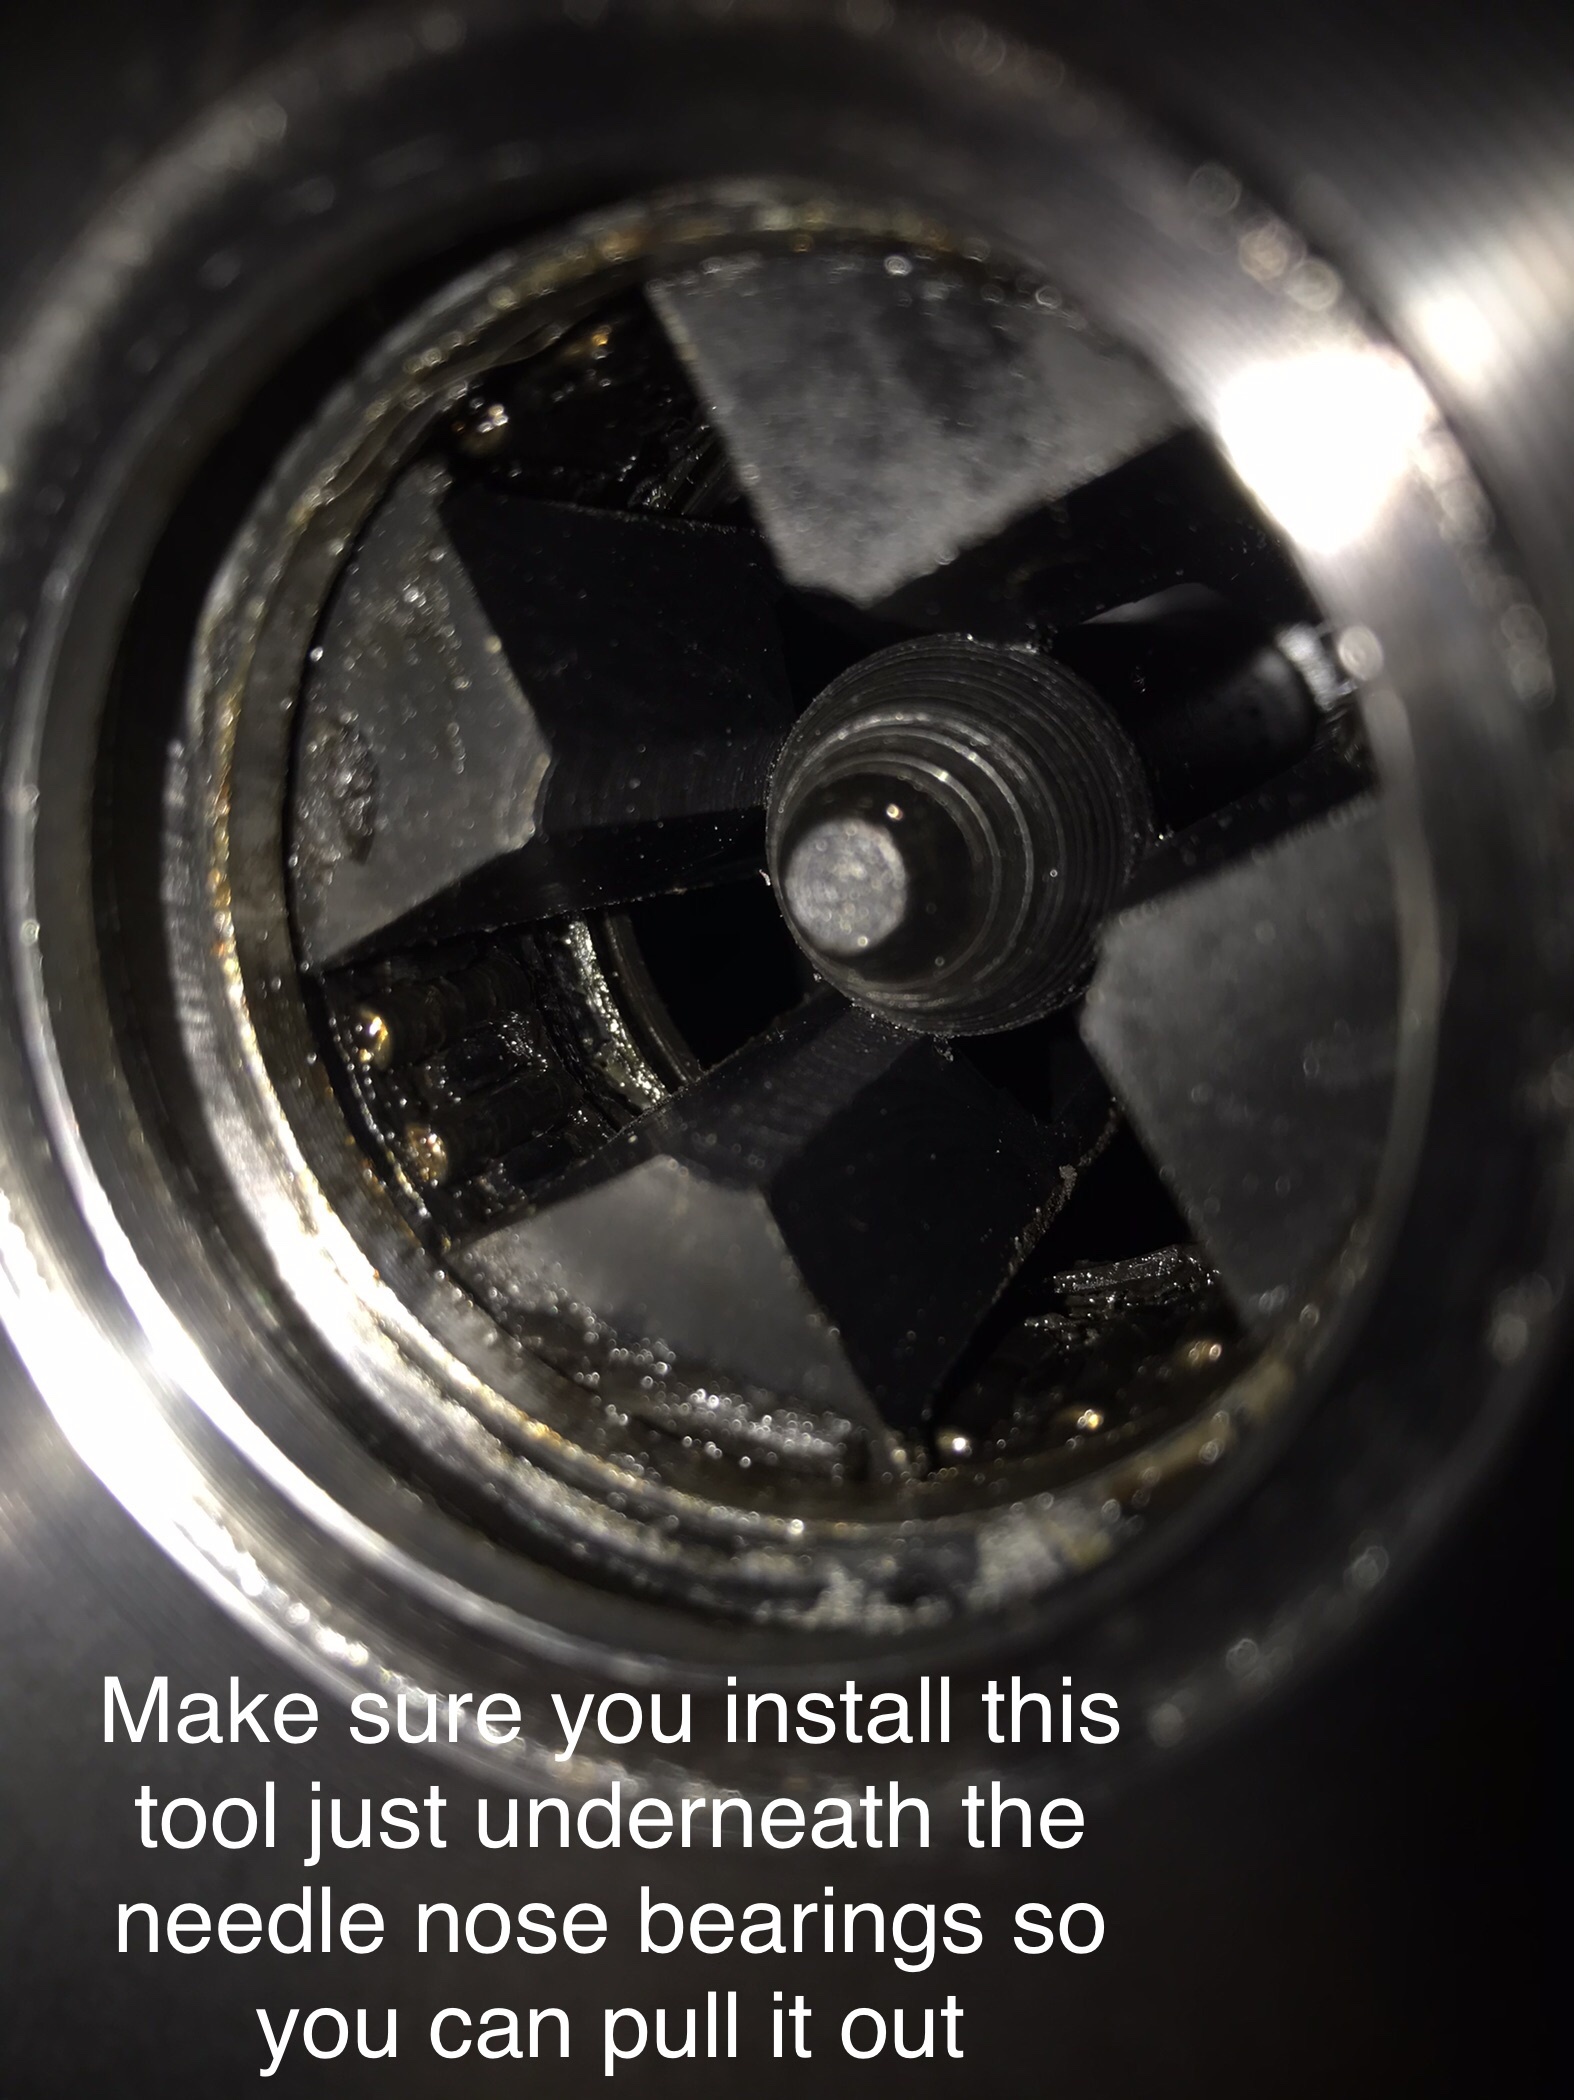
This tool comes with a slide hammer I say if you have a 2.5 or 5Ibs cast iron round weight for a little extra hit


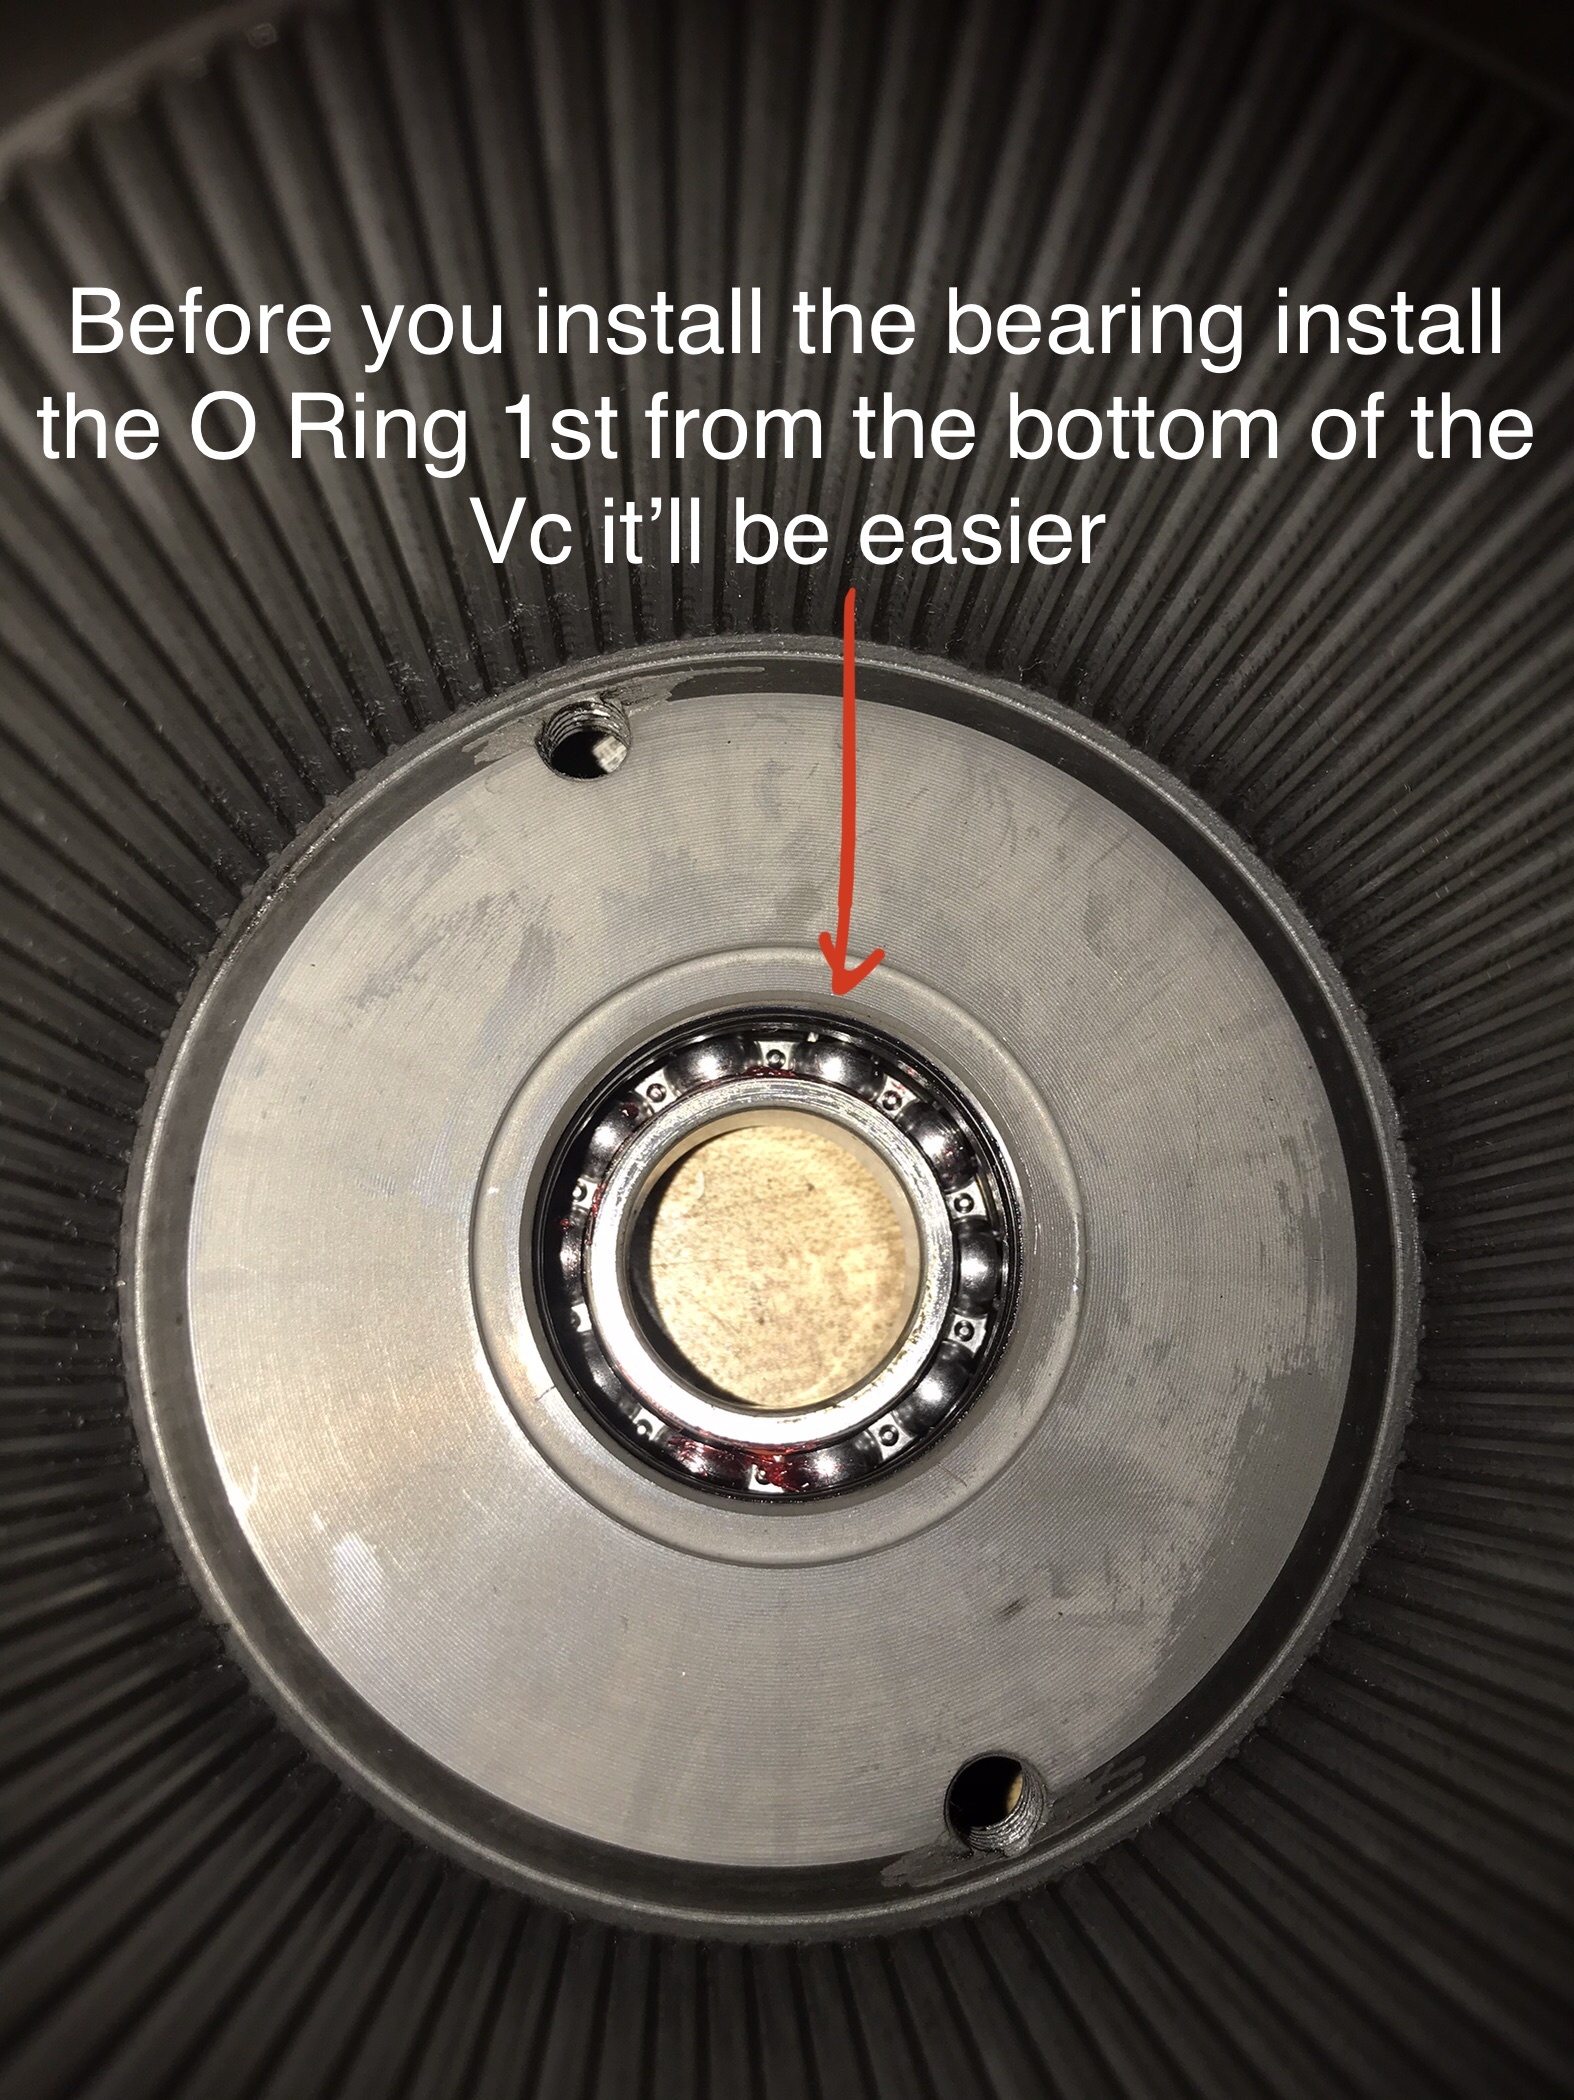
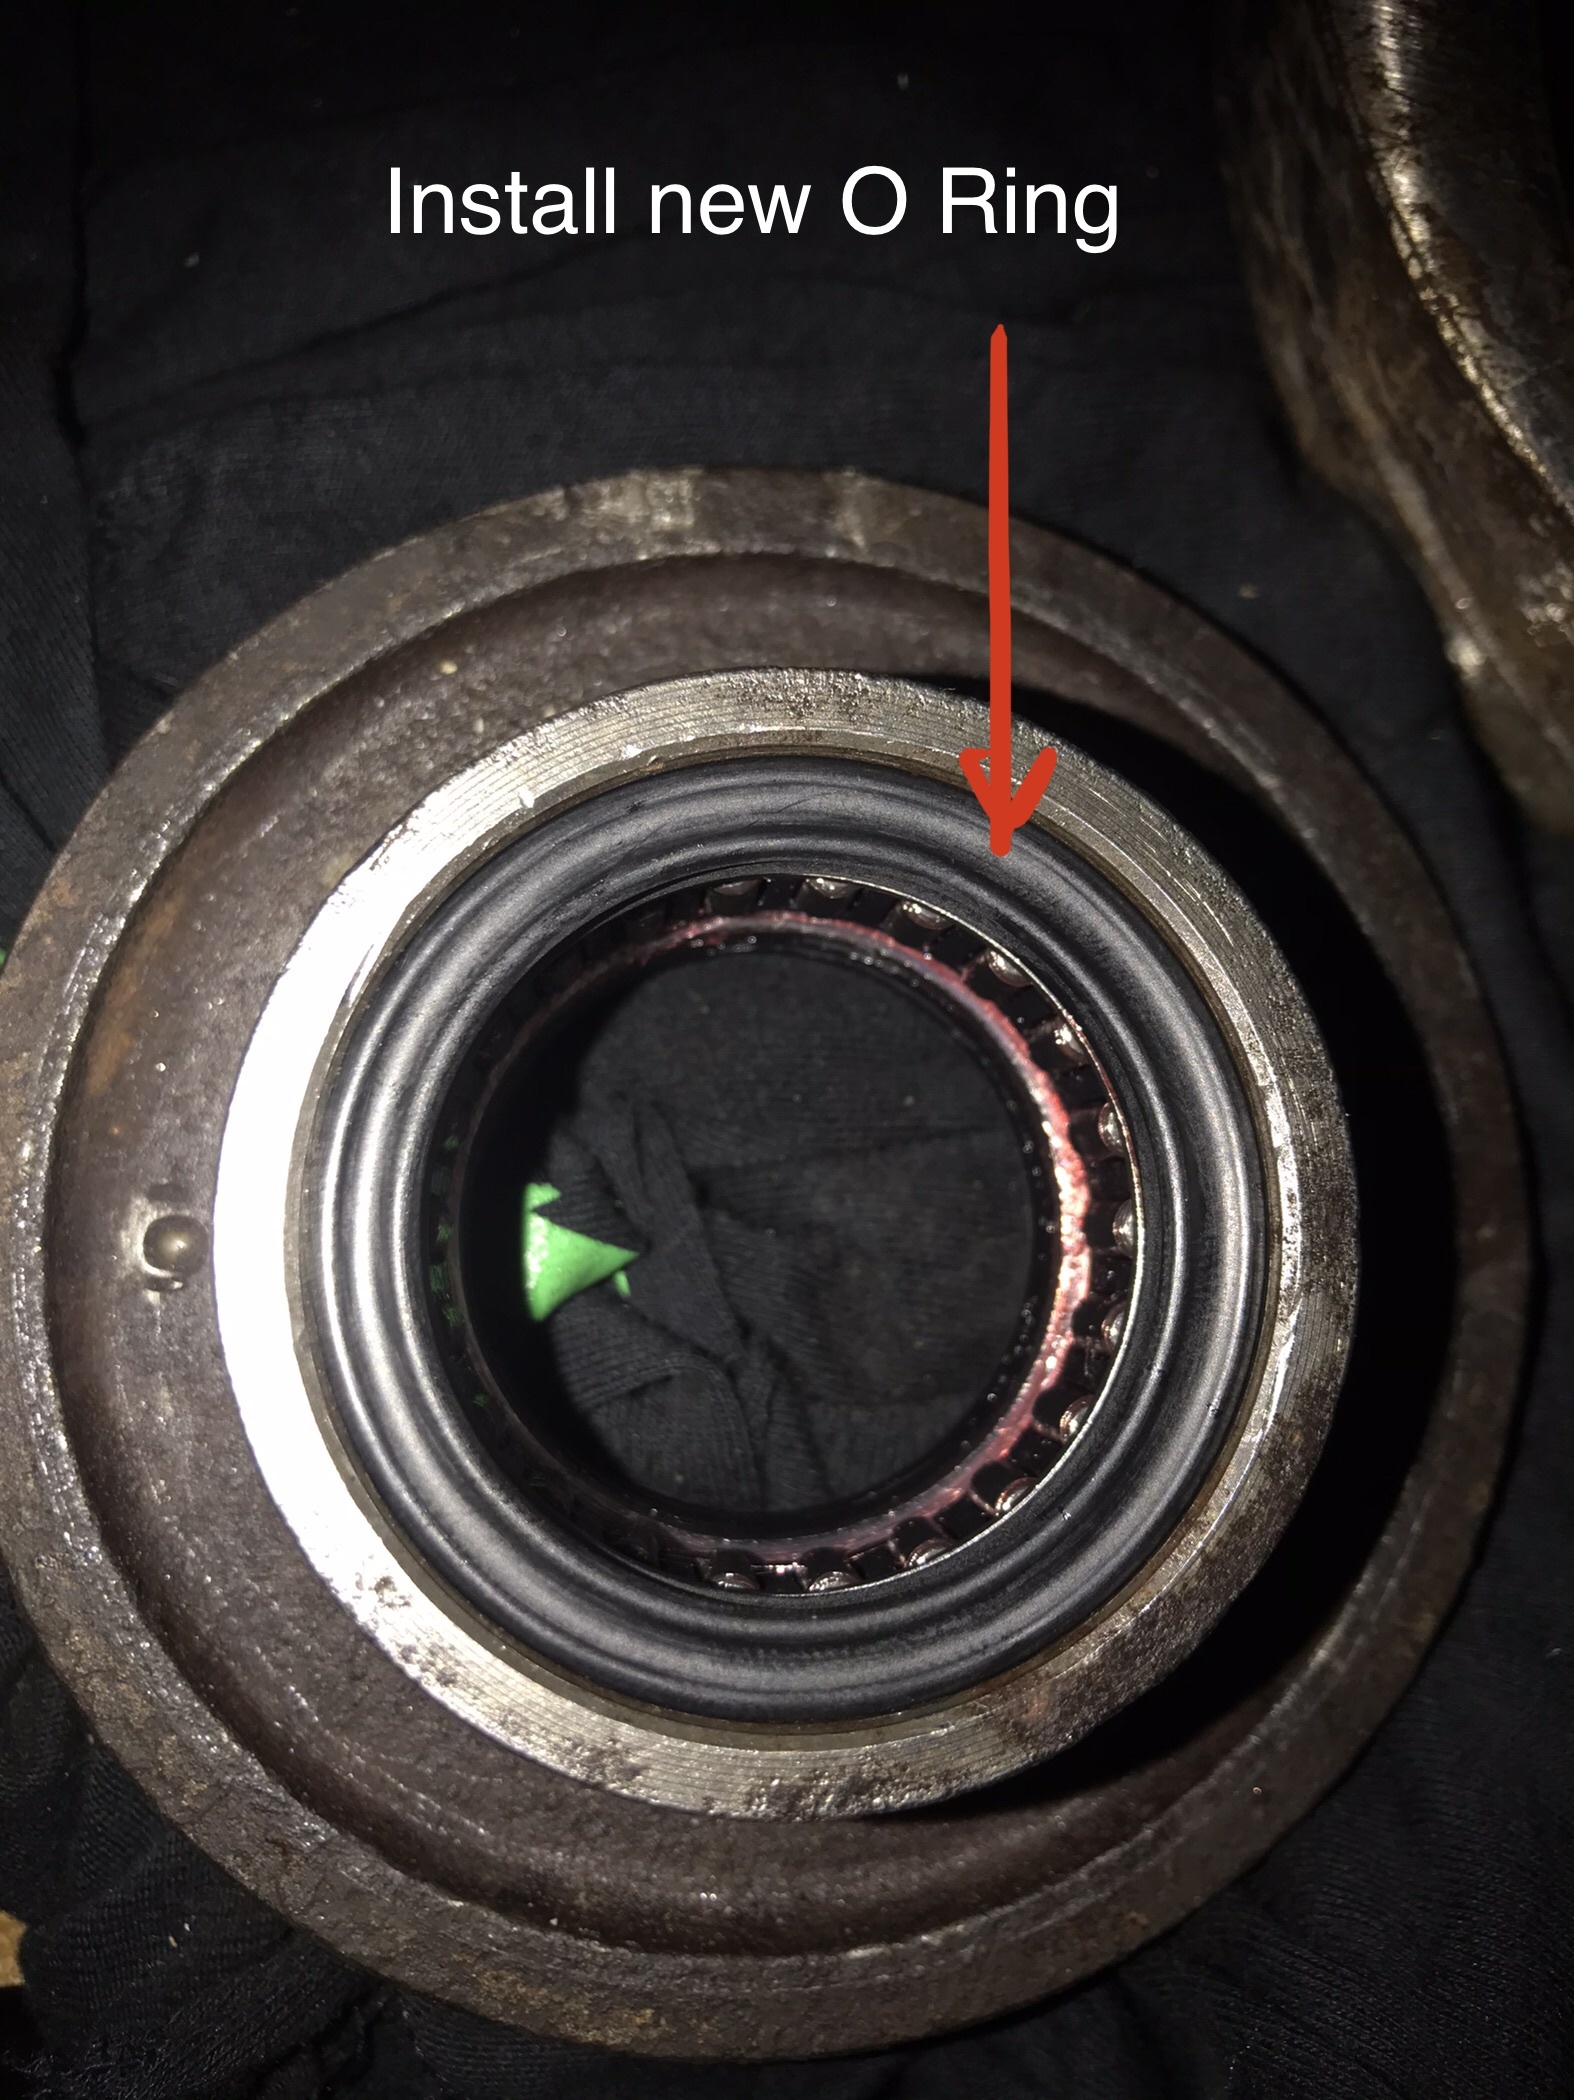
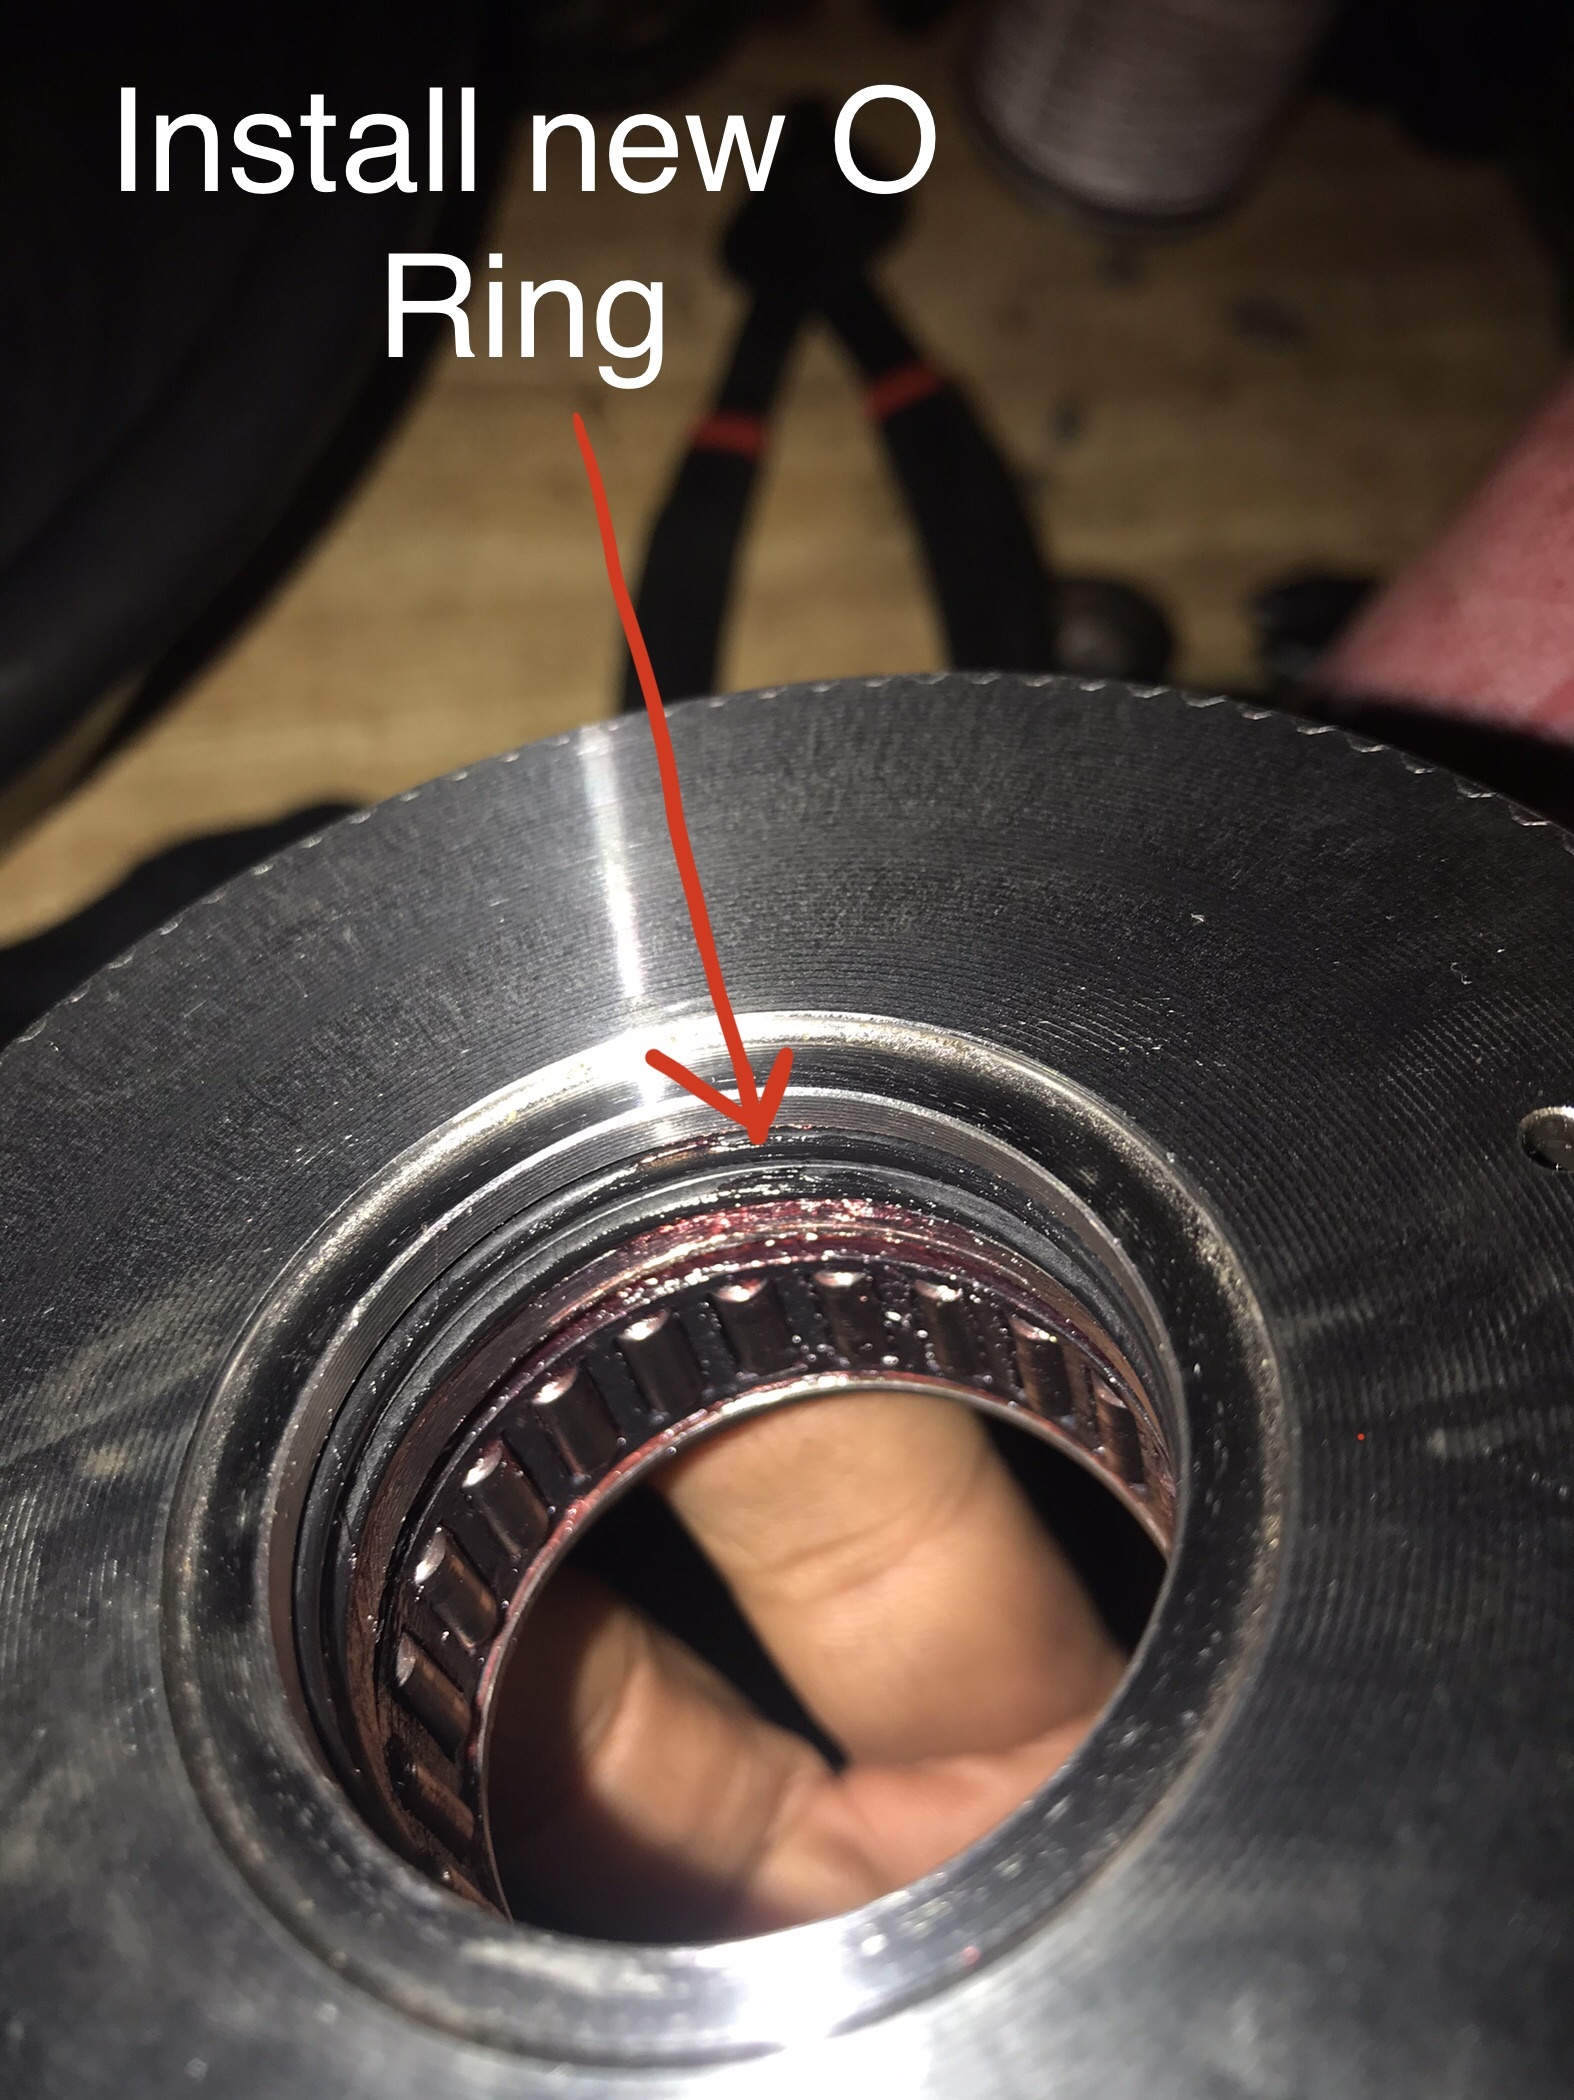
Clean the top and install the new needle nose bearing and 3 O Rings

Next clean the shaft and remember the first set disc and snap ring we set aside from earlier now they come Into play
the disc and snap ring that was at the bottom of the VC
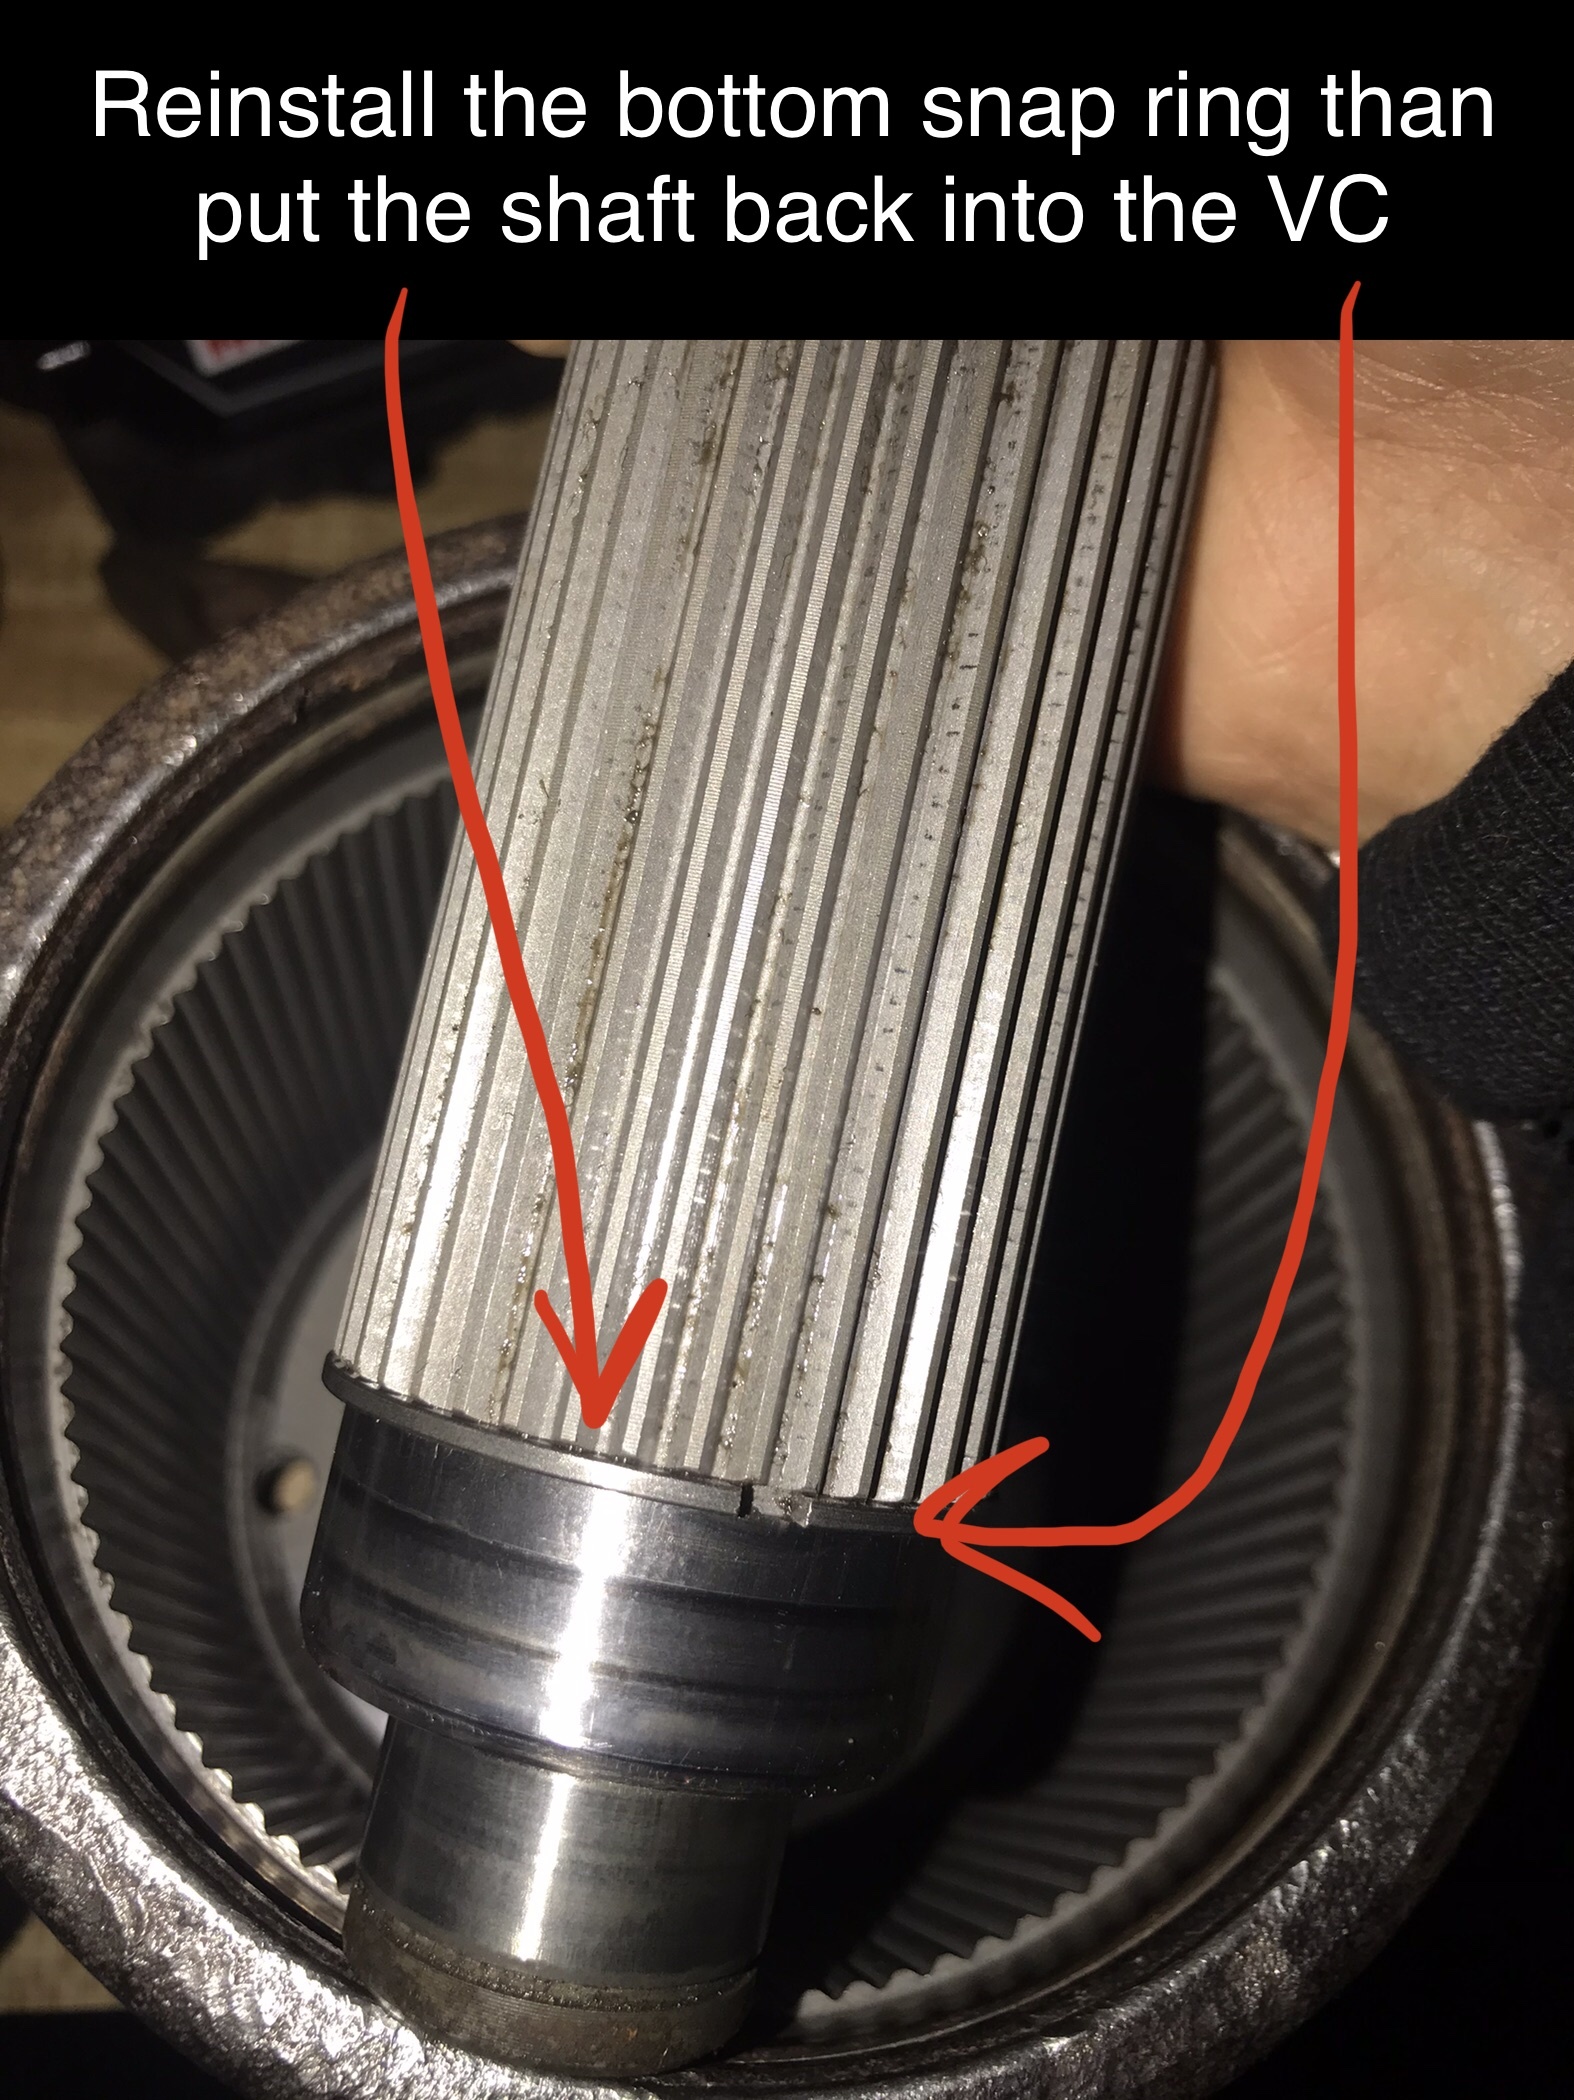
put the inner snap ring on the bottom of the shaft and put it in the VC casing and install the snap ring on the bottom outer of the VC casing once you’ve done that

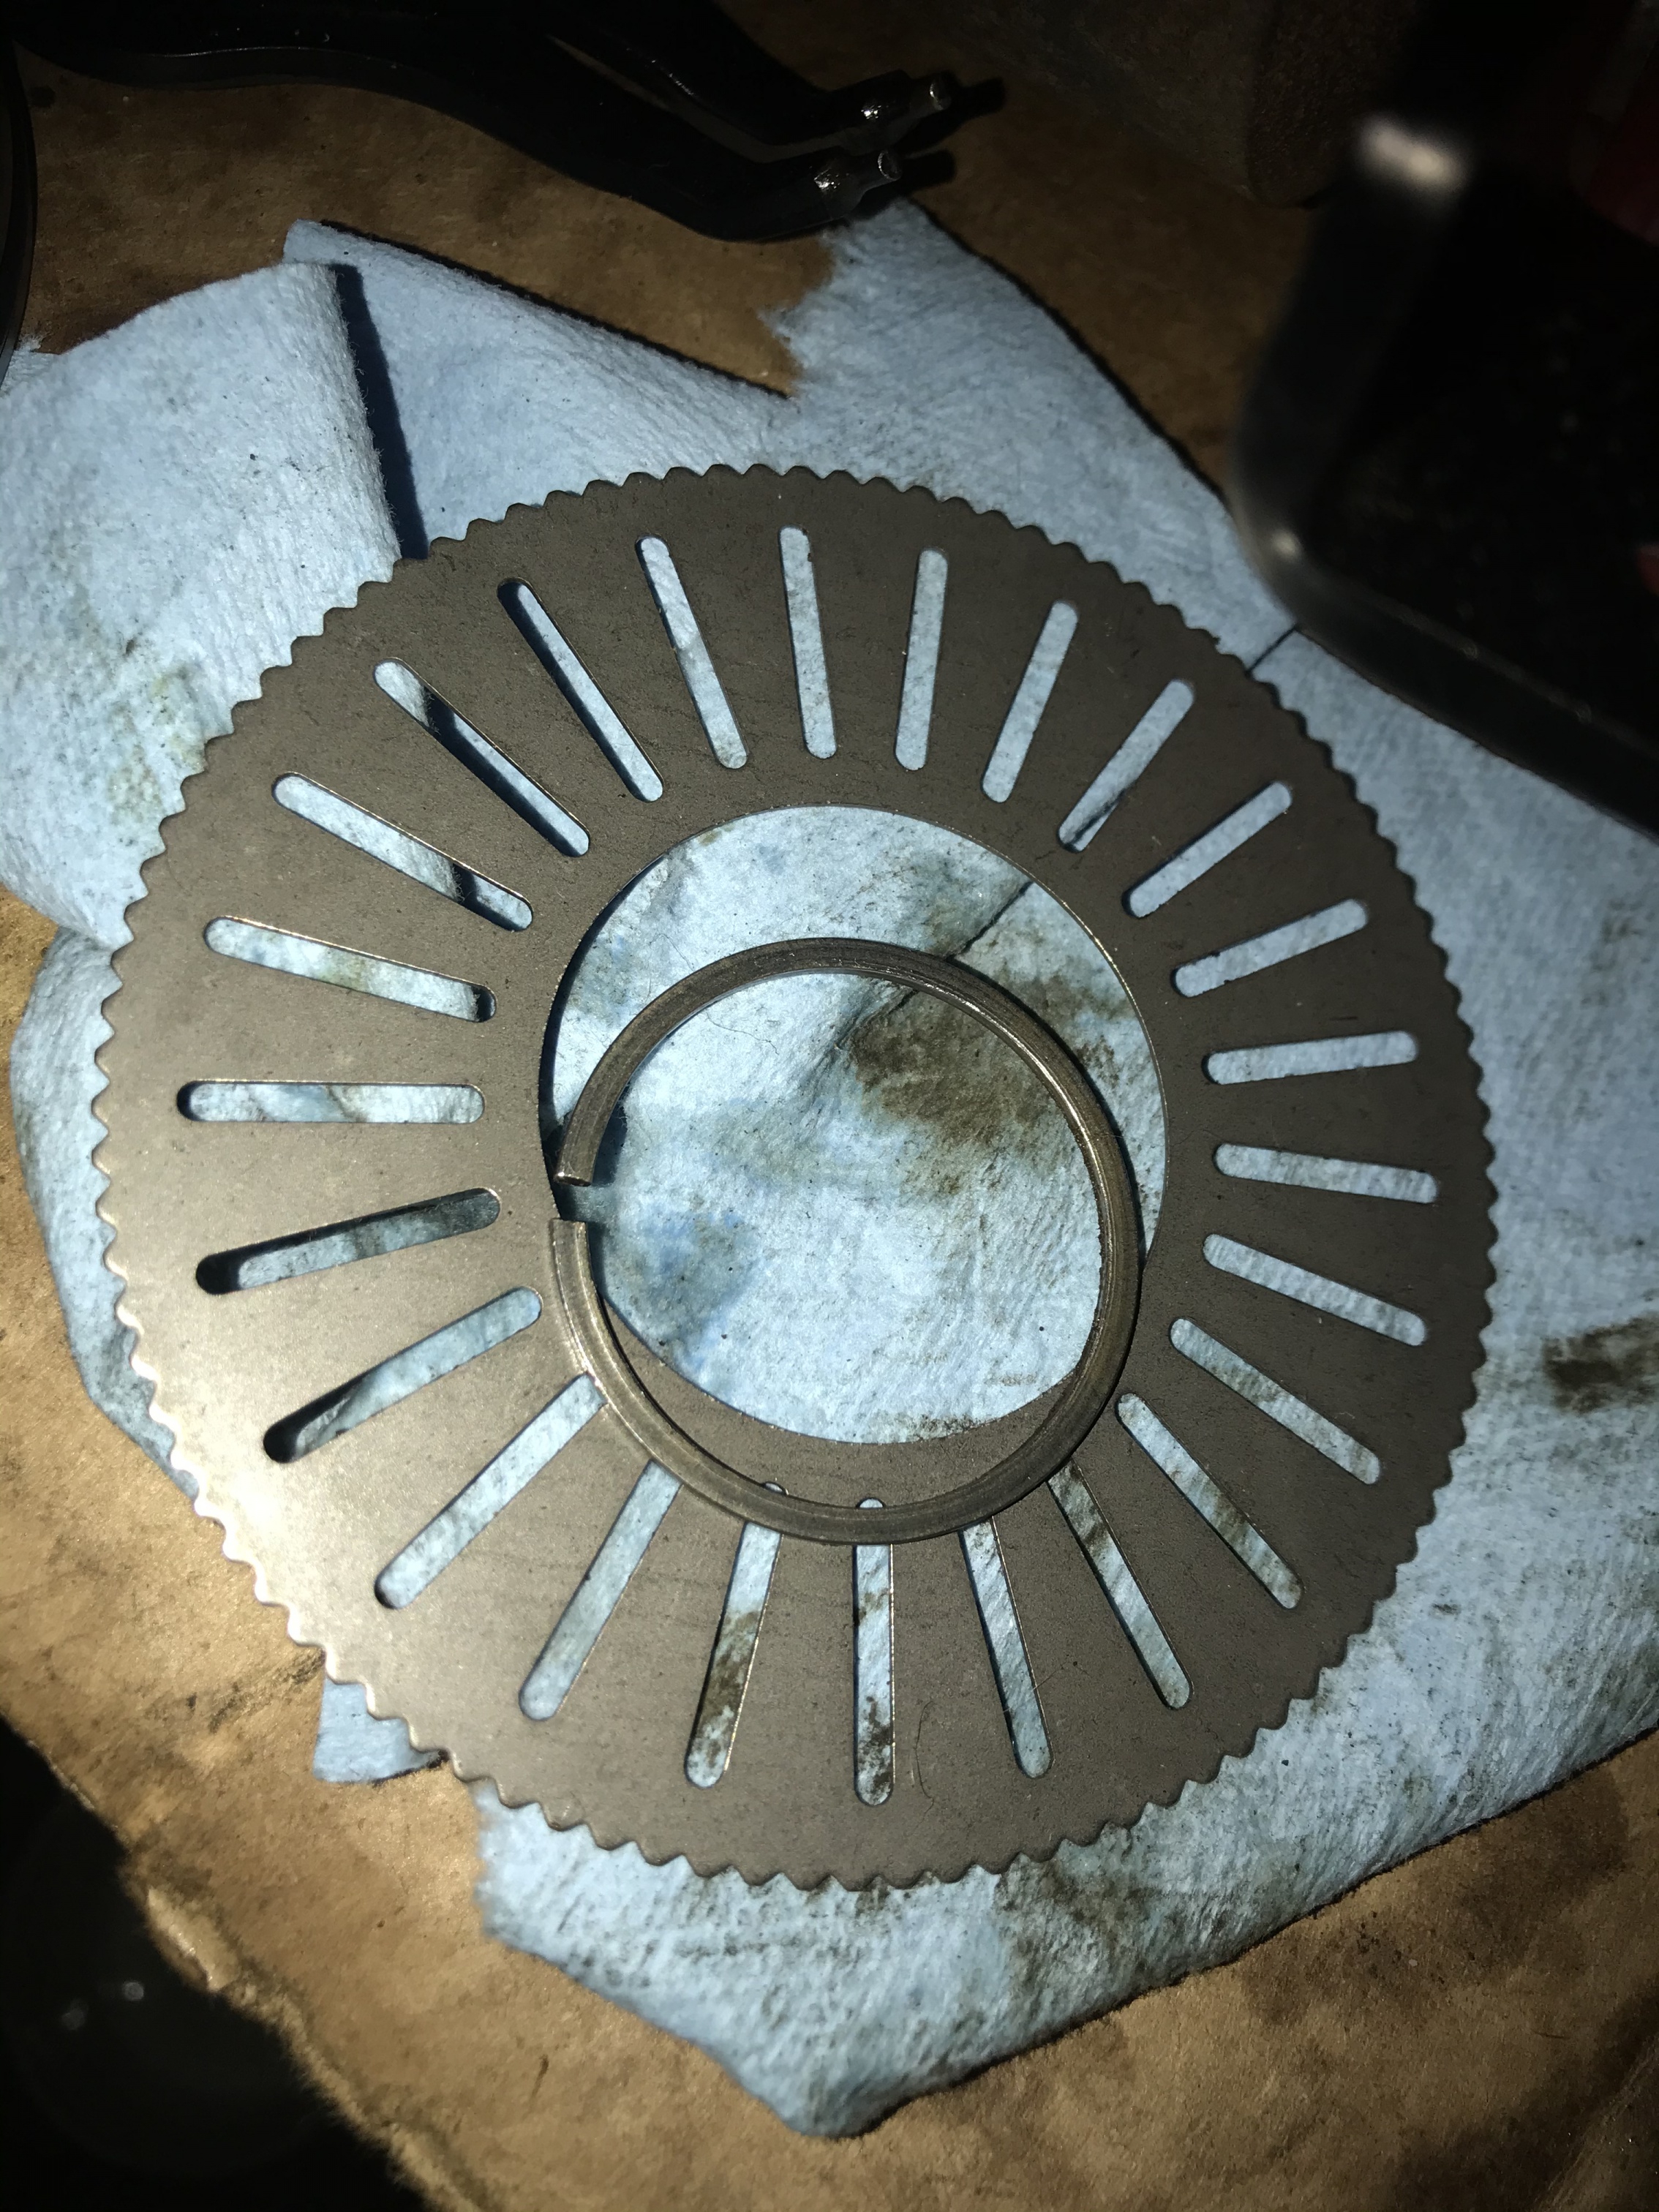
Now flip the VC upright pour a little bit of fluid before you install the first disc. Make sure when you install the disc’s back in they’re lined up with the correct outer/inner Groove and install in the correct order remember the very very 1st disc is the the disc with the slit with outer Groove

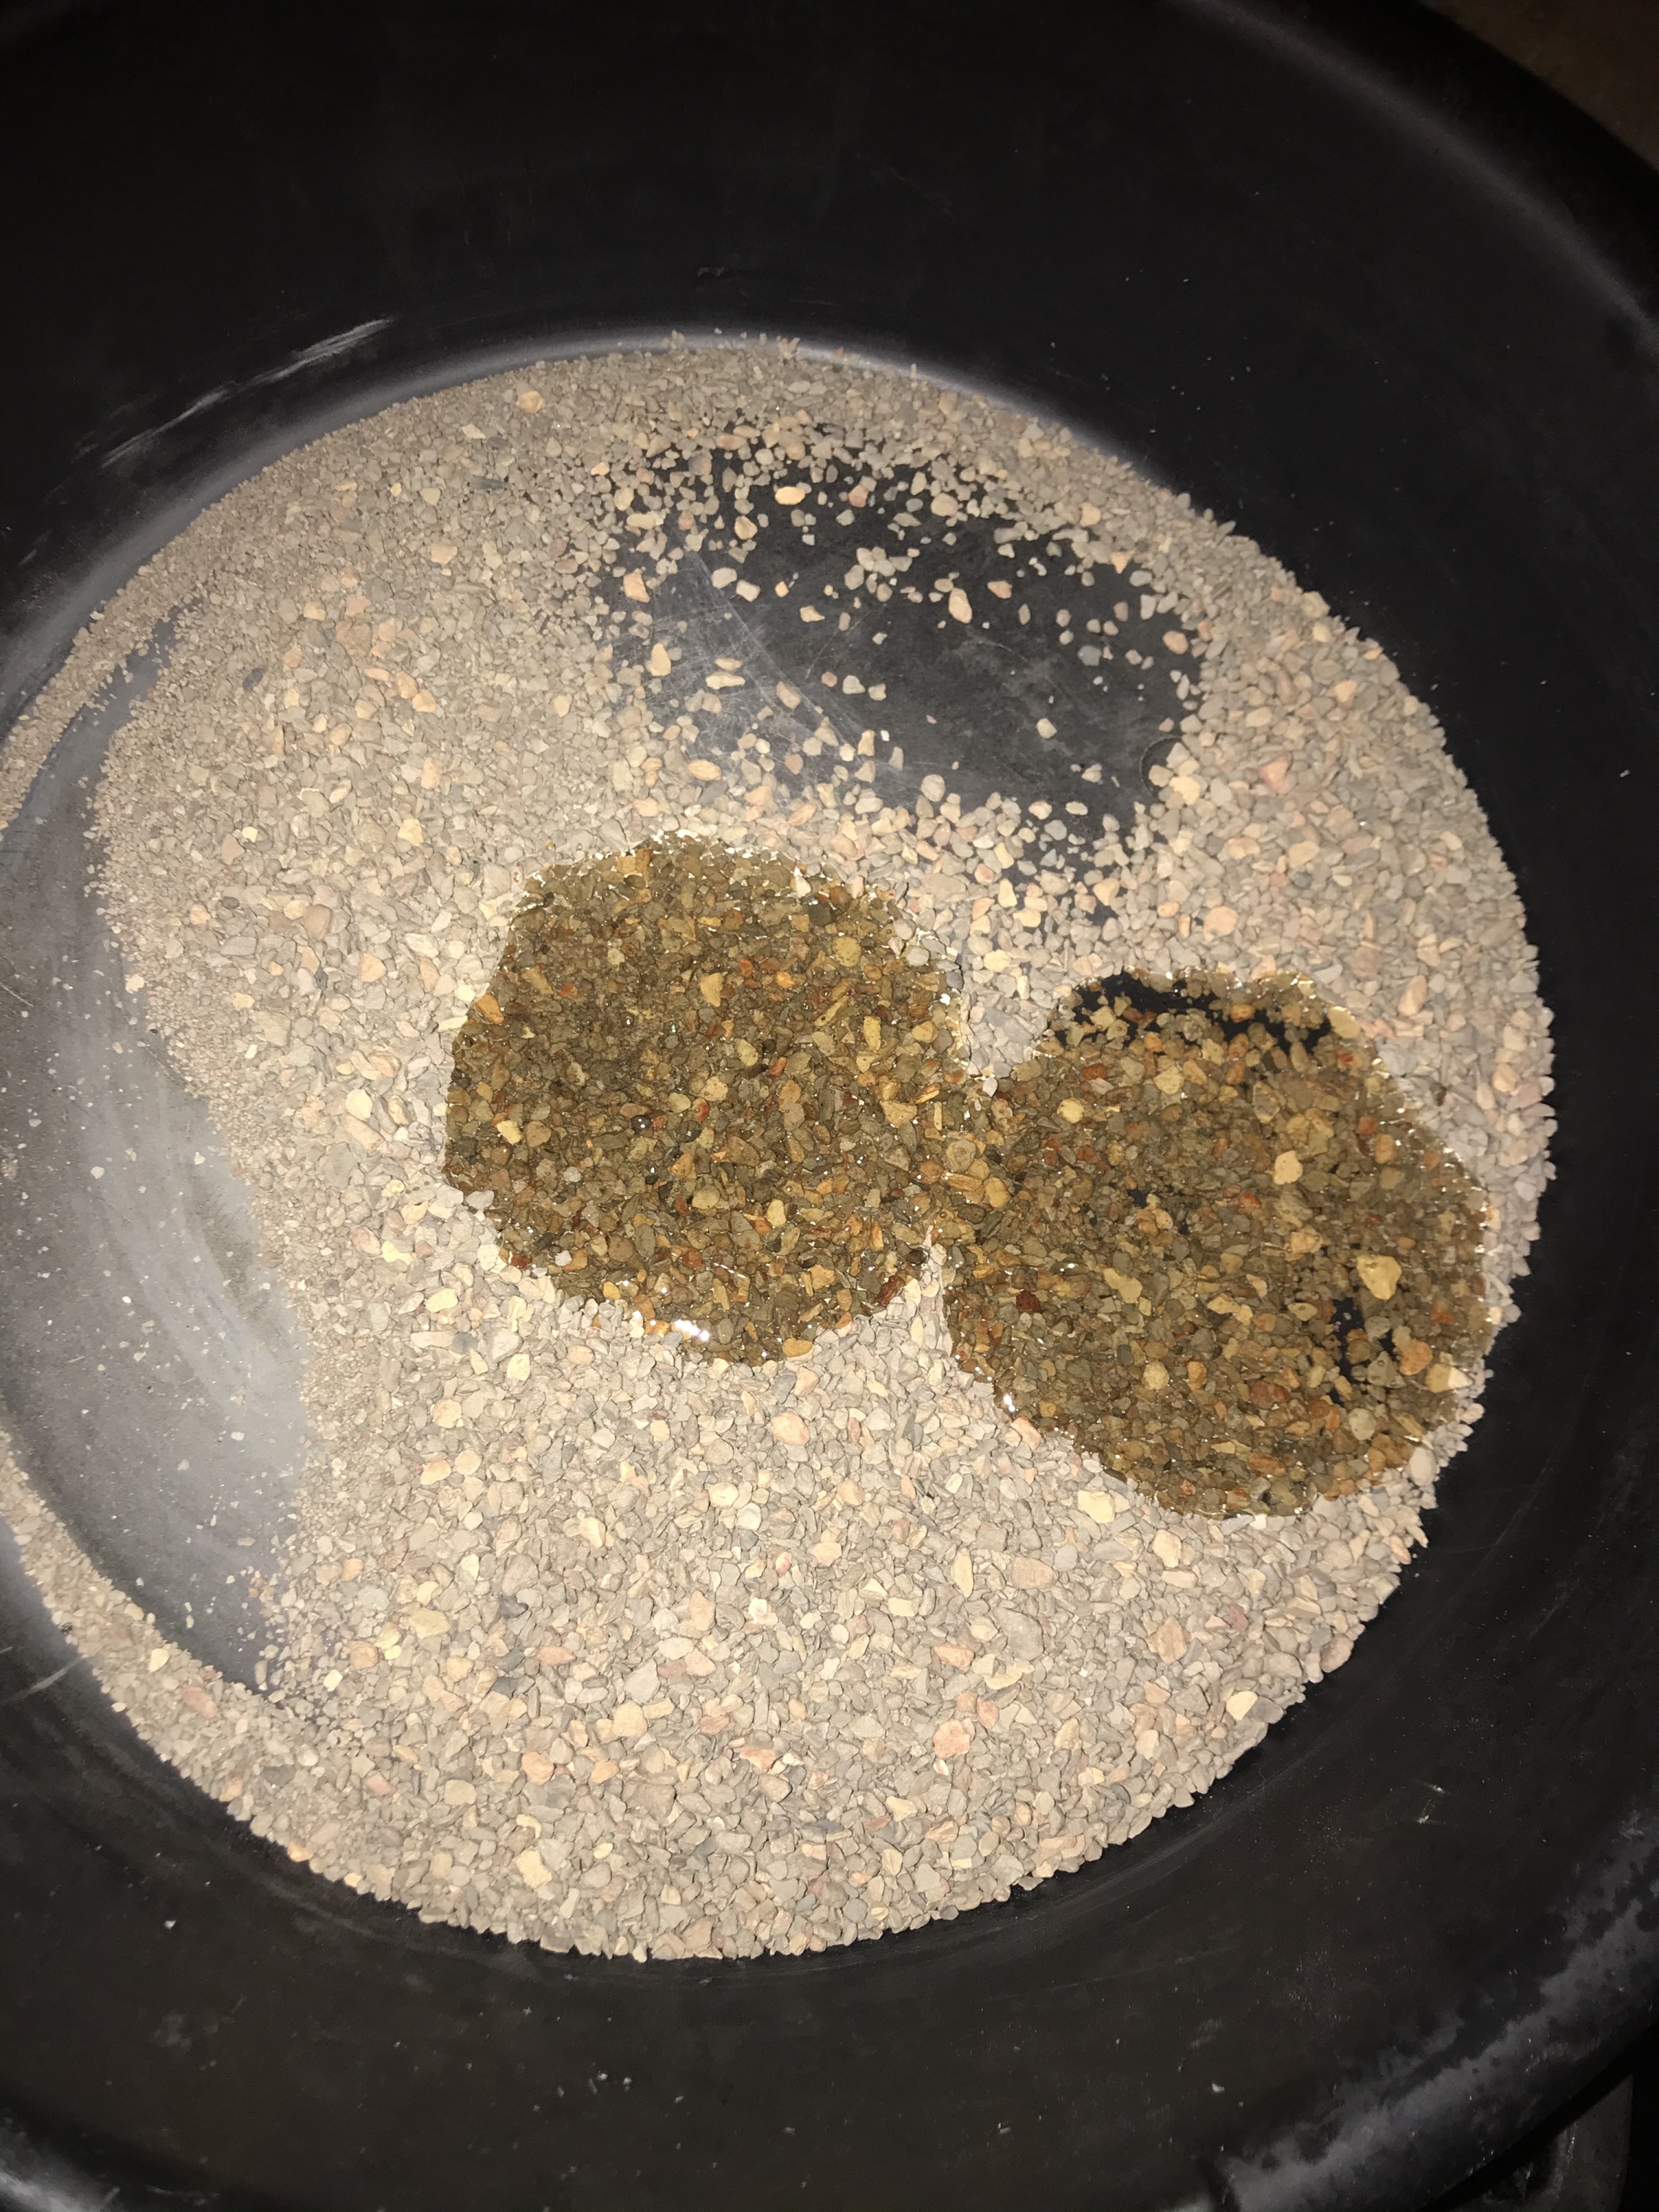
After you installed this disc in the picture above, start to clean the disc’s/rings one by one (i cleaned them one by one it’ll be faster if you just threw all of them in a drain oil pan and cleaned them all at once) in a little bucket with penetration oil you need to make sure the discs/rings go in this order from bottom to top
1st circle disc with inner grooves
2nd ring
3rd disc with slits and outer groove
they have to go in this order make sure you don’t mix them up or misplace a ring

It’s a slow process but ever set of disc/ring I used a flat head or you can use a CLEAN straight 3’ exhaust pipe and add fluid every set you out in make sure the fluid is always on top of each set of disc/ring

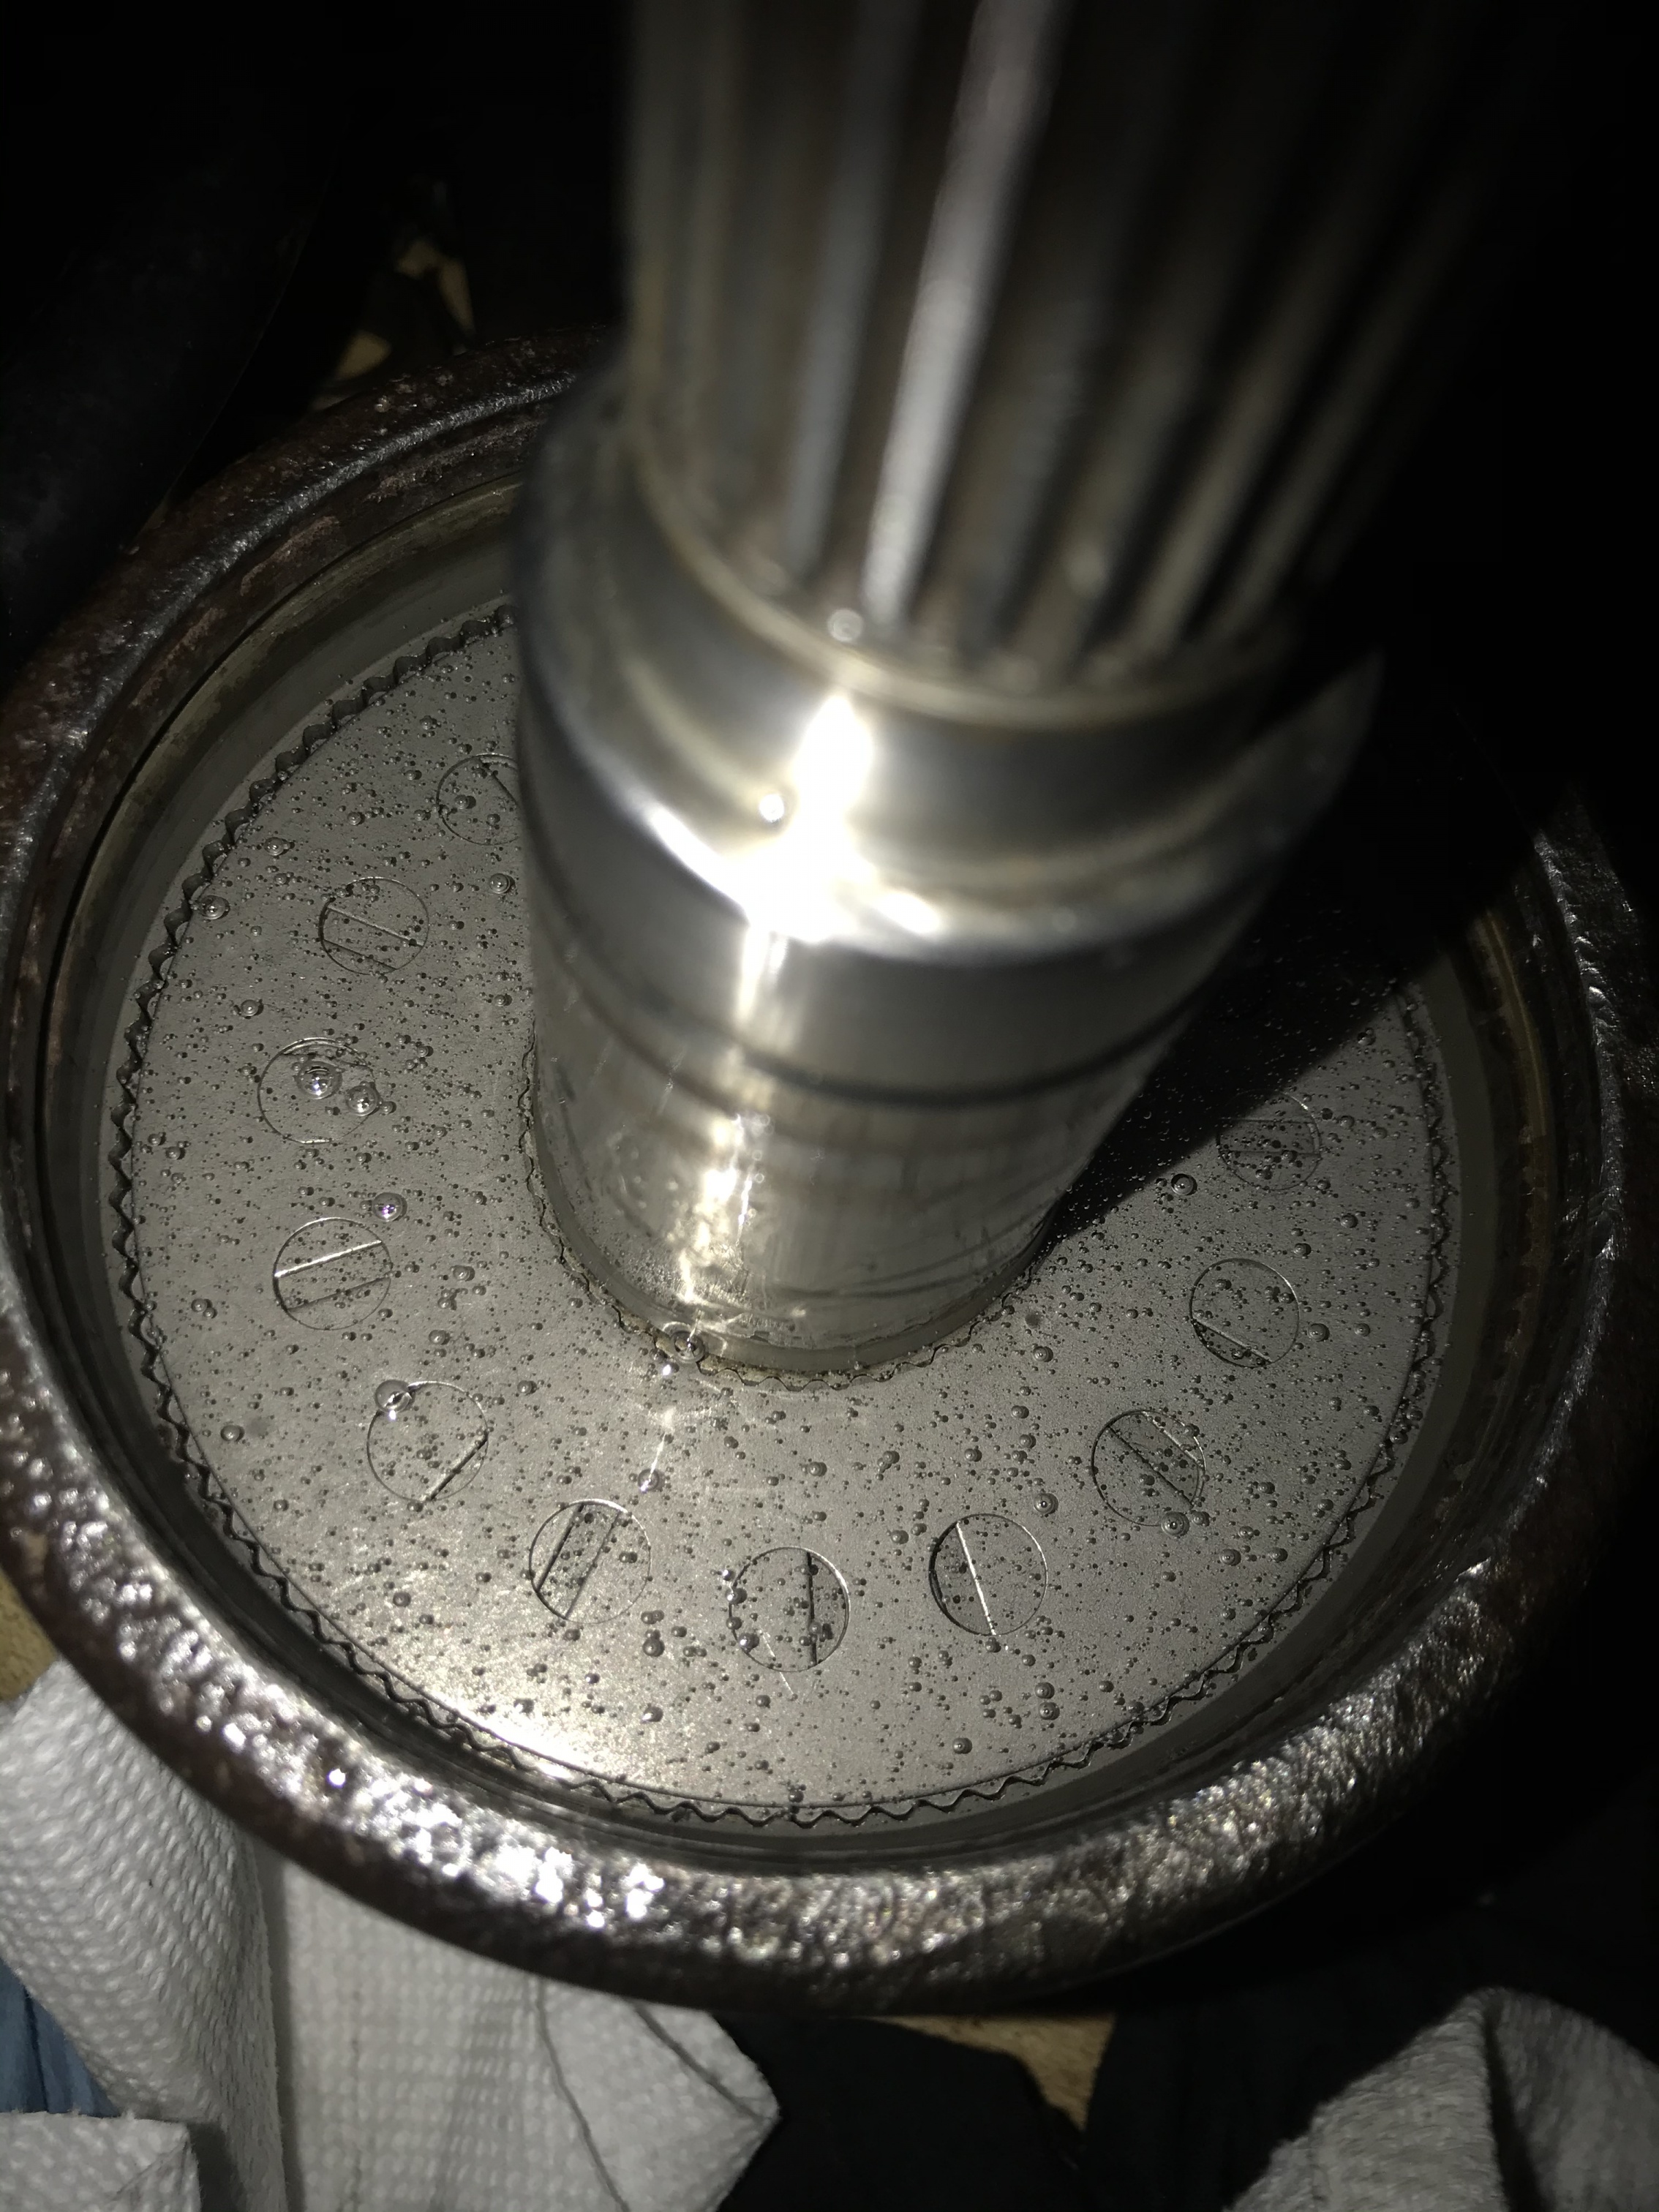
Once you’re done there should be one disc/snap ring left that we set aside that was on the top of the shaft that looks like this (yes there were two sets one on the bottom and top) make sure you put the snap ring in first that holds down all the disc’s, then add the last disc make sure it’s sitting in there properly in the grooves just like the bottom disc it just flouts
it should look like the picture in the bottom, yes you’ll see all those little bubbles that’s just air pockets escaping let gravity takes its course I covered it and let this VC settle overnight
It should look like this the following day no air pockets anymore
Put the top on the VC

Make sure to get the Main snap Ring around the top of the VC before you Get the press ready don’t press it yet

you’ll need to unscrew the torx screws completely out in order to breath the system out
once you unscrewed the torxs out, press the top down slowly you’ll see a decent amount of fluid to come out at the same time watch the top so you can put the main snap ring back in place after that screw in the torx screws back in I had a drain Pan under the Viscous Coupler to catch the fluid
Now install the shields back on. Finally it’s all set and done. Congratulations you just rebuilt your Viscous Coupler ???

I hope I covered everything and hopefully all you found this helpful with the info I provided, if you have any questions leave a comment and I’ll help you out. Thank you for reading have a great day ?
Comments
That is a DAMN good write up. Thank you!
thank you it took awhile and hope its some what easy to understand and do
Nice write up! Thanks for taking the time to document the whole process. Will definitely be referencing this when I do mine.
Thank you, I’ve always wanted to get this done when I really understood how the VC functions, I needed to document this entire thing with as much info as I could. Specially how old these parts are 31-34 years old bearings/fluid don’t last that long, might as well rebuild or buy new