DIY gauge pods, on your bezel, not your pillar, not your dash, Mickey Mouse up in it!
 greenteagod
Moderator
greenteagod
Moderator
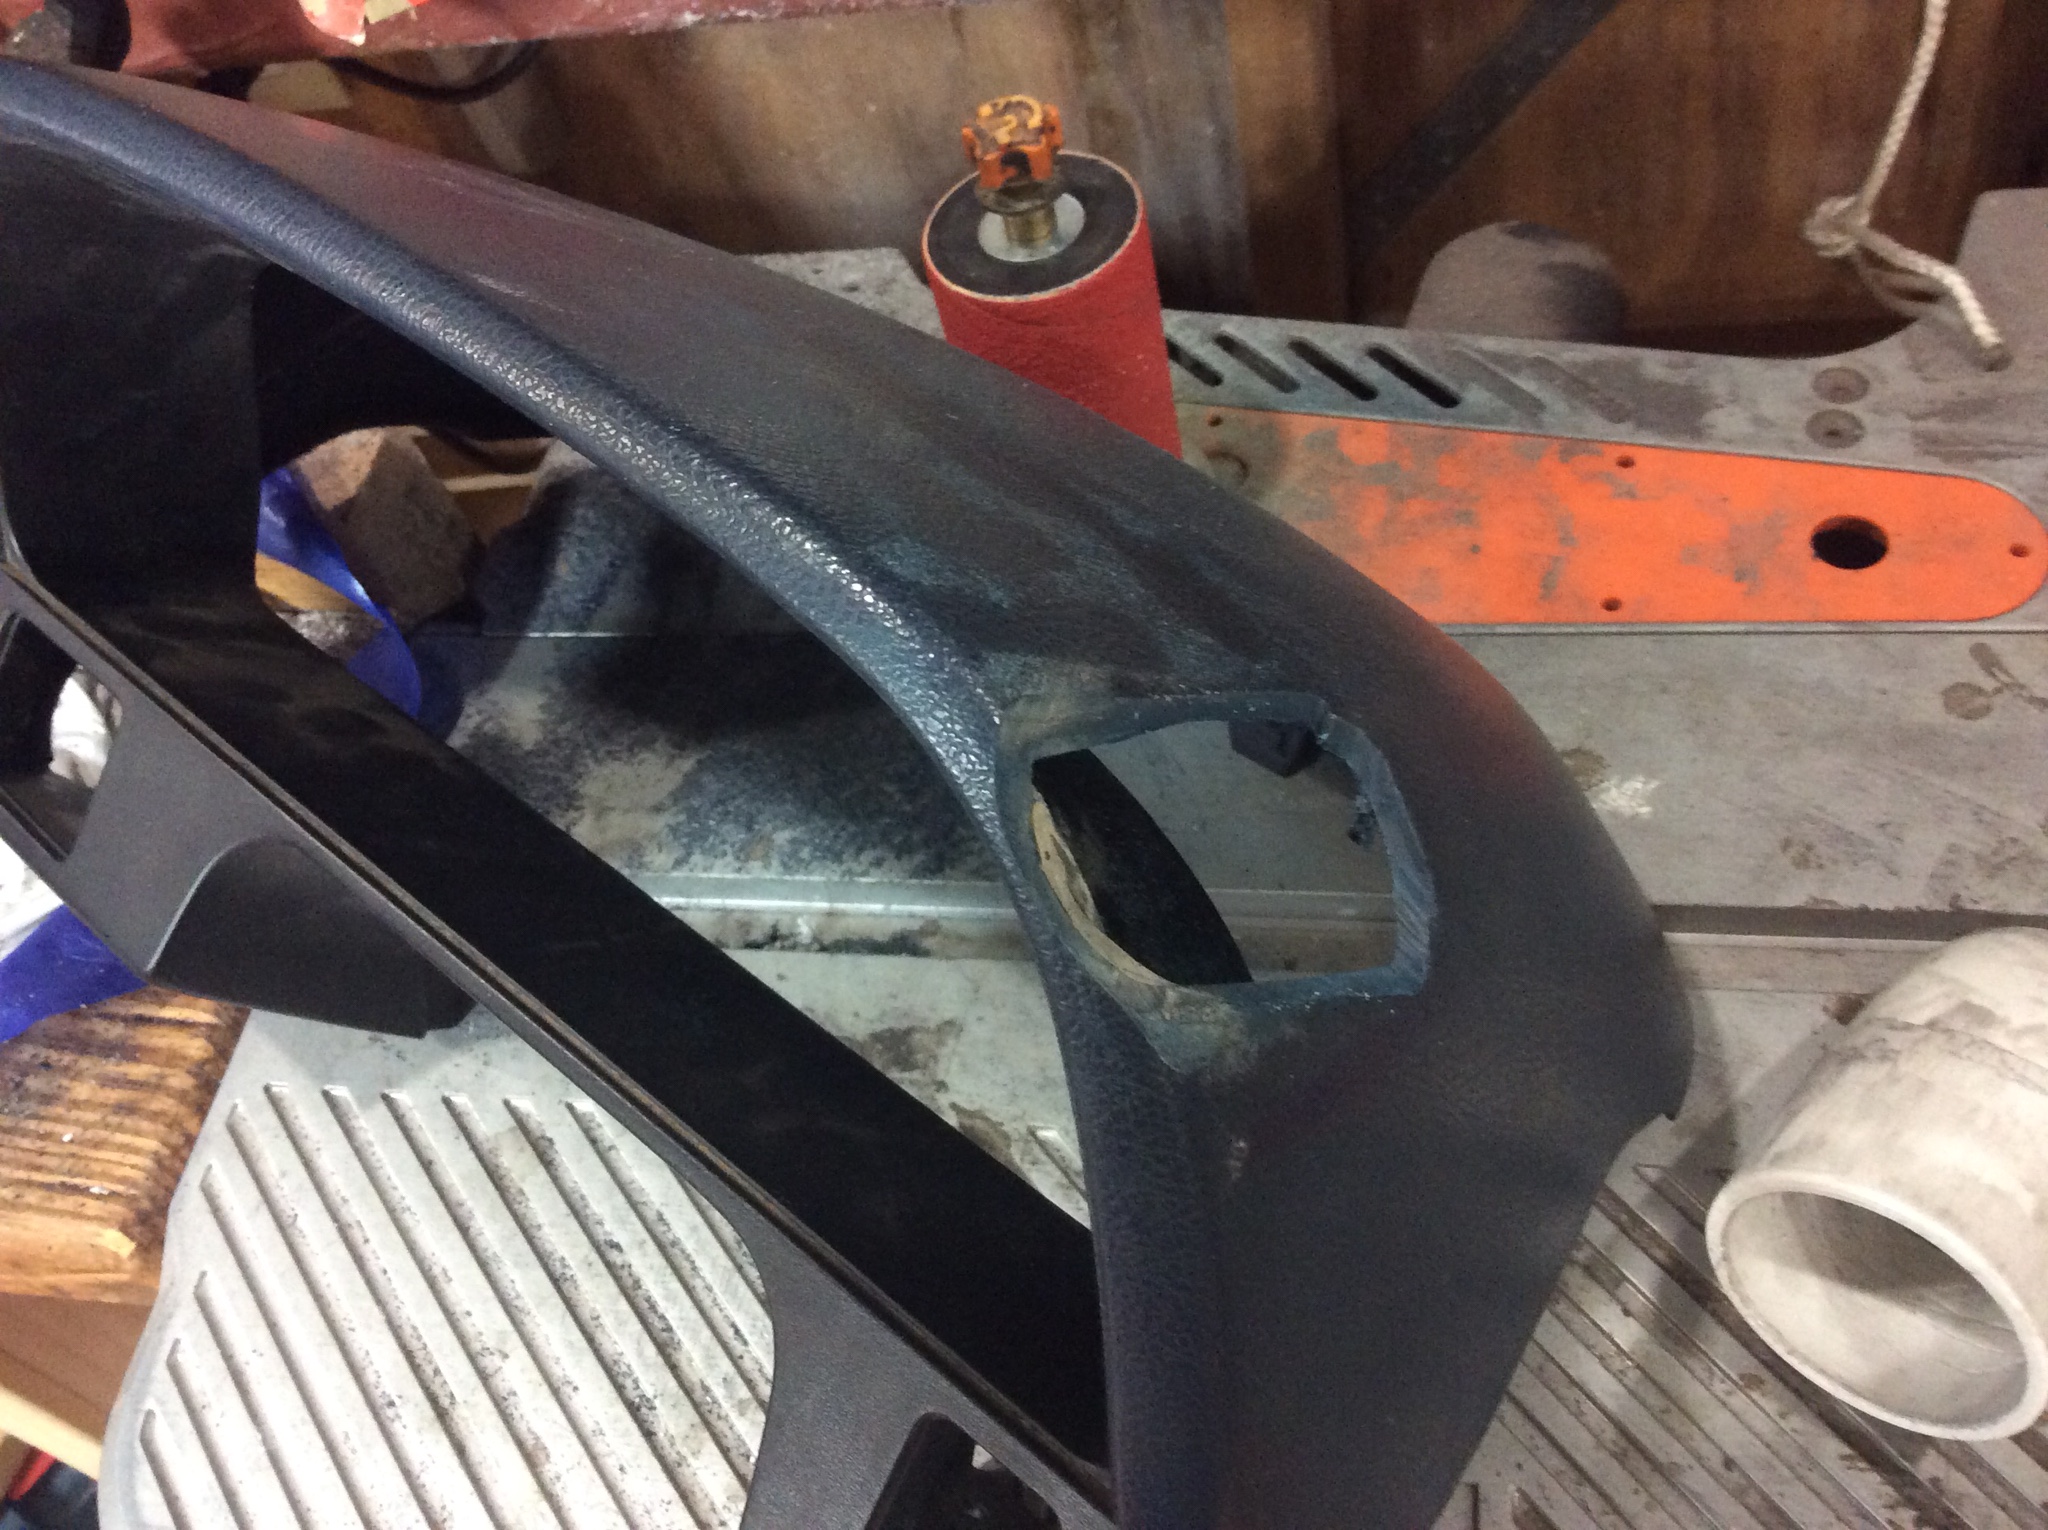
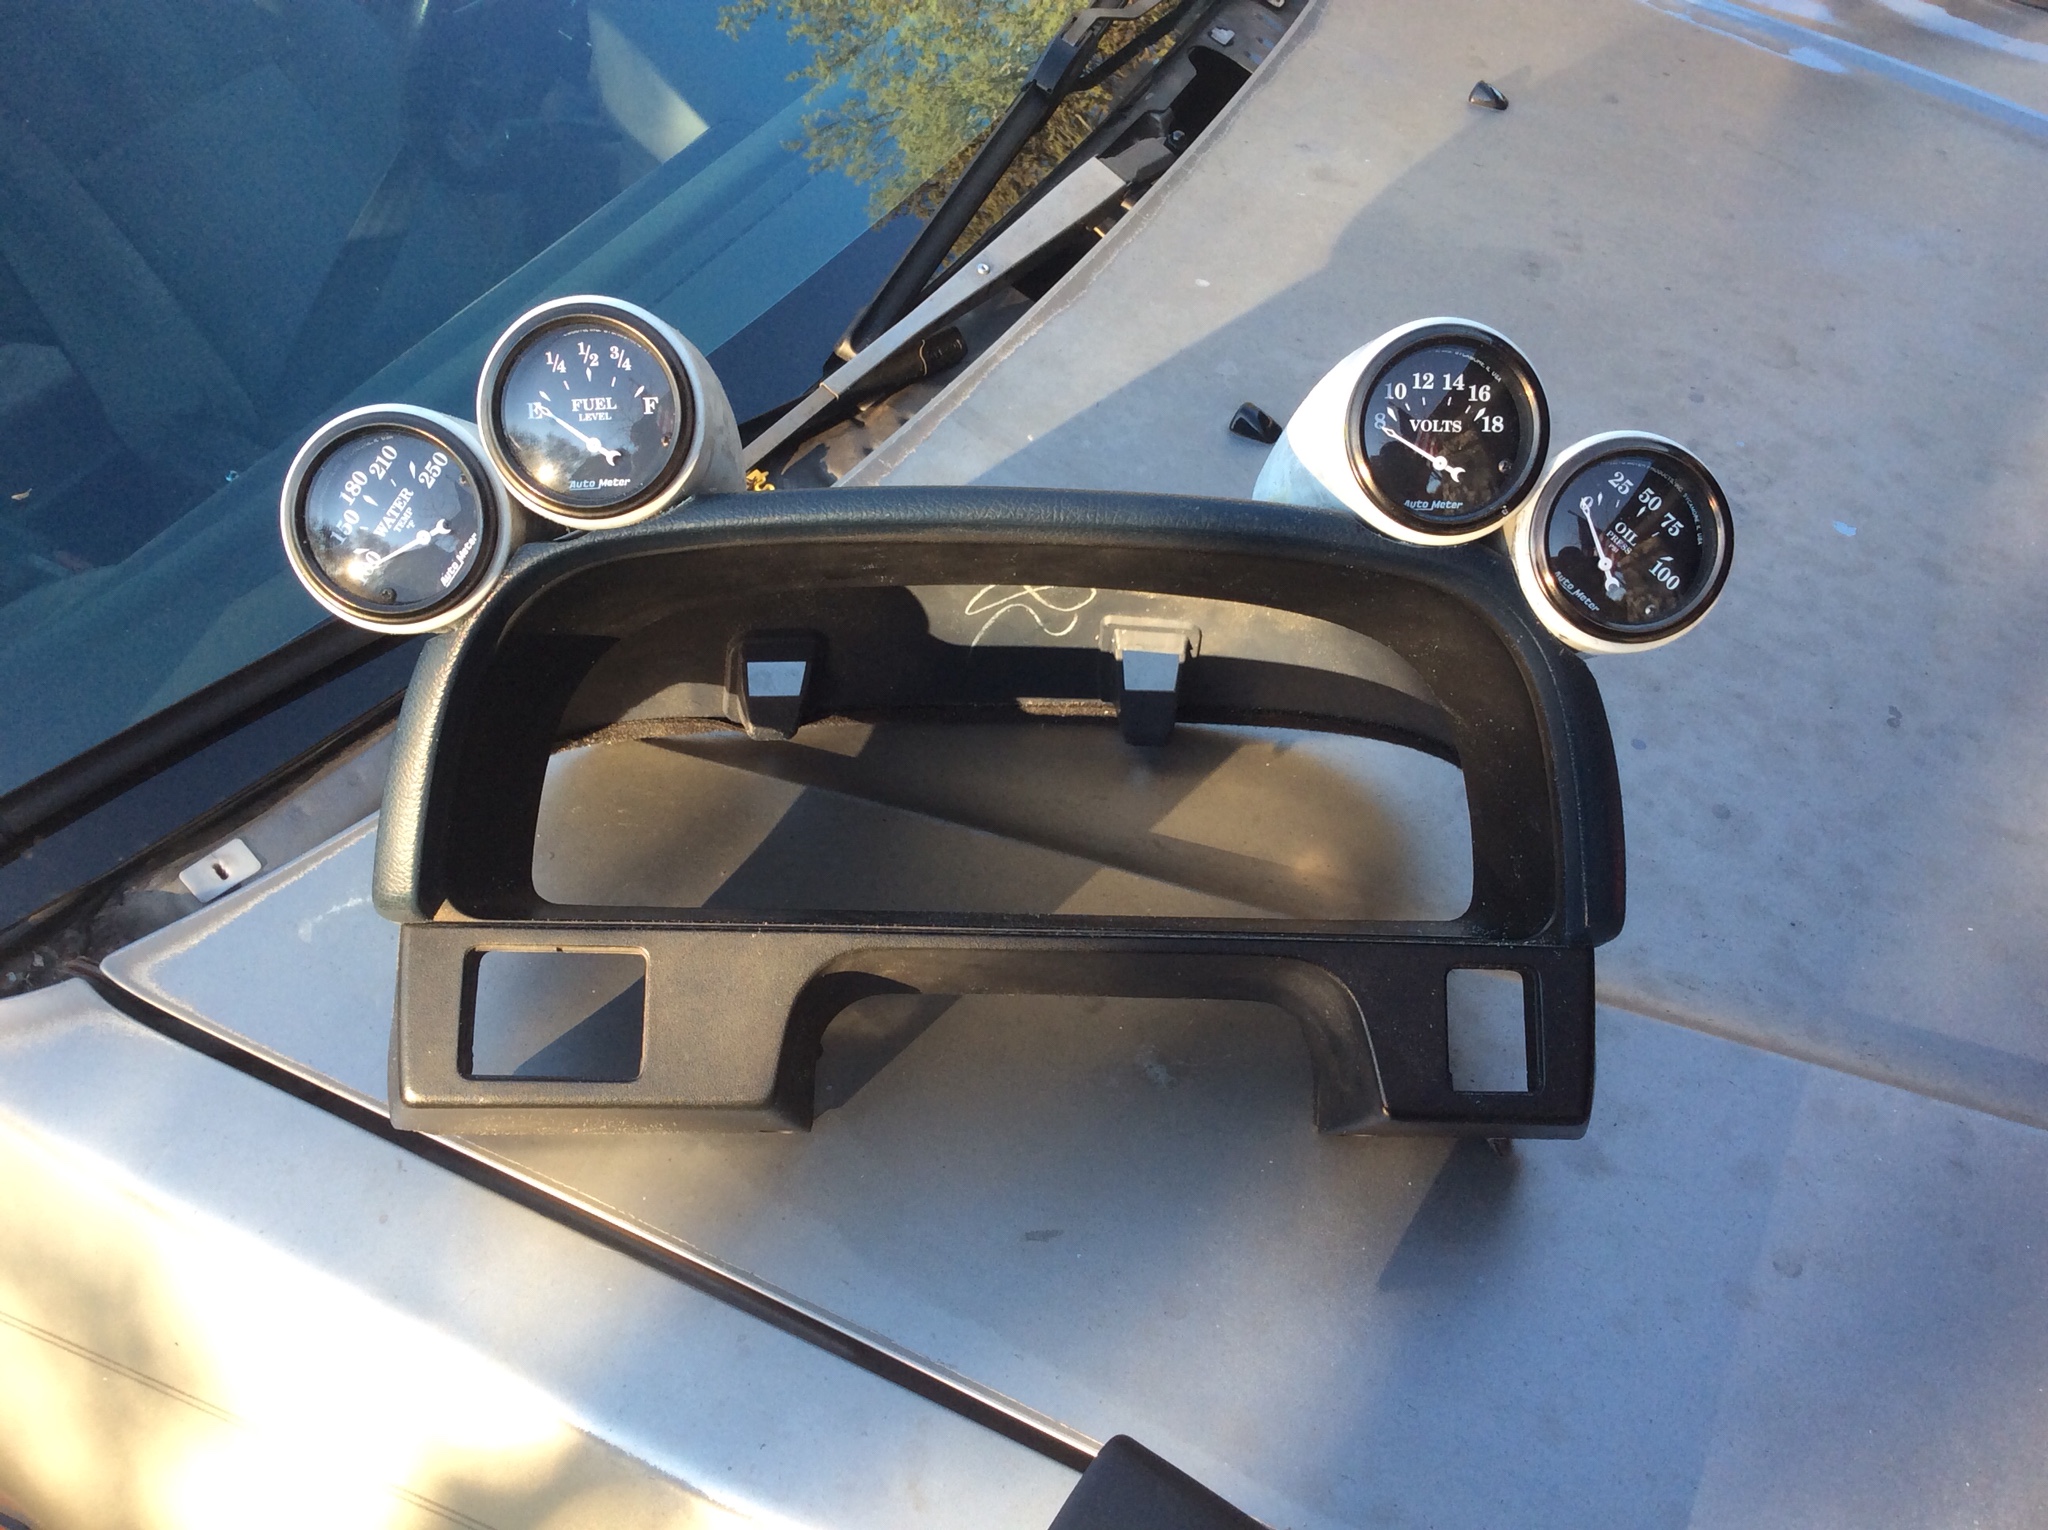
So I wanted to do some gauge pods, and I'm not a huge fan of the A pillar pod look. Nor was I looking for pods to replace my dash vents or pods on the dashboard itself. In stumbling around on the nets I found some pics of people who did some integrated with their gauge bezel. That seemed like a great solution to me so I figured I would have at it.
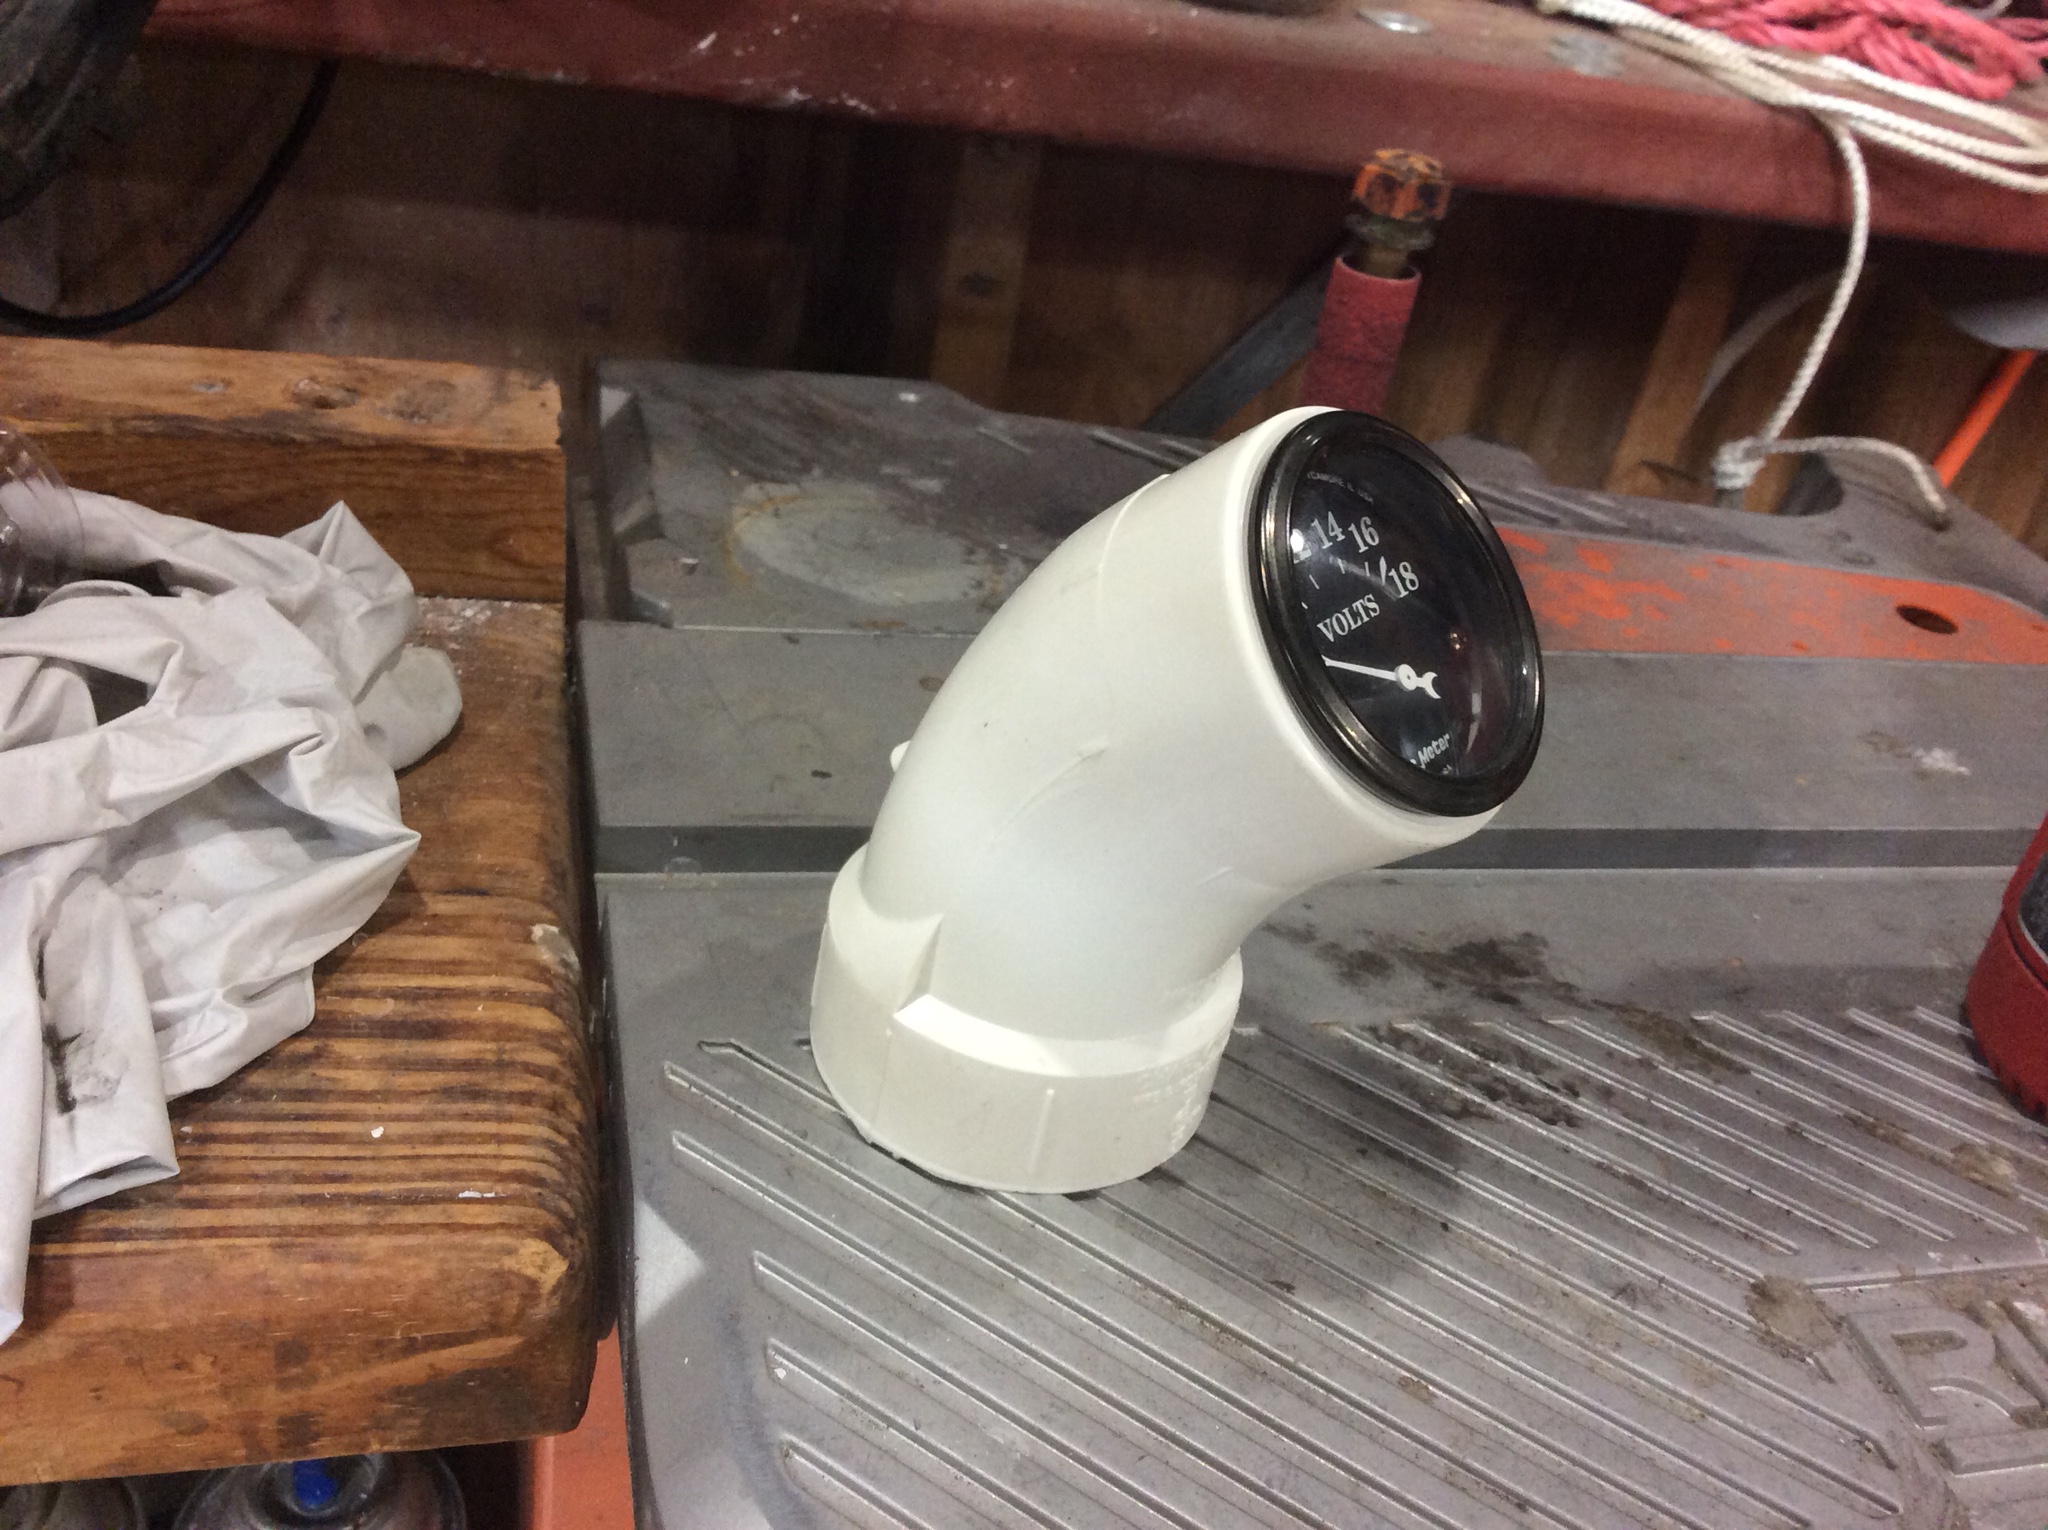
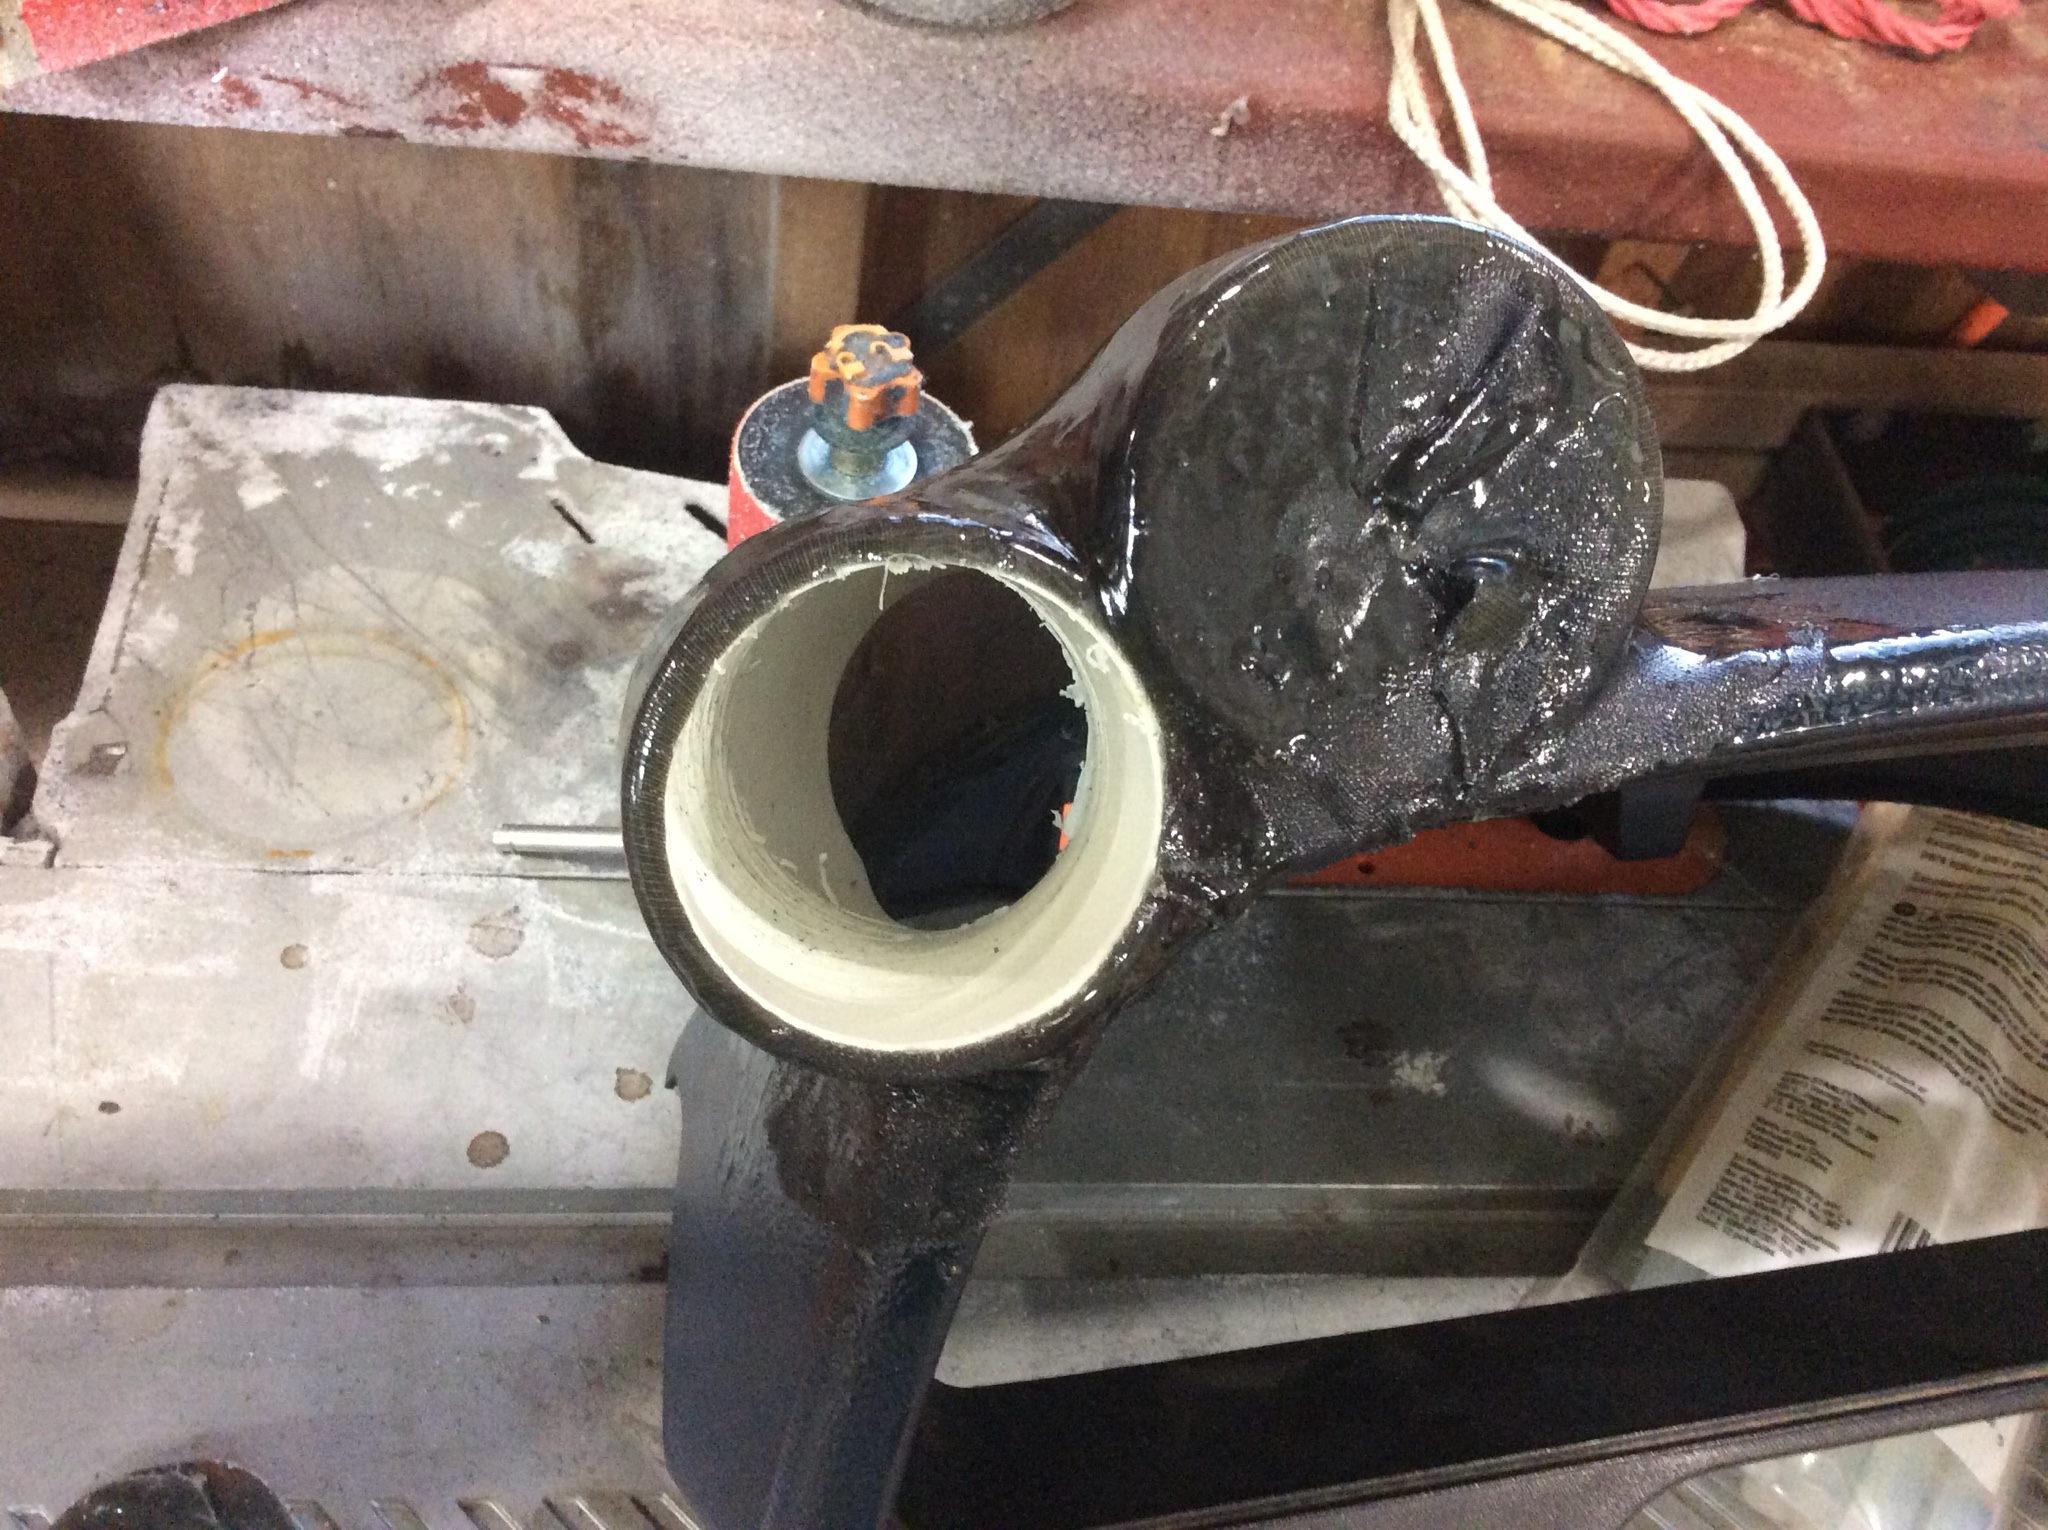
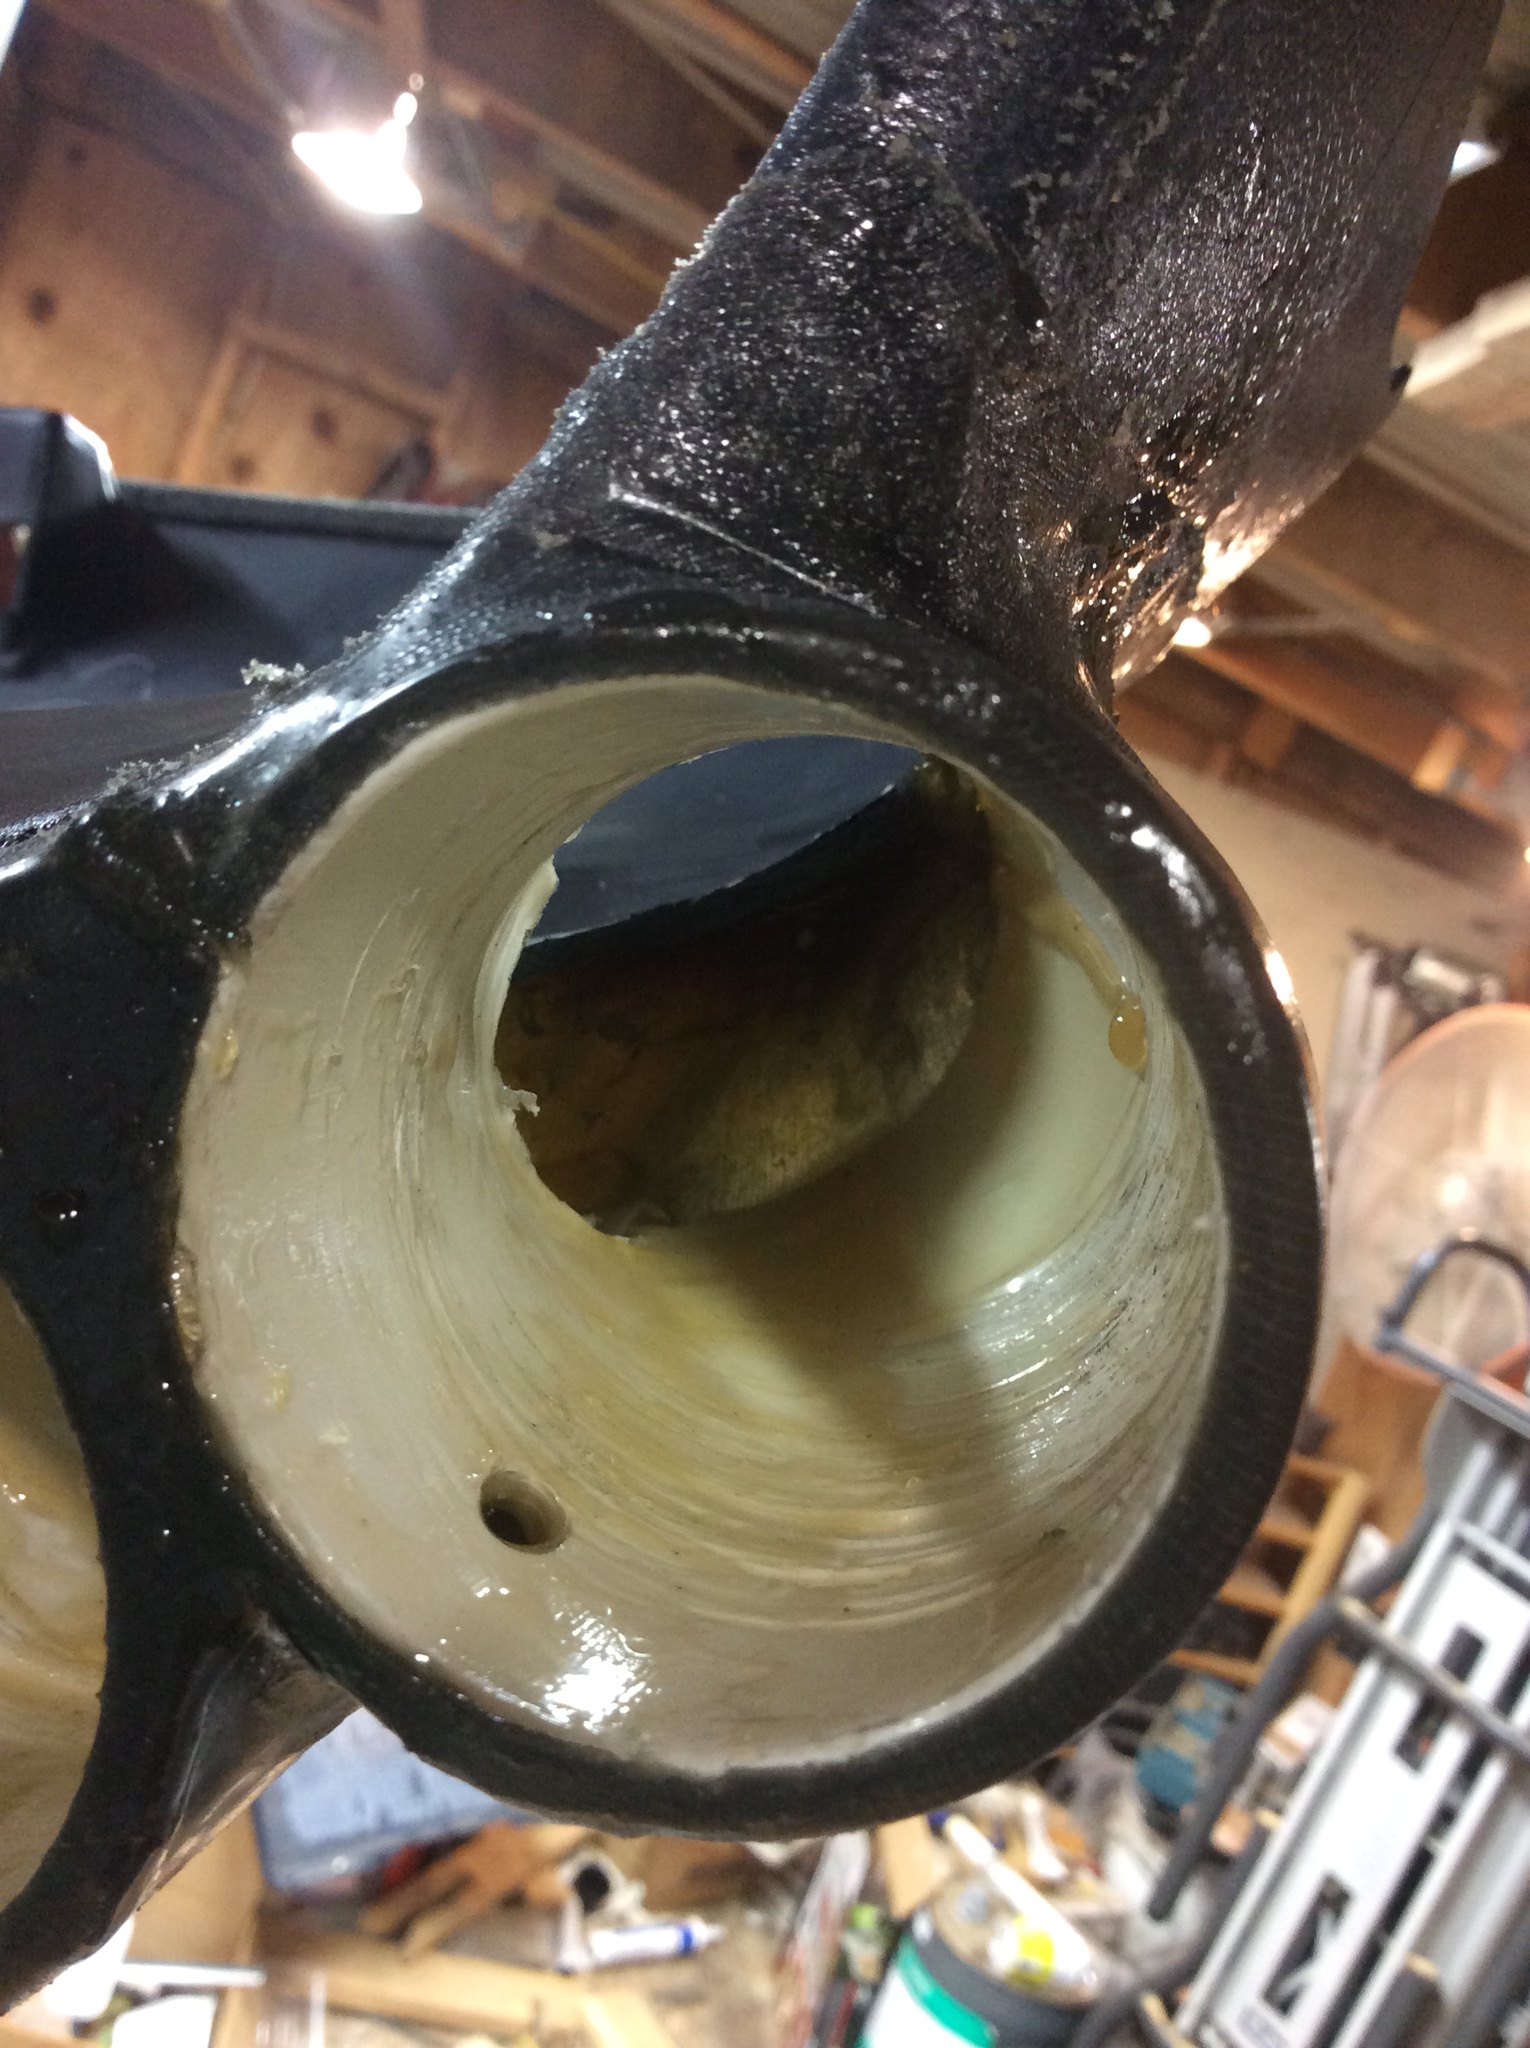
The picture above shows the general concept of what we'll be working with. Anyone who has done diy with gauges knows how close the gauges will snug up into some 2" pvc. If you are having to work with a curve at all the 45 degree street elbow is a great start to your project. These can be had at most any place that supplies plumbing fittings and they are cheap.
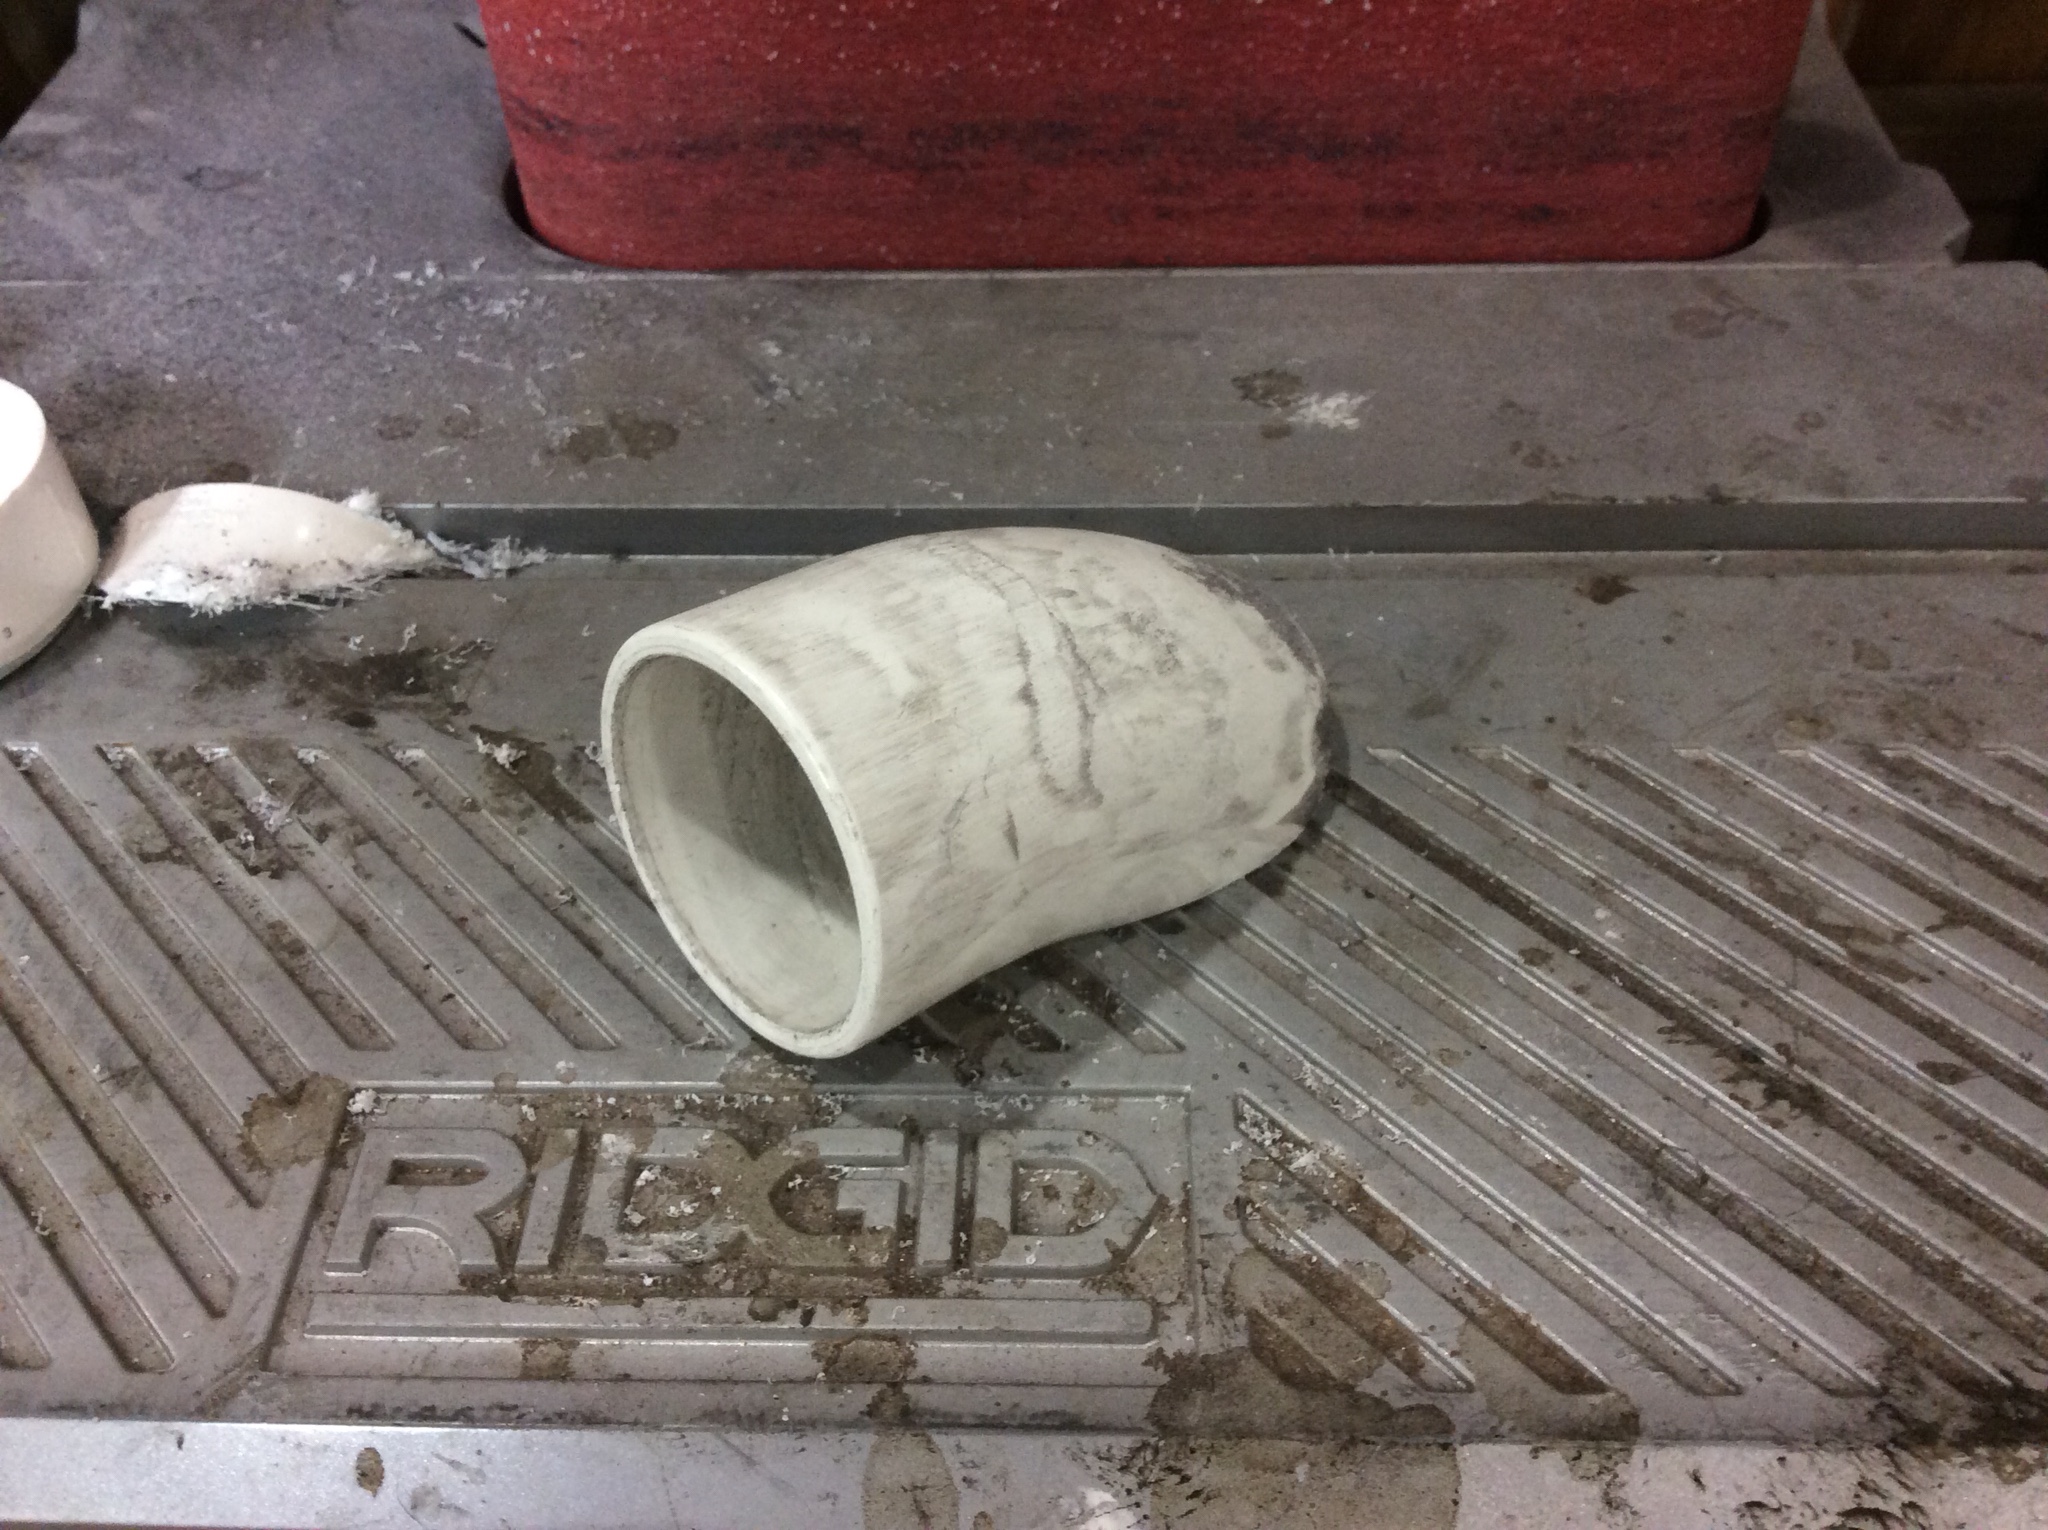
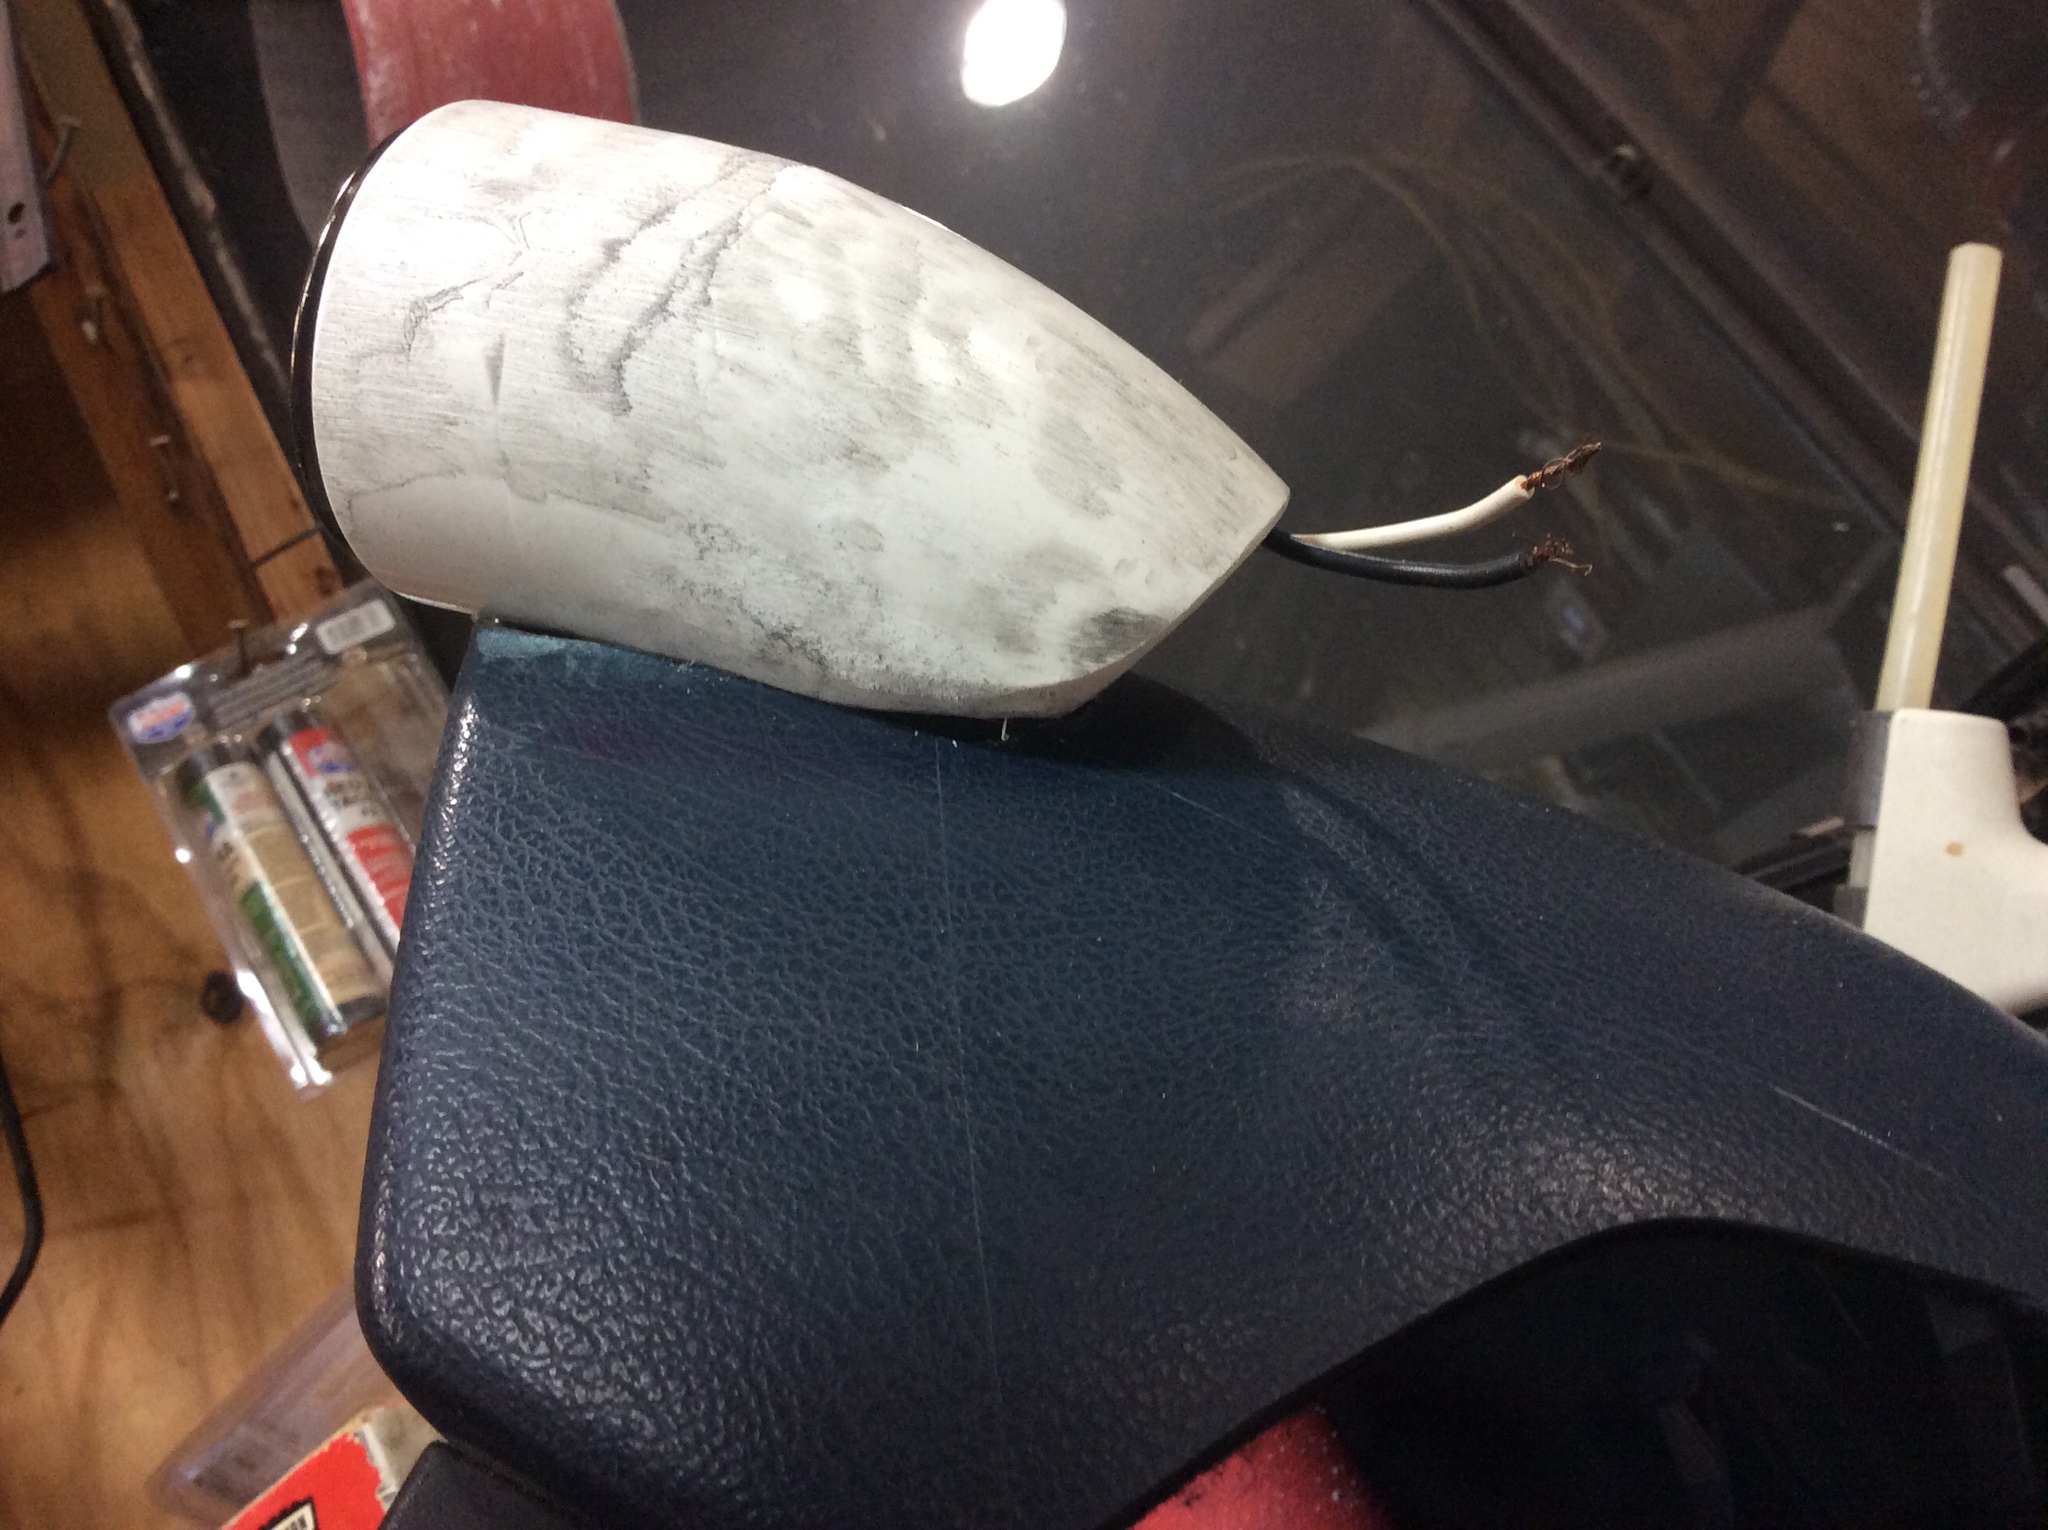
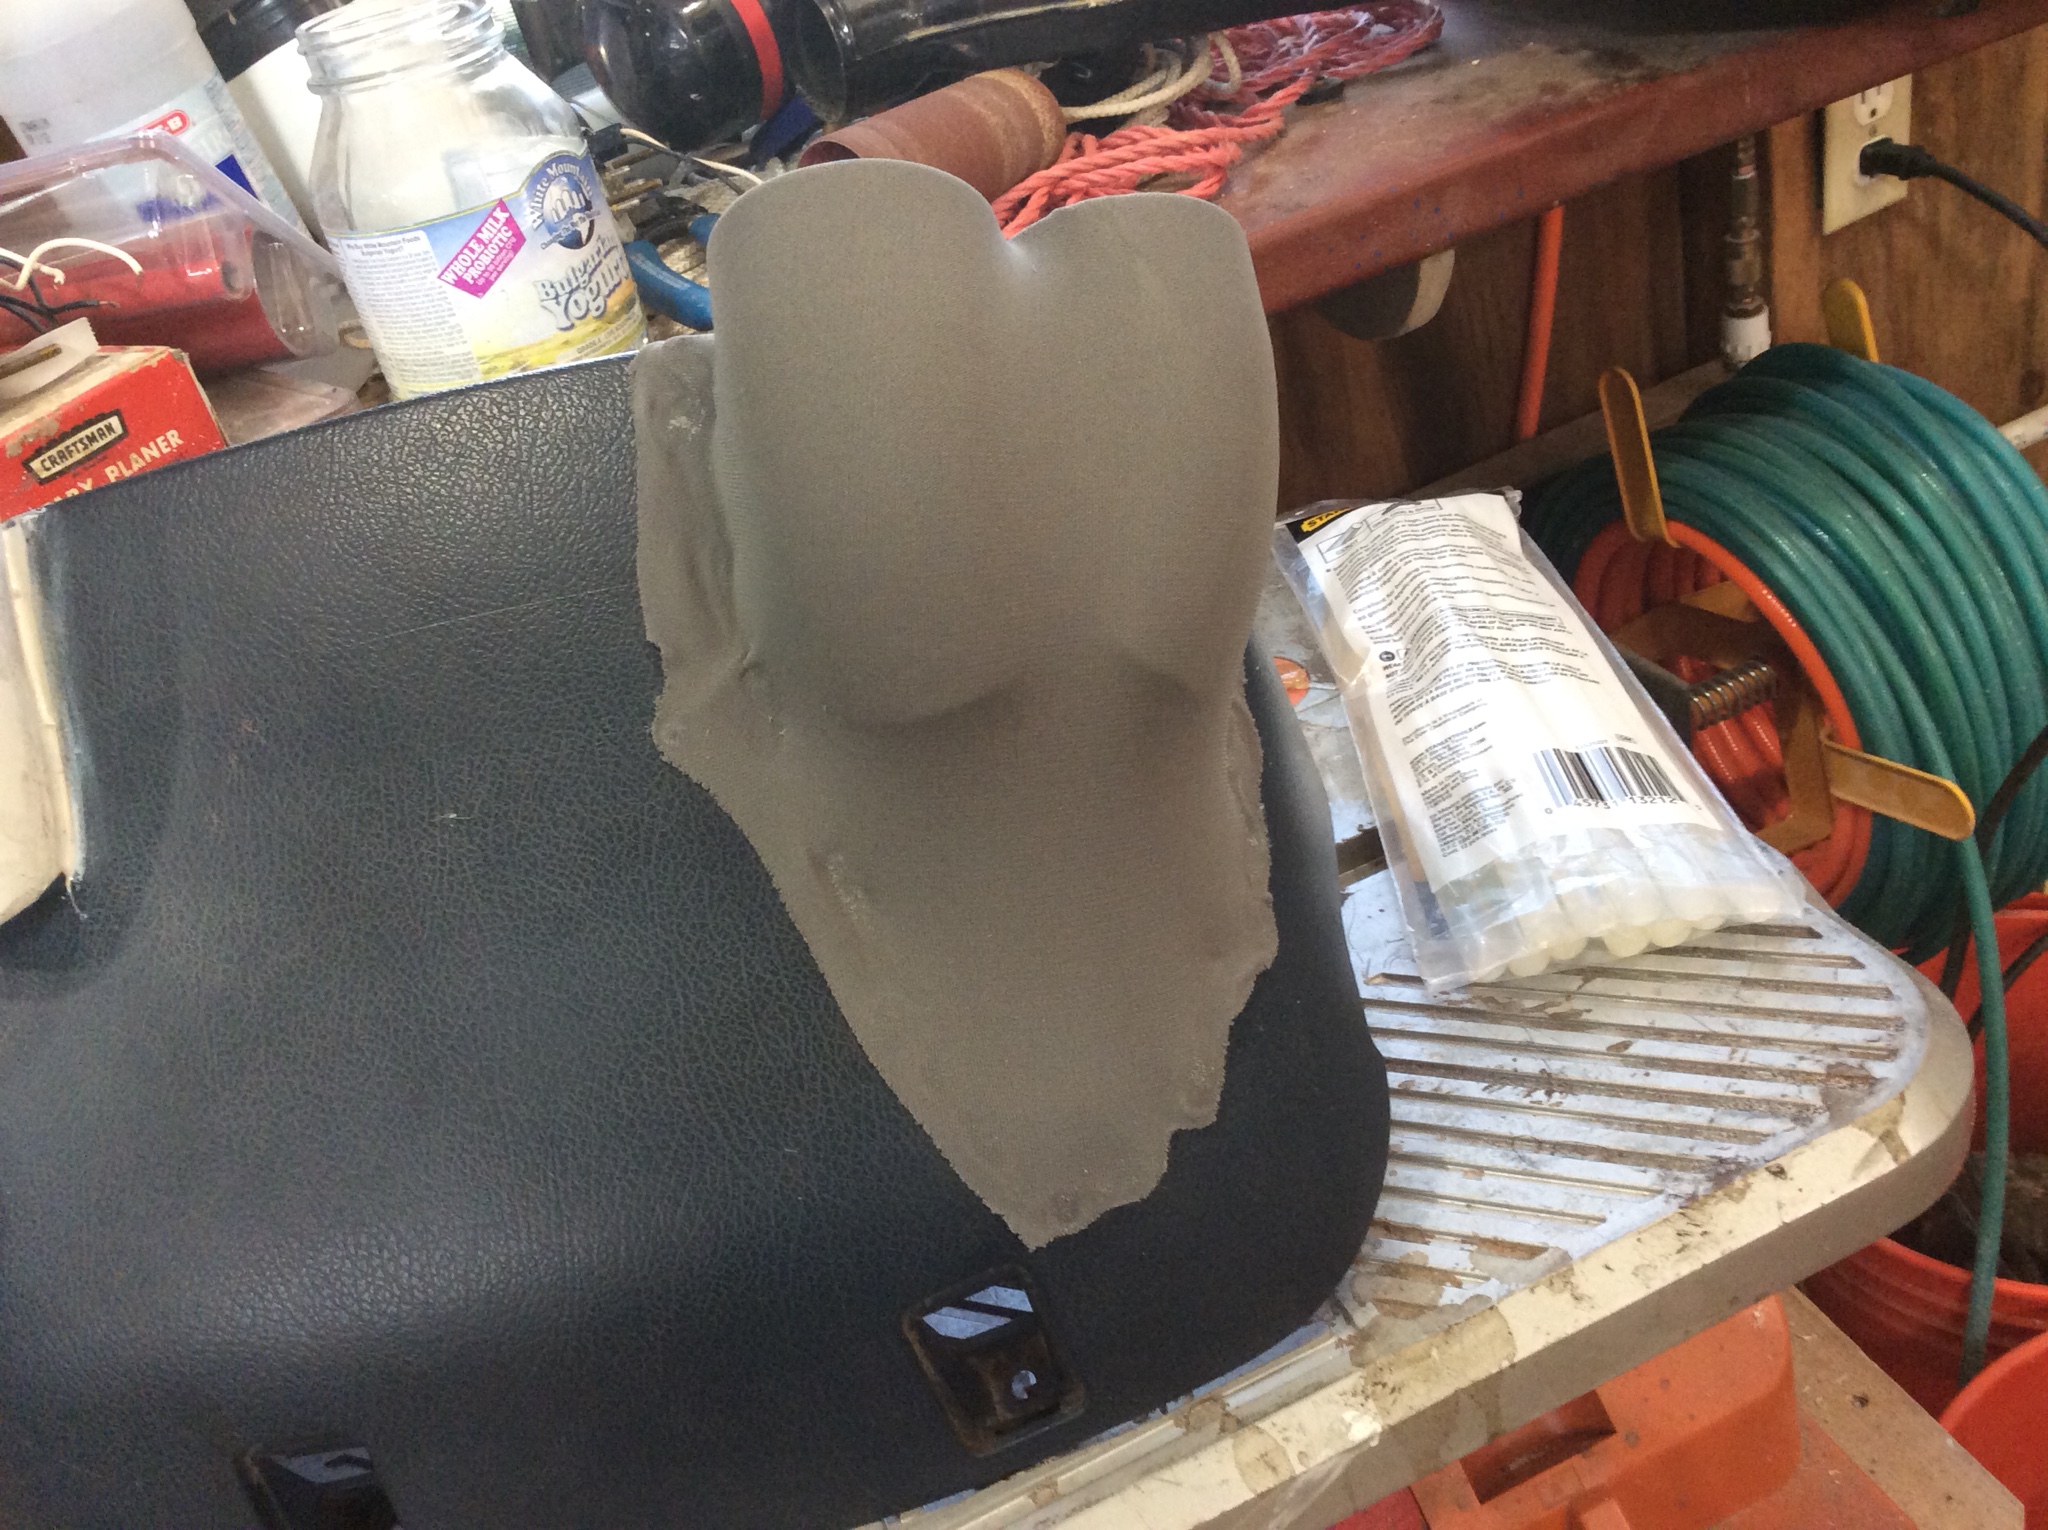
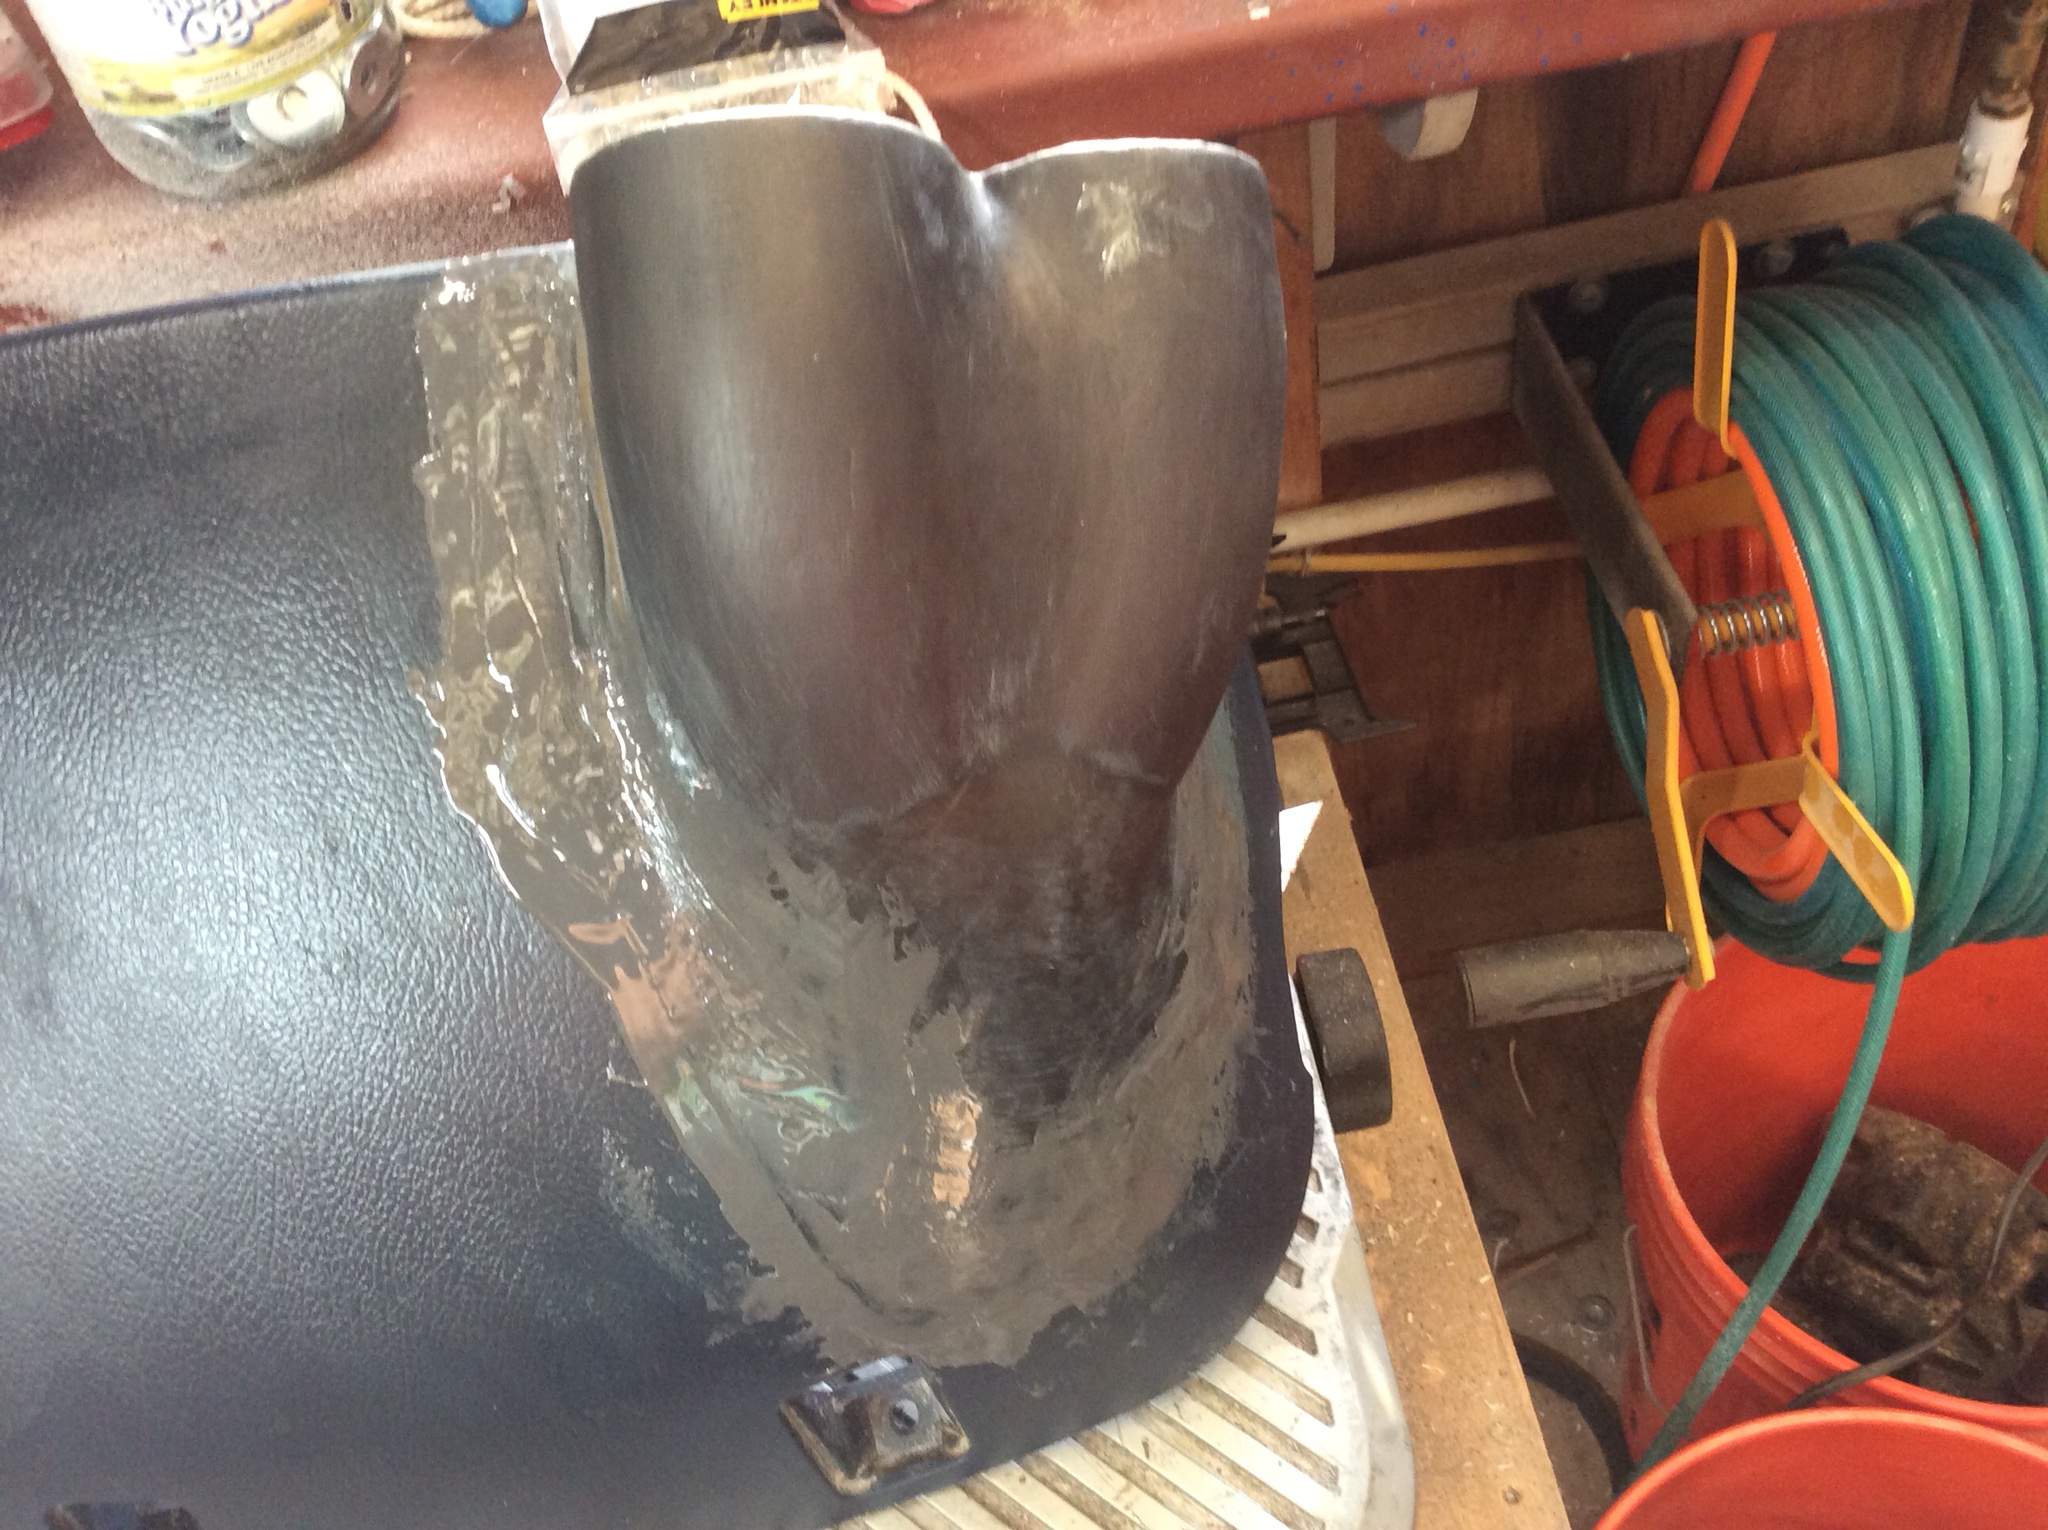
I start with cutting away the majority of the scrap. I had a bandsaw to make quick work of it, you can also use a hand saw or pvc saw, it's fairly easy stuff to cut.

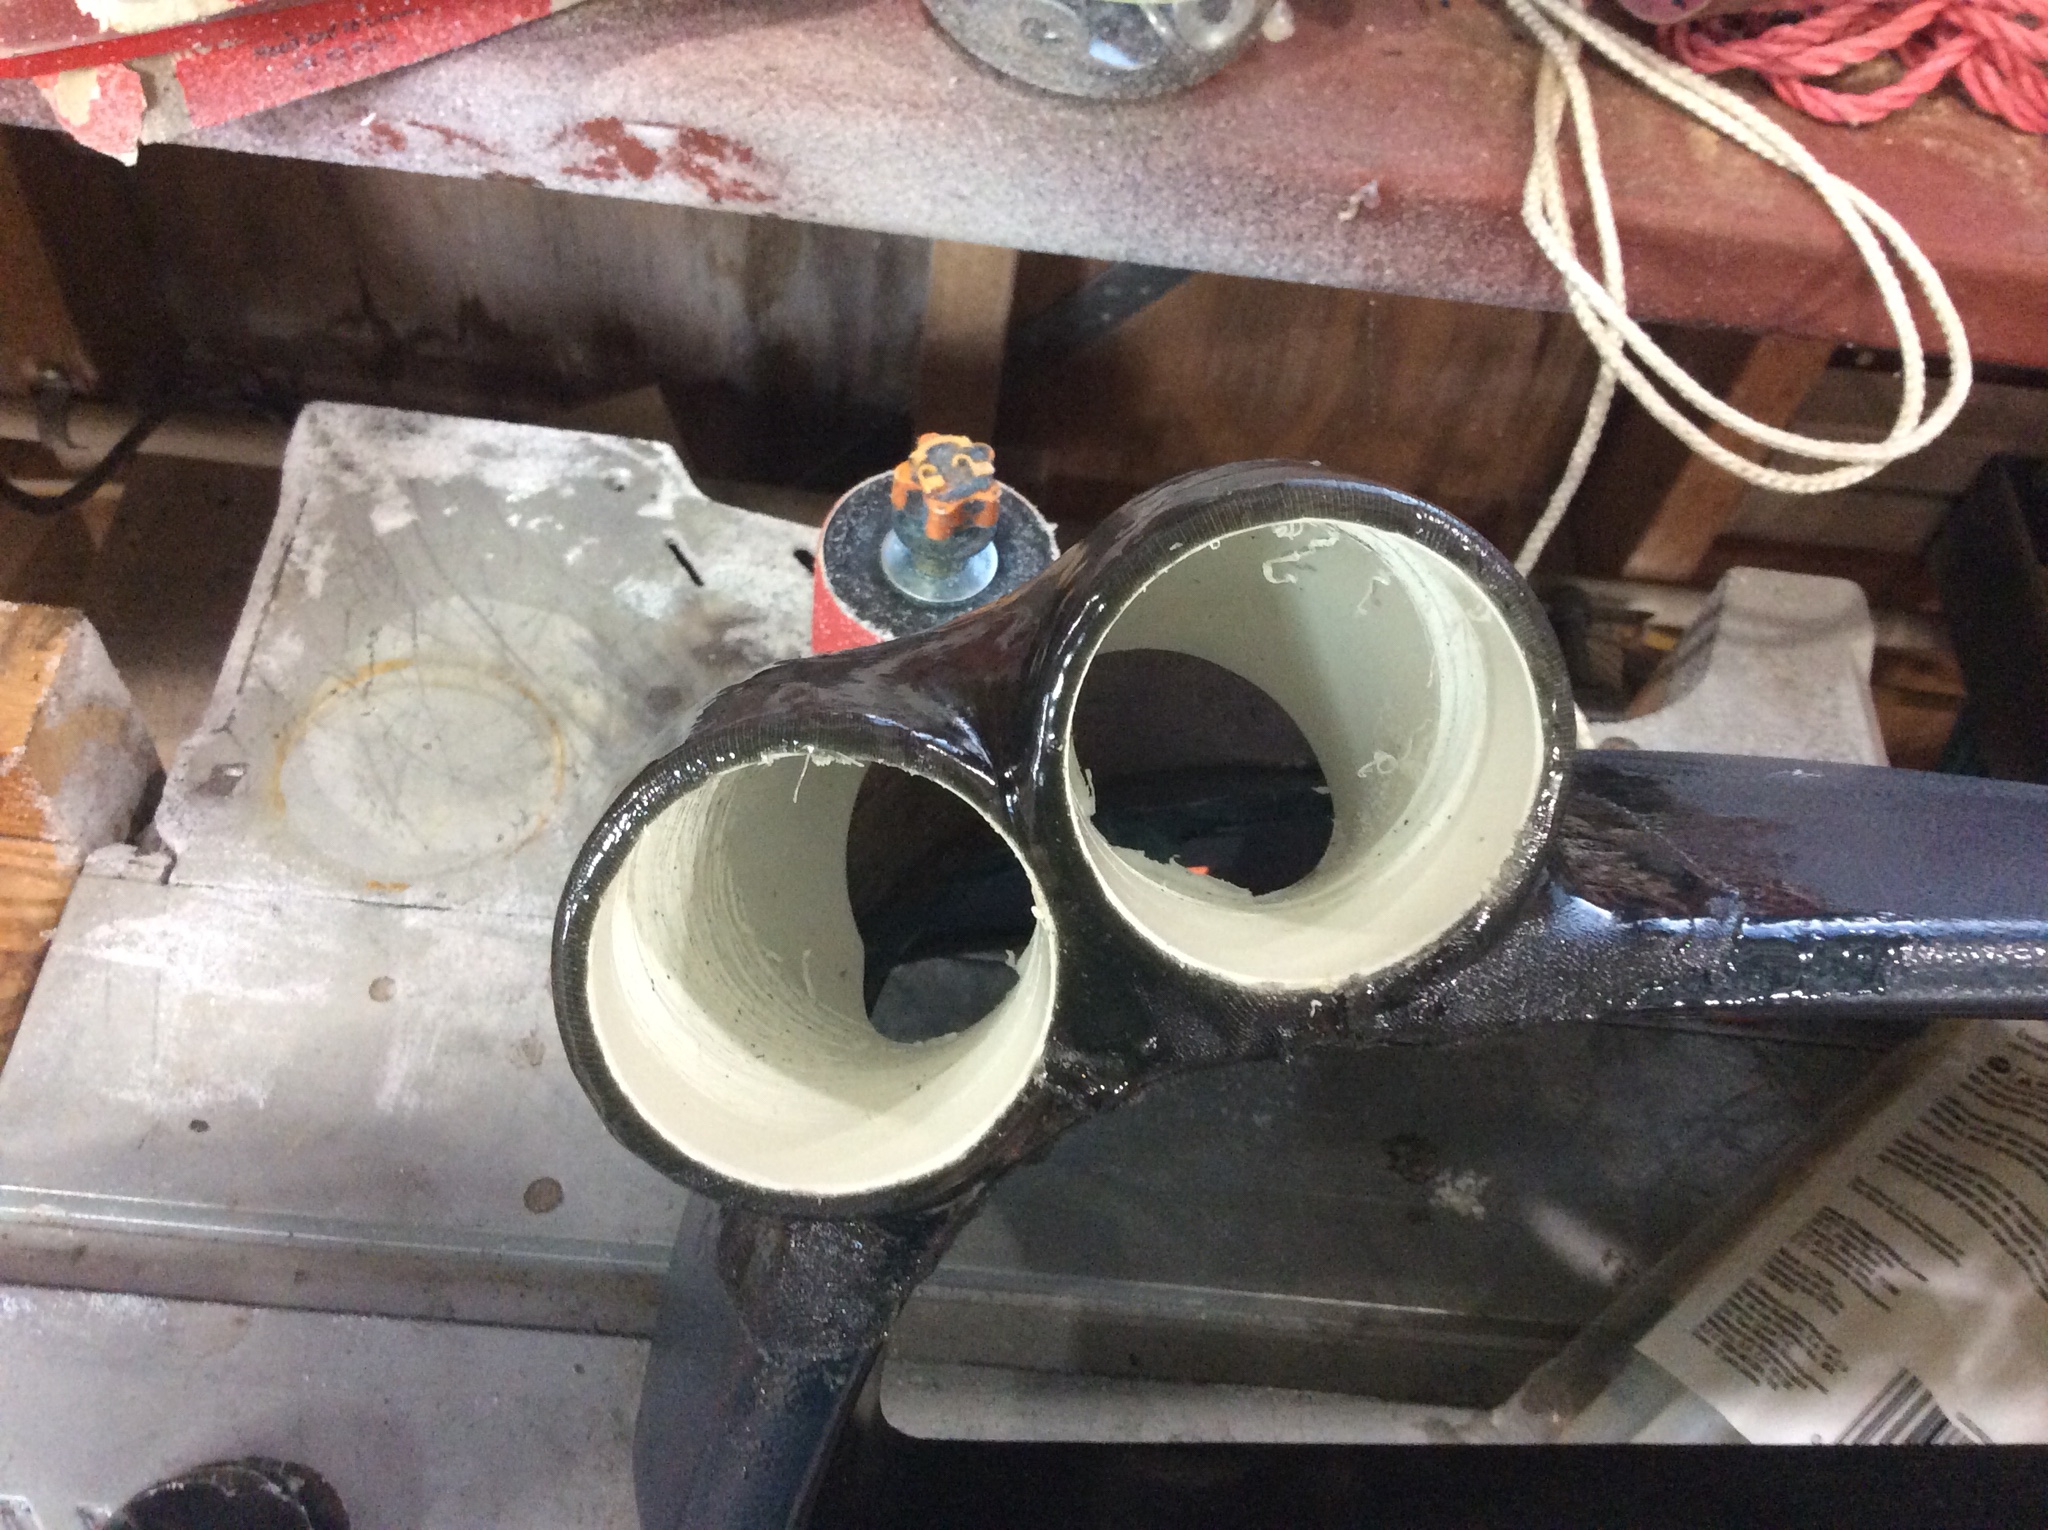
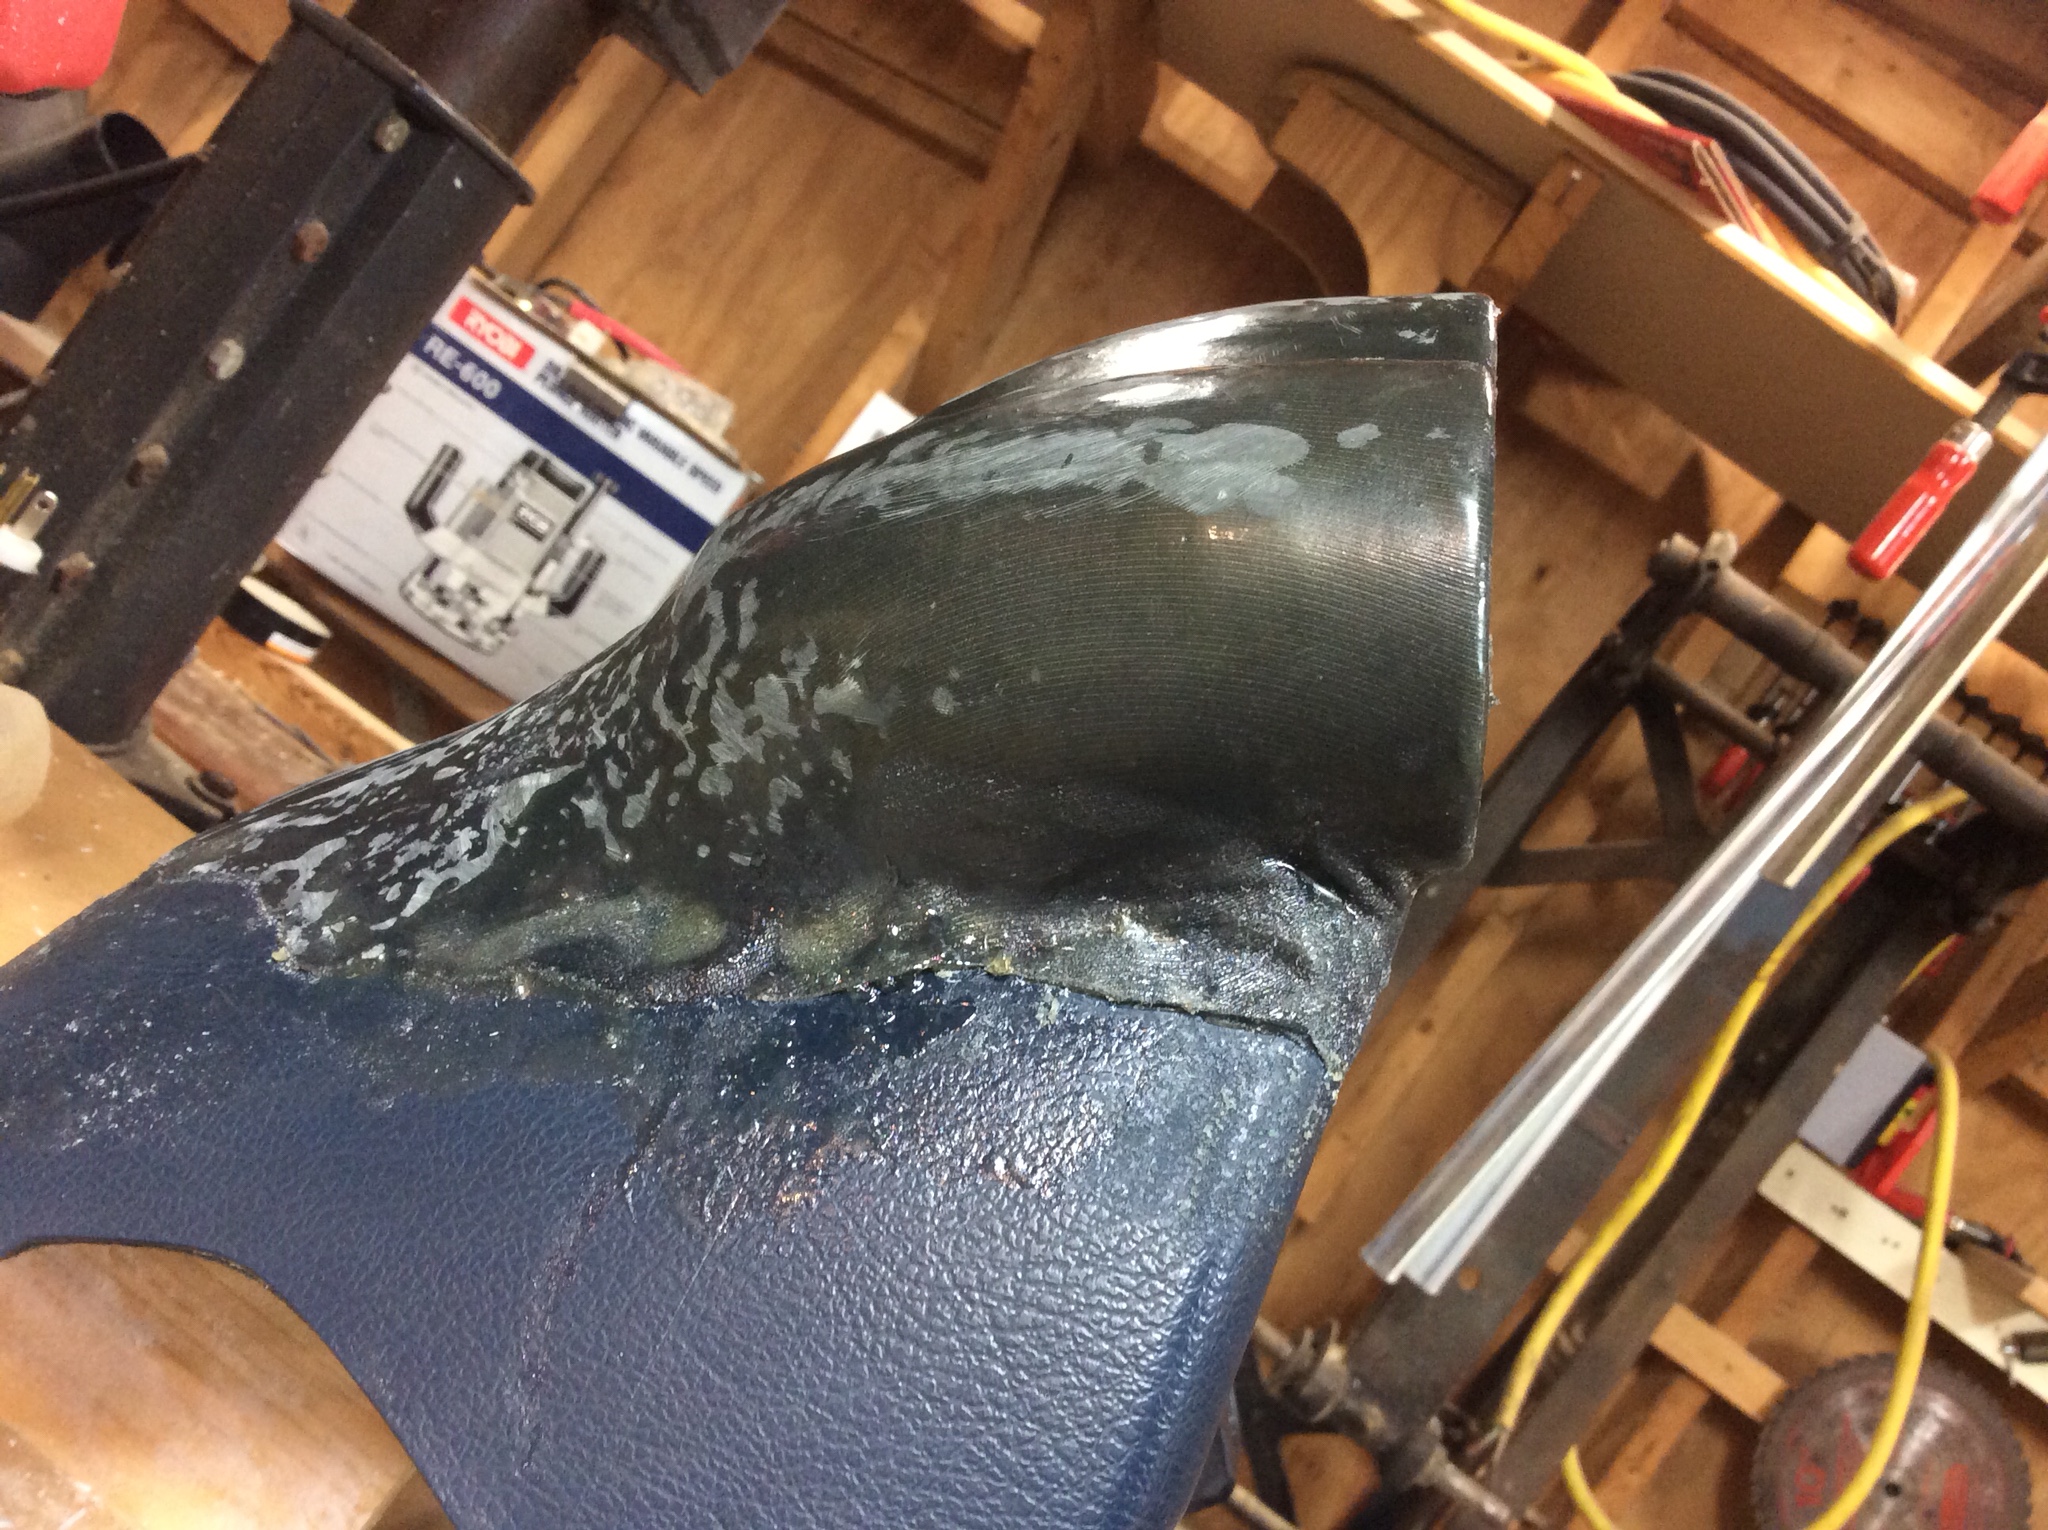
With that done, I needed to give it a little more general shaping.
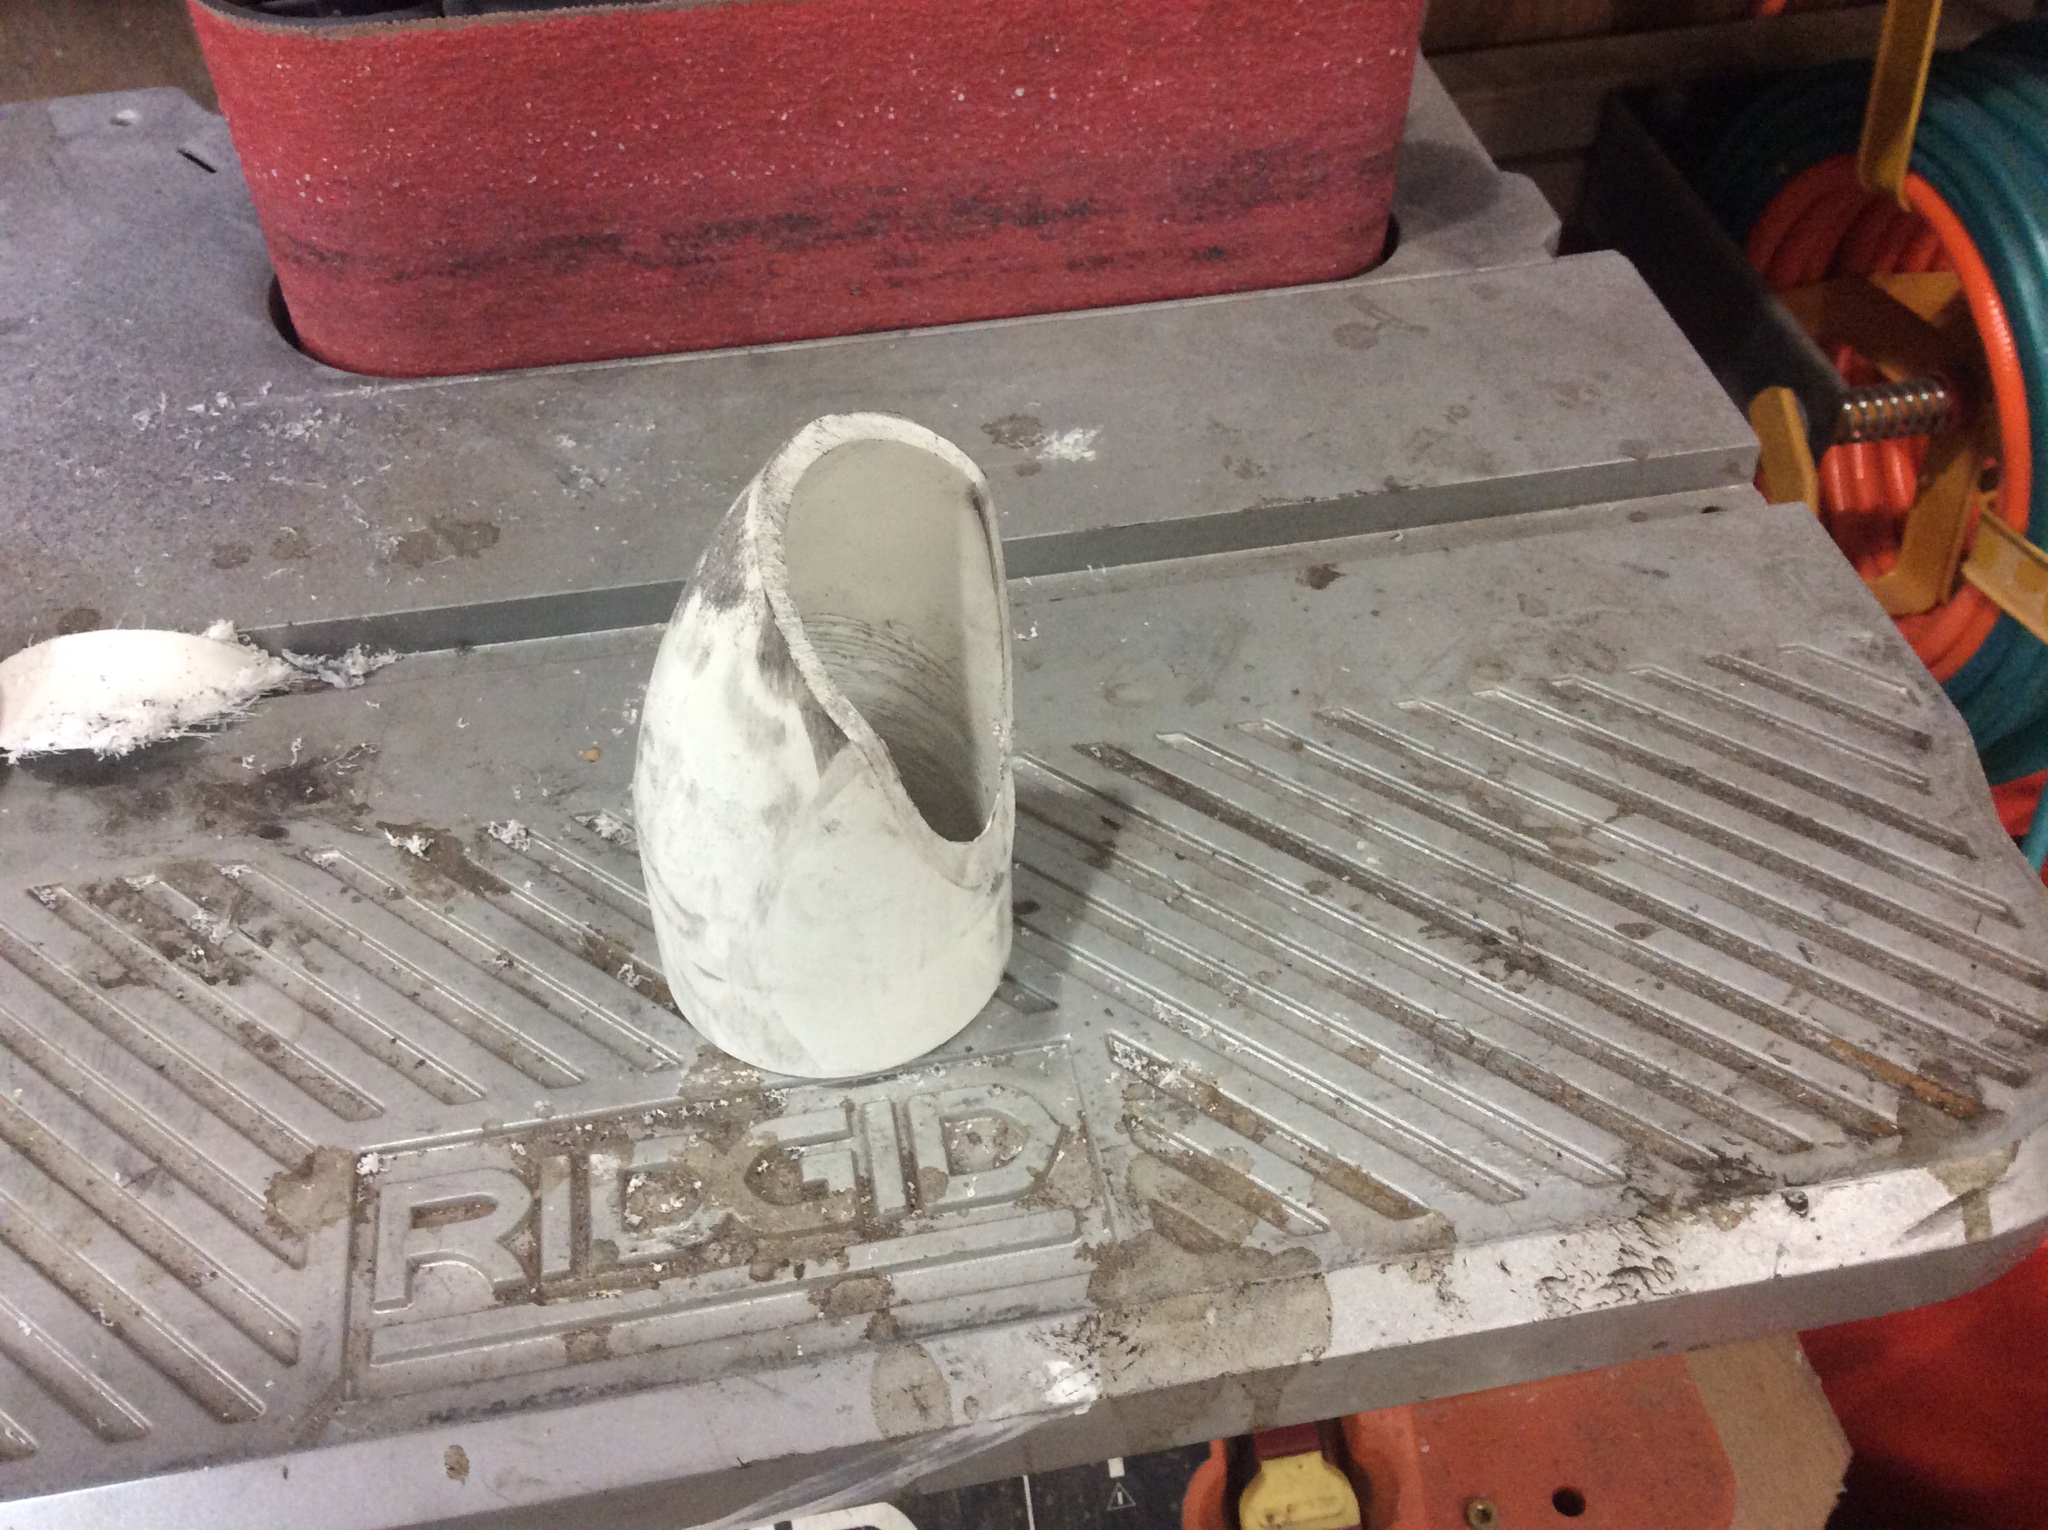
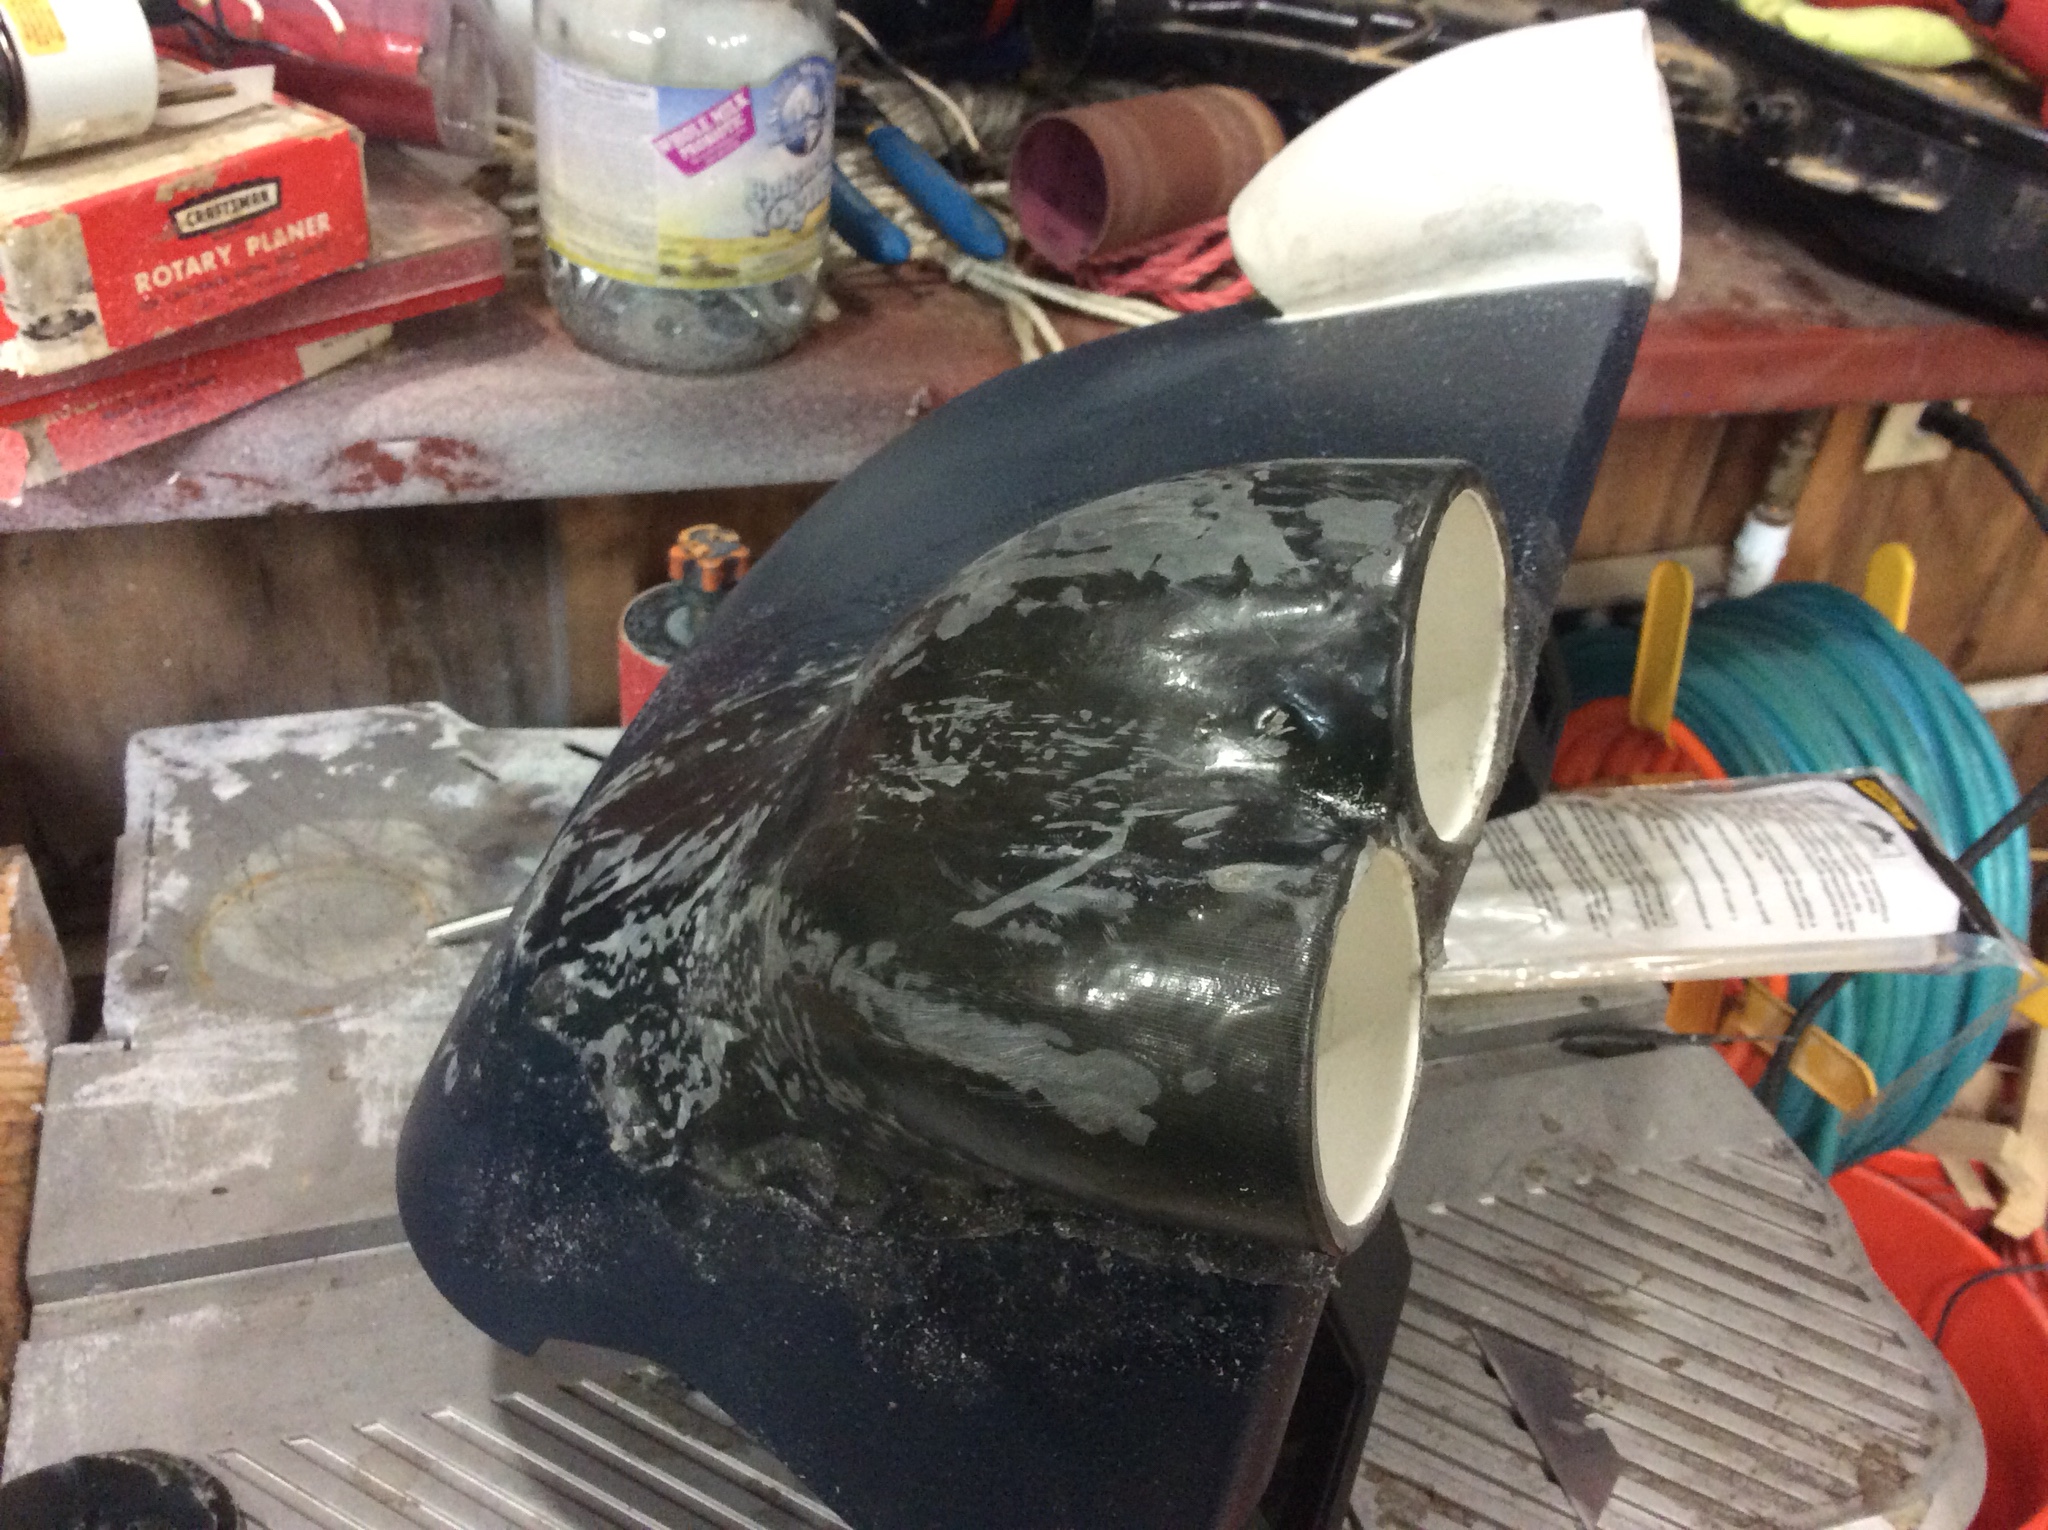
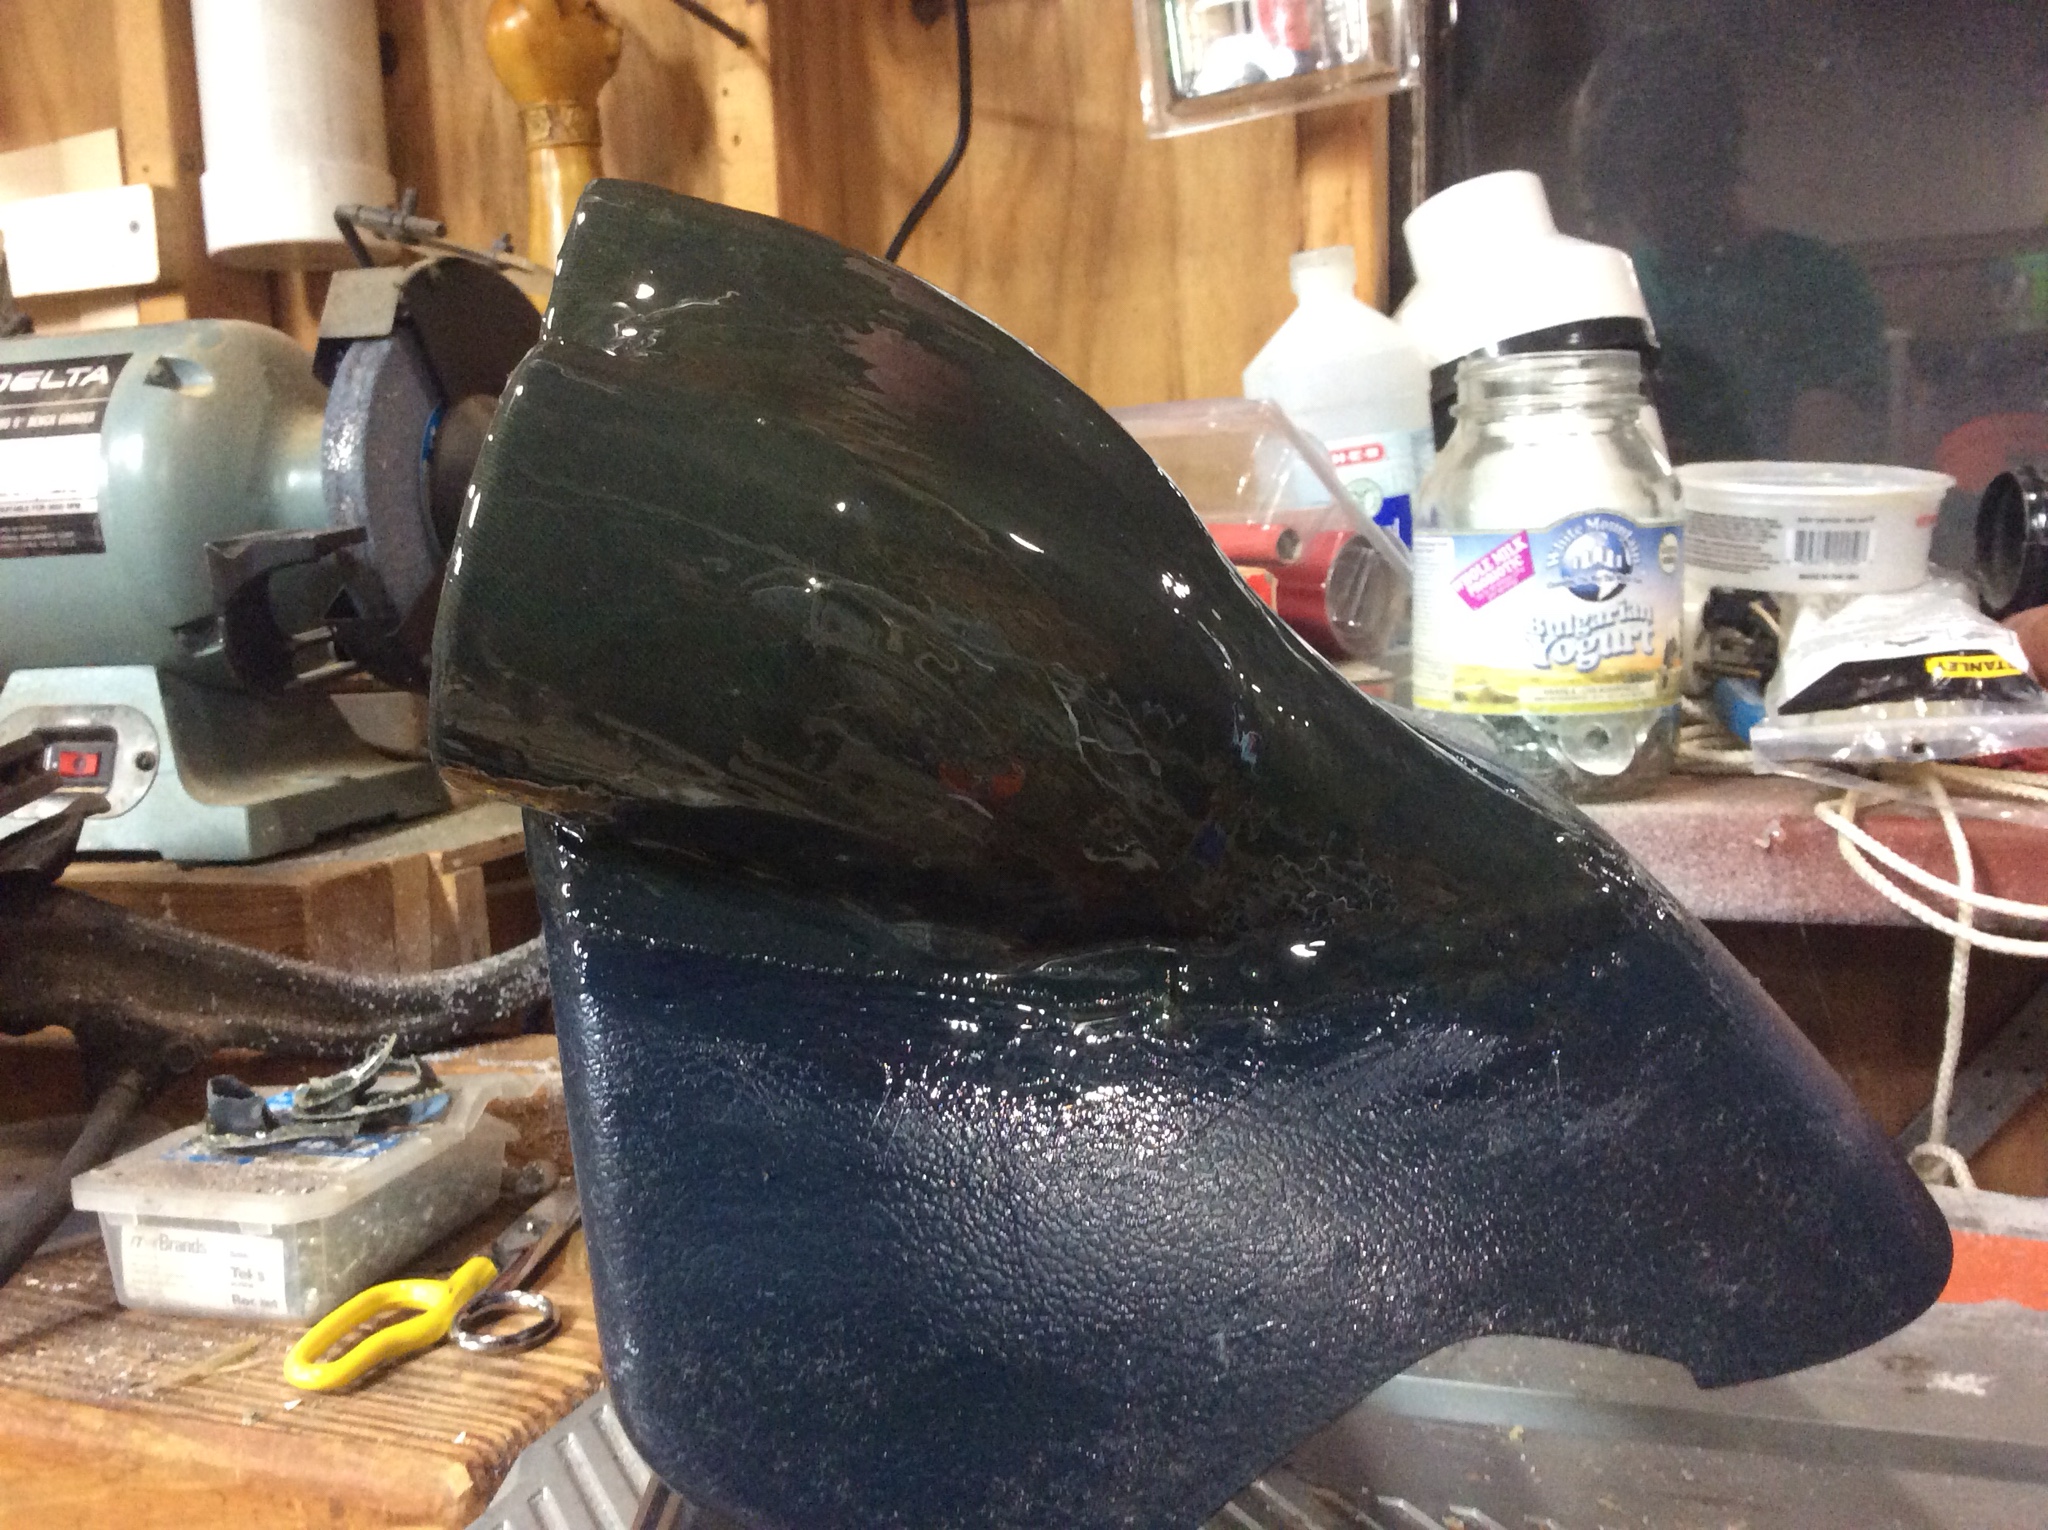
And a shot of what will be the under side of the pod. Even more shaping will need done, so this is still in a rough state.
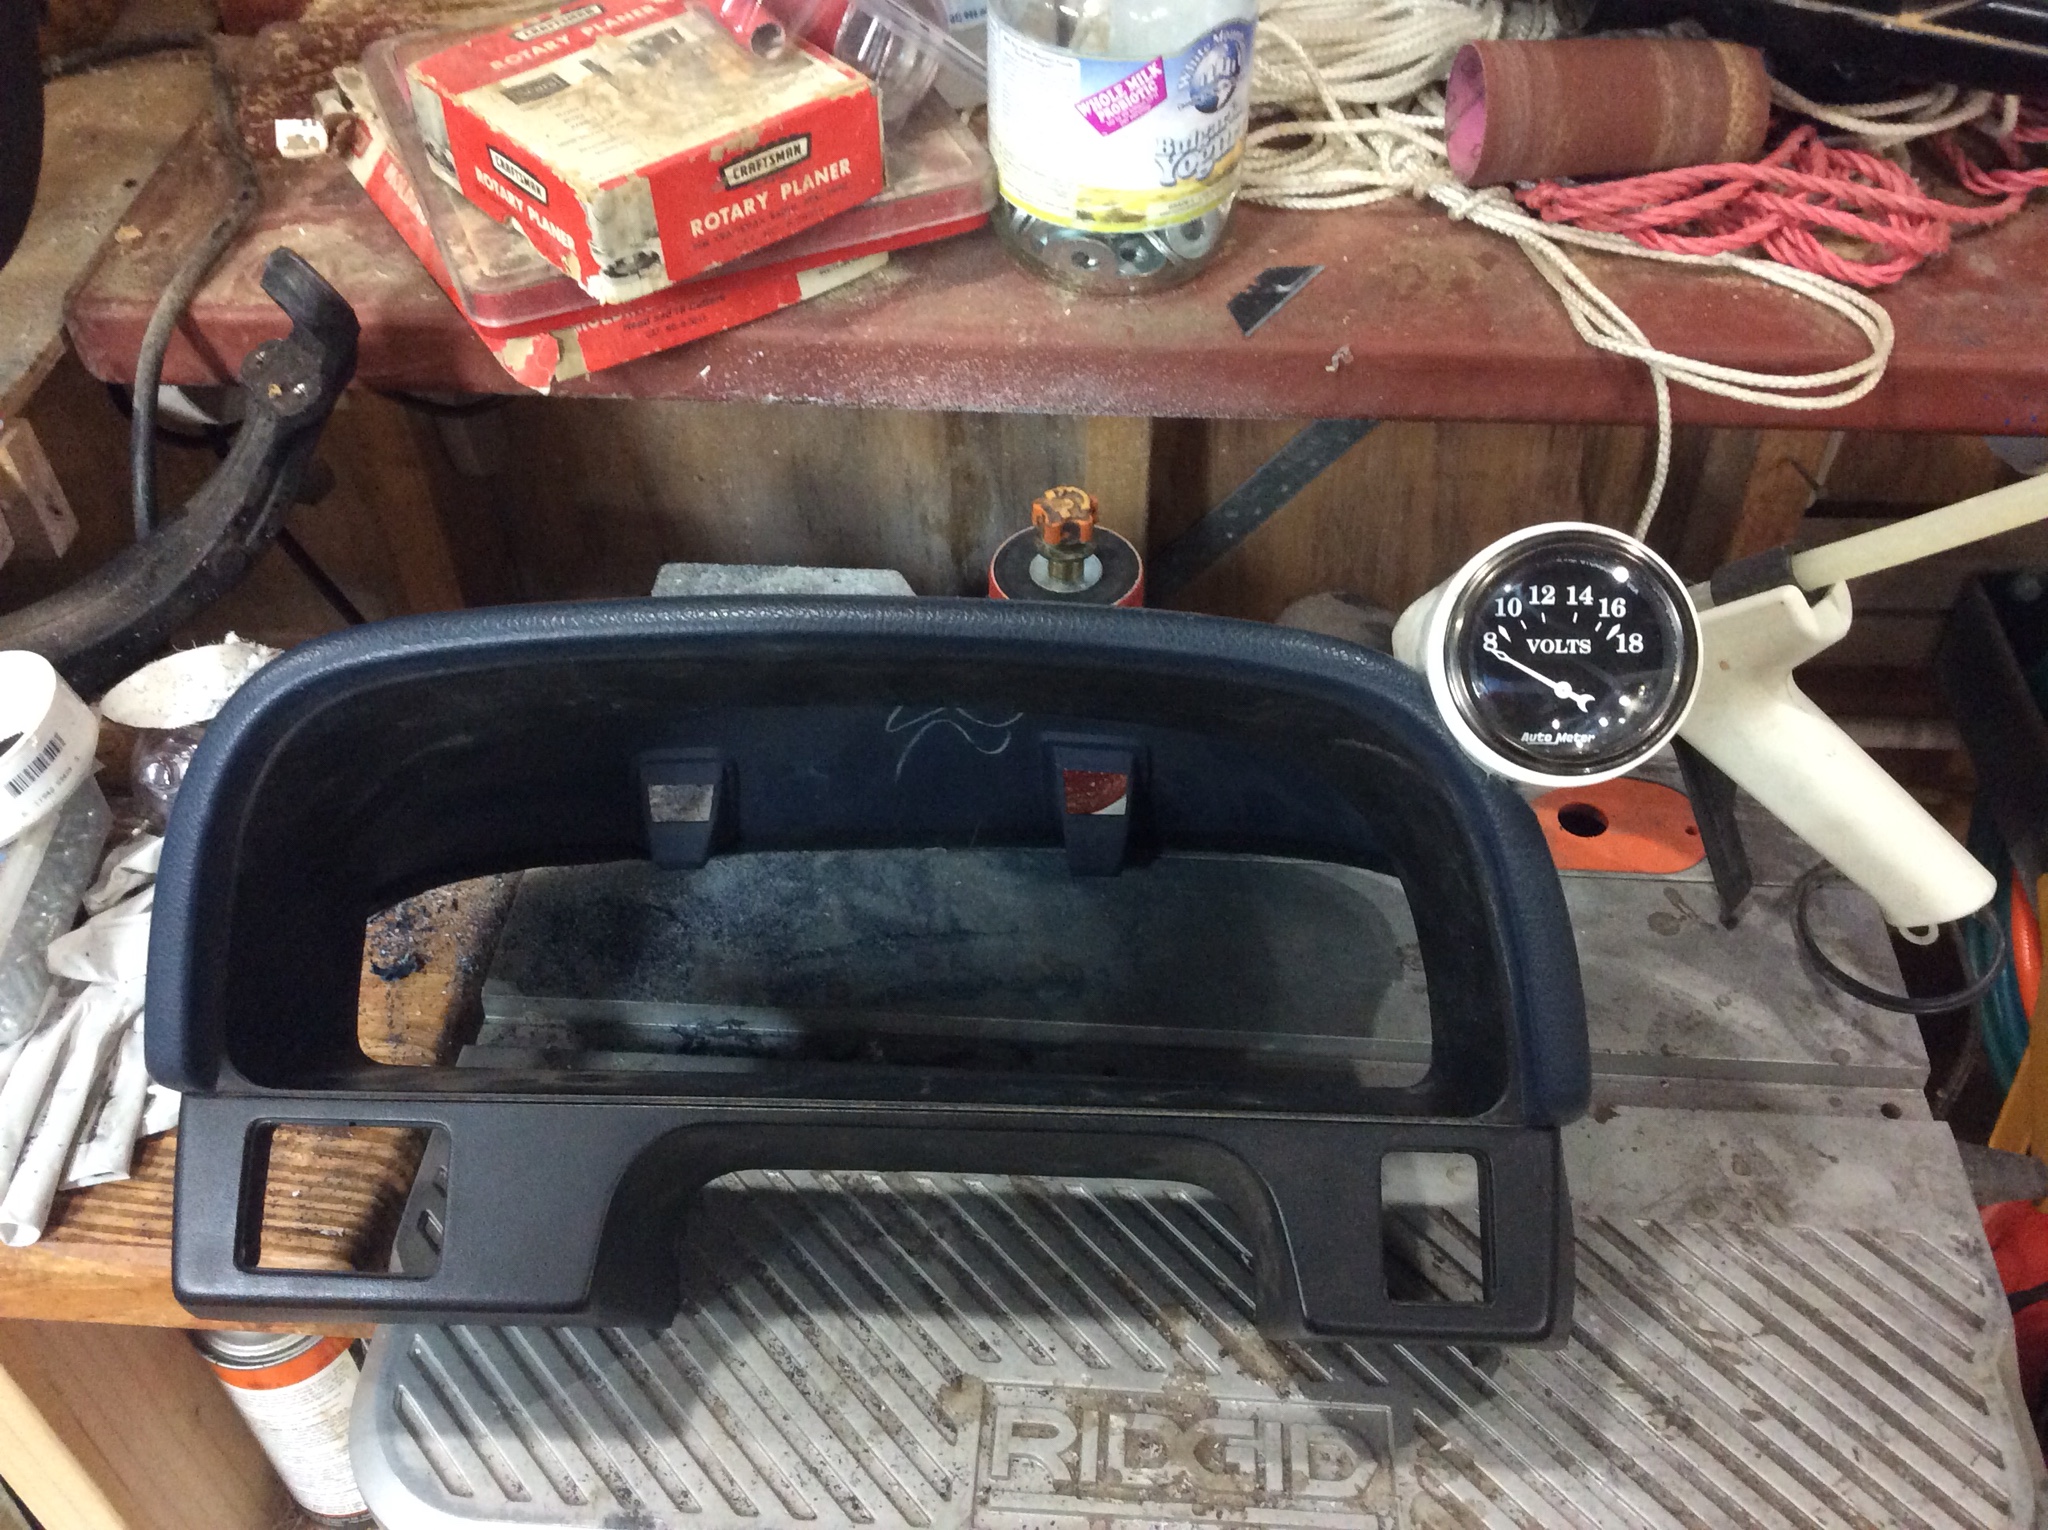
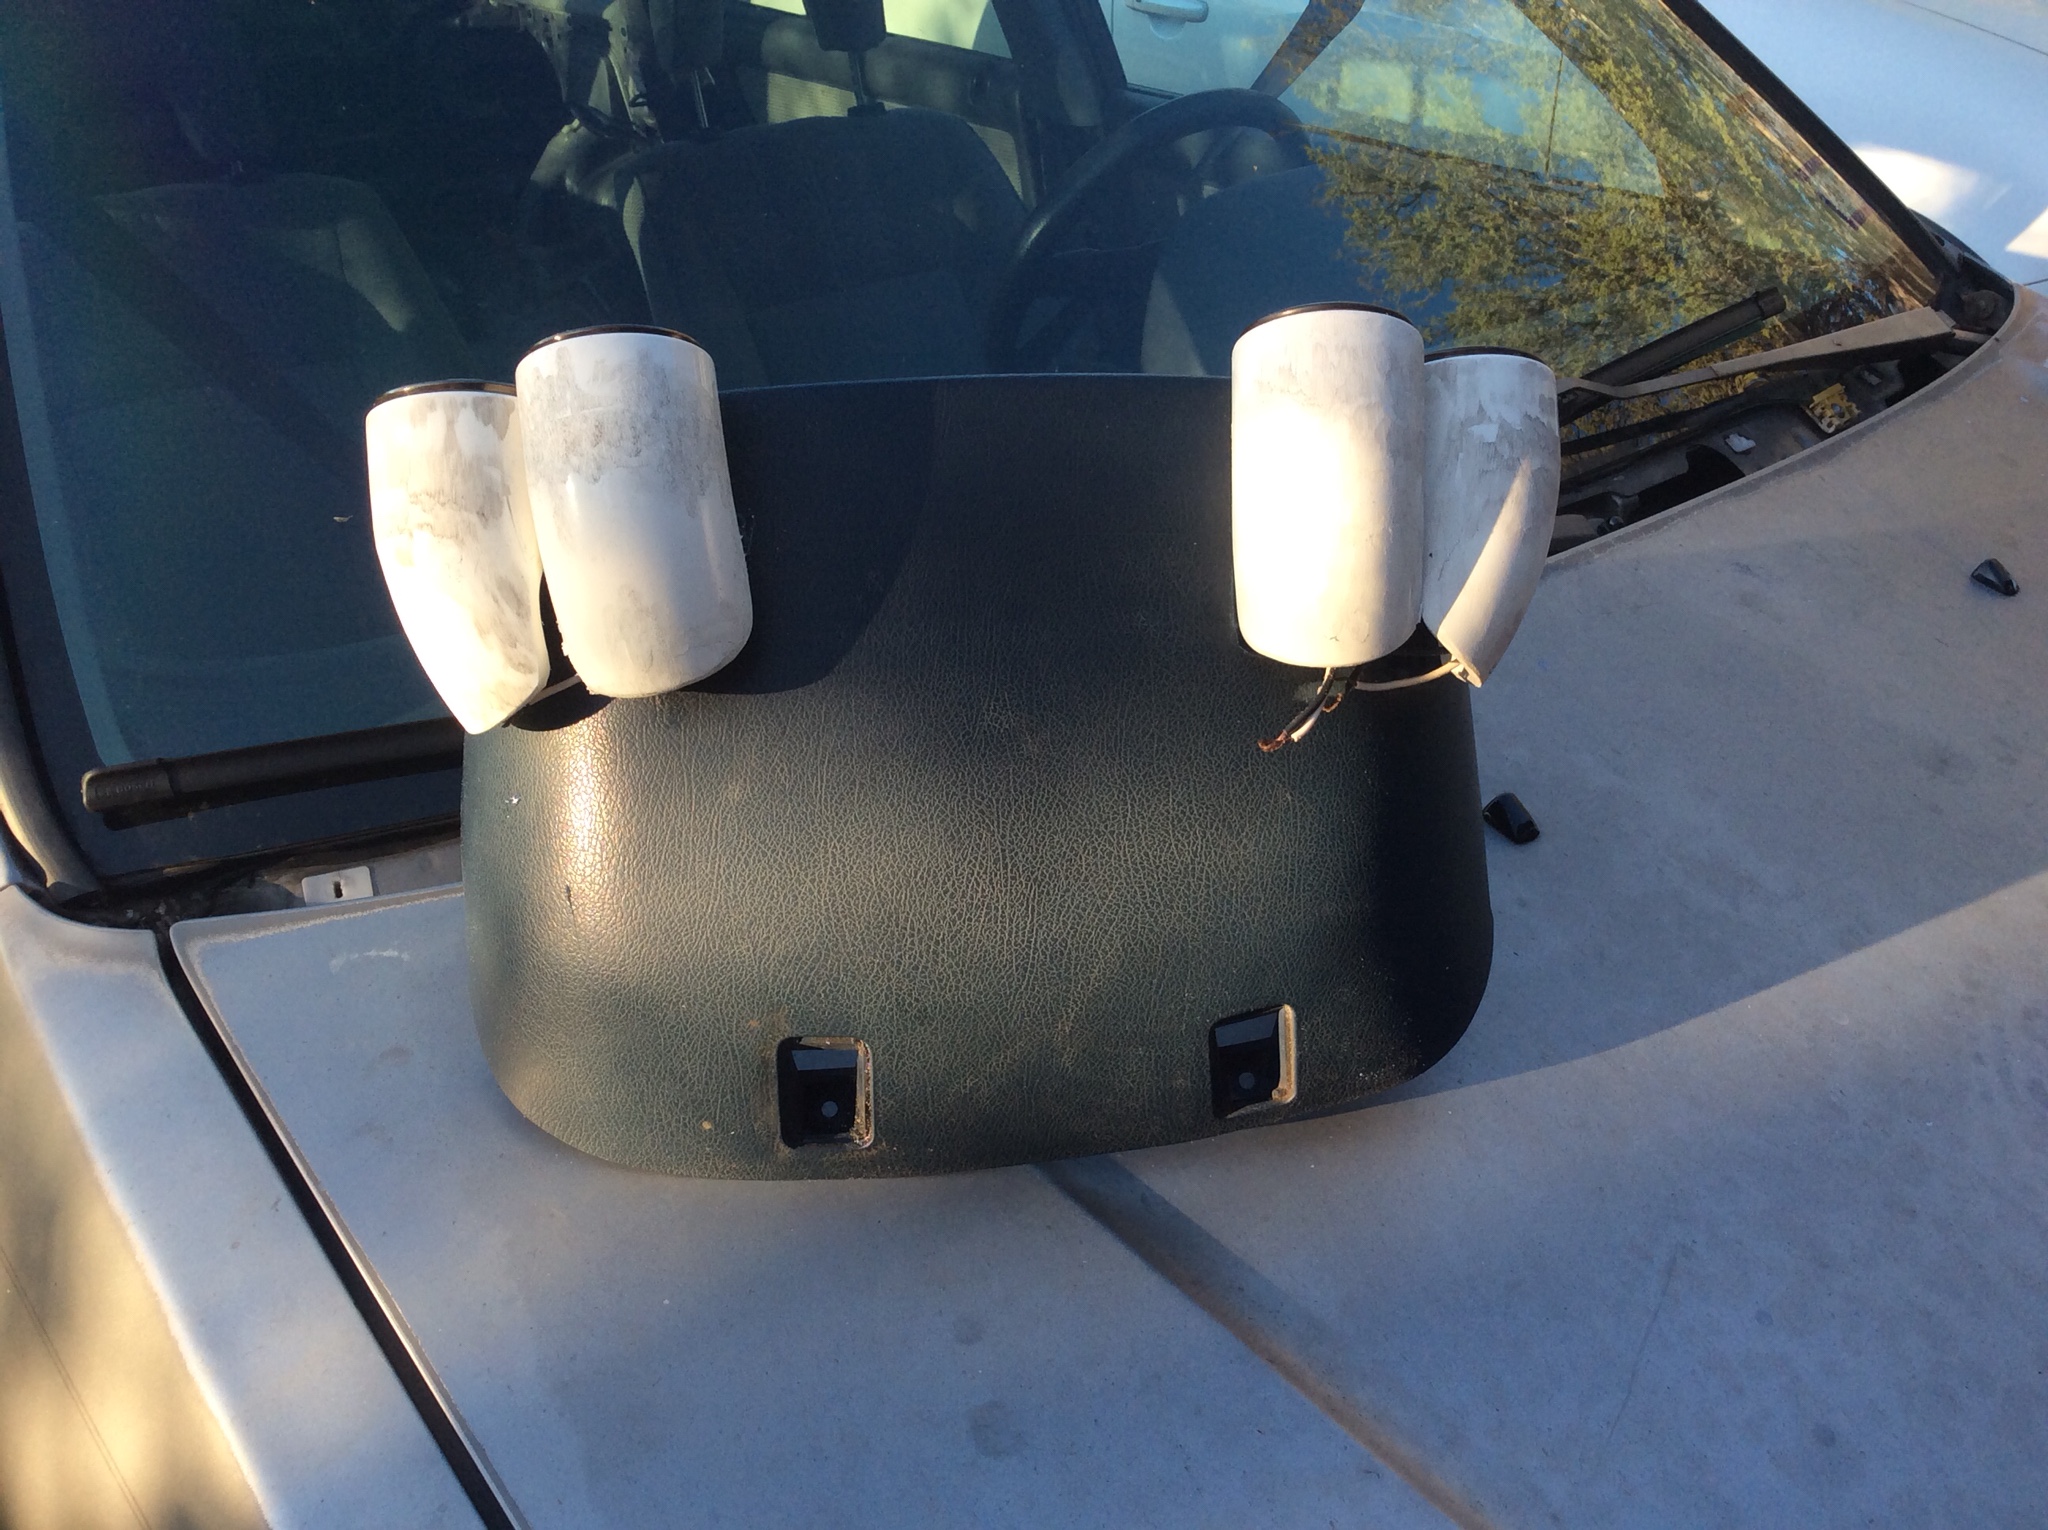
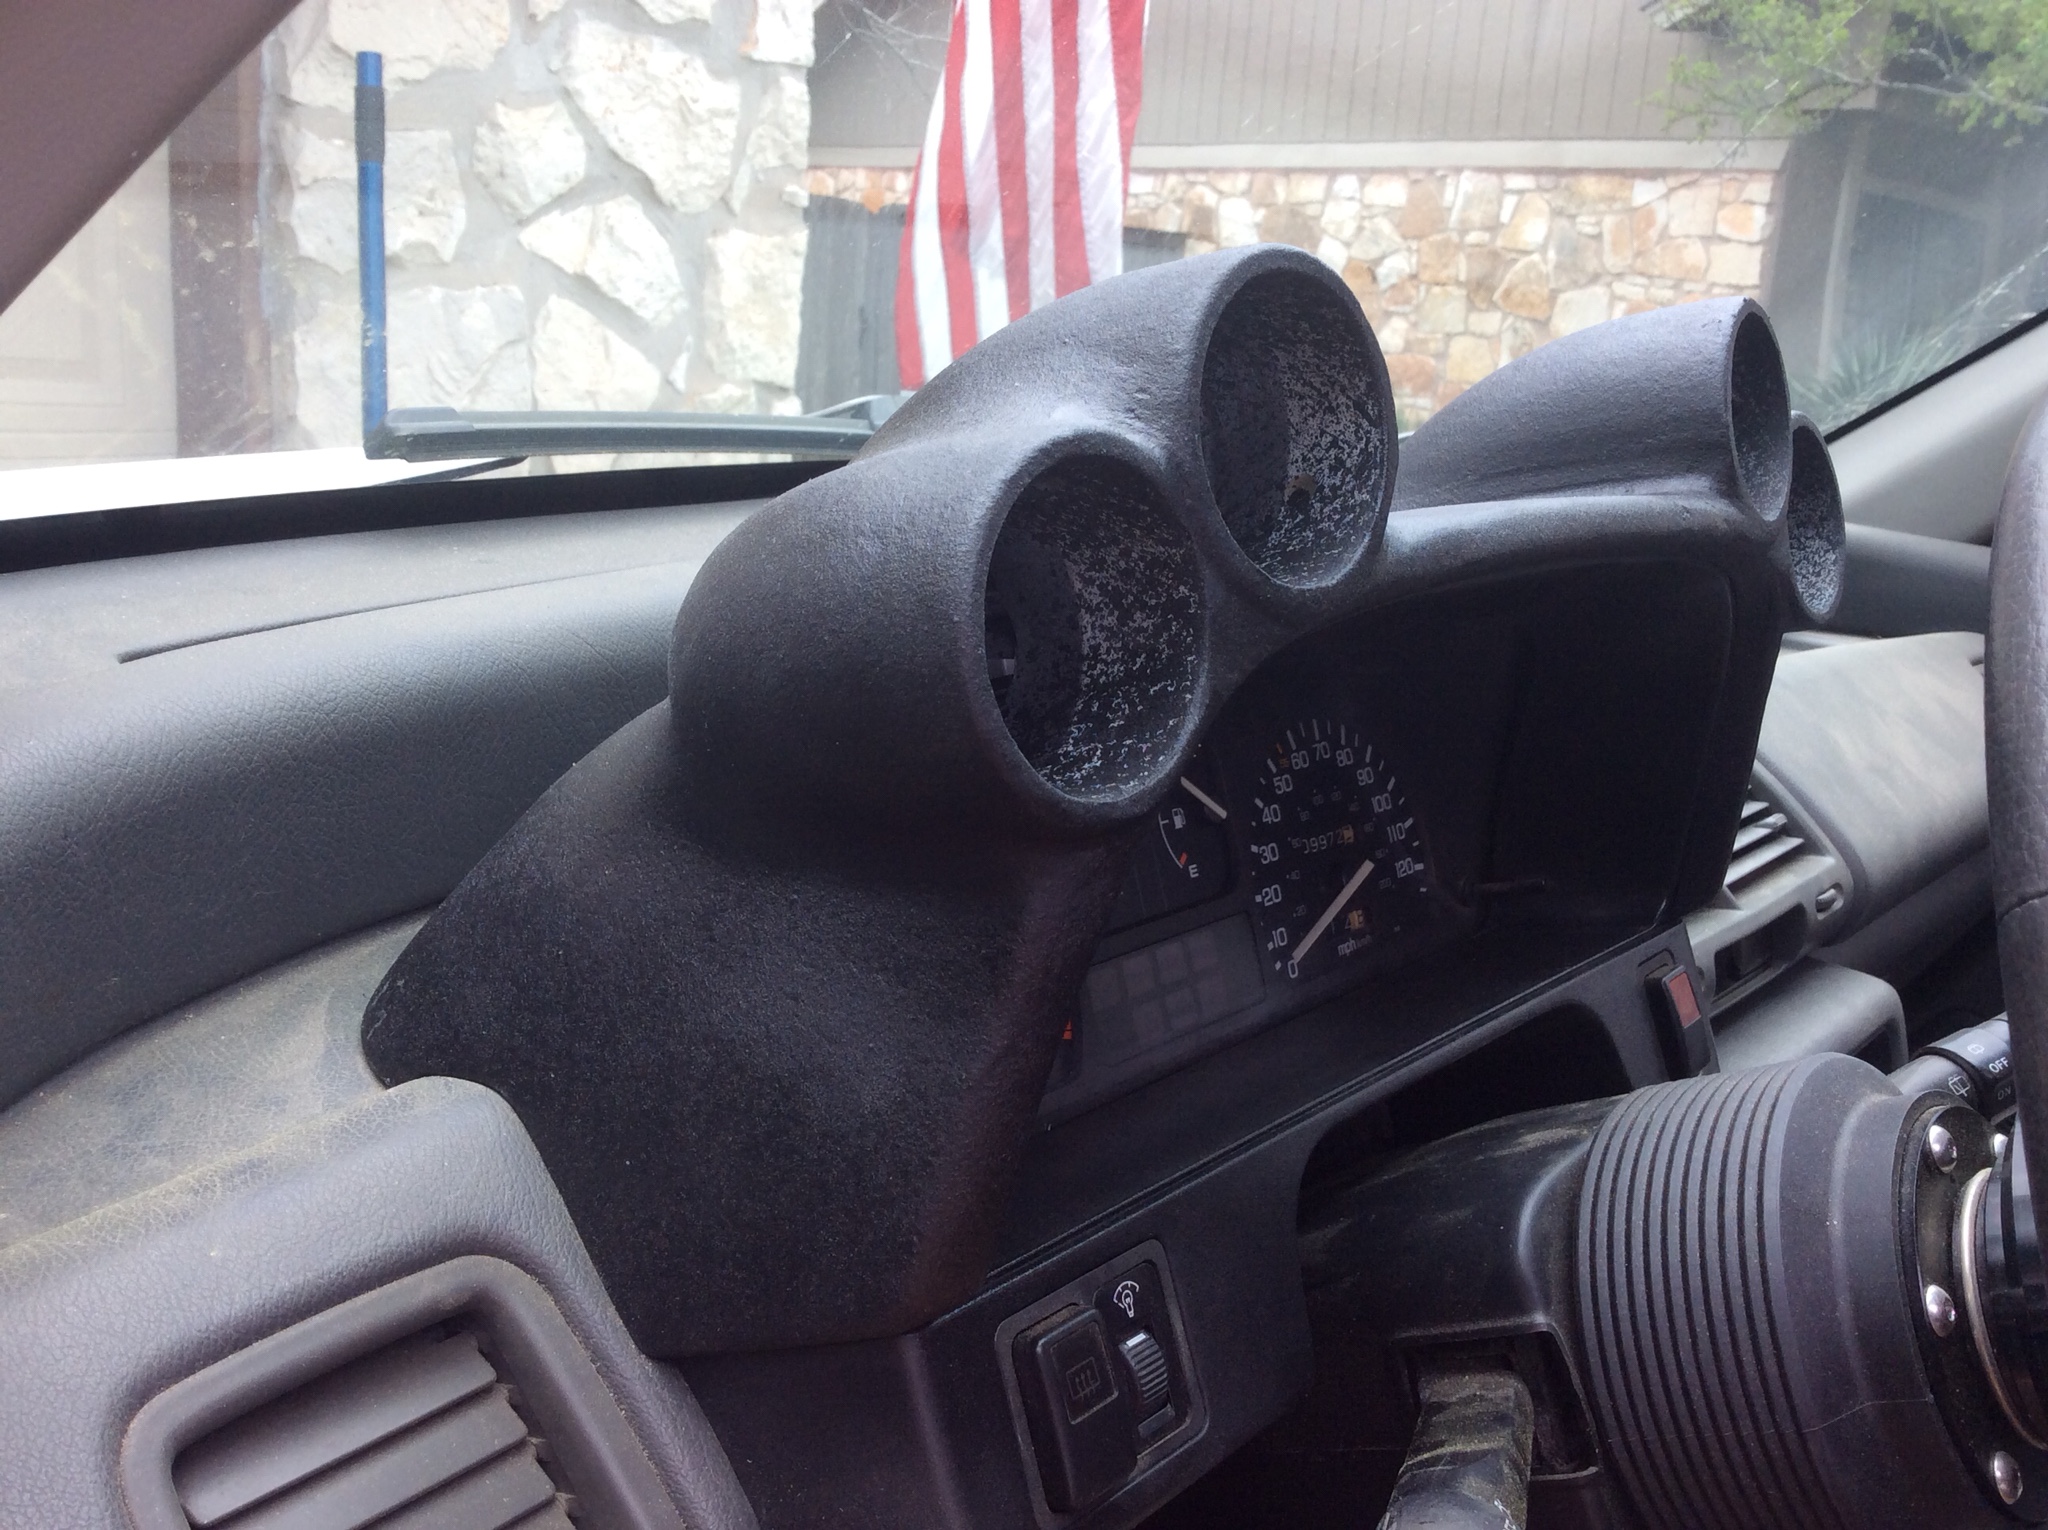
General idea of the location. You could potentially load up the entire top with pods if you need them, and depending on your taste.
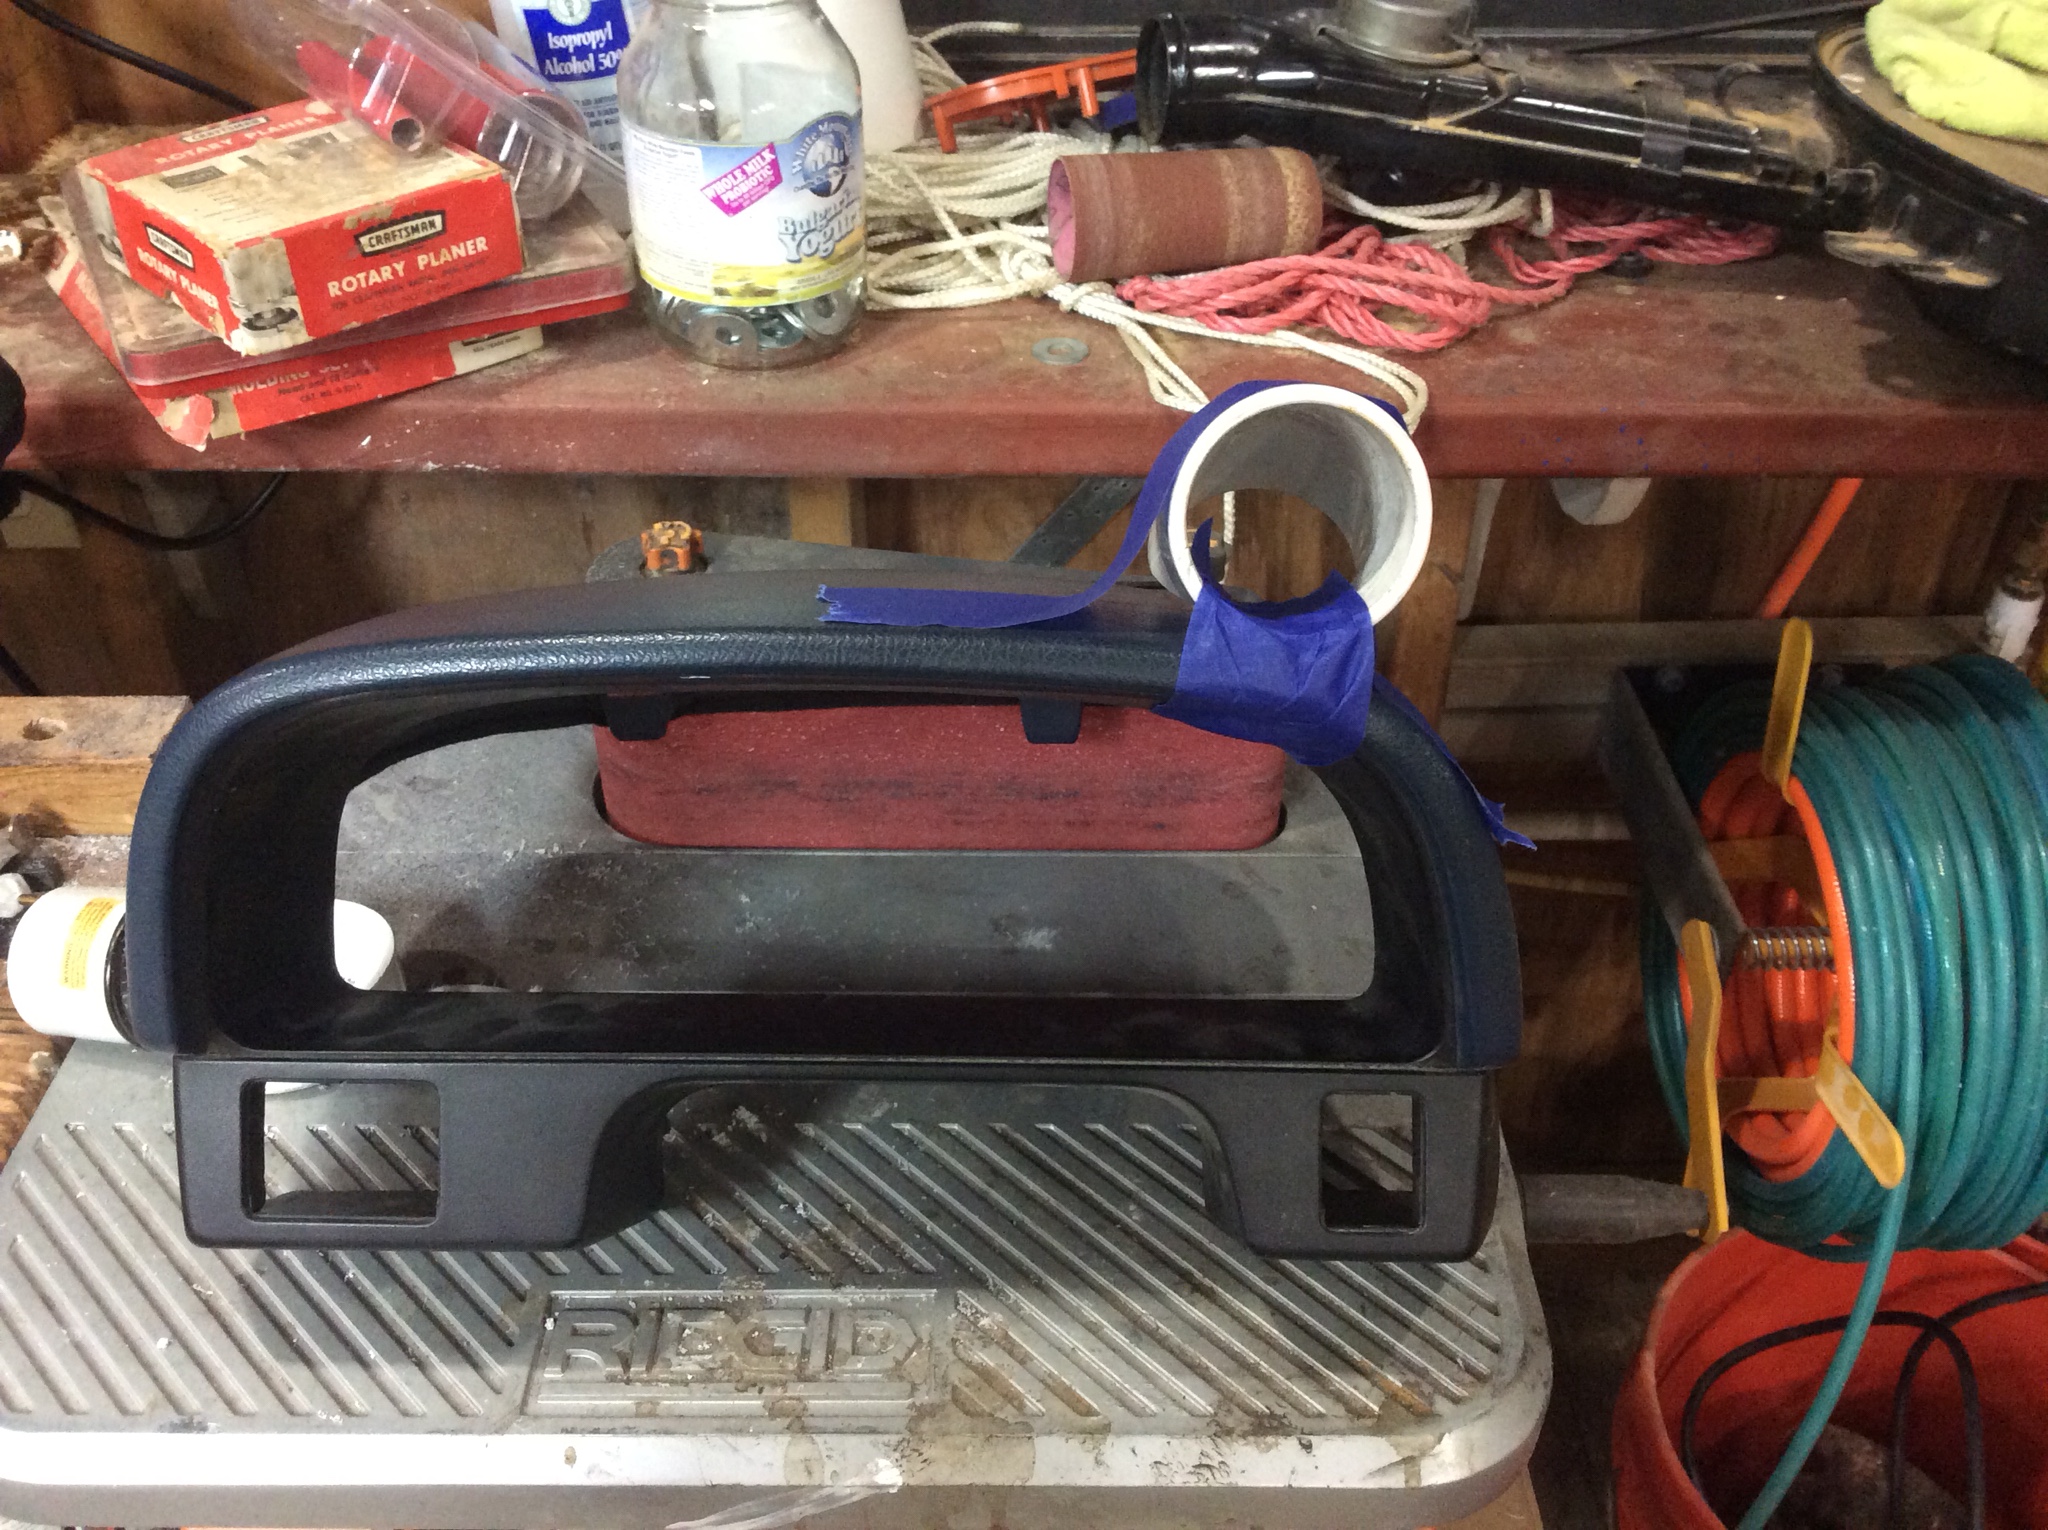
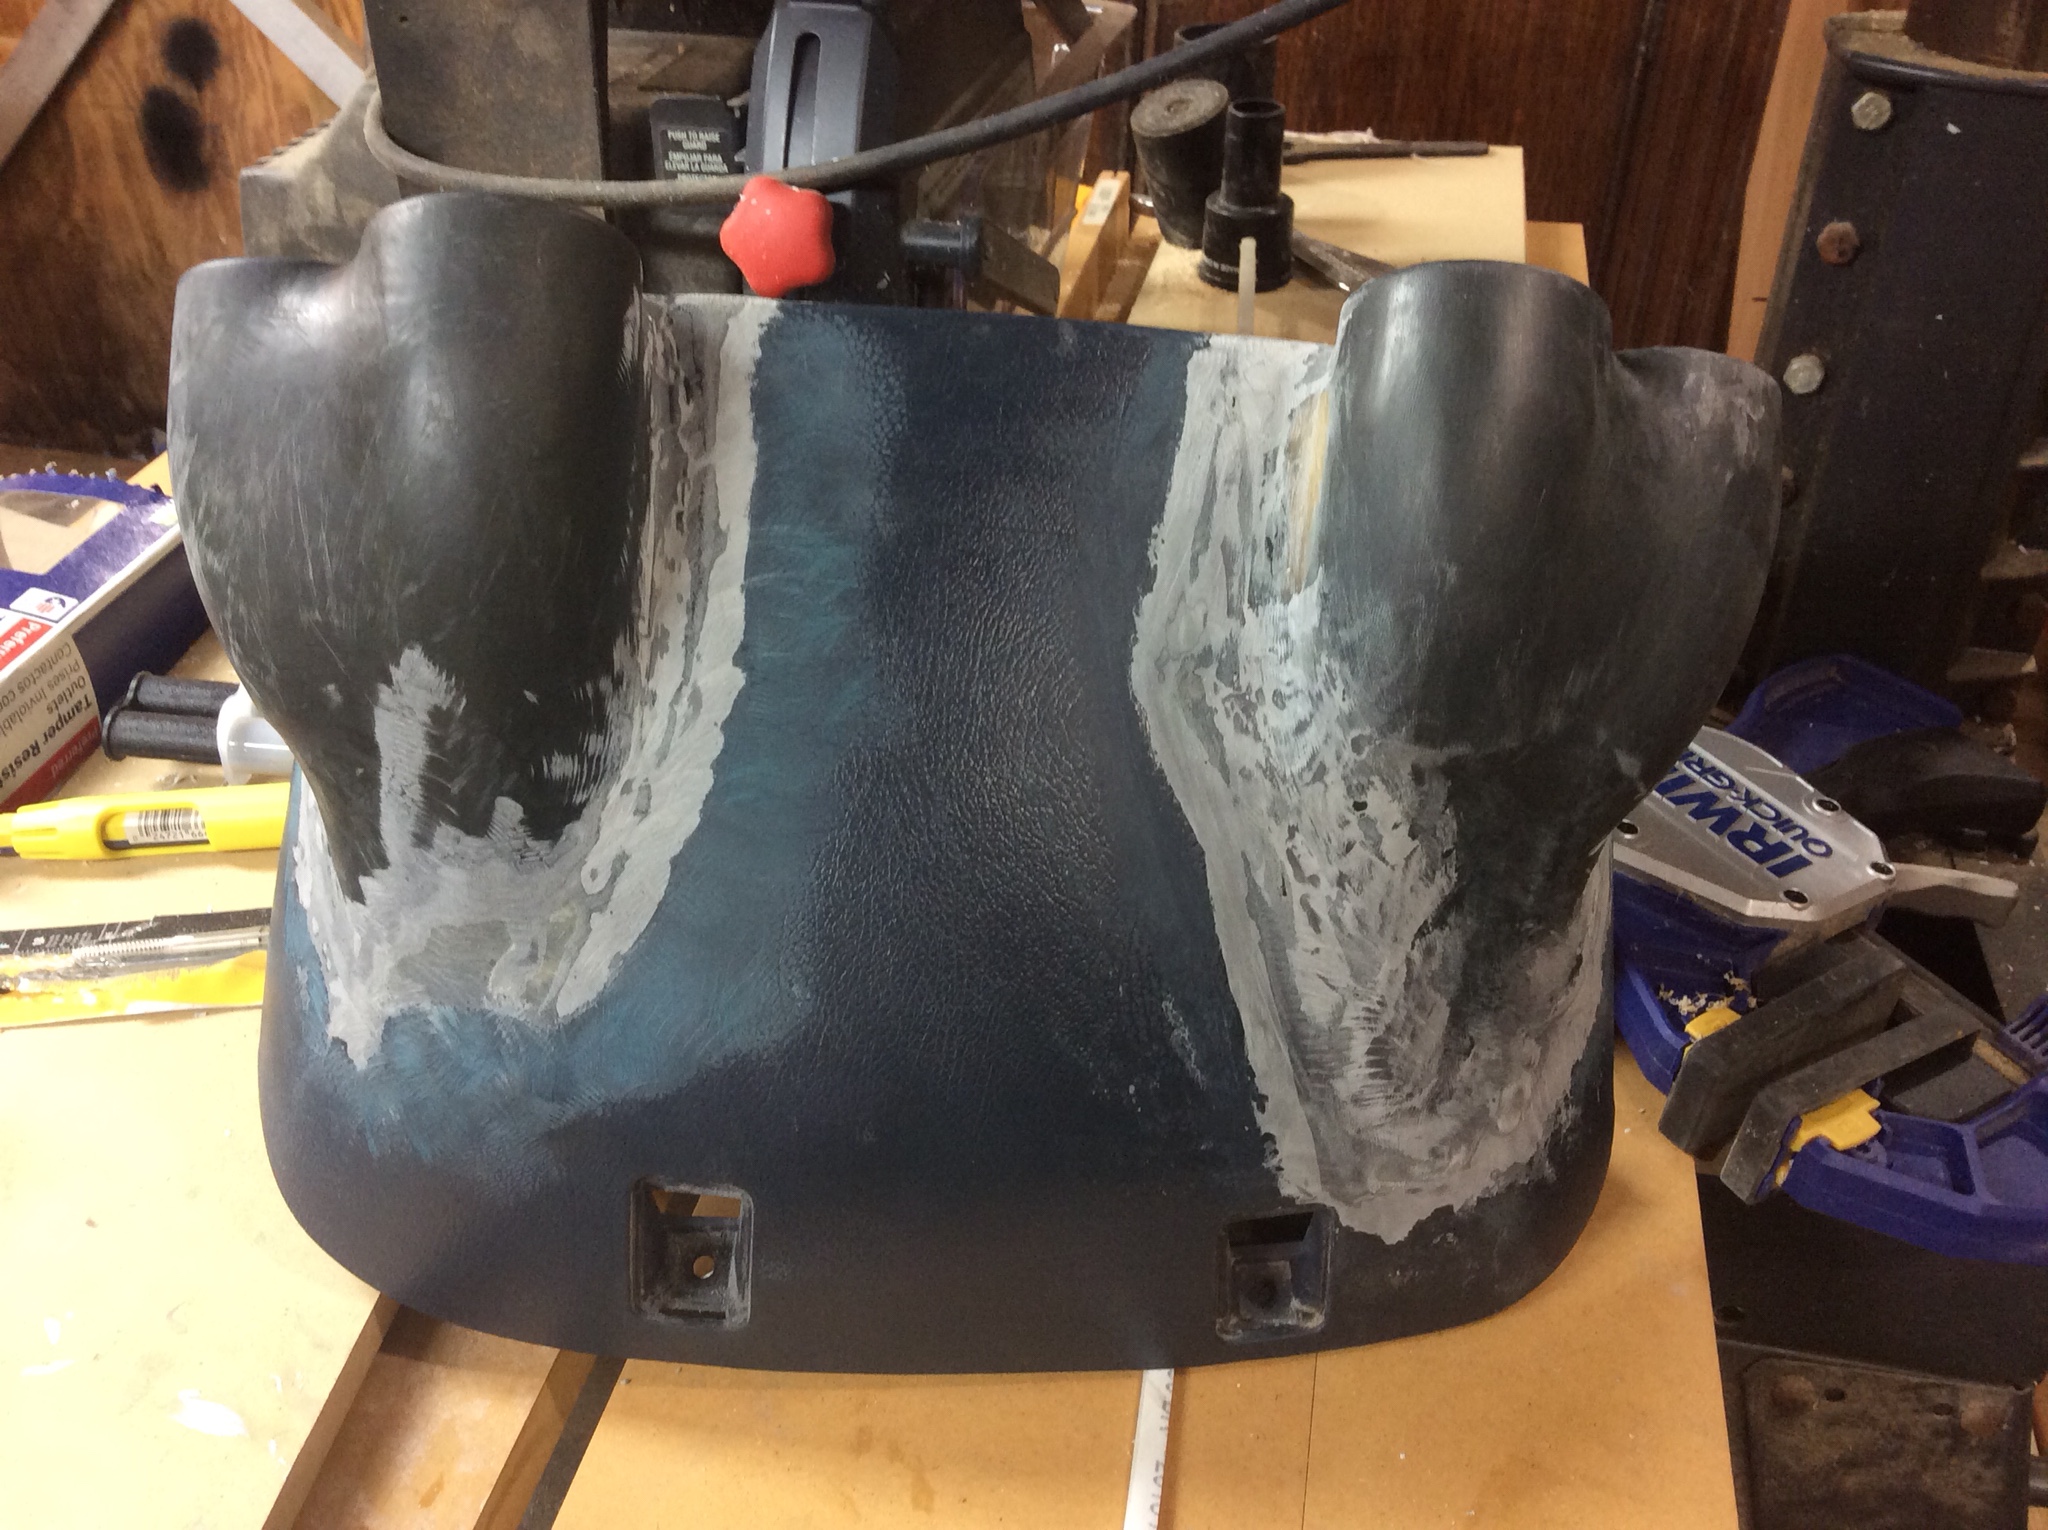
Now, the moment of not turning back, we get to cut into the original housing itself. If you can get these bezels for cheap I recommend nabbing one whenever you come across them. Why, cause I might need more in the future and I'll be hitting you up! Gimme bezels plz.
Nestled in and hot glued in place.
If you are only needing one pod, then you can proceed to the steps about applying fabric and resin. Otherwise repeat this as needed.
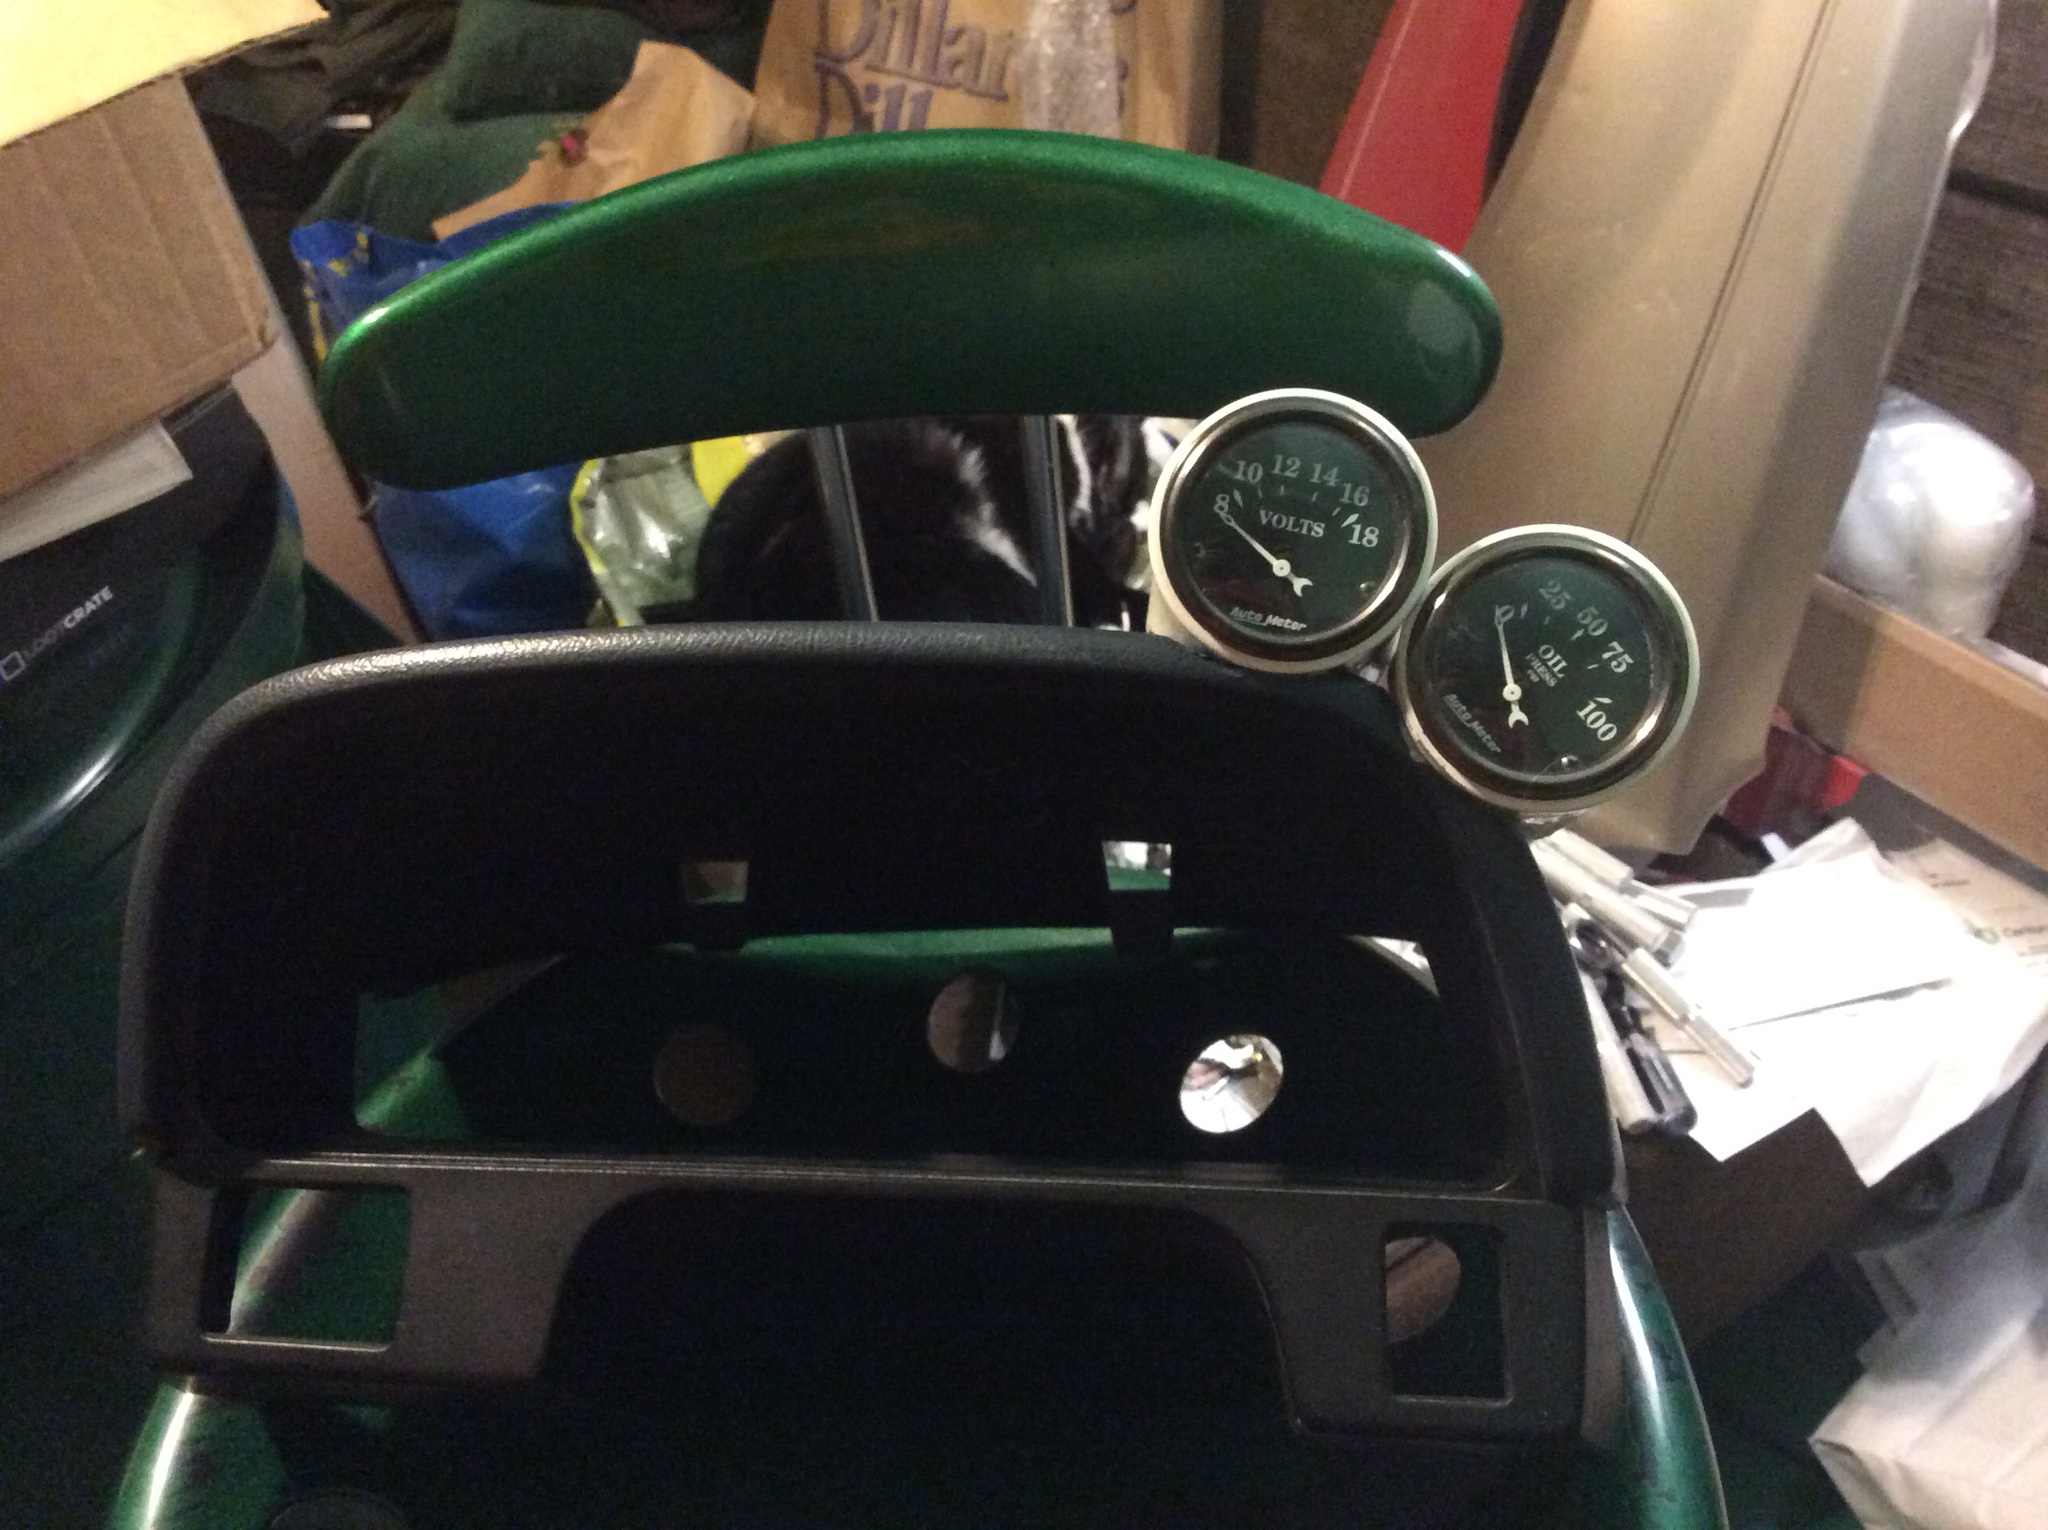
Ok. Second gauge in place. Here would be my first real learning from experience tip. Bond the pods together before attaching any to the cluster. You can get them to mate up perfectly if you do it off the bezel. Otherwise you are going to be fighting the orientation on the bezel itself. If that isn't super clear I will point it out more in upcoming pics.
I also recommend sanding a recess into the side of one pod to match the profile of the other pod. The bezel of the gauge doesn't come to the edge of the pod, so you can see you have a bit of clearance to work with this.
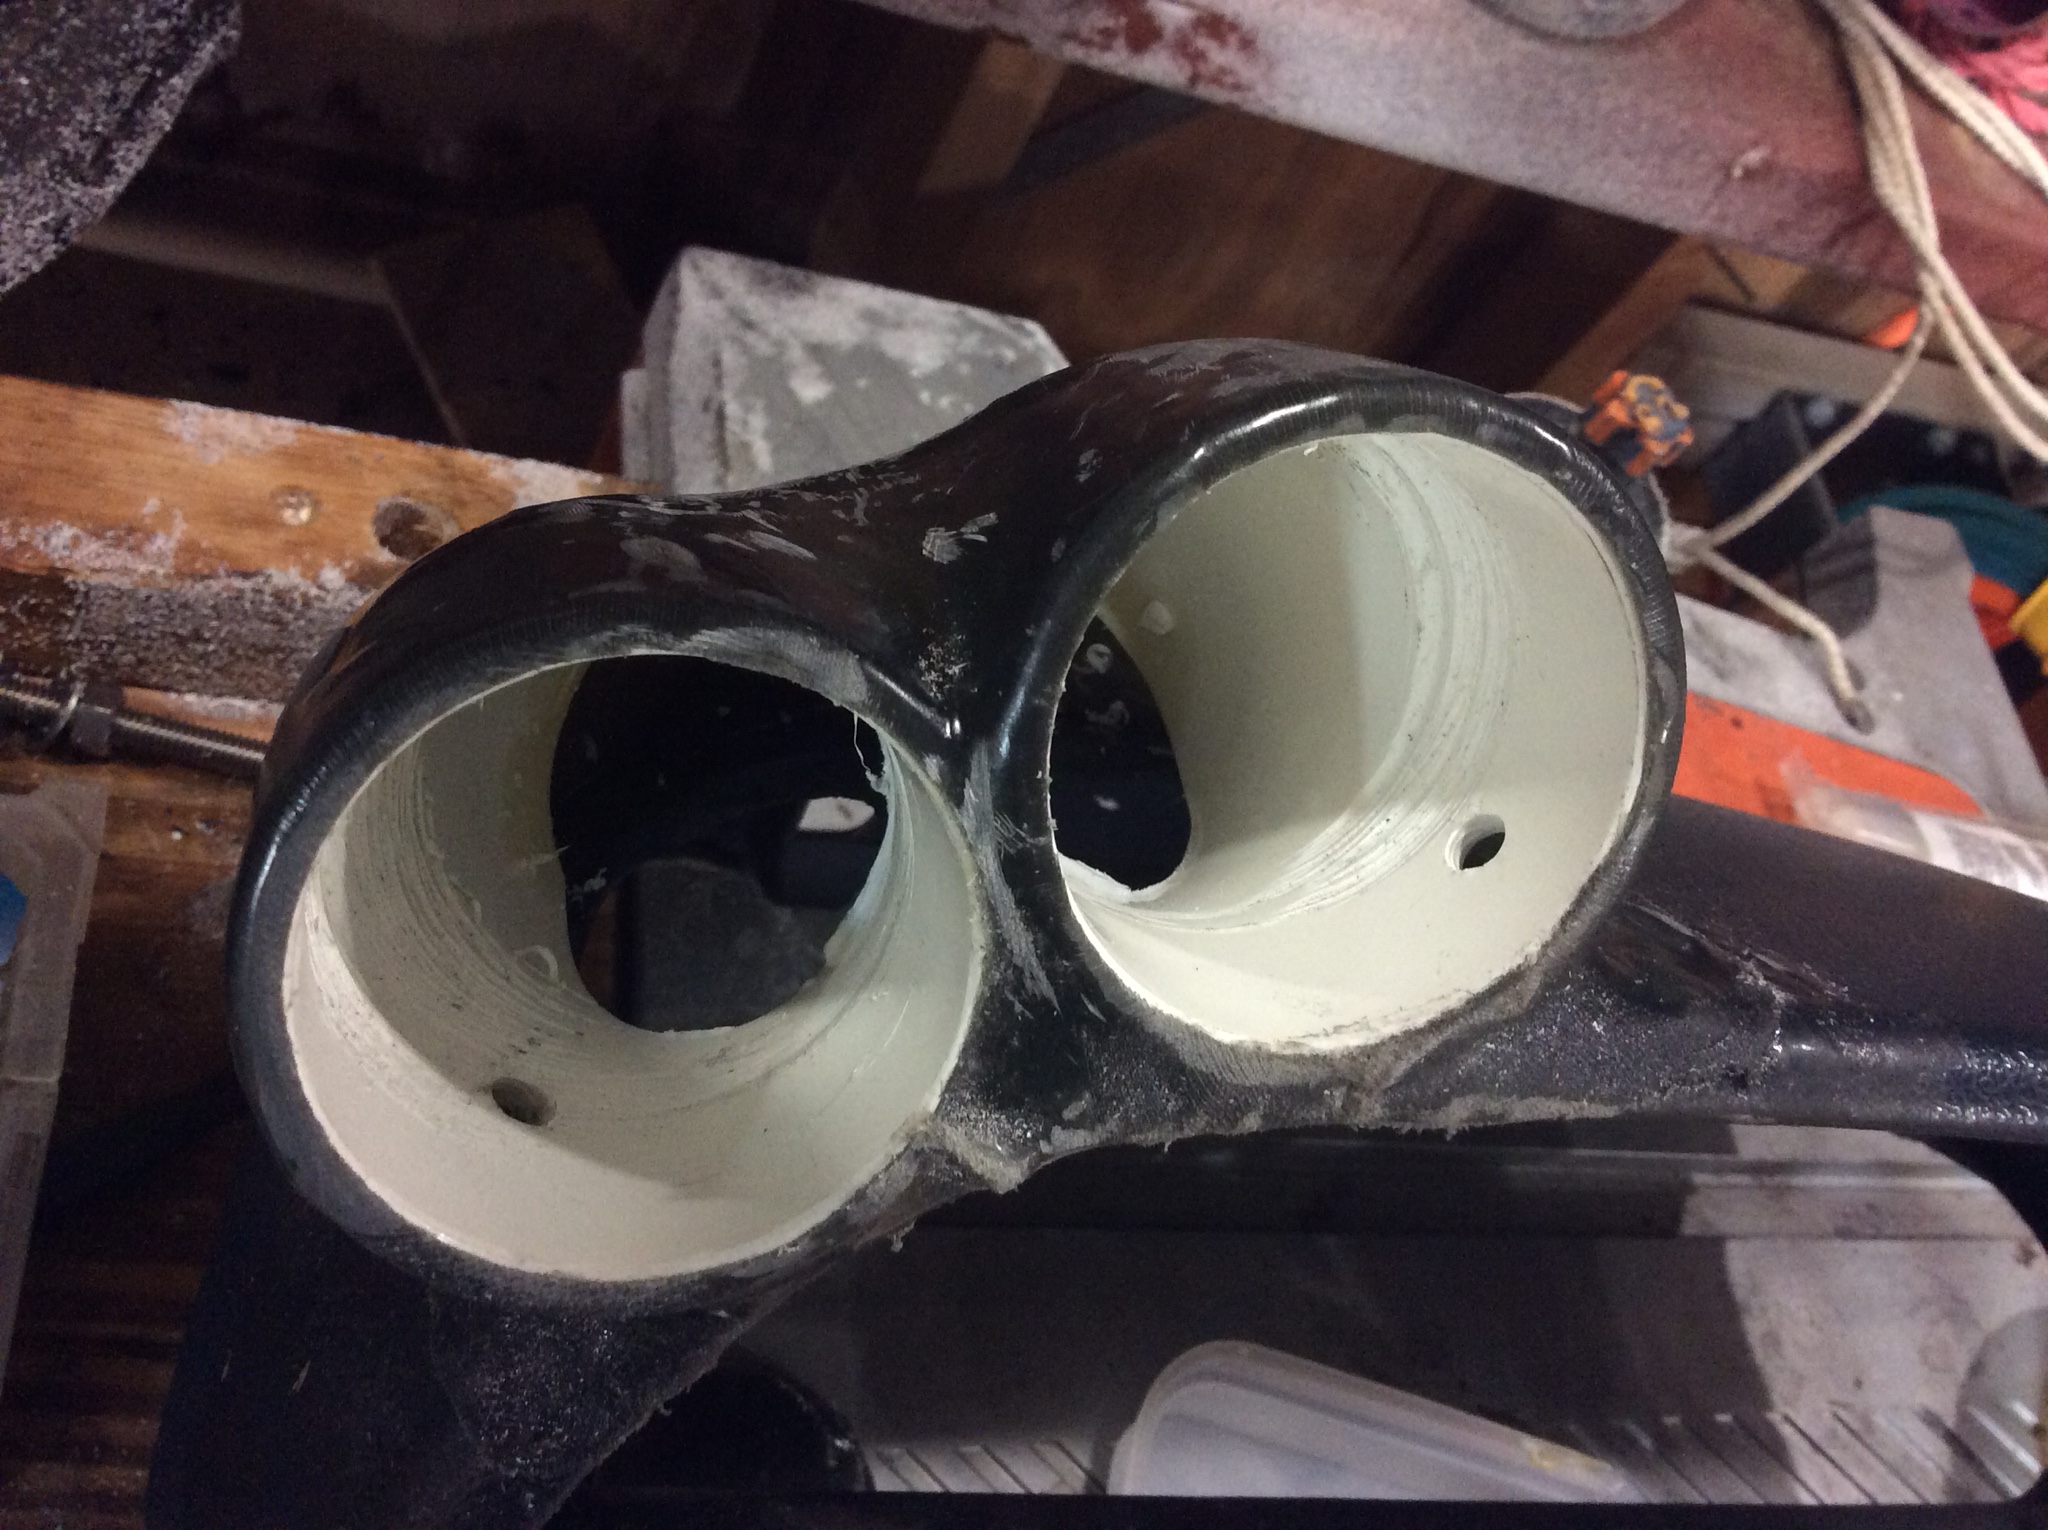
In the pic below you can see how they fit together just a little tighter in cutting that recess.
And repeat on the other side. Measure as carefully as you can to get them even. Or if symmetry isn't your thing, do what you will. A side note, don't try to use the attachment points at the back as any reference for center, they are totally not symmetrical.
Ok here you can see what I was talking about in sticking the pods together off the bezel. The two on the left, there is a huge gap between the pods at the back. I did those individually. On the right they are tight against each other the whole way back. You will need to fiddle with the alignment of the 45 degree bend to get things just right, but having them tight together like that helps a great deal in the future steps.
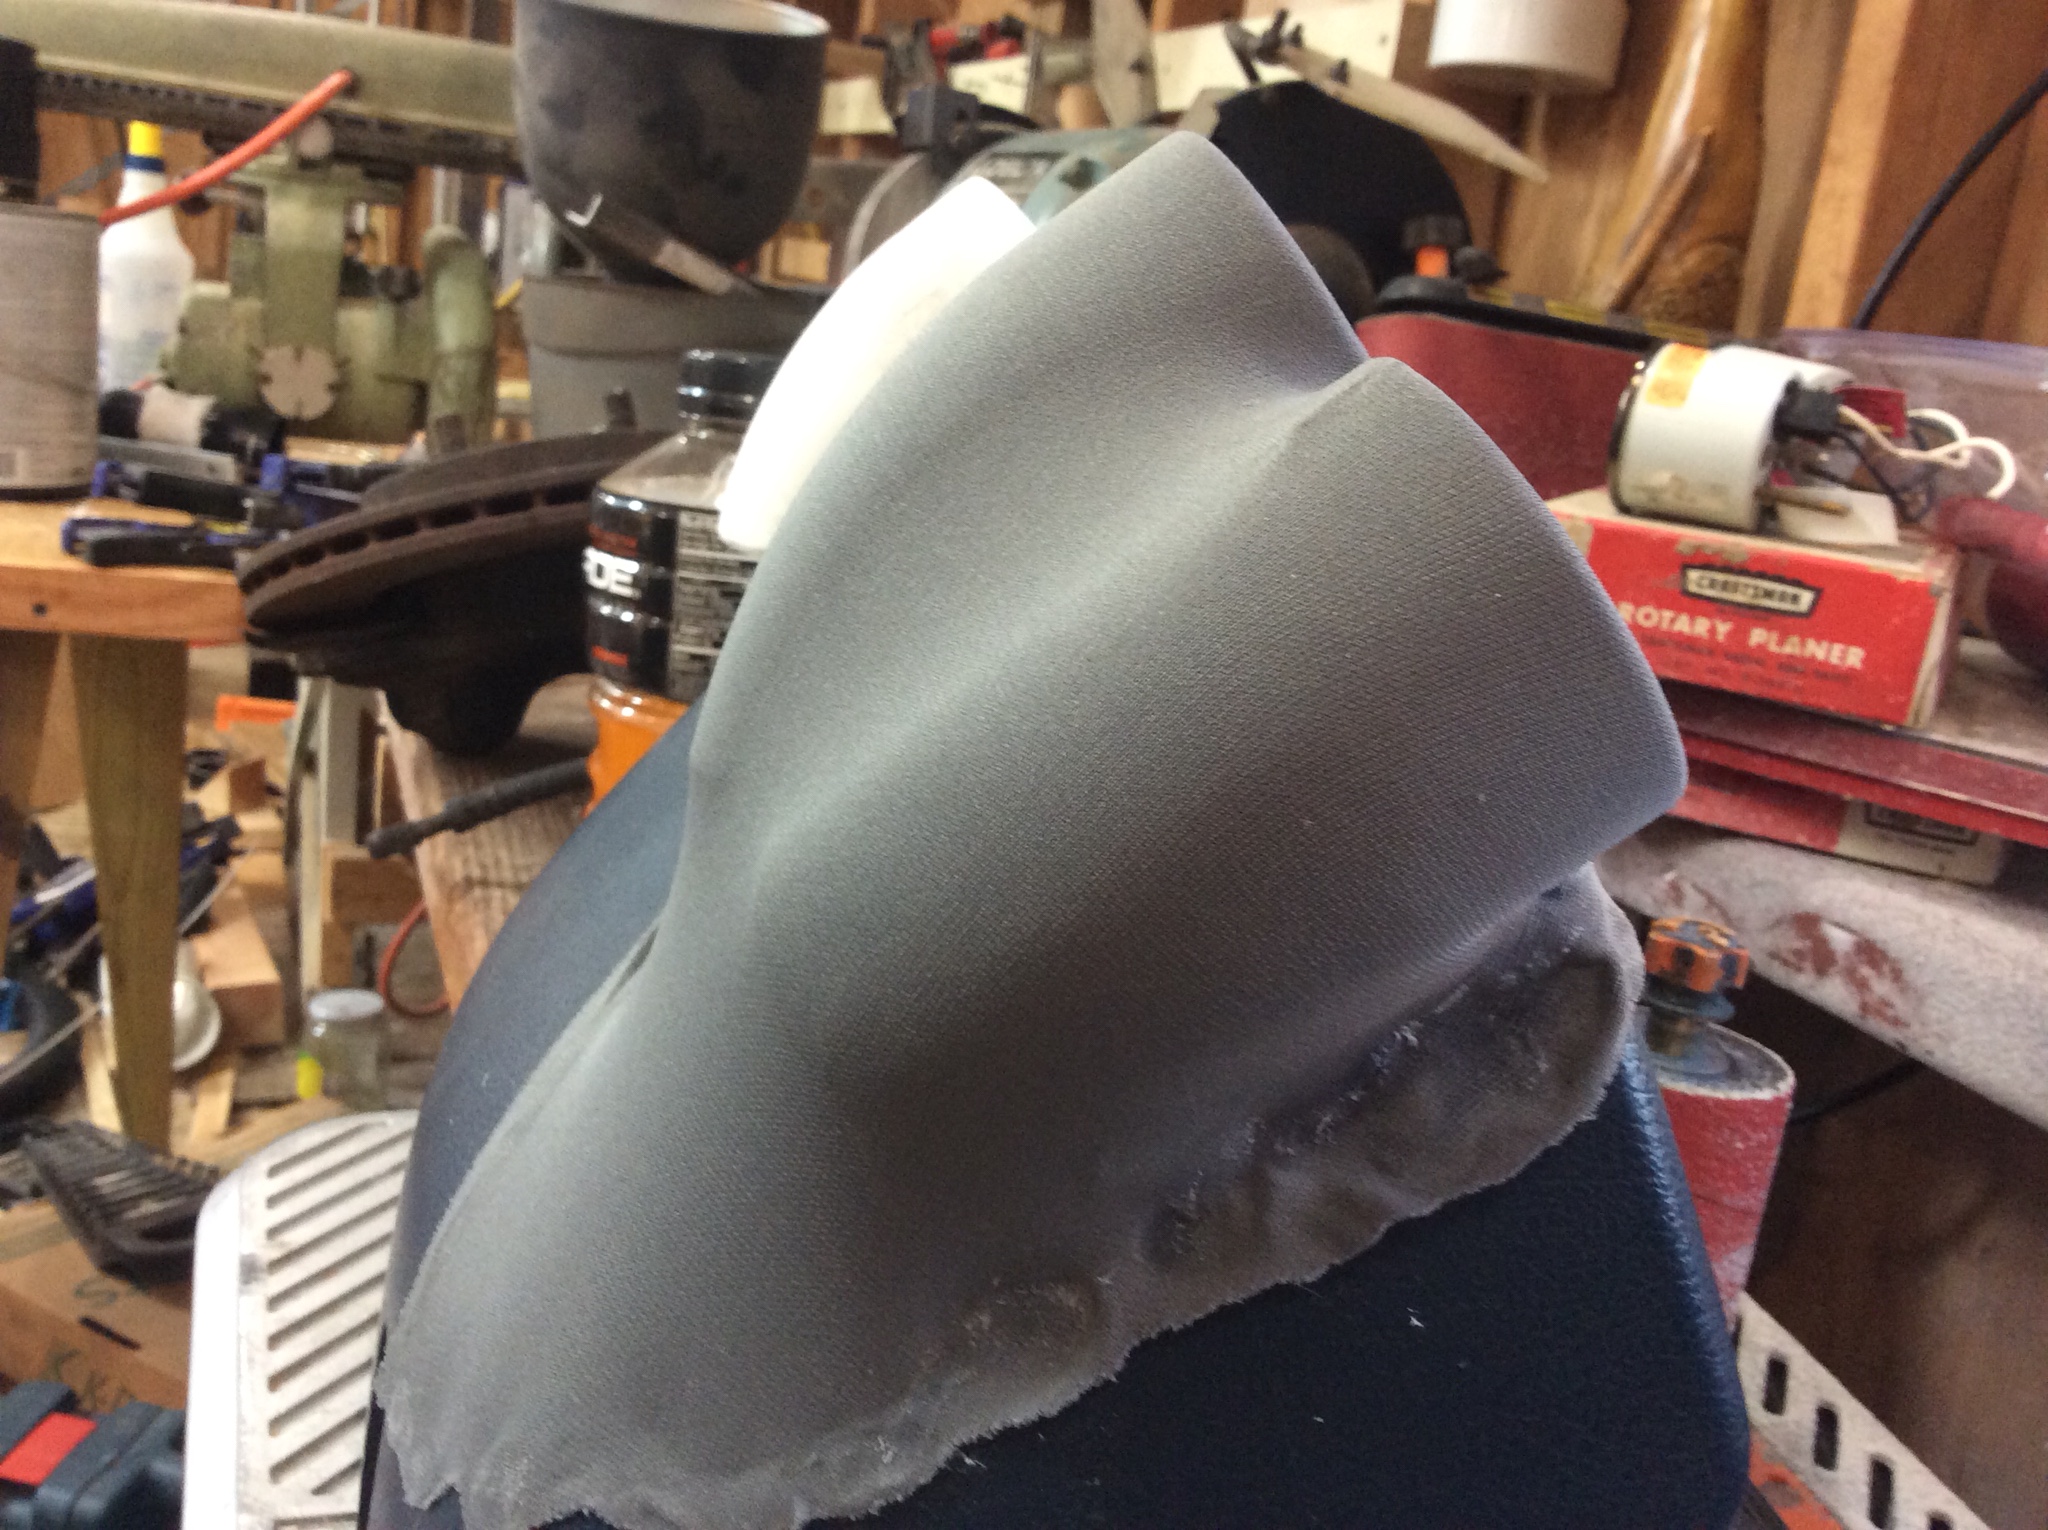
All right, here we go, draping the fabric. I used some heavy nylon since it has good stretch. I normally use fleece for this type of thing, but it is too thick for what I am going for here.
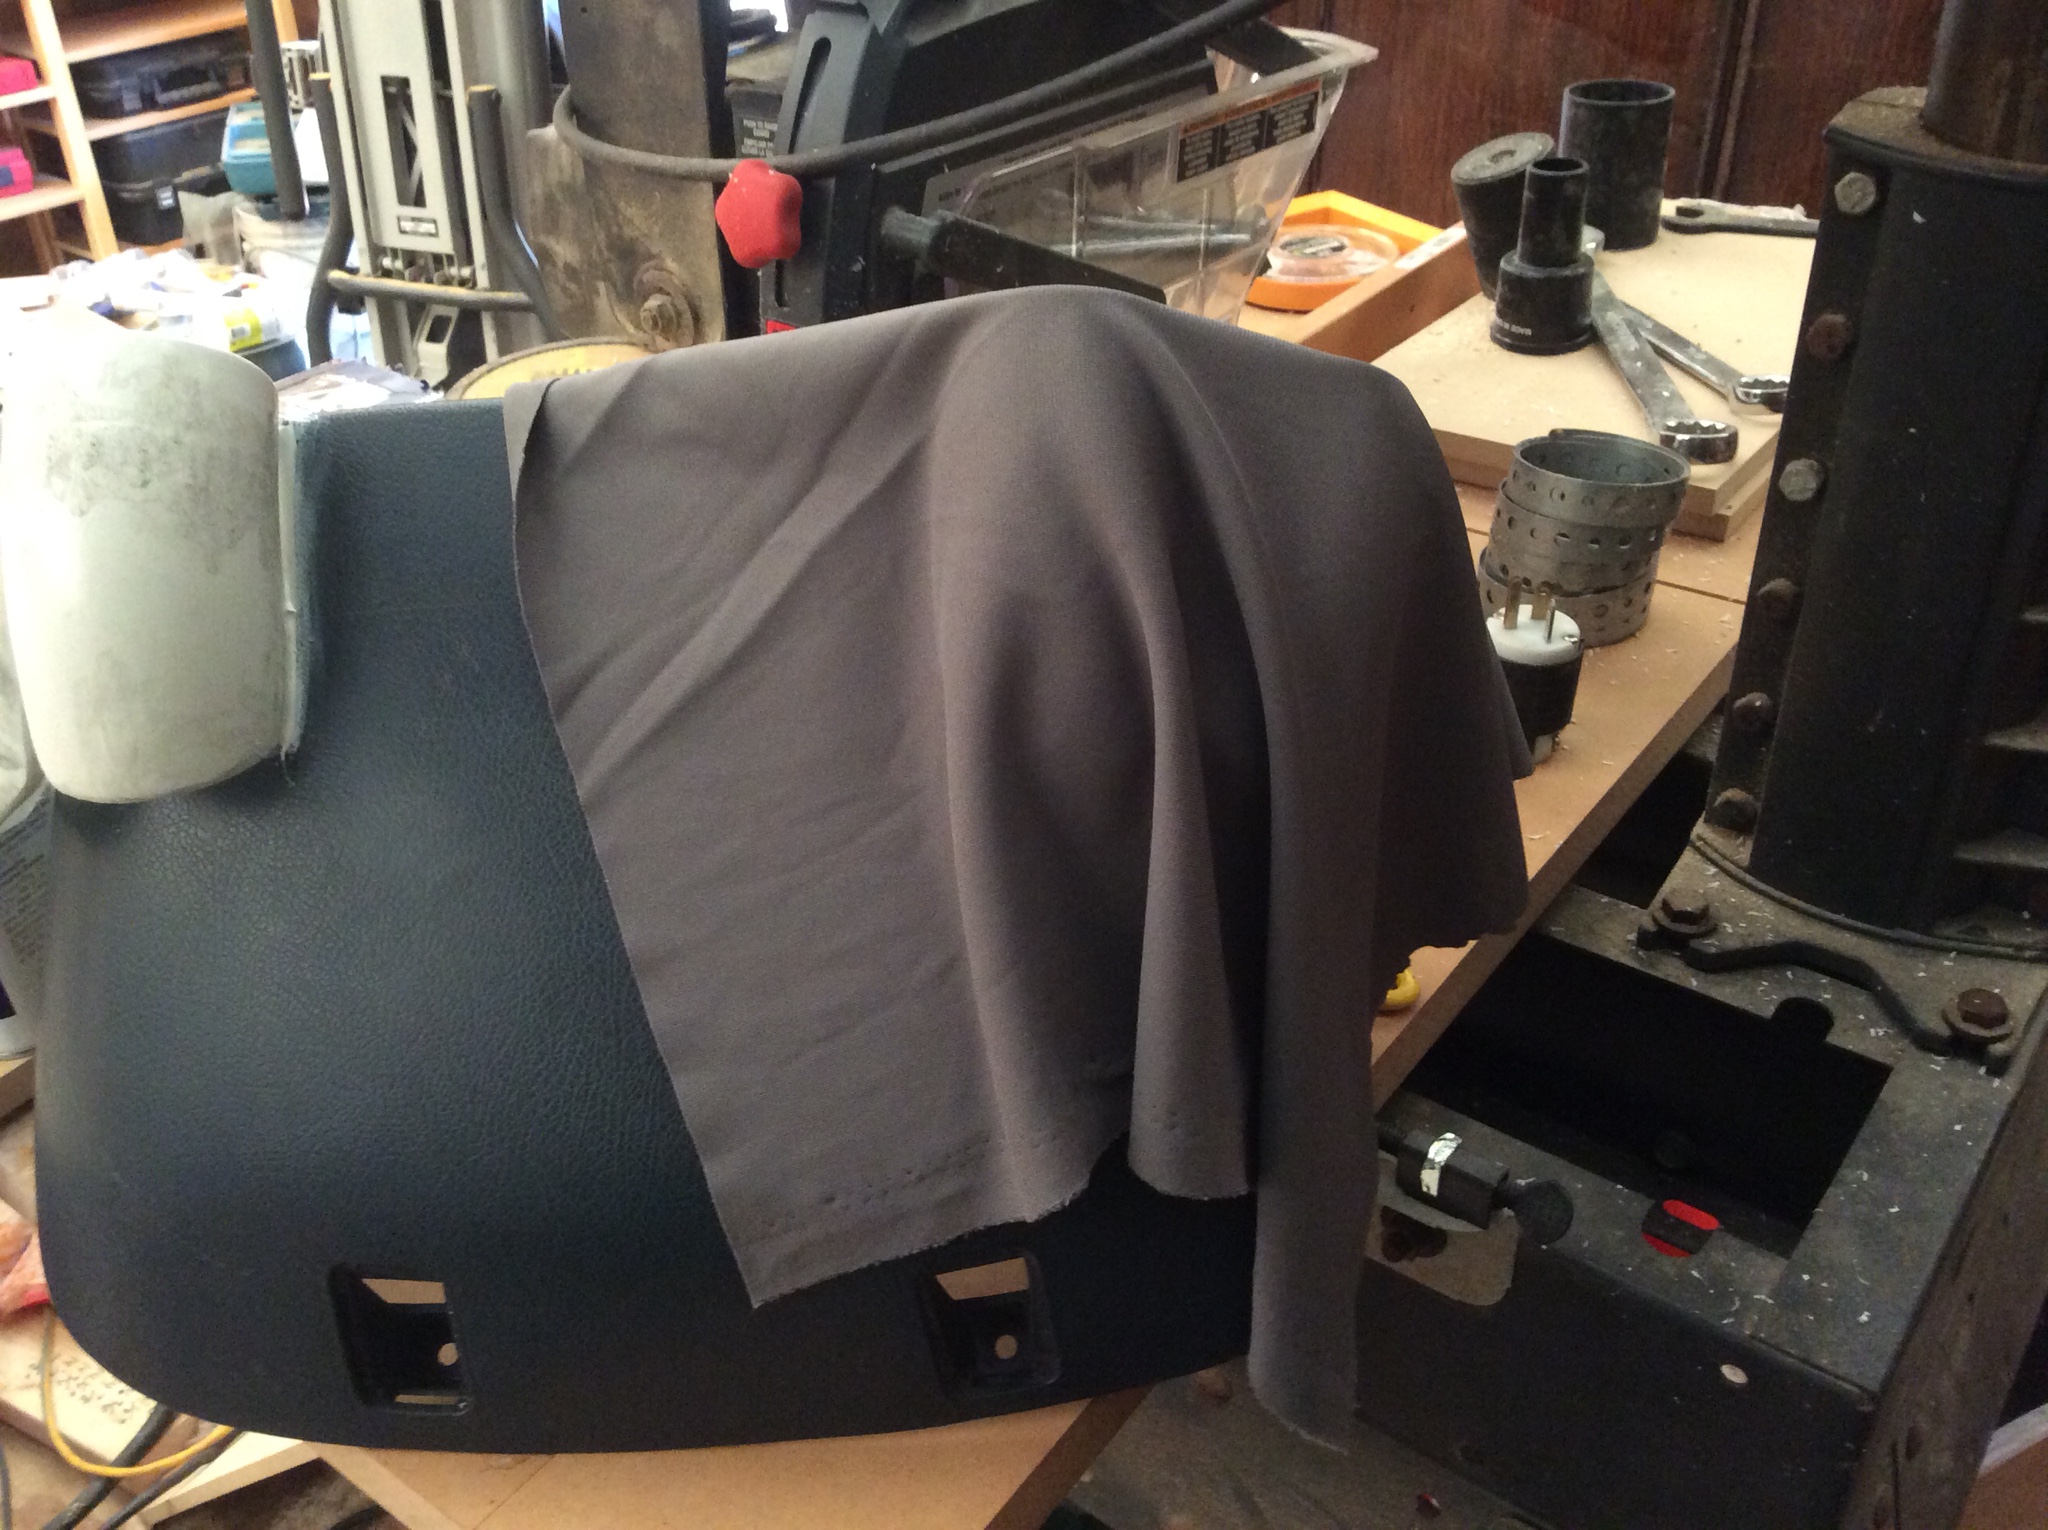
A learning step here. I glued in between the pods. There is no need to do that, and you just give yourself more headache in the future if you do so.

Here we see just gluing around the edge and getting the fabric pulled as tight as possible. I recommend a high melt temp glue gun as you want as much bond here as possible, and also the ability to press the glue as flat as possible. That's important for shaping in the future.

Continue to wrap and then cut away any excess. Doubled layers is all right, just so long as you get enough resin saturation.
Here I will point out why bonding the pods together off the bezel works out much better. You can see in the pic below that I have the fabric stretched all the way to the back of the bend on the bezel and I still have protrusion on the back of the pods. This could have been addressed with a bit more sanding and shaping. But I was lazy and wanted to get it done.
Below you can see a bit of a wrinkle in the fabric below. This is from where I tried to glue the fabric between the pods and it pulled free. The reason I am saying this is a totally unnecessary step is for two reasons. If you leave the fabric like I did here, stretched across the top, then there is no need to glue.
If you want a gap all the way down to the seam of the pods, we'll just cut away that fabric once the resin has gelled and then fill the gaps with filler. Either way, no need to glue between the pods here.
Coat with resin completely.
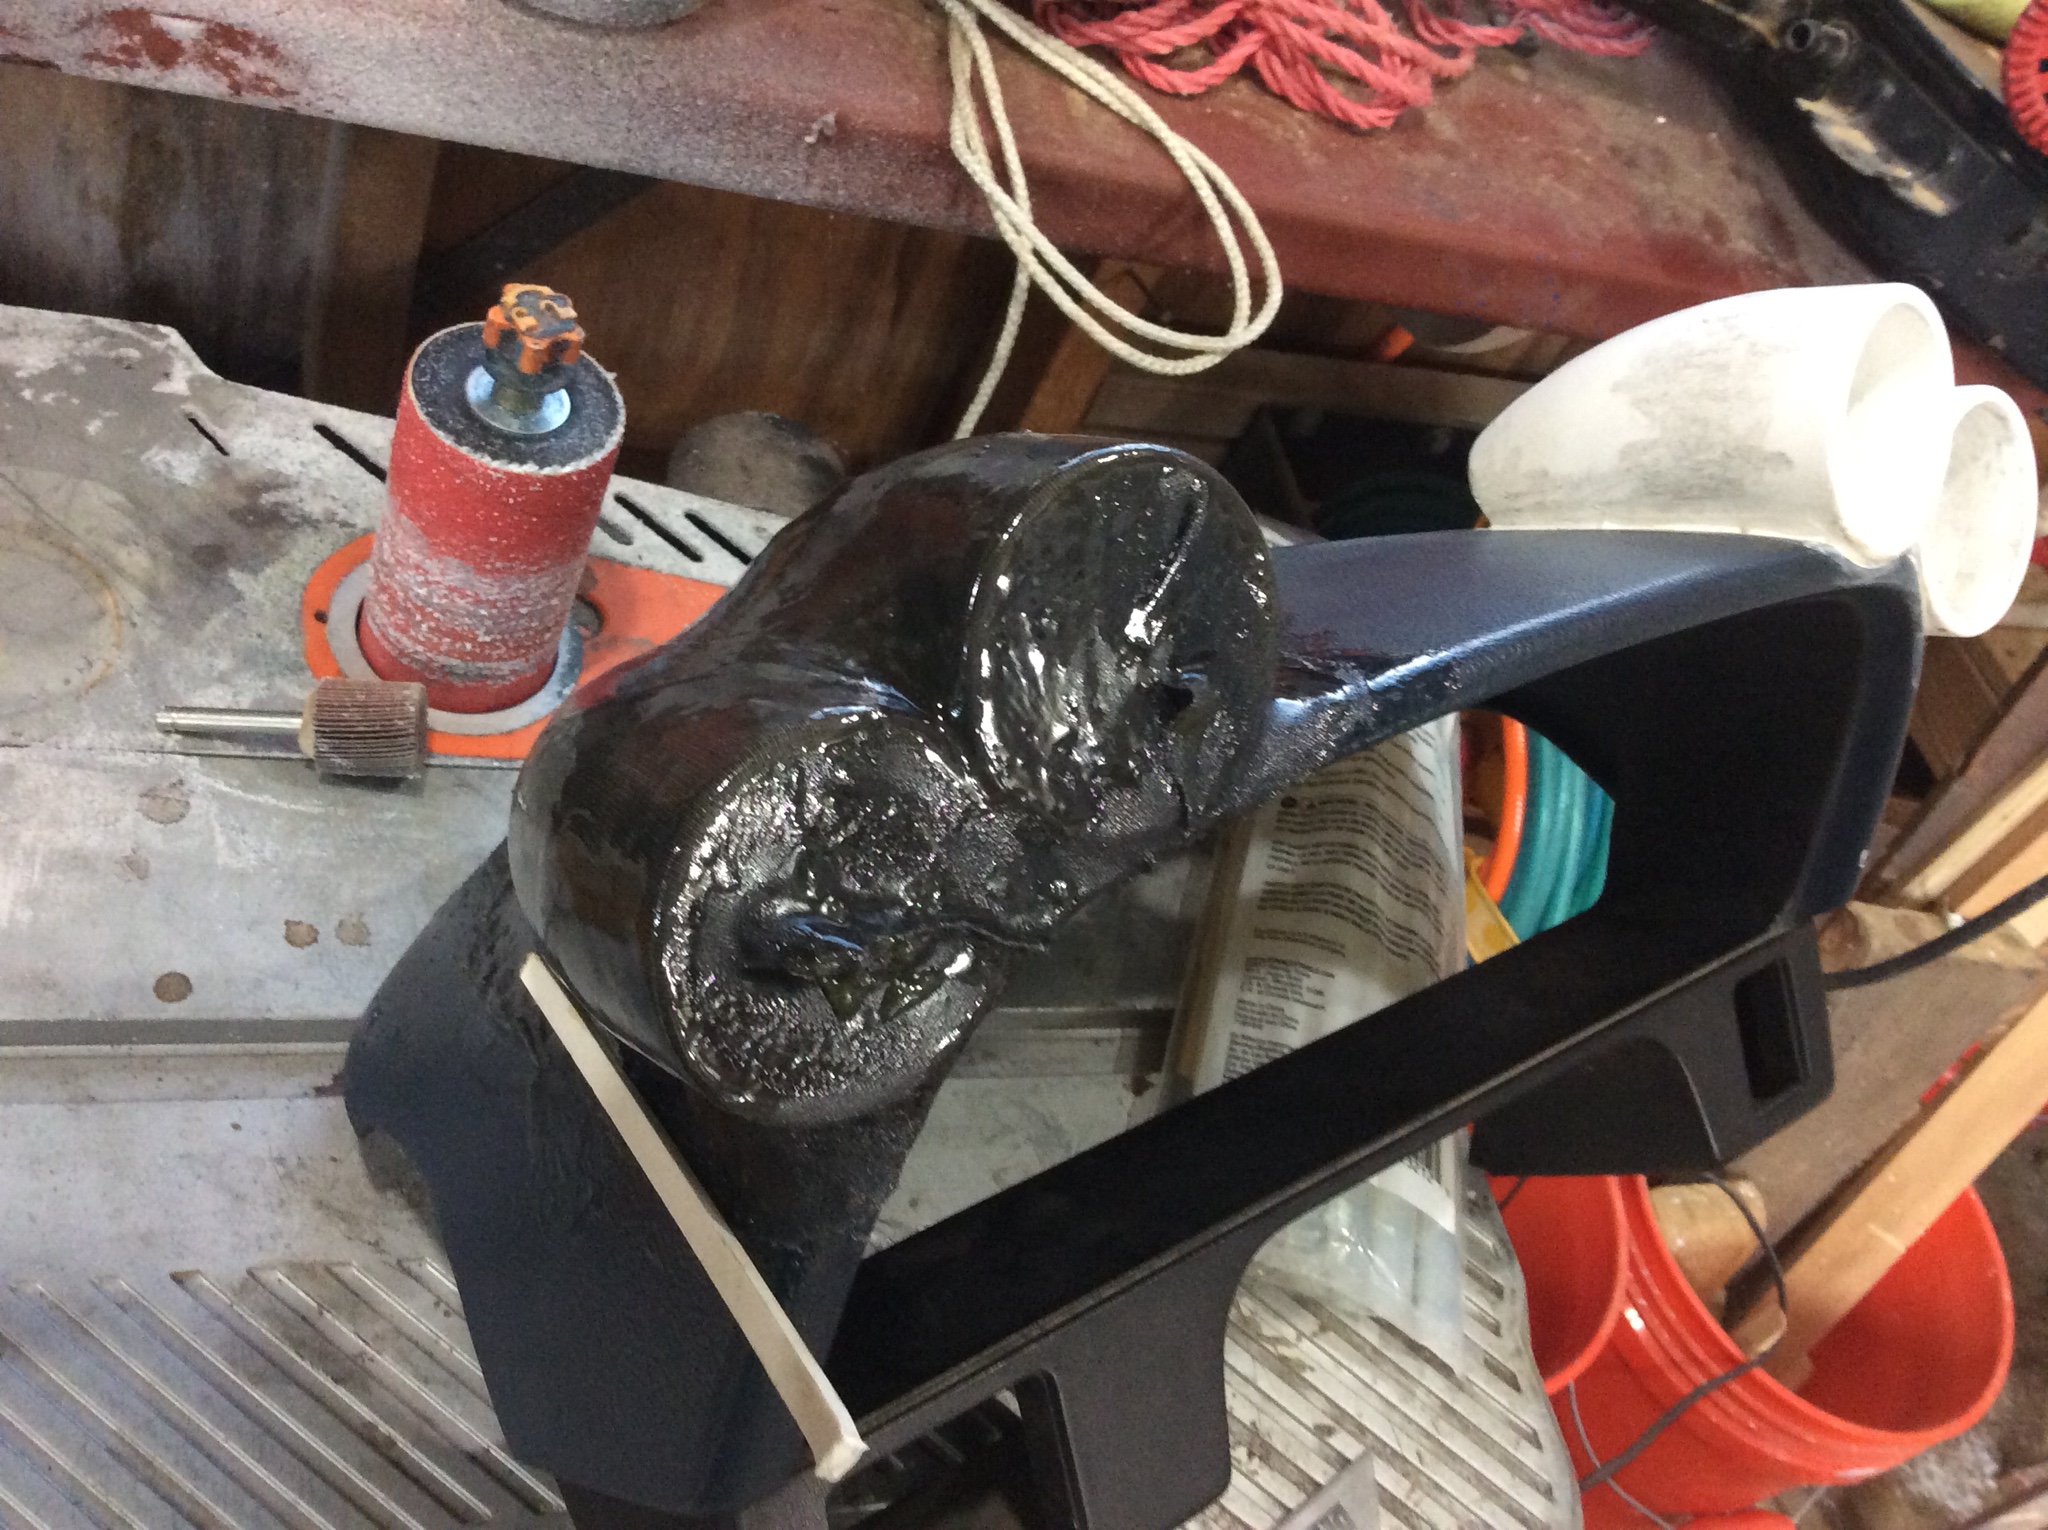
Very completely.
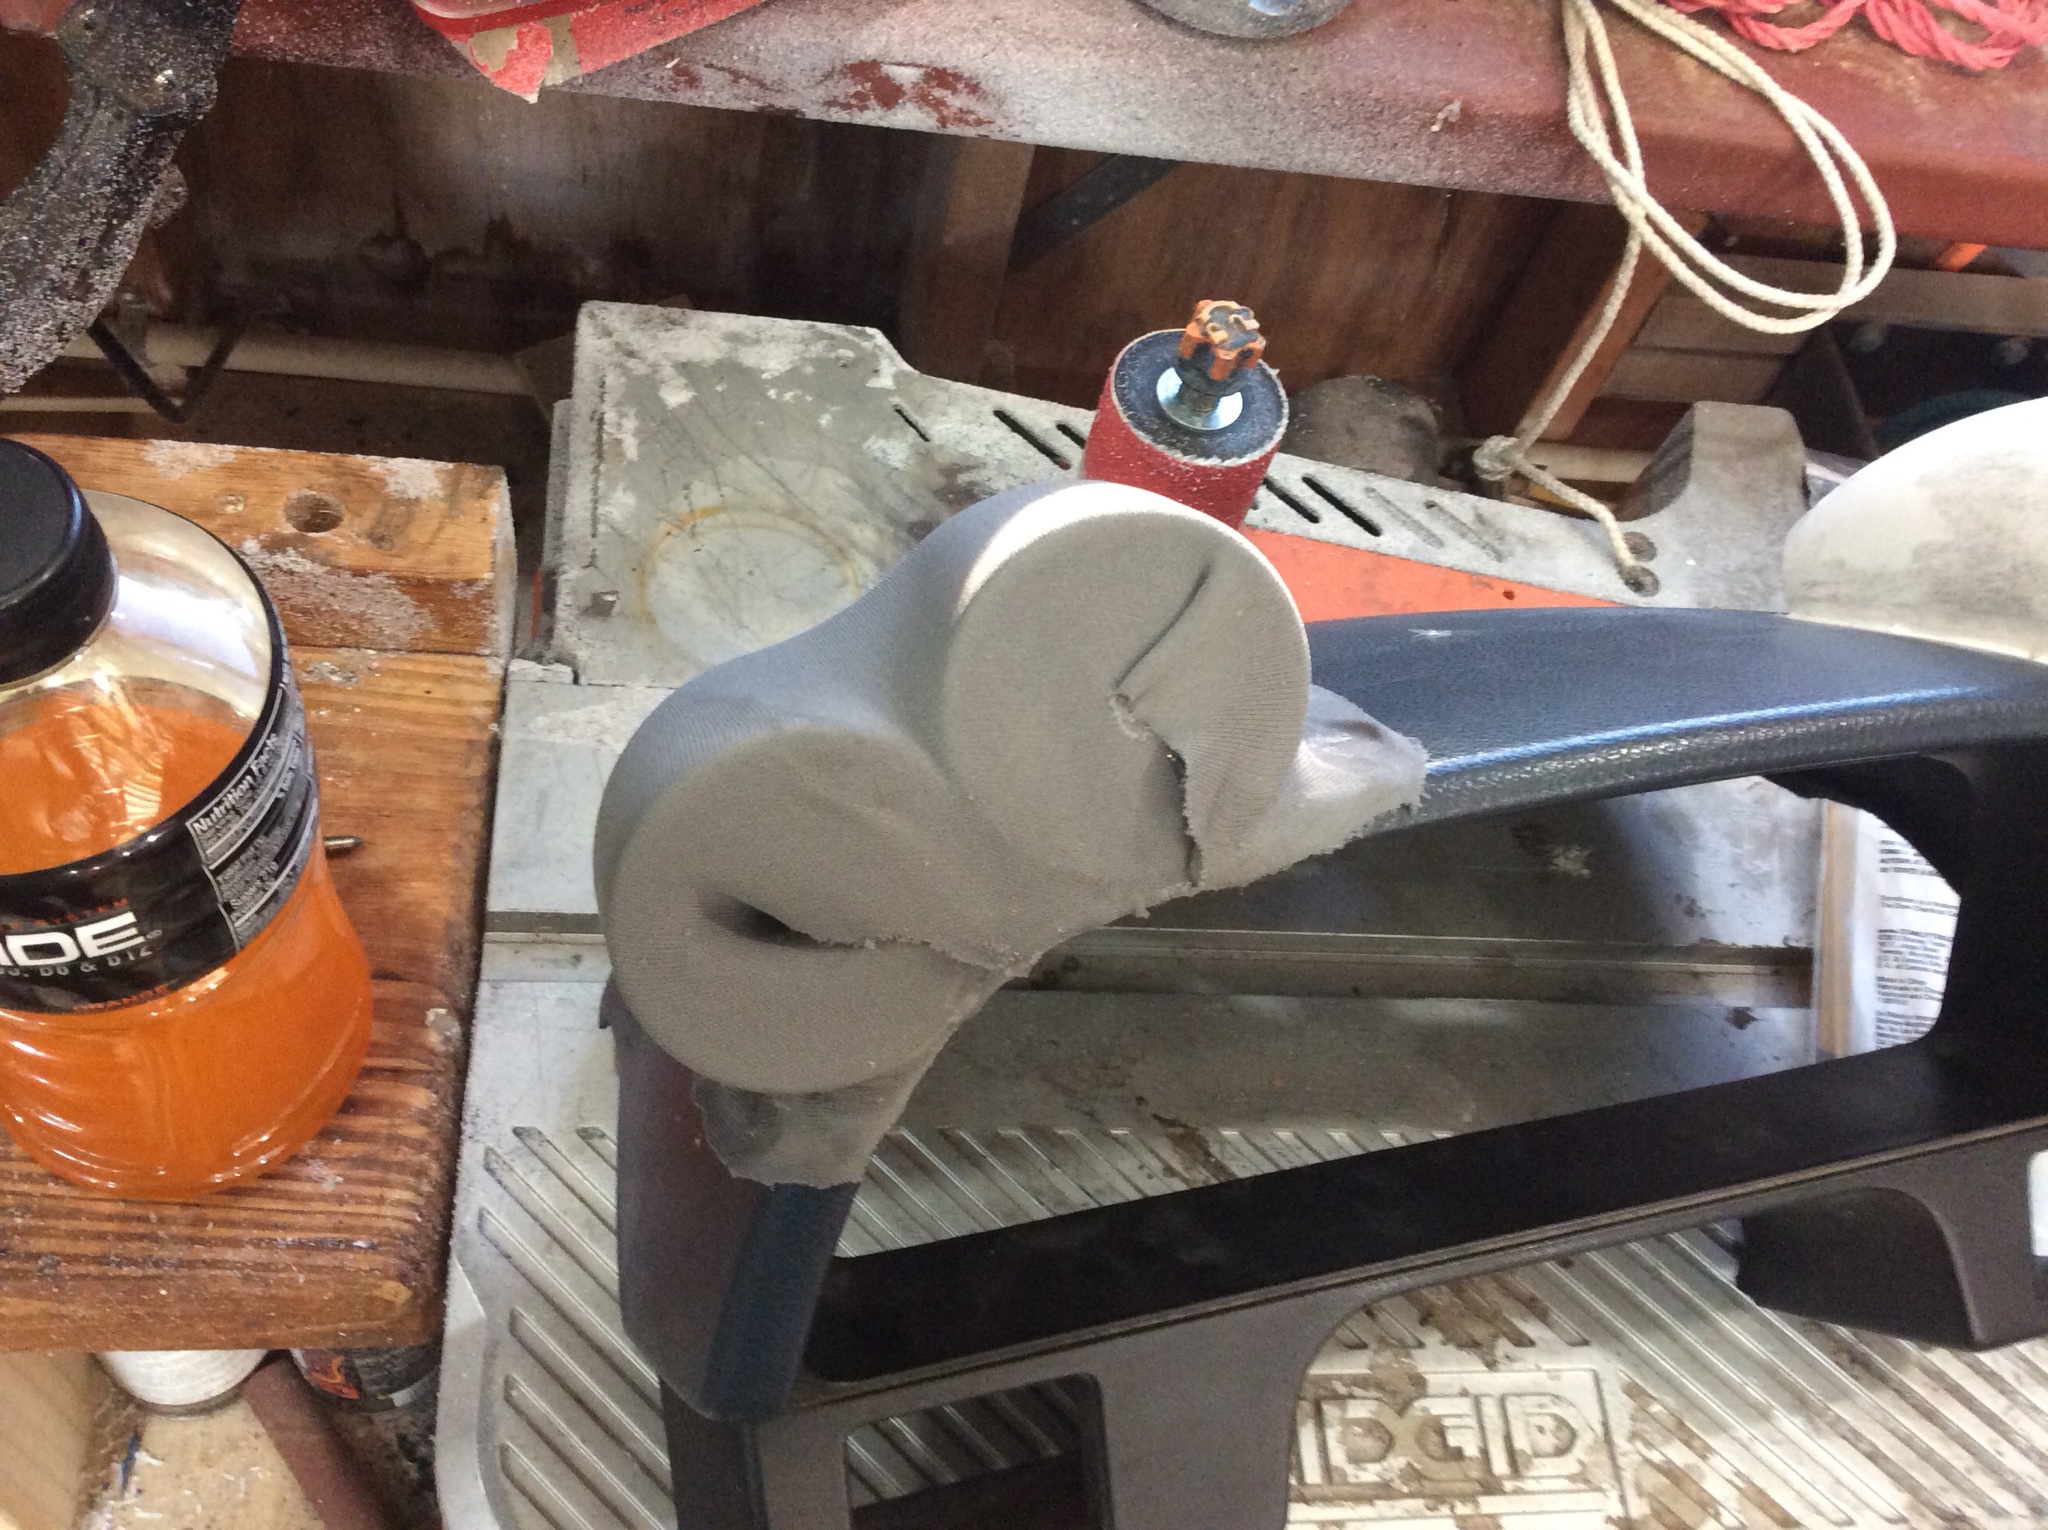
After it has gelled, you can cut away the pod openings. This is where the resin has set up but not fully hardened. It will be soft, and still hot from the chemical reaction, but it will no longer be tacky to the touch.
Smoothing out the rough spots.
Here I needed to drill some holes to get resin to the back side of the fabric. It was still a little thin and flexible so I figured backfilling would help a lot with that, and it did.
It did make a nasty mess of the inside of the pods, but nothing a flap wheel won't take care of.
More coats of resin just to build it up a touch.
Filing gaps with jb weld.
And smoothing
You can see in the pic below again what I was mentioning about fitting the pods off the bezel. On the right the fabric stretched way far back, vs on the left, not nearly as much. Now how far it tapers back can totally be up to you, but on the left I have far less of the pod rear end poking up through the fabric.
If you have any large gaps to fill, use some bondo. Otherwise if it's just tiny areas jb works well but is harder to shape after the fact. I just didn't have any bondo at the time, but did have the jb.
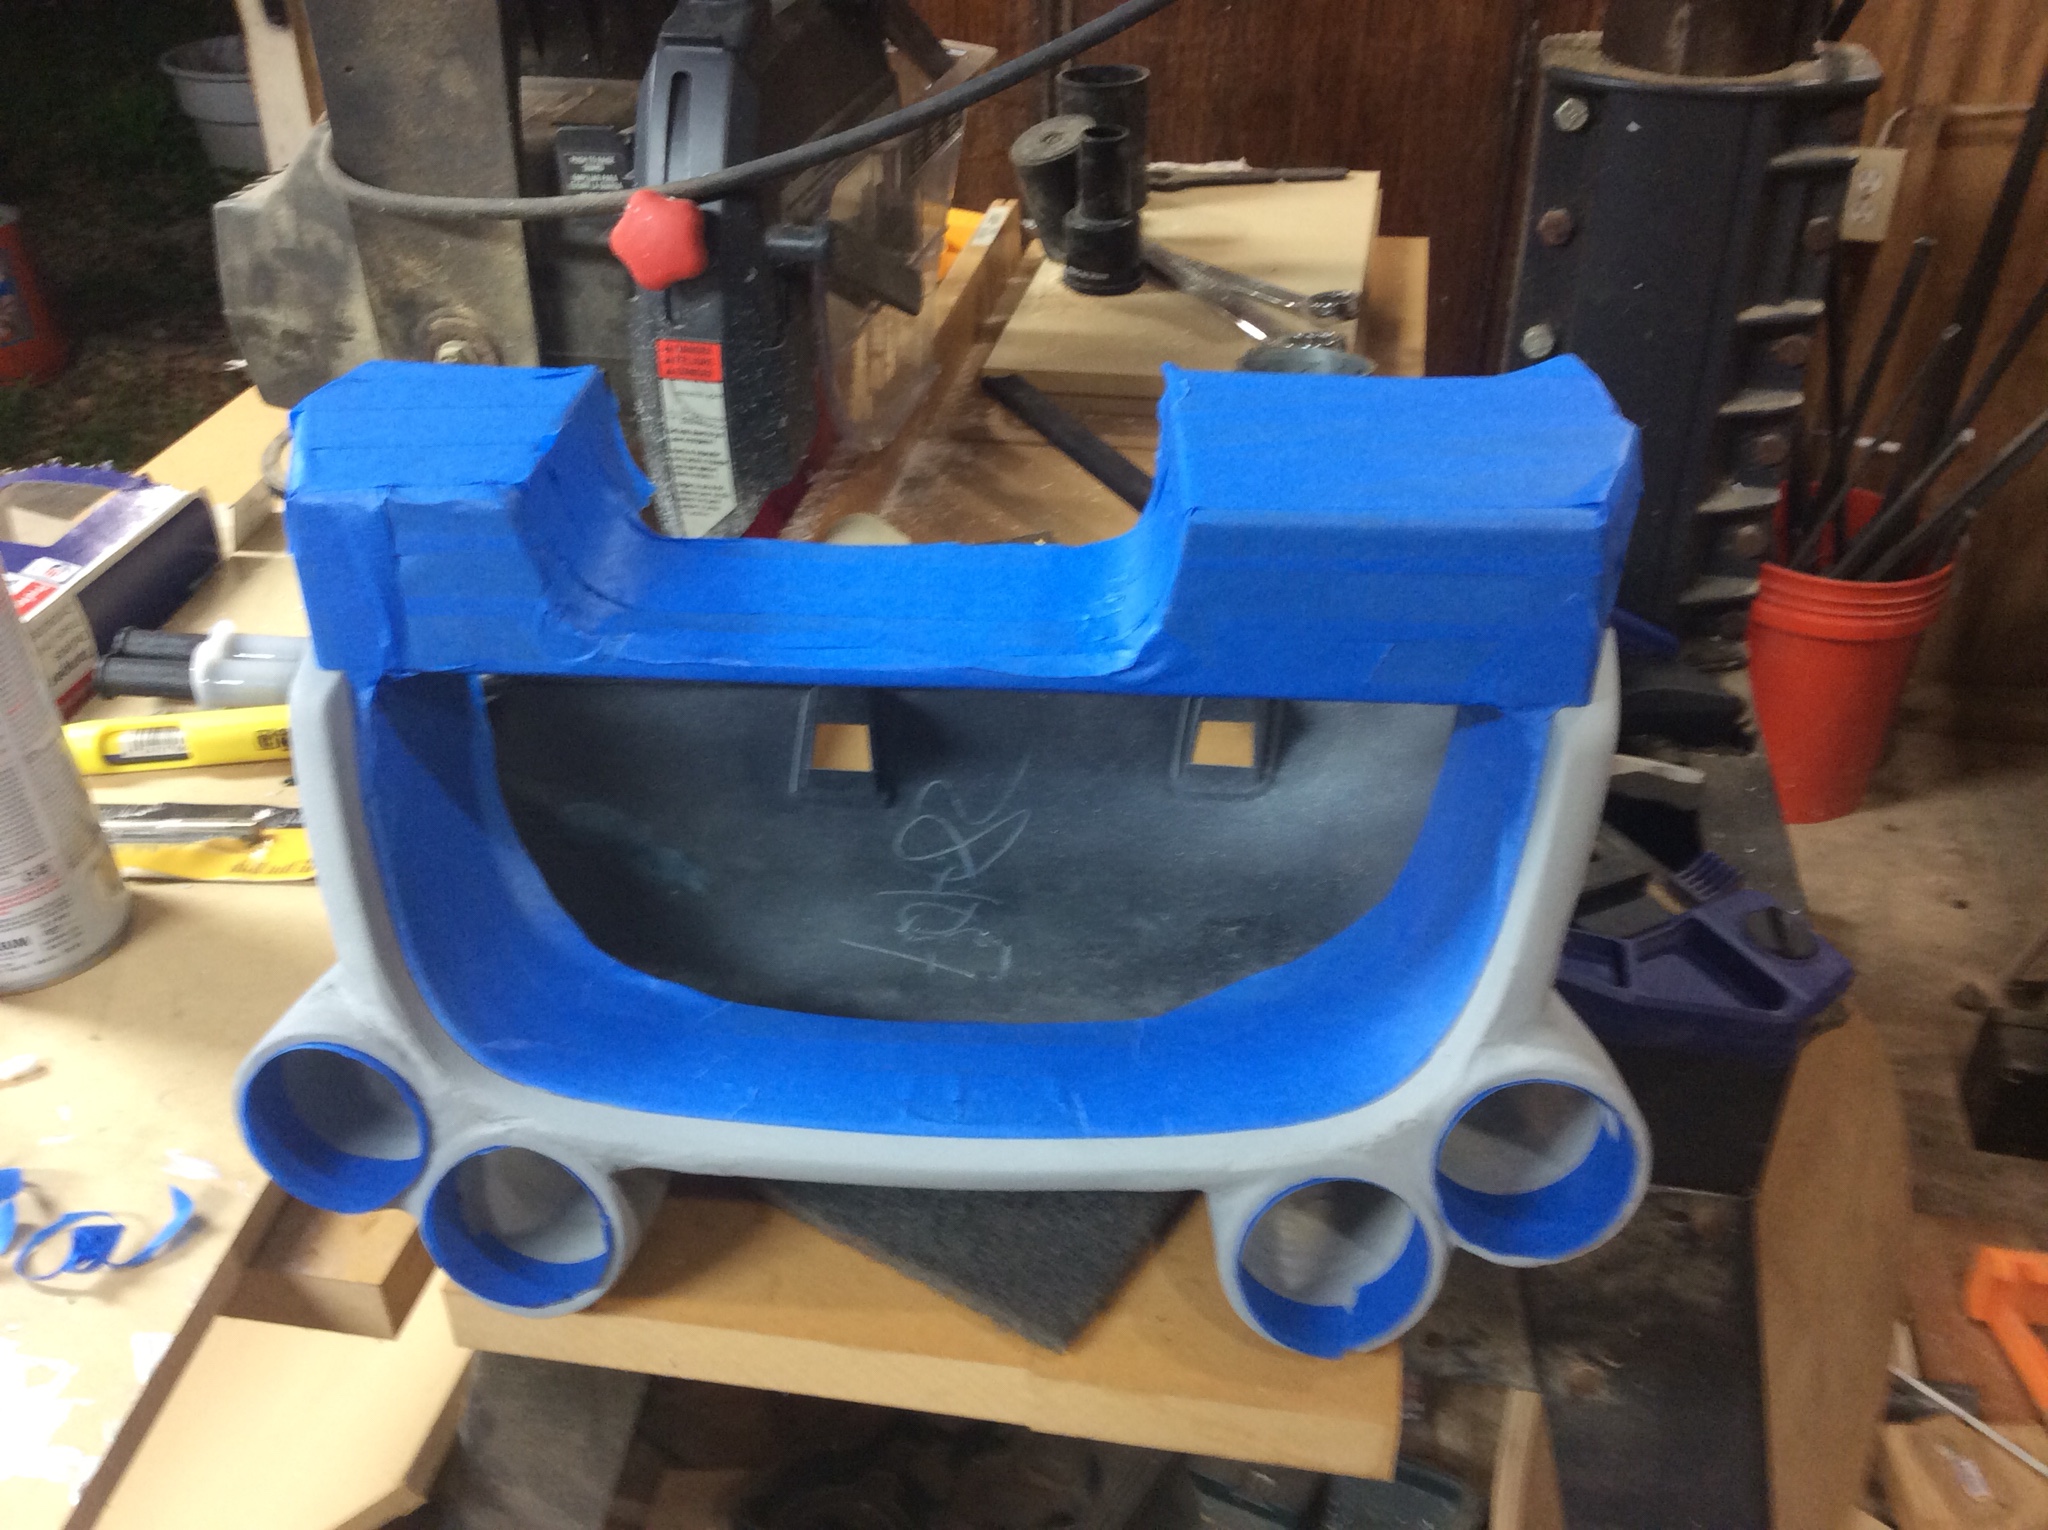
Once everything was sufficiently shaped, now for some masking and priming.
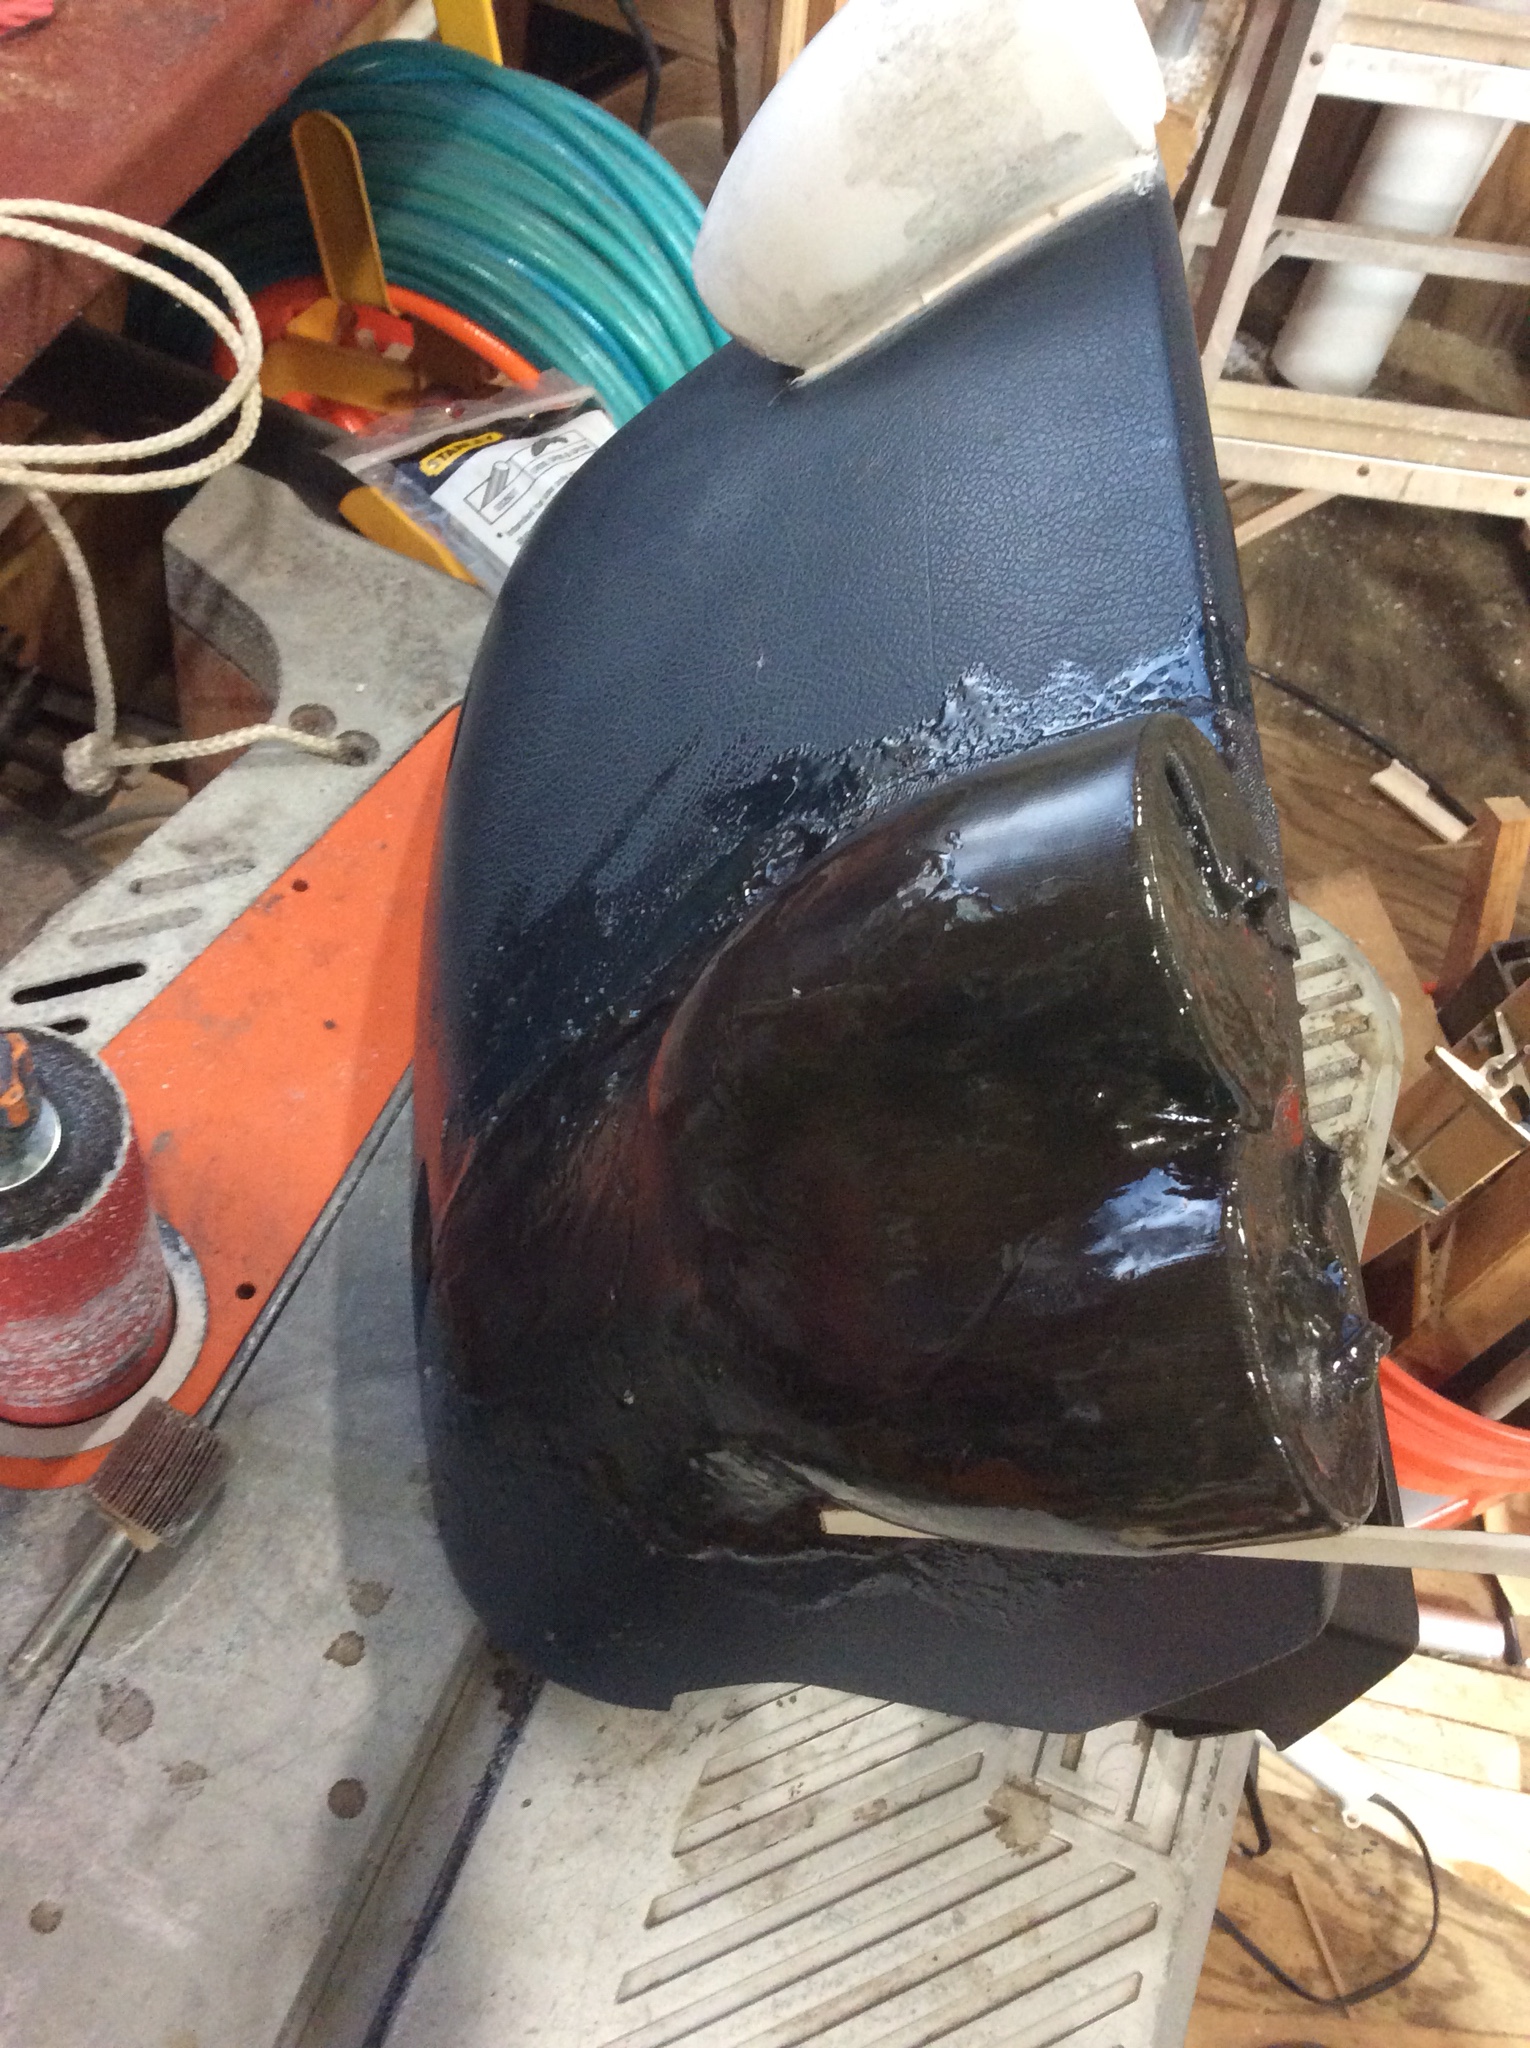
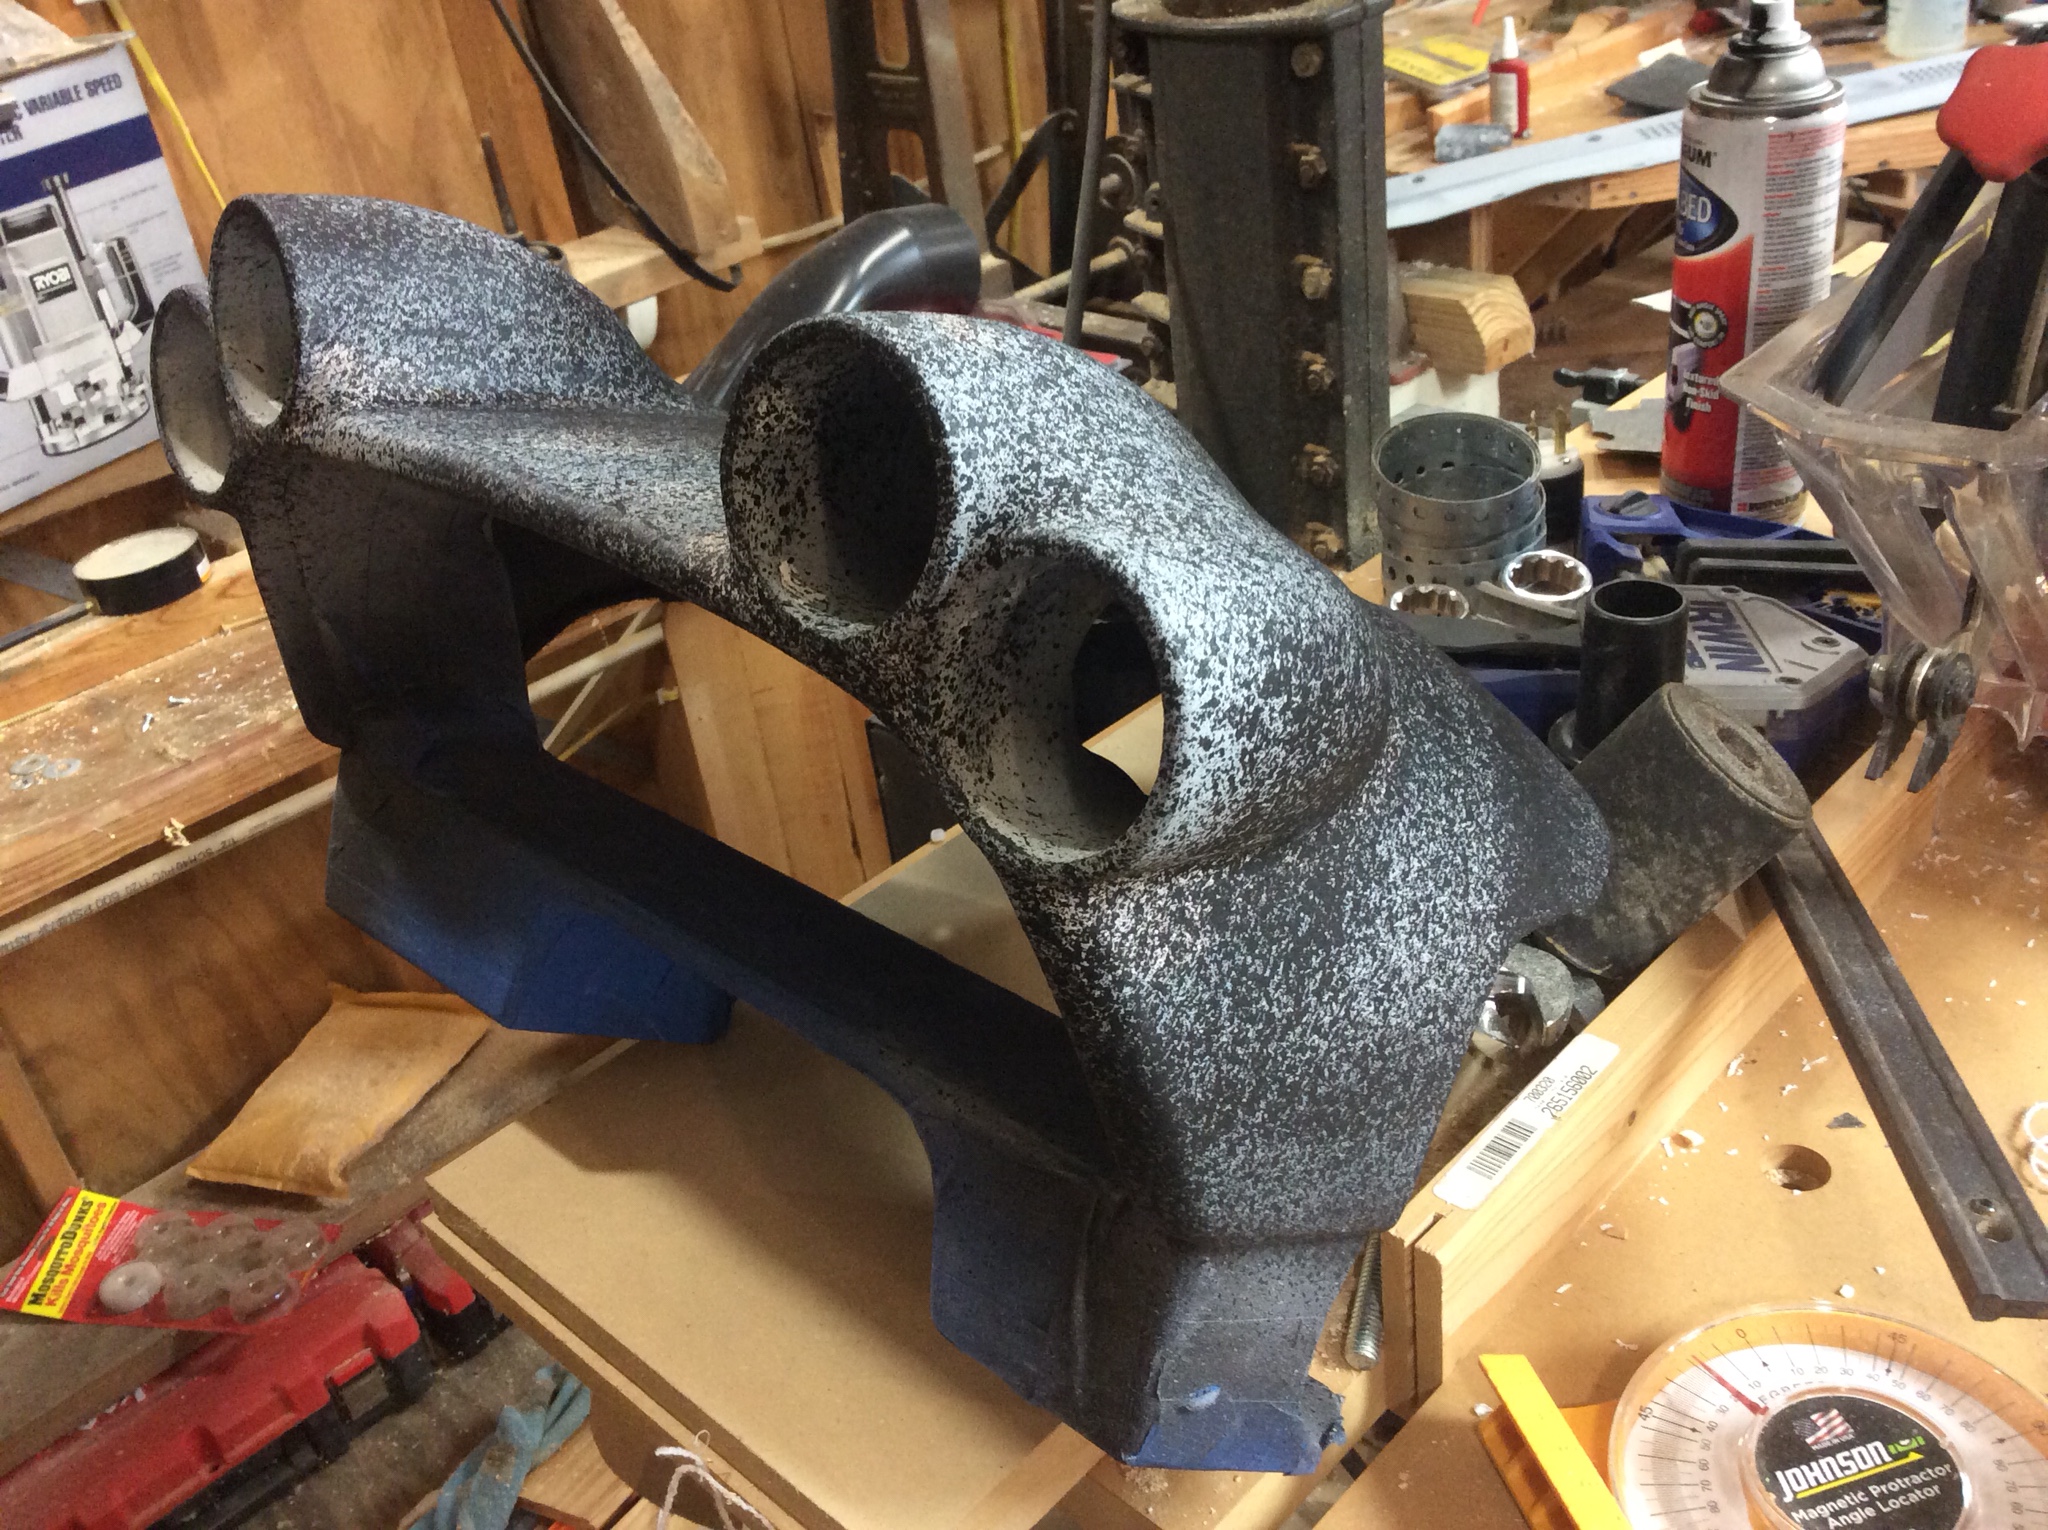
After a few coats and some sanding and smoothing in between, time for the bedliner. I recommend duplicolor bed armor. I have worked with the restoleum bed liner in the future and it sucks. Clogs easily, overall bleh.
First coat, go lightly with it otherwise it'll get all saggy and potentially split on you.
Repeat as needed. It dries with a fairly eggshell finish. If you are color matching your interior you can just spray over this. I have not found the right color gray for that yet so I'm holding off for now, since black works.
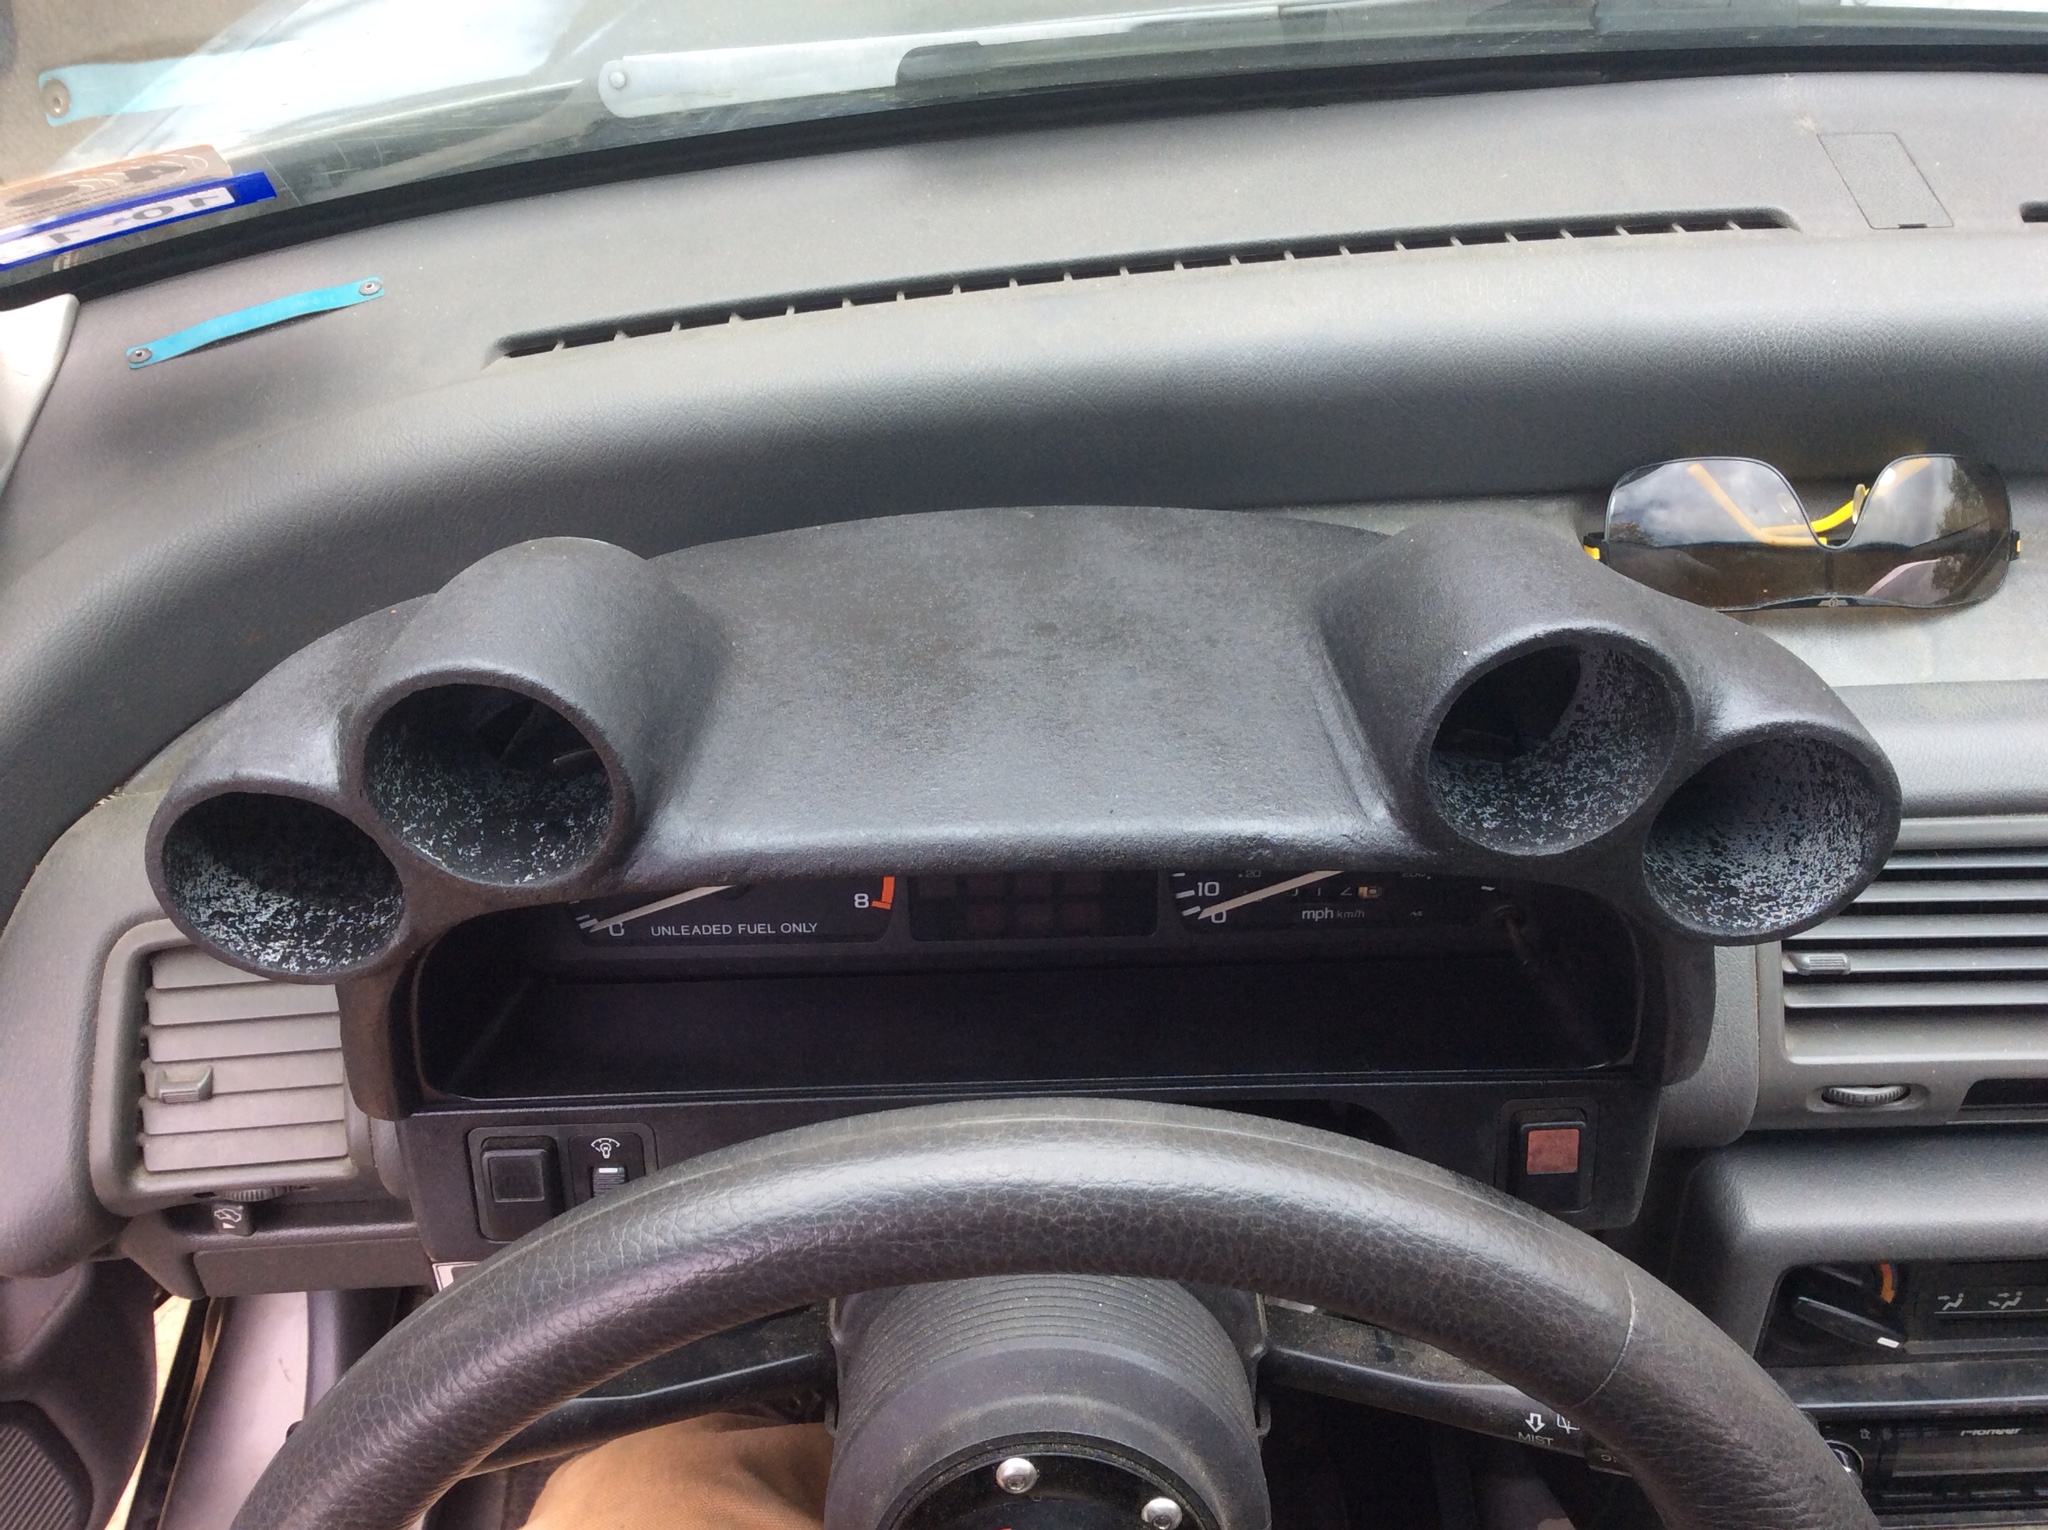
And the nearly final product. I should probably have cleaned the pollen. Damn live oaks down here. Giving me the sneezes.
Sort of a top down. On the right you can see where I got a bit aggressive with the sanding as there is a bit of a groove there. Just be mindful of stuff like that. I'll likely go back and fix it at some point, when I get the color matched paint in for the interior gray most likely.
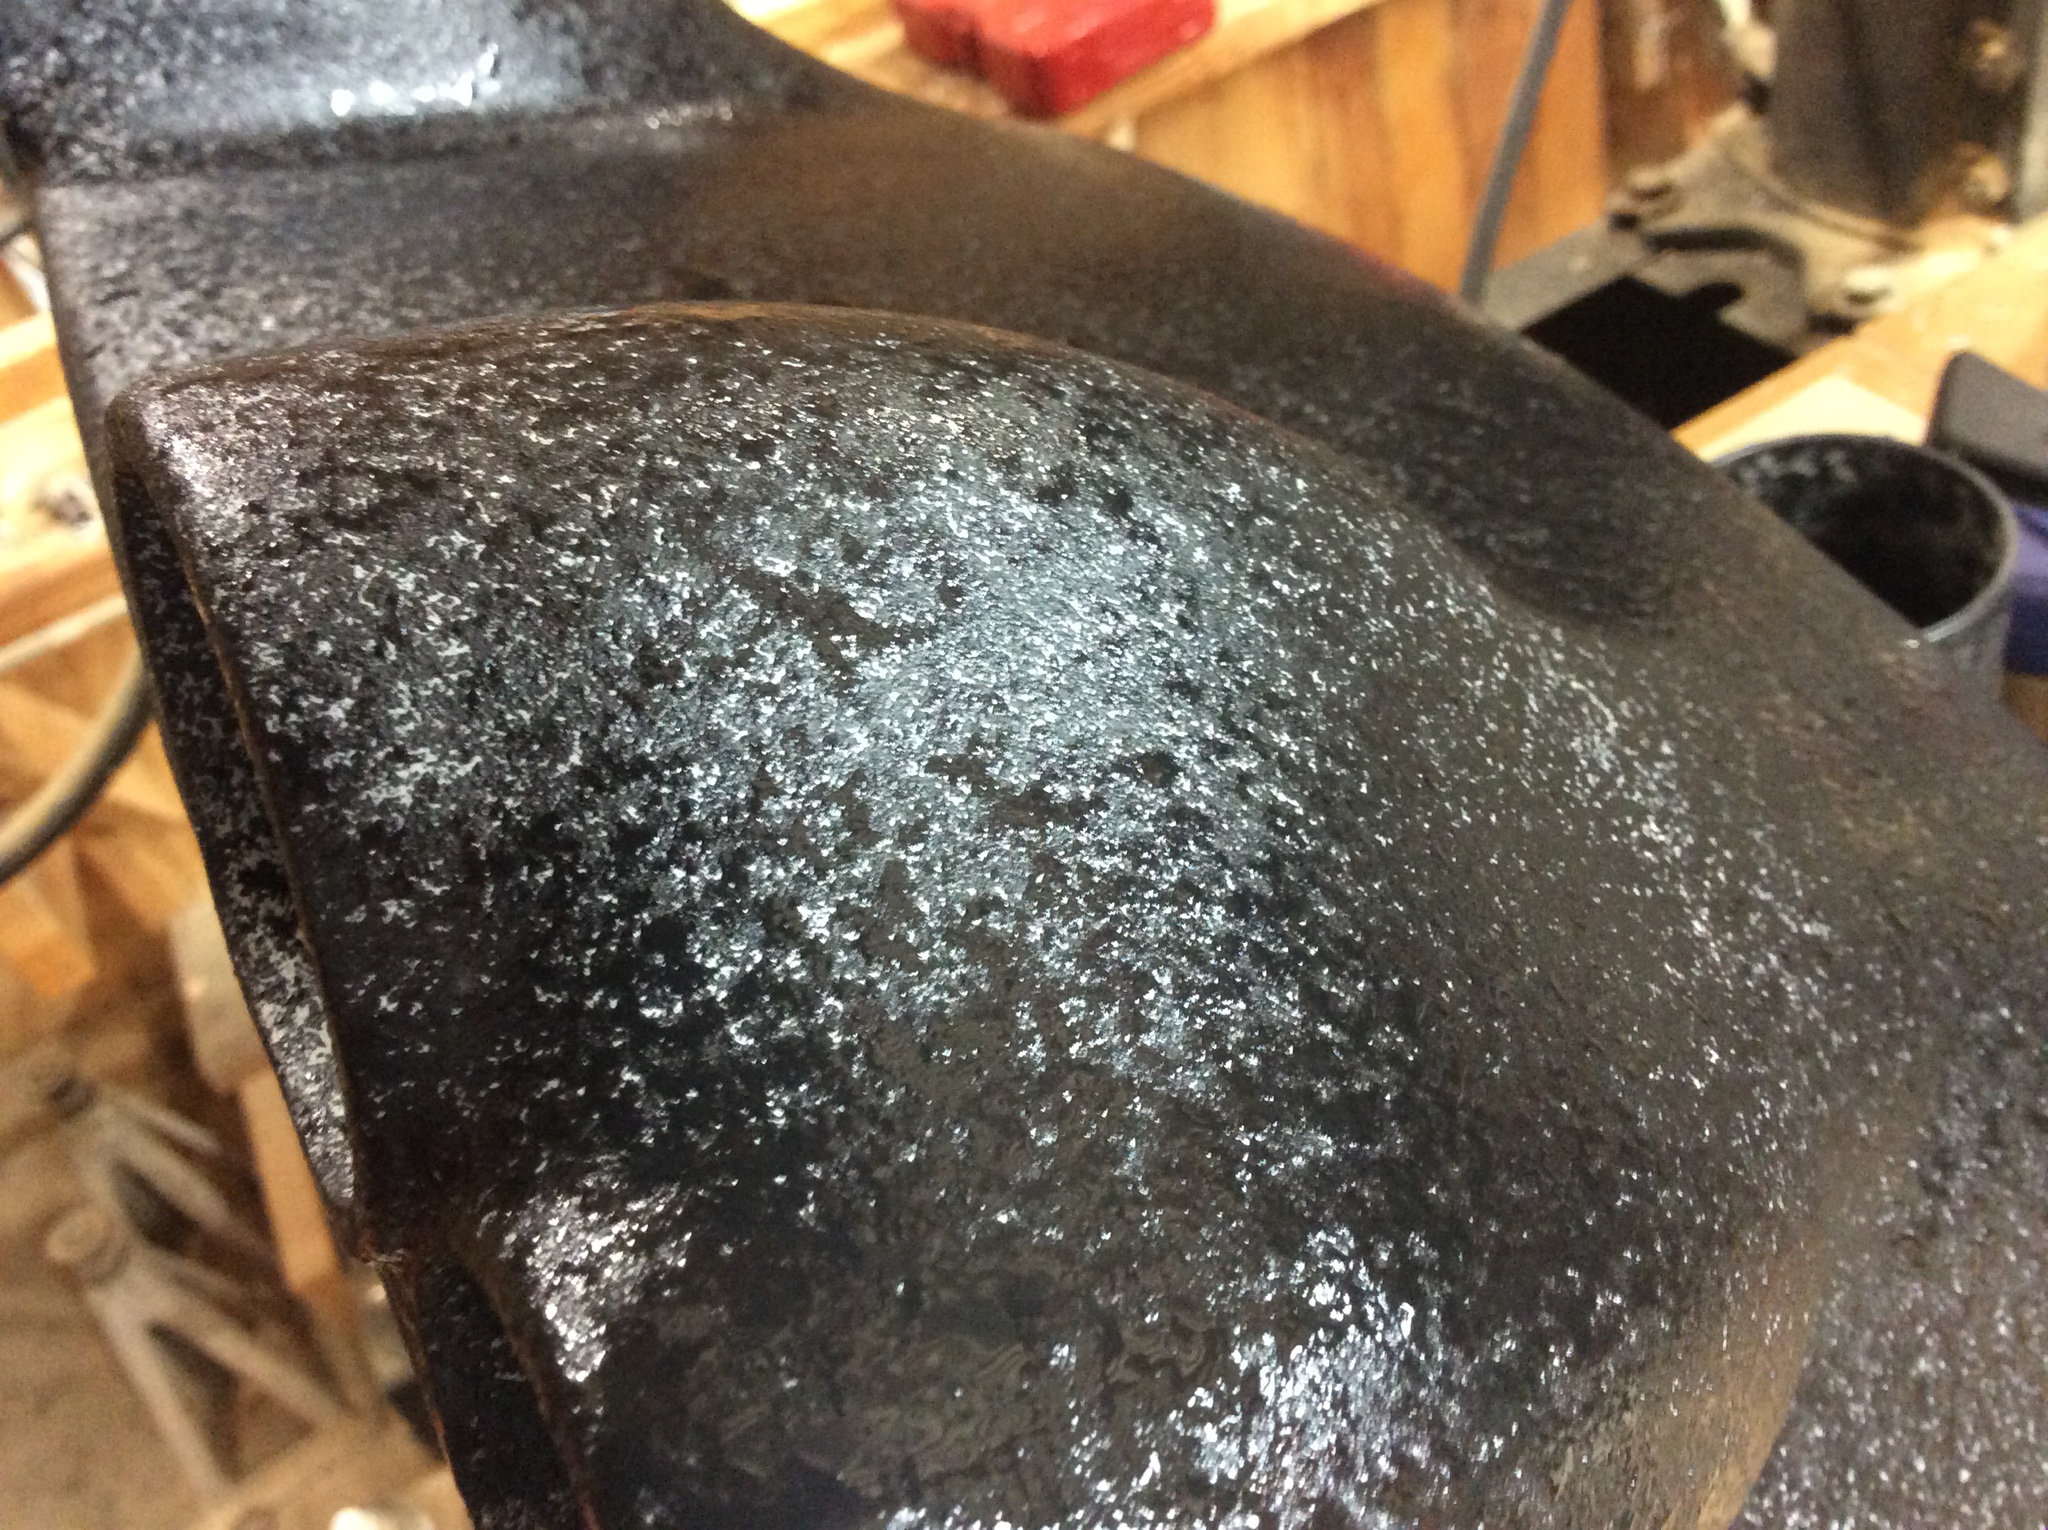
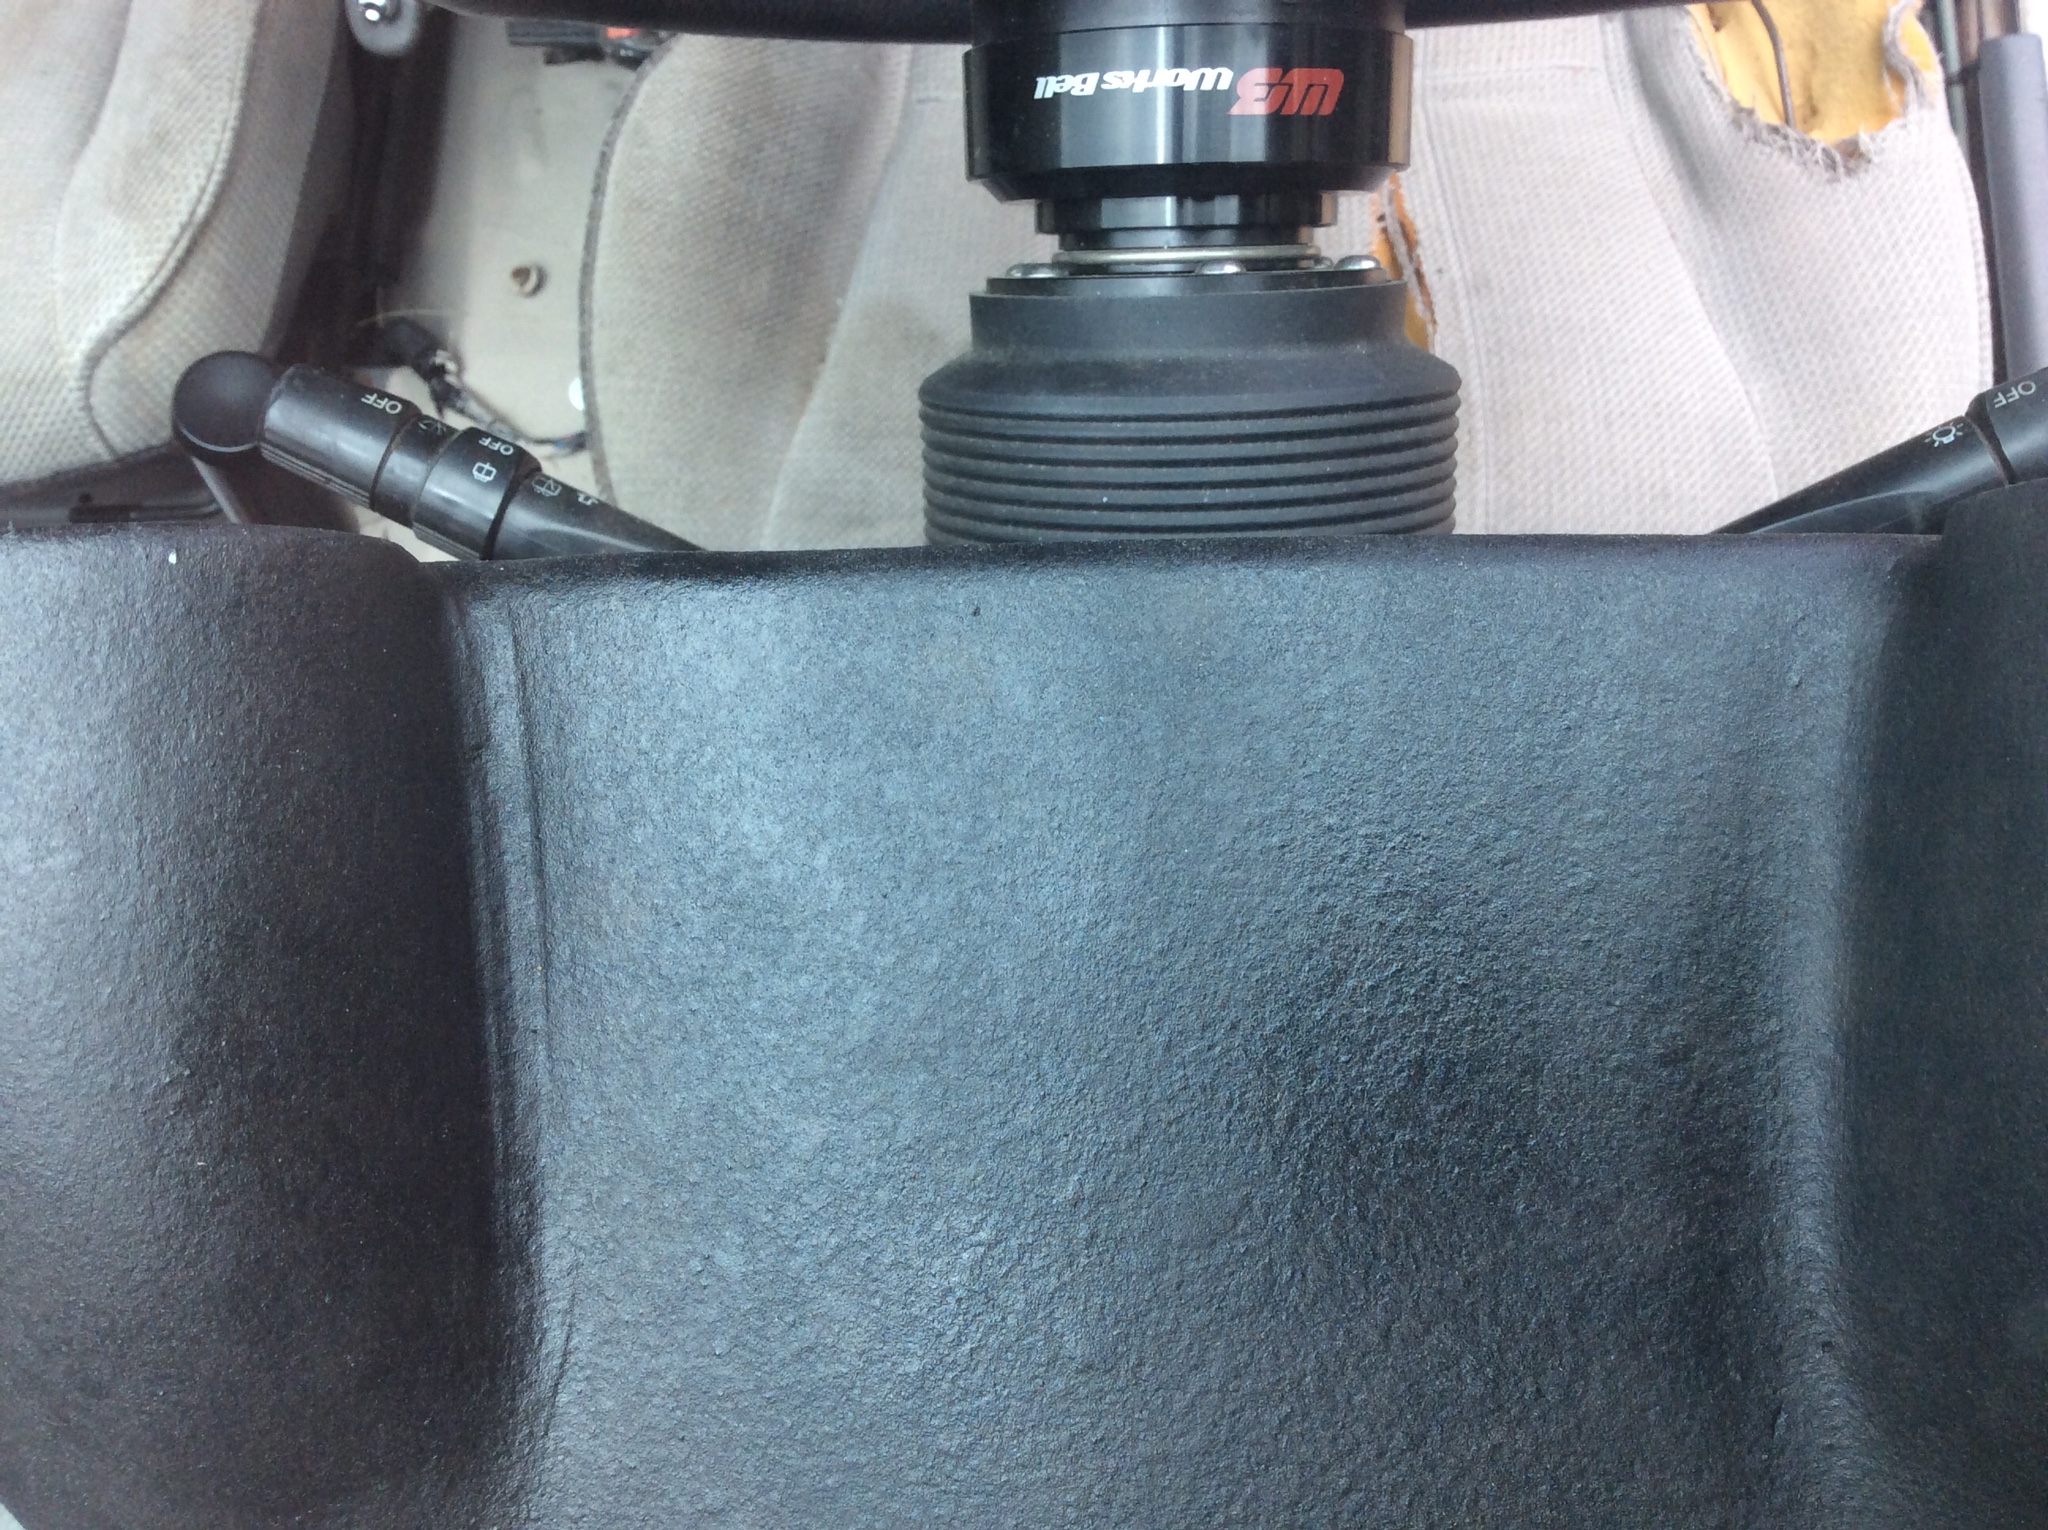
And a bit of a shot of the texture itself. If I were going to make a mold of these likely what I'd do is cast some of the original texture as a stamp and use that to stamp actual texture in body filler. That would be a massive undertaking though, and probably more effort than it's worth.
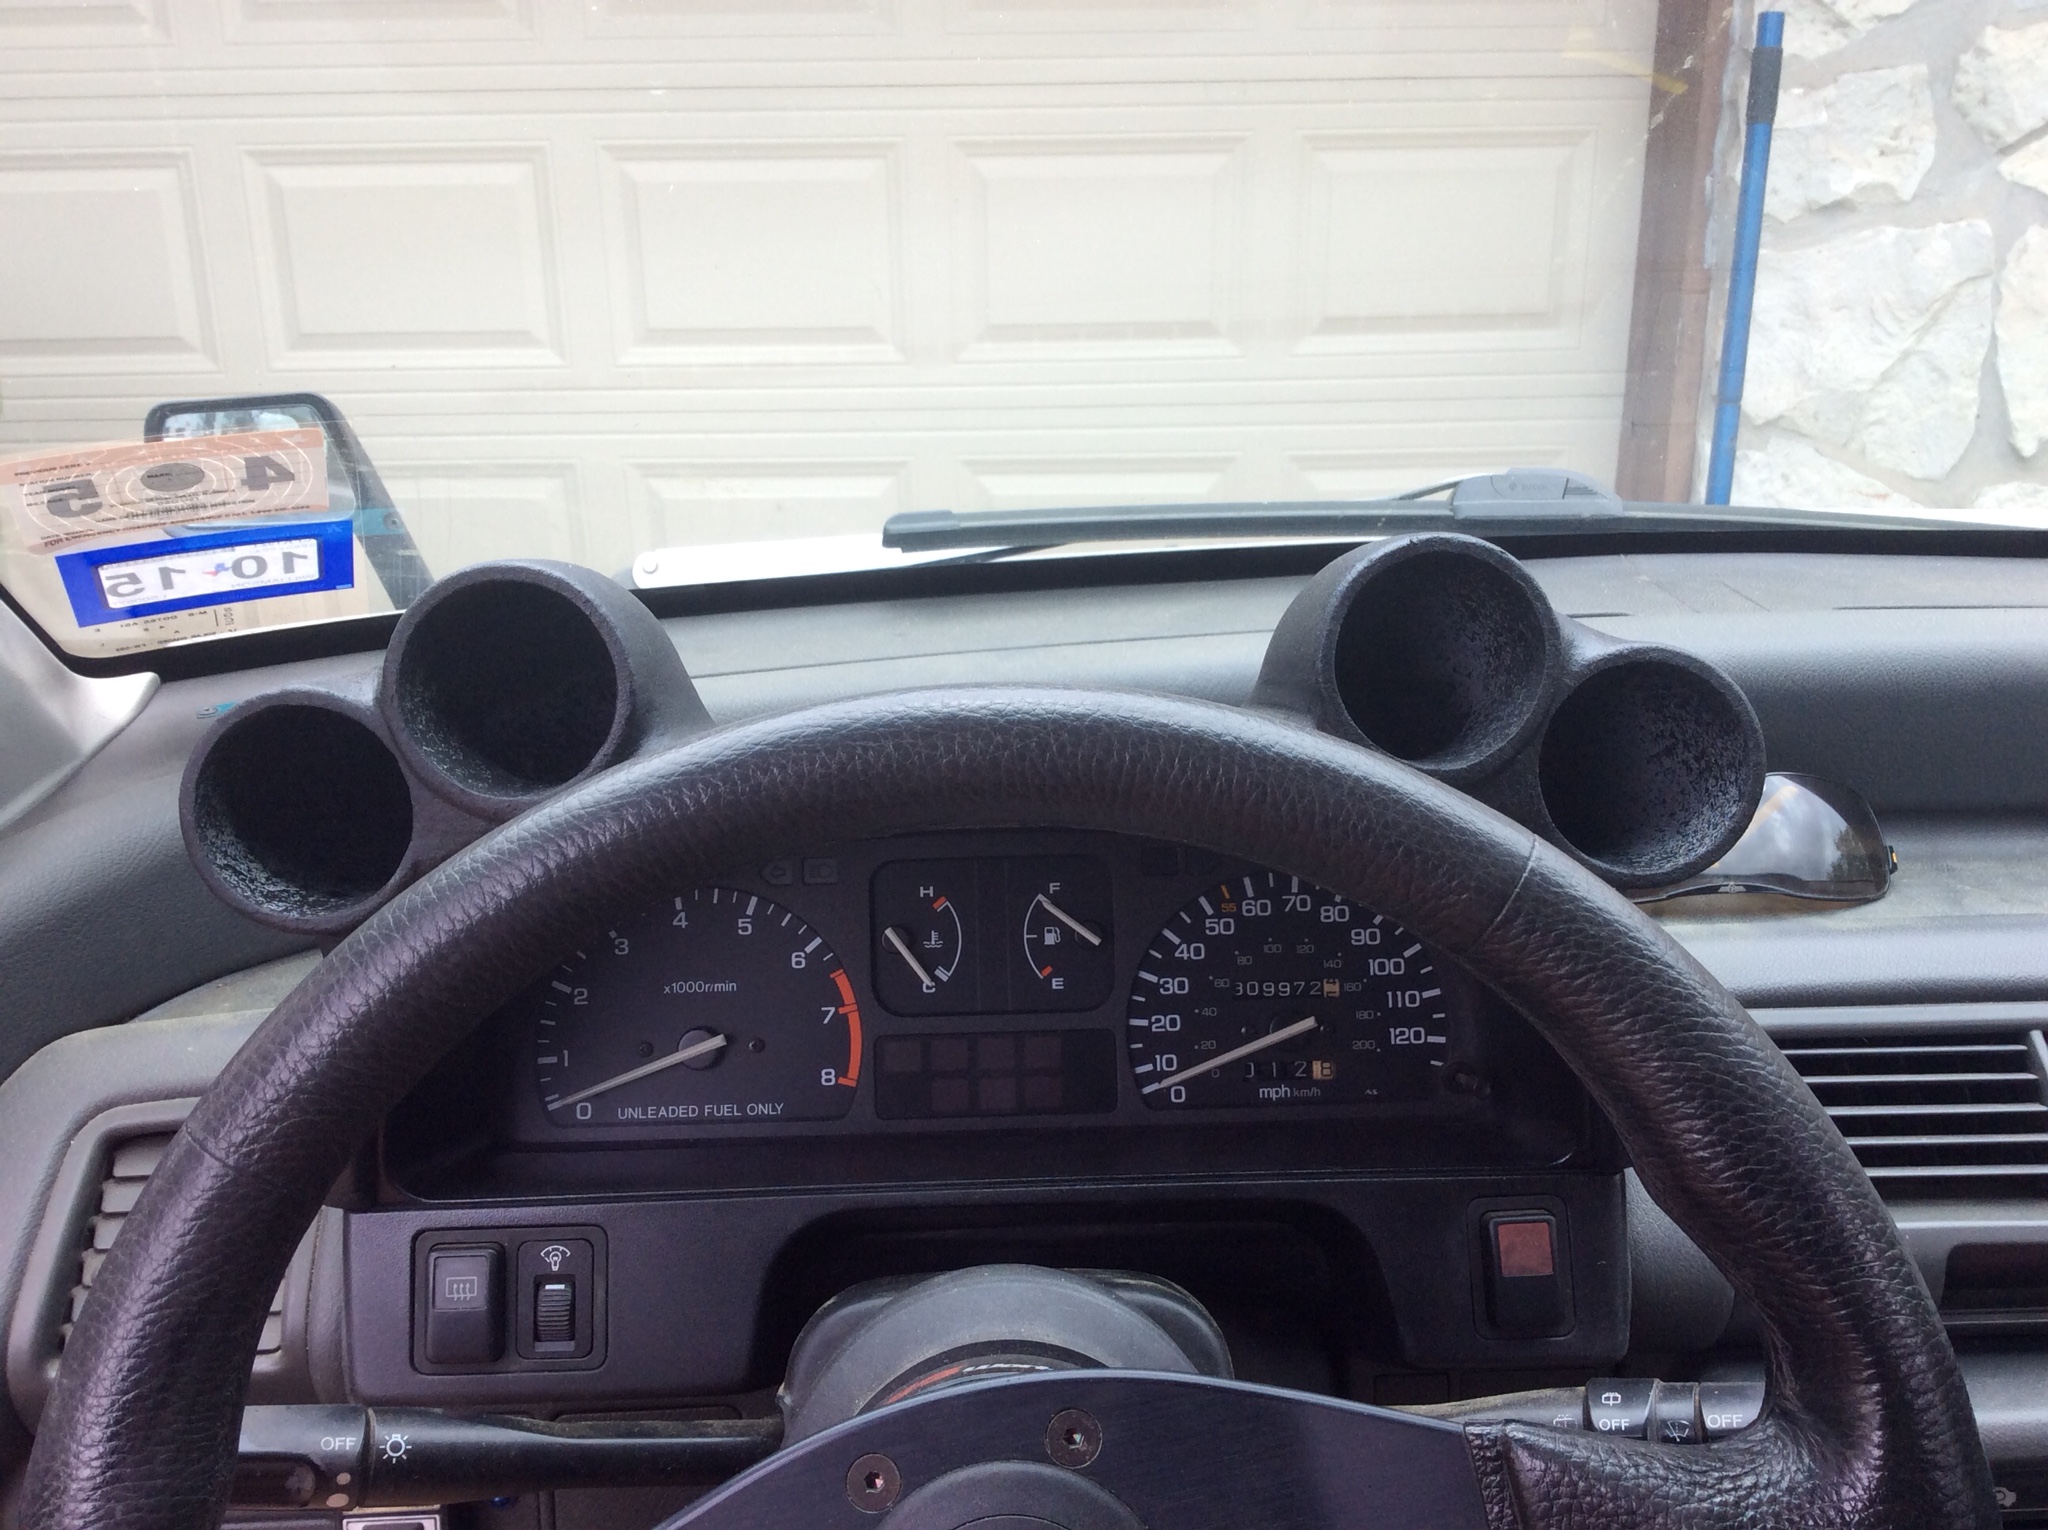
And here I put the camera lense right where my eye is and lined up the shot to give you an idea of how they look to to driver. I'm 5'7 so your line of sight may vary. All in all though I'm quite pleased.
A break down of the costs.
Bezel, free though my jaw is sore... You can use your own as needed. Since this is a fairly labor intensive process you might want to try to find another. The cool thing is since its gonna be painted anyway you don't really need to concern yourself with the color.
45 degree street elbow. I think about a buck a piece from Home Depot.
$15 Epoxy resin. I just used the bondo "fiberglass" resin. You may already have this on hand even.
$5 nylon fabric. I bought a couple yards of it so I can have some for other projects. You don't really need too much though, one yard will be more than adequate to give you a couple tries in case you screw something up.
$12 bed liner paint
Stuff like primer and jb weld I already had on hand, if you need bondo body filler I think that is $10 for a small container of it.
The cost itself isn't too bad, lots of labor, sanding and shaping.
Gauges of course can vary in price wildly, so that's up to you.
Tools used
Saw for cutting pvc
Hot glue gun for attaching pvc to bezel and to each other. You could use pvc glue on this if you had some handy, I wouldn't go and buy any specific for this though.
Spindle/belt sander for shaping. This can be done with a Dremel and sandpaper if you don't have a spindle sander handy.
Die grinder with flap wheel for opening up interior of pipes. Also can be done with a Dremel as needed. I also hogged out a bit with a hole cutting saw bit, but that in reality was more of a pain in the ass than it was worth. I'd recommend flap wheel on the die grinder above all.
Heat gun. It was optional, but helped in shaping the pods a bit so I didn't have to do as much sanding, and also for remelting hot glue as needed.
In summation, it was a lot of work but I'm happy with the results, and it's always been something I've wanted to do. I've built speaker boxes and the like with fleece and resin and fiberglass, but haven't really had the opportunity or need to build some pods. I hope this was informative and if you have any questions, comments, tips, criticisms please feel free to strike up a conversation.

The picture above shows the general concept of what we'll be working with. Anyone who has done diy with gauges knows how close the gauges will snug up into some 2" pvc. If you are having to work with a curve at all the 45 degree street elbow is a great start to your project. These can be had at most any place that supplies plumbing fittings and they are cheap.
I start with cutting away the majority of the scrap. I had a bandsaw to make quick work of it, you can also use a hand saw or pvc saw, it's fairly easy stuff to cut.

With that done, I needed to give it a little more general shaping.

And a shot of what will be the under side of the pod. Even more shaping will need done, so this is still in a rough state.

General idea of the location. You could potentially load up the entire top with pods if you need them, and depending on your taste.

Now, the moment of not turning back, we get to cut into the original housing itself. If you can get these bezels for cheap I recommend nabbing one whenever you come across them. Why, cause I might need more in the future and I'll be hitting you up! Gimme bezels plz.

Nestled in and hot glued in place.

If you are only needing one pod, then you can proceed to the steps about applying fabric and resin. Otherwise repeat this as needed.

Ok. Second gauge in place. Here would be my first real learning from experience tip. Bond the pods together before attaching any to the cluster. You can get them to mate up perfectly if you do it off the bezel. Otherwise you are going to be fighting the orientation on the bezel itself. If that isn't super clear I will point it out more in upcoming pics.
I also recommend sanding a recess into the side of one pod to match the profile of the other pod. The bezel of the gauge doesn't come to the edge of the pod, so you can see you have a bit of clearance to work with this.
In the pic below you can see how they fit together just a little tighter in cutting that recess.

And repeat on the other side. Measure as carefully as you can to get them even. Or if symmetry isn't your thing, do what you will. A side note, don't try to use the attachment points at the back as any reference for center, they are totally not symmetrical.

Ok here you can see what I was talking about in sticking the pods together off the bezel. The two on the left, there is a huge gap between the pods at the back. I did those individually. On the right they are tight against each other the whole way back. You will need to fiddle with the alignment of the 45 degree bend to get things just right, but having them tight together like that helps a great deal in the future steps.

All right, here we go, draping the fabric. I used some heavy nylon since it has good stretch. I normally use fleece for this type of thing, but it is too thick for what I am going for here.

A learning step here. I glued in between the pods. There is no need to do that, and you just give yourself more headache in the future if you do so.

Here we see just gluing around the edge and getting the fabric pulled as tight as possible. I recommend a high melt temp glue gun as you want as much bond here as possible, and also the ability to press the glue as flat as possible. That's important for shaping in the future.

Continue to wrap and then cut away any excess. Doubled layers is all right, just so long as you get enough resin saturation.

Here I will point out why bonding the pods together off the bezel works out much better. You can see in the pic below that I have the fabric stretched all the way to the back of the bend on the bezel and I still have protrusion on the back of the pods. This could have been addressed with a bit more sanding and shaping. But I was lazy and wanted to get it done.

Below you can see a bit of a wrinkle in the fabric below. This is from where I tried to glue the fabric between the pods and it pulled free. The reason I am saying this is a totally unnecessary step is for two reasons. If you leave the fabric like I did here, stretched across the top, then there is no need to glue.
If you want a gap all the way down to the seam of the pods, we'll just cut away that fabric once the resin has gelled and then fill the gaps with filler. Either way, no need to glue between the pods here.

Coat with resin completely.

Very completely.

After it has gelled, you can cut away the pod openings. This is where the resin has set up but not fully hardened. It will be soft, and still hot from the chemical reaction, but it will no longer be tacky to the touch.


Smoothing out the rough spots.

Here I needed to drill some holes to get resin to the back side of the fabric. It was still a little thin and flexible so I figured backfilling would help a lot with that, and it did.

It did make a nasty mess of the inside of the pods, but nothing a flap wheel won't take care of.


More coats of resin just to build it up a touch.

Filing gaps with jb weld.

And smoothing
You can see in the pic below again what I was mentioning about fitting the pods off the bezel. On the right the fabric stretched way far back, vs on the left, not nearly as much. Now how far it tapers back can totally be up to you, but on the left I have far less of the pod rear end poking up through the fabric.

If you have any large gaps to fill, use some bondo. Otherwise if it's just tiny areas jb works well but is harder to shape after the fact. I just didn't have any bondo at the time, but did have the jb.
Once everything was sufficiently shaped, now for some masking and priming.

After a few coats and some sanding and smoothing in between, time for the bedliner. I recommend duplicolor bed armor. I have worked with the restoleum bed liner in the future and it sucks. Clogs easily, overall bleh.
First coat, go lightly with it otherwise it'll get all saggy and potentially split on you.

Repeat as needed. It dries with a fairly eggshell finish. If you are color matching your interior you can just spray over this. I have not found the right color gray for that yet so I'm holding off for now, since black works.

And the nearly final product. I should probably have cleaned the pollen. Damn live oaks down here. Giving me the sneezes.

Sort of a top down. On the right you can see where I got a bit aggressive with the sanding as there is a bit of a groove there. Just be mindful of stuff like that. I'll likely go back and fix it at some point, when I get the color matched paint in for the interior gray most likely.

And a bit of a shot of the texture itself. If I were going to make a mold of these likely what I'd do is cast some of the original texture as a stamp and use that to stamp actual texture in body filler. That would be a massive undertaking though, and probably more effort than it's worth.

And here I put the camera lense right where my eye is and lined up the shot to give you an idea of how they look to to driver. I'm 5'7 so your line of sight may vary. All in all though I'm quite pleased.

A break down of the costs.
Bezel, free though my jaw is sore... You can use your own as needed. Since this is a fairly labor intensive process you might want to try to find another. The cool thing is since its gonna be painted anyway you don't really need to concern yourself with the color.
45 degree street elbow. I think about a buck a piece from Home Depot.
$15 Epoxy resin. I just used the bondo "fiberglass" resin. You may already have this on hand even.
$5 nylon fabric. I bought a couple yards of it so I can have some for other projects. You don't really need too much though, one yard will be more than adequate to give you a couple tries in case you screw something up.
$12 bed liner paint
Stuff like primer and jb weld I already had on hand, if you need bondo body filler I think that is $10 for a small container of it.
The cost itself isn't too bad, lots of labor, sanding and shaping.
Gauges of course can vary in price wildly, so that's up to you.
Tools used
Saw for cutting pvc
Hot glue gun for attaching pvc to bezel and to each other. You could use pvc glue on this if you had some handy, I wouldn't go and buy any specific for this though.
Spindle/belt sander for shaping. This can be done with a Dremel and sandpaper if you don't have a spindle sander handy.
Die grinder with flap wheel for opening up interior of pipes. Also can be done with a Dremel as needed. I also hogged out a bit with a hole cutting saw bit, but that in reality was more of a pain in the ass than it was worth. I'd recommend flap wheel on the die grinder above all.
Heat gun. It was optional, but helped in shaping the pods a bit so I didn't have to do as much sanding, and also for remelting hot glue as needed.
In summation, it was a lot of work but I'm happy with the results, and it's always been something I've wanted to do. I've built speaker boxes and the like with fleece and resin and fiberglass, but haven't really had the opportunity or need to build some pods. I hope this was informative and if you have any questions, comments, tips, criticisms please feel free to strike up a conversation.
Comments
I made a set of fibreglass speaker pods for a previous car with the same method, its a good project that lots of people can tackle
NZ: This is where mine are and i love it, but HOLY BALLS is this well executed and with your method i could angle them all towards the driver and look much cleaner from the center. I may end up doing something like this if i need another display. Well done!
One thing that could be sort of cool is if you use some nut inserts in that little recess above the vents on the dash and set it up where it was like a digital readout, that way plug and play on it. Remove the pod setup when you didn't need it, install it for the track days or whatever. But that might just be more cool factor than actual functionality =D
Either way, thanks for the comments.
There is a bit of color difference in the soft part of the dash, which is to be expected. Compare the color to the vents though. Spot on, it's brilliant. With it being a latex paint I was able to dilute it just enough to run it through my sprayer hooked up to my air compressor. Worked out great. Just kept the windows down for a bit to get rid of the smell, which again being latex wasn't too over powering anyway.
Autometer ES voltage gauge
Once I figure out the other gauges I want I'll get em installed and post a pic of them all lit up and such. Debating on whether I want to power them off the dimmer so they can dim as well. Might be worthwhile since they are a bit brighter and closer to my face.