HOW TO: R&R Driver's Side Window Regulator
 Ridge911
New Wagonist
Ridge911
New Wagonist
My driver's side window regulator has been getting increasingly worse, and it was time to replace it. I couldn't find any Wagons at the junkyard, and preferred to get a new unit. I was unable to locate a "new" regulator by Dorman or any other company specifically made for the wagon. Bam advised that a sedan regulator would work with some minor modifications. I tried my best to document below:
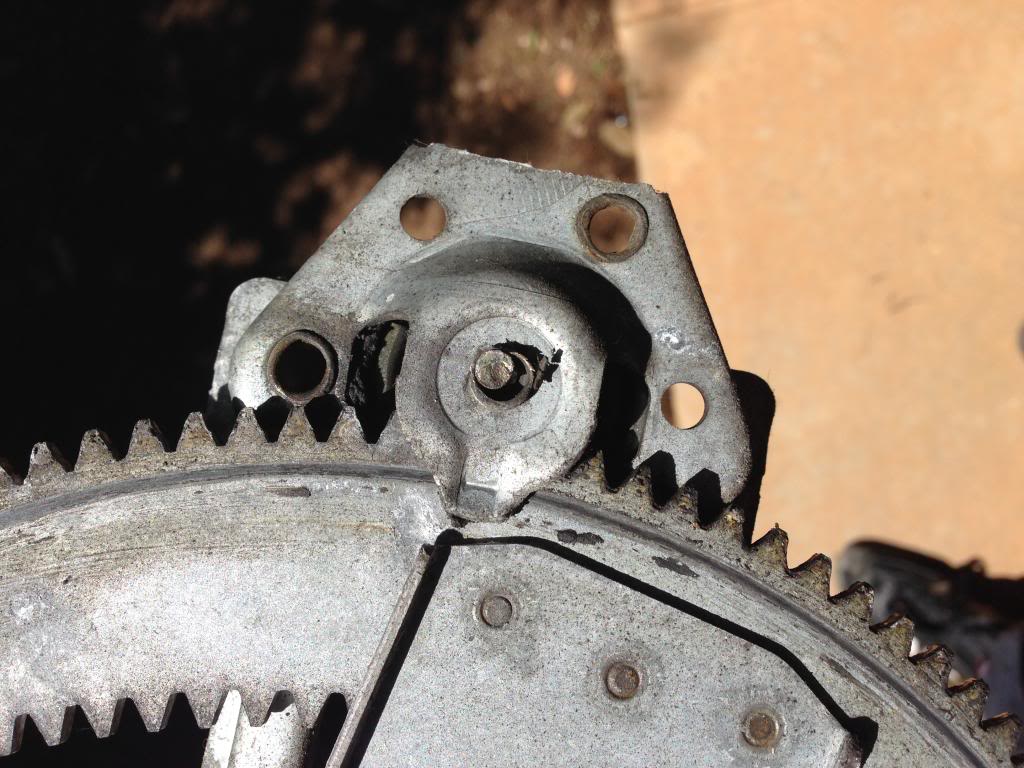
This is the reason most of the regulators fail. This is a pic of the backside of the regulator at the "crank pin". You can see the metal is wallowed out.
This is the "new SEDAN regulator" below the old wagon one (above).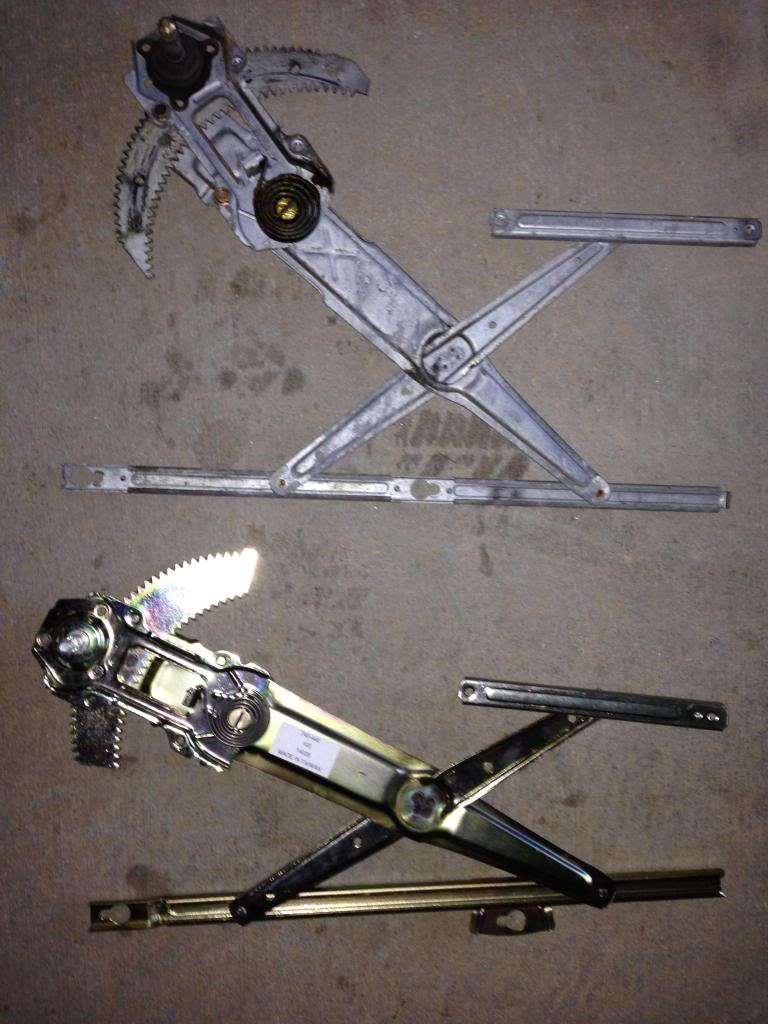
As you can see, the most obvious differences are the shape and number of teeth on the crescent gear, and the length and glass mount points on the lower bracket.
You need to put the lower glass mount bracket onto the new regulator.
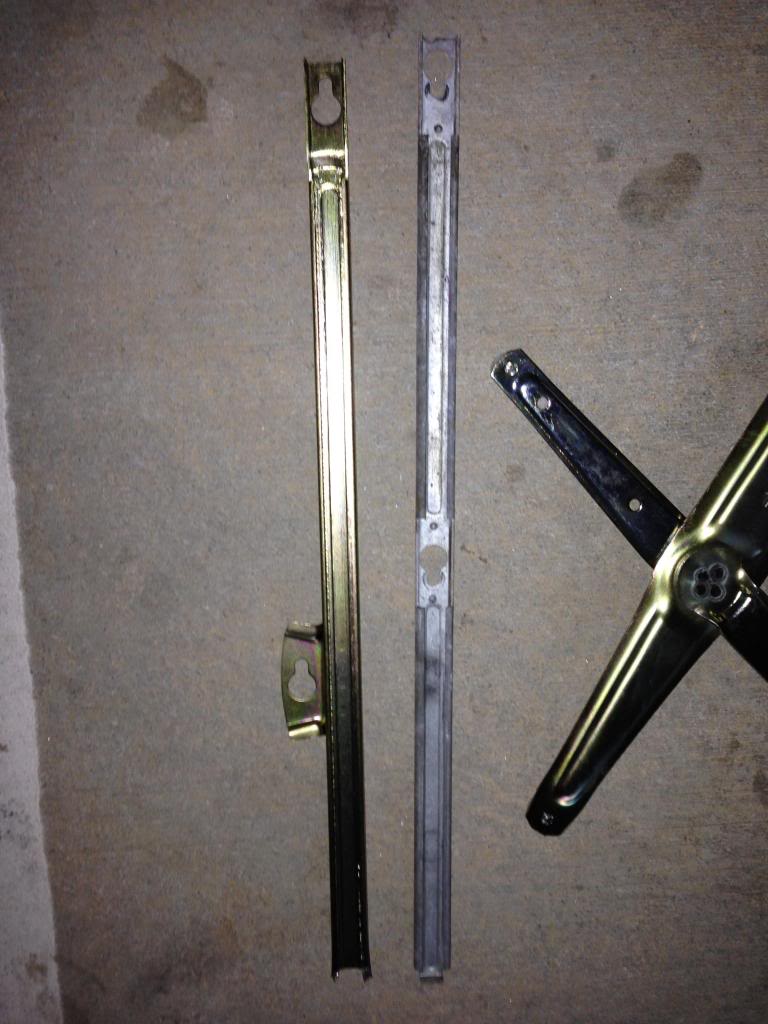
1)There are 2 dimples in the center of the old glass bracket that need to be "punched in". You can see the 2 dimples on the old lower glass bracket on either side of the right side glass bracket hole in the picture above. I suggest a ball peen hammer and drift punch, but you can use pretty much anything. Hammer the 2 dimples down.
2) Next, bend the retaining tab down on the right side and slide the bracket off. If this sounds confusing, once you see it in person, it becomes very apparent. All done with tools that most anyone has. (Hammer, a punch/screwdriver. and a pair of pliers).

Here's a close up of the different bottom brackets. You can see the dimples and tab on the end of the old bracket pretty clearly.
You're going to hate me, but I didn't take a picture of the old/new regulator pieces assembled. I'm not a photographer, and I got too focused on getting it together. In short, the new plastic bushings on the new regulator need some encouraging to get to slide onto the old lower glass bracket. clean the bracket, liberally lubricate with grease (not any wimpy silicone spray), and get those things in there. Bend the tab back and you're ready to install the regulator. Even with lubrication, the lower glass bracket may still be stiff. Once its installed, it doesn't seem to make too much difference, so don't sweat it too much.
When I heard "window won't roll all the way down" I was extremely pessimistic if this was going to satisfy me, but...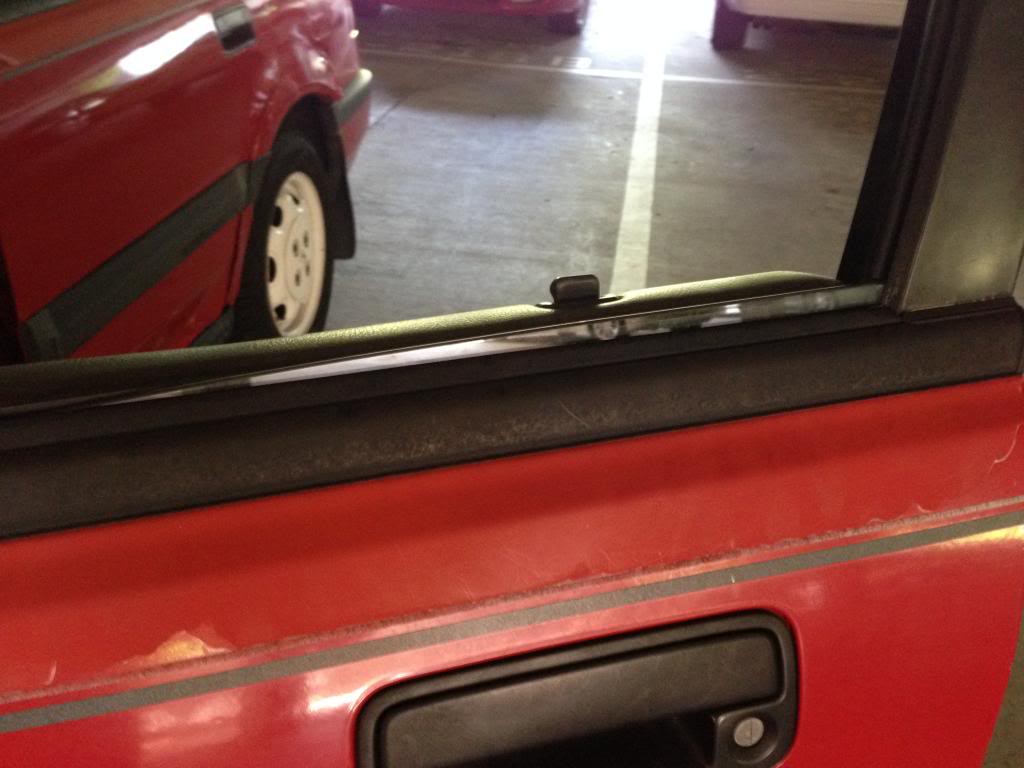
There's only about 1/4 Inch exposed when its rolled all the way down Hardly noticeable.
Total project time took ~3 hours, with removal of door panel, cleaning, R&R regulator, and Dynamat install. Window works great now.
This is the reason most of the regulators fail. This is a pic of the backside of the regulator at the "crank pin". You can see the metal is wallowed out.

This is the "new SEDAN regulator" below the old wagon one (above).

As you can see, the most obvious differences are the shape and number of teeth on the crescent gear, and the length and glass mount points on the lower bracket.
You need to put the lower glass mount bracket onto the new regulator.
1)There are 2 dimples in the center of the old glass bracket that need to be "punched in". You can see the 2 dimples on the old lower glass bracket on either side of the right side glass bracket hole in the picture above. I suggest a ball peen hammer and drift punch, but you can use pretty much anything. Hammer the 2 dimples down.
2) Next, bend the retaining tab down on the right side and slide the bracket off. If this sounds confusing, once you see it in person, it becomes very apparent. All done with tools that most anyone has. (Hammer, a punch/screwdriver. and a pair of pliers).

Here's a close up of the different bottom brackets. You can see the dimples and tab on the end of the old bracket pretty clearly.

You're going to hate me, but I didn't take a picture of the old/new regulator pieces assembled. I'm not a photographer, and I got too focused on getting it together. In short, the new plastic bushings on the new regulator need some encouraging to get to slide onto the old lower glass bracket. clean the bracket, liberally lubricate with grease (not any wimpy silicone spray), and get those things in there. Bend the tab back and you're ready to install the regulator. Even with lubrication, the lower glass bracket may still be stiff. Once its installed, it doesn't seem to make too much difference, so don't sweat it too much.
When I heard "window won't roll all the way down" I was extremely pessimistic if this was going to satisfy me, but...

There's only about 1/4 Inch exposed when its rolled all the way down Hardly noticeable.
Total project time took ~3 hours, with removal of door panel, cleaning, R&R regulator, and Dynamat install. Window works great now.
Comments
I had a really nice OE EE one in stock, so I swapped it again and left the sedan one for next time.
edit: by the way, nice job on the how-to. Thanks for taking the time to document.
EDIT: I'll dig up the number later tonight
I also forgot to mention, but cleaning and lubricating the window seals will also help preserve the seals and the regulator life.
I use ShinEtsu silicone grease. When I used to work at Honda, that was the only thing we used in the window track.
I like that you have your own stock of wagon parts.
Bam, we had talked about this at IA this year. I was exhausted that day, but I appreciate your input.
You know you might be able to adjust that out. If you look at the two bolts closest to the rear end of the door that hold the short bar part of the regulator, the bolt closest to the rear of the door has a slot. You should be able to adjust the bolt in the slot. I know I just replaced mine but with a wagon one and I still had to do a little adjusting of this short arm. Give it a try anyway.
You may be right.