My Shuttle RT4WD JRSC fun/dd project
 steinar
Band Wagon
steinar
Band Wagon
Hi guys! I'm pretty new to this forum, but I've been lurking around here seeking info since I got my wagon. So I thought its time to sign up and join the community ") I'm from Norway, so my english is not perfect, but hopefully you will understend most. I enjoy reading build threads from the beginning, so I thought I should include the beginning of this build too, even though some of it is cut&paste. So sorry for a looong first post
I'm from Norway, so my english is not perfect, but hopefully you will understend most. I enjoy reading build threads from the beginning, so I thought I should include the beginning of this build too, even though some of it is cut&paste. So sorry for a looong first post ")
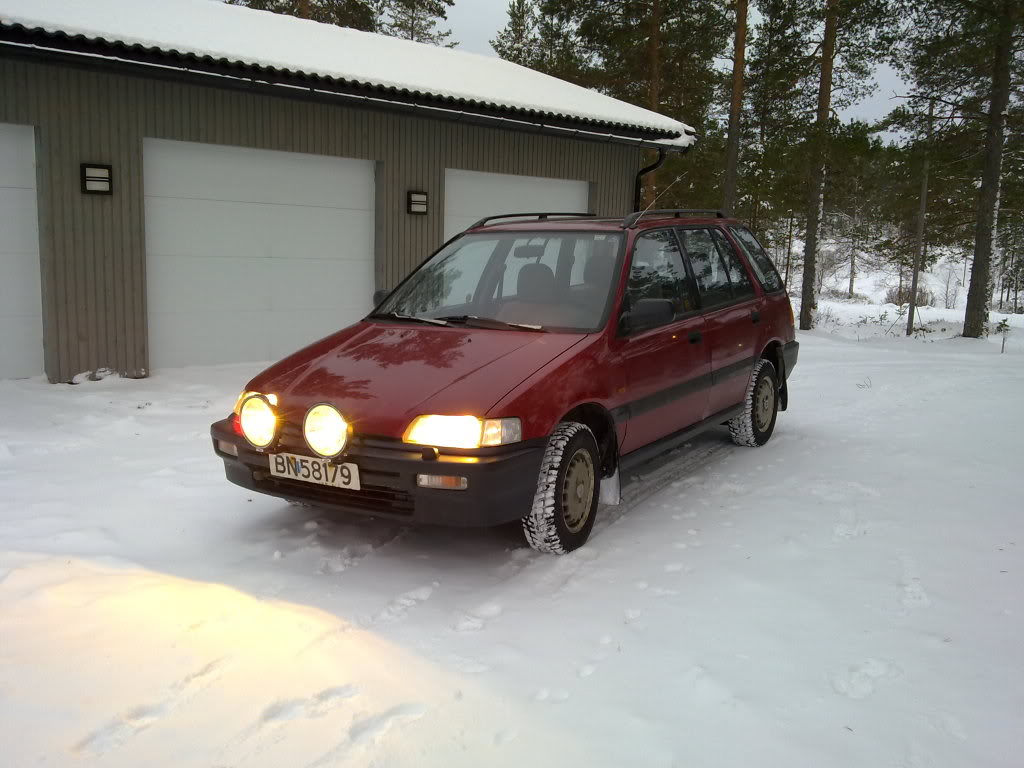
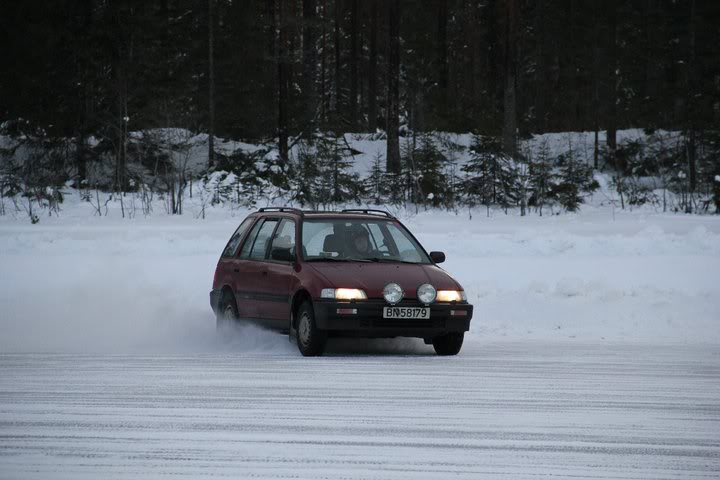
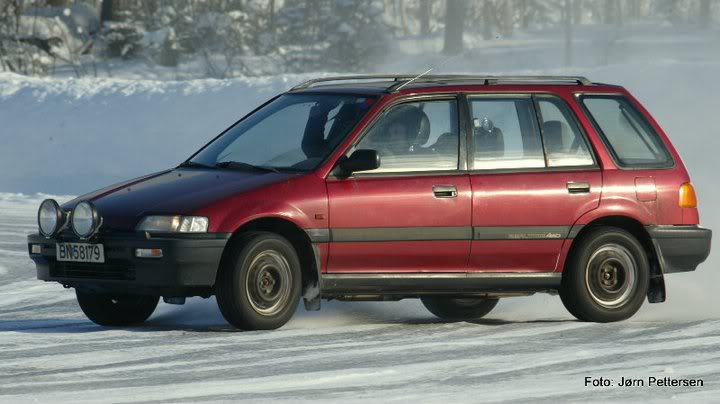
The reason I wanted a wagon was because I was going crazy during the winter with no fun car. I have a civic that I track regulary during the summer, but fwd is no fun on the ice. So this wagon is my winter fun car, and dd. I'm a function>form guy, so sorry for lots of pics of a dirty car. Hope some of you like it anyway
Here it is. One of the first mods was some huge lights. The stock lights doesnt really do a good job, and during the winter its awlays dark up here so it was definately needed.
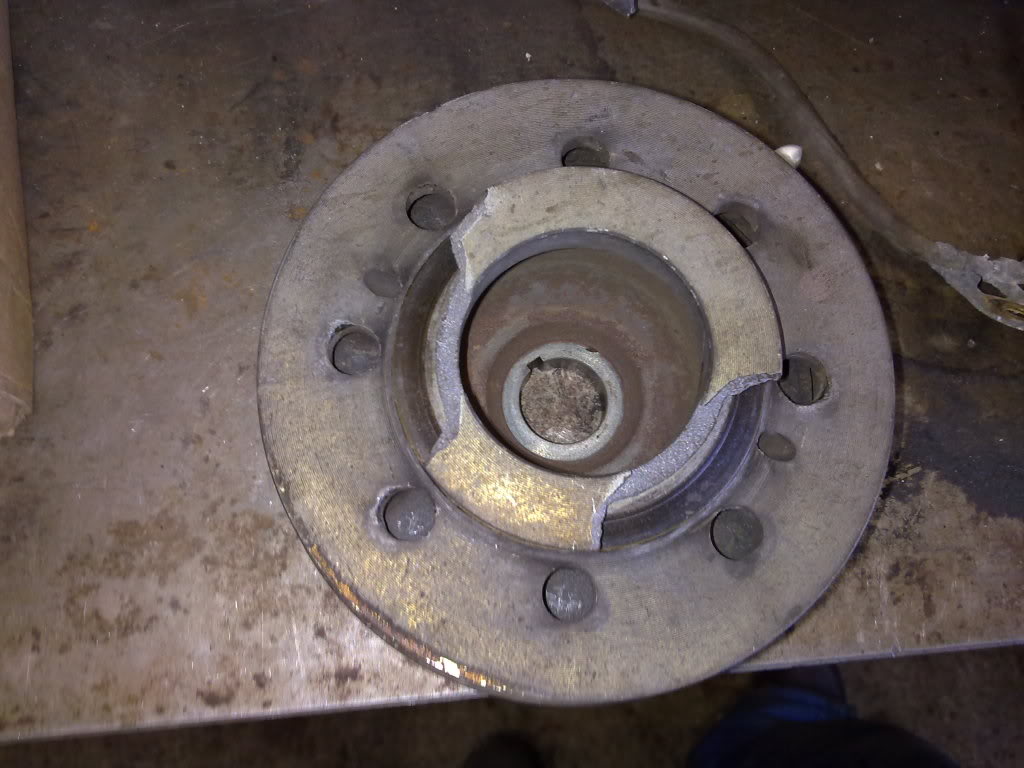
The lady I bought the car from was selling it because it didnt pass inspection, so there were some fixes. The first thing that needed fixing was the front brakes. The calippers were dragging, and the owner had driven it to the point where the pads were so worn they had fallen out of the calippers and seized between the brackets and disks. So the car didnt go anywhere.
Old, crappy disks...
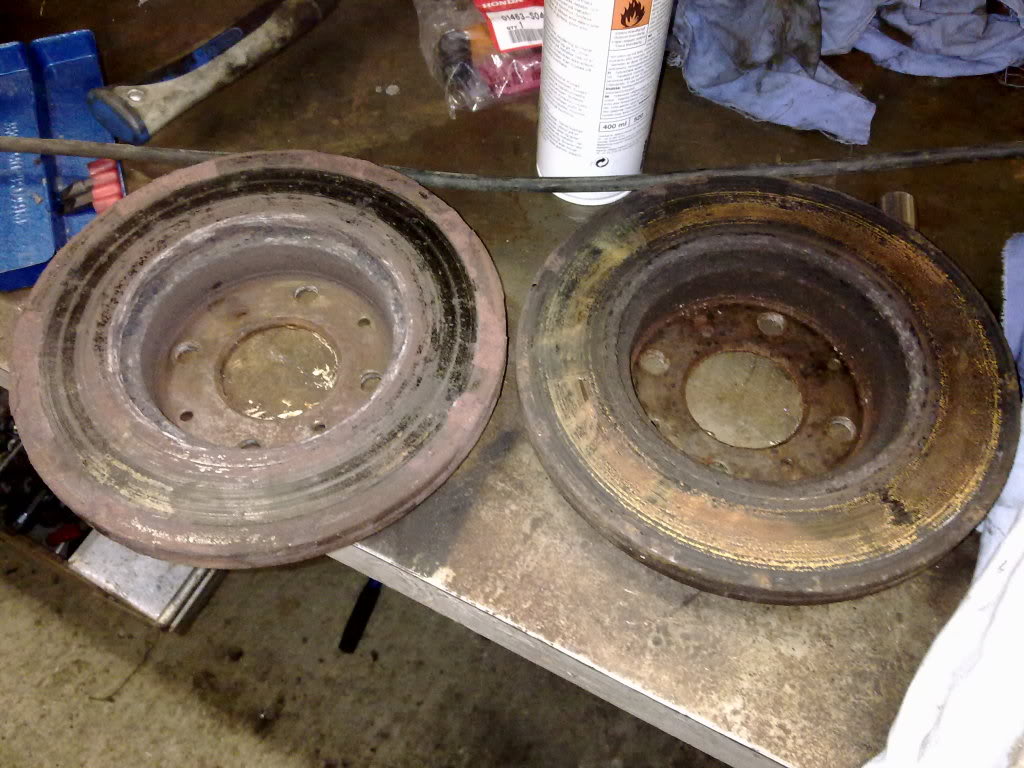
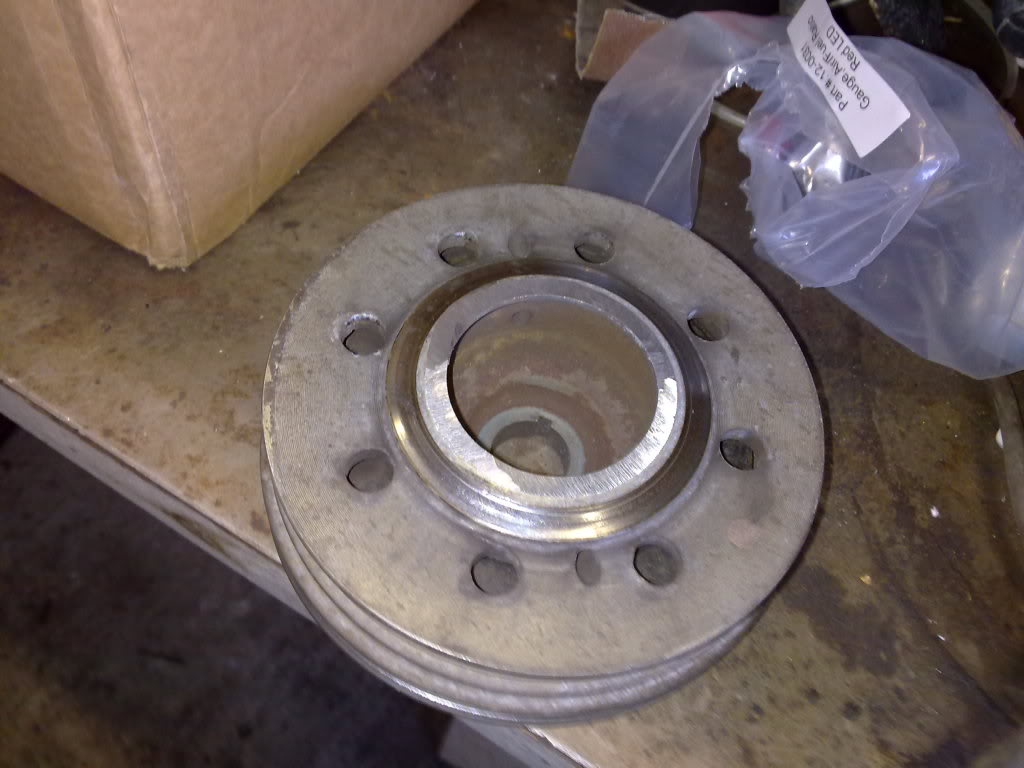
The calipper pistons were so rusted that after I had removed 0.5mm from them, there were still grooves in them. I was in a hurry, so I made some new ones the same day.
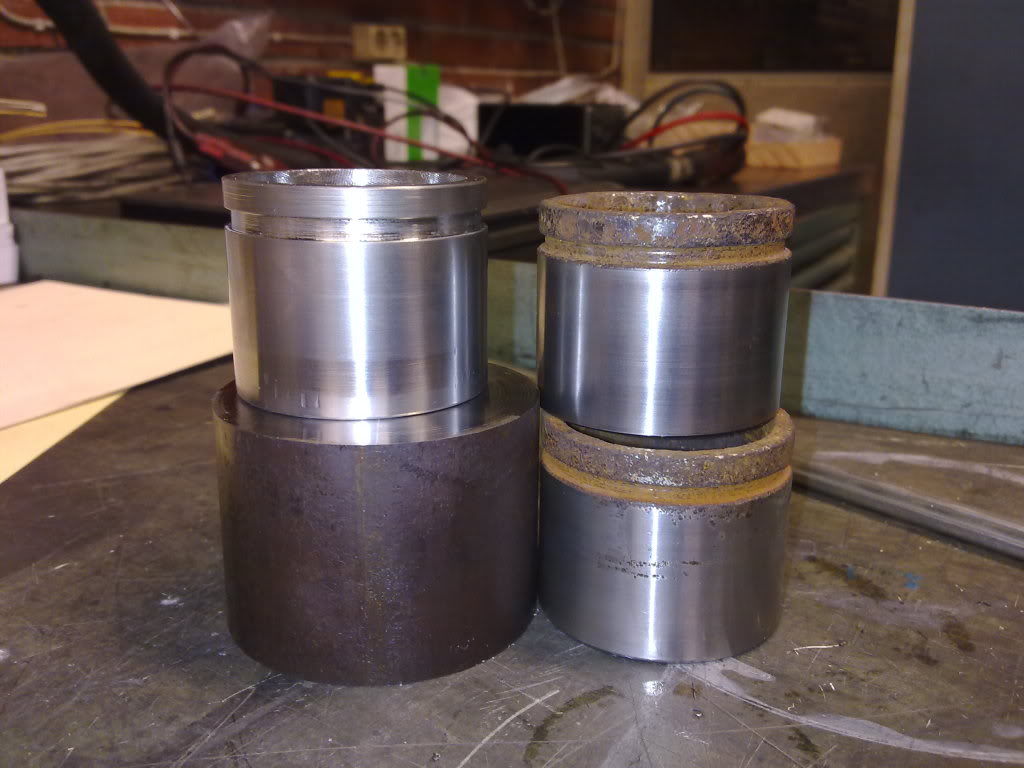
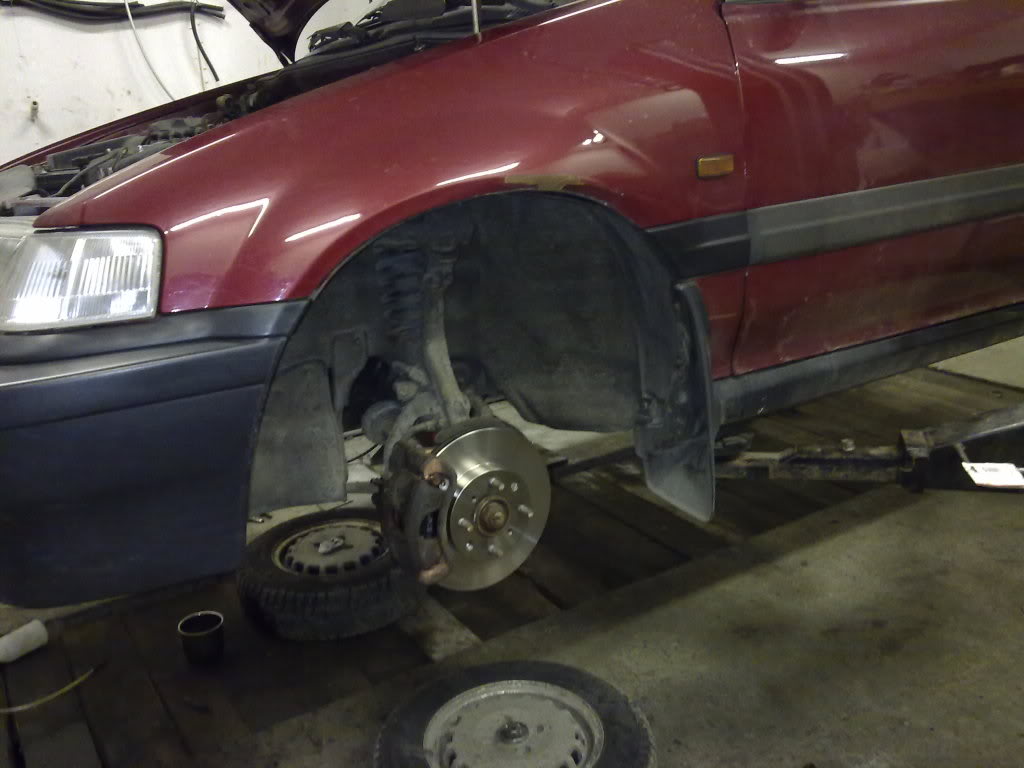
Finished. Now I could actually try the car
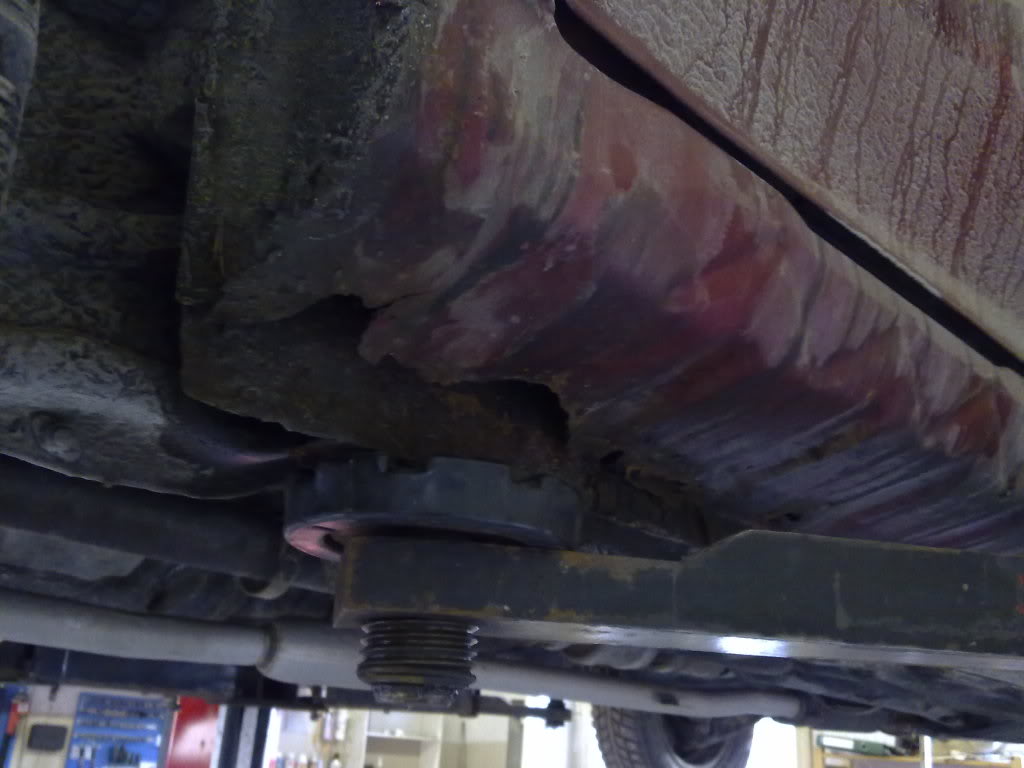
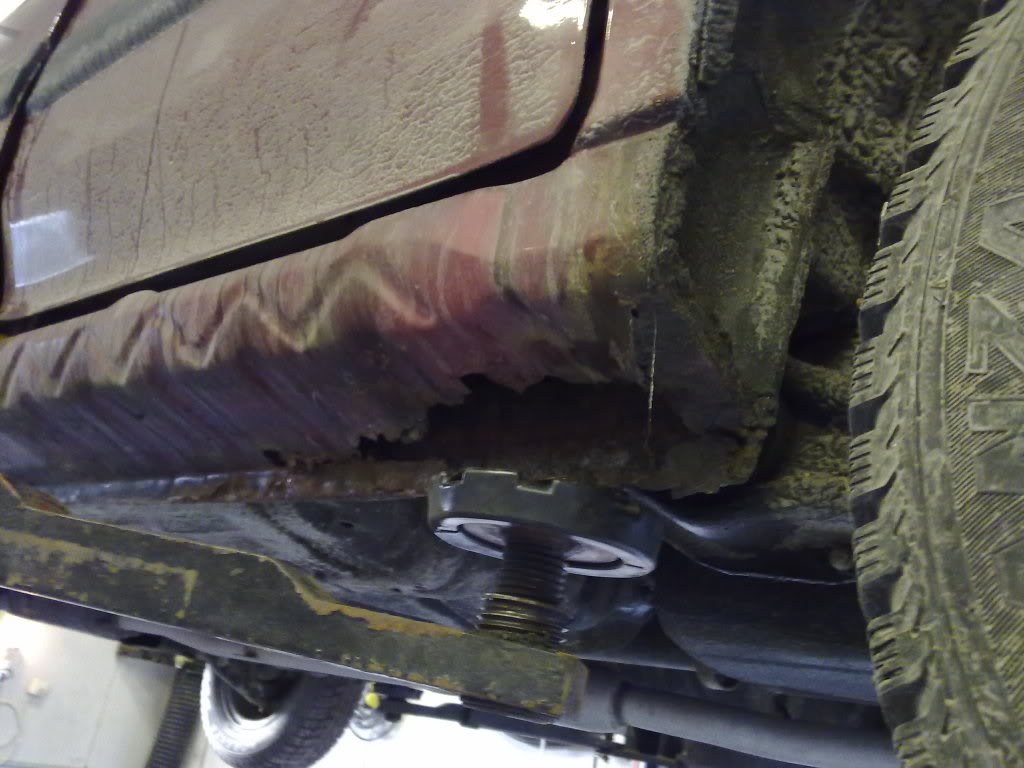
Next up was one of the things I really, really hate. Rust. This was behind the side skirts:
I cut everything out (and a little more) and welded in new metal. As you can see this is the first thing I'm doing this myself, lol. Luckily it doesnt matter how it looks, as everything is behind the side skirts.
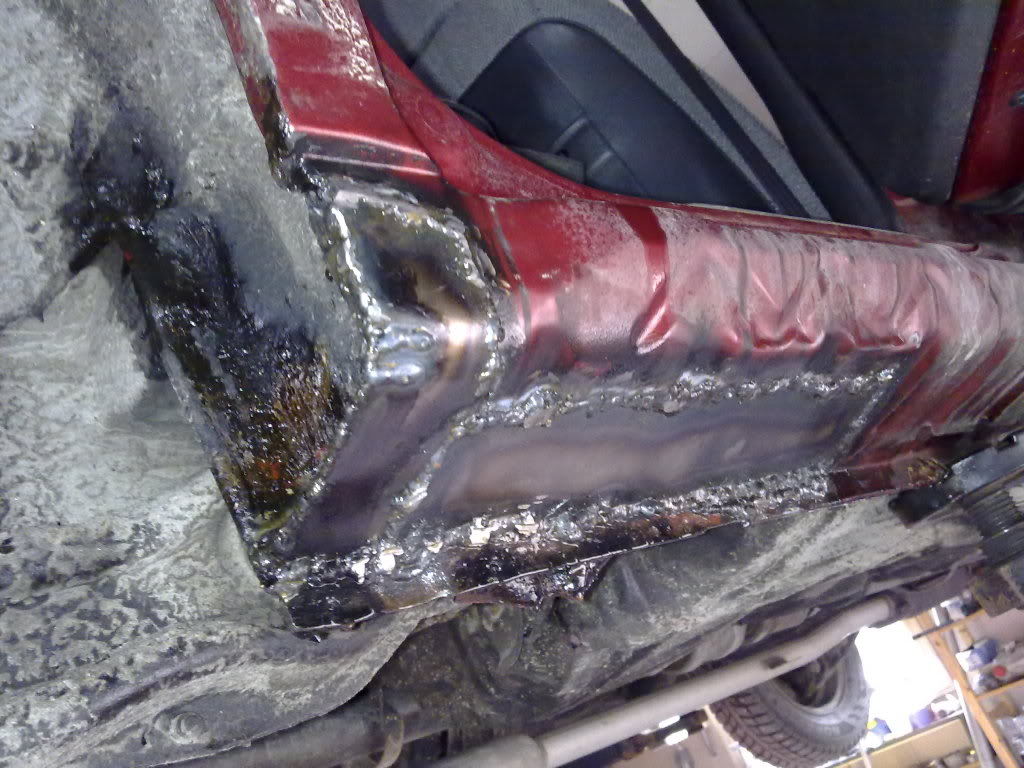

I covered everything with different anti-rust stuff, so hopefully it will hold up for some years.
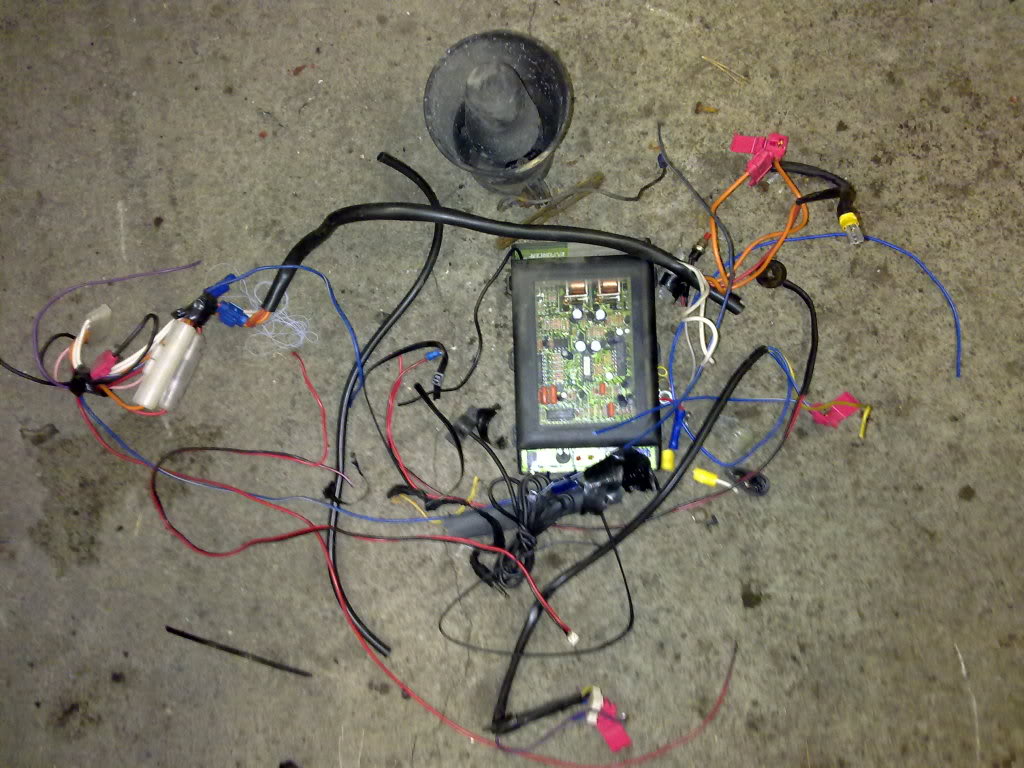
I found this old POS when I was hooking up the extra lights. It has been disabled, and there was wires with crappy connections everywhere under the dash.
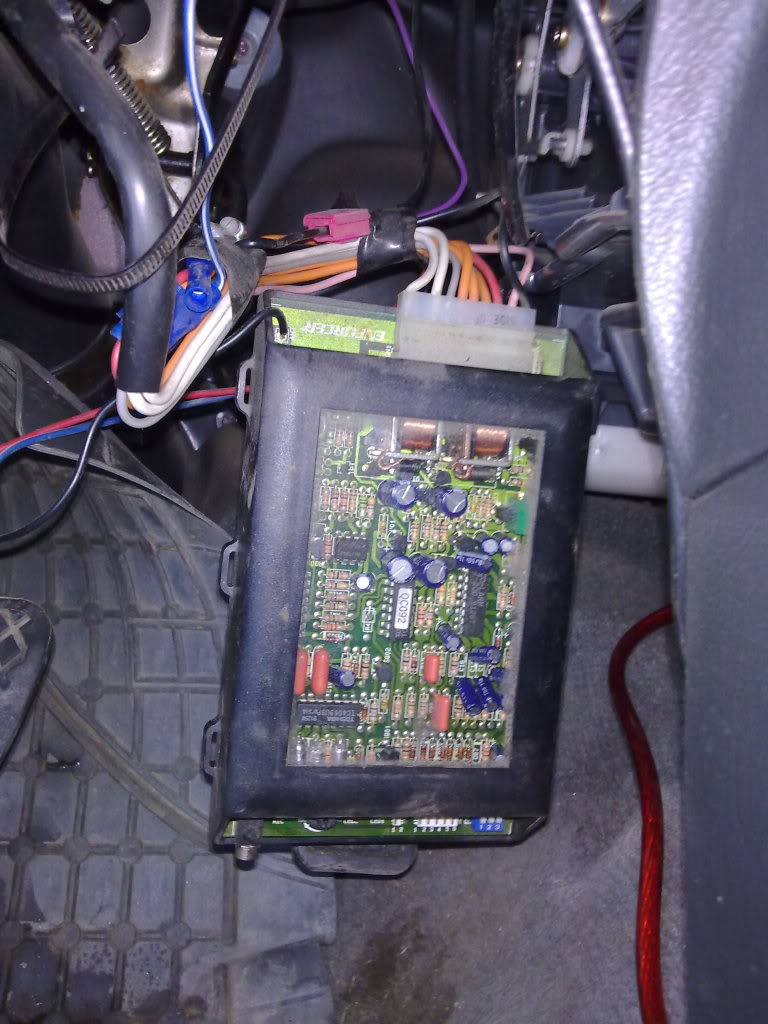
Now its on my floor, I like it better there.
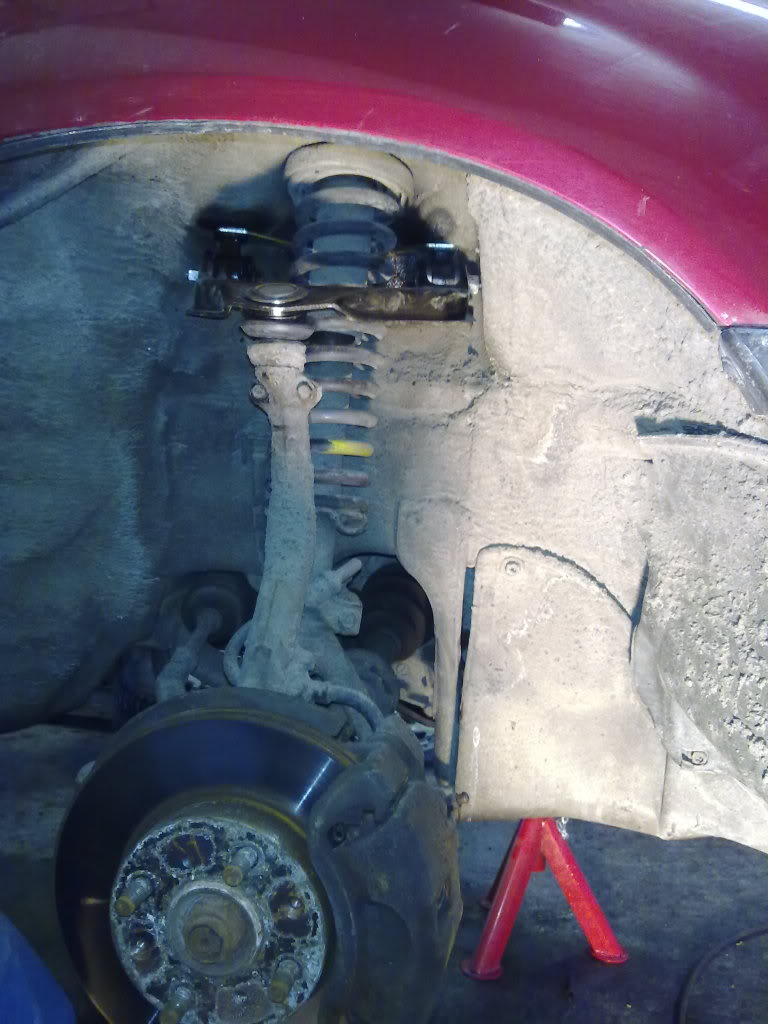
Now that I could start to use the car, I discovered that both the upper ball joints were shot. I ordered some new ones on ebay. Not sure about the quality, but so far so good. Time will tell.
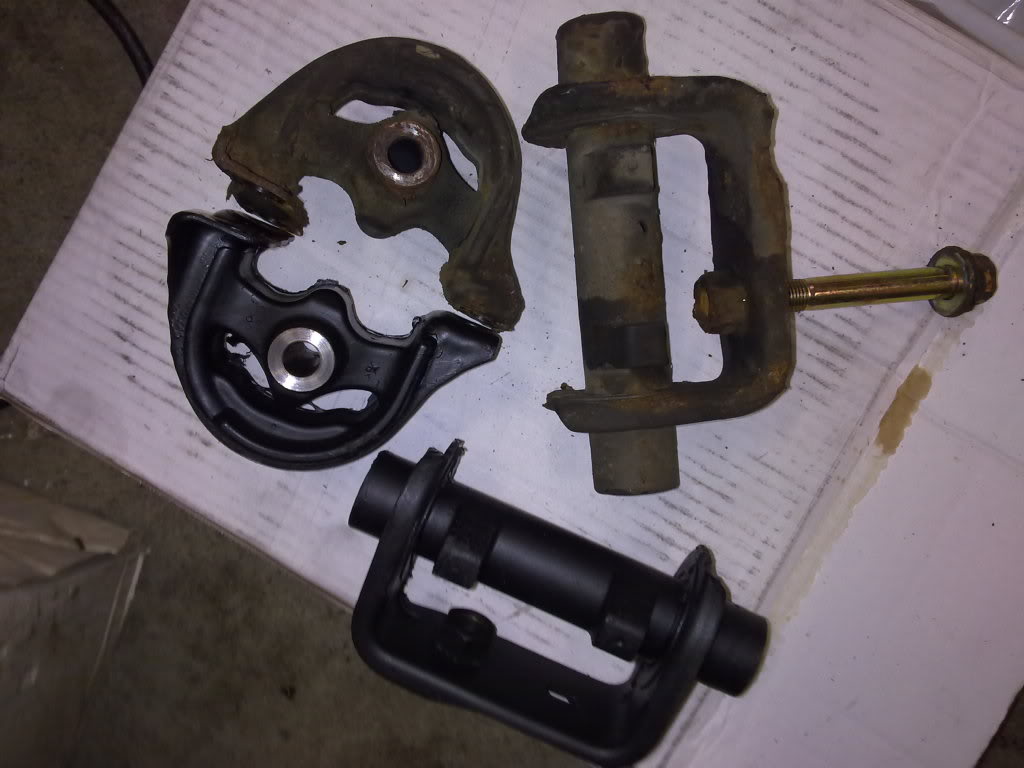
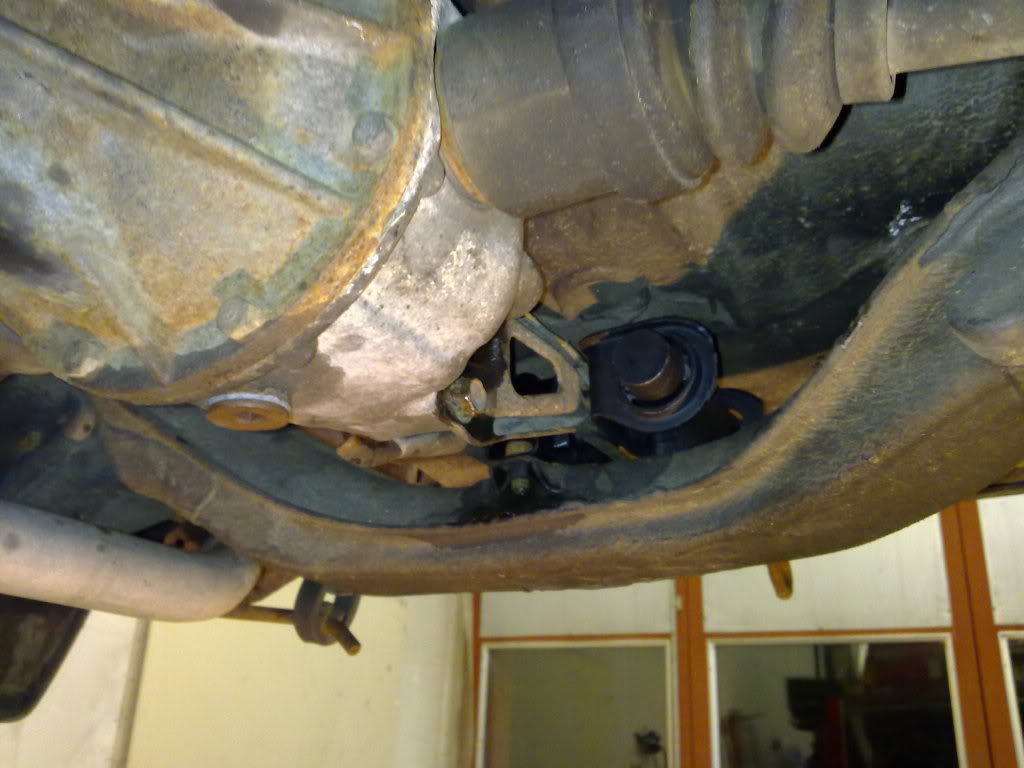
I also found the rear mounts on the rear diff have seen better days. I was expecting hell with rusted out bolts and everything, but everything turned out really easy. My lucky day!
Oh, and I also did the timing belt. THe old one was 12(!) years old, lol. Forgot to take pictures, but here's the old one. It didnt look good...
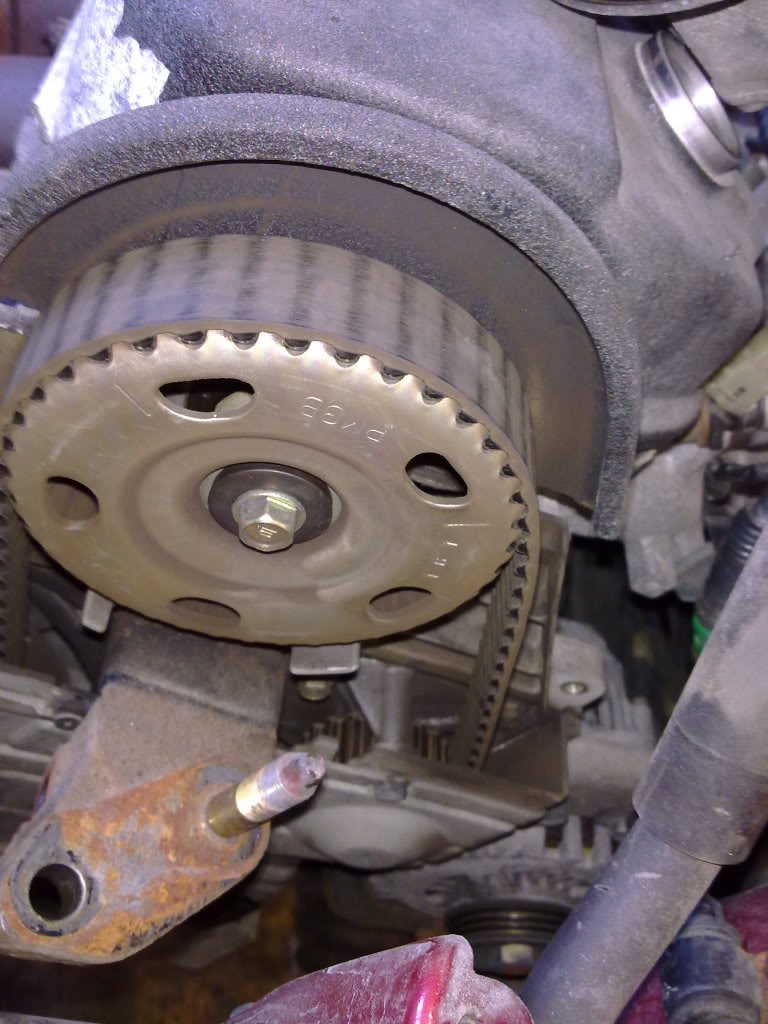
I also did a stupid mistake when removing the crank pulley bolt. Dont ask me how, lol
So now I'm running no power steering, lol
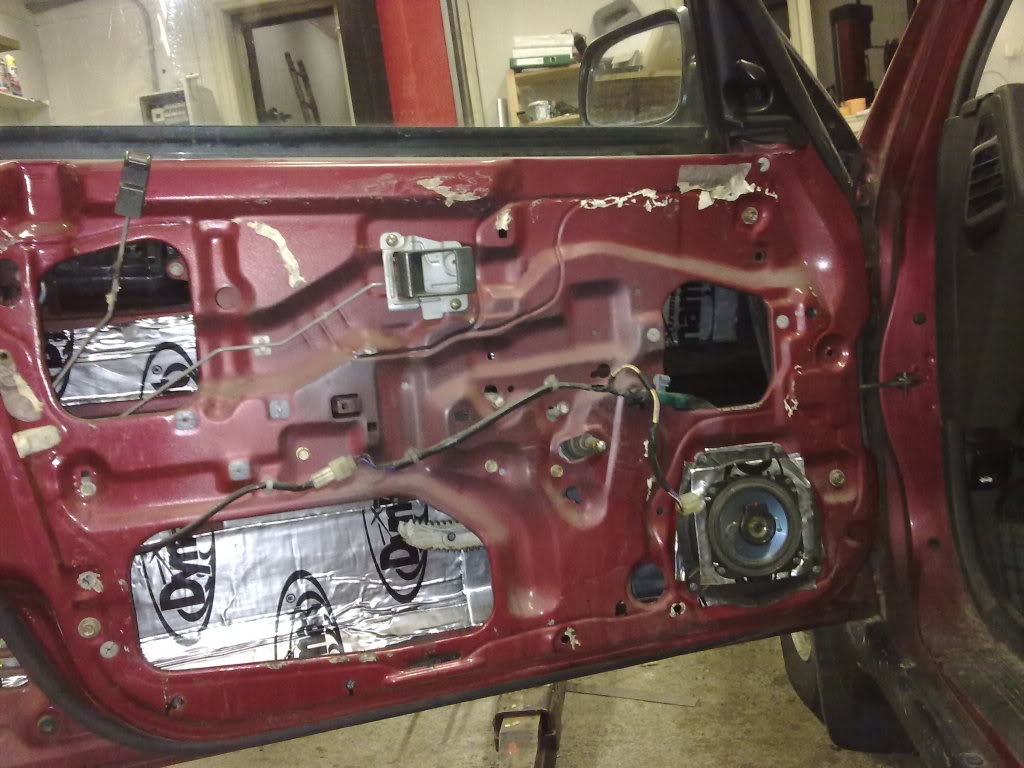
The amount of noise inside the car when running 60mph on studded tires are HUGE, so I did some sound dampening of the doors. It helped a little with the noise, but not much. At least the speakers works a lot better with this stuff inside the doors, so I can hear the radio now, lol
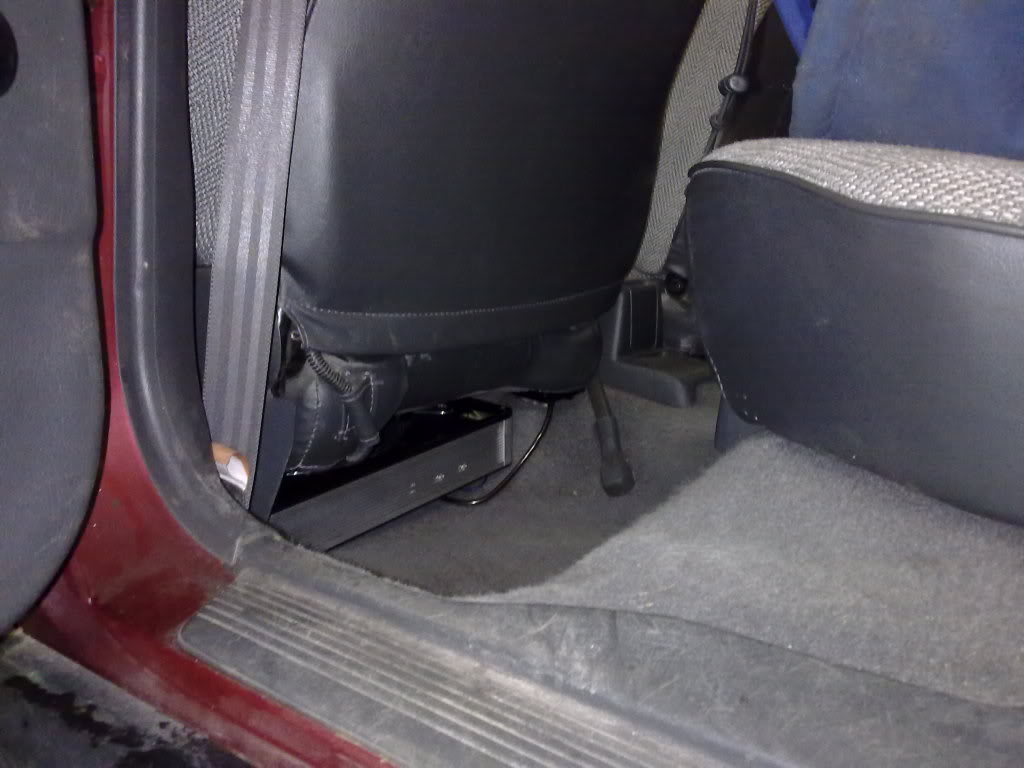
The old subwoofer-thingy I had laying in my garage fitted under the driver seat. Barely...
Now that the car was in OK shape, it was time for something more fun... I bought a JRSC a while back, so I figure it was time to put it to use. Of course it didnt go like planned, and I found some problems. When I removed the pulley, I found this:

It seems like the pulley nut has come loose, and it has been driven like this for a while. The pulley bolt hole was should be 16mm, but some places it was almost 17mm. The slot in the shaft for the woodruf key was ruined. And the seal had taken a beating too, so it needed some work before I could bolt it on. So I ordered a rebuild kit with bearings for the snout.
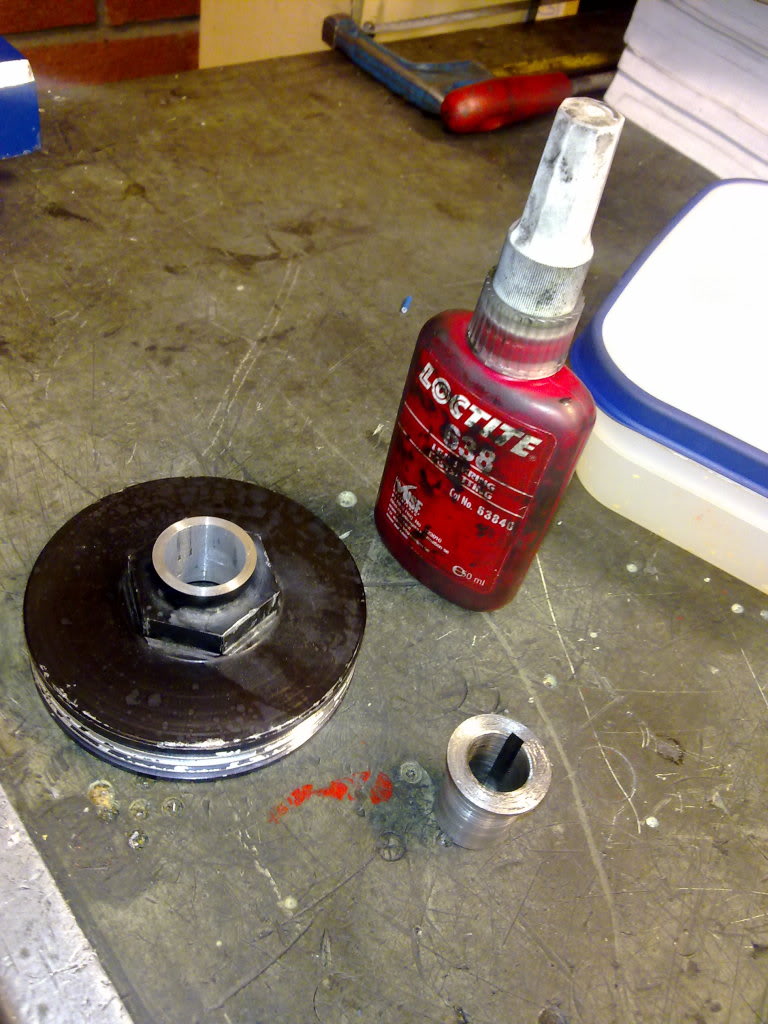
While I waited for bearings, I started out with the pulley. Made a bigger hole in it

And I made a new insert with a new slot for a woodruf key that I installed with Loctite 638. I love that stuff
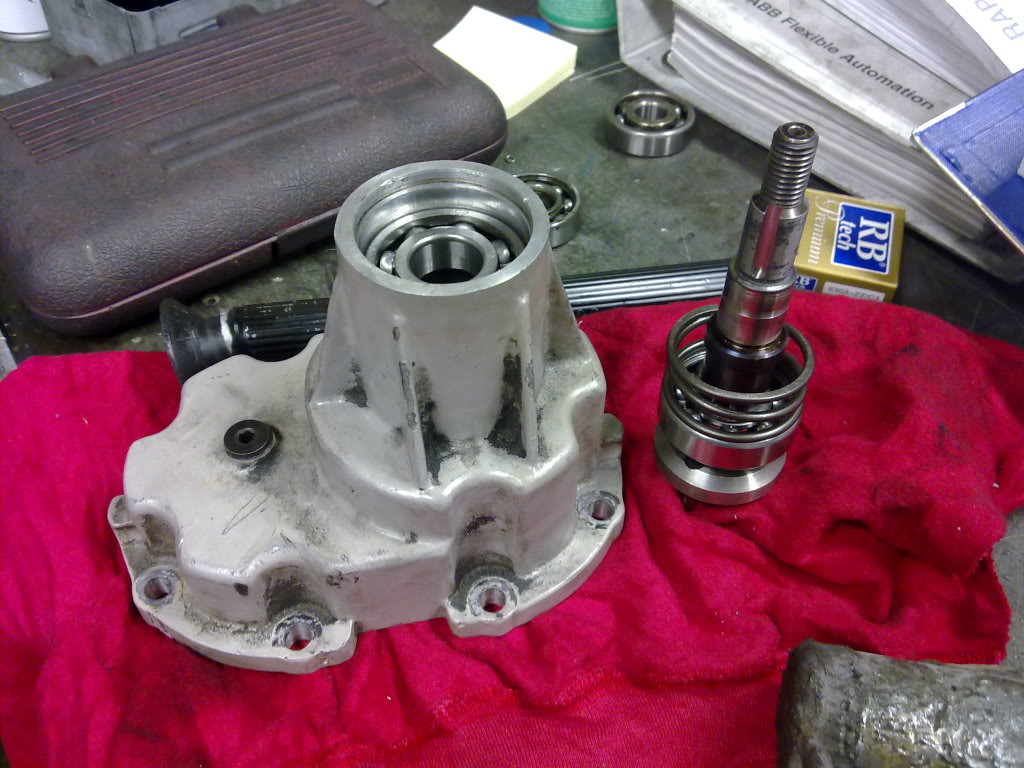
The shaft disassembled
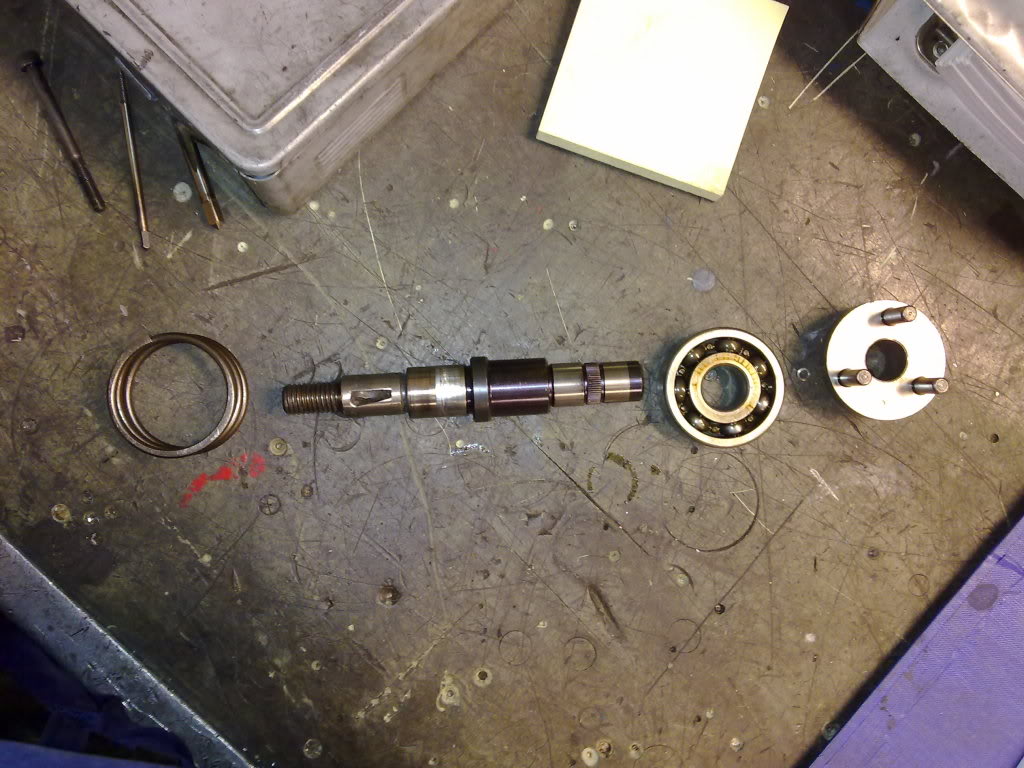
Put some work into it
Reassembled the shaft, and a new bearing in the snout housing
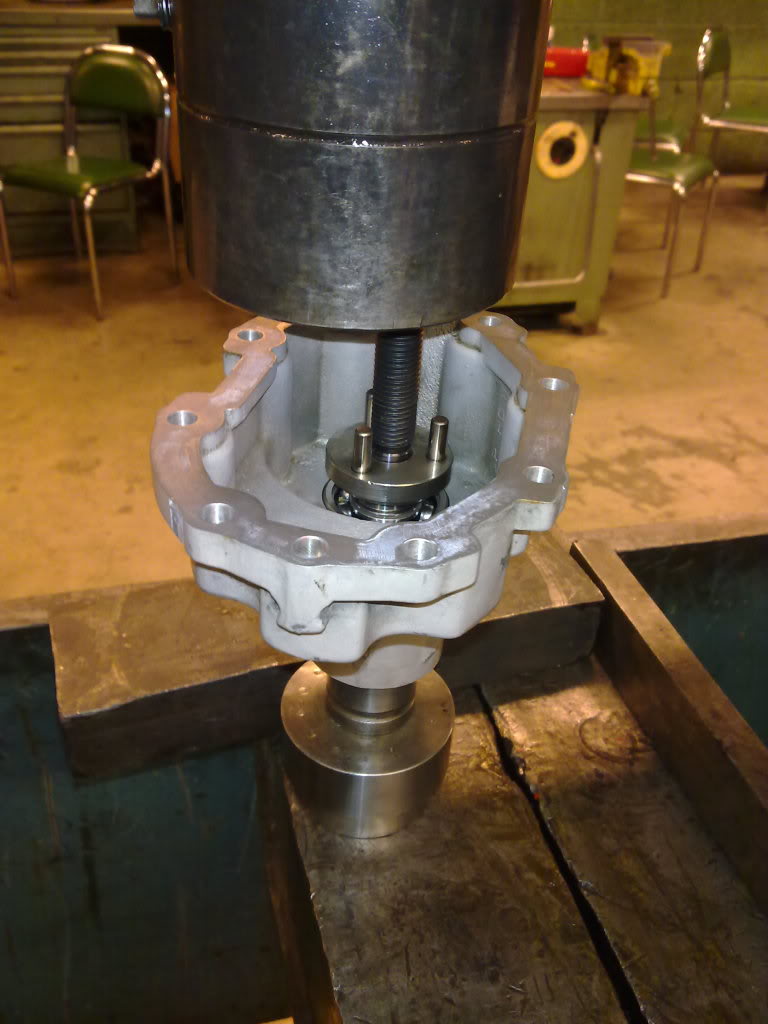
Pressing it in where it belongs
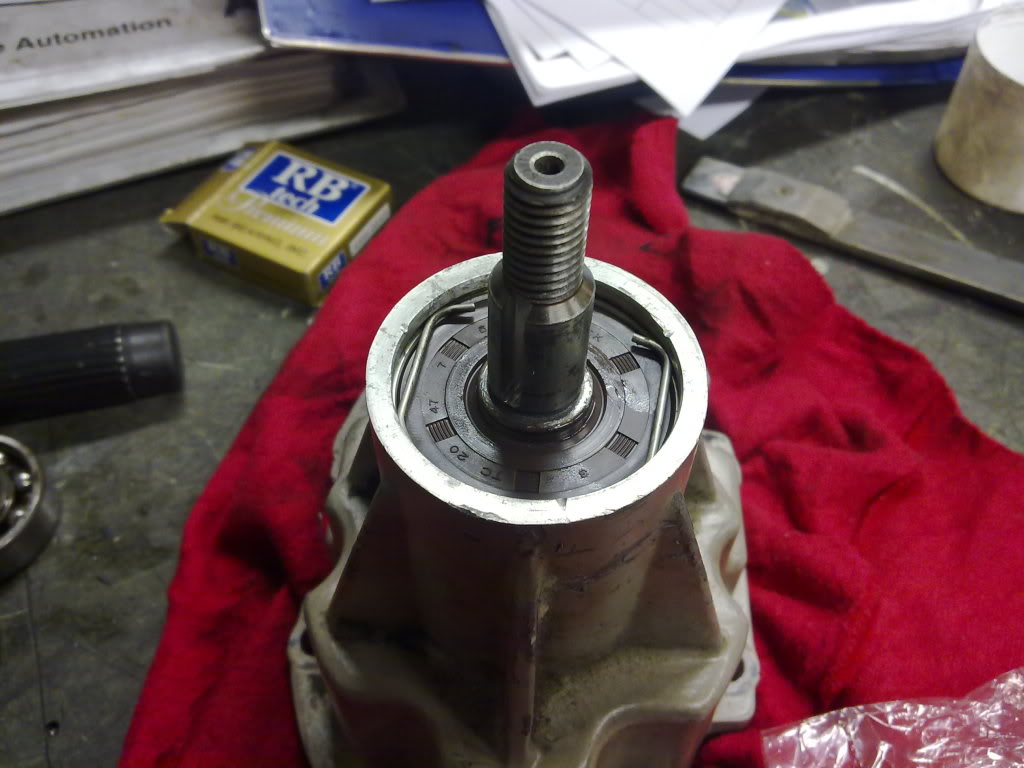
And at last a new seal
Now I was about to start porting the inlet and outlet a bit before I bolted it in, but of course I found signs that the rear bearings were worn. There had been some contact between the housing and rotors in the rear of the blower, so I wont chance anything. So now I was waiting for new rear rotor bearings. Always something...
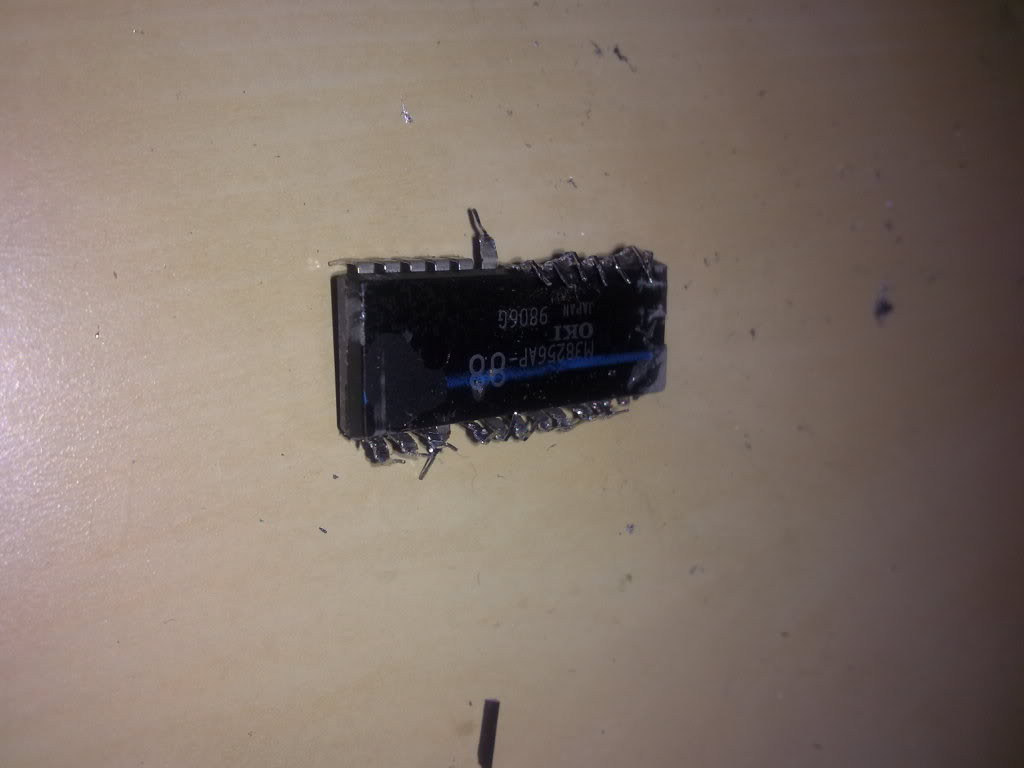
I also chipped the ecu so it is ready for the blower. Always a pain to desolder that stock chip with just a vacuum pump...
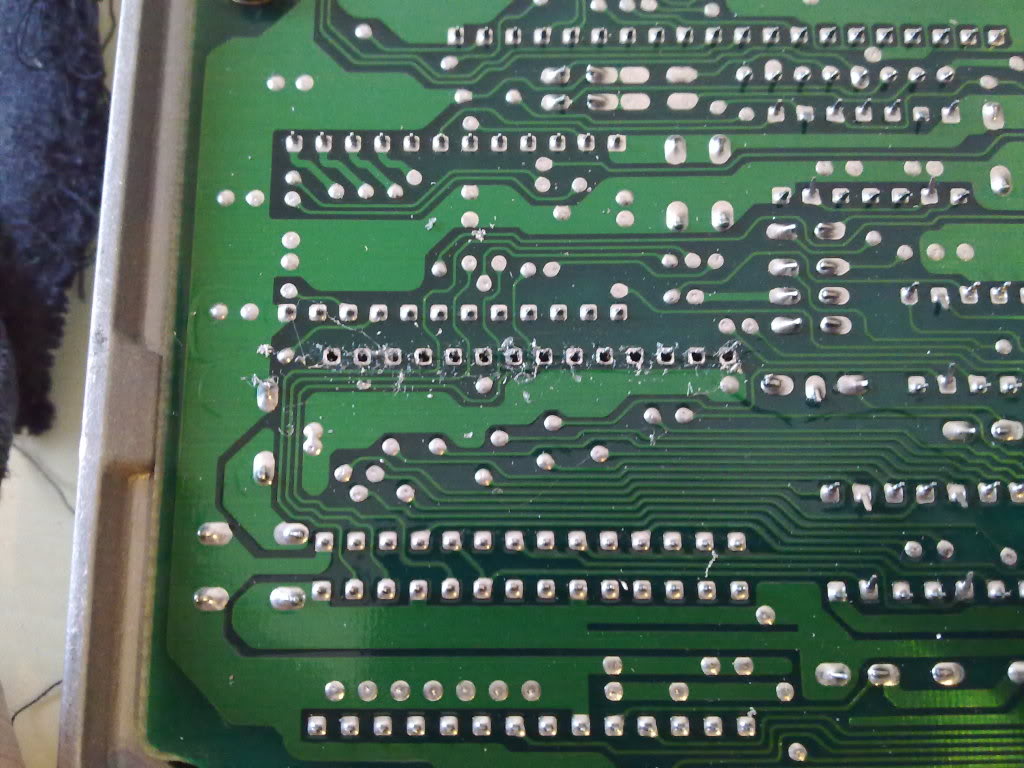
After my pation ran out I ended up cutting and/or pulling out one pin at a time. The stock chip looks nasty now, lol
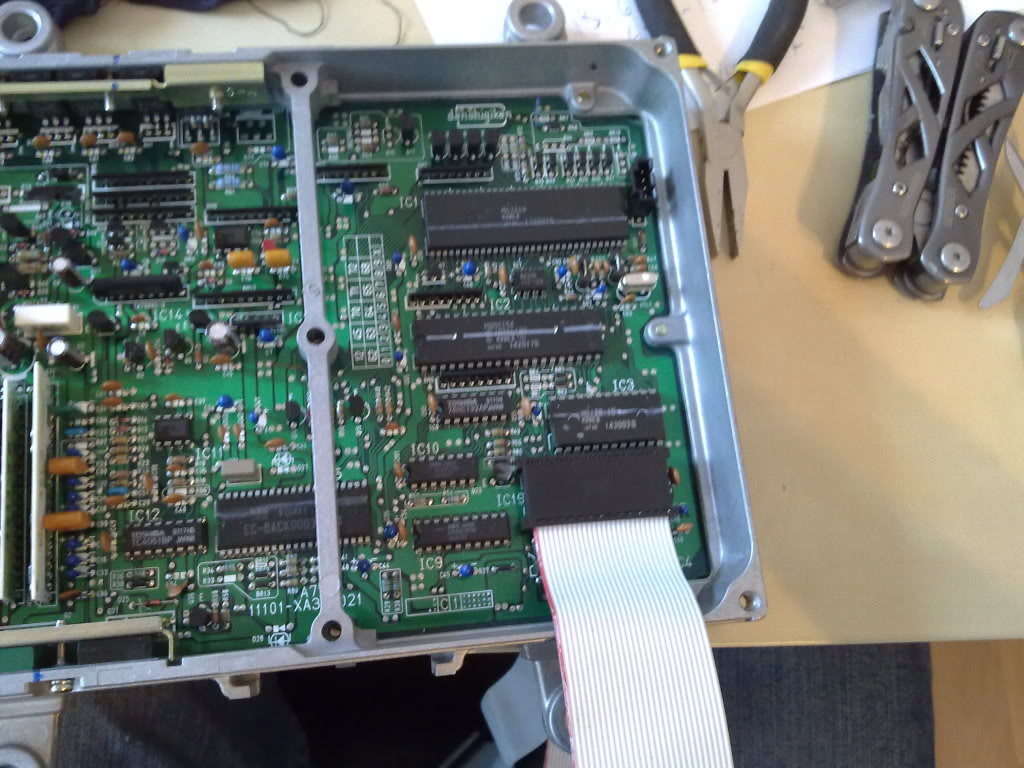
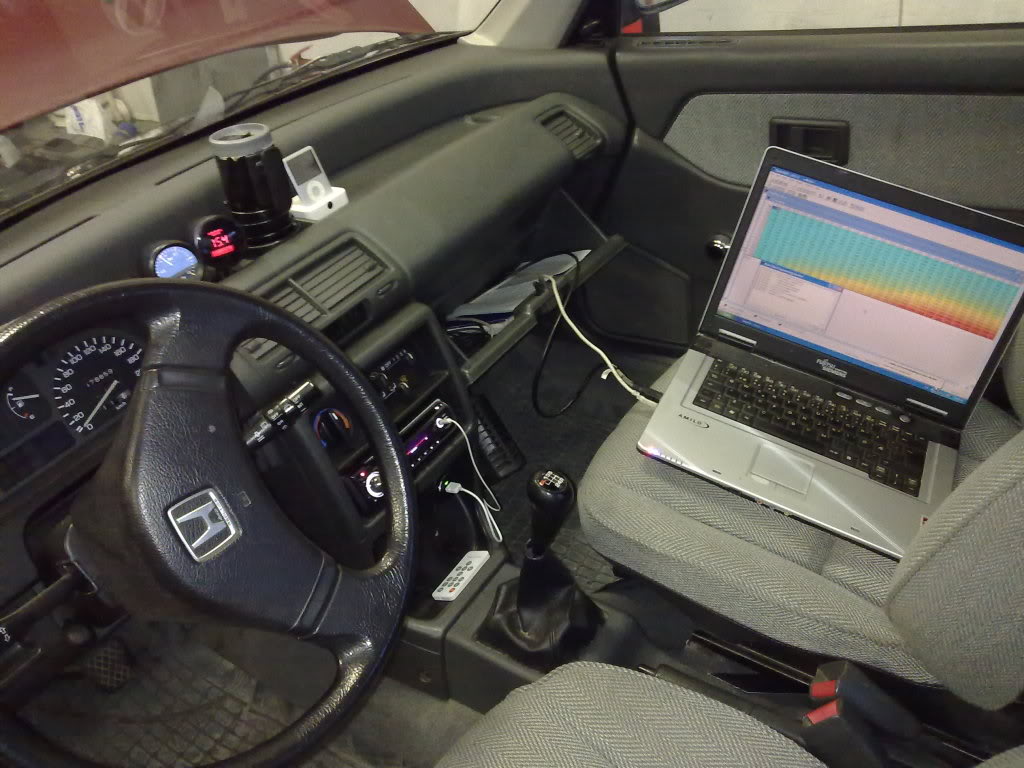
After a while this was the result. Ostrich is in place and working its magic
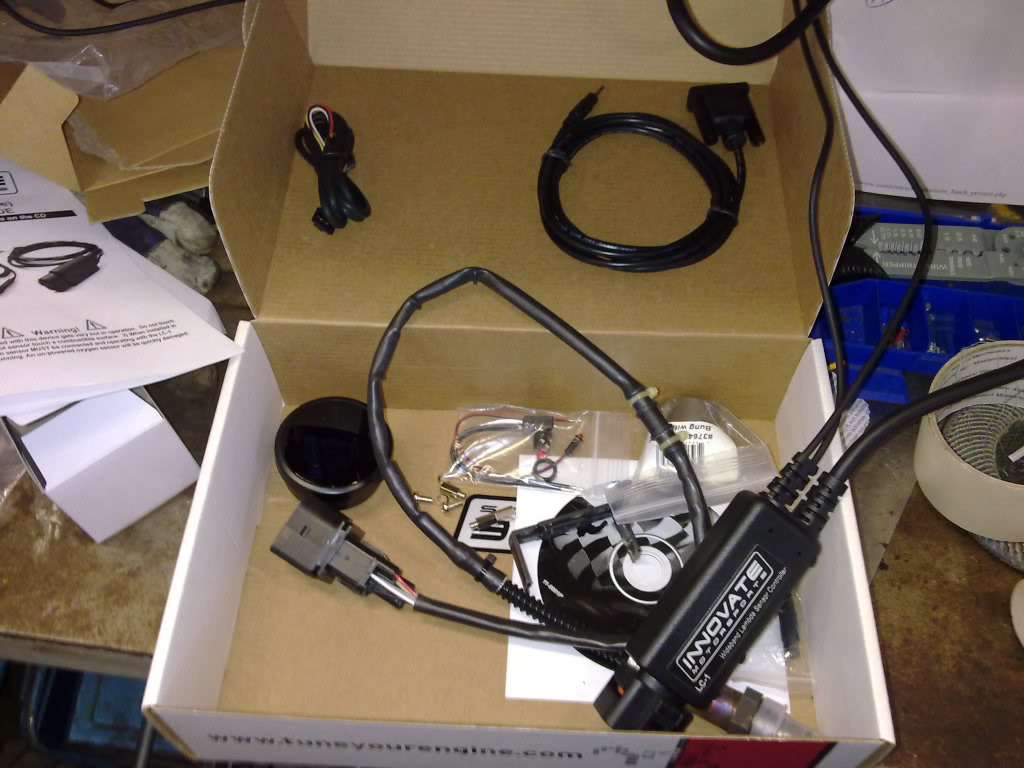
I also installed a Innovate LC1 wideband
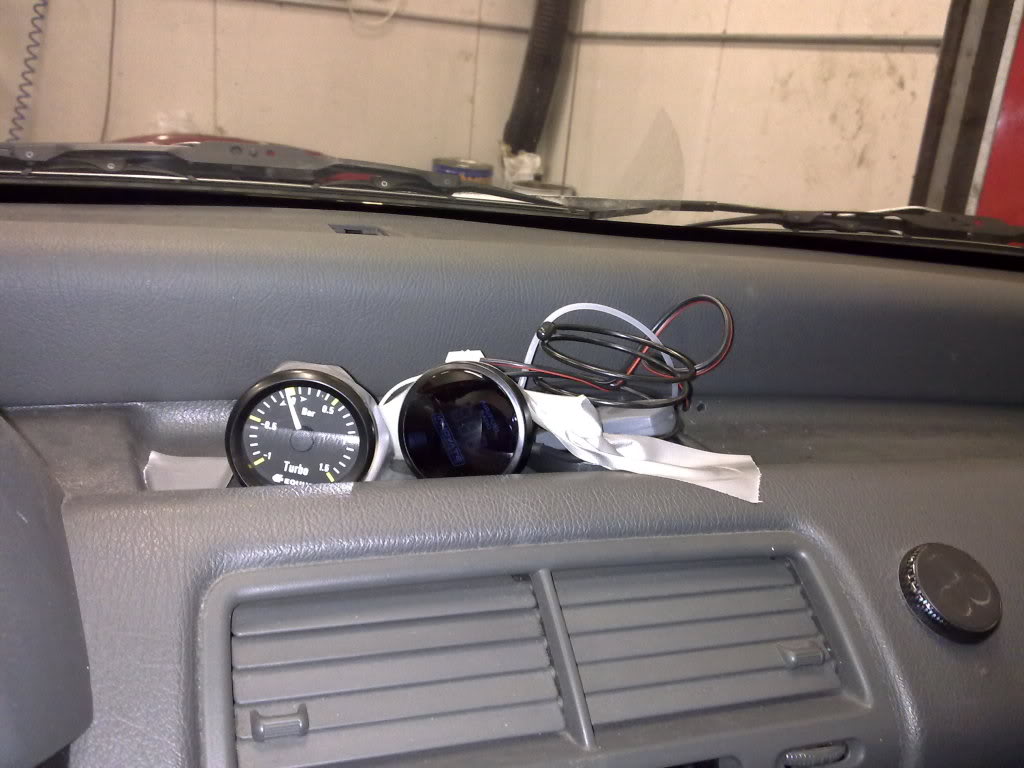
My temporary gauge pod, lol
TurboEdit is up and running.
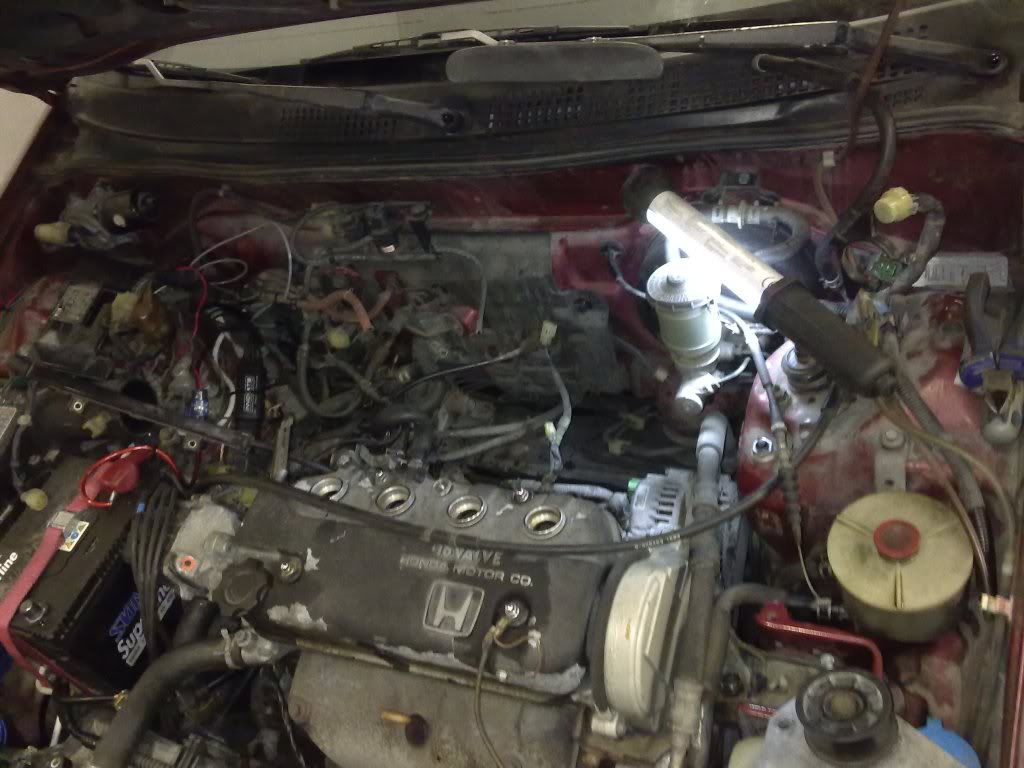
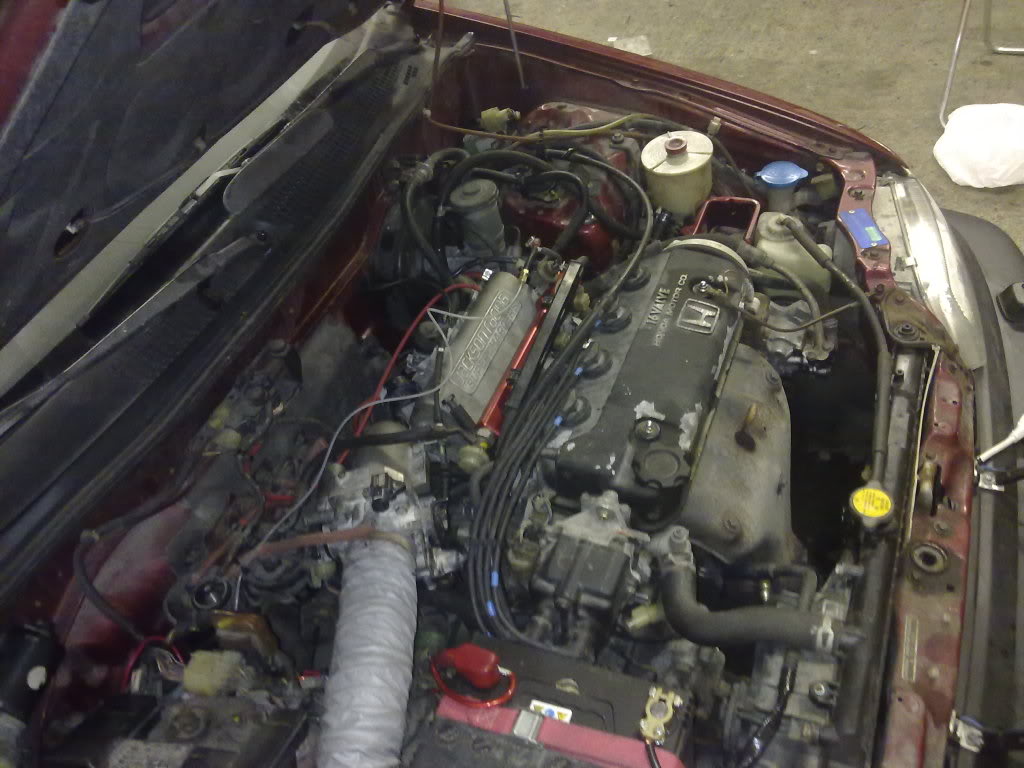
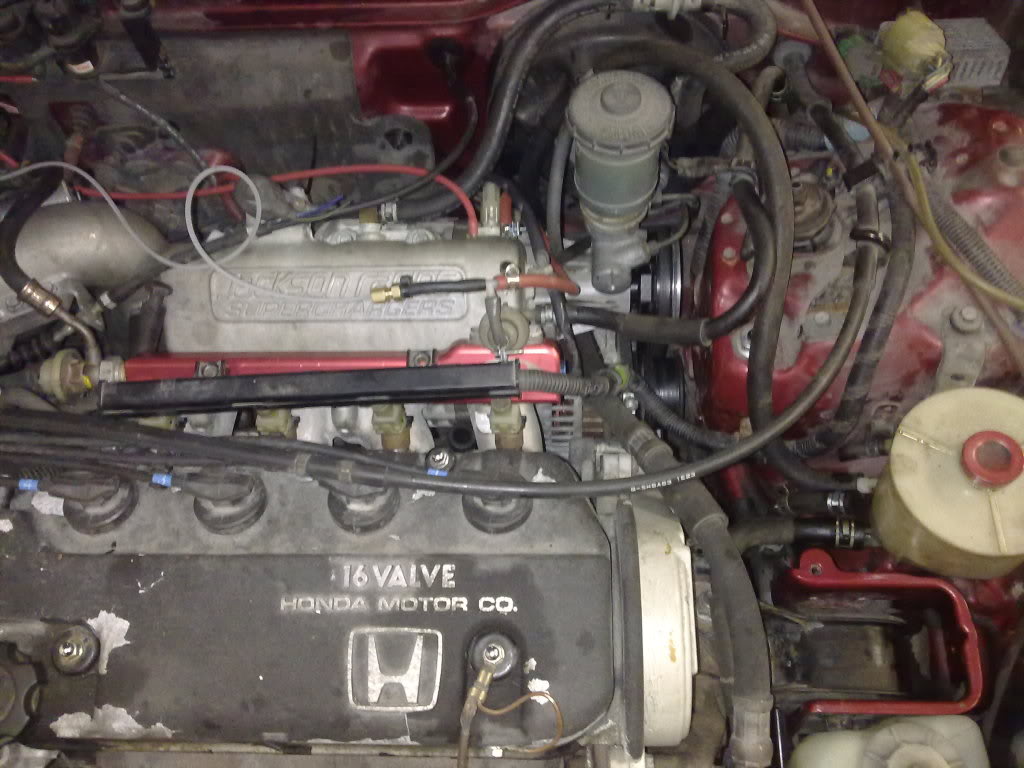
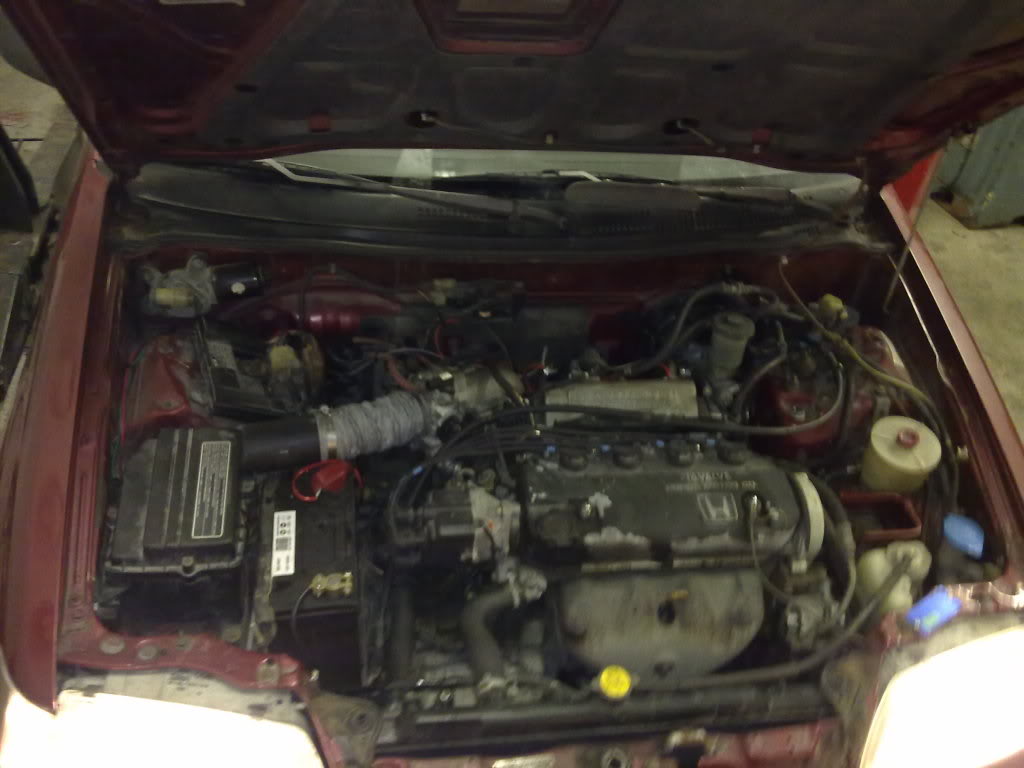
Everything looks like a f***ng mess under my hood now, but the blower is in I needed the car for work, so I had to use a lot of temporary solutions. But the car is running and the blower is whining, so I'm happy.
And I cant seem to decide if I want PS or not. Currently I just dont have a belt hooked up because I broke the groove on the crank pulley...
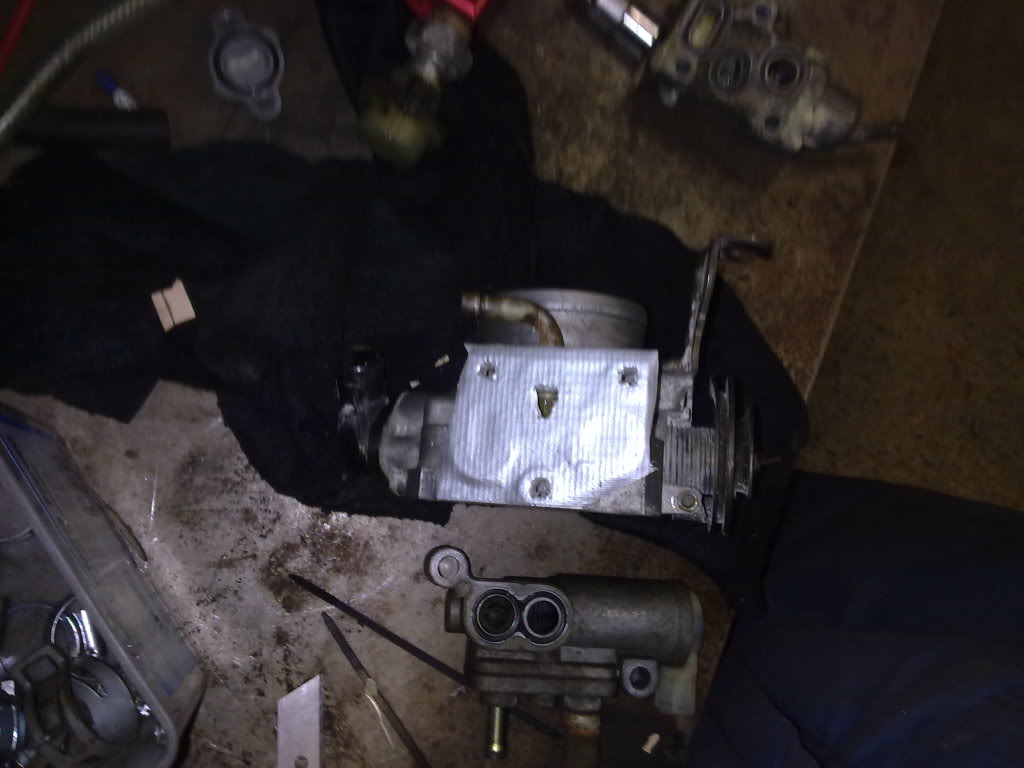
I had a problem with the cold idle. When it was really cold outside the idle would sky rocket. At -13*F it reached 3500rpm, I dont think that is the best idea in the long run, lol. After looking a little closer I found out that the stock throttlebody did NOT have a fitv, but the one that came with the jrsc did. The stock TB would not bolt up on the jrsc for some reason, so I MacGyver'ed the fitv on the other one. Coolant still flows through the tb to keep the tb ice-free, but no air goes through it. Works great! No leaks, and the idle is around 2000 rpm on cold starts now.
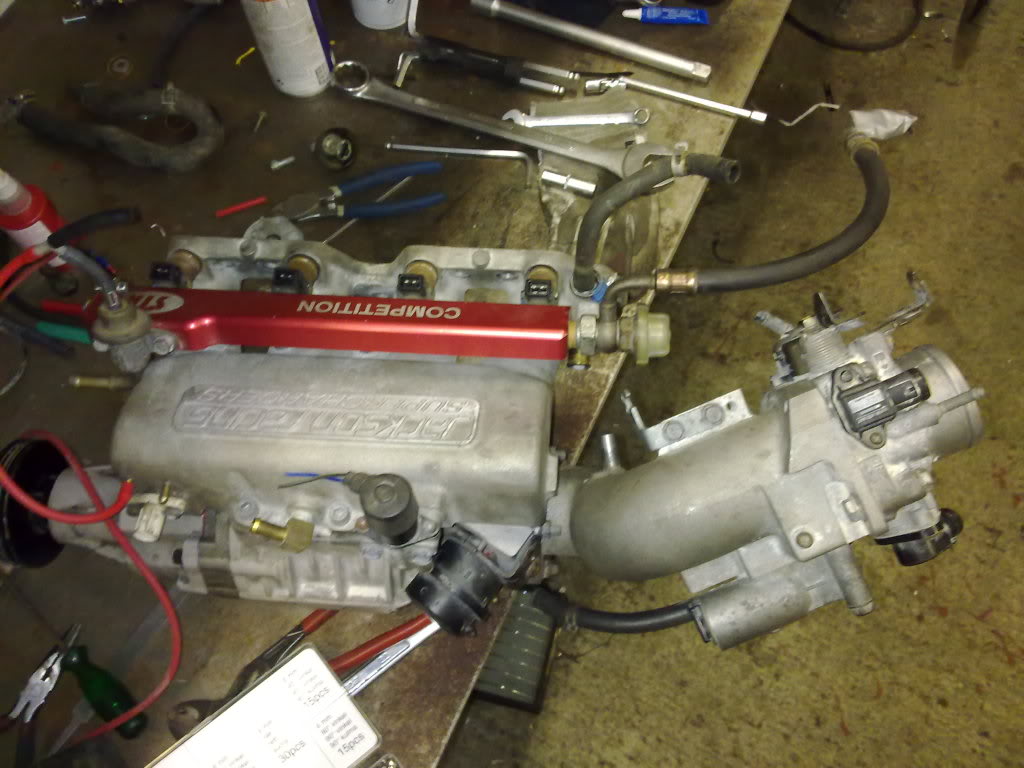
I looked a second time at the stock fuel rail and found out how the fpr was meant to be mounted. I want the engine bay to appear stock, and a huge red fuel rail that says COMPETITION didnt help I was still waiting for my KN panel filter so I can fit the stock air filter box, so this was a temporary solution I just threw on there (the stock filter was really dirty when I got the car. When I was datalogging the map signal I could watch the vacuum climb with the rpm's during WOT, lol). Engine bay still looks like crap though, but I kind of like it that way...
After that I took a look at the stoct catalyst converter. I've been looking for a huge bottleneck in the system because the little d16 would want basically the same fuel at 3 or 5 psi in the upper rpms. When I got the thing off, this is what it looked like:
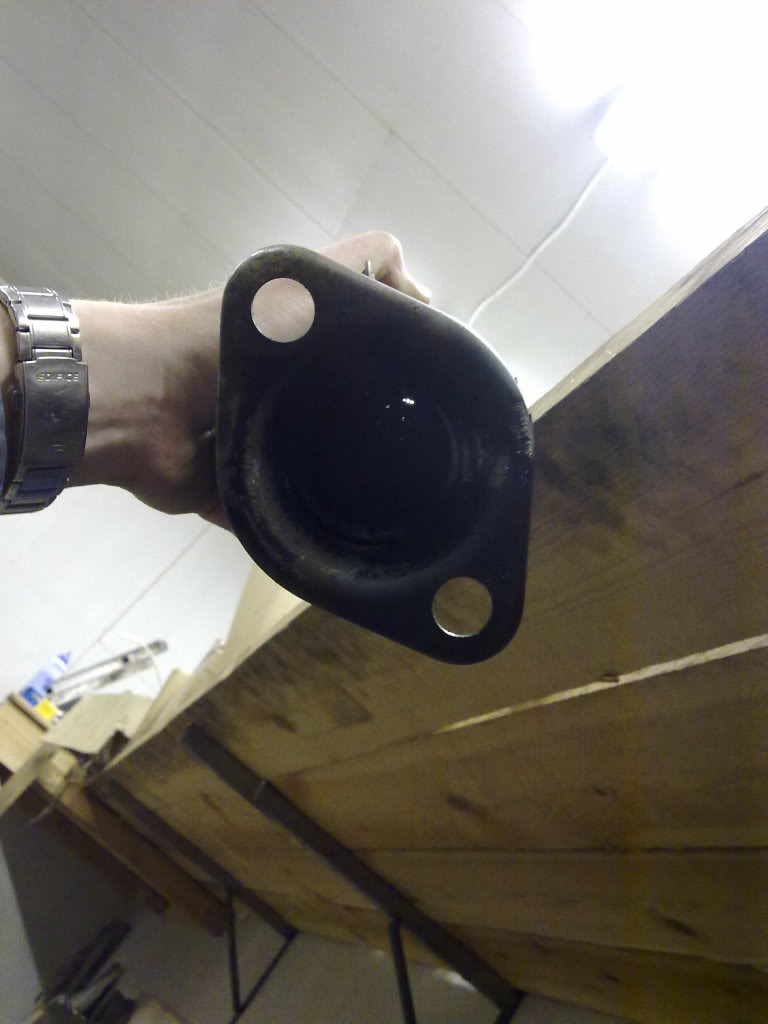
Not very free flowing at all...
So finally I could use some of the old crap that has been using space in the garage... Found both the flanges I needed to make a test pipe.
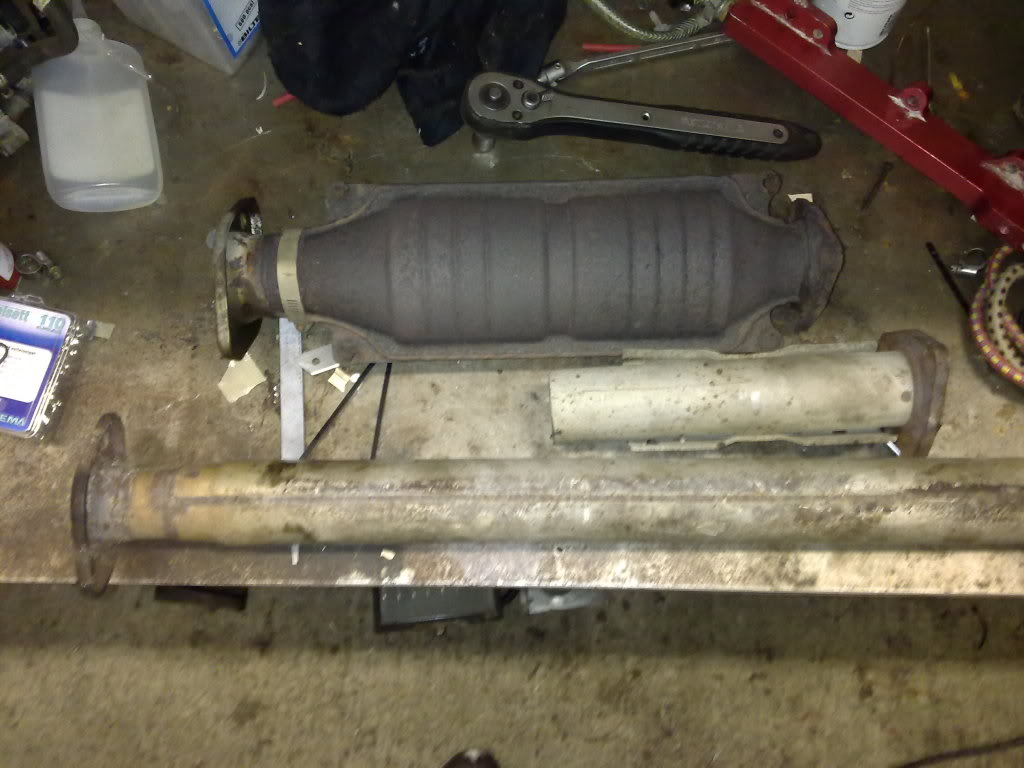
It turned out looking really weird on the outside, haha. The stock exhaust was double-walled for some reason, and there are some leftovers after a shield on one of the parts. But the inside is what counts, and its straight and the same diameter all the way. I will eventually change all the exhaust to a 2" or 2 1/4" system, but this will do for the moment. It helped a LOT to get rid of that old cat. After tuning, the fuel curves looks normal in TE now.
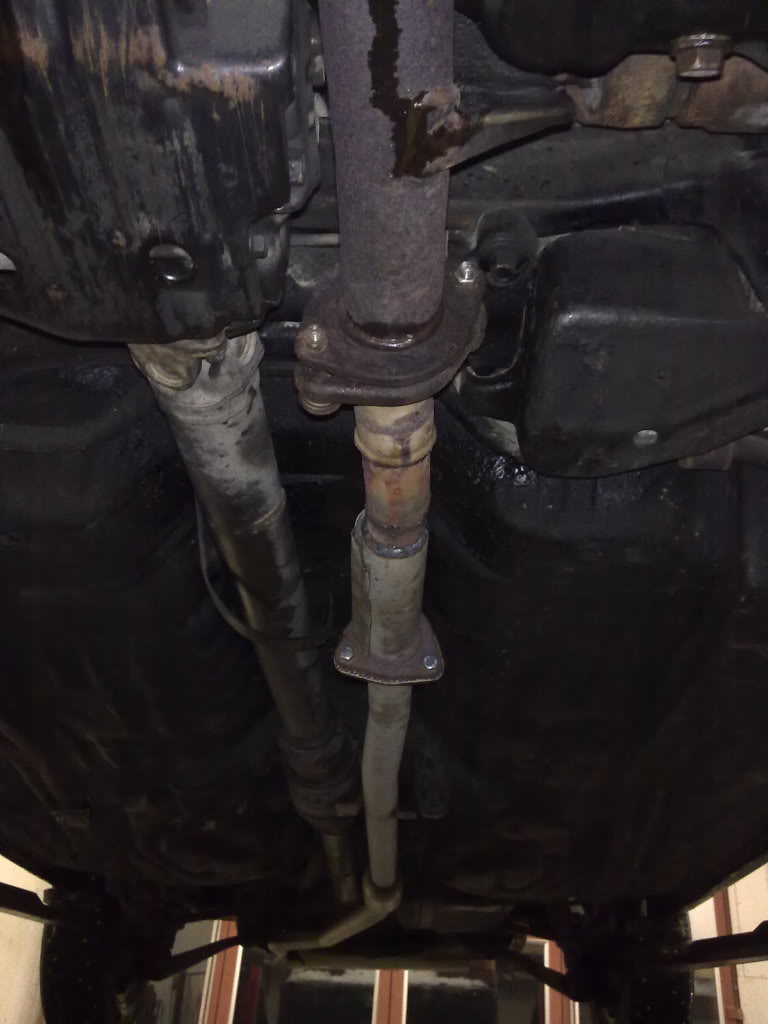
I also found out I that the 3.8" blower pulley and d16a6 crank pulley is one of the worst combinations out there. So I can spin the blower a lot faster. It only makes like 5.3 psi now. Its a lot better than stock, but it sure could have been a lot better. I was thinking about changing to a d16y8 pulley, but they are not so common over here, and besides I havent been able to find an answer to the exact size, so I dont know how much it will help. So I think I'll just make myself a new blower pulley.
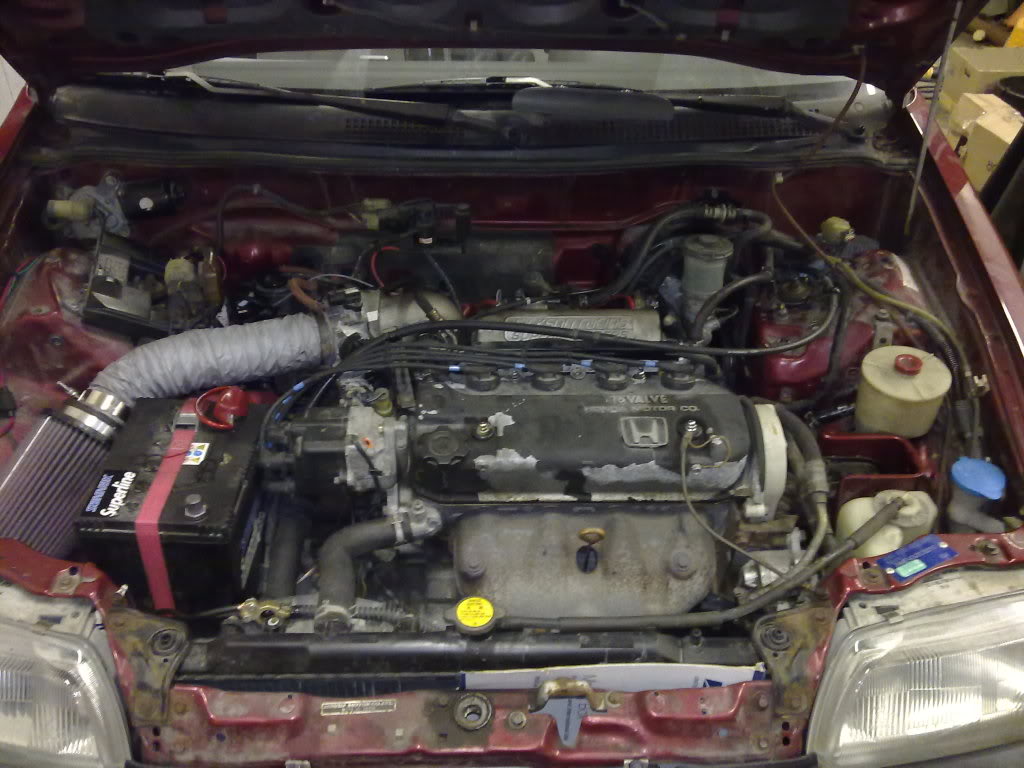
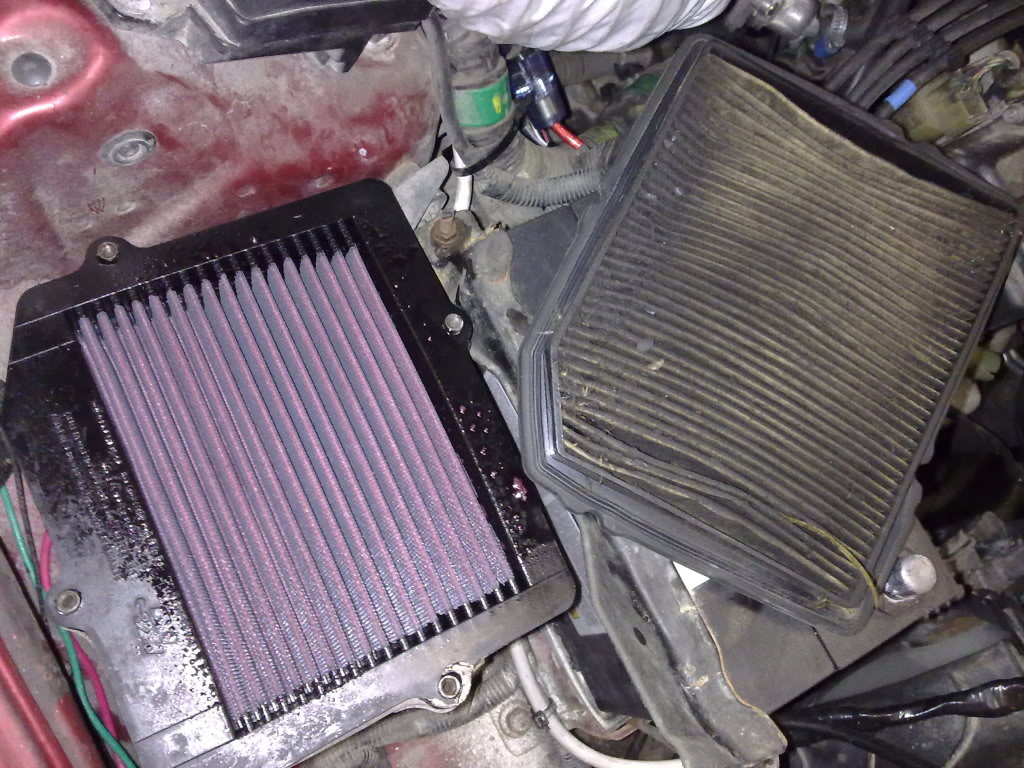
Aaaand, finally got my drop-in filter, as the old paper filter was really dirty. I want the engine bay to appear stock. Just need to figure out a suitable way to connect the air box and the tb, as the stock piece doesnt fit at all anymore...
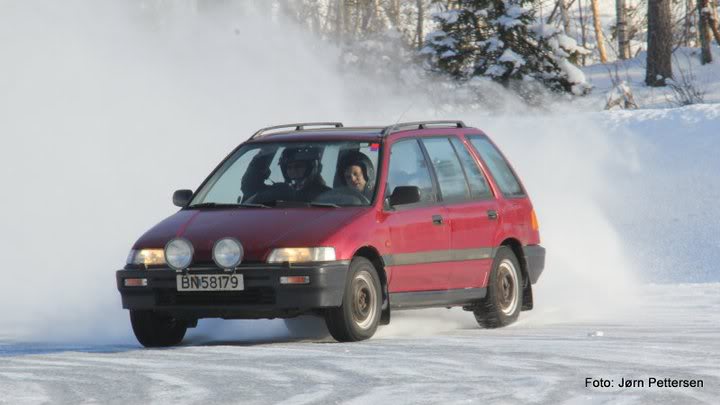
Aaand I went to a trackday on ice. Didnt really have ANY grip with my current tires and I havent done any suspension mods yet. But most of all I need to learn how to drive awd on ice. But it was definately fun anyway! Found a picture on the interwebz...
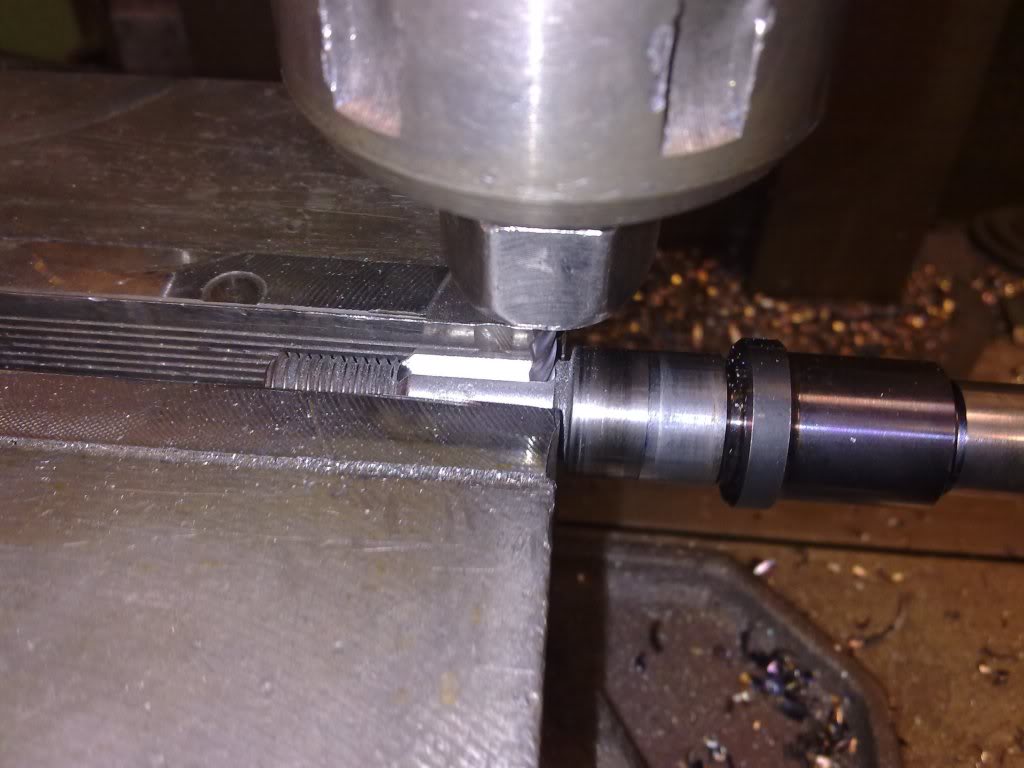
I've been thinking about how to make a diy smaller pulley for my blower, since I'm barely making 5psi of boost now. The hard thing is to make the v-grove with excactly 40 degrees. So I came up with this method...
Ghetto-rigged cutting disc in the lathe
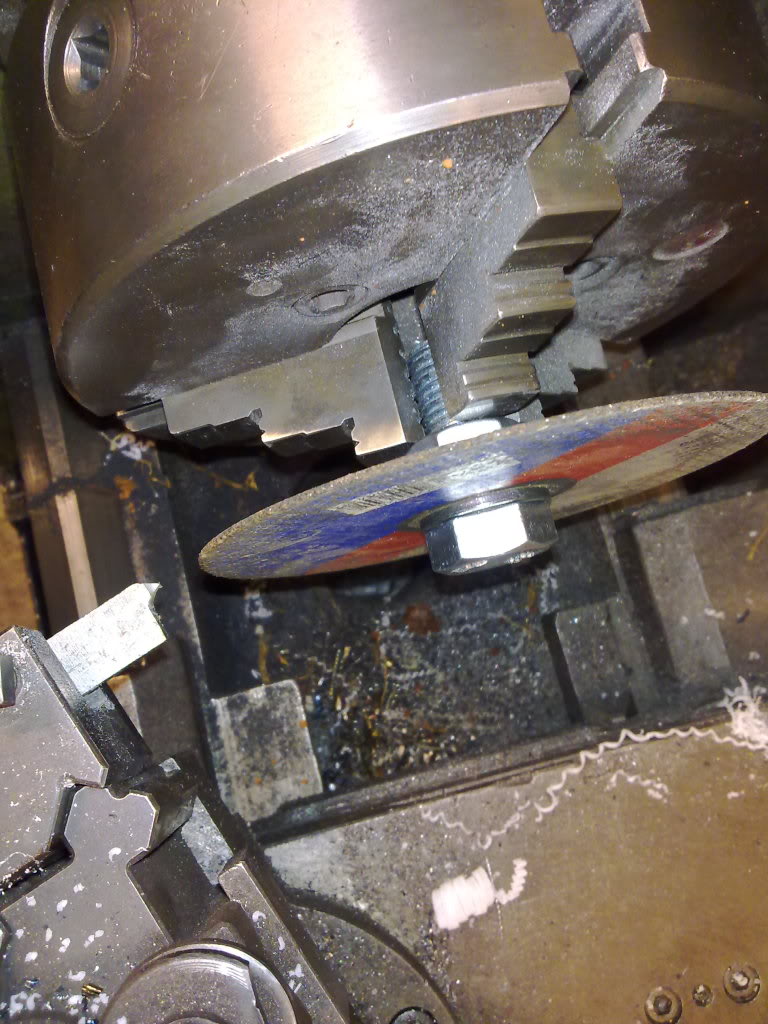
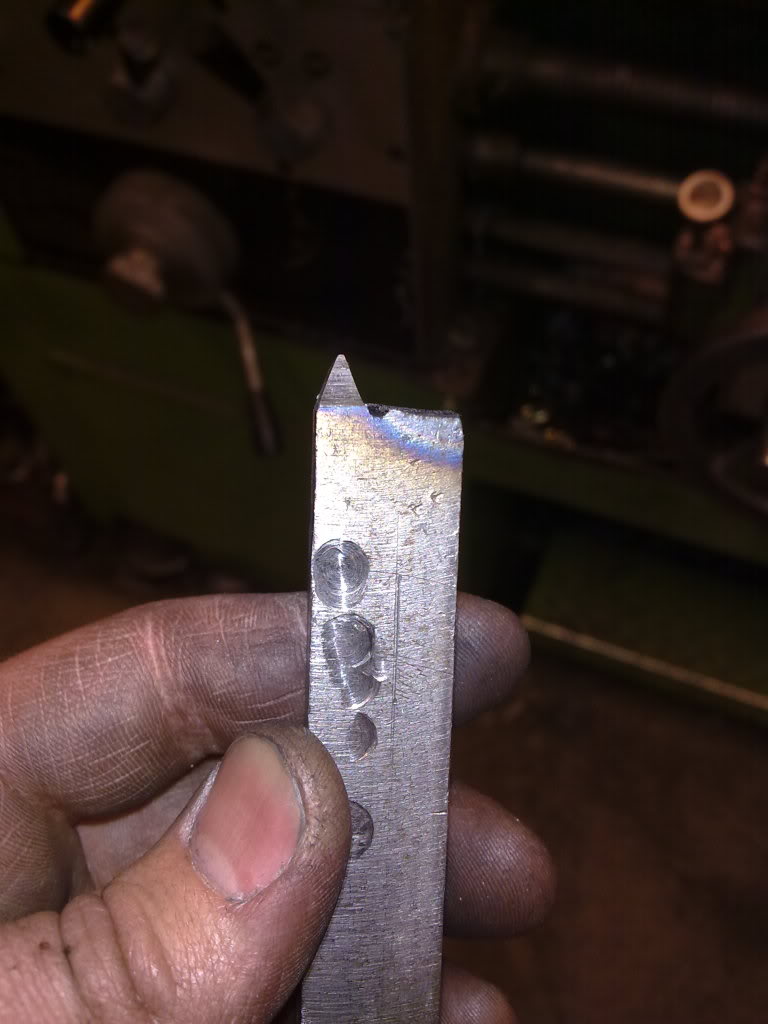
Cutting the tool with the 40 degrees tip
After a little manual touch-up I ended up with a cutting tool that looks like this:
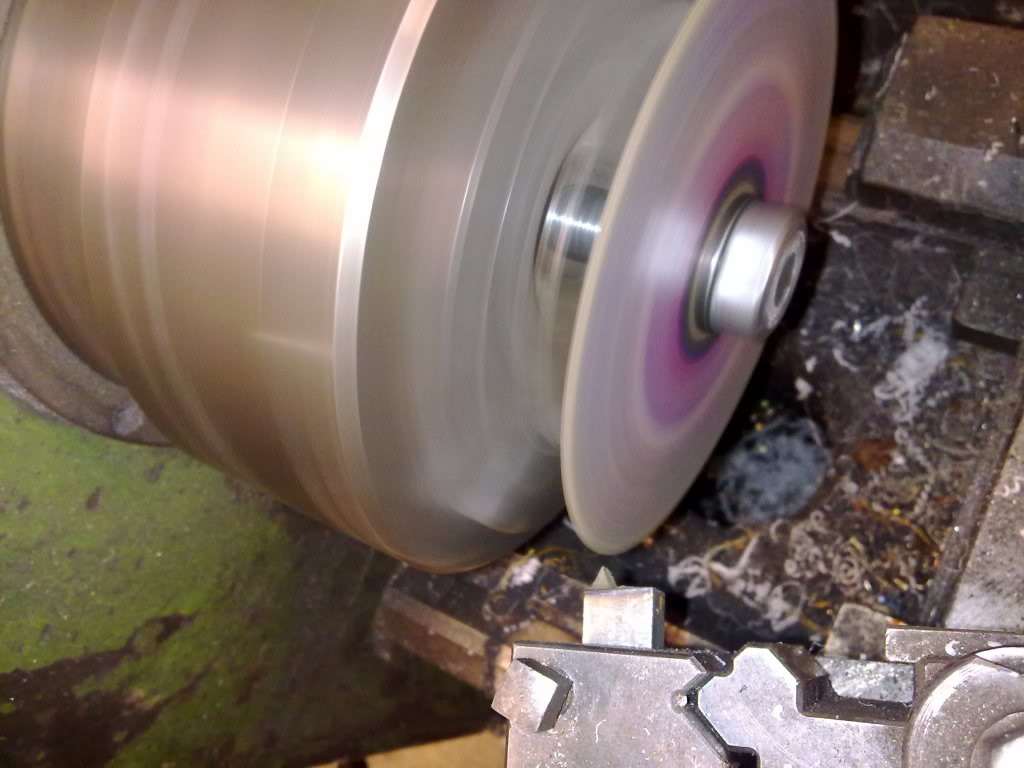
The rest of the job in the lathe was pretty straight forward, and the final result turned out like this... 3.2" pulley goodness
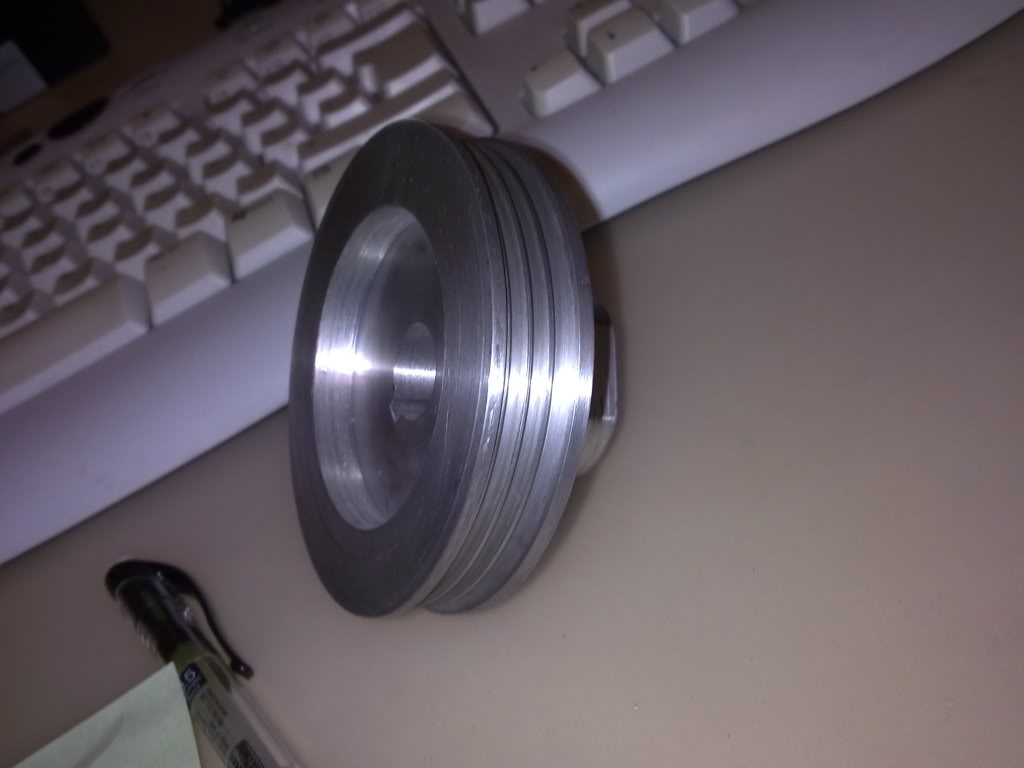
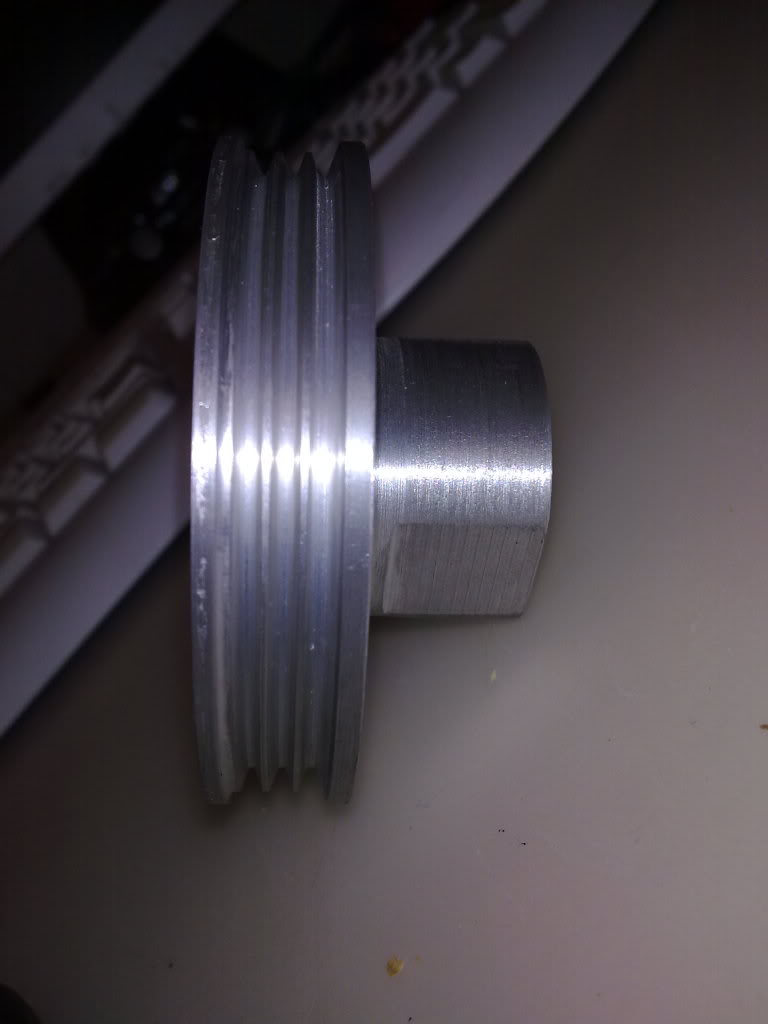
I messed up a little with the width at the left side, but I dont think it matters. The belt wont be riding there anyway.
Just needs to get the new pulley on the blower, fit my rear swaybar, and get some better tires, and I'm ready to hit the ice again!
Time to focus on getting rid of that rediculous understeer. I had some oem springs from my civic laying around, and the front springs looks like they could replace the rear springs on the shuttle without any modifications at all. They are a lot stiffer, and the reide height should be about the same as stock.
Some pics of the progress:
OEM EG on top, OEM wagon on bottom:
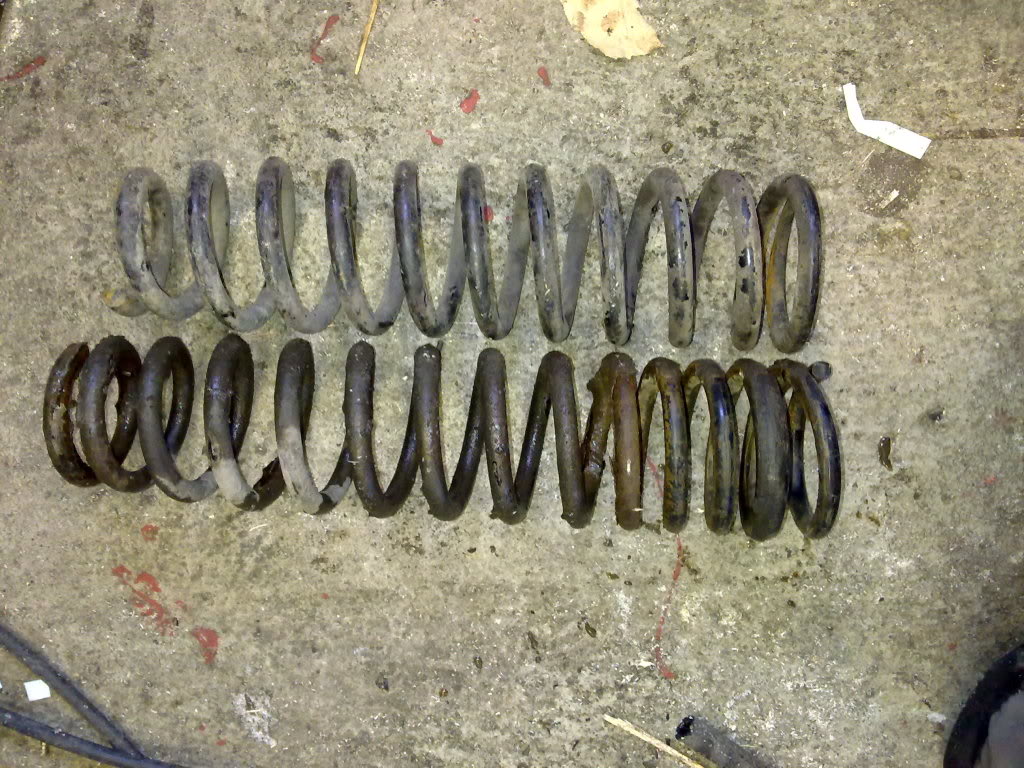
If the front EG springs are stiffer, the ride height shouldnt be too far from stock.
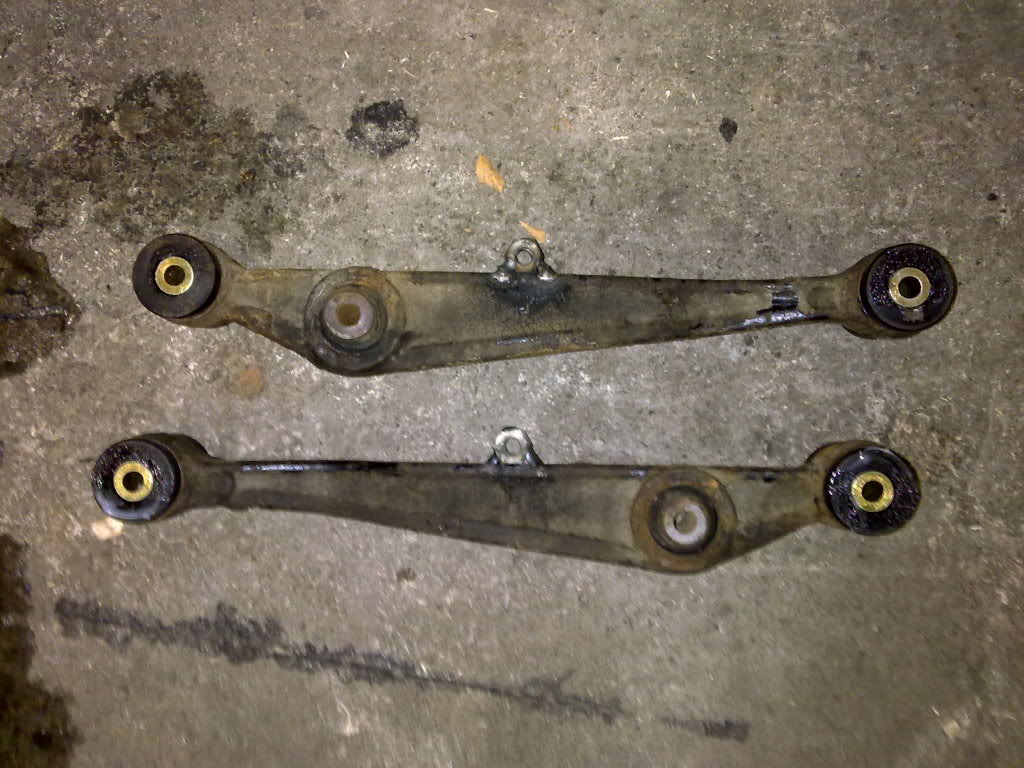
One finished (bottom one)
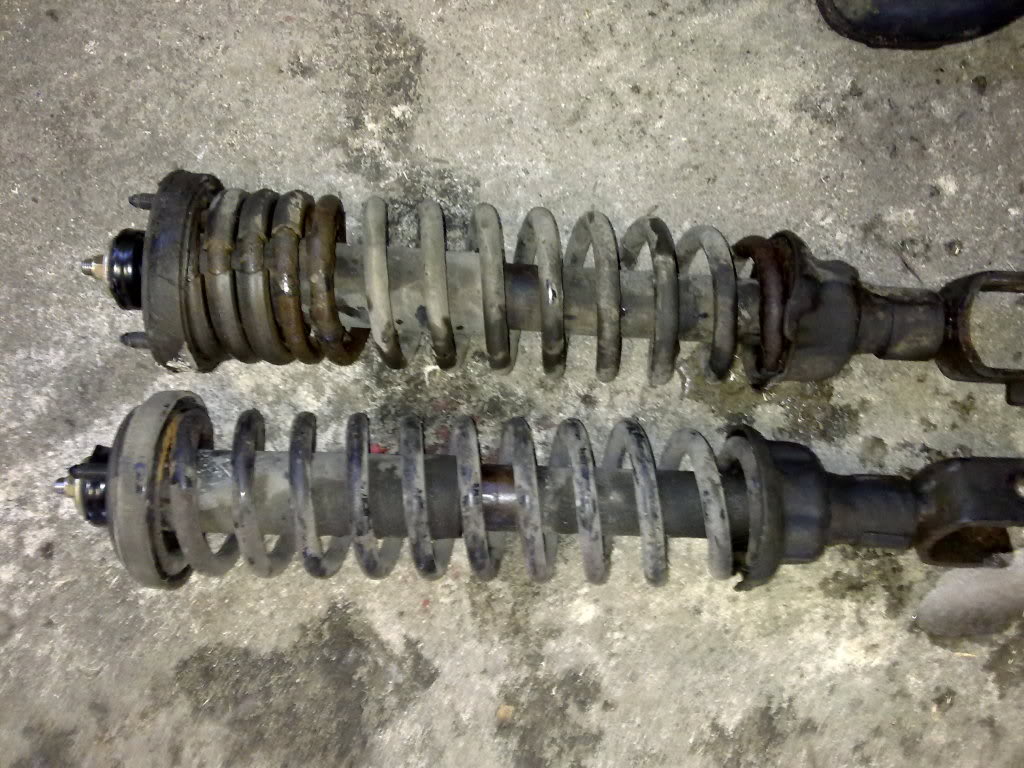
And of course one of the bolts snapped. It was totally seized in the bushing. After I cut it out, I tried pressing the bolt out of the bushing with a 10 ton press, but there was not a chance...
I looked around in the garage at my pile of leftover parts, and actually found a set of four ES bushings that fitted the rear lower arms. Wohoo!!
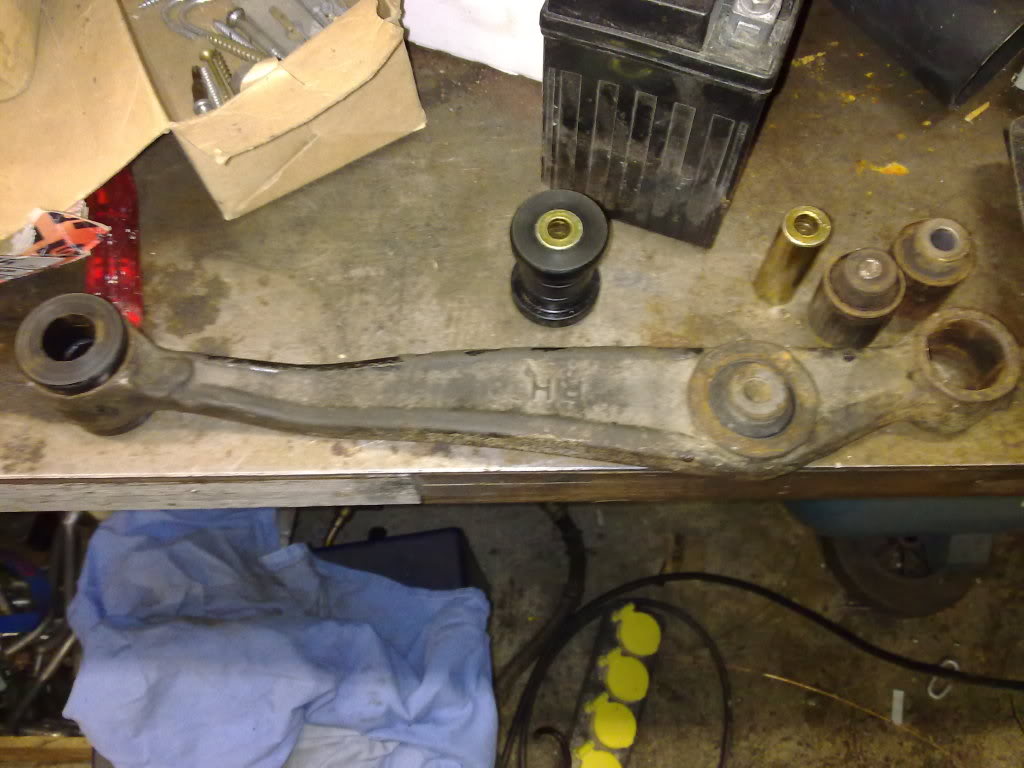
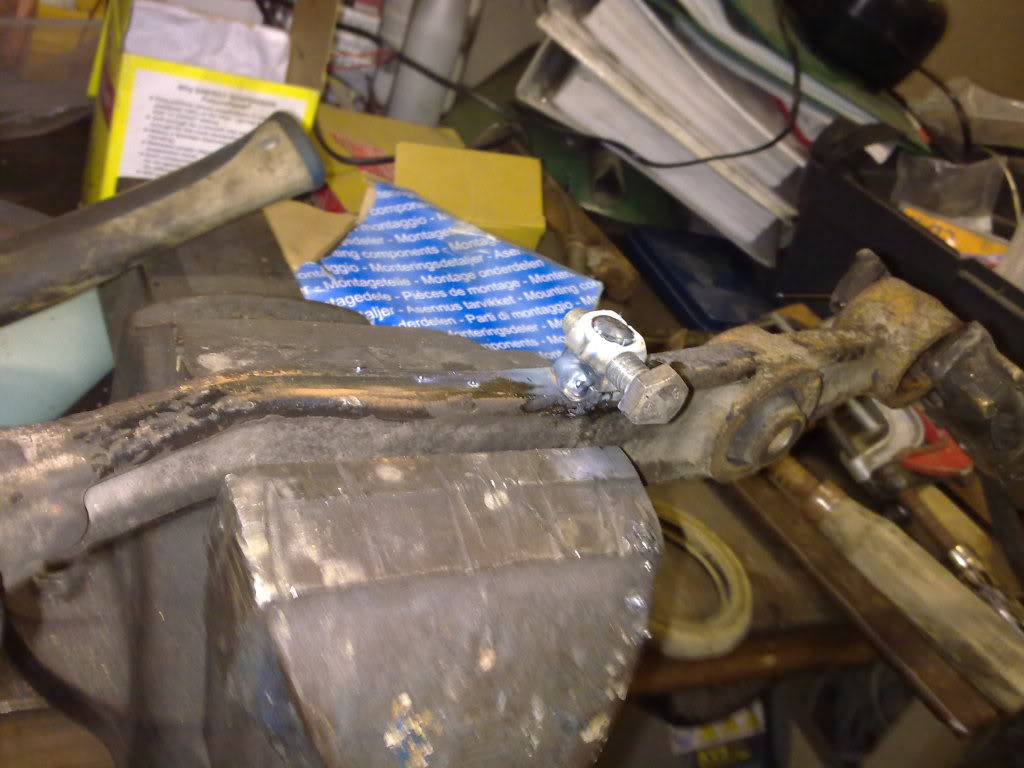
I'm planning to install a swaybar in the future, so when I had the rear arms out, I convinced them to accept the swaybar... No need for blinging aluminium rear arms with holes for swaybar now
Aaaand forgot to take pictures after the install...:p
Btw, I checked the mileage last week, using the car to work and ended up at 34 mpg. Its decent, but I have some more touching up to do in the map, so I hope to get a little higher. Cold weather and snow doesnt make it any better either.
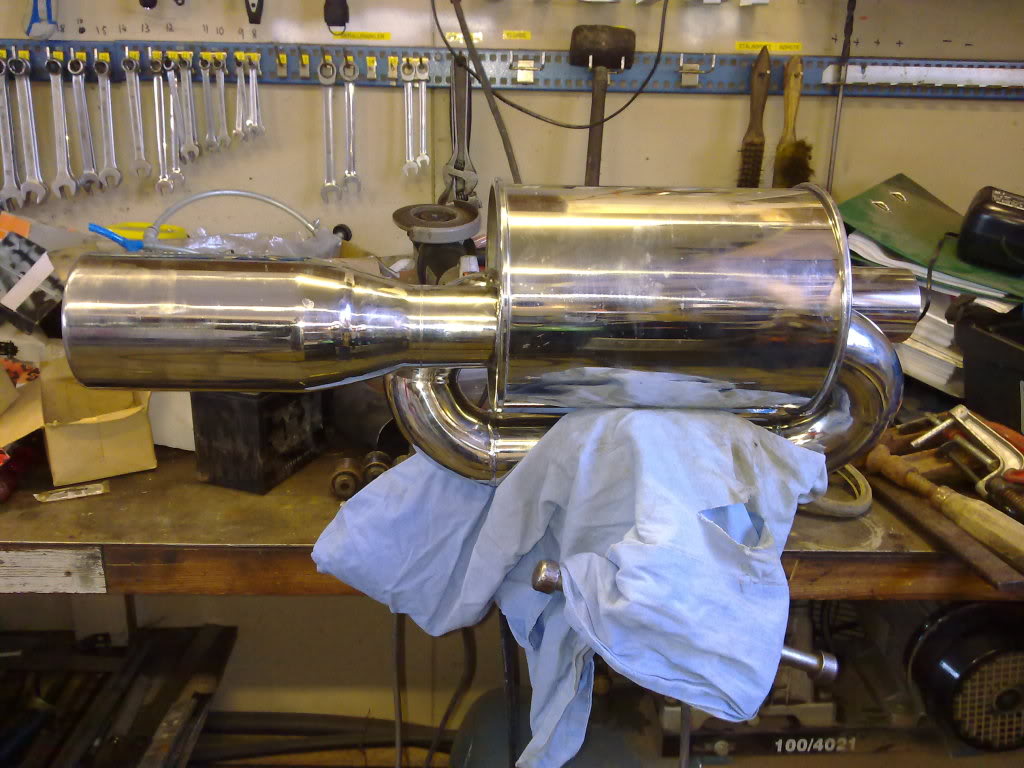
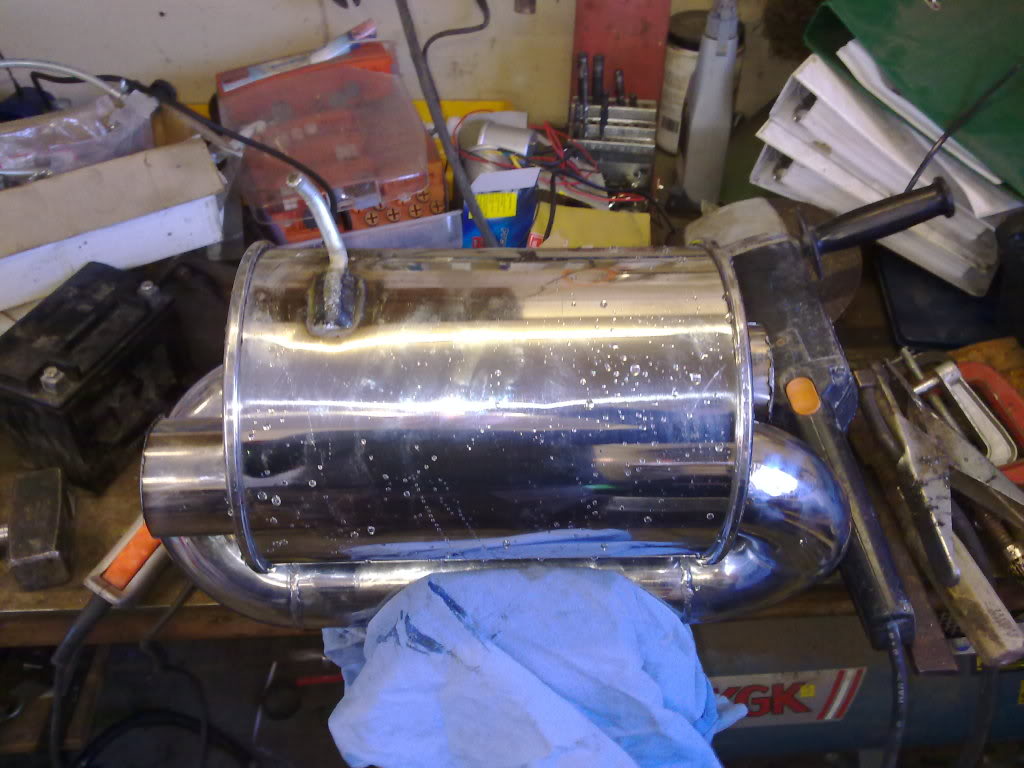
Redid the exhaust today. I had forgotten I had a Megan catback for my civic laying around, so I cut it to pieces and used some of it on the wagon. I also had a ebay twinloop in the garage, so I only used what I found today. So now I have a bigger exhaust on the wagon, and less crap laying around stealing space in the garage. Nice!
I tried to make the exhaust compatible with a swaybar which I will install in the future, and the twinloop muffler was a bit different than what I had in mind. I had to mount it like the 92-00 civic muffler hangs, but there's a lot less space in the wagon... So it looks kind of retarded, but it was "free" and it works, so I'm happy!
Pics for today!
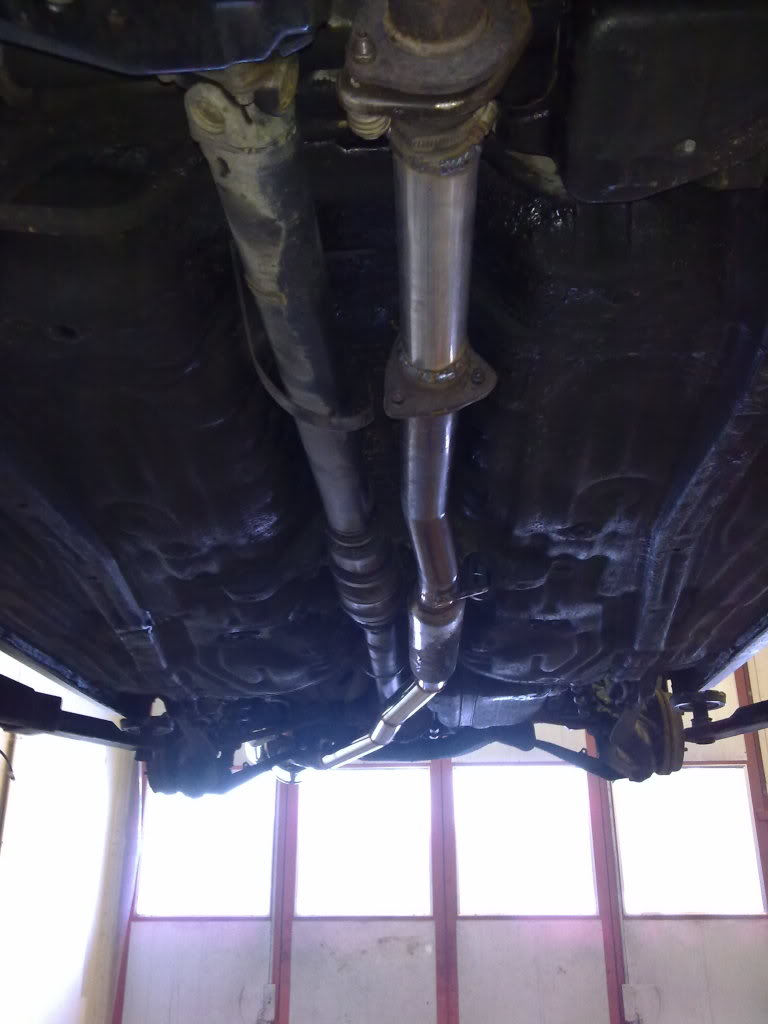
First it was like this
Then it was like this
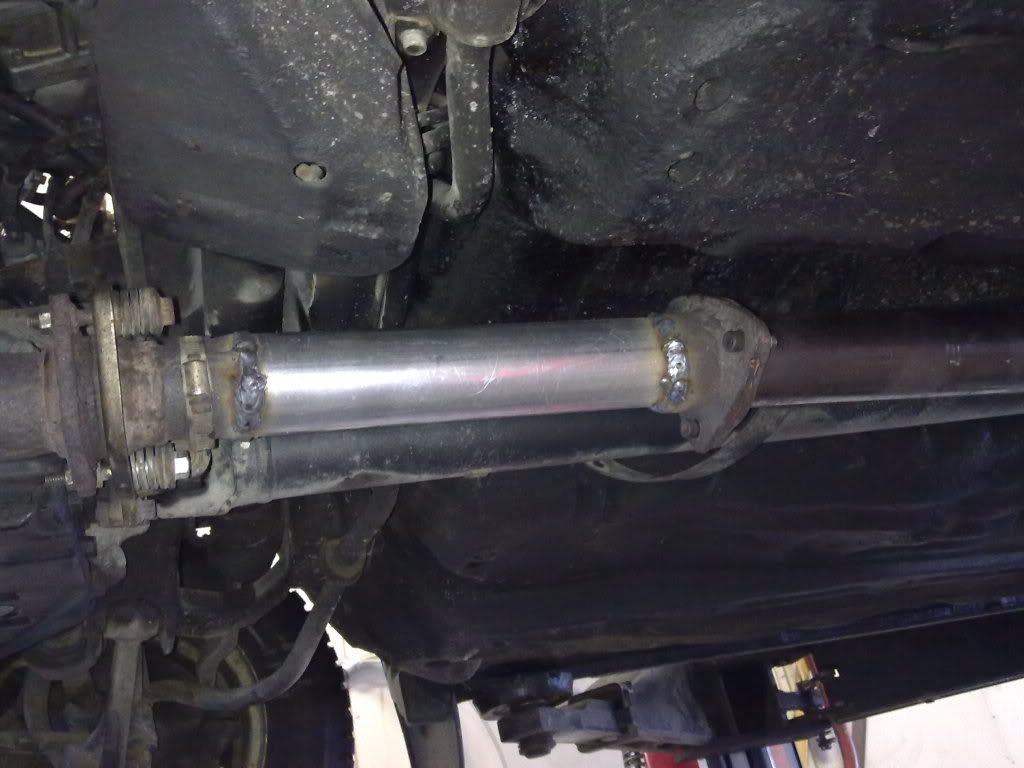
I cut up the old, clogged up cattalyst converter to make a flange for the stock donut gasket. Then a piece of 60mm pipe, and into 2.5".
The rest:
The muffler

The afr gauge leaned out almost half a point, so hopefully I picked up a couple horses too. The system was surprisingly quiet, so I'm very happy with it
I borrowed the studded tires from my GF's car this weekend and went for some icey fun again. And holy shit, the civic front springs made a difference! As long as I can dial the speed and set the car up properly, it goes through the corners like a dream compared to last time. Still need a lot of practice of course, but I've had so much fun today Still cant believe how good this thing works, considering its a 20 year old econo-box with the cheapest possible 4wd system, lol
Here's some incar video from my gorpo cam:
http://www.youtube.com/watch?v=tCsw-CGYaMI
http://www.youtube.com/watch?v=YpgJykBYqUI
http://www.youtube.com/watch?v=JCWqgb_kZvU
They mixed cars with normal tires and rally tires today. In the end of the last video I get passed by a rwd porsche with rally tires and I'm amased how much grip they get on ice. Too bad I would need at least 100-150 hp to keep the car sideways and a cage to be allowed with a set of those...
Also found a couple pics from the weekend fun
THats it for now. I need a new set of studded tires, and to install a rear swaybar. I also need to install the smaller pulley on the blower, but I'm afraid my clutch will give up once I do that. It feels like its on the edge
of what it will handle now with only 5psi, so I guess its pretty worn. Need to get a hold of somethong better...
The reason I wanted a wagon was because I was going crazy during the winter with no fun car. I have a civic that I track regulary during the summer, but fwd is no fun on the ice. So this wagon is my winter fun car, and dd. I'm a function>form guy, so sorry for lots of pics of a dirty car. Hope some of you like it anyway
Here it is. One of the first mods was some huge lights. The stock lights doesnt really do a good job, and during the winter its awlays dark up here so it was definately needed.
The lady I bought the car from was selling it because it didnt pass inspection, so there were some fixes. The first thing that needed fixing was the front brakes. The calippers were dragging, and the owner had driven it to the point where the pads were so worn they had fallen out of the calippers and seized between the brackets and disks. So the car didnt go anywhere.
Old, crappy disks...
The calipper pistons were so rusted that after I had removed 0.5mm from them, there were still grooves in them. I was in a hurry, so I made some new ones the same day.
Finished. Now I could actually try the car
Next up was one of the things I really, really hate. Rust. This was behind the side skirts:
I cut everything out (and a little more) and welded in new metal. As you can see this is the first thing I'm doing this myself, lol. Luckily it doesnt matter how it looks, as everything is behind the side skirts.
I covered everything with different anti-rust stuff, so hopefully it will hold up for some years.
I found this old POS when I was hooking up the extra lights. It has been disabled, and there was wires with crappy connections everywhere under the dash.
Now its on my floor, I like it better there.
Now that I could start to use the car, I discovered that both the upper ball joints were shot. I ordered some new ones on ebay. Not sure about the quality, but so far so good. Time will tell.
I also found the rear mounts on the rear diff have seen better days. I was expecting hell with rusted out bolts and everything, but everything turned out really easy. My lucky day!
Oh, and I also did the timing belt. THe old one was 12(!) years old, lol. Forgot to take pictures, but here's the old one. It didnt look good...
I also did a stupid mistake when removing the crank pulley bolt. Dont ask me how, lol
So now I'm running no power steering, lol
The amount of noise inside the car when running 60mph on studded tires are HUGE, so I did some sound dampening of the doors. It helped a little with the noise, but not much. At least the speakers works a lot better with this stuff inside the doors, so I can hear the radio now, lol
The old subwoofer-thingy I had laying in my garage fitted under the driver seat. Barely...
Now that the car was in OK shape, it was time for something more fun... I bought a JRSC a while back, so I figure it was time to put it to use. Of course it didnt go like planned, and I found some problems. When I removed the pulley, I found this:
It seems like the pulley nut has come loose, and it has been driven like this for a while. The pulley bolt hole was should be 16mm, but some places it was almost 17mm. The slot in the shaft for the woodruf key was ruined. And the seal had taken a beating too, so it needed some work before I could bolt it on. So I ordered a rebuild kit with bearings for the snout.
While I waited for bearings, I started out with the pulley. Made a bigger hole in it
And I made a new insert with a new slot for a woodruf key that I installed with Loctite 638. I love that stuff
The shaft disassembled
Put some work into it
Reassembled the shaft, and a new bearing in the snout housing
Pressing it in where it belongs
And at last a new seal
Now I was about to start porting the inlet and outlet a bit before I bolted it in, but of course I found signs that the rear bearings were worn. There had been some contact between the housing and rotors in the rear of the blower, so I wont chance anything. So now I was waiting for new rear rotor bearings. Always something...
I also chipped the ecu so it is ready for the blower. Always a pain to desolder that stock chip with just a vacuum pump...
After my pation ran out I ended up cutting and/or pulling out one pin at a time. The stock chip looks nasty now, lol
After a while this was the result. Ostrich is in place and working its magic
I also installed a Innovate LC1 wideband
My temporary gauge pod, lol
TurboEdit is up and running.
Everything looks like a f***ng mess under my hood now, but the blower is in
And I cant seem to decide if I want PS or not. Currently I just dont have a belt hooked up because I broke the groove on the crank pulley...
I had a problem with the cold idle. When it was really cold outside the idle would sky rocket. At -13*F it reached 3500rpm, I dont think that is the best idea in the long run, lol. After looking a little closer I found out that the stock throttlebody did NOT have a fitv, but the one that came with the jrsc did. The stock TB would not bolt up on the jrsc for some reason, so I MacGyver'ed the fitv on the other one. Coolant still flows through the tb to keep the tb ice-free, but no air goes through it. Works great! No leaks, and the idle is around 2000 rpm on cold starts now.
I looked a second time at the stock fuel rail and found out how the fpr was meant to be mounted. I want the engine bay to appear stock, and a huge red fuel rail that says COMPETITION didnt help
After that I took a look at the stoct catalyst converter. I've been looking for a huge bottleneck in the system because the little d16 would want basically the same fuel at 3 or 5 psi in the upper rpms. When I got the thing off, this is what it looked like:
Not very free flowing at all...
So finally I could use some of the old crap that has been using space in the garage... Found both the flanges I needed to make a test pipe.
It turned out looking really weird on the outside, haha. The stock exhaust was double-walled for some reason, and there are some leftovers after a shield on one of the parts. But the inside is what counts, and its straight and the same diameter all the way. I will eventually change all the exhaust to a 2" or 2 1/4" system, but this will do for the moment. It helped a LOT to get rid of that old cat. After tuning, the fuel curves looks normal in TE now.
I also found out I that the 3.8" blower pulley and d16a6 crank pulley is one of the worst combinations out there. So I can spin the blower a lot faster. It only makes like 5.3 psi now. Its a lot better than stock, but it sure could have been a lot better. I was thinking about changing to a d16y8 pulley, but they are not so common over here, and besides I havent been able to find an answer to the exact size, so I dont know how much it will help. So I think I'll just make myself a new blower pulley.
Aaaand, finally got my drop-in filter, as the old paper filter was really dirty. I want the engine bay to appear stock. Just need to figure out a suitable way to connect the air box and the tb, as the stock piece doesnt fit at all anymore...
Aaand I went to a trackday on ice. Didnt really have ANY grip with my current tires and I havent done any suspension mods yet. But most of all I need to learn how to drive awd on ice. But it was definately fun anyway! Found a picture on the interwebz...
I've been thinking about how to make a diy smaller pulley for my blower, since I'm barely making 5psi of boost now. The hard thing is to make the v-grove with excactly 40 degrees. So I came up with this method...
Ghetto-rigged cutting disc in the lathe
Cutting the tool with the 40 degrees tip
After a little manual touch-up I ended up with a cutting tool that looks like this:
The rest of the job in the lathe was pretty straight forward, and the final result turned out like this... 3.2" pulley goodness
I messed up a little with the width at the left side, but I dont think it matters. The belt wont be riding there anyway.
Just needs to get the new pulley on the blower, fit my rear swaybar, and get some better tires, and I'm ready to hit the ice again!
Time to focus on getting rid of that rediculous understeer. I had some oem springs from my civic laying around, and the front springs looks like they could replace the rear springs on the shuttle without any modifications at all. They are a lot stiffer, and the reide height should be about the same as stock.
Some pics of the progress:
OEM EG on top, OEM wagon on bottom:
If the front EG springs are stiffer, the ride height shouldnt be too far from stock.
One finished (bottom one)
And of course one of the bolts snapped. It was totally seized in the bushing. After I cut it out, I tried pressing the bolt out of the bushing with a 10 ton press, but there was not a chance...
I looked around in the garage at my pile of leftover parts, and actually found a set of four ES bushings that fitted the rear lower arms. Wohoo!!
I'm planning to install a swaybar in the future, so when I had the rear arms out, I convinced them to accept the swaybar... No need for blinging aluminium rear arms with holes for swaybar now
Aaaand forgot to take pictures after the install...:p
Btw, I checked the mileage last week, using the car to work and ended up at 34 mpg. Its decent, but I have some more touching up to do in the map, so I hope to get a little higher. Cold weather and snow doesnt make it any better either.
Redid the exhaust today. I had forgotten I had a Megan catback for my civic laying around, so I cut it to pieces and used some of it on the wagon. I also had a ebay twinloop in the garage, so I only used what I found today. So now I have a bigger exhaust on the wagon, and less crap laying around stealing space in the garage. Nice!
I tried to make the exhaust compatible with a swaybar which I will install in the future, and the twinloop muffler was a bit different than what I had in mind. I had to mount it like the 92-00 civic muffler hangs, but there's a lot less space in the wagon... So it looks kind of retarded, but it was "free" and it works, so I'm happy!
Pics for today!
First it was like this
Then it was like this
I cut up the old, clogged up cattalyst converter to make a flange for the stock donut gasket. Then a piece of 60mm pipe, and into 2.5".
The rest:
The muffler
The afr gauge leaned out almost half a point, so hopefully I picked up a couple horses too. The system was surprisingly quiet, so I'm very happy with it
I borrowed the studded tires from my GF's car this weekend and went for some icey fun again. And holy shit, the civic front springs made a difference! As long as I can dial the speed and set the car up properly, it goes through the corners like a dream compared to last time. Still need a lot of practice of course, but I've had so much fun today
Here's some incar video from my gorpo cam:
http://www.youtube.com/watch?v=tCsw-CGYaMI
http://www.youtube.com/watch?v=YpgJykBYqUI
http://www.youtube.com/watch?v=JCWqgb_kZvU
They mixed cars with normal tires and rally tires today. In the end of the last video I get passed by a rwd porsche with rally tires and I'm amased how much grip they get on ice. Too bad I would need at least 100-150 hp to keep the car sideways and a cage to be allowed with a set of those...
Also found a couple pics from the weekend fun
THats it for now. I need a new set of studded tires, and to install a rear swaybar. I also need to install the smaller pulley on the blower, but I'm afraid my clutch will give up once I do that. It feels like its on the edge
of what it will handle now with only 5psi, so I guess its pretty worn. Need to get a hold of somethong better...
Comments
great built cant wait for more
I need to spend more time on a lathe, Im useless at the moment
I'm loveing that smaller pulley.
Not quite sure, I found it in the trash at work, lol. It is some kind of mild steel, but we have several types, so I'm not sure excactly what it is. Gave it a nice coating of copper spray at the exposed parts, so hopefully they wont rust any more than the stock ones.
Btw, found another video at the camera that might be a little more interesting. More traffic. Cayenne turbo and 911's, never thought I should see thar kind of cars at the ice, lol. A couple cars wit rally tires too, the Audi at 12.00 is serioulsy fast!
http://www.youtube.com/watch?v=kkYmoDyzVsY