RandEE's Build - Next Level? (long)
Hey, my name's Randy
This is my first ever build thread. I've always wanted to make one, but never had the time or motivation to start one.
So bear with me. I've had this car since late 2014, have a lot of progress to post, and I'll try to make this first post as
short as possible. But with 100 pictures.. I'll be honest it's going to be pretty long, even with leaving out most of the
small details. So bring a few bags of popcorn.
I've been into cars pretty much forever, and have always wanted to build my own cars. I've owned about 15 cars/trucks
since 09, and every single one I've done something to. Whether it be a set of coilovers, wheels, or a paint job. I've never
had more space than a 2 car garage to work with, and try to do everything I can myself.
I'll start the thread off by showing you some of my previous cars, the more notable ones.
I've loved Civic Wagons since 2010, I've owned 3 prior to the one I'm making this thread about, one being a parts
car for my first wagon. I got my first wagon (which was my 5th car) back in 2012, beat to hell for $600.
12/5/2012 The day I got my first wagon.
All I did on that one was some "quick, half-ass" body work, and painted it with rustoleum.
8/18/2013 My first wagon as it sat after being "completed"
When I got it done, I didn't drive it much, the transmission was auto, slipped really badly, and I just didn't like it
anymore. So I sold it for $1500 a few months later.
After that I got a few other cars, one being an EF Sedan that was pretty beat for $900.
12/15/2013 The day I got my EF Sedan.
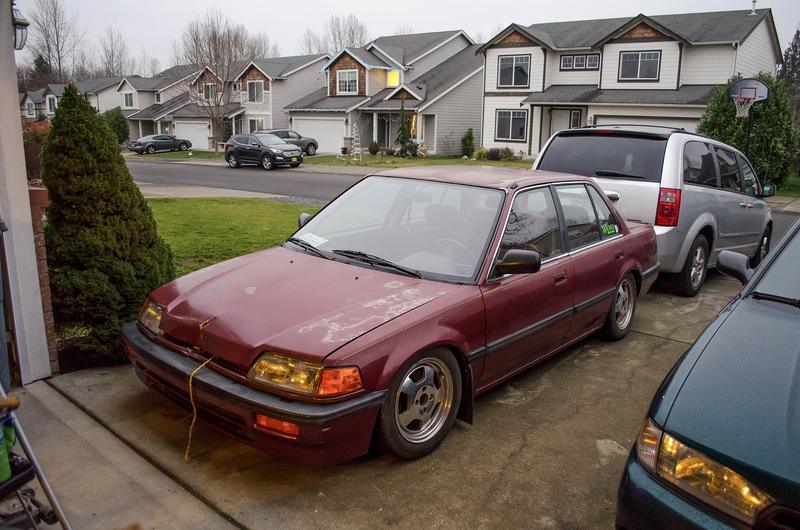
I did some "More legit" body work on it, and got it painted at Maaco, it definitely turned out better than my first
wagon, but.. still not perfect.
9/6/2014 A few months down the road after it had been done for a while.
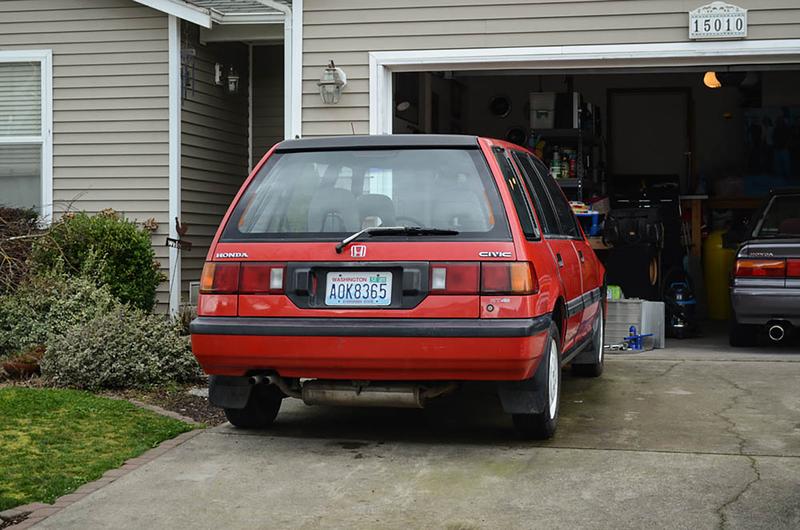
While I still had that car, I bought a Subaru Legacy for $1500, had that for a few months, did a few mods and
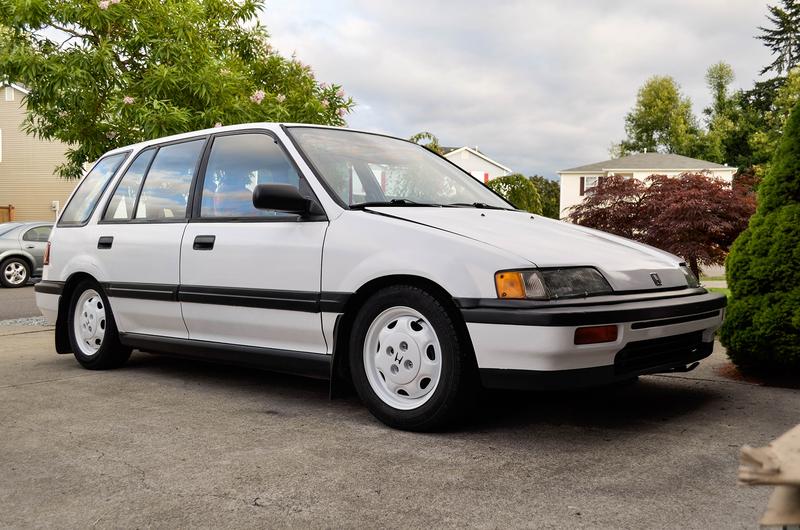
traded it for a pretty nice red manual RT4WD Civic Wagon.
3/9/2014 The day I got my red RT4WD.
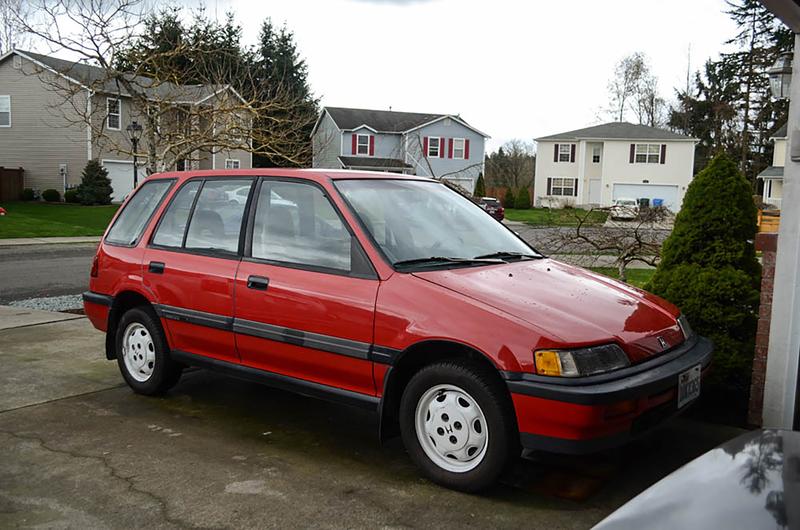
It had a few issues, and I needed money at the time, so I sold it for a pretty good profit.
(Which I obviously ended up regretting for along time).
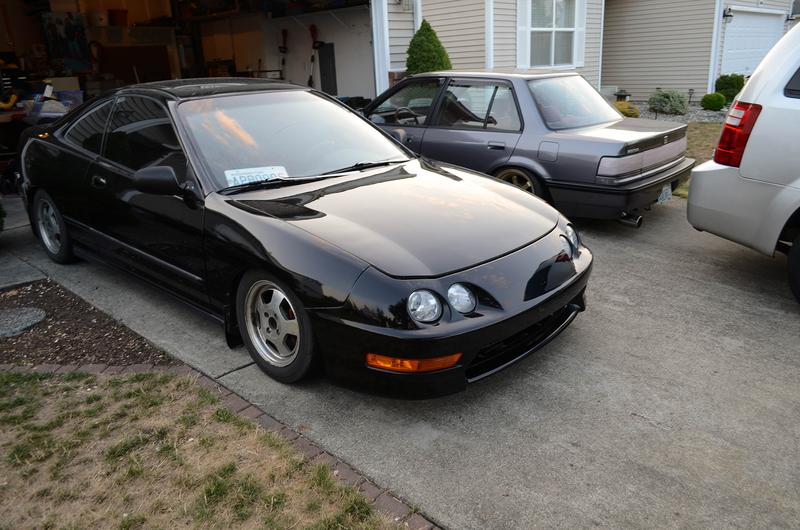
With some of the profit I bought a DC Integra for $800.
4/27/2014 The day I got my Integra
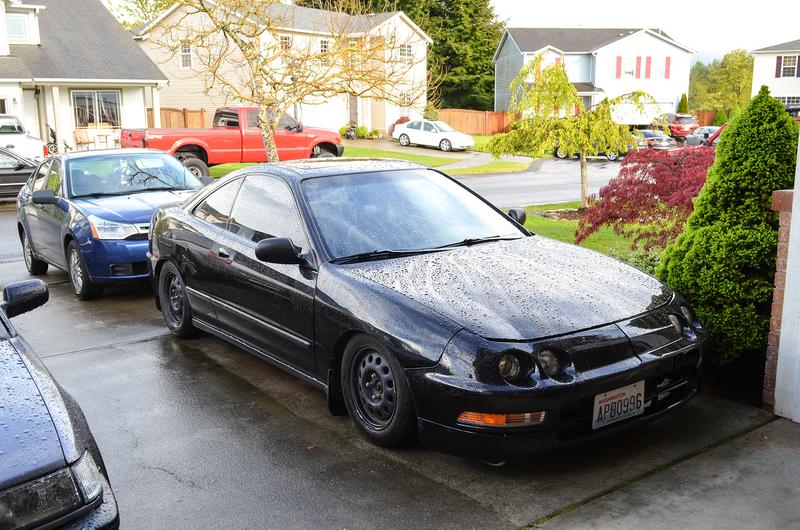
It needed a new front bumper, which I replaced, and painted it messing around with using "Legit" paint products
and an HVLP gun. I got a really good result out of it, and now I absolutely love painting everything the "right" way.
7/10/2014 The Integras new bumper.

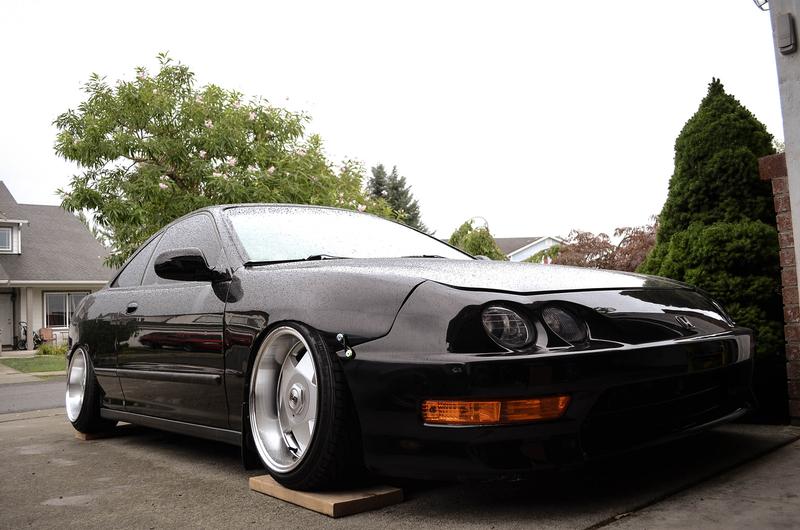
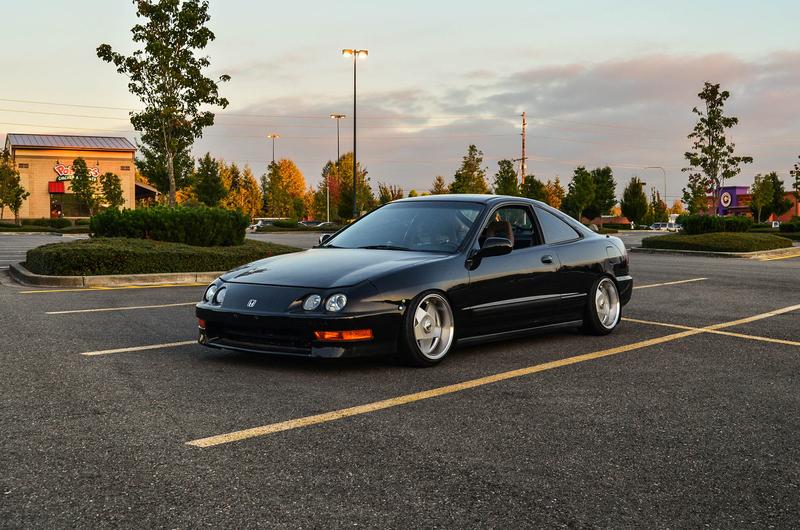
A few months after replacing and painting the bumper, I ended up slamming it on some super wide wheels, it
all ended up looking pretty good. I barely drove it around though.
9/2/2014 The Integra stanced out.
It was around this time where I kept seeing my friends post pictures of their wagons (I had made quite a few friends
through Civic Wagons at the time I had mine), and it made me realize how much I missed mine.
So I decided to sell my EF Sedan and try and get into another Civic Wagon for a decent price.
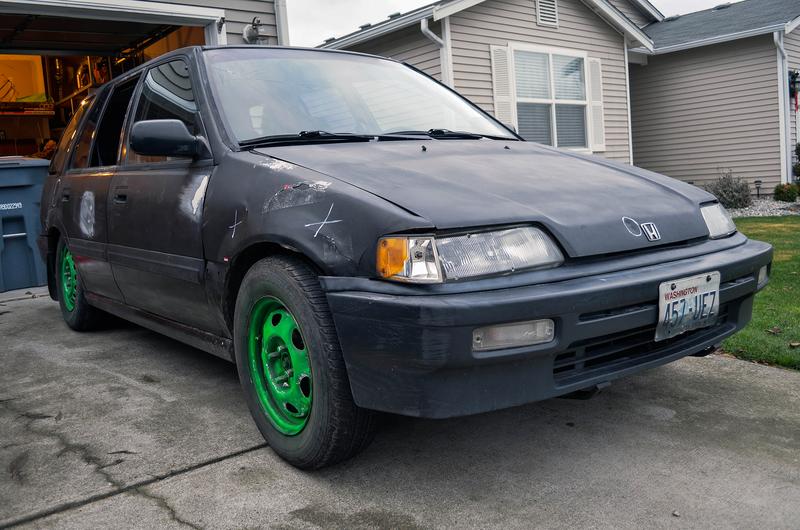
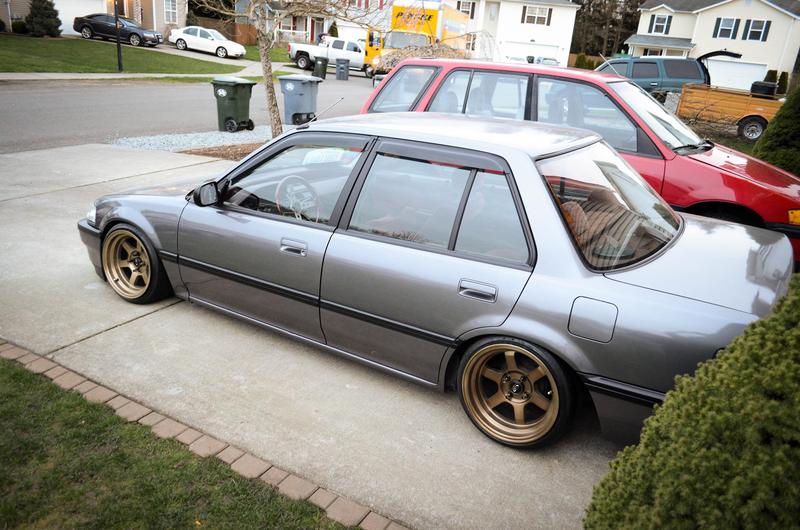
Luckily, within a week of selling my EF Sedan, I came across a Craigslist ad for a 1990 Civic Wagon with a B18A1 swap
for $1200. The only catch was, it needed a new clutch. I had never messed with anything mechanical to that extent, and
wanted to give it a shot and learn something. So I went and looked at it, and immediately knew I had to have it, The
interior was the cleanest I had ever seen in an EF, the body was pretty straight, no major dents or rust, the engine ran
great. So I made a deal with him, $1200 and he tows it to my place 1hr away. He accepted, and the next day I had the
car in my driveway. That was 9/13/14.
My original plans with this wagon were to just replace the clutch quickly, and drive the hell out of it. Hah.. those plans
lasted a week.
There's only one way to keep me from selling a car, and that is: To spend more time and money on it than I could
ever get back out of it. I'm far past that point. So there's no turning back now.
Time to make this wagon as close to perfect as I can.
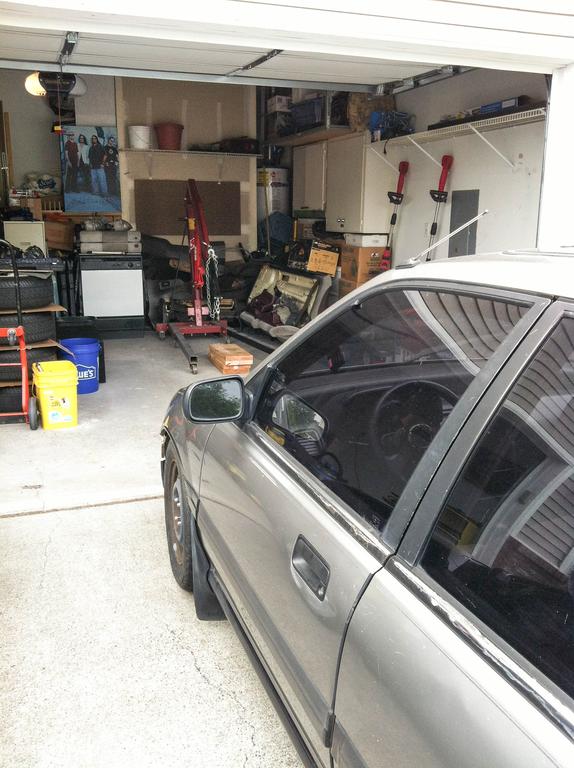
9/13/14. The Wagon as it had been dropped off at my house.
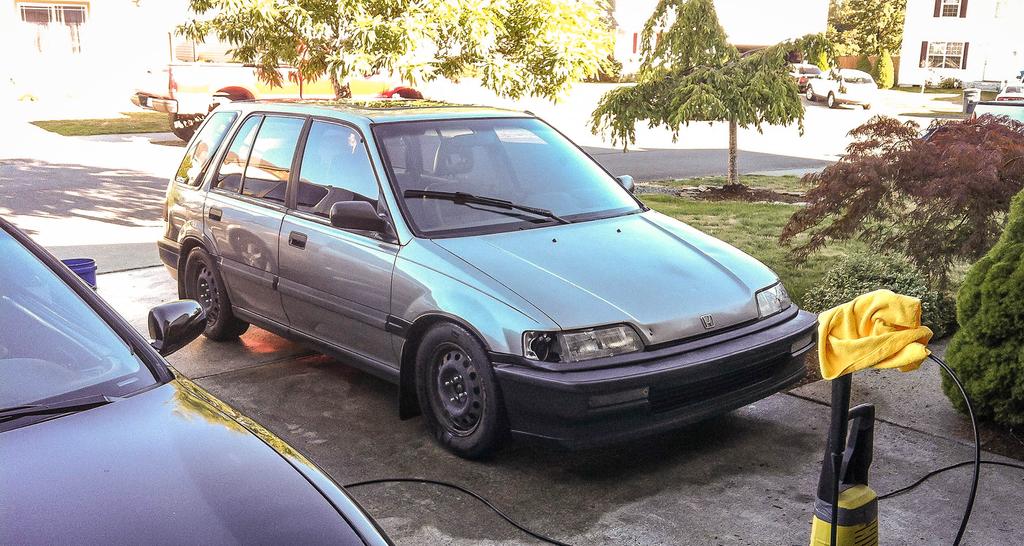
It had an LS swap out of a 90 Integra. The person who I bought it from said it was built in the early 2000's at a shop in Oregon. Hence the
earliest Hasport swap mounts I've ever seen.
I drove it around my neighborhood block a few times, and the clutch was slipping really bad under acceleration just like the ad stated. I was
looking around for a simple fix, maybe a bad clutch cable, broken pedal assembly, anything like that. Those were all good. So I knew I had to
pull the trans and replace the clutch at that point. No big deal, it was time to learn something.
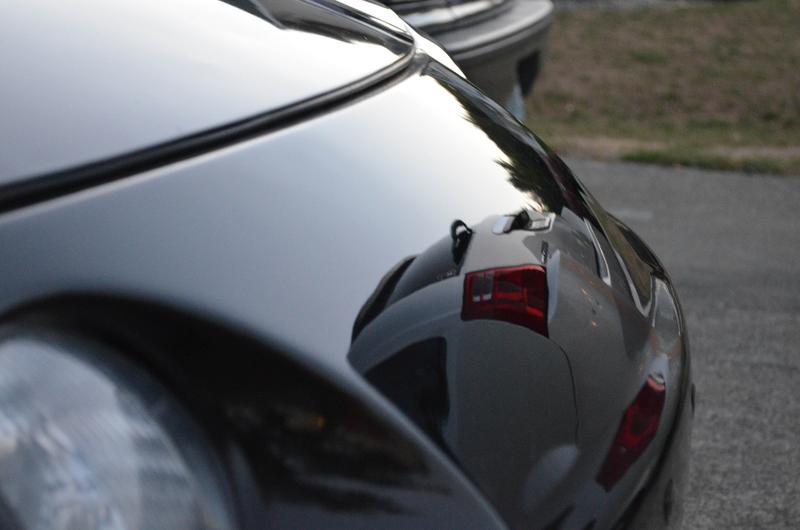
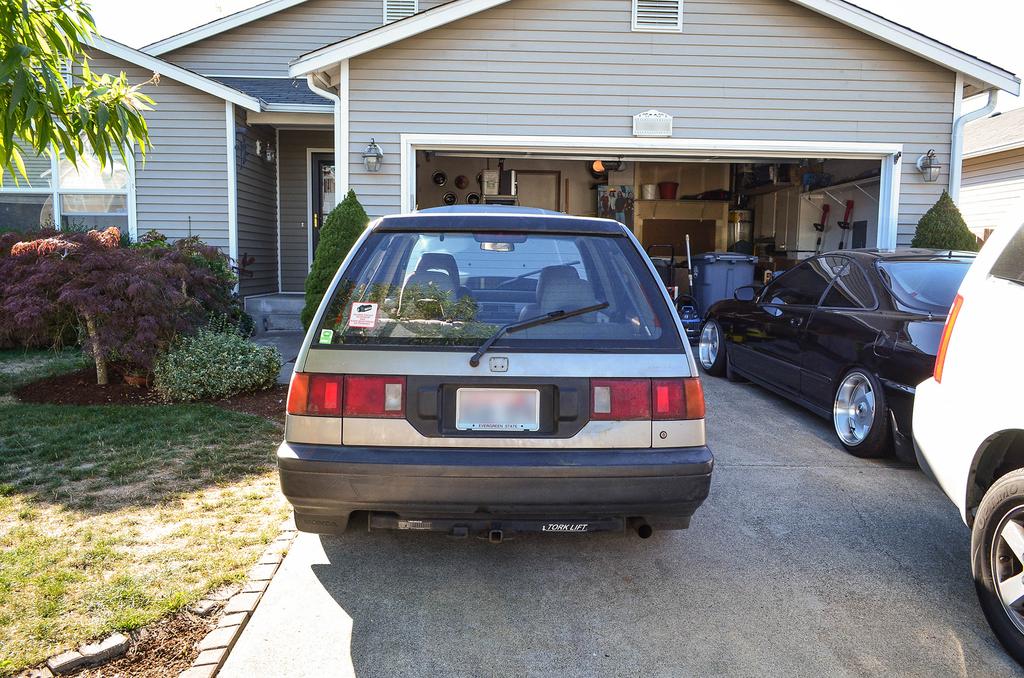
After I figured that out, I still had plenty of day light left, and a lot of motivation. The horrible tail lights were bugging me, and I had to fix them
right away. I already knew the method to bring them back, so I wet sanded them with various grits of paper, and buffed them. I was super
happy with the results.

That night while researching, I figured out that the easiest way to take the transmission off one of these cars is to pull the engine. I was fine
with that.
A week went by, and I finally decided it was time to get down on pulling the engine out. I needed an engine hoist, was about to leave to go get
one, but then decided to ask my neighbor across the street if he had one, and sure enough, he did! Saves me money, I still use it to this day haha.
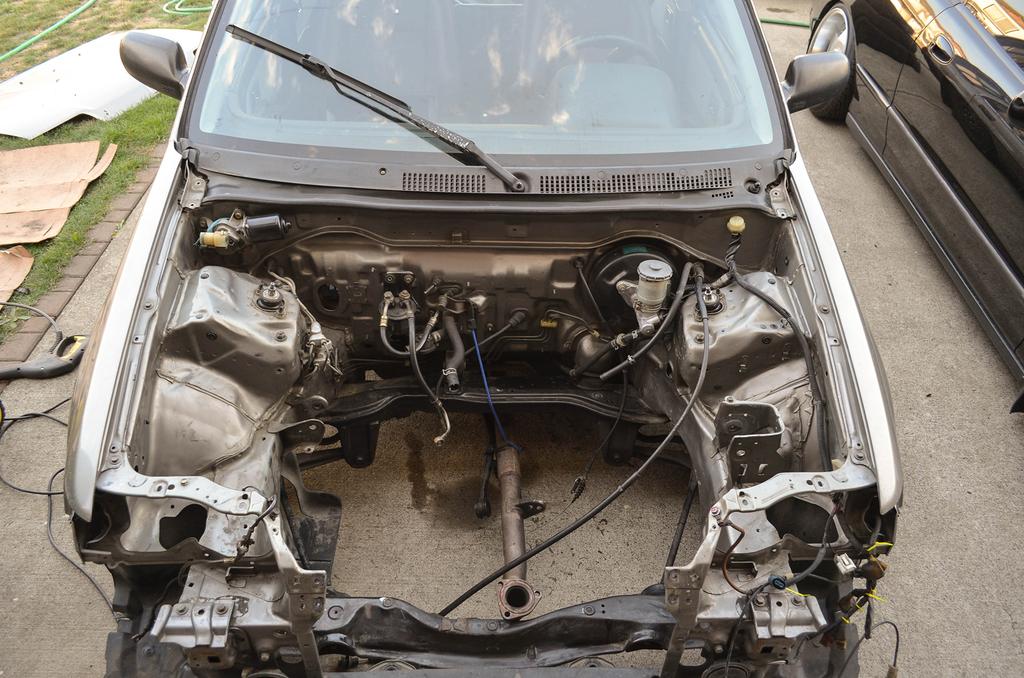
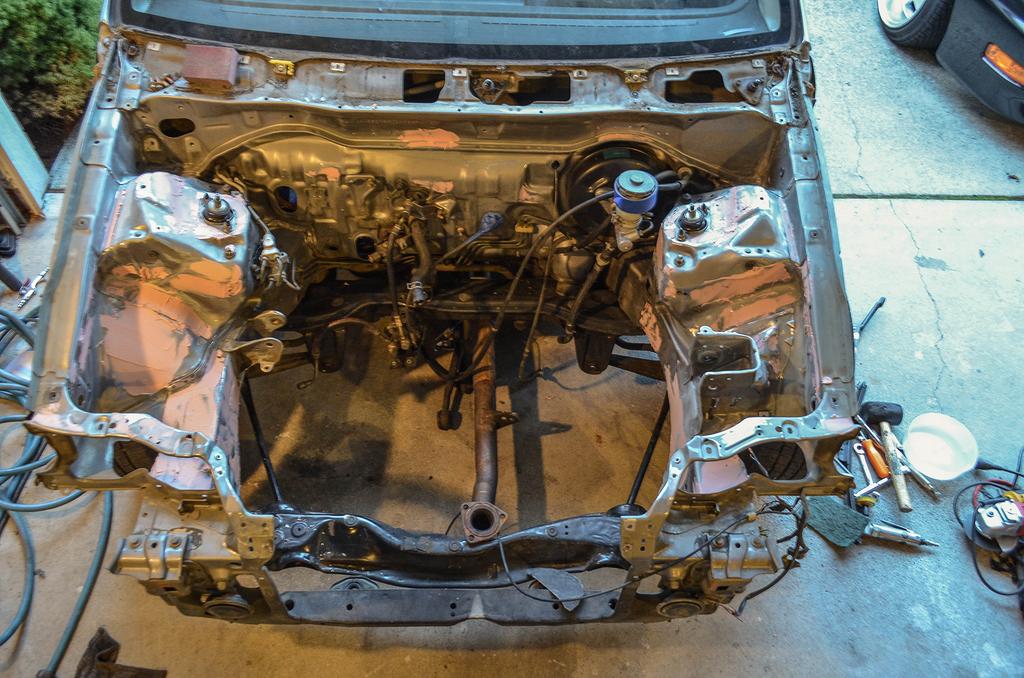
9/20/14. Pulling the engine out
Being my first time pulling an engine, or doing anything mechanical really to this point, it took me a while. But by the next day it was finally out.
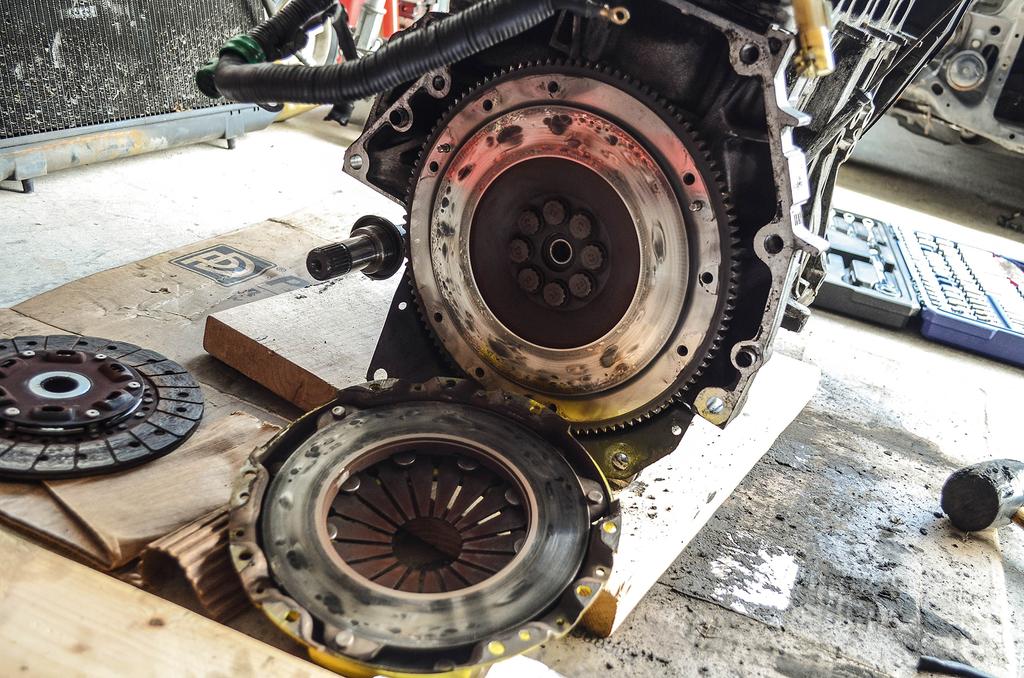
Here you can see the horribly burnt up pressure plate/flywheel. This was a "Brand new" ACT clutch apparantly. The disc still had plenty of life on it.
(the cause of the slipping clutch was a broken clutch release spring...)
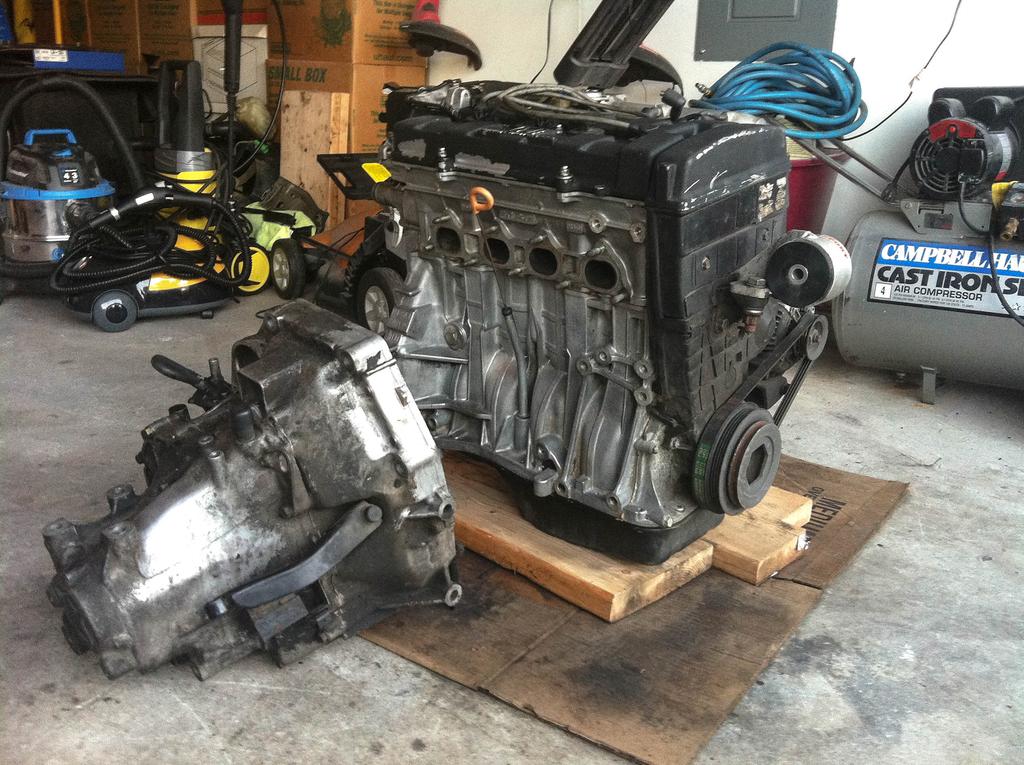
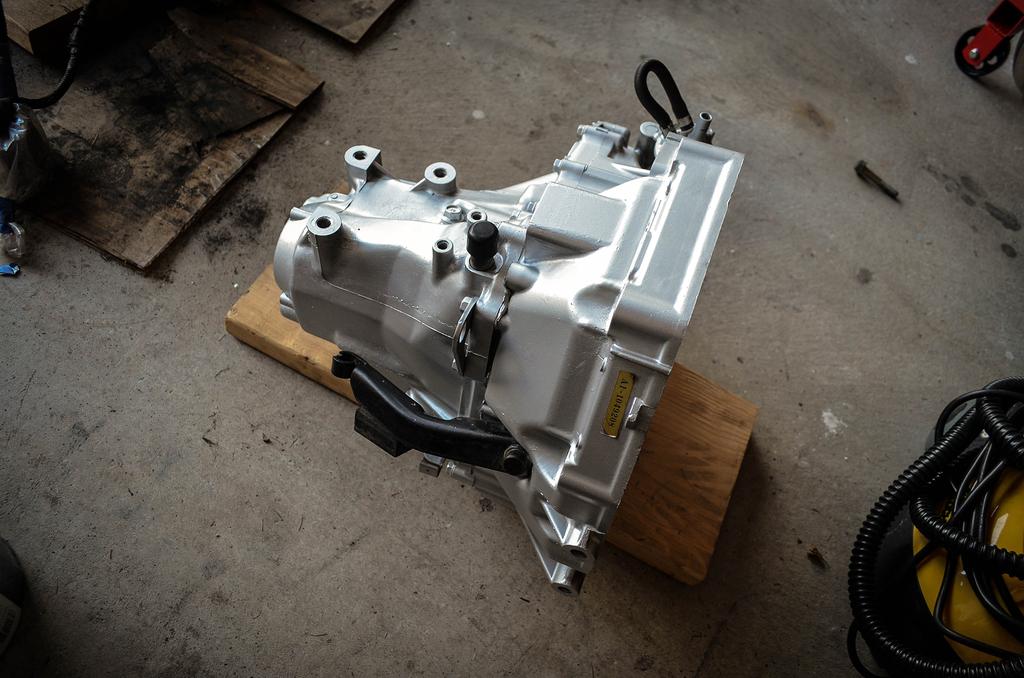
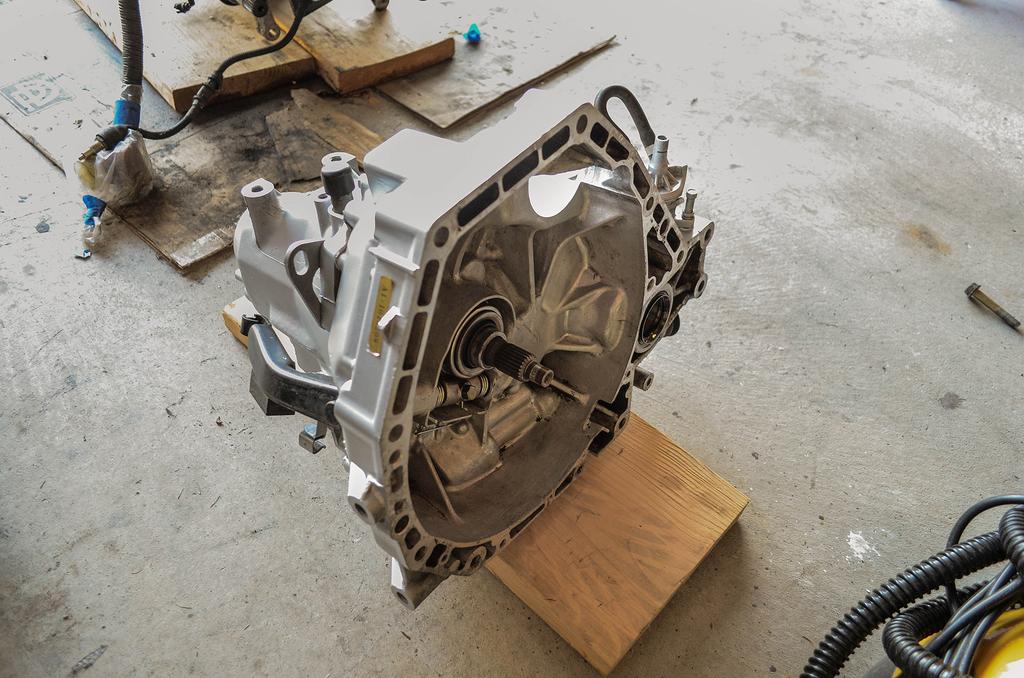
While everything was apart, I decided to clean up everything, including the dirty transmission.
Wire wheels, brushes, brake cleaner, oven cleaner, and a lot of mess. But it's definitely worth it.
When the transmission was clean, and wire wheeled, I painted the outside of the case with some high temp VHT paint.
Going against my original plans, and ideas, I started cleaning up every little bolt. I painted the valve cover, as well as the intake manifold,
engine block, distributor, etc.
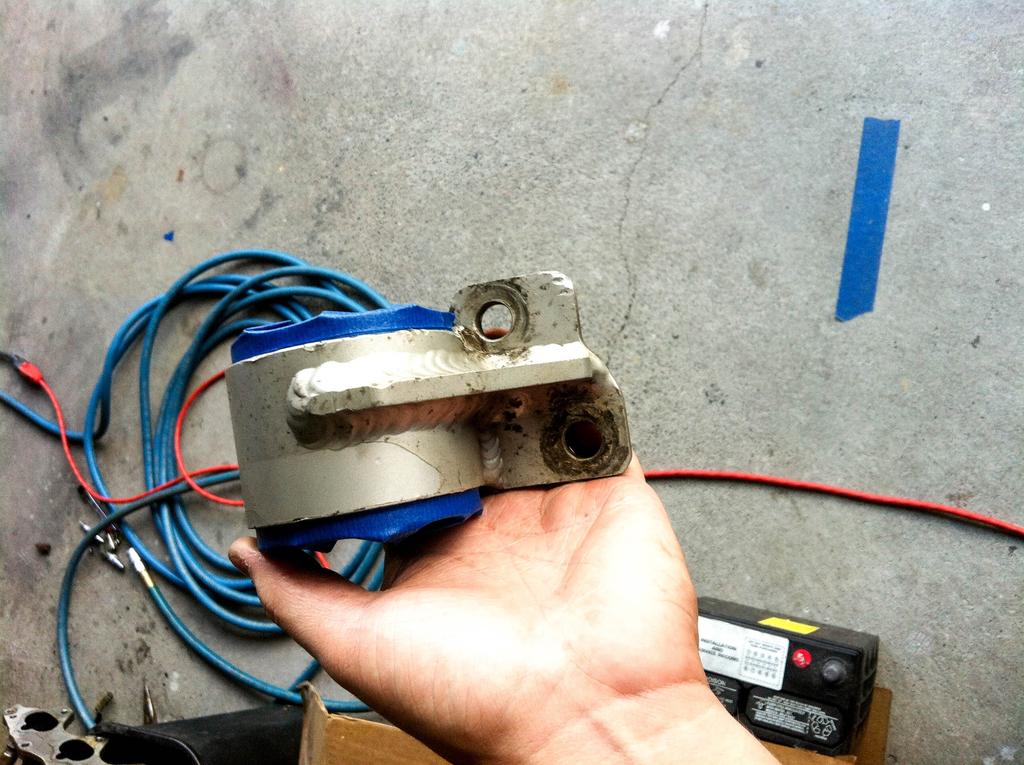
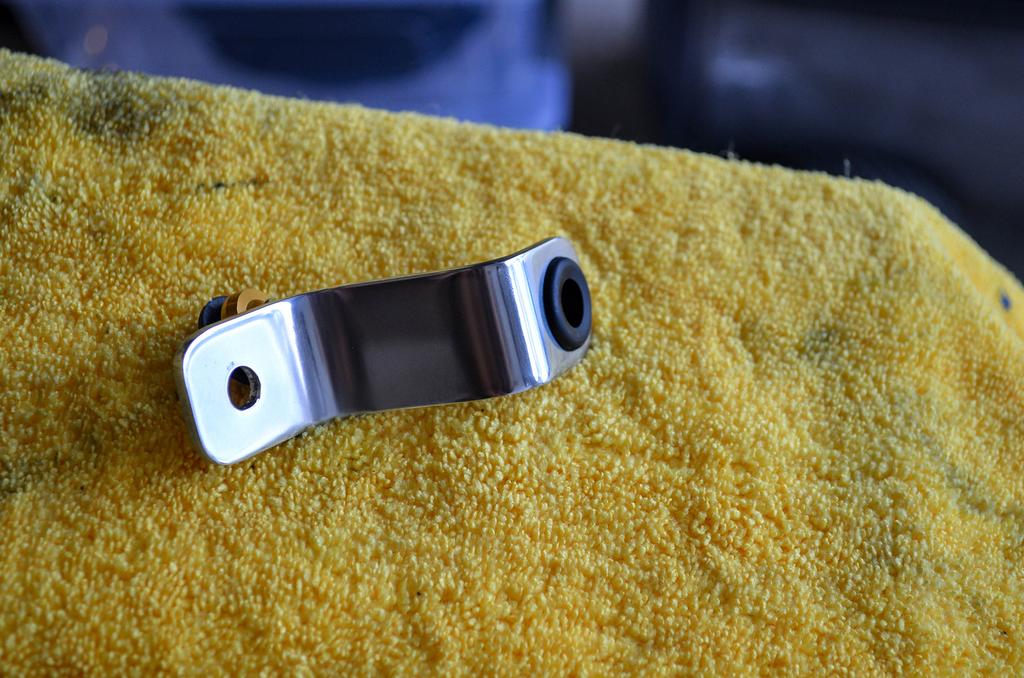
Also spent a few hours sanding and polishing the engine mounts.
Aaaand decided "Hey! Why not try and shave the engine bay, and fully wire tuck it!"... so I did. Little did I realize how much time it takes, I spent
4 or 5 total days on the body work/prep. 6-8 hours a day.
A good 40 hours later, and a trip to the paint supply shop, I was finally ready to paint the engine bay.
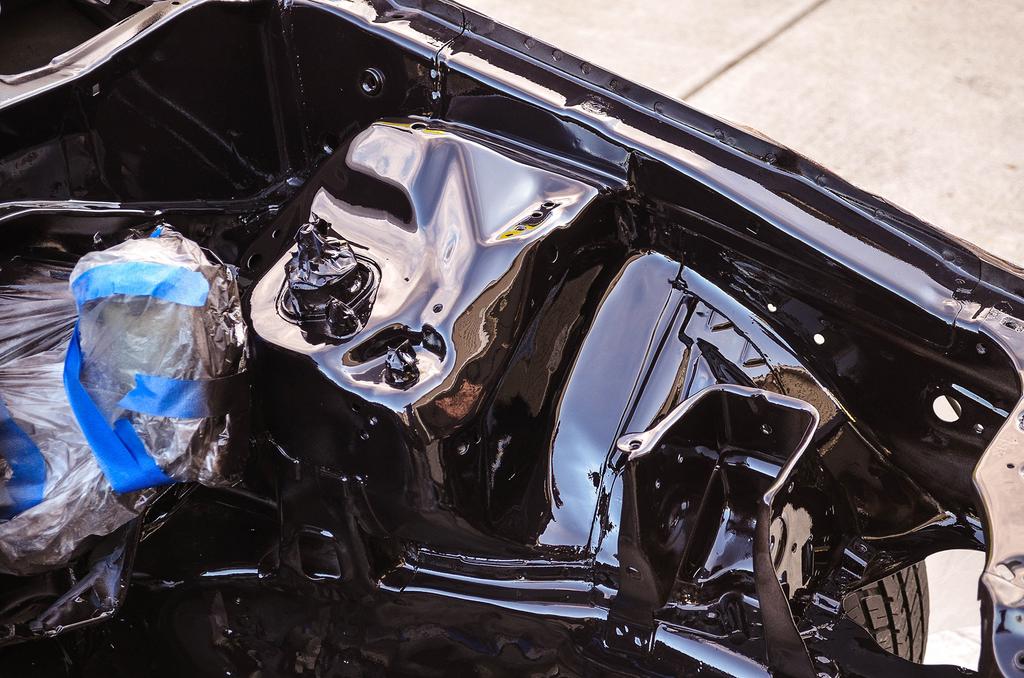
Overall, the paint came out great. I had really good coverage, and I was pretty happy with everything.
...But the color. It was supposed to be more purple, and you can only see that it's purple in direct light. 90% of the time it looks completely
black, and that's just not the color I was aiming for. I decided to keep the color the way it was for now, and eventually change it later on.
Now that the engine bay way was painted, I had a mess of wires to deal with. I wanted to fully wire tuck the engine bay, and wouldn't
settle for anything else.
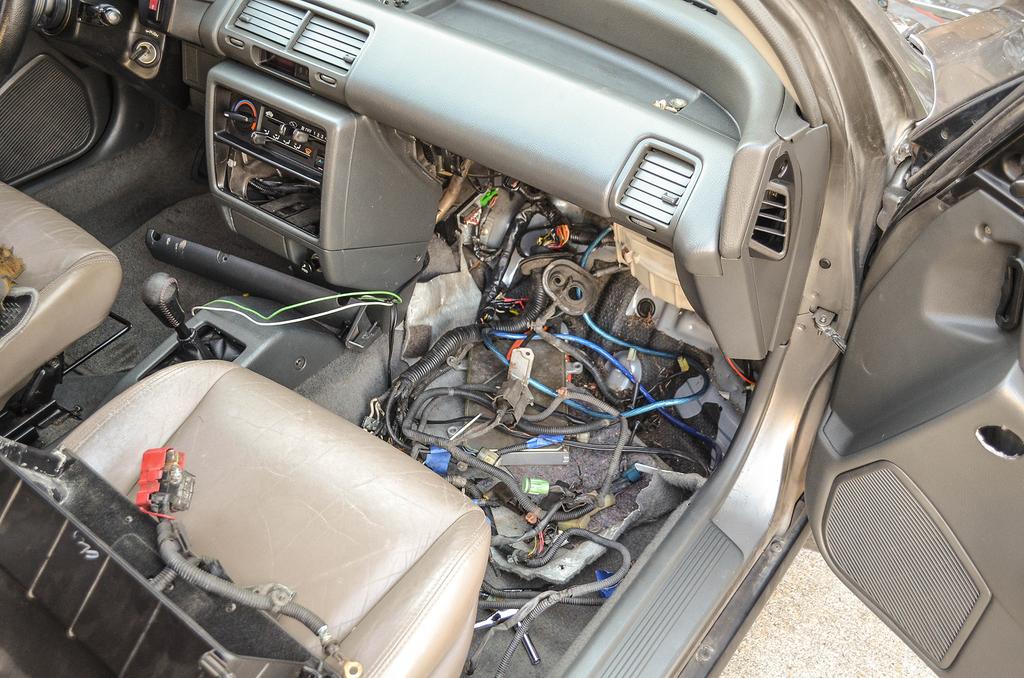
Underestimating the amount of work it would take AGAIN, it took me a LONG time, and a LOT of research to figure out how to properly route
every wire, where to put the fuse box, etc.
A week or so later, I finally got every wire properly routed, grounded, and connected.
After that was done, I replaced everything to do with the clutch. Throw out bearing, Clutch release spring, Clutch, Flywheel
(resurfaced), etc. Also replaced the spark plug wires, plugs, oil, oil filter....
And with all that done, it was time to finally put the engine back into the car.
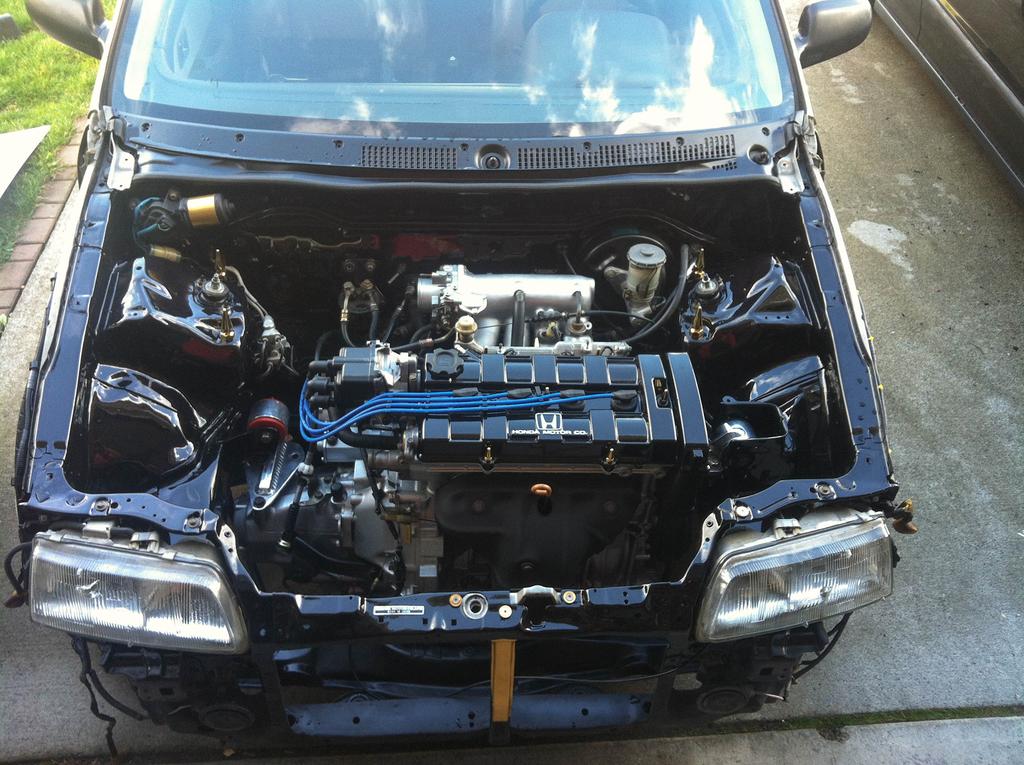
Having got the engine installed, I put everything back together, filled it with fluids, and started it up. It ran perfectly after the first few cranks,
idled good, revved good. I was super happy! So I turned the car off, and checked everything over.
Everything was good, so I closed the hood, lowered the car off the jack stands, and got back in the car to take it for a test drive.
This is where things take a turn for the worse, after finally getting everything done, spending all of that time cleaning everything, painting,
replacing..... it wouldn't fire back up...
I was devastated. I can't see why it wouldn't start. It was just running perfectly 5 minutes ago!
A few days after that ordeal, I was messing around with all of the things connected to the intake manifold, I adjusted the TPS all the way to one
side, and got the car to actually fire up. But it sounded horrible, misfiring, jumpy idle, backfiring, black smoke. It sat like this for a month. I
couldn't figure it out.
I thought I needed a new engine.
One month later,
I sold my black Integra, I needed money for a new engine. I wasn't going to give up and sell my wagon. I had already invested 100-150 hours on it
to this point. I was searching around for another engine, I had a decent amount of money from selling the Integra, and wanted something better
than the LS. I was already so deep into this project that I wanted it all to be worth it in the end. My original plan was completely out of the water
at this point. I'm going to make this wagon better than it came from the factory in every aspect.
I found a few complete swaps on craigslist, B16's, LSvtec's.. I was set on this one LSvtec swap, messaged the guy and was willing to meet up
with him the next day. I was scared to buy an engine out of the car without knowing if it ran good or not. But still wanted to meet up anyways.
The next day rolls around, I had just woken up, checked craigslist once more, and I couldn't believe it. I found an EG Hatch with a GSR swap,
coilovers, PLM header, Skunk2 intake manifold, GSR Blades.. the list goes on. The best part is, it was only a bit more money than I was going to
purchase the LSvtec for. So of course I ended up messaging the guy, and set up a date to meet up with him.
I met up with him a few days later, and the car seemed to run pretty good. It had a misfire, which wasn't too bad. He agreed to let me compression
test it there on the spot, and I was super happy to see that every cylinder read over 240psi. So I definitely wanted it. I ended up buying it and driving
it home the next day.
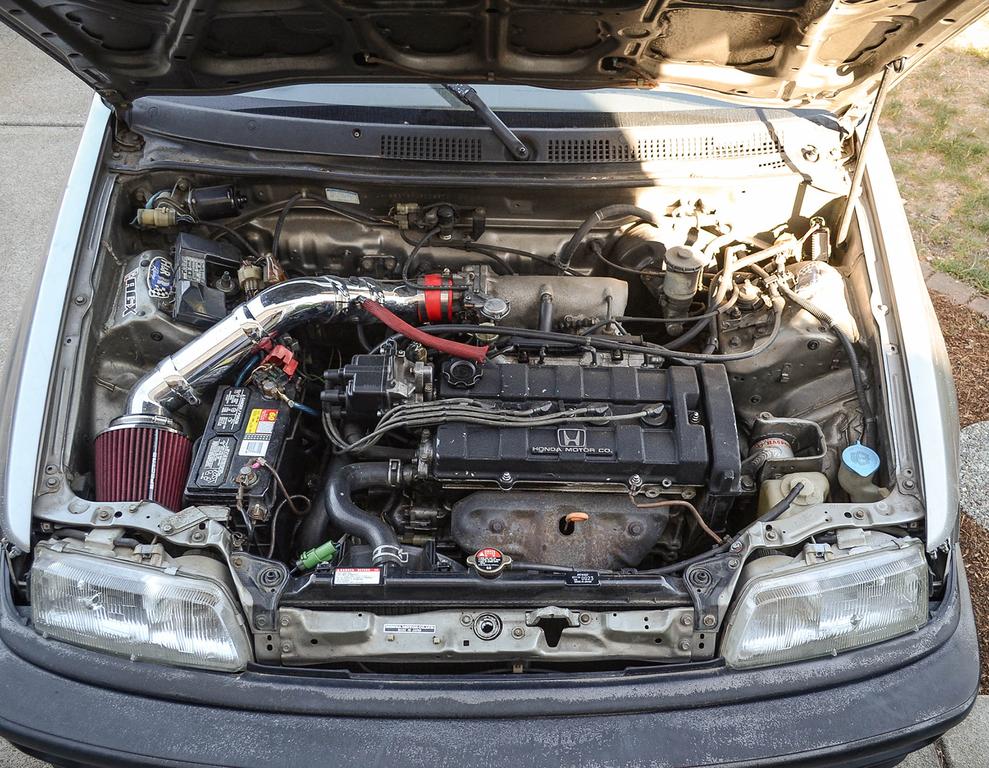
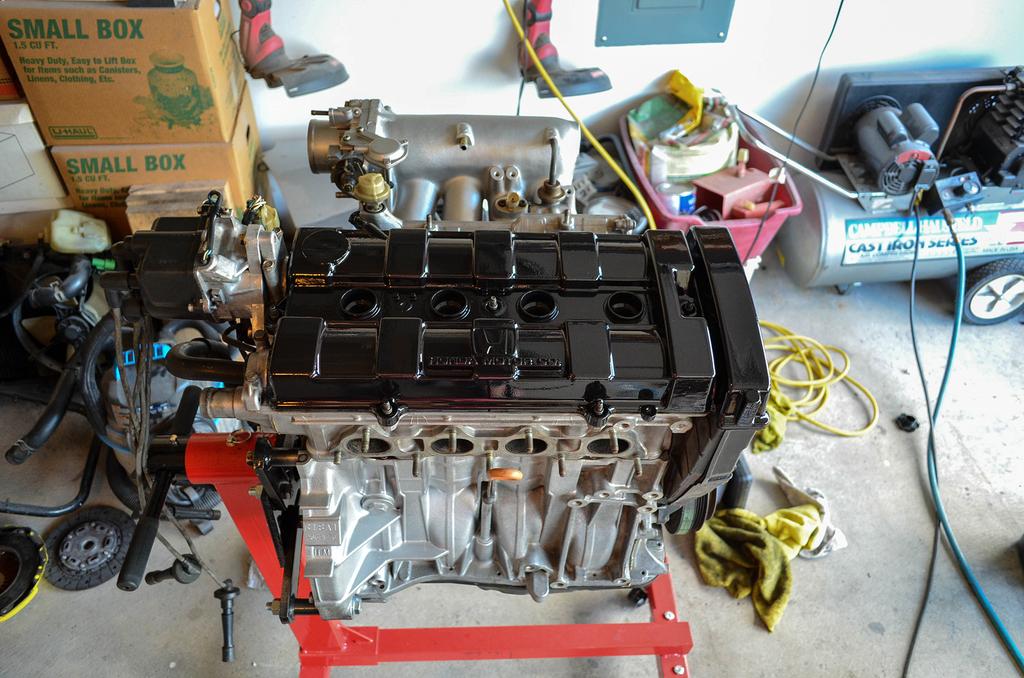
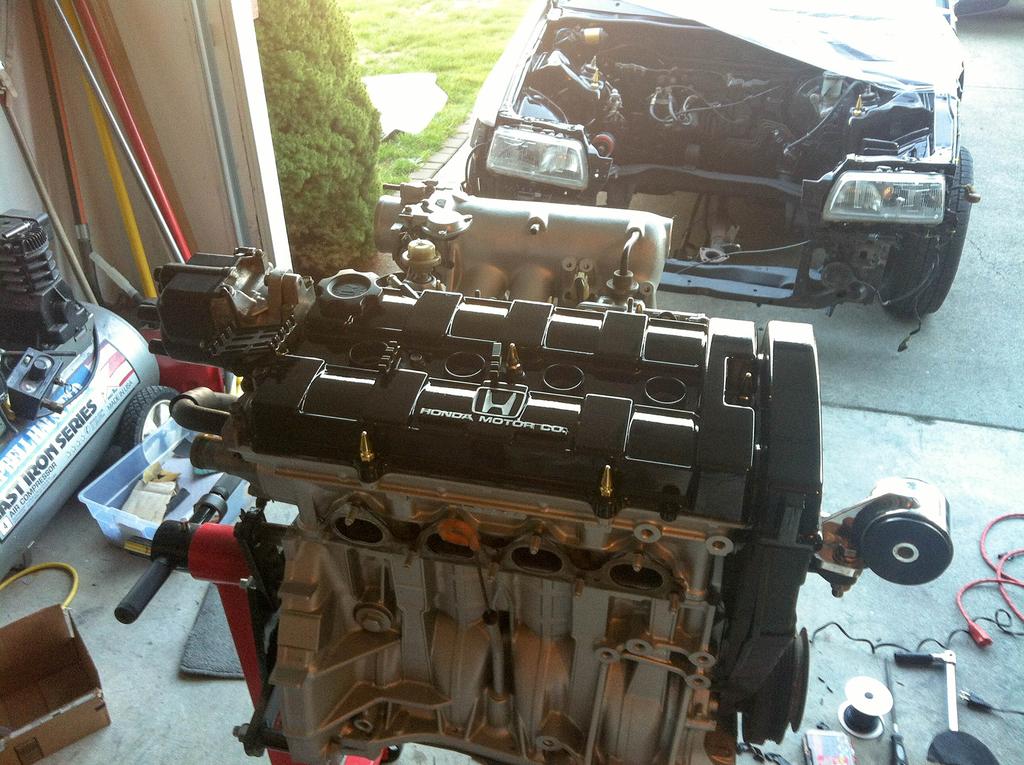
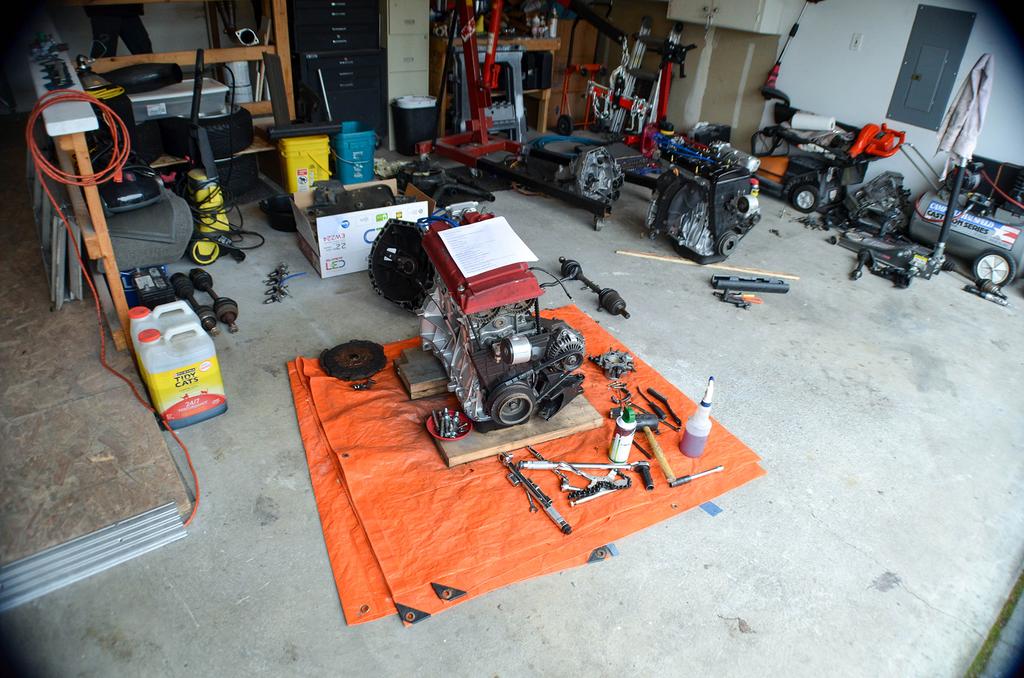
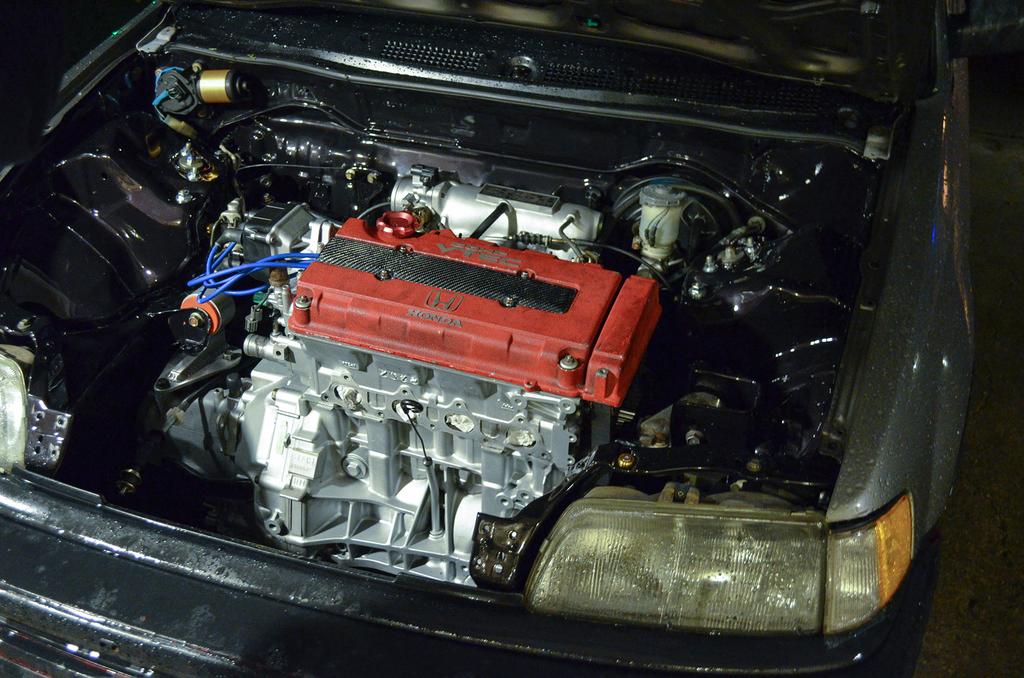
11/18/14. The donor EG's heart.
I wasted no time pulling the engine out of the EG, swapping over the necessary pieces like the post mount, clutch, transmission, mounts..
As well as cleaning up the engine block, intake manifold, alternator, and painting various pieces.
Along with doing all of that, I replaced various gaskets, seals, and the spark plugs/wires in an attempt to fix the misfire issue that the motor
had.
(The misfiring was caused by the previous owner overlapping two separate intake manifold gaskets, one OEM and one Hondata thermal gasket)
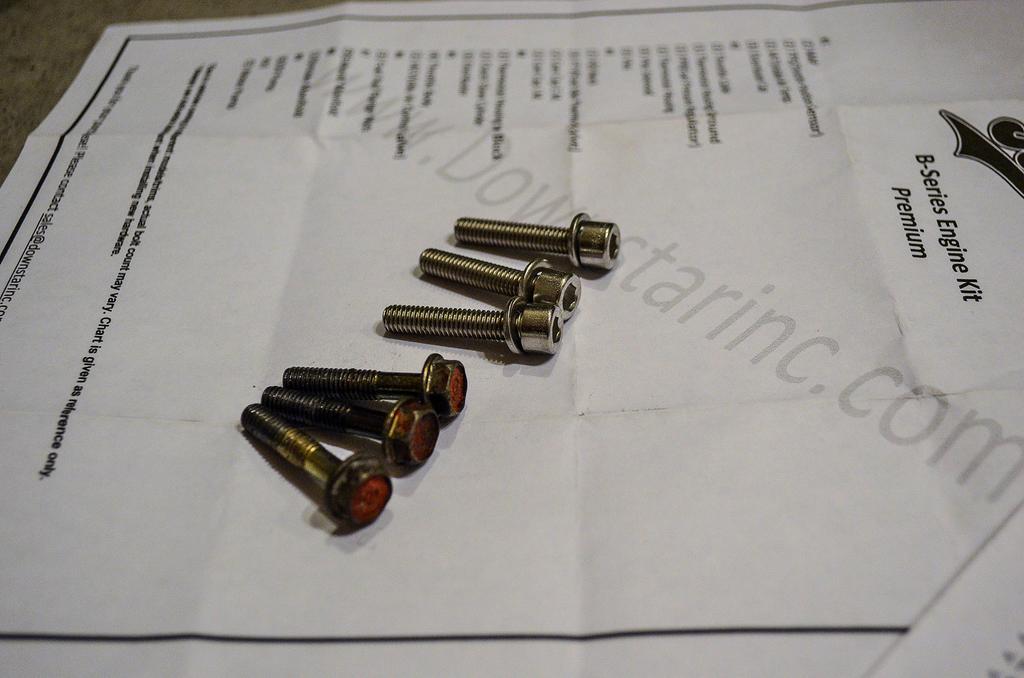
Of course I wasn't going to keep the dirty OEM bolts. I bought a Downstar B Series bolt kit and replaced most every bolt on the engine.
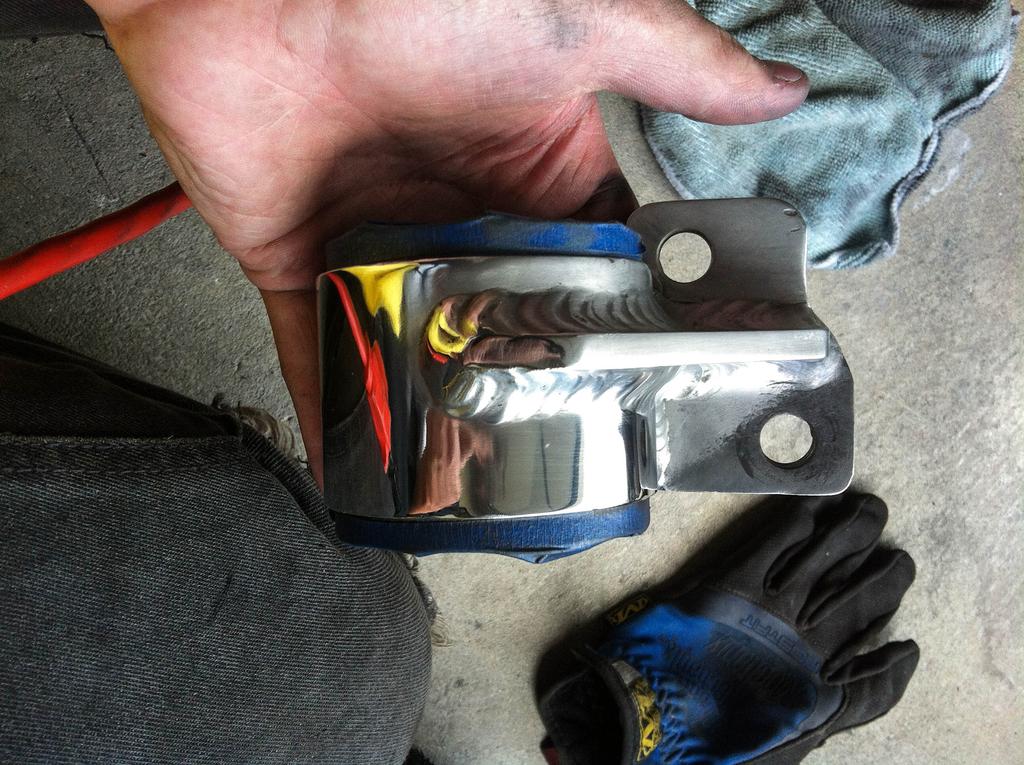
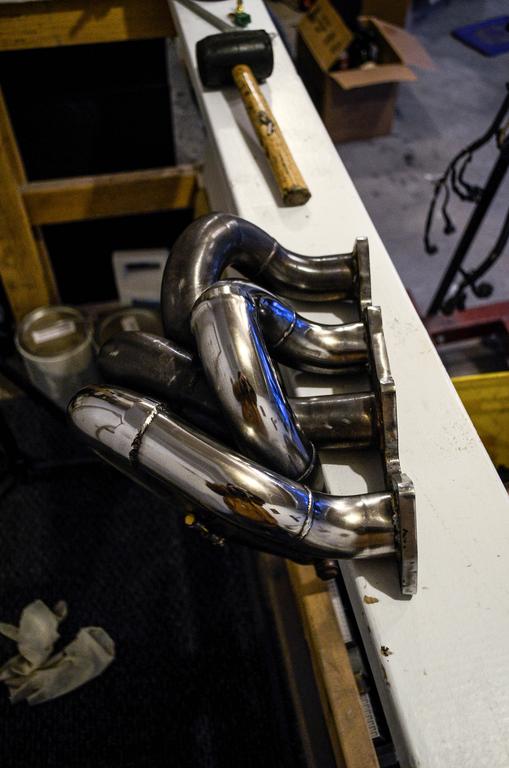
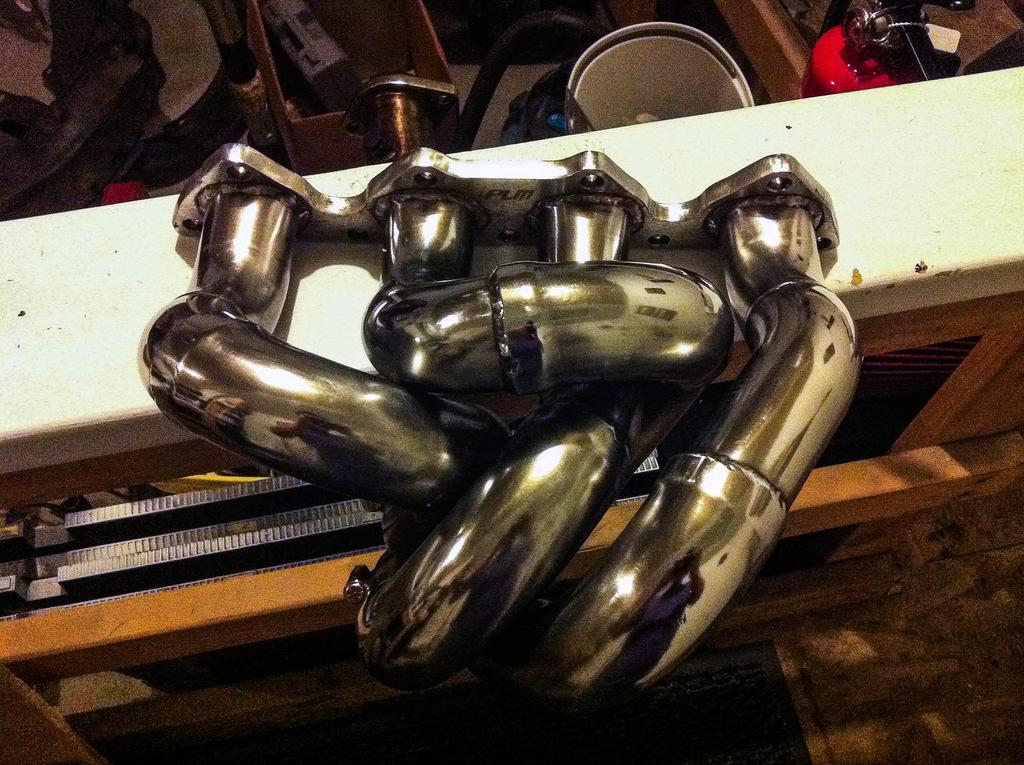
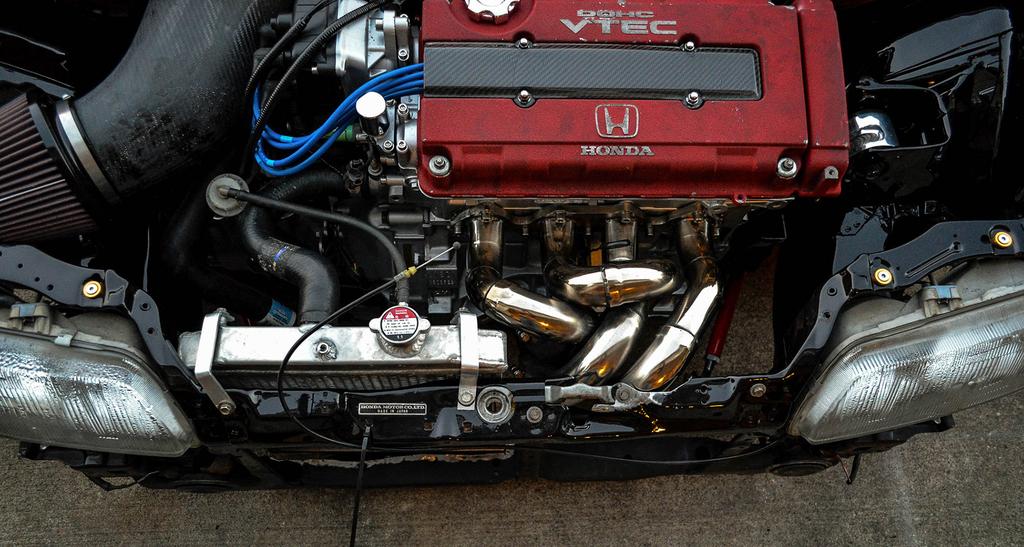
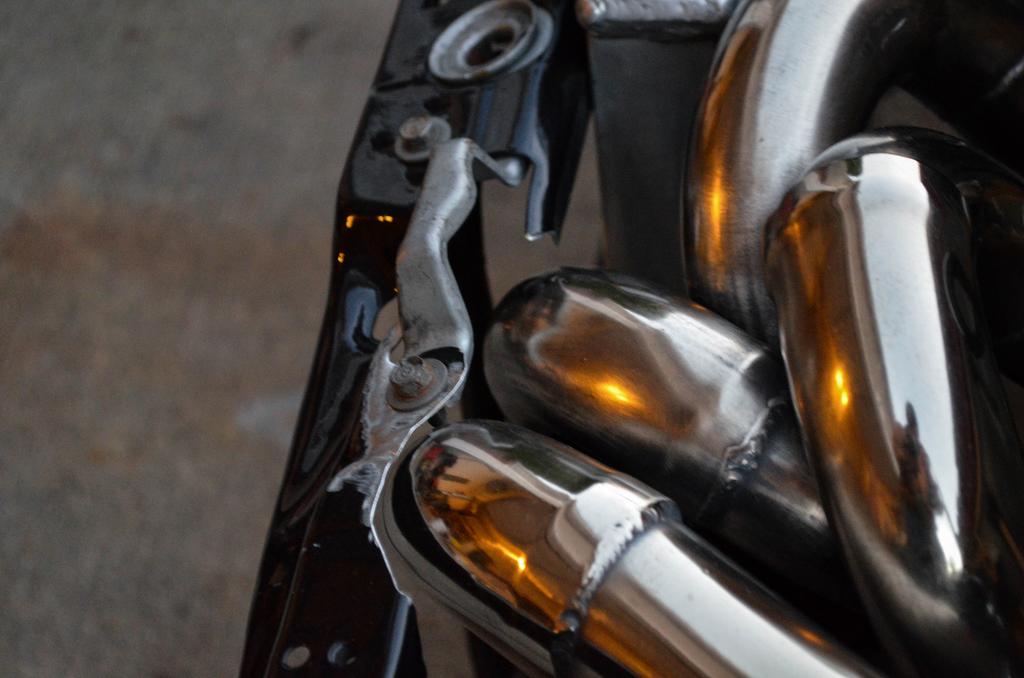
If you were disgusted at how bad the PLM header looked in the picture of the engine in the EG, you're definitely not alone. So I spent about 6 hours
polishing that. They don't even look this nice directly from PLM.
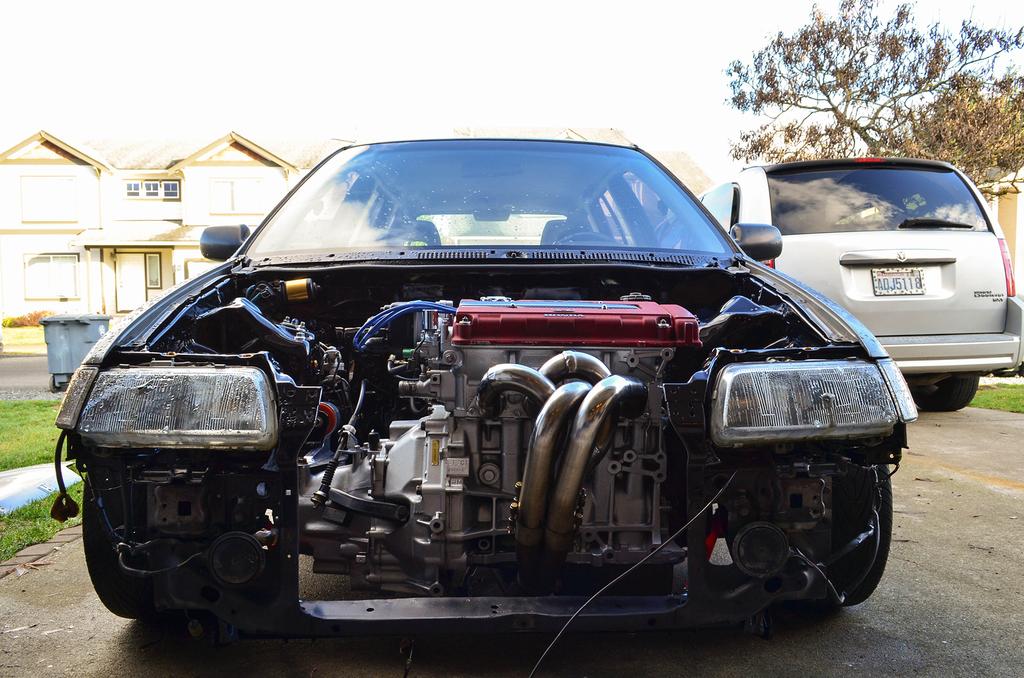
Skipping ahead after all that work, I put together the engine with everything being freshened up, bolted the trans on, and dropped it in with
the help from a friend aligning it up going in.
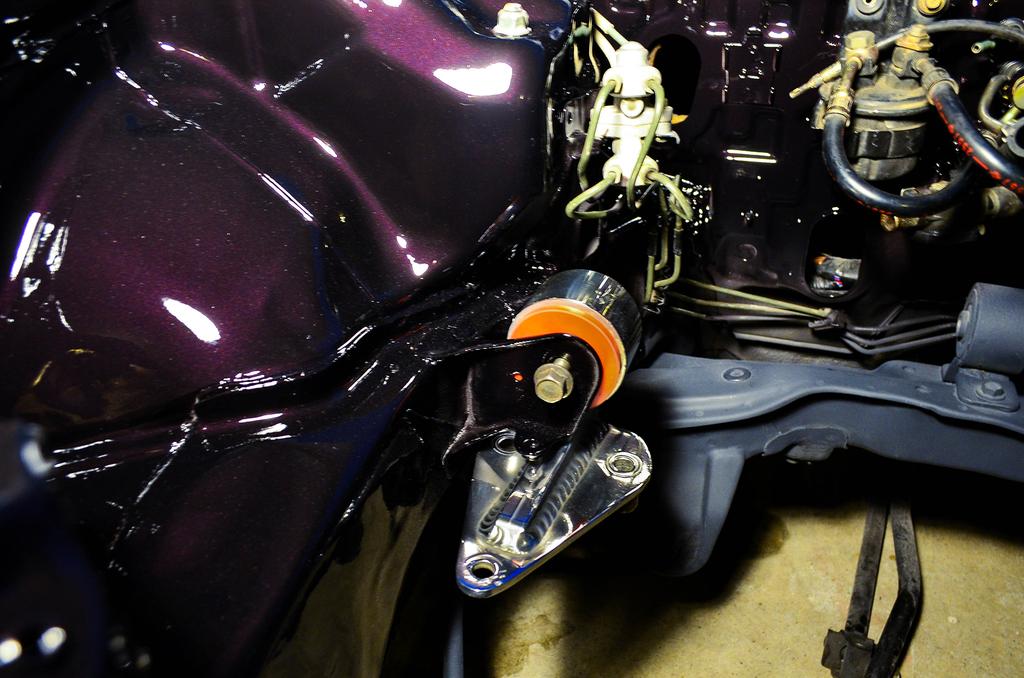
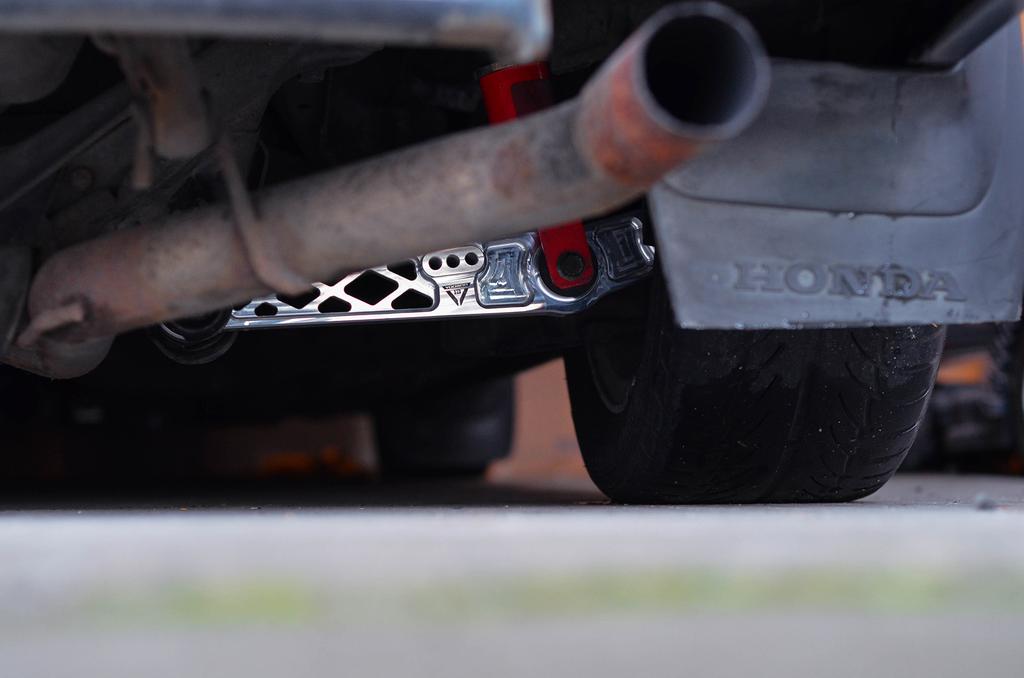
Now, something I knew before spending time polishing that header.. was that I needed to get a traction bar or cut my stock cross member
to allow clearance for it to fit. So after some research I decided to buy an Innovative one.
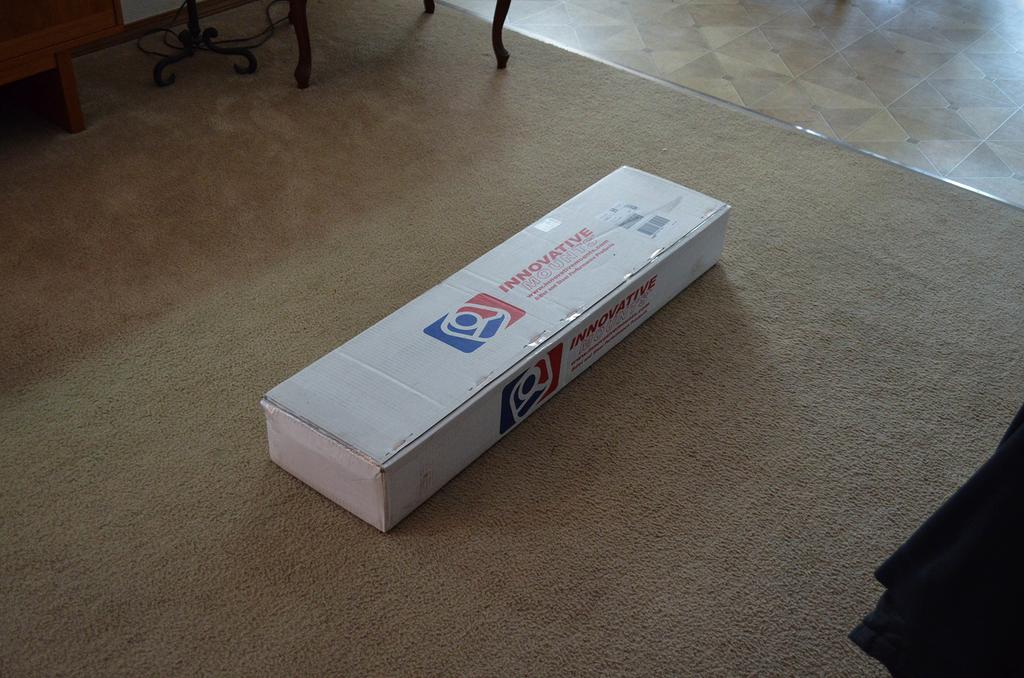
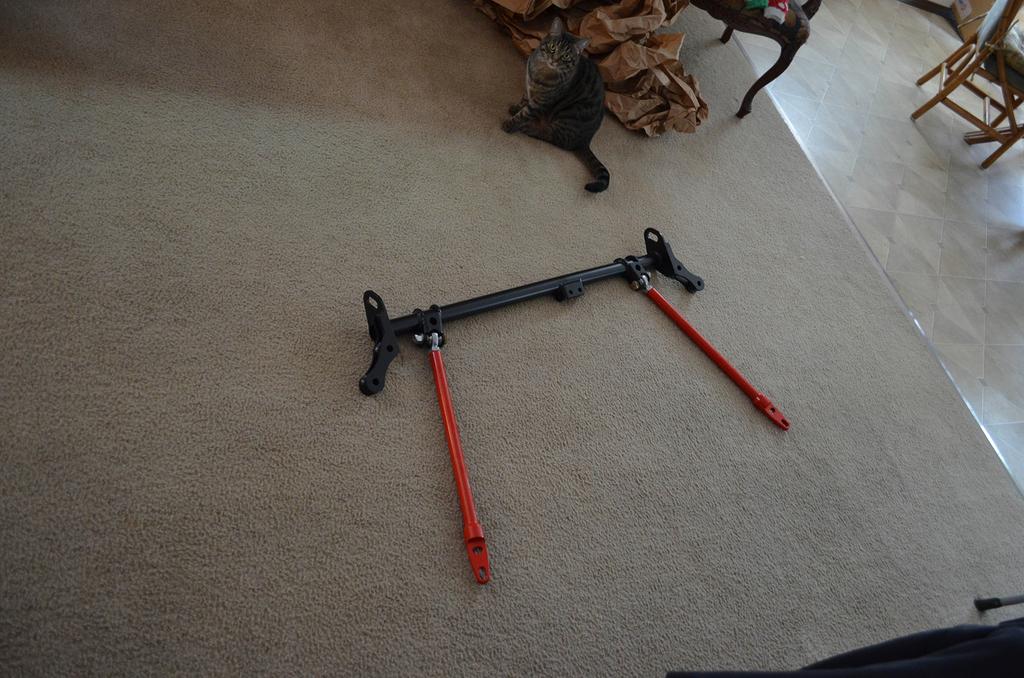
And 30 minutes after getting that in the mail, I quickly threw it on, and bolted up my header.
Along with a traction bar, I needed to get a half size radiator meant for an EG... also cut my T Bracket.
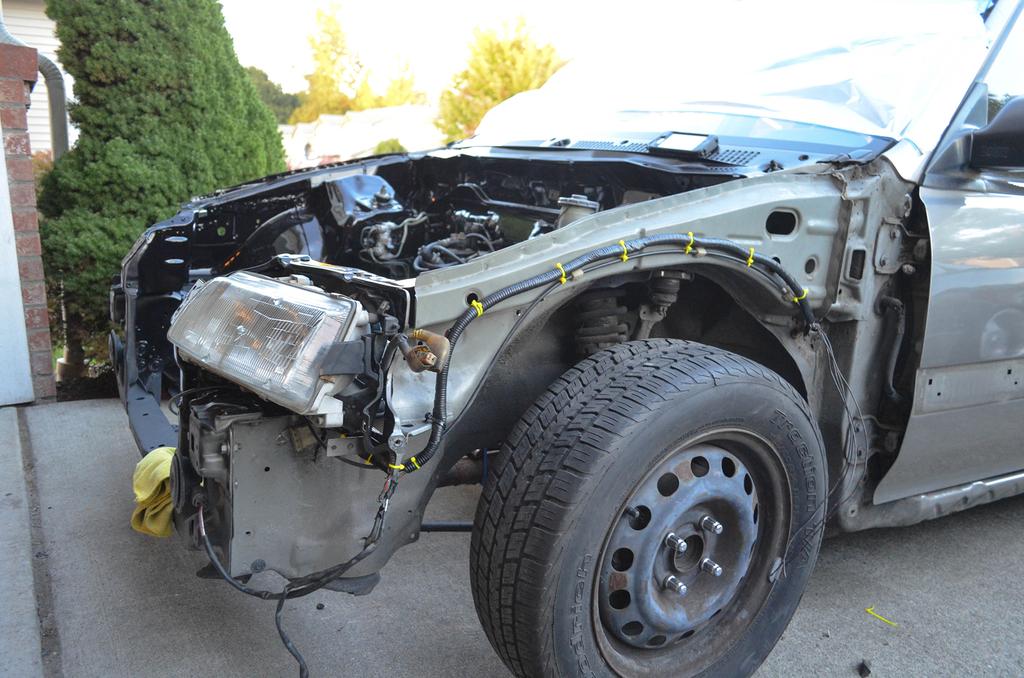
Staring me in the face during this whole process so far, were the nasty looking headlights, with gaping holes. So I found a like-new set in a
junkyard.
The fading corner lights didn't match the headlights, so I wet-sanded and cleared them.
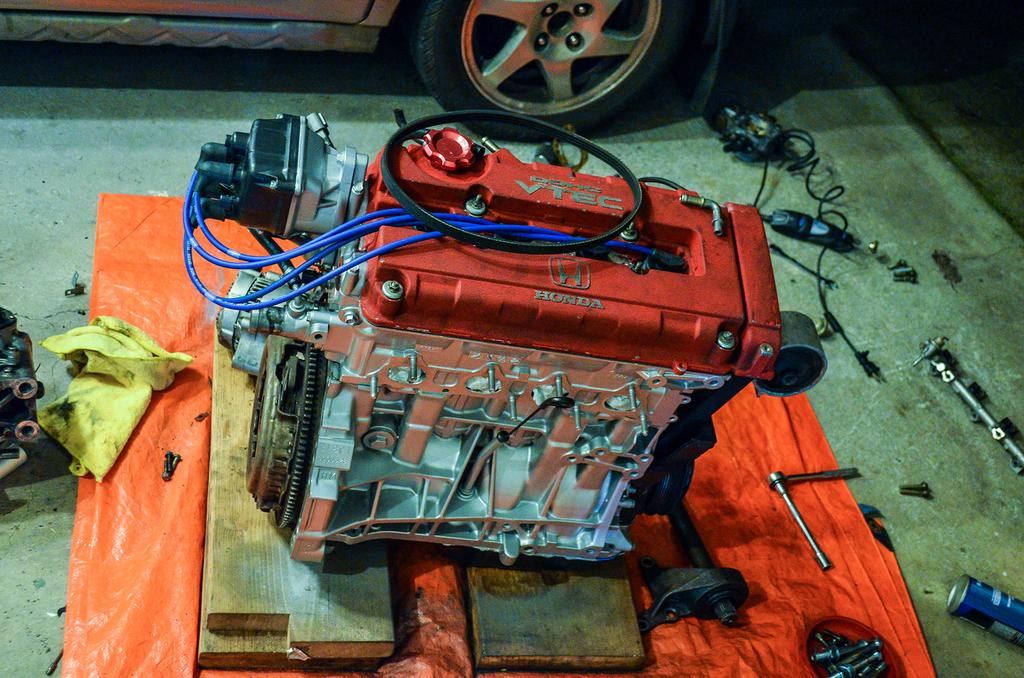
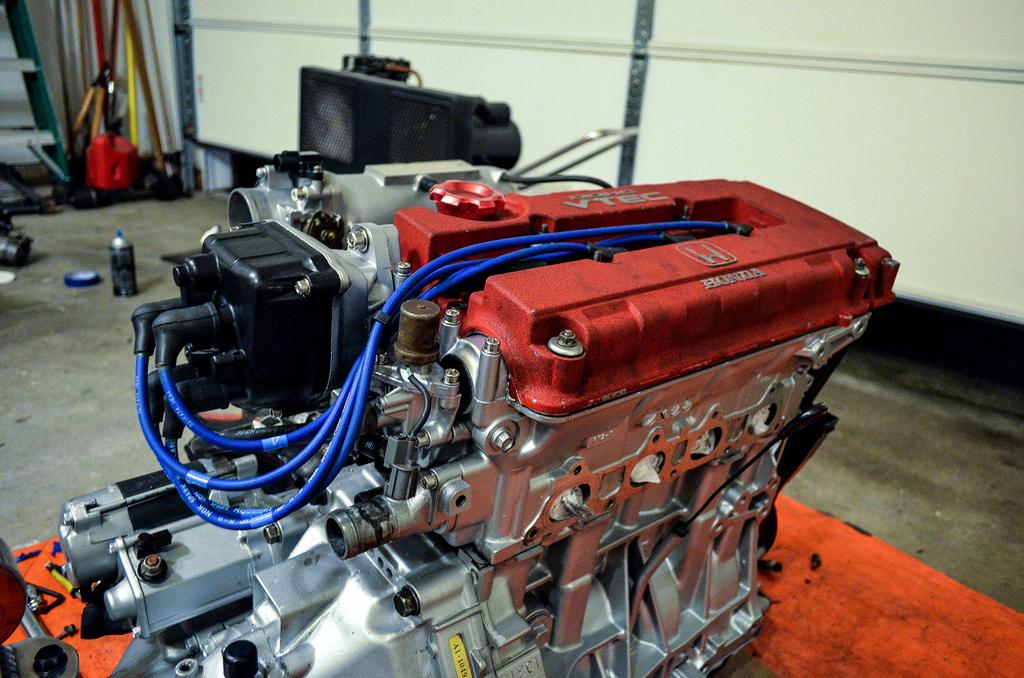
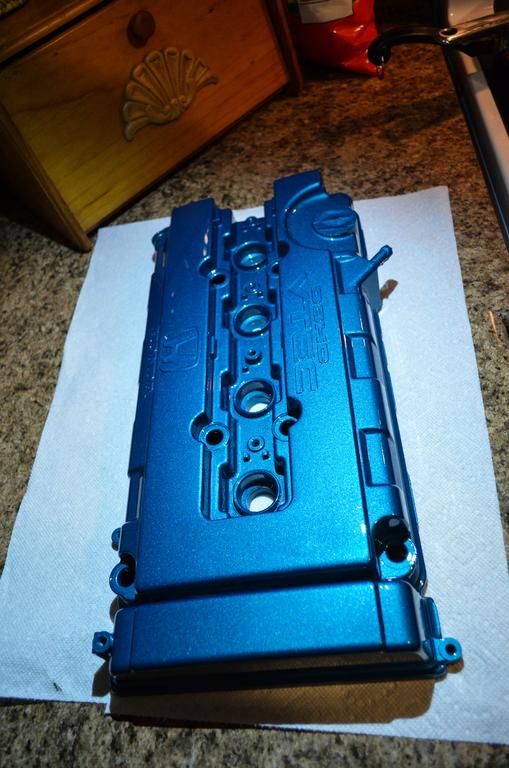
One of the "final" touches I wanted to do with the engine was paint the valve cover. My friend had just painted the bay on his wagon Tahitian
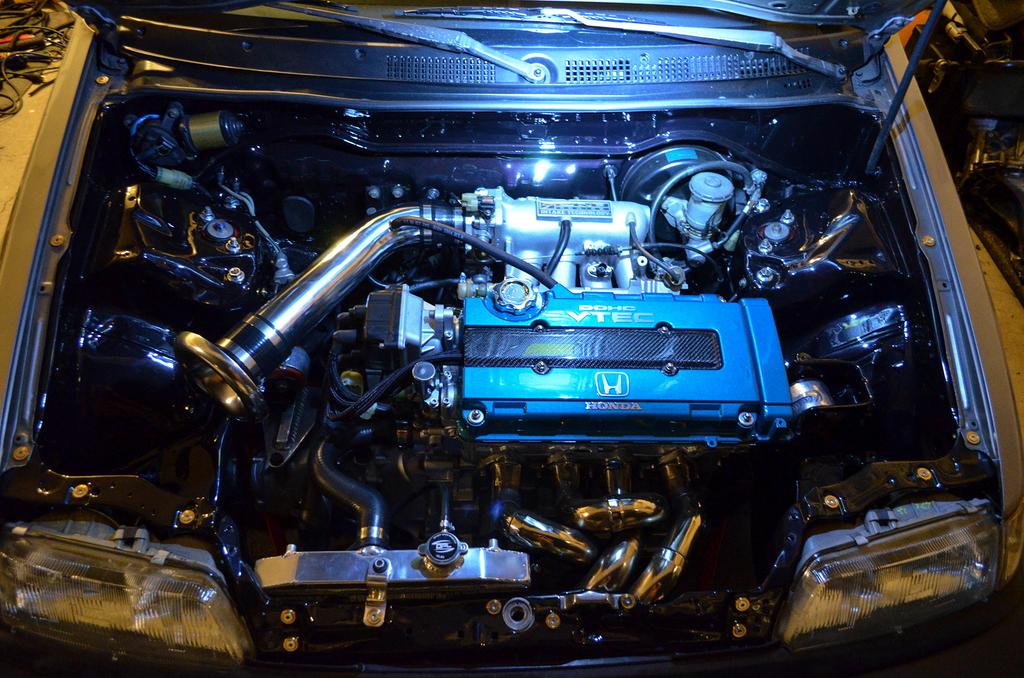
Green, and I liked that enough to copy him and paint my valve cover the same color. However it turned out a bit more blue, but I still like it.
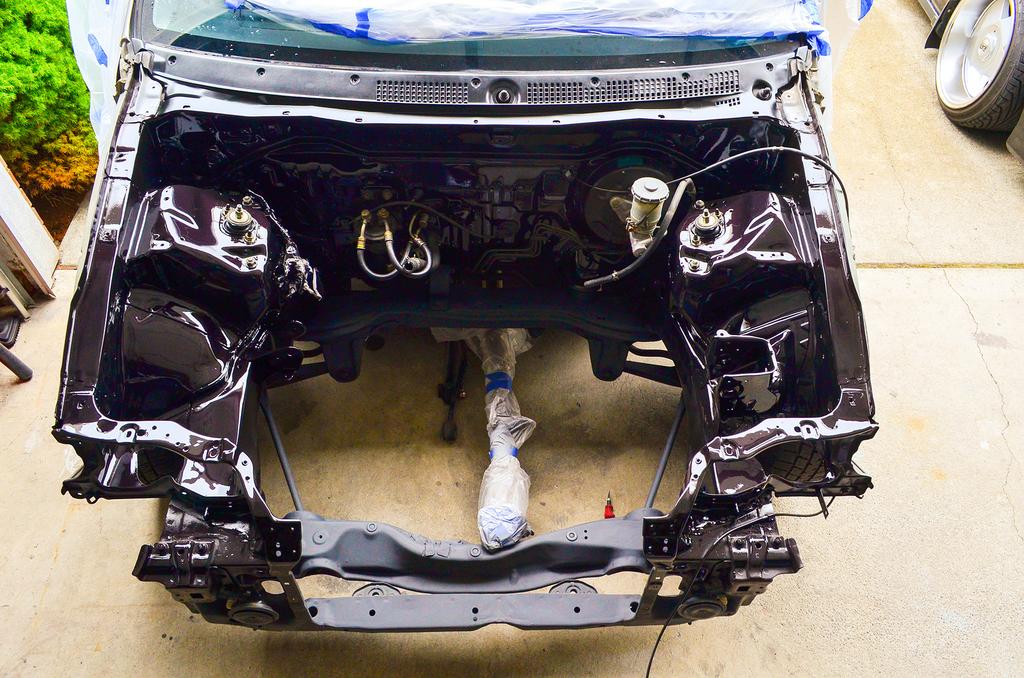
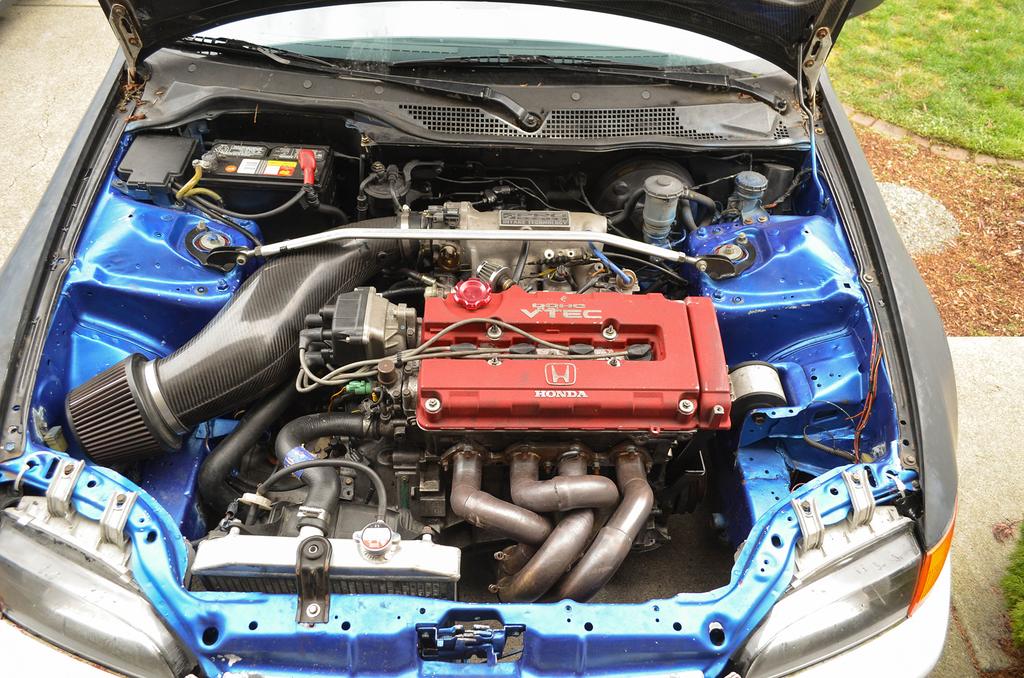
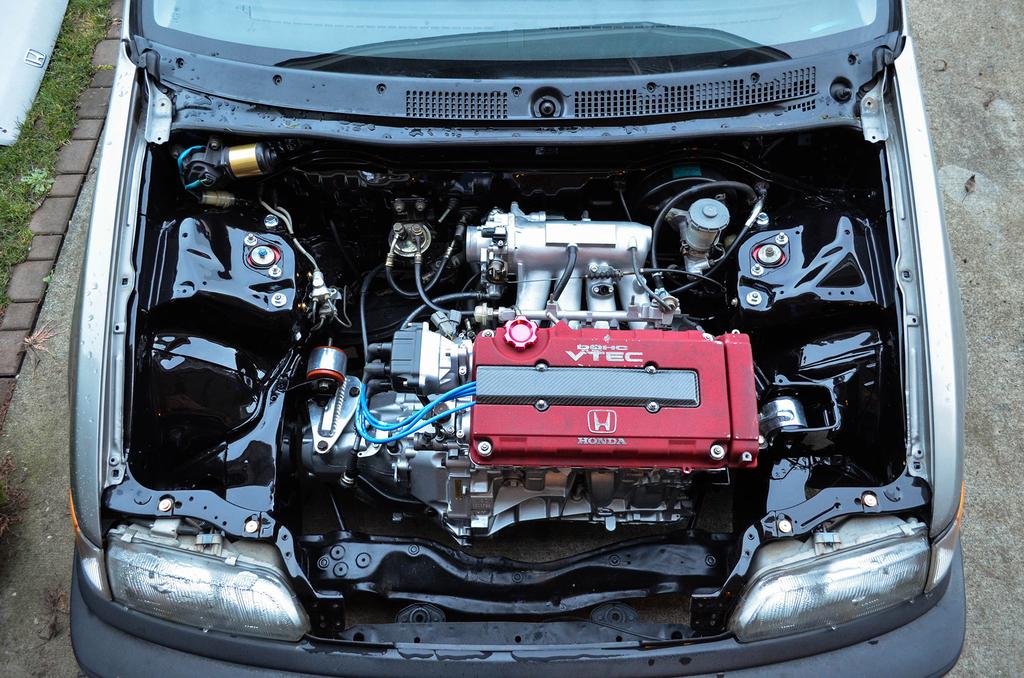
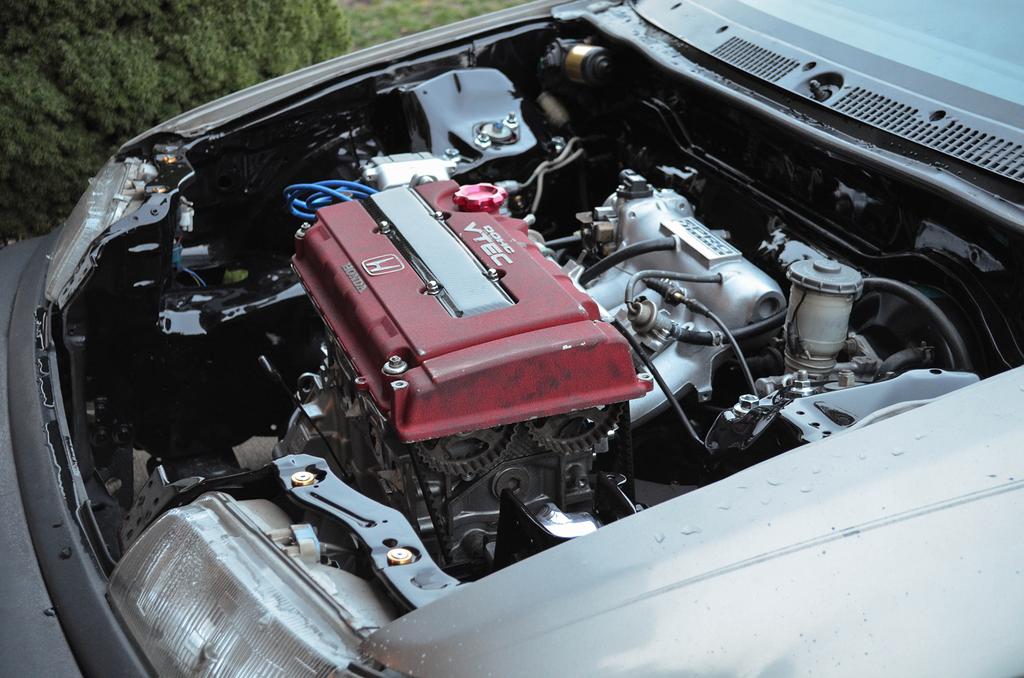
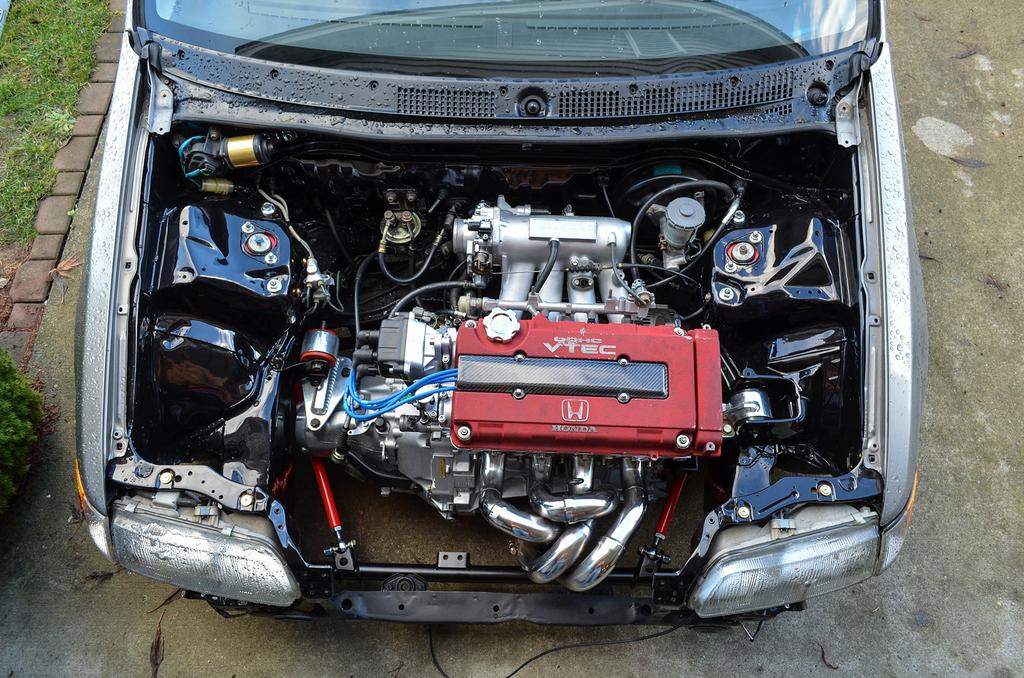
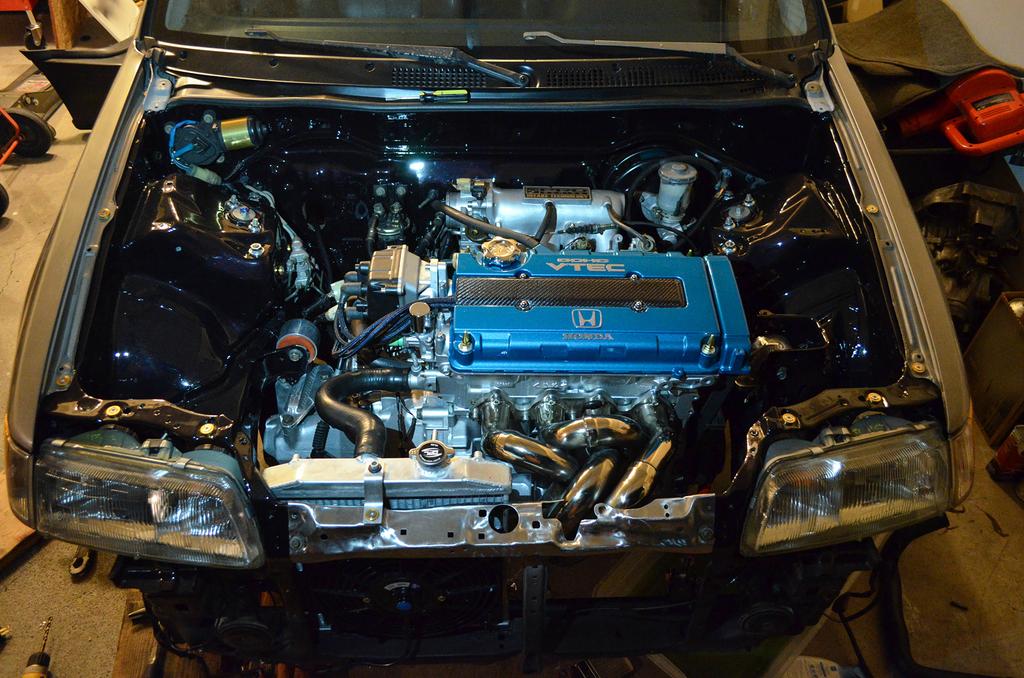
1/29/15. The GSR swap is complete and runs good. Completely changed in only a few months since owning it.
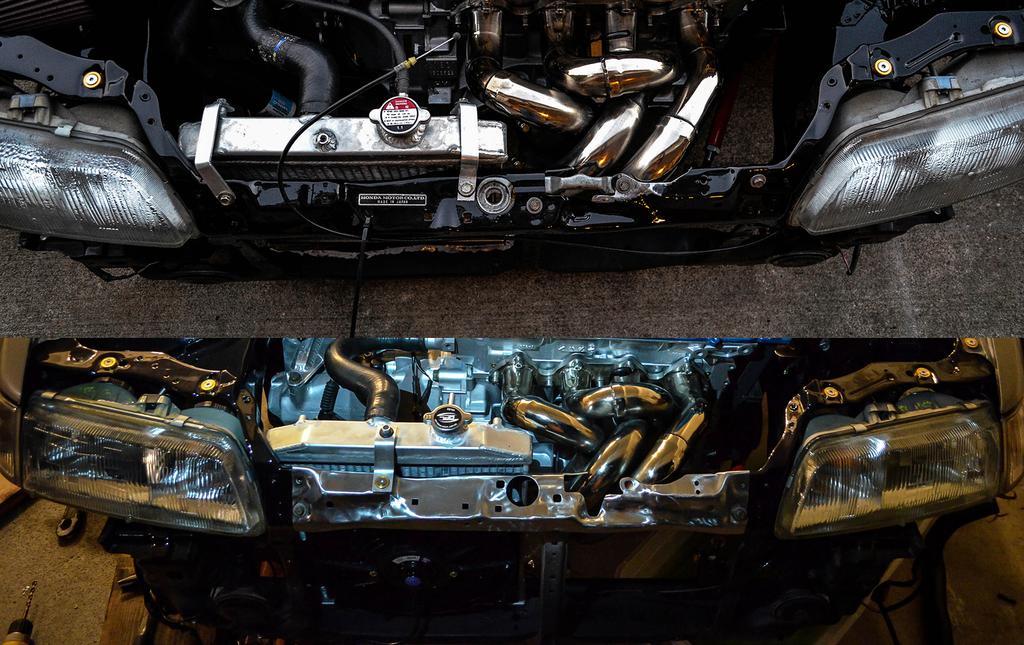
If you remember in a previous pic how I mounted the radiator, you may have laughed. It looked pretty bad. So I decided to make one that didn't
look so bad.
(Comparison shot between the two different radiator brackets, MUCH better.)
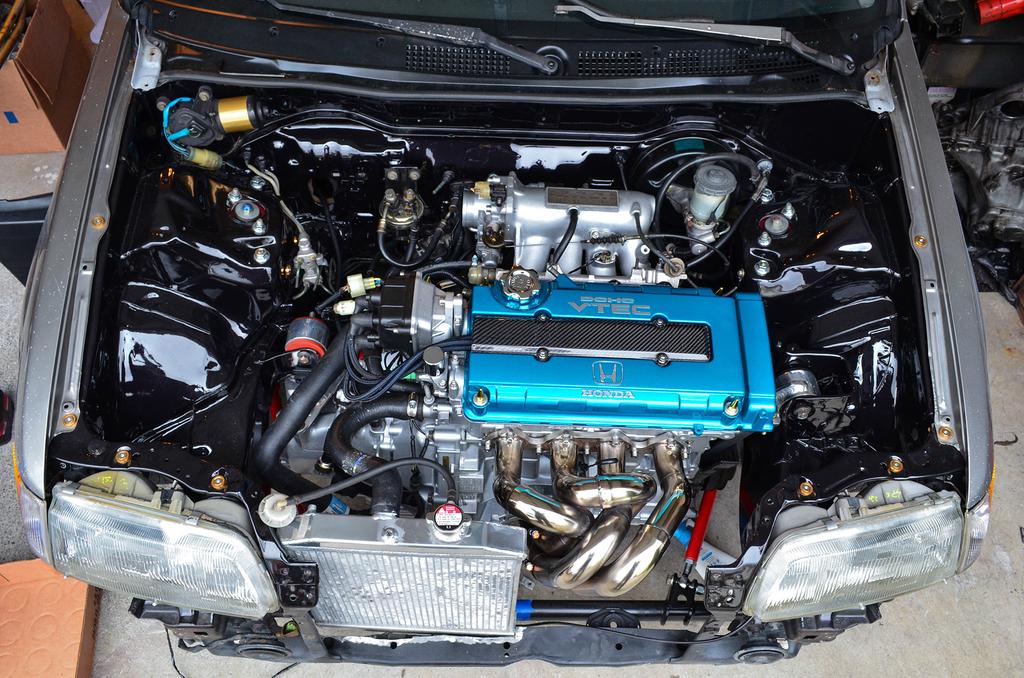
I put a new custom intake on, and this is how the engine bay looked after I was done with the swap. It still looks like this today as of (10/27/15)
The engine ran perfect, pulled pretty decent. Now it was just time to work out a few kinks. One of them being to replace the stock cut DA
shift linkage with a Hasport one.
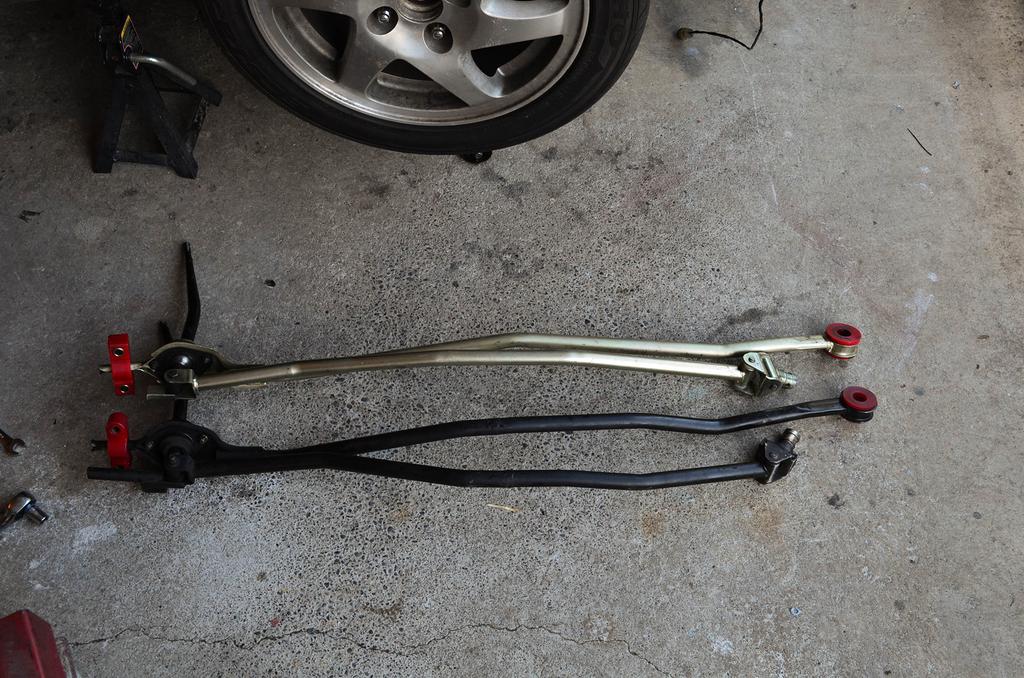
I got a set of brand new VooDoo13 LCA's for it too, since my Blox ones had horrible bushings.
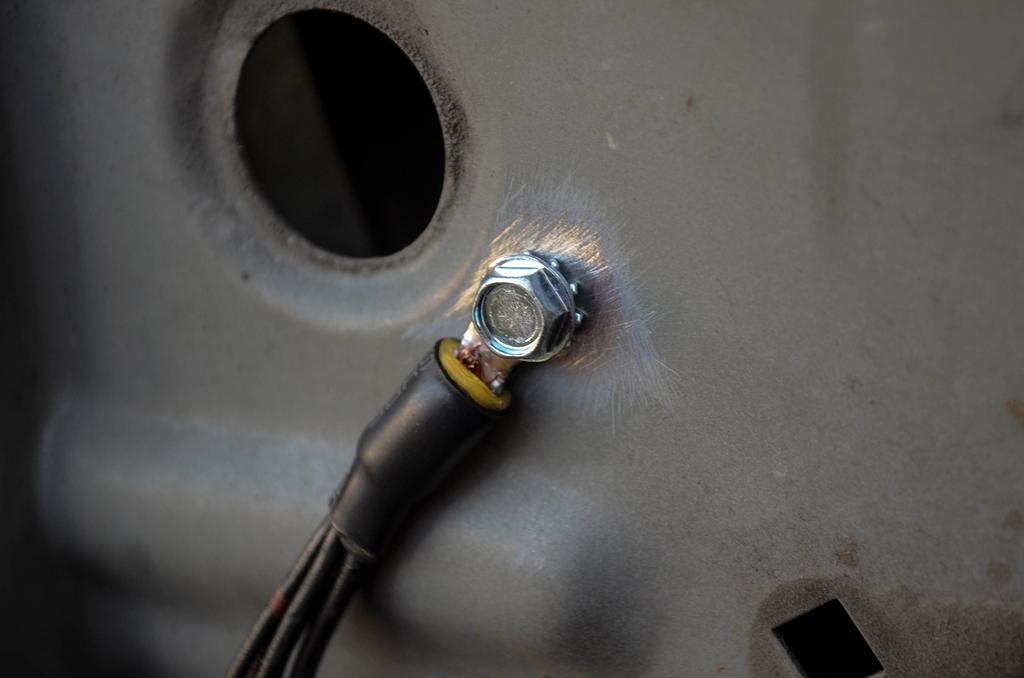
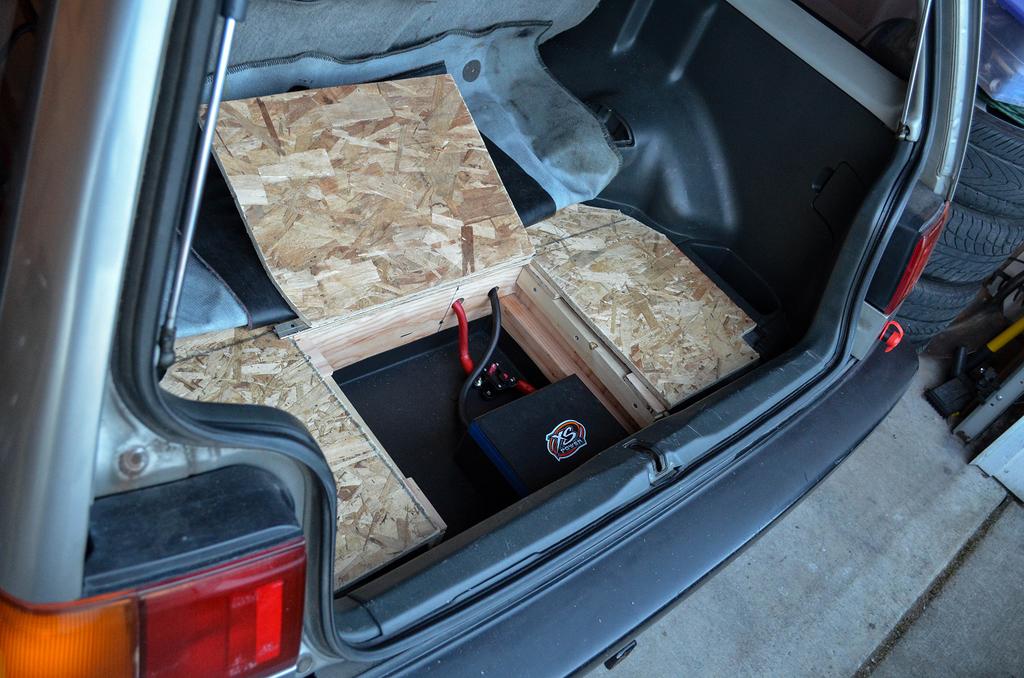
Here's something interesting, which not many people would normally see. This is how I relocated my battery. After a ton of research I believe
this is the best setup you can run. I'm running 0g power wire from the battery to a 200amp circuit breaker, then to the front of the car, to a
distribution block. From there I'm running 4g to the starter, 8g to the fuse box, 8g to the alternator, and 8awg to the power seatbelt fuses.
In a custom box that I threw together, that also doubles as storage. The battery is an XS power D680. Which is amazing, has a better
warranty than the odyssey equivalent also.
This is my first ever build thread. I've always wanted to make one, but never had the time or motivation to start one.
So bear with me. I've had this car since late 2014, have a lot of progress to post, and I'll try to make this first post as
short as possible. But with 100 pictures.. I'll be honest it's going to be pretty long, even with leaving out most of the
small details. So bring a few bags of popcorn.
I've been into cars pretty much forever, and have always wanted to build my own cars. I've owned about 15 cars/trucks
since 09, and every single one I've done something to. Whether it be a set of coilovers, wheels, or a paint job. I've never
had more space than a 2 car garage to work with, and try to do everything I can myself.
I'll start the thread off by showing you some of my previous cars, the more notable ones.
I've loved Civic Wagons since 2010, I've owned 3 prior to the one I'm making this thread about, one being a parts
car for my first wagon. I got my first wagon (which was my 5th car) back in 2012, beat to hell for $600.
12/5/2012 The day I got my first wagon.
All I did on that one was some "quick, half-ass" body work, and painted it with rustoleum.
8/18/2013 My first wagon as it sat after being "completed"
When I got it done, I didn't drive it much, the transmission was auto, slipped really badly, and I just didn't like it
anymore. So I sold it for $1500 a few months later.
After that I got a few other cars, one being an EF Sedan that was pretty beat for $900.
12/15/2013 The day I got my EF Sedan.
I did some "More legit" body work on it, and got it painted at Maaco, it definitely turned out better than my first
wagon, but.. still not perfect.
9/6/2014 A few months down the road after it had been done for a while.
While I still had that car, I bought a Subaru Legacy for $1500, had that for a few months, did a few mods and
traded it for a pretty nice red manual RT4WD Civic Wagon.
3/9/2014 The day I got my red RT4WD.
It had a few issues, and I needed money at the time, so I sold it for a pretty good profit.
(Which I obviously ended up regretting for along time).
With some of the profit I bought a DC Integra for $800.
4/27/2014 The day I got my Integra
It needed a new front bumper, which I replaced, and painted it messing around with using "Legit" paint products
and an HVLP gun. I got a really good result out of it, and now I absolutely love painting everything the "right" way.
7/10/2014 The Integras new bumper.
A few months after replacing and painting the bumper, I ended up slamming it on some super wide wheels, it
all ended up looking pretty good. I barely drove it around though.
9/2/2014 The Integra stanced out.
It was around this time where I kept seeing my friends post pictures of their wagons (I had made quite a few friends
through Civic Wagons at the time I had mine), and it made me realize how much I missed mine.
So I decided to sell my EF Sedan and try and get into another Civic Wagon for a decent price.
Luckily, within a week of selling my EF Sedan, I came across a Craigslist ad for a 1990 Civic Wagon with a B18A1 swap
for $1200. The only catch was, it needed a new clutch. I had never messed with anything mechanical to that extent, and
wanted to give it a shot and learn something. So I went and looked at it, and immediately knew I had to have it, The
interior was the cleanest I had ever seen in an EF, the body was pretty straight, no major dents or rust, the engine ran
great. So I made a deal with him, $1200 and he tows it to my place 1hr away. He accepted, and the next day I had the
car in my driveway. That was 9/13/14.
My original plans with this wagon were to just replace the clutch quickly, and drive the hell out of it. Hah.. those plans
lasted a week.
There's only one way to keep me from selling a car, and that is: To spend more time and money on it than I could
ever get back out of it. I'm far past that point. So there's no turning back now.
Time to make this wagon as close to perfect as I can.
9/13/14. The Wagon as it had been dropped off at my house.
It had an LS swap out of a 90 Integra. The person who I bought it from said it was built in the early 2000's at a shop in Oregon. Hence the
earliest Hasport swap mounts I've ever seen.
I drove it around my neighborhood block a few times, and the clutch was slipping really bad under acceleration just like the ad stated. I was
looking around for a simple fix, maybe a bad clutch cable, broken pedal assembly, anything like that. Those were all good. So I knew I had to
pull the trans and replace the clutch at that point. No big deal, it was time to learn something.
After I figured that out, I still had plenty of day light left, and a lot of motivation. The horrible tail lights were bugging me, and I had to fix them
right away. I already knew the method to bring them back, so I wet sanded them with various grits of paper, and buffed them. I was super
happy with the results.
That night while researching, I figured out that the easiest way to take the transmission off one of these cars is to pull the engine. I was fine
with that.
A week went by, and I finally decided it was time to get down on pulling the engine out. I needed an engine hoist, was about to leave to go get
one, but then decided to ask my neighbor across the street if he had one, and sure enough, he did! Saves me money, I still use it to this day haha.
9/20/14. Pulling the engine out
Being my first time pulling an engine, or doing anything mechanical really to this point, it took me a while. But by the next day it was finally out.
Here you can see the horribly burnt up pressure plate/flywheel. This was a "Brand new" ACT clutch apparantly. The disc still had plenty of life on it.
(the cause of the slipping clutch was a broken clutch release spring...)
While everything was apart, I decided to clean up everything, including the dirty transmission.
Wire wheels, brushes, brake cleaner, oven cleaner, and a lot of mess. But it's definitely worth it.
When the transmission was clean, and wire wheeled, I painted the outside of the case with some high temp VHT paint.
Going against my original plans, and ideas, I started cleaning up every little bolt. I painted the valve cover, as well as the intake manifold,
engine block, distributor, etc.
Also spent a few hours sanding and polishing the engine mounts.
Aaaand decided "Hey! Why not try and shave the engine bay, and fully wire tuck it!"... so I did. Little did I realize how much time it takes, I spent
4 or 5 total days on the body work/prep. 6-8 hours a day.
A good 40 hours later, and a trip to the paint supply shop, I was finally ready to paint the engine bay.
Overall, the paint came out great. I had really good coverage, and I was pretty happy with everything.
...But the color. It was supposed to be more purple, and you can only see that it's purple in direct light. 90% of the time it looks completely
black, and that's just not the color I was aiming for. I decided to keep the color the way it was for now, and eventually change it later on.
Now that the engine bay way was painted, I had a mess of wires to deal with. I wanted to fully wire tuck the engine bay, and wouldn't
settle for anything else.
Underestimating the amount of work it would take AGAIN, it took me a LONG time, and a LOT of research to figure out how to properly route
every wire, where to put the fuse box, etc.
A week or so later, I finally got every wire properly routed, grounded, and connected.
After that was done, I replaced everything to do with the clutch. Throw out bearing, Clutch release spring, Clutch, Flywheel
(resurfaced), etc. Also replaced the spark plug wires, plugs, oil, oil filter....
And with all that done, it was time to finally put the engine back into the car.
Having got the engine installed, I put everything back together, filled it with fluids, and started it up. It ran perfectly after the first few cranks,
idled good, revved good. I was super happy! So I turned the car off, and checked everything over.
Everything was good, so I closed the hood, lowered the car off the jack stands, and got back in the car to take it for a test drive.
This is where things take a turn for the worse, after finally getting everything done, spending all of that time cleaning everything, painting,
replacing..... it wouldn't fire back up...
I was devastated. I can't see why it wouldn't start. It was just running perfectly 5 minutes ago!
A few days after that ordeal, I was messing around with all of the things connected to the intake manifold, I adjusted the TPS all the way to one
side, and got the car to actually fire up. But it sounded horrible, misfiring, jumpy idle, backfiring, black smoke. It sat like this for a month. I
couldn't figure it out.
I thought I needed a new engine.
One month later,
I sold my black Integra, I needed money for a new engine. I wasn't going to give up and sell my wagon. I had already invested 100-150 hours on it
to this point. I was searching around for another engine, I had a decent amount of money from selling the Integra, and wanted something better
than the LS. I was already so deep into this project that I wanted it all to be worth it in the end. My original plan was completely out of the water
at this point. I'm going to make this wagon better than it came from the factory in every aspect.
I found a few complete swaps on craigslist, B16's, LSvtec's.. I was set on this one LSvtec swap, messaged the guy and was willing to meet up
with him the next day. I was scared to buy an engine out of the car without knowing if it ran good or not. But still wanted to meet up anyways.
The next day rolls around, I had just woken up, checked craigslist once more, and I couldn't believe it. I found an EG Hatch with a GSR swap,
coilovers, PLM header, Skunk2 intake manifold, GSR Blades.. the list goes on. The best part is, it was only a bit more money than I was going to
purchase the LSvtec for. So of course I ended up messaging the guy, and set up a date to meet up with him.
I met up with him a few days later, and the car seemed to run pretty good. It had a misfire, which wasn't too bad. He agreed to let me compression
test it there on the spot, and I was super happy to see that every cylinder read over 240psi. So I definitely wanted it. I ended up buying it and driving
it home the next day.
11/18/14. The donor EG's heart.
I wasted no time pulling the engine out of the EG, swapping over the necessary pieces like the post mount, clutch, transmission, mounts..
As well as cleaning up the engine block, intake manifold, alternator, and painting various pieces.
Along with doing all of that, I replaced various gaskets, seals, and the spark plugs/wires in an attempt to fix the misfire issue that the motor
had.
(The misfiring was caused by the previous owner overlapping two separate intake manifold gaskets, one OEM and one Hondata thermal gasket)
Of course I wasn't going to keep the dirty OEM bolts. I bought a Downstar B Series bolt kit and replaced most every bolt on the engine.
If you were disgusted at how bad the PLM header looked in the picture of the engine in the EG, you're definitely not alone. So I spent about 6 hours
polishing that. They don't even look this nice directly from PLM.
Skipping ahead after all that work, I put together the engine with everything being freshened up, bolted the trans on, and dropped it in with
the help from a friend aligning it up going in.
Now, something I knew before spending time polishing that header.. was that I needed to get a traction bar or cut my stock cross member
to allow clearance for it to fit. So after some research I decided to buy an Innovative one.
And 30 minutes after getting that in the mail, I quickly threw it on, and bolted up my header.
Along with a traction bar, I needed to get a half size radiator meant for an EG... also cut my T Bracket.
Staring me in the face during this whole process so far, were the nasty looking headlights, with gaping holes. So I found a like-new set in a
junkyard.
The fading corner lights didn't match the headlights, so I wet-sanded and cleared them.
One of the "final" touches I wanted to do with the engine was paint the valve cover. My friend had just painted the bay on his wagon Tahitian
Green, and I liked that enough to copy him and paint my valve cover the same color. However it turned out a bit more blue, but I still like it.
1/29/15. The GSR swap is complete and runs good. Completely changed in only a few months since owning it.
If you remember in a previous pic how I mounted the radiator, you may have laughed. It looked pretty bad. So I decided to make one that didn't
look so bad.
(Comparison shot between the two different radiator brackets, MUCH better.)
I put a new custom intake on, and this is how the engine bay looked after I was done with the swap. It still looks like this today as of (10/27/15)
The engine ran perfect, pulled pretty decent. Now it was just time to work out a few kinks. One of them being to replace the stock cut DA
shift linkage with a Hasport one.
I got a set of brand new VooDoo13 LCA's for it too, since my Blox ones had horrible bushings.
Here's something interesting, which not many people would normally see. This is how I relocated my battery. After a ton of research I believe
this is the best setup you can run. I'm running 0g power wire from the battery to a 200amp circuit breaker, then to the front of the car, to a
distribution block. From there I'm running 4g to the starter, 8g to the fuse box, 8g to the alternator, and 8awg to the power seatbelt fuses.
In a custom box that I threw together, that also doubles as storage. The battery is an XS power D680. Which is amazing, has a better
warranty than the odyssey equivalent also.
Comments
I decided one day to get started on the body work, which of course I wanted to do. This thing was completely dented up, I'm making this car
perfect.
In this next picture you can see I started sanding the body with a long block. Everywhere that the paint is not sanded (darker than the rest)
is a dent. This picture is how bad just these two doors were, the rest of the body was about this bad. I had a LOT of work ahead of me.
I apologize ahead of time for my lack of pictures during this process, as it's been the longest part of this project. But in just these next few
pictures you'll see a few hundred hours/months of work.
The date was now 7/20/15. I had completed 80% of the body work, and gone through 3 different stages of filler primer/blocking.
In the midst of doing the body work, I had days.. even weeks of doing no work on it. Lost a lot of motivation in that time period.
Taking a break, I was looking at the dirty seats that were once in the wagon. Completely filthy. I decided to mess around with them, and took
the cover off of one, and threw it in the bathtub with some de-greaser/dish soap and a brush. After scrubbing it for about 20 minutes, the water
was completely black. I took the cover out and threw it in the washing machine, and once that was done, let it air dry on my deck, and then
finally put the cover back on. WHAT A DIFFERENCE! They look brand new. Now I just need to repeat this process on the others.
Fast forward a few months, I had moved houses. Haven't touched the wagon in months. Been looking at it out of the corner of my eye, just
neglecting it. Through the process of moving I had lost a lot of motivation to do anything on it.
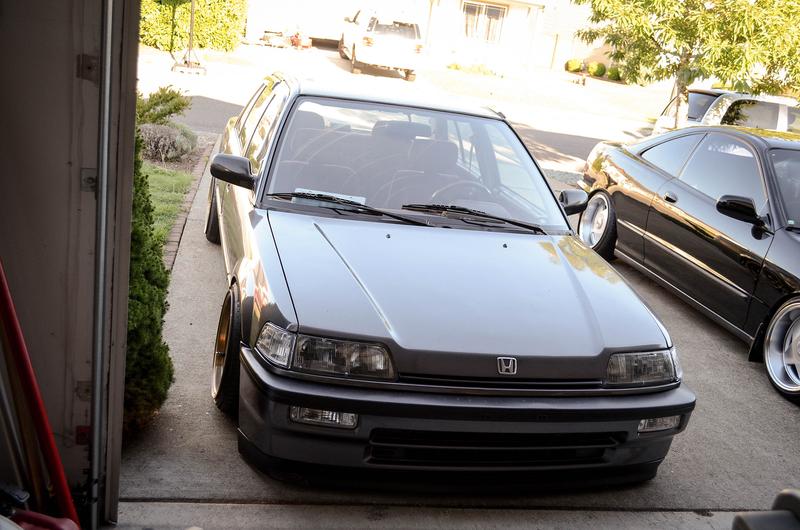
While going through this stage, I was helping my buddies on their cars. First I helped my friend get his EK Sedan ready for paint, he paid me some
chicken nuggets though so it's all cool. Here's a picture of how his sedan turned out after all of our work on it.
Then one day while getting some food downtown with another friend, I had told him about this Civic Wagon on the side of the road up ahead that
had been for sale for quite a while, long story short, we stopped by.. and he bought it! haha. To keep this story quick, I found him another car with
a b16 swap, we switched motors over, and we finally got his wagon done. Here's a picture of that. (He also paid me in chicken nuggets for labor)
Getting back to my wagon now. When my friend needed to borrow my injectors for his wagon, I found these lodged in my fuel rail.
Probably explains why my car wasn't as fast as it was supposed to be....
After my friends cars were done, it was time to finally get back down on my wagon. This time for real.
So I took all of the doors off with some help from a few friends (At this point every single thing on this car I've removed at least once)
Over the entire time of owning my wagon and deciding that I wanted to do a complete paint job, I was thinking of a color. I had always
regretted selling my red RT4WD wagon from earlier in this thread, and loved the color on it. But I didn't want to just have another stock
looking wagon, so I wanted to paint it something other than an OEM color. I was pondering the thought of painting it something other than
red, but after rendering different options on Photoshop, I couldn't find anything else that I liked as much as red.
So I decided on a very interesting looking red. It's a red pearl with a purple hue to it in the direct light. The flakes aren't too overwhelming,
and so far I'm in love with the color.
I painted a test patch on my old hood. (the damaged one off my EF Sedan from early on in the thread). This way I could tell if the primer I was
using, the basecoat, and clear coat, all interact well with each other before painting my actual car with it.
And yes, they all work perfectly with each other. (3 different brands)
A few days after I painted the test patch, and after letting it cure. It was time to actually start painting my car. Starting with the jambs of course.
I had to paint the hatch separately, since I only have 4 body work stands. I painted the doors a few days prior to painting the jambs on the car and
hatch.
After these pictures were taken, I put the doors and hatch back on with help from the same friends who helped me take them off, and aligned them
as best as I could. No more pictures on this first post.
And well. That is how it sits today. I've been taking a break for the past day or so making this thread. I hope you've somewhat enjoyed it so far.
There's going to be a lot more progress on this, I'm still not even close to my goal believe it or not.
My plans as of now are, replace every single bolt on the car with allen bolts/beauty washers, do something on the interior, like maybe some custom
S2K seats, Nardi steering wheel, and a K-Tuned shifter, finish the body work on the outside of the car, paint the outside of the car, and it may
sound crazy to you.. but after that's done, I'm going to completely re-do the engine bay again. Welding every hole shut, tucking the brakes, fuel
lines, radiator, deleting the booster, deleting the wipers.. etc.. If I'm not happy with something on this car, I'm going to re-do it and make it
perfect.
Love the attention to detail and the extra work you ended up doing looks like it was worth the effort.
Without welding the holes are you worried at all about the shaved bay bondo cracking or coming out at all?
I'm going through the stage where my "First 5 posts must need approval before they can be seen". I've posted the other half immediately after the first, and am just waiting on that to get approved.
..and this reply will also need approved, so you'll get this late too! lol.
However,
Thanks! It's been a lot of work.
Thanks alot! I was very picky with how I wanted the radiator to mount, I wanted it to look somewhat OEM.
Yeah, I've had plenty of encounters of people running super thin wire (10-14awg) all the way from the back to the front, some without fusing at all,
and they complained about having starting issues... I wonder why..
Haha, it was definitely all worth it to me. When I shaved the bay, I didn't cover any holes at all with body filler. I knew to not cover any of the seams, or holes as they wouldn't have lasted a week without cracking. The only thing I covered with body filler are the divots from where the factory had spot welded everything together. I removed the gross OEM seam sealer and replaced it with 3m
seam sealer, and spent my time to make it look decent.
About that traction bar, I definitely recommend it. Even if you aren't running a big header, it's also a necessary part if you want to run a half radiator in the correct orientation without cutting your stock cross-member.
Oh nice! I loved seeing your wagon, and so did my buddy. Your wagon inspired me to get down on painting mine quicker.
more
until it's finished. Which we all know will never happen, since no project is ever really "Finished".
If anyone has any questions about anything they've seen so far, feel free to message me or reply on here. I will respond to everyone.
Alright... so now that I have an up to date build thread.. I can start posting about every little thing I do now, and actually take pictures with
the build thread in mind.
Anyways.. on to the current progress.
After a week of not working on the car, and making countless excuses as to why I couldn't.. I finally decided to put in some work the other day.
The main thing that I did was shave the Antenna.
I don't see a need for an antenna these days, I only use my phone for music. BUT - I will wire up a hidden antenna eventually just in case.
I'll show you how I did it.
The stock antenna.. Not pretty, and definitely not cutting it for what I'm doing. It needs to go.
Removing it was super easy! Just unplug it from the radio, unscrew it from the top, and pull it straight out! One of the easiest things I've done.
I'm left with this hole, and those threaded inserts.
First thing I did was go and literally rip off a piece of metal from my scrap hood.
Marked that piece for where to cut it.
Cut (or in this case ripped) along the lines, and sanded away most of the paint.
After ripping out the threaded inserts, I JB welded the piece inside of the hole with the help of a magnet. It was very tedious to do.
The next morning it was dry. (I kept the magnet on over night so it would hold in place, as well as taped it)
Grinded down the jb weld, aswell as most of the surrounding area.
Filled the majority of the patch with fiberglass reinforced body filler. (Bondo brand)
The fiberglass filler after being sanded:
On top of that, I used some regular body filler to do the rest of the filling. (Rage Gold filler)
After being sanded:
It felt perfect, like nothing was ever there. It was time to prime it with some super high build 2k primer (U-Pol)
It looks great, and overall it took me 3 days because of the weather, but only 5 hours of actual work.
...And that concludes the antenna shave. I can take that off the list.
Another thing I nearly forgot about, was to do the body work on the gas door.
While working on the antenna shave I got that done and out of the way.
I'll show you how I did that too. This is the last of the body work aside from the hood.
This is how the gas door looked when I started. One high spot and a few low spots.
I decided the best idea was to strip it down to bare metal and fill the entire thing.
Stripper applied:
The best part!
Sanded with 80g:
Rage Gold filler again:
Sanded:
Evercoat Metal Glaze:
Sanded:
And primed with high build 2k U-Pol primer.
The car is almost ready to be painted. I only have a few things left that need some more body work. For instance, I've put in over 20 hours
of work into my hood, but I can still feel some minor waves when running my hand across it. I know I'd regret painting it if there's a wave
or two on the car anywhere, so I may as well spend the extra time now and fix it.
My next project will be to finish the body work on the hood.. and prime that too. Then guide coat all of the new primer, and block sand forever
to get everything super flat.
I was wondering if somebody would notice that, haha. Haven't bothered to take it off, Started undergoing major work a few days after Hondafest.
So, a quick update: I ordered some single bulb plastic headlights from New Zealand 10 days ago, and today they finally arrived!
They're in 9/10 condition, and I plan on wet sanding all of the old clear coat off, and re clearing them to make the lens immaculate. Aswell
as painting the back portion satin black.
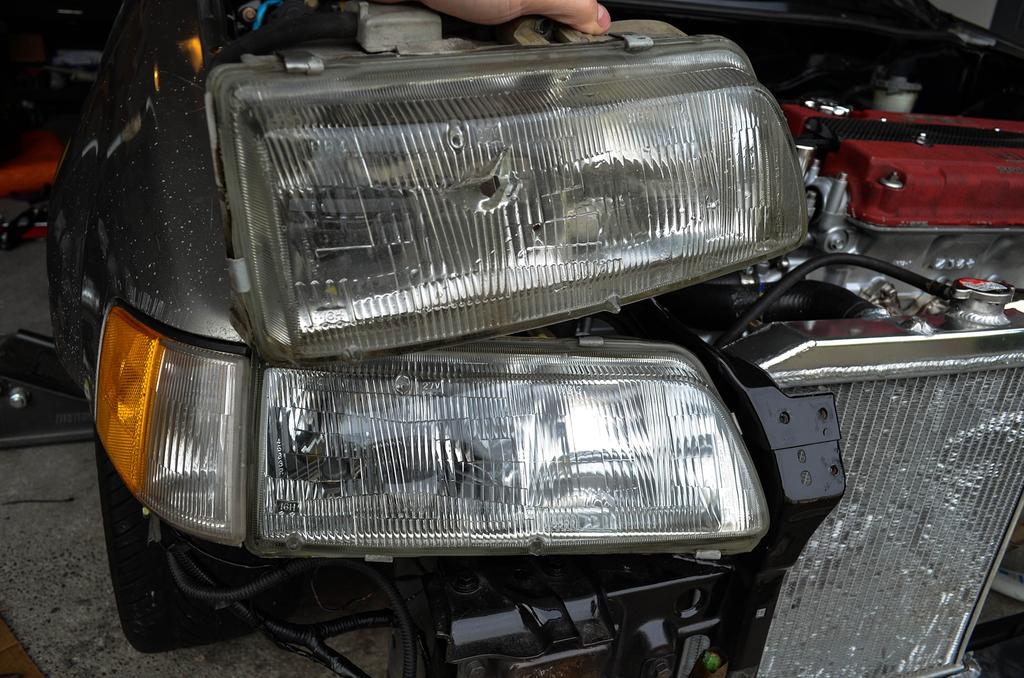
Here you can see the difference between the USDM glass headlights, and the plastic ones.
The USDM ones have those bumps that are supposed to aid in alignment, but they're just plain hideous.
Old glass headlights:
And the new plastic ones, much cleaner appearance:
I threw one of my random corner lights I had laying around on just to see how it fit. (Still trying to source some perfect condition clear ones)
You can see here that the USDM Glass headlights have these black buckets, and the plastic ones I got do not. Again, MUCH cleaner looking.
The thing that drew me to getting these particular headlights, and in plastic, is that with any type of glass headlight you can't necessarily wet
sand them and make them look perfect again with a coat or two of clear coat, I also love the fact that they're a single bulb design. Every thing
about these headlights is nicer than my old ones IMO. I never thought I'd get so excited over a pair of headlights.
Anyways, I've been really slacking on getting the wagon ready for paint. It's been freezing here lately and I can't get out there and do anything
without either the material freezing, or myself freezing. I have some things coming in the mail that I ordered on Black Friday, and I'll get out
there again and mess with those when they arrive.
anywhhoooo
http://www.ebay.com/itm/OEM-88-91-Honda-Civic-5Dr-Wagon-Only-Front-Corner-Lights-Lamp-Pair-Clear-/391319461020?fits=Model%3ACivic&hash=item5b1c751c9c:g:BJkAAOSwiwVWRVVJ&vxp=mtr
Thanks guys! I appreciate it.
I've noticed those for sale, and they look decent. But I'm not convinced. I'd have to see better pictures. It seems they have a blue-ish tint to them.
I think I'll hold off for some OEM ones without any cracks and then re condition them if needed.
The JDM plastic lights still use the metal bracket from 88-89, just FYI. Only the later ones had the one piece design.
All that matters to me is that the ones I got don't have the metal brackets/buckets. If I saw some JDM plastic lights with the rear brackets/external alignment adjustments I wouldn't have bought those.
The first thing I did was clean the seats, you may have noticed that I only cleaned the bottom portions of the seats before, so I finally decided
to finish cleaning the upper half. Although I plan on eventually reupholstering some rear wagon seats, I wanted to keep this set in tact and
find a spare set from the junk yard in worse shape to mess around with. In case I ever want to go back to the original wagon interior, I'll
always have this near-perfect set laying around.
These seats looked horrible, but I could see past the dirt and "stains". I used the same cleaning method on these as I did on the bottom half.
Take the covers completely off, wash them in the tub with some degreaser, put them in the washing machine straight after the tub, and finally
dry them on low heat for the minimal amount of time.
Pictures of that process:
The water from washing these isn't half as bad as it was from washing the bottoms a few months ago:
After putting the covers back on, and mocking them up next to the previously cleaned lower halfs, the final result! Well worth the time it took:
(The bottom half's seem darker, but that's just the lighting.)
The next small project I had going on was test fitting a buddies S2K seat into my wagon. I swapped over the bucket/rails from my Integra seats
that are currently in the car just to get an idea.
They look good in there, but I wasn't happy about having to swap the buckets. However after the successful test fit I've decided on purchasing
some black S2K seats when I find a good deal on some. My plan is to use the original S2K rails and weld some wagon rails onto them, this will
allow me to get them to sit in there exactly how I want, and not have to swap the buckets.
The last thing I did which took quite a while to complete, due to drying times and waiting for a break in the weather was refurbishing the
headlights that I received in a previous post.
After taking the lenses off, wet sanding the lenses with various grits to get rid of the old clear coat, scratches, and rock chips, removing all of
the old sealant, painting the back casings black, throwing 4 new coats of clearcoat on the lenses, and putting the lenses back on with fresh sealant,
The result is phenomenal.
The pictures honestly can't and don't do these things justice. They look so good in person.
Anyways, that's pretty much it for this update. I'm trying to think of more things that I can mess around with while waiting for the weather to
be nice.
I received some more stuff in the mail today that I ordered on Black Friday. So I'll do an update once I get around to messing with those.
Busy during the holidays - can't accomplish much, however;
I've mounted a headlight just to see how it looks - I like it!
Traded bumpers with a friend here who cares less about his wagon, it's better than mine - but still needs a few repairs. Main thing is it has less
waves on the top section, and fits better overall. I test fit that along with some corner lights I had laying around. The front end seems to line up
wonderfully;
This picture is without much at all messing with aligning it via the bolts, plus I didn't have the bracket that connects the bumper to the fender
installed, that will come after I paint the car.
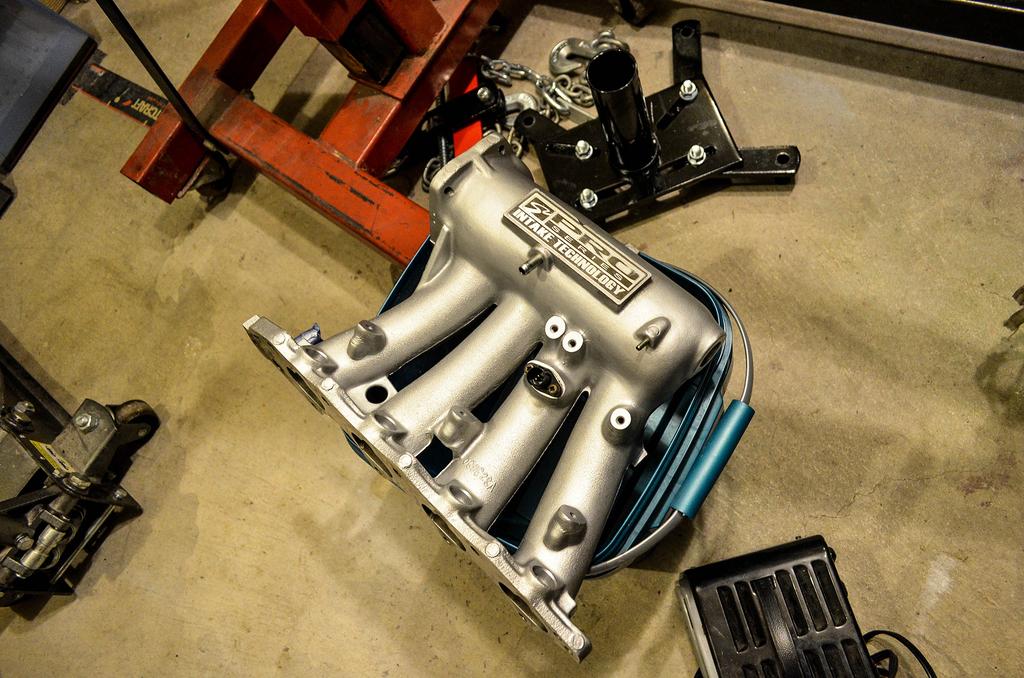
Then I installed what I purchased on Black Friday a few weeks back. A Skunk2 Ultra IM and 74mm throttle body (Not pictured);
Finally, to end this update - I've impulsively purchased a Euro rear interior setup. That should hopefully arrive within the first week of next year.
-Can't wait!
Are they the same as the Hatch or do we have to look for wagon specific?
https://www.go-parts.com/9091-honda-civic-headlight-assembly-right-passenger-p-13094.html
If those are new, and the same design I might just pull the trigger.
Thanks! I love the way they turned out.
And to answer your question;
I'm unsure if the hatch ones of the same design as mine will work on a wagon. I remember having to swap over my headlight buckets (The black brackets on the back of the headlights) on my USDM headlights when I had used those, they were from a sedan or hatch. But other than that, had no issues with fitment.
I ordered these single bulb plastic ones without the buckets/brackets only because the ad stated that they came off of a Shuttle. I probably wouldn't have ordered them if they were from a Hatch/Sedan regardless.
-Huge thanks to Mapone on here for being a great seller!
Carpet before:
Carpet after:
Rear seats and interior installed:
My old floor/battery setup still works perfectly after trimming the edges:
For this rear interior, I plan on eventually converting the holes to run speakers, as well as converting the right rear storage compartment into
a sub box with a flush mount setup. But I'm keeping it the way it is now for the 2016 show season.
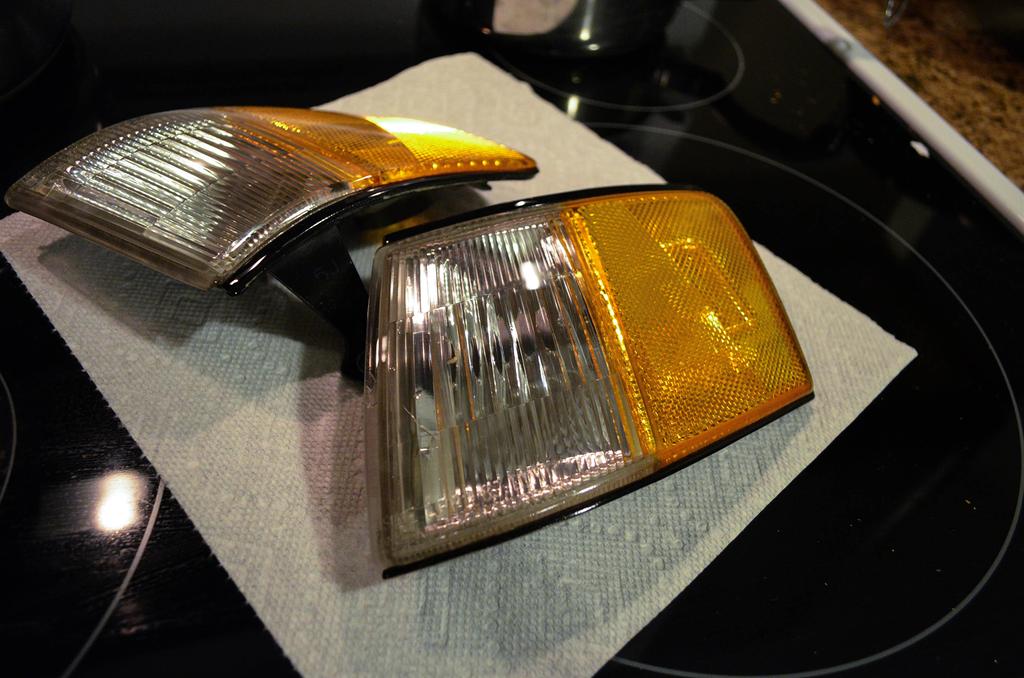
Now, along with the rear interior - I finally got some mint OEM clear corner lights! I've already wet sanded them in preparation for clear coat,
and re-painted the black trim around them.
Before paint:
After paint:
Keep in mind, the lens is wet sanded in this picture:
At this point, they were ready for paint. But I didn't want to mix up such a small amount of clear for just the corner lights - so I decided I wanted
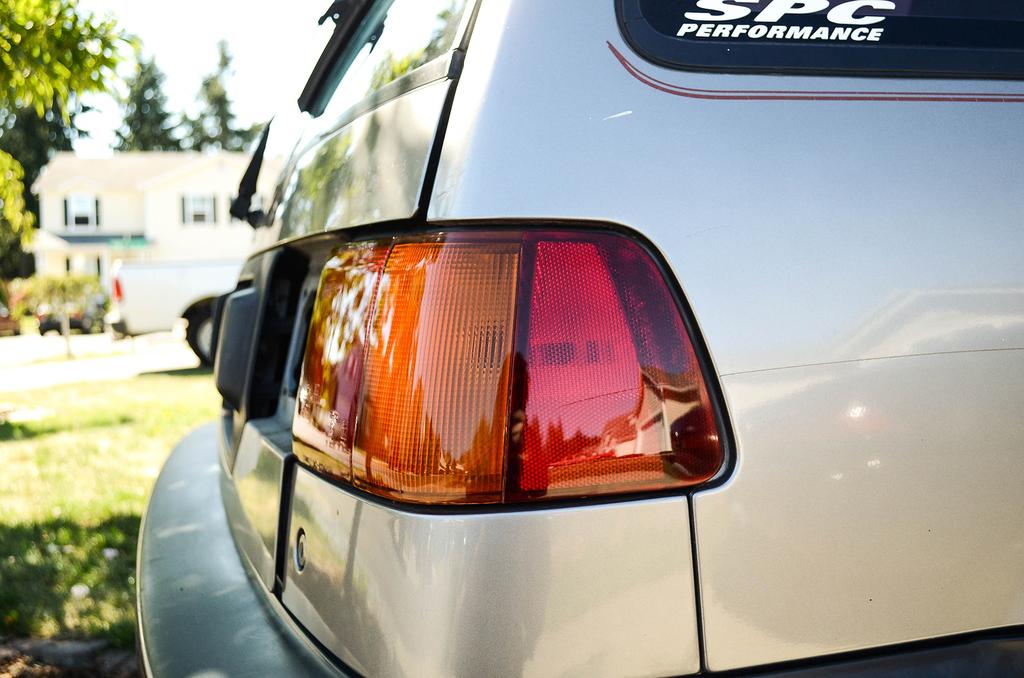
to clear my tail lights as well.
But, I decided to experiment on them as they weren't in the best condition to begin with. Now, I've always liked all red tail lights on Integras and
such, so I decided to tint the orange section on these red.
Orange section taped off:
After 4 coats on the orange section, I layed down 2 more on the entire light(s), to try and even out the color:
It worked out well, they matched pretty decent:
I loved the all red look a lot! However, I wasn't happy with them still. I never took the lens off - so the inside was still orange. In certain light you
could still see a hint of orange in the lens.
Being that I was just experimenting on these anyways, I wanted to try something crazy for the clear coat. I had some "Micro" paint flake laying
around in my shop that I've never used before, and decided to mess around and clear coat them with the flake.
And well... you can see that they look sort of ridiculous. The paint flake is WAY too big, and when not in direct sunlight, it looks like dust/dirt.
I'm not bothered though, this gives me the opportunity to take the lens off and tint them properly next time. I just need to spend a few hours sanding
all of this clear off! Then - I can clear them normally, along side the corner lights.
Trial and error.
Also, made a new Instagram for the wagon. Follow for quicker updates. - @Kinda_Clean