Fogging up the dark side. or. Check your defogger lines before you tint.
 greenteagod
Moderator
greenteagod
Moderator
All right, so you're looking at getting your windows tinted. Maybe you're concerned about how dark you can go, maybe you want some crazy chrome reflective stuff. Maybe you're thinking about blocking heat. One thing you might not be thinking about is your rear defogger.
Well, you should...
If you tint over broken lines, they are forever broken. There's no going back in there and fixing stuff without severely ruining your tint.
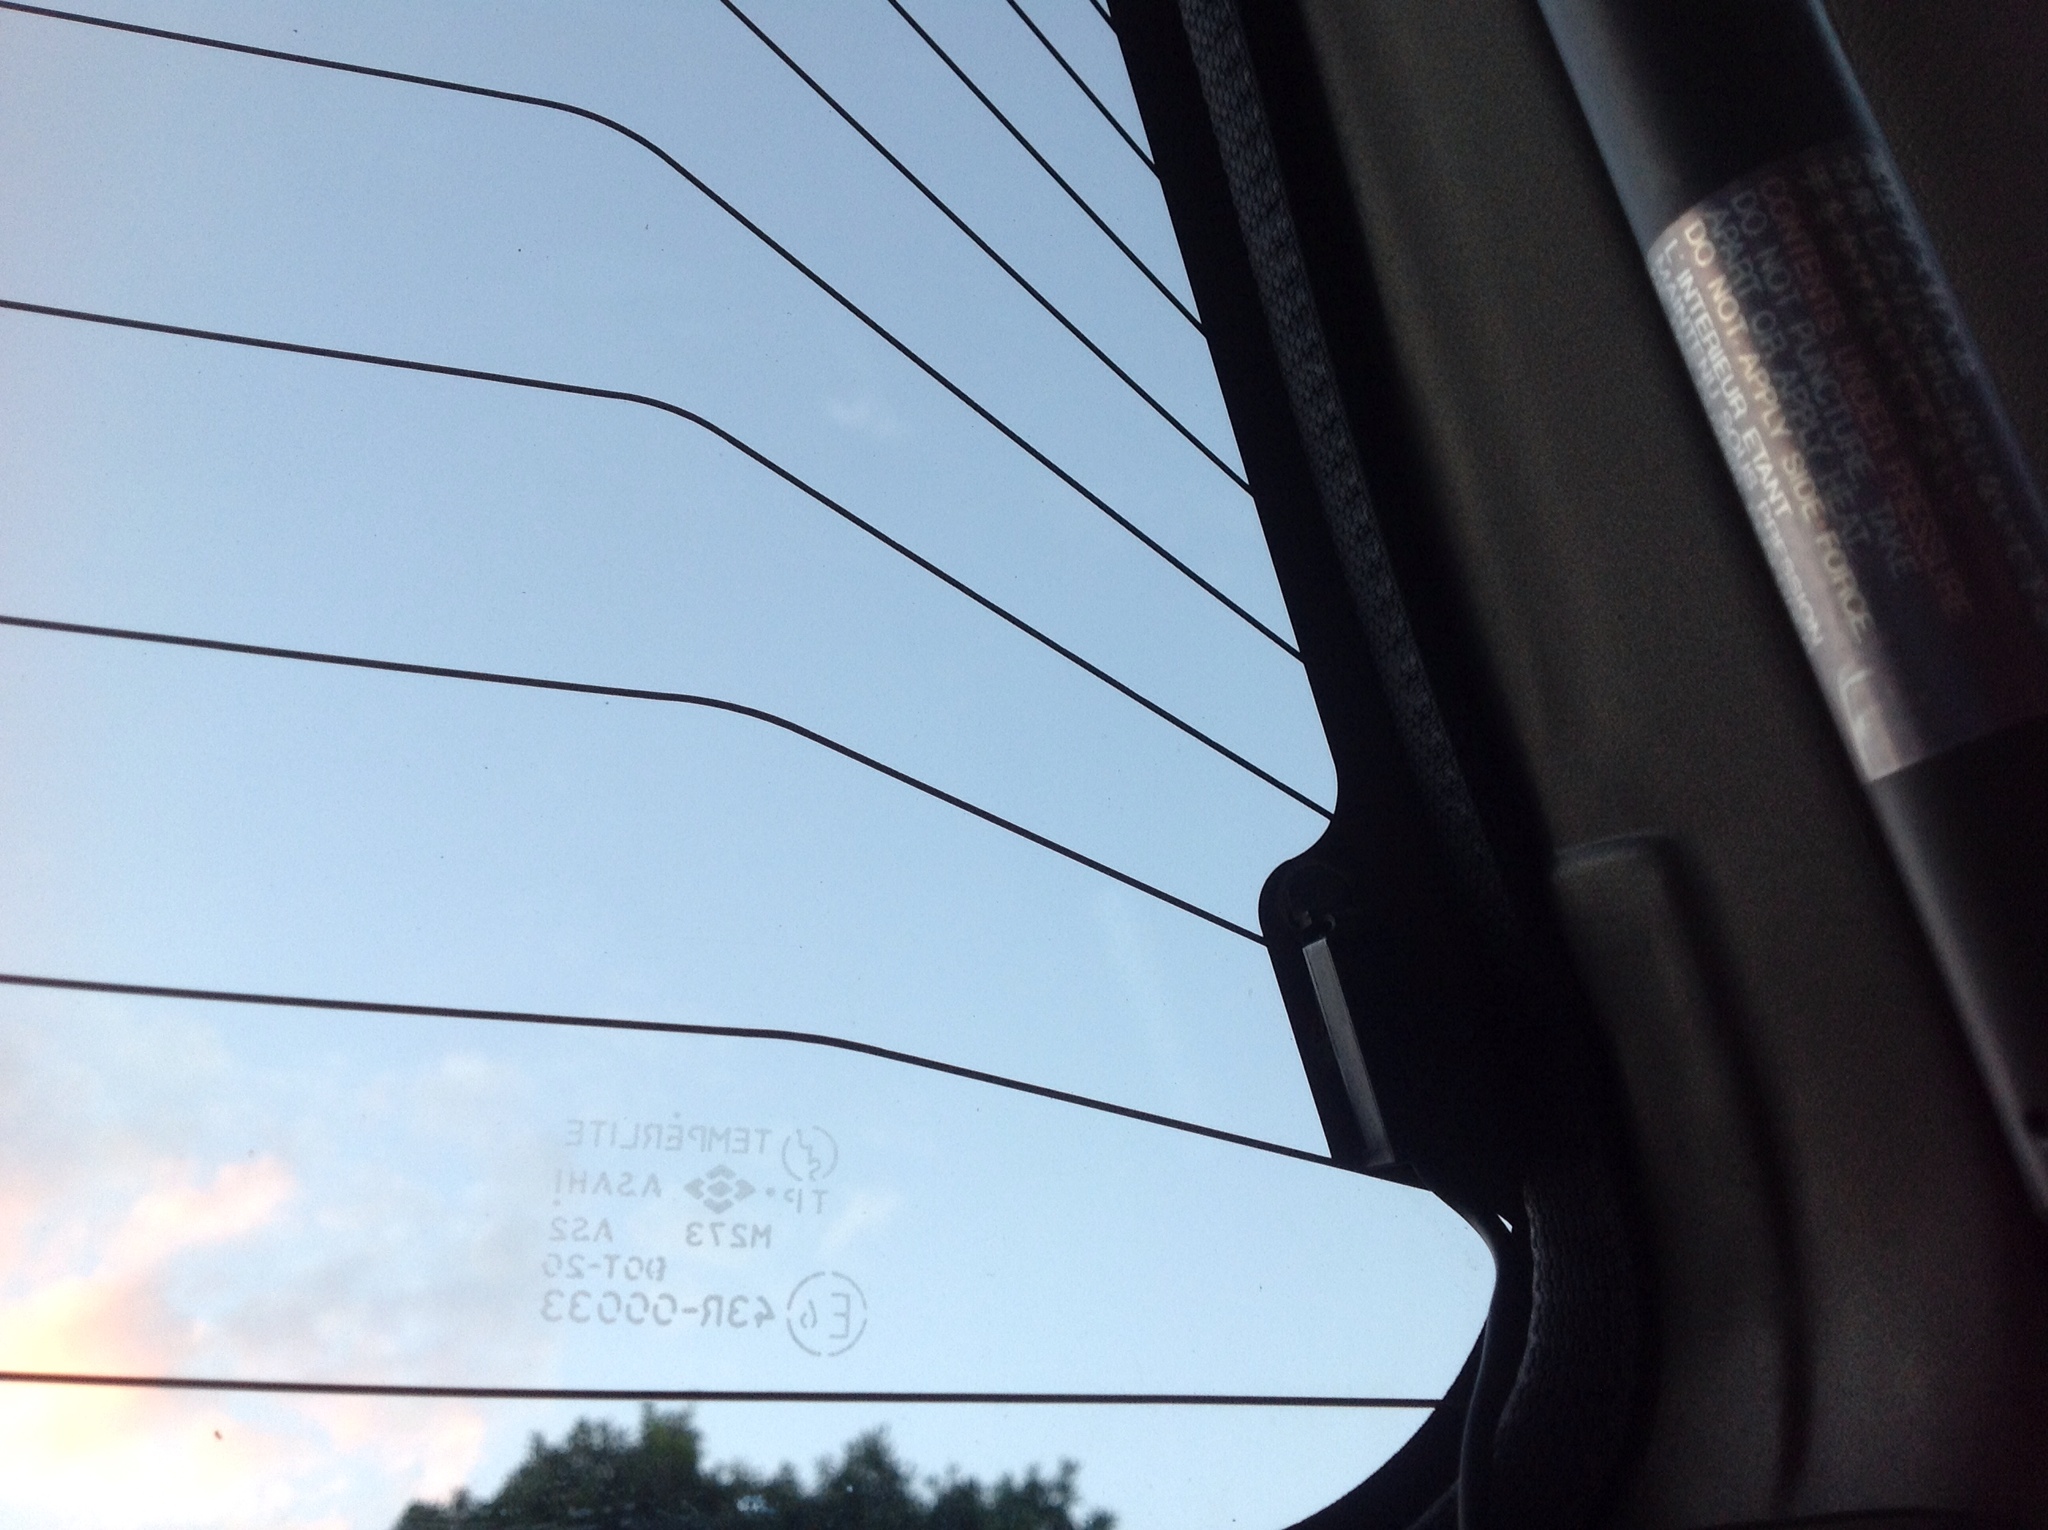
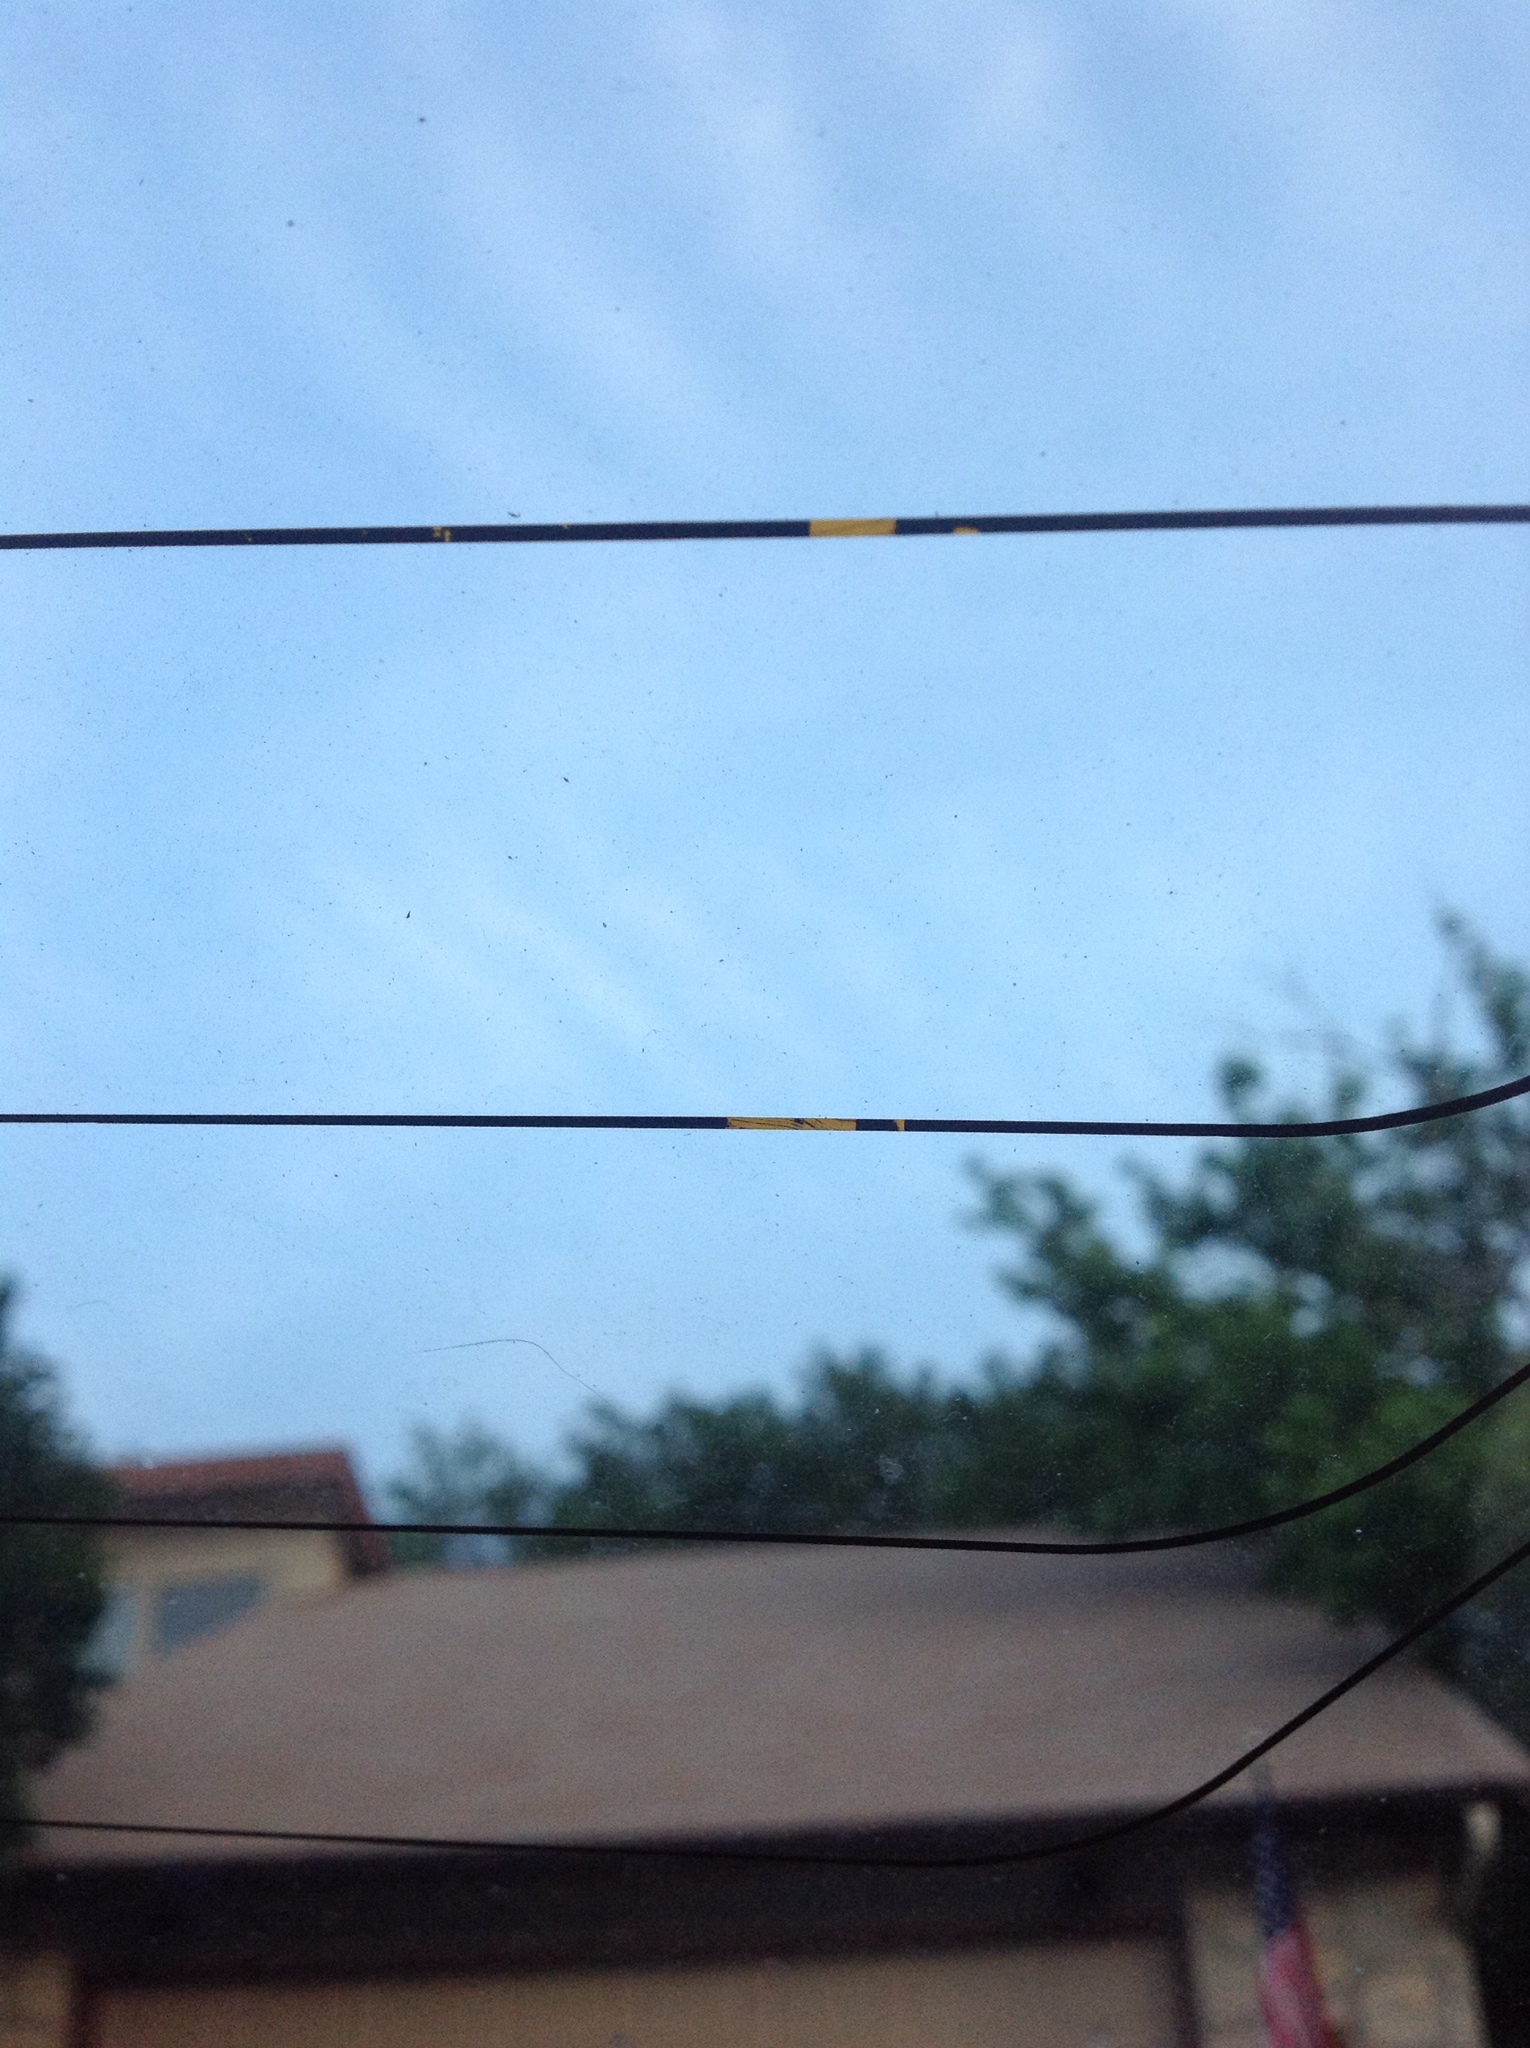
In going over mine I found four broken lines. Unfortunately this is bound to happen, especialy in a hatchback or wagon where stuff gets loaded up and hauled around.
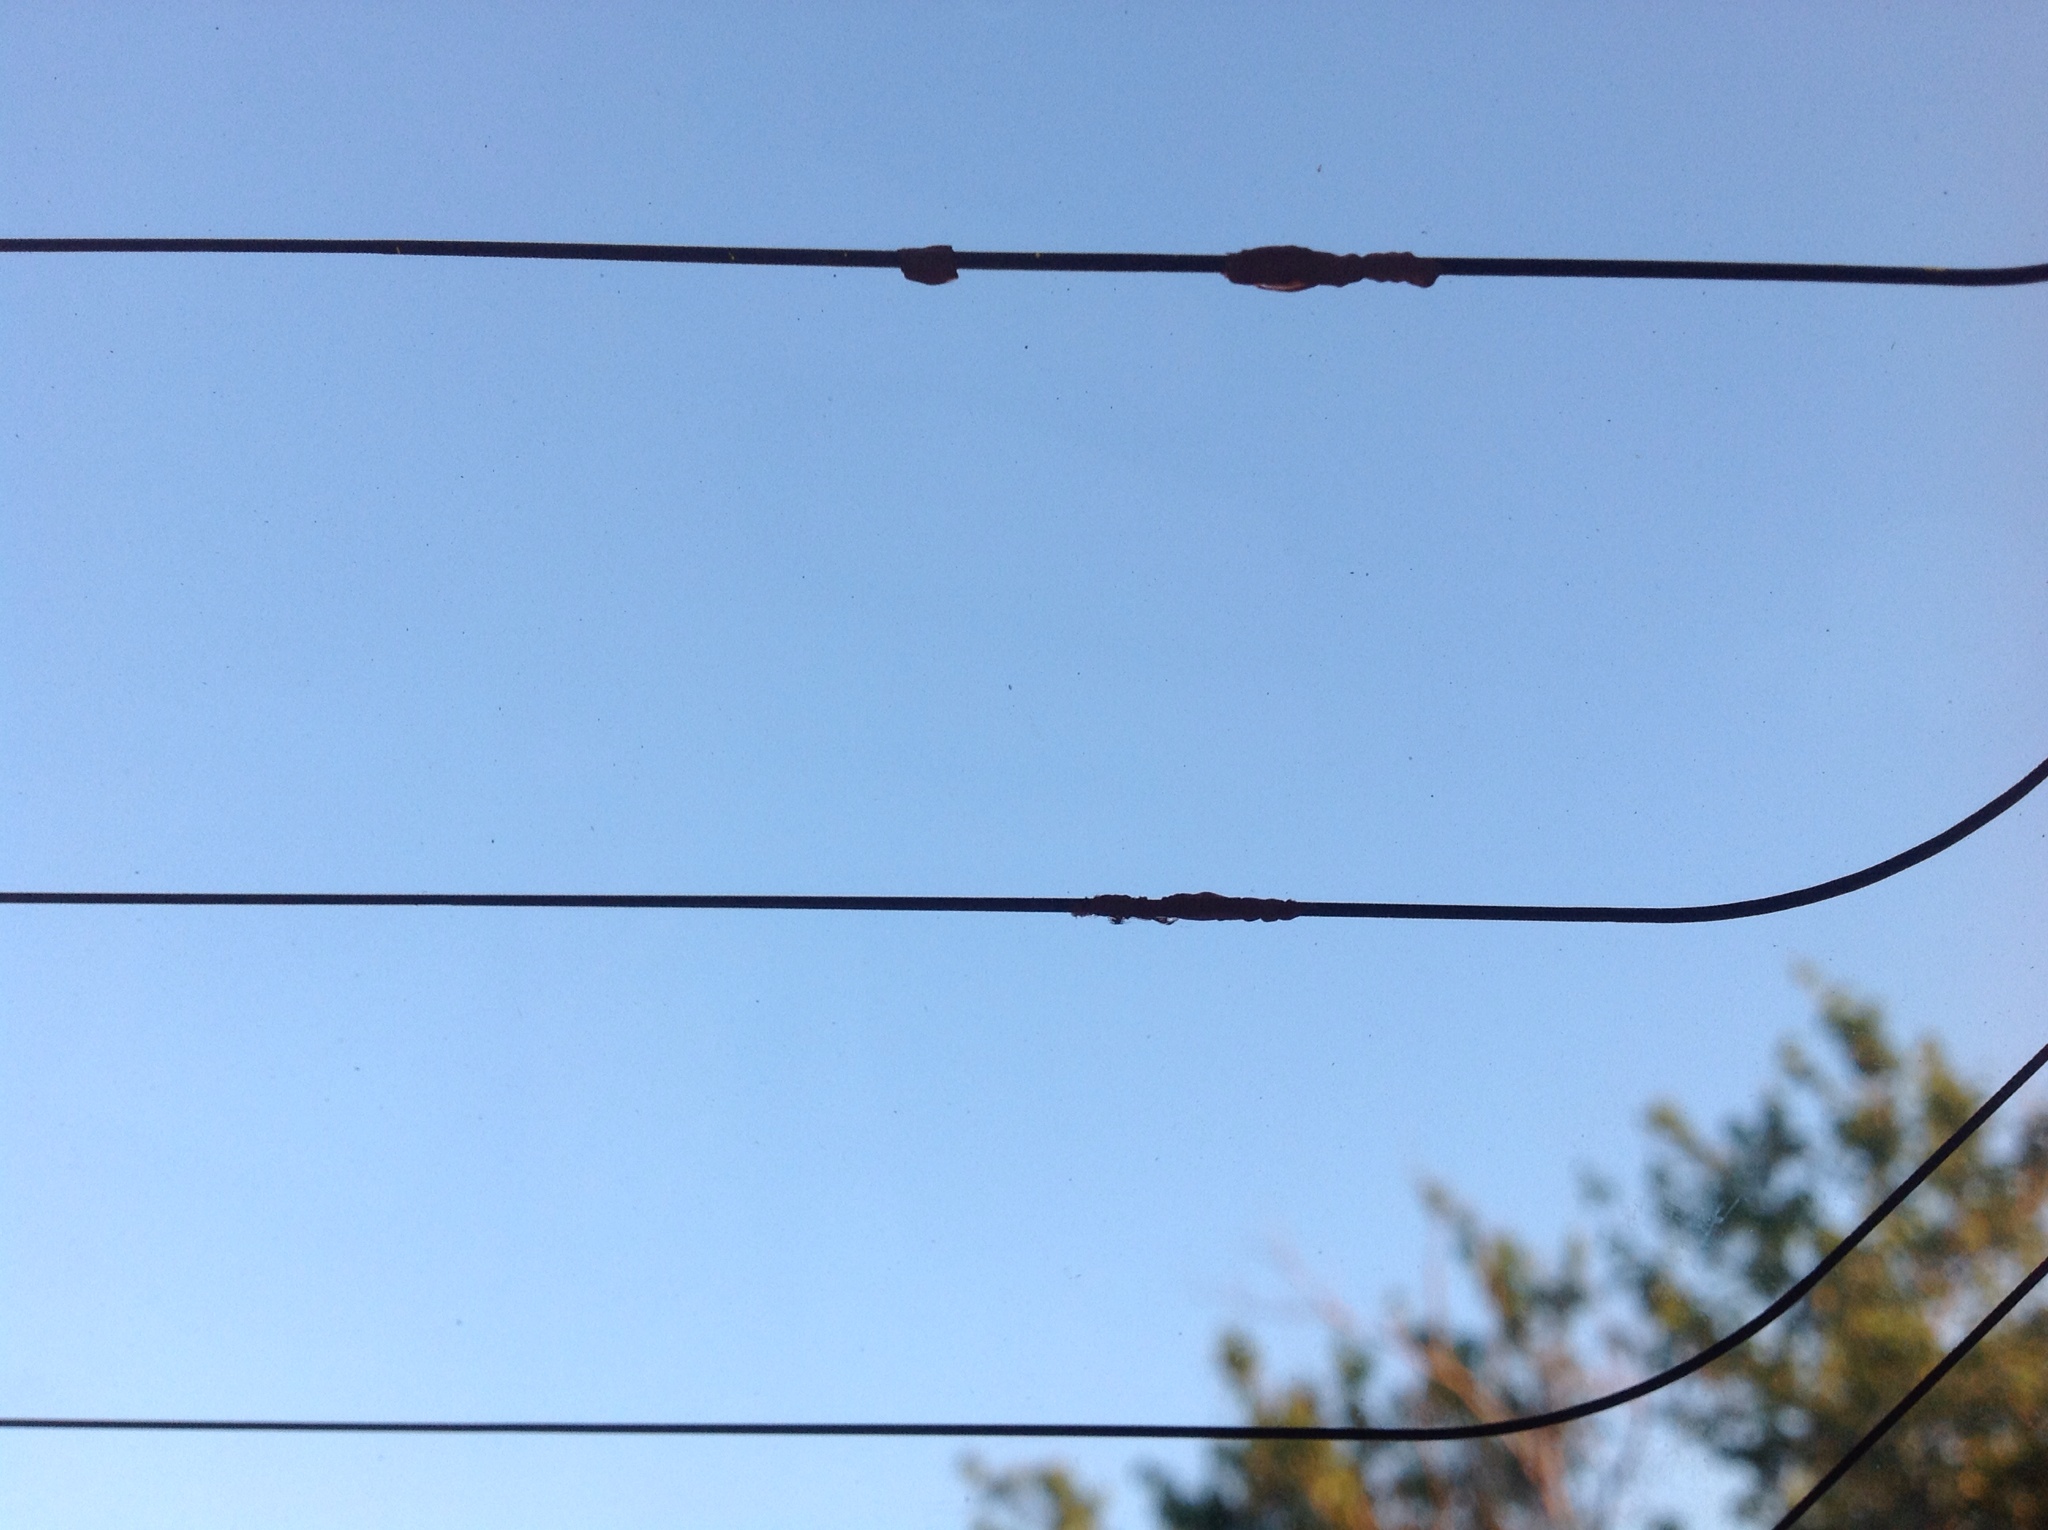
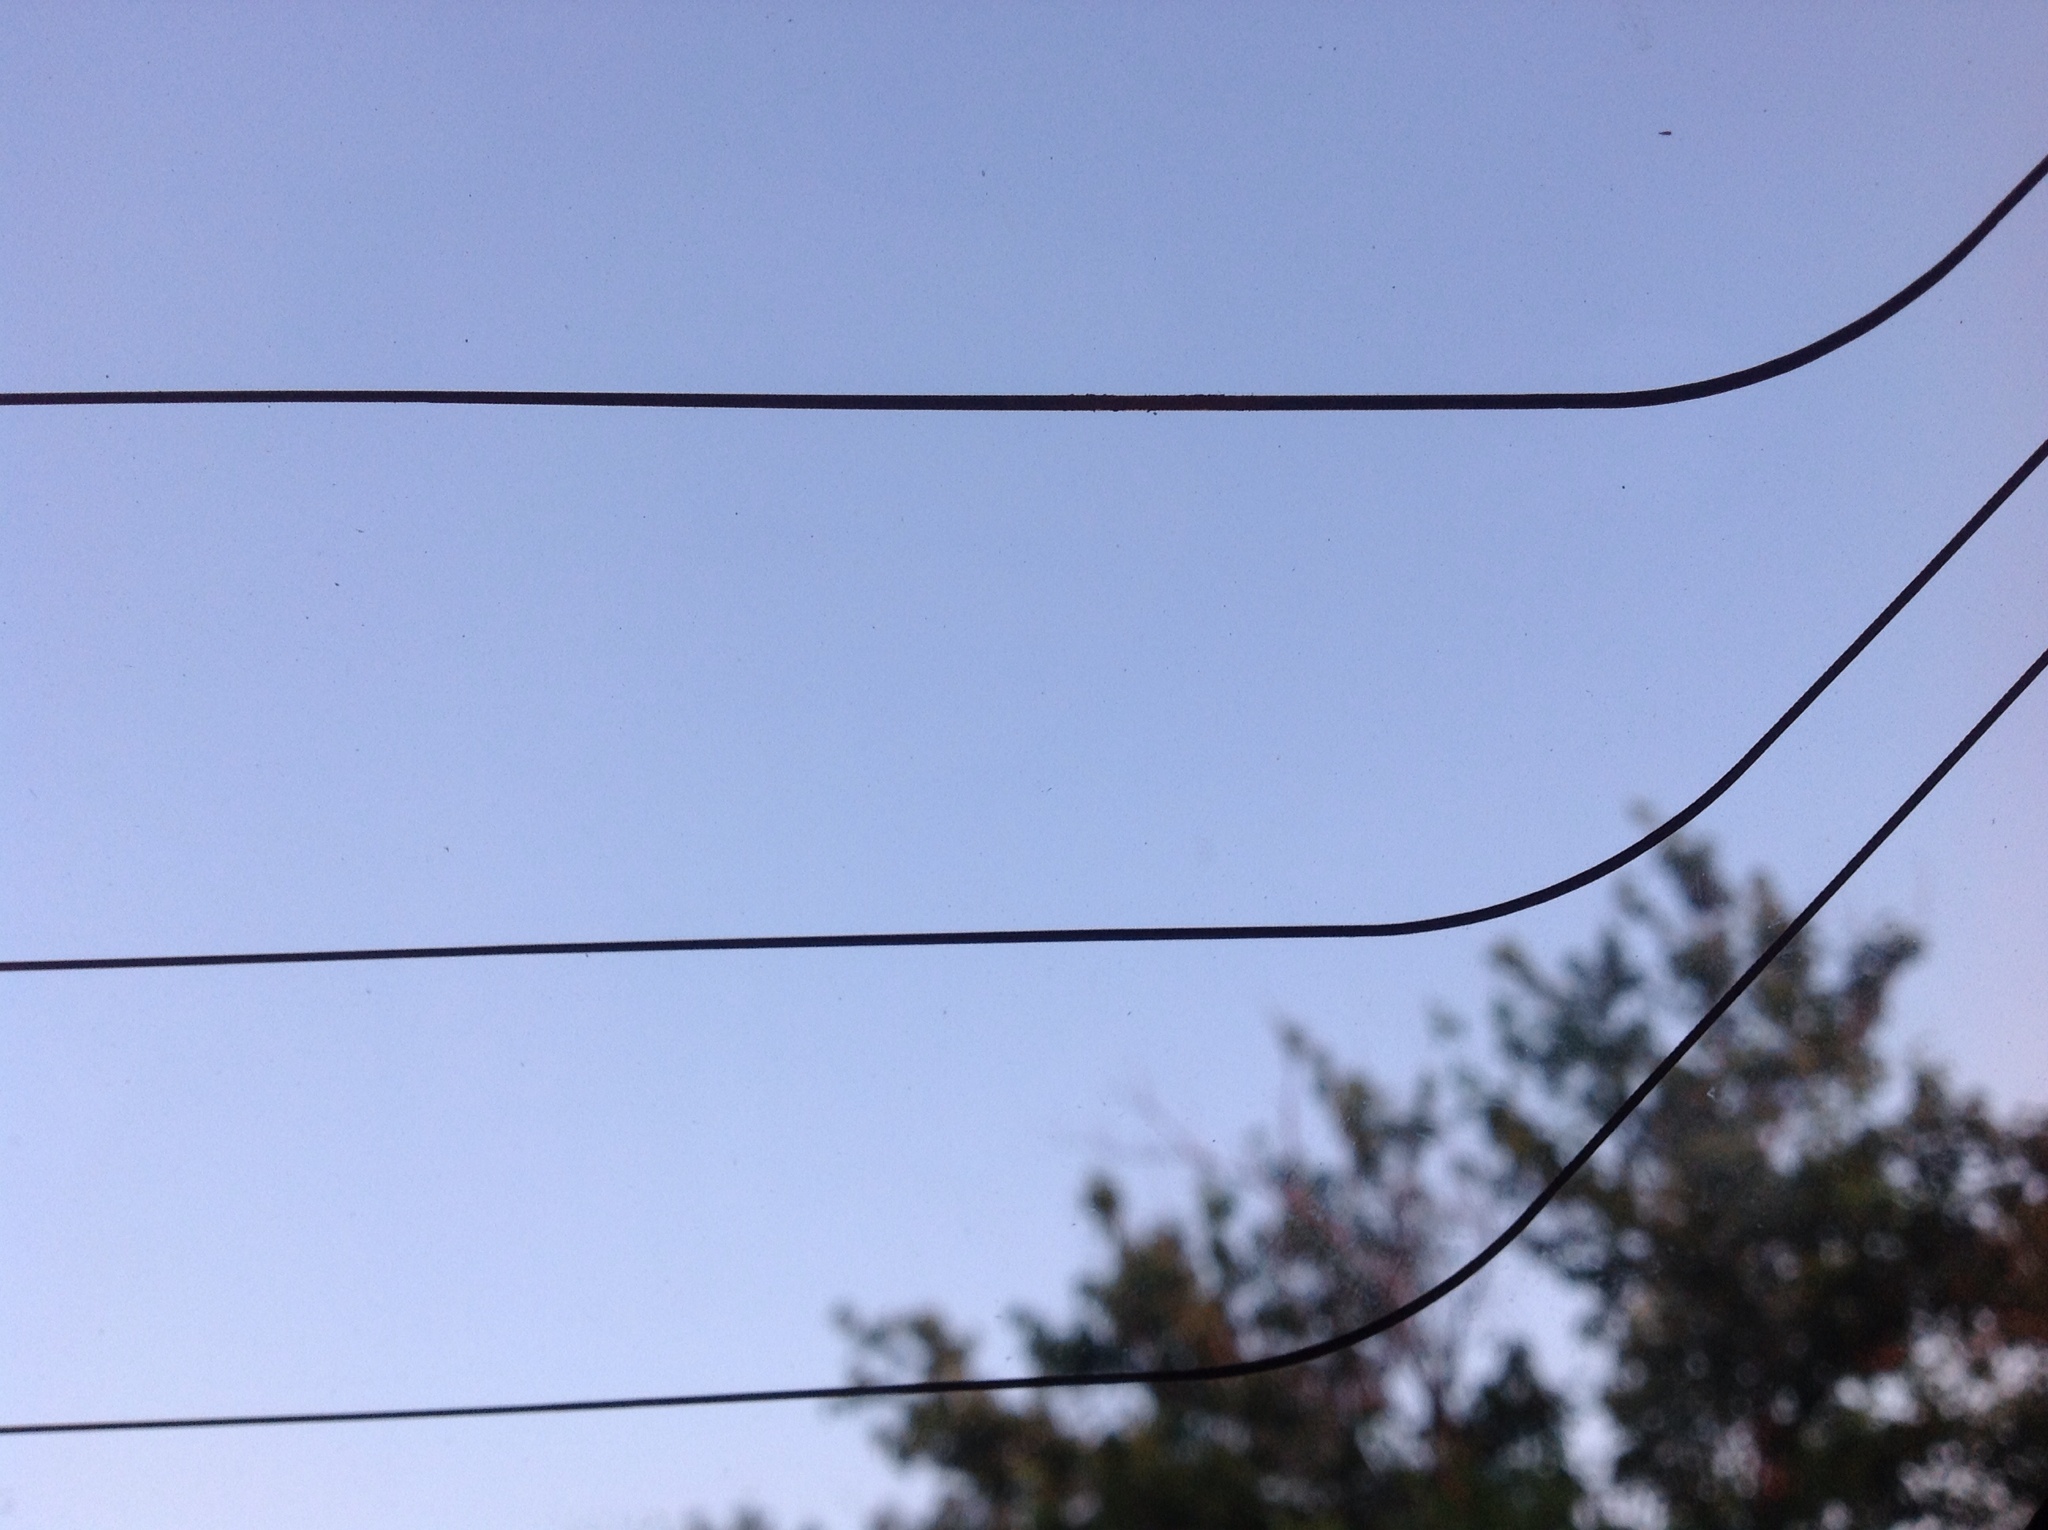
Here is what to be on the lookout for.
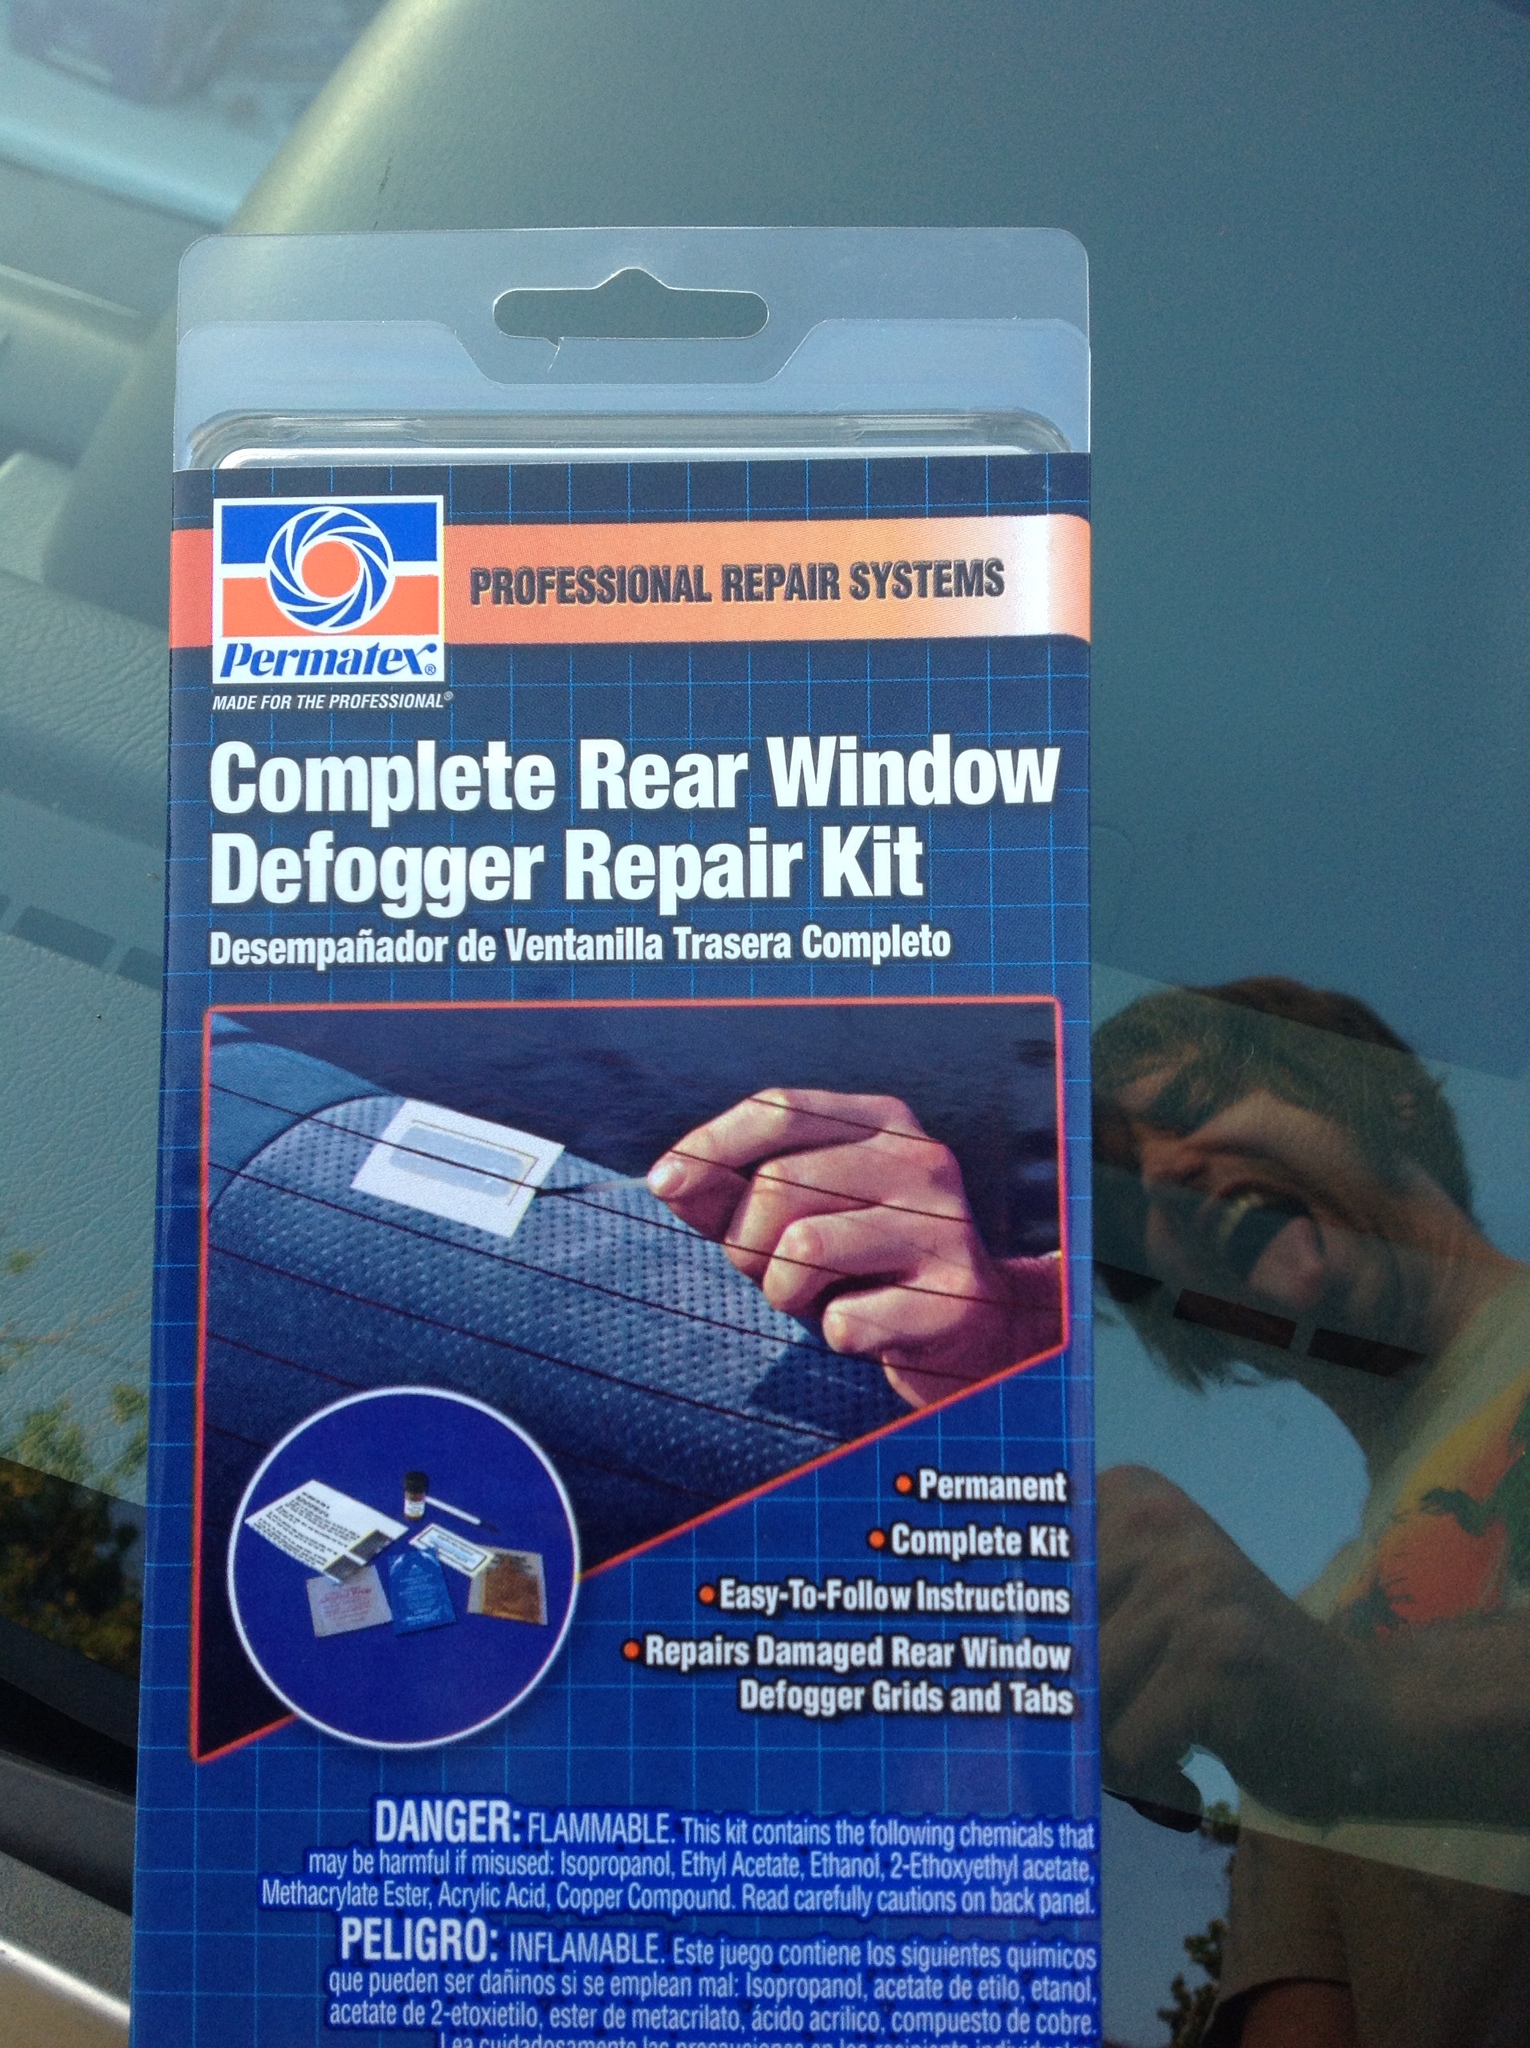
So now that we've identified the breaks, you need a repair kit. I've used permatex several times with good results.
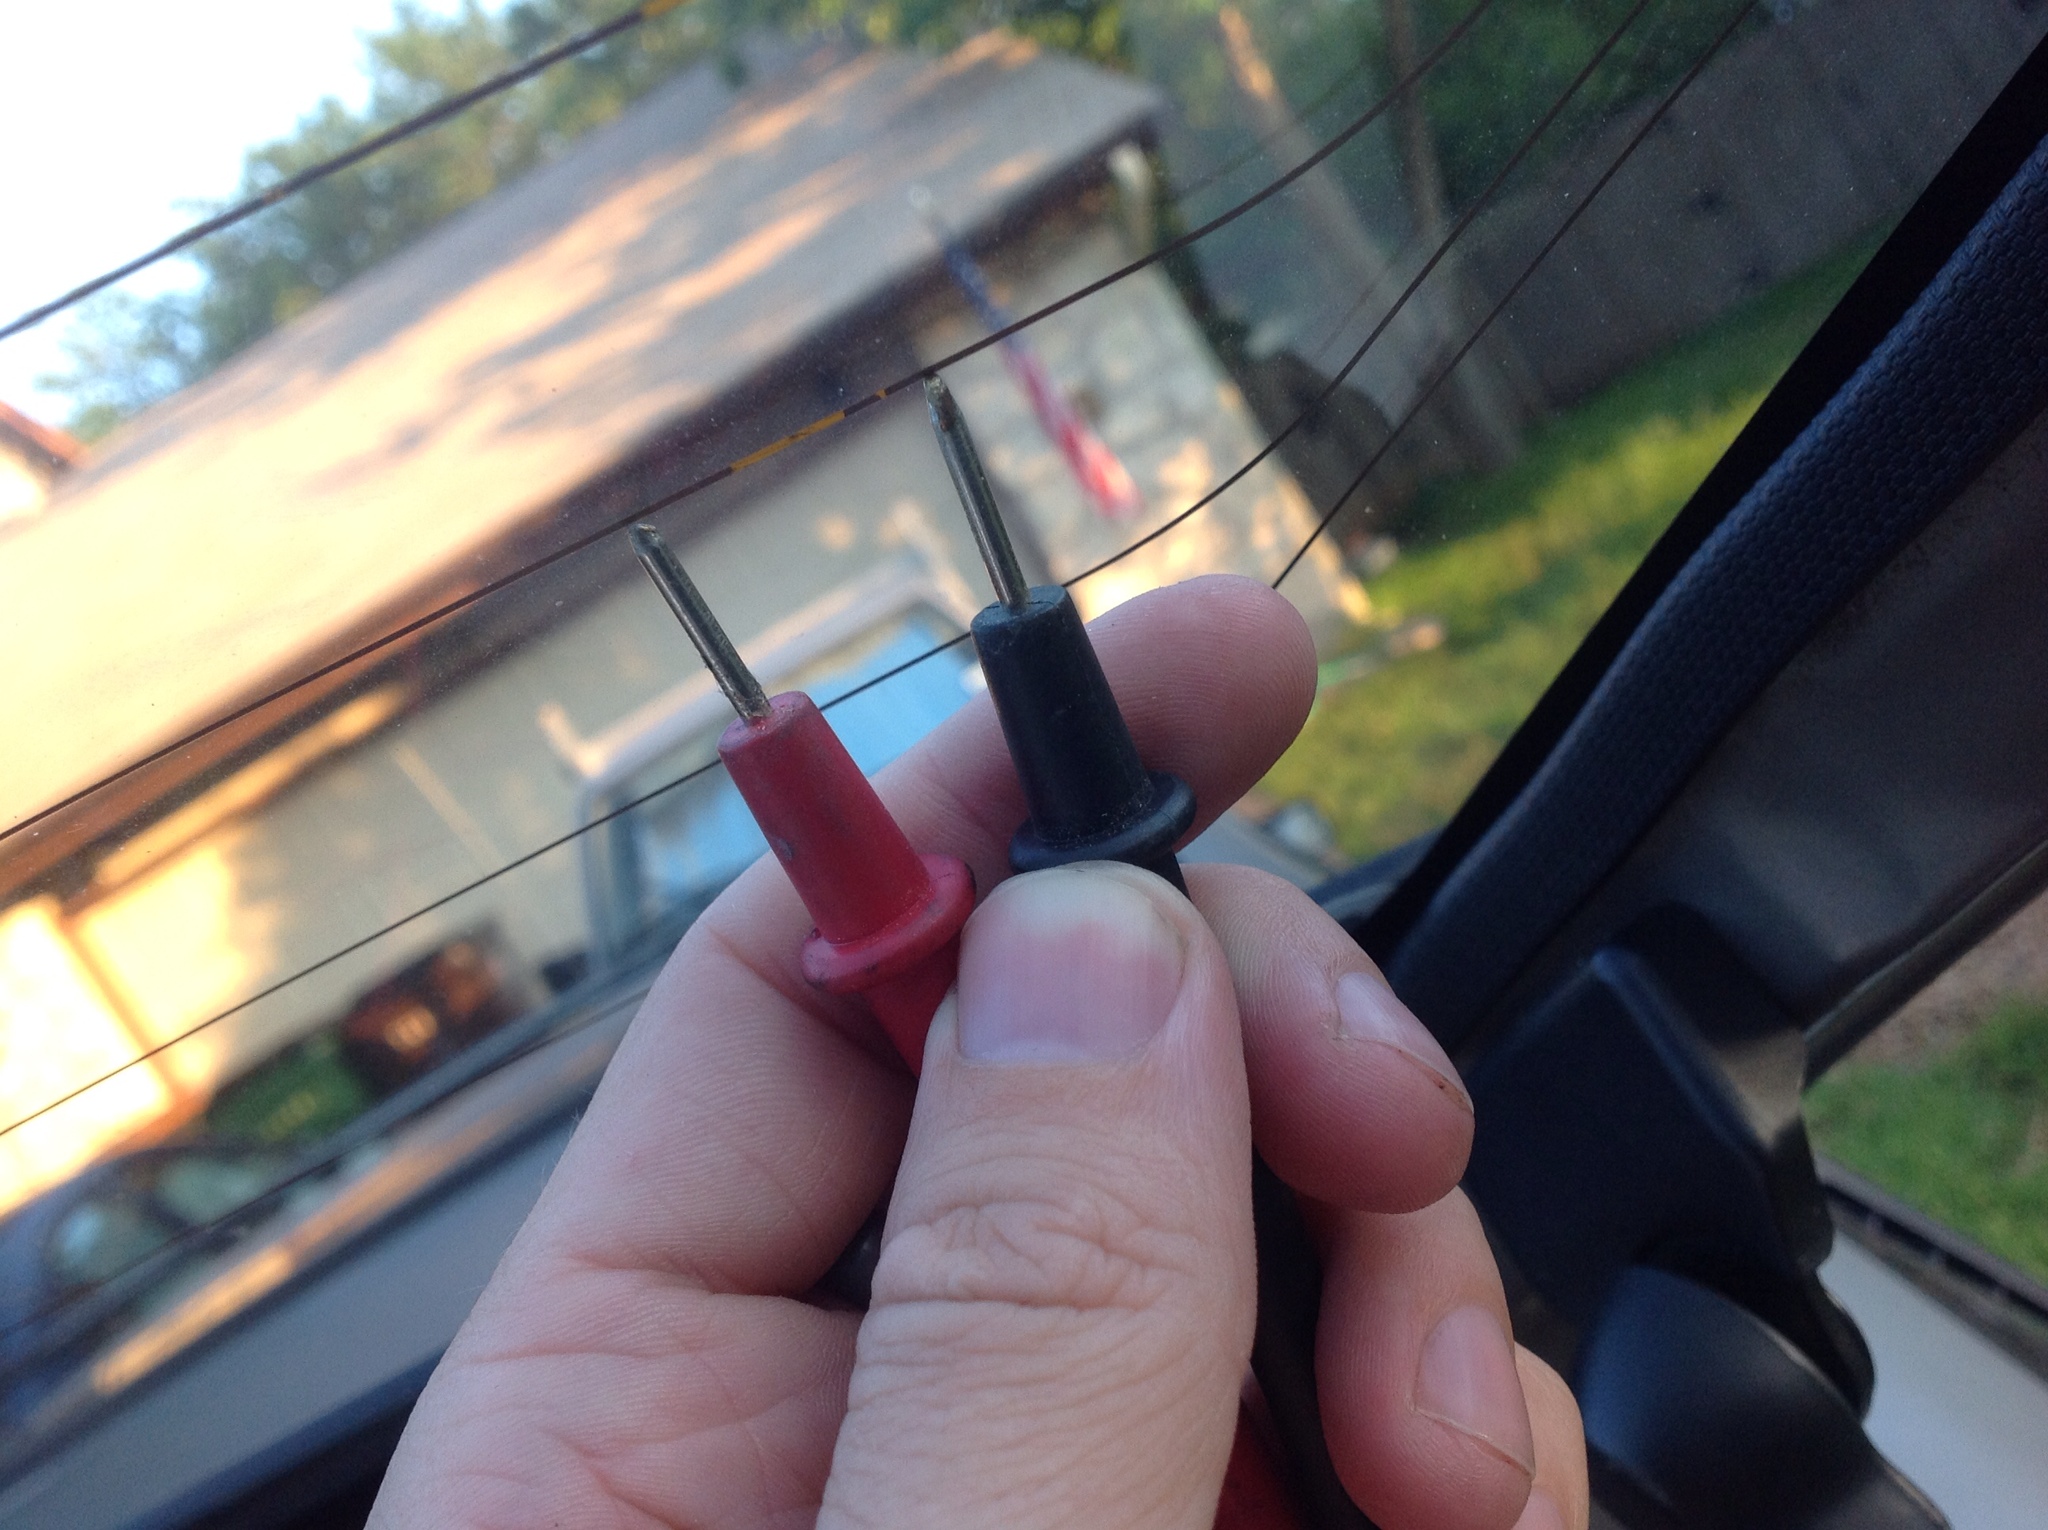
One thing they say to do is check the resistance. My multimeter is old and jacked and had to have the wires replaced so it never truly reads zero. But it'll get down to like .2 ohm.
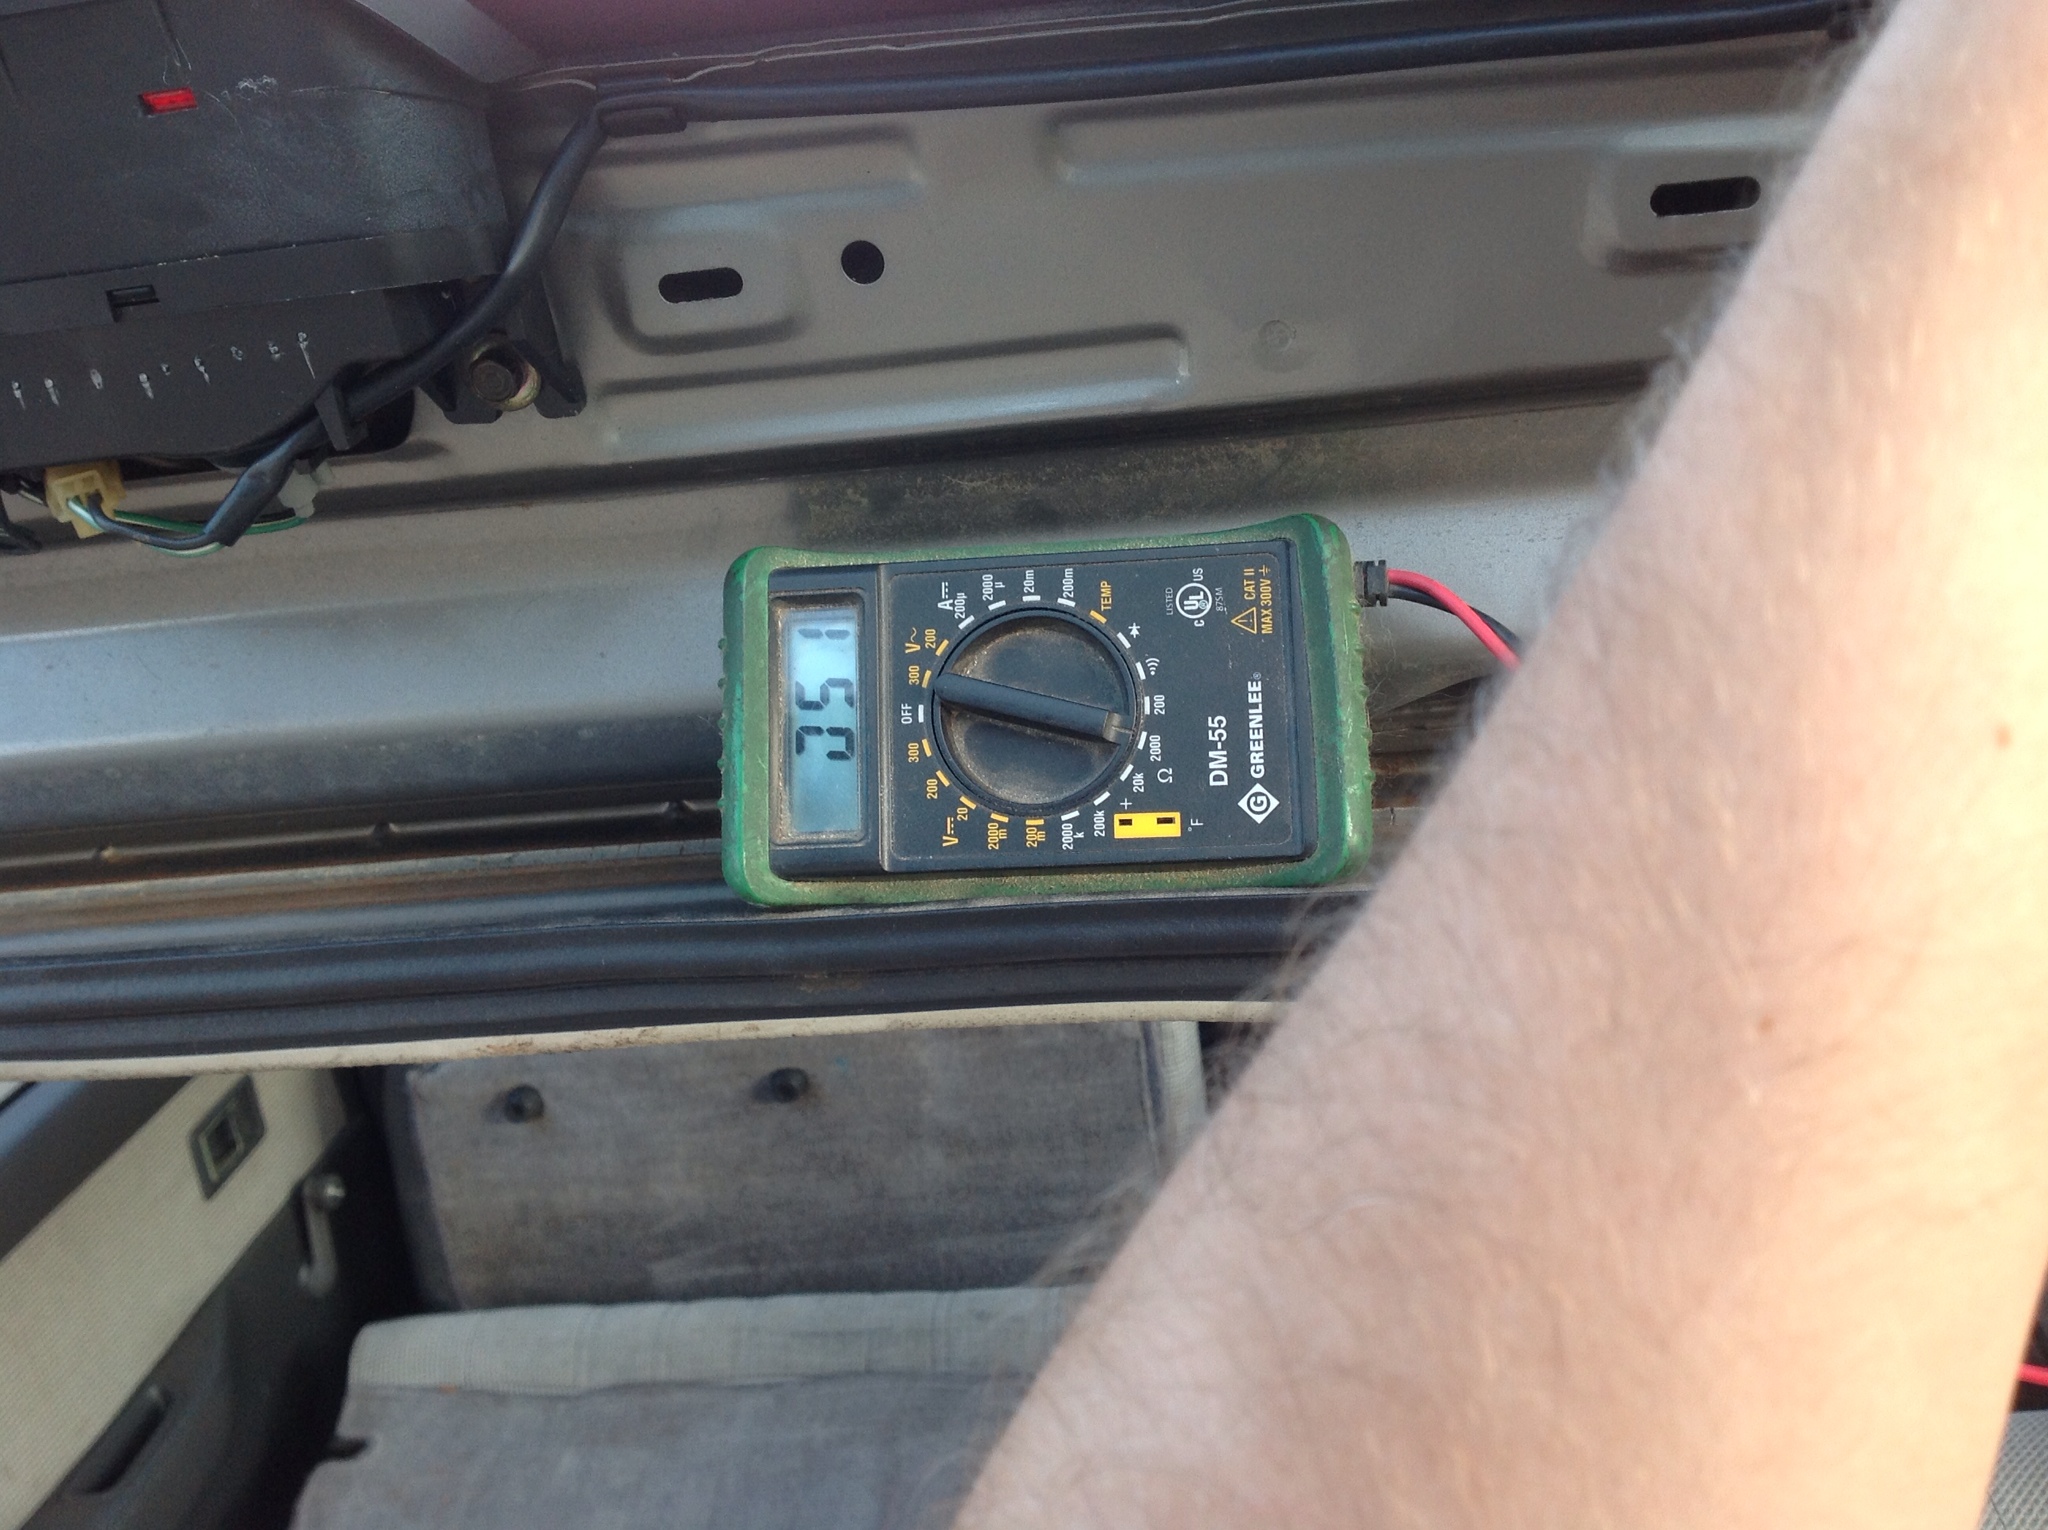
You can see here that it was reading well above that because it has to travel the long way round, thus your resistance.
There are a couple components of the repair kit. One is to reattach the tabs if they've come off. For mine I'm not worried about that, so I just go straight to the little bottle of copper paint.
It comes with a little template that is worthless. It's good for one repair sort of. But it is too wide for my cars lines anyway. So you just prep with the alcohol wipe dry it off, and then paint the copper paint on there. Try to get as close as you can to the line but you don't have to be pinstripe perfect.
It dries quickly so what you can do after about 10 minutes is bust out a good ol razor blade. Then you use the original lines as reference and scrape up to them carefully. You can then flake the extra bits off with ease. Take your time with it.
Here is what it looks like cleaned up. I dusted off the remaining flakes too and now it's only visible if you get up close and look for the color difference.
Afterwards they say check for it to be zero ohm. With our lines being so narrow, unless you had a hairline separation that might not happen. The farther away the probes the higher your resistance. I just measured off a known good line for reference and compared to that.
On a known good line on the same gap as my largest break I was getting .8 ohm. After the fix I was getting 1.2. Not absolutely perfect, but far better than it making no connection and getting 51ohm.
Now the only thing that remains is to see how it holds up with tint. I know they will need to scrub the windshield, but I'll need to let them know to watch out for those lines. Hopefully the copper has bonded to the original contact points well enough, but you never know.
Updates when I find out.

Well, you should...
If you tint over broken lines, they are forever broken. There's no going back in there and fixing stuff without severely ruining your tint.
In going over mine I found four broken lines. Unfortunately this is bound to happen, especialy in a hatchback or wagon where stuff gets loaded up and hauled around.
Here is what to be on the lookout for.

So now that we've identified the breaks, you need a repair kit. I've used permatex several times with good results.

One thing they say to do is check the resistance. My multimeter is old and jacked and had to have the wires replaced so it never truly reads zero. But it'll get down to like .2 ohm.

You can see here that it was reading well above that because it has to travel the long way round, thus your resistance.

There are a couple components of the repair kit. One is to reattach the tabs if they've come off. For mine I'm not worried about that, so I just go straight to the little bottle of copper paint.
It comes with a little template that is worthless. It's good for one repair sort of. But it is too wide for my cars lines anyway. So you just prep with the alcohol wipe dry it off, and then paint the copper paint on there. Try to get as close as you can to the line but you don't have to be pinstripe perfect.

It dries quickly so what you can do after about 10 minutes is bust out a good ol razor blade. Then you use the original lines as reference and scrape up to them carefully. You can then flake the extra bits off with ease. Take your time with it.
Here is what it looks like cleaned up. I dusted off the remaining flakes too and now it's only visible if you get up close and look for the color difference.

Afterwards they say check for it to be zero ohm. With our lines being so narrow, unless you had a hairline separation that might not happen. The farther away the probes the higher your resistance. I just measured off a known good line for reference and compared to that.
On a known good line on the same gap as my largest break I was getting .8 ohm. After the fix I was getting 1.2. Not absolutely perfect, but far better than it making no connection and getting 51ohm.
Now the only thing that remains is to see how it holds up with tint. I know they will need to scrub the windshield, but I'll need to let them know to watch out for those lines. Hopefully the copper has bonded to the original contact points well enough, but you never know.
Updates when I find out.