LED gauge light installation
 greenteagod
Moderator
I'm not a huge fan of the color of the gauges in the civic but I can't stand those after market conversions where you end up with something that looks completely out of place at best and at worst looks like you feel Vatozone is the end all be all of automotive goodness.

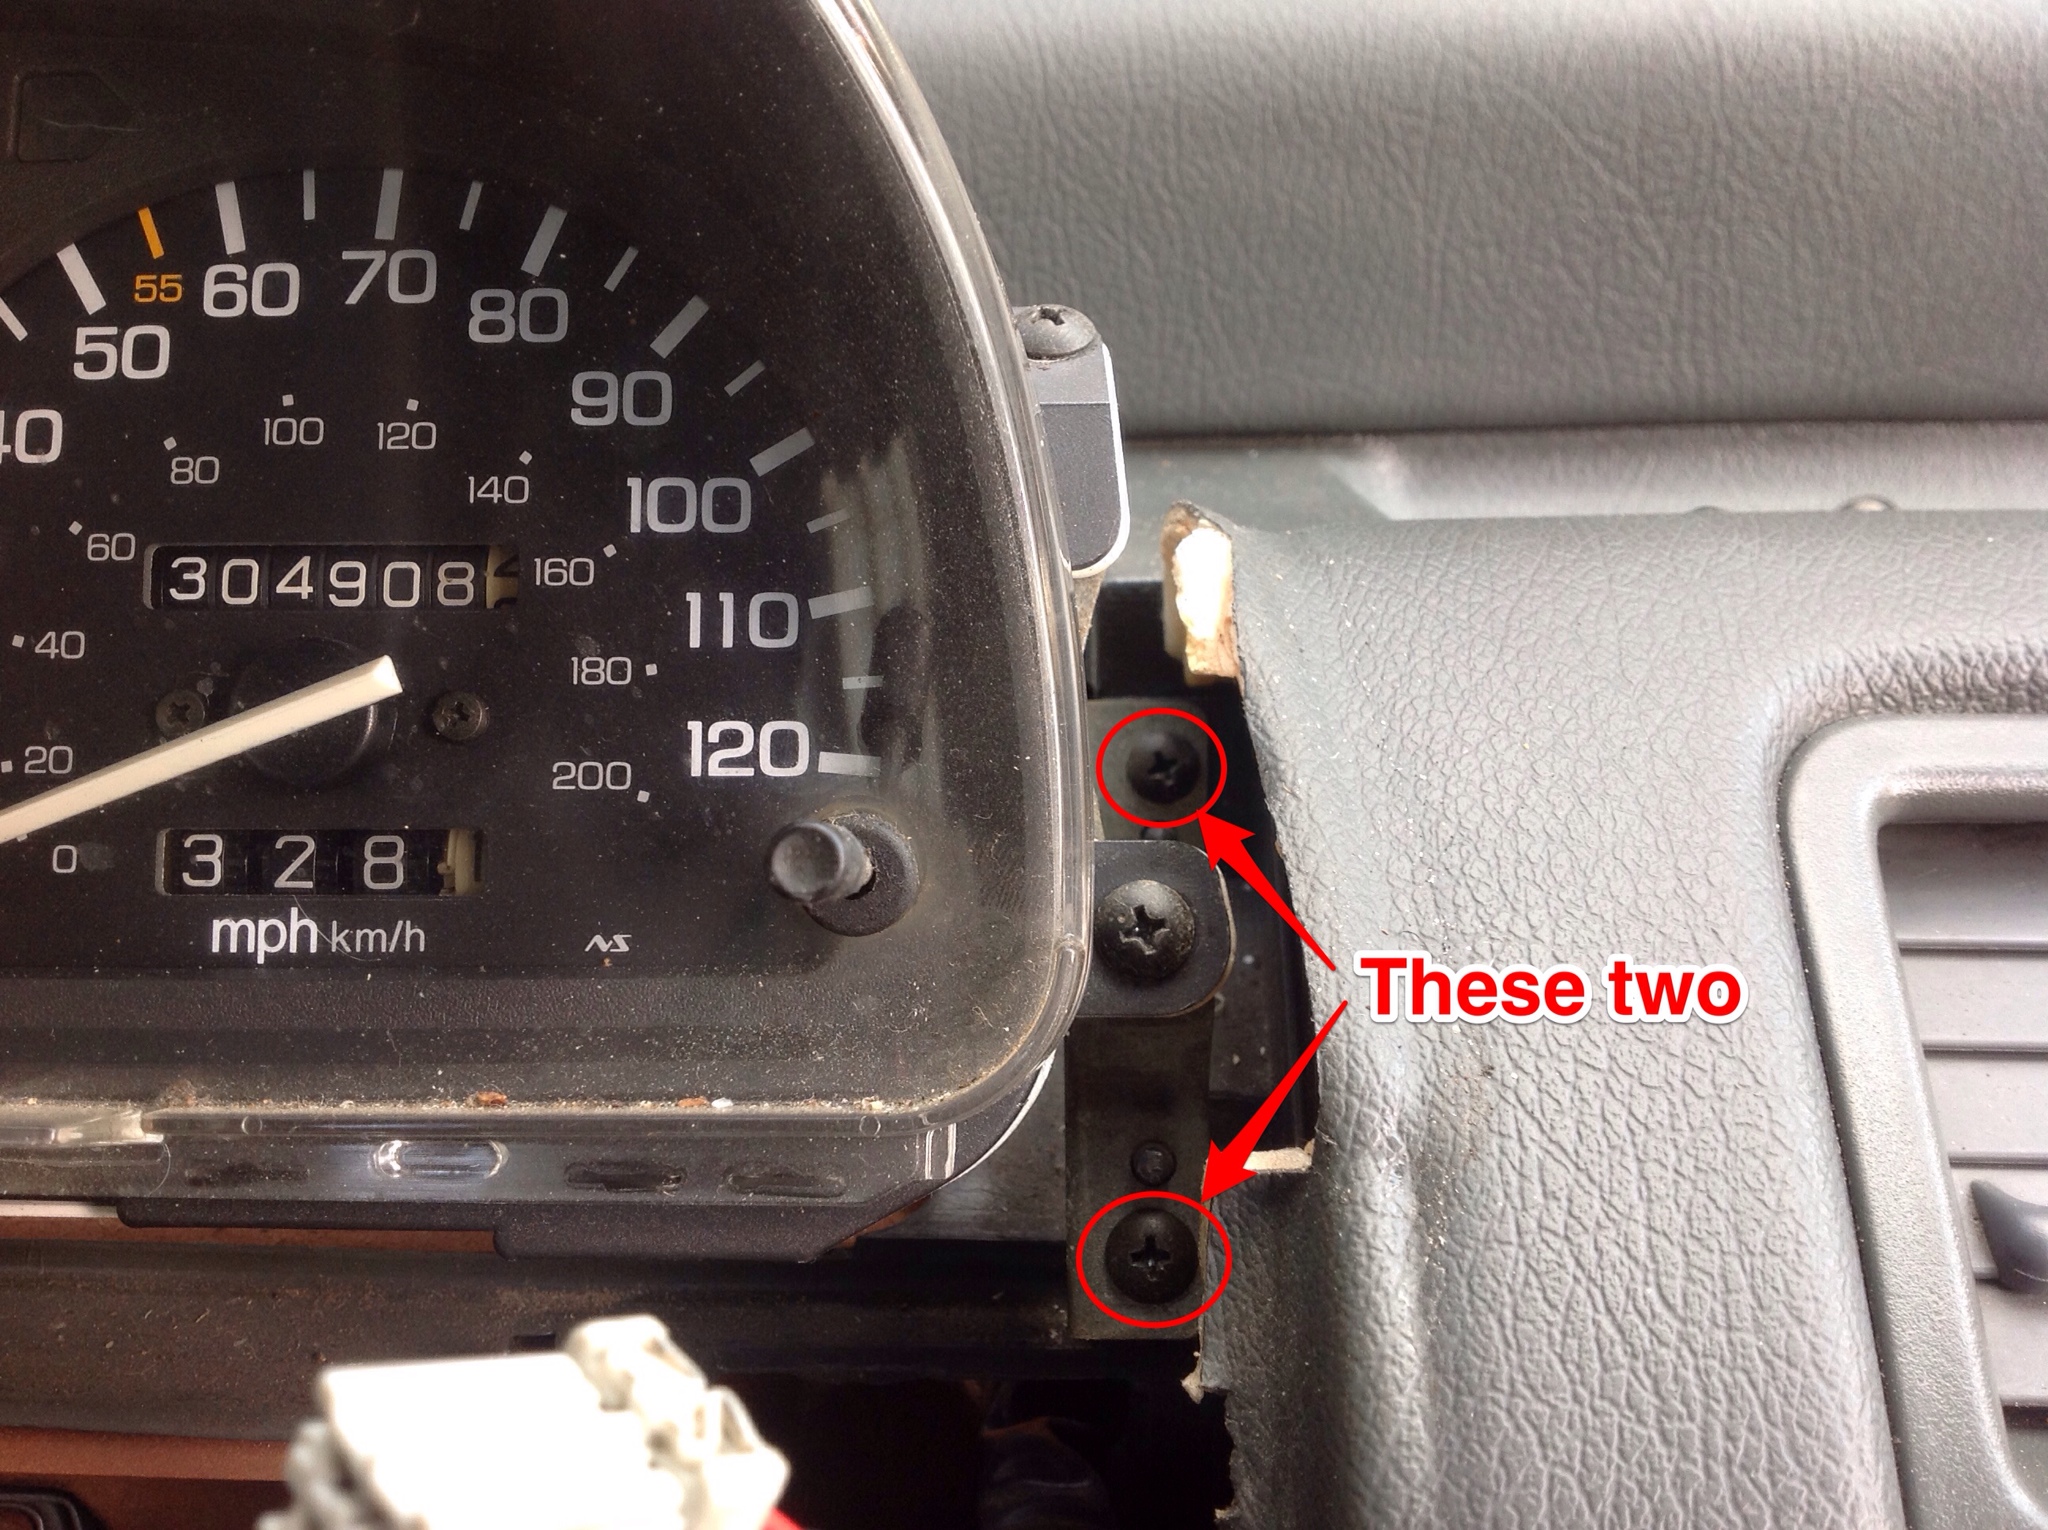
Another crappy pic but it's either this or through the windshield. Here are two of the four screws you need to remove to get the gauge bezel off. Super simple. The other two are visible underneath, these are on the top and under two pop off panels.

Then you can swing the whole thing out of your way just by disconnecting the emergency flasher. It's the easiest to disconnect as well.

Next up four screws to pull the gauges. It's the two that are set farther back. The closer screw and the one on top are for removing the clear plastic, which doesn't need done for this. Same location on the other side.

I'll try to get a clean windshield pic of this, but you pull a big plug at both sides and a clip holds the speedo in. Very simple to get all apart.

The five circled in the image below are size 74 bulbs. So use whatever 74 LED equivalent you see fit. I am going for red for best night vision on them. All of the rest if the bulbs are for the indicator lights which are all behind colored panels anyway and I'm not changing the paneling so those can stay.

This one happened to be burnt out on me as well so all the more reason to replace. Notice the bulb has a blue sleeve over it. This is because the gauges also have two smaller front lights that shine through a red panel on the under side of the top of the gauge housing. So they balance each other out a bit. No idea why this is done, I'm sure someone else knows though.

One thing to note the LEDs themselves are polarized, which means they only work when installed one way. So check your lights before screwing the gauge cluster back down as you're liable to have some that don't light up. I was only 2 for 5 the first time =(
All right. Gotta load a couple pics off the phone, just showing the LEDs themselves in the sockets, nothing that important. I did get some with the camera showing the difference.
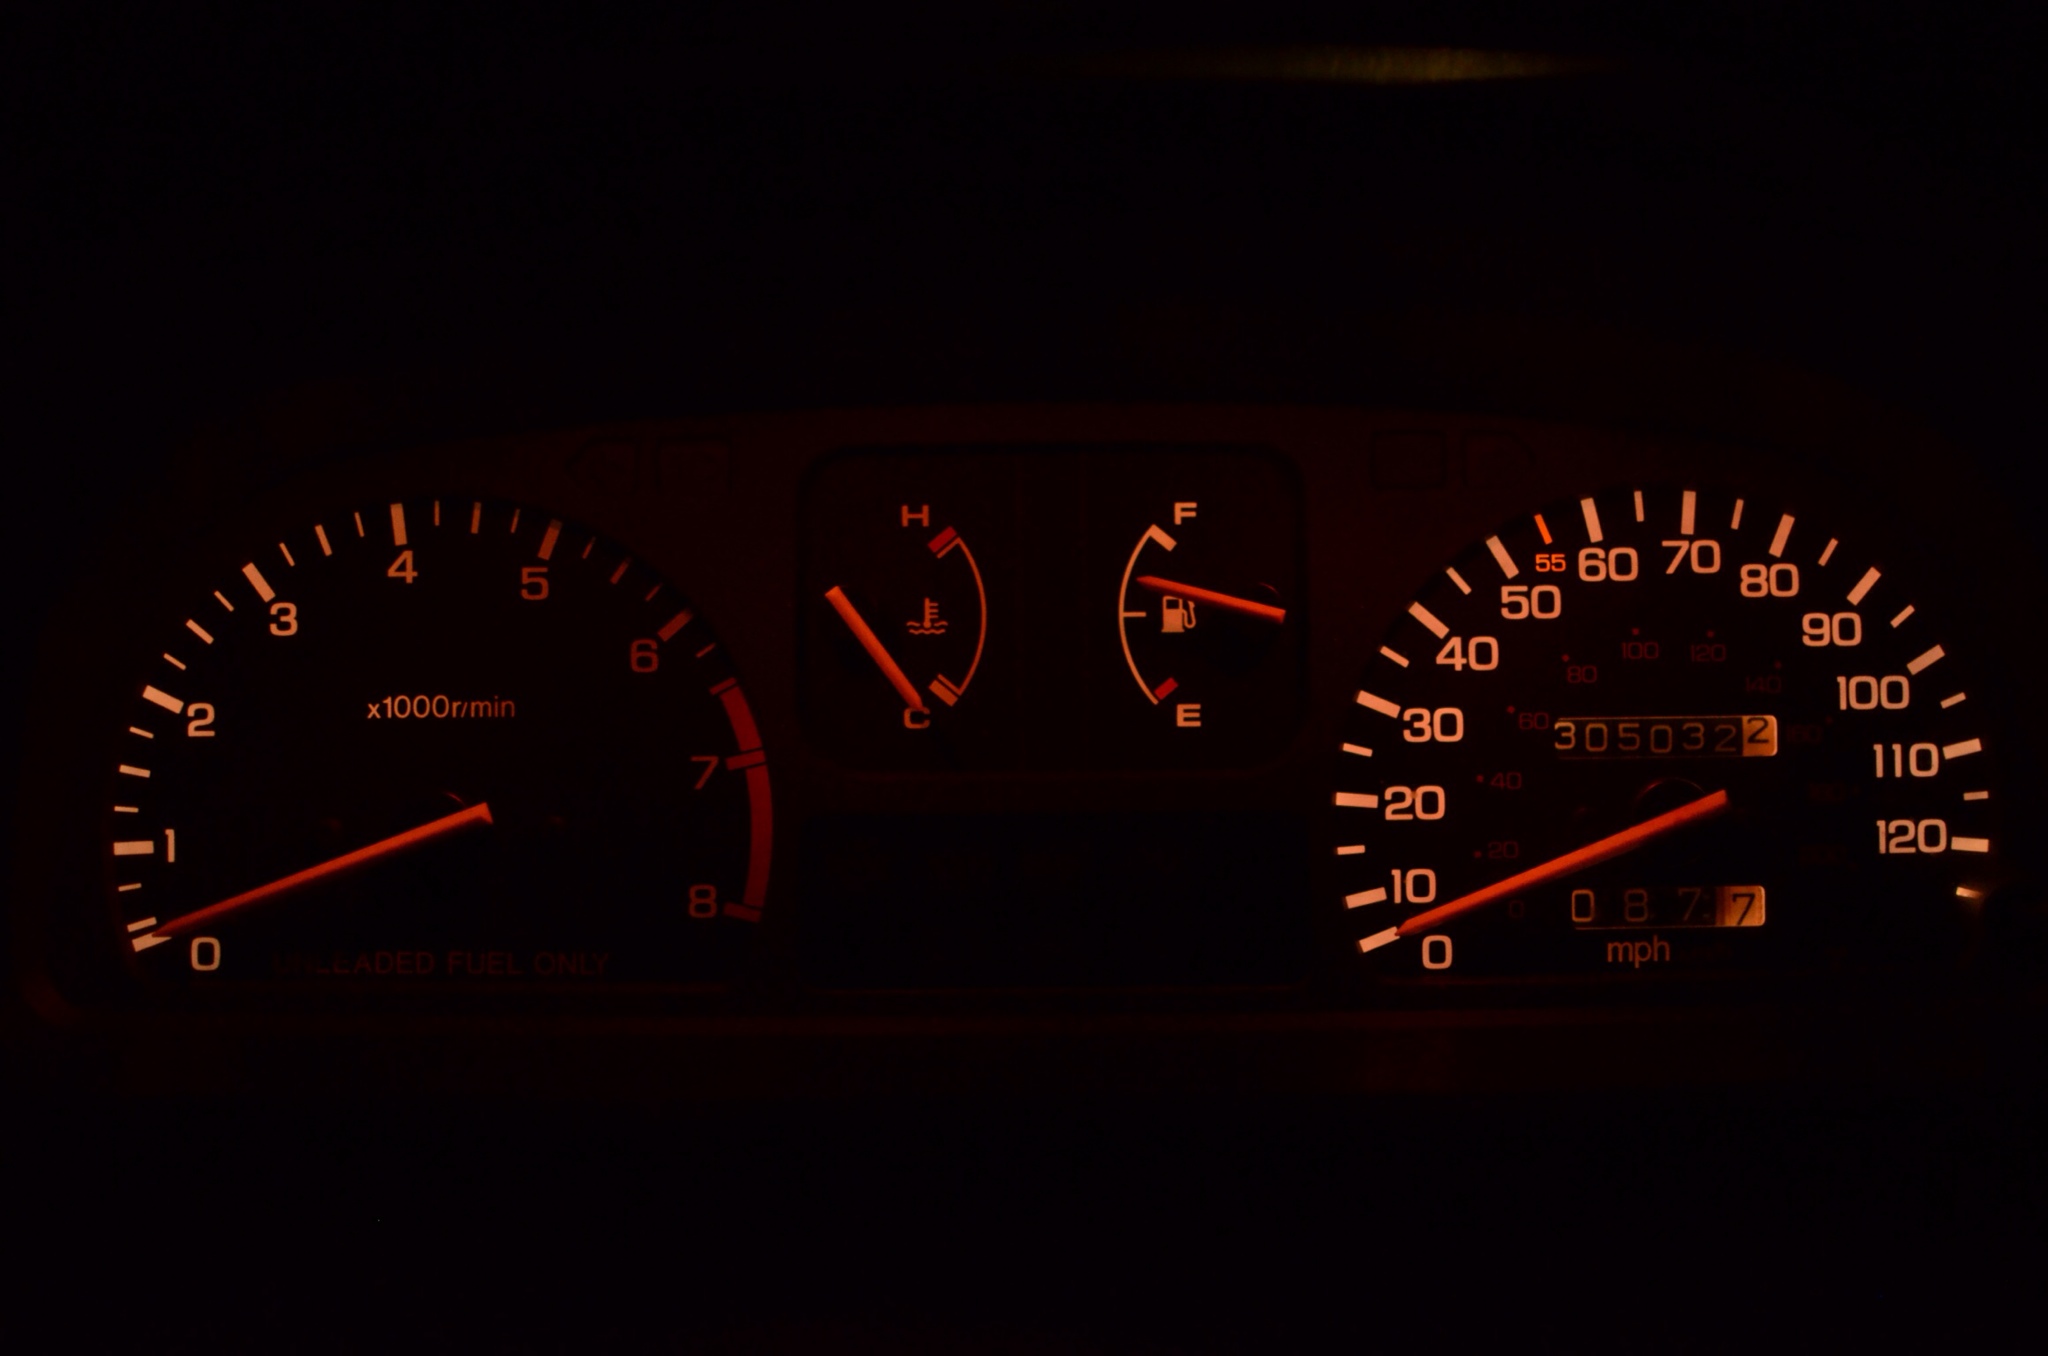
Intro pic is the before but I'll post it here again
Before

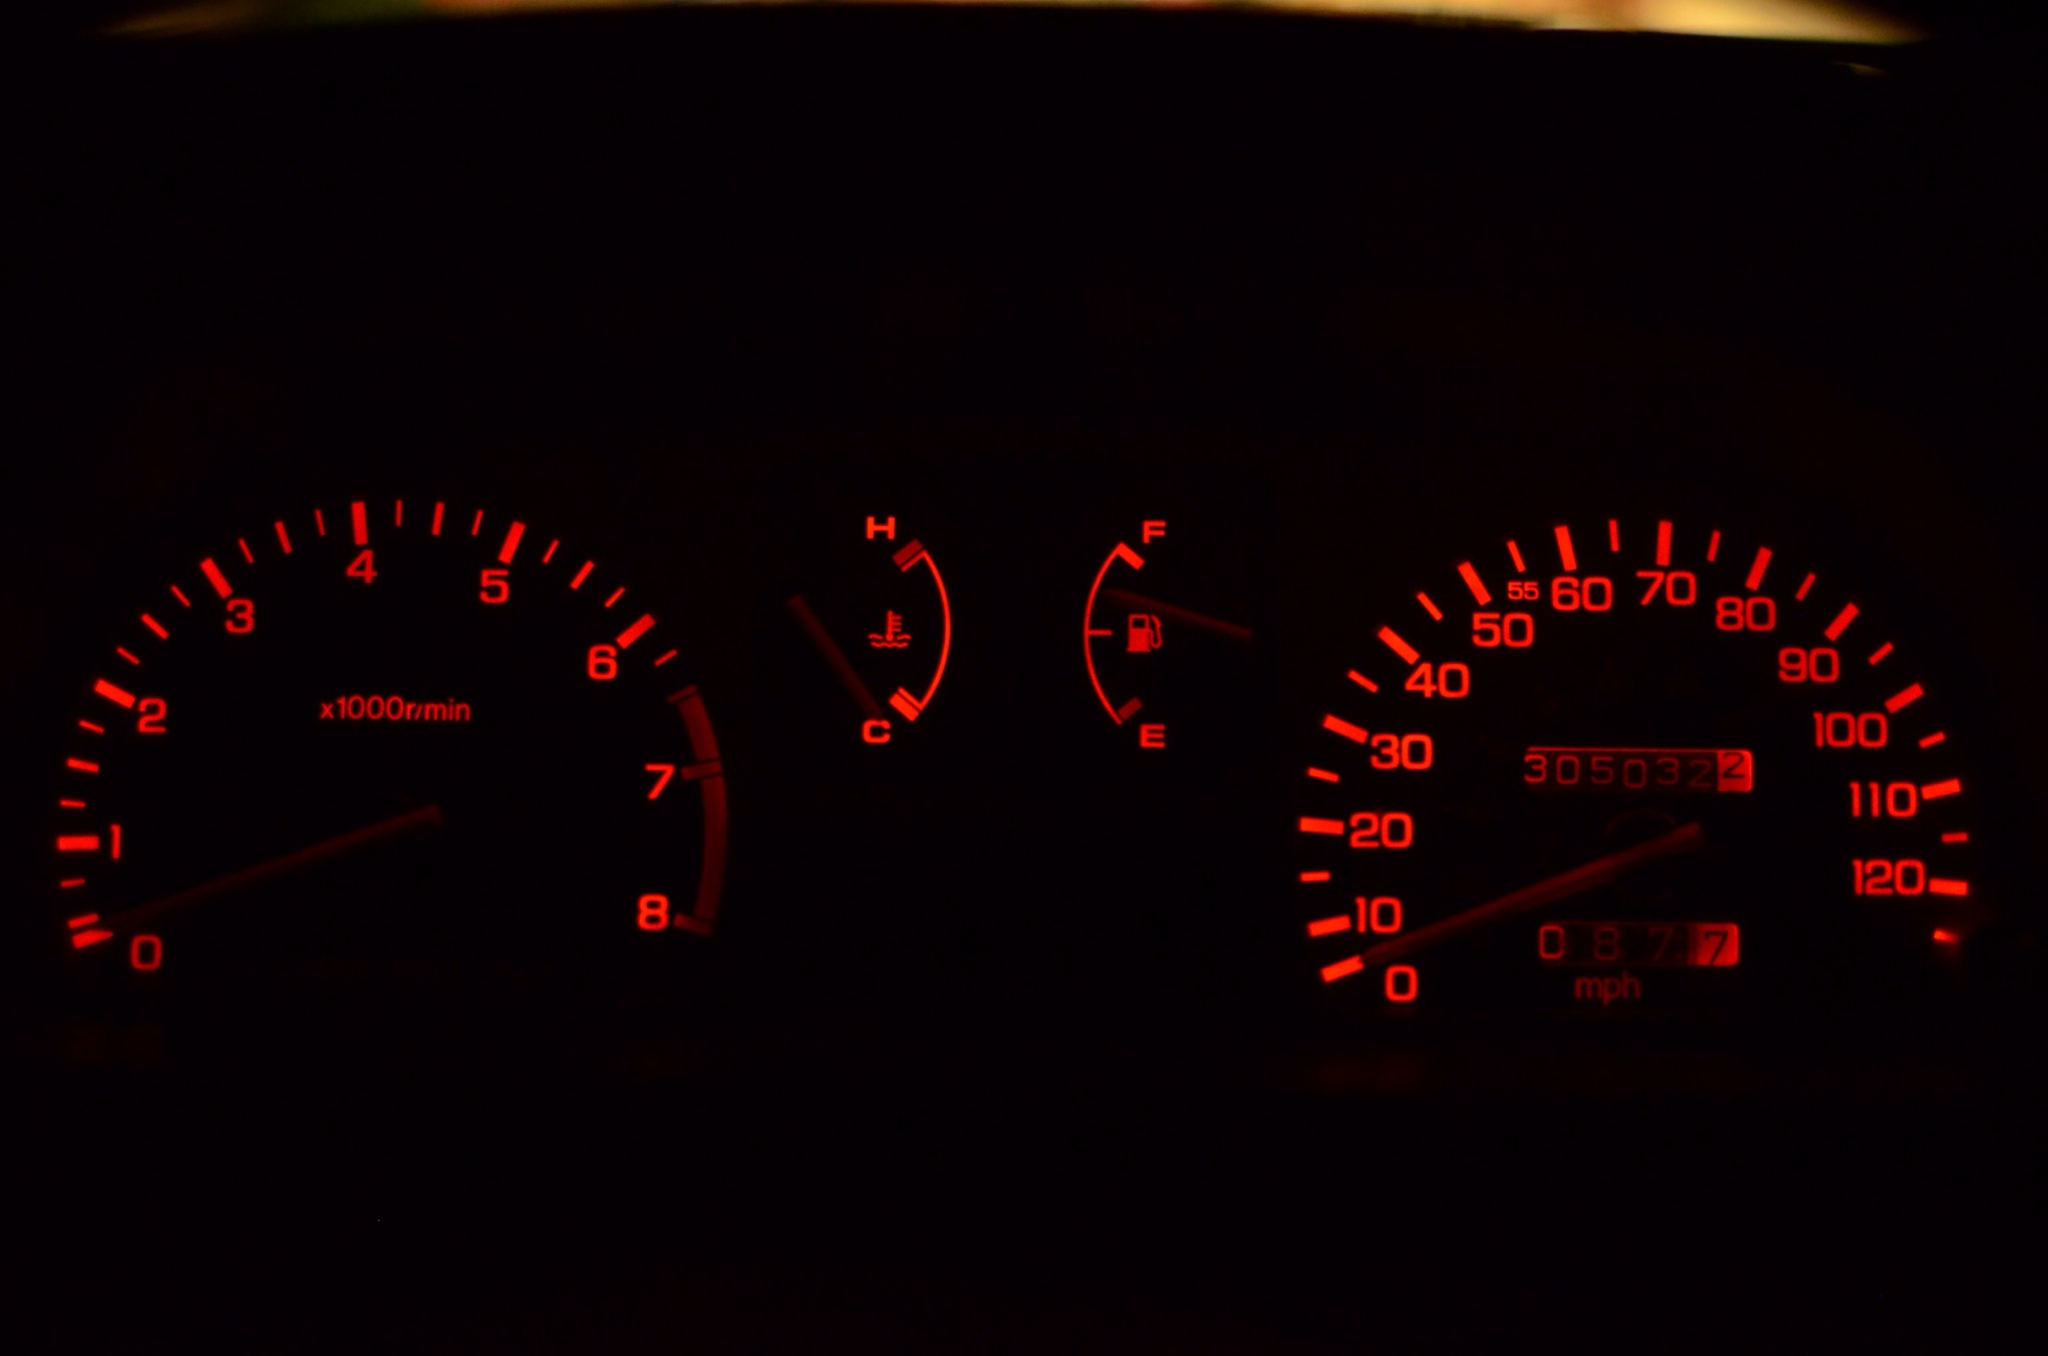
After

Sweeeeet.
Killa's white bulbs arrived today as well so as soon as he can get over here we're gonna install them. Pics likely in his build thread once we do so and I'll pos some here just to have another example.
The red bulbs installed are https://www.superbrightleds.com/moreinfo/boat-miniature-wedge-bulbs/74-led-bulb-3-smd-led-wide-angle-wedge-base/228/1071/
Killa's will be the same bulb but in Cool White.

Another crappy pic but it's either this or through the windshield. Here are two of the four screws you need to remove to get the gauge bezel off. Super simple. The other two are visible underneath, these are on the top and under two pop off panels.

Then you can swing the whole thing out of your way just by disconnecting the emergency flasher. It's the easiest to disconnect as well.

Next up four screws to pull the gauges. It's the two that are set farther back. The closer screw and the one on top are for removing the clear plastic, which doesn't need done for this. Same location on the other side.

I'll try to get a clean windshield pic of this, but you pull a big plug at both sides and a clip holds the speedo in. Very simple to get all apart.

The five circled in the image below are size 74 bulbs. So use whatever 74 LED equivalent you see fit. I am going for red for best night vision on them. All of the rest if the bulbs are for the indicator lights which are all behind colored panels anyway and I'm not changing the paneling so those can stay.

This one happened to be burnt out on me as well so all the more reason to replace. Notice the bulb has a blue sleeve over it. This is because the gauges also have two smaller front lights that shine through a red panel on the under side of the top of the gauge housing. So they balance each other out a bit. No idea why this is done, I'm sure someone else knows though.

One thing to note the LEDs themselves are polarized, which means they only work when installed one way. So check your lights before screwing the gauge cluster back down as you're liable to have some that don't light up. I was only 2 for 5 the first time =(
All right. Gotta load a couple pics off the phone, just showing the LEDs themselves in the sockets, nothing that important. I did get some with the camera showing the difference.
Intro pic is the before but I'll post it here again
Before

After

Sweeeeet.
Killa's white bulbs arrived today as well so as soon as he can get over here we're gonna install them. Pics likely in his build thread once we do so and I'll pos some here just to have another example.
The red bulbs installed are https://www.superbrightleds.com/moreinfo/boat-miniature-wedge-bulbs/74-led-bulb-3-smd-led-wide-angle-wedge-base/228/1071/
Killa's will be the same bulb but in Cool White.
Comments
Sweet, glad it looks good since that's what we're doing with Killa's
I personally loathe cool white with a passion, especially when it's coming out of headlights. So More power to you dudes =D I'm sure Killa will dig it, he's a twisted individual.
Here's a quick video I made of it.
http://www.ebay.com/itm/10x-T5-1LED-74-17-Dash-Board-Wedge-GREEN-18-37-70-Car-Gauge-Cluster-Light-Bulbs-/121496907633?pt=Motors_Car_Truck_Parts_Accessories&hash=item1c49c7af71&vxp=mtr
This one does have more LEDs on the array itself so that's going to account for some of the brightness, but the way these distribute light it's good having some light come out the sides too to carry it along the little plastic channels that they're using to light things up.
That said, at $4 for a pack if they suck it's not like you're gonna be out anything cept for a bit of time, and you can easily power the cluster up to see how it looks without having to fully reassemble everything.
As far as heater control goes, it's not going to look the best. That's a colored plastic and it's just using white bulbs behind it. I put reds in there to get the white letters red, but with the way that interacts with blue, basically at night you don't see the blue at all they sort of cancel each other out. Red and Green sort of do the same thing. Not sure how it will light up the blue. It does make the control a bit more difficult to identify. It'll work, and yes those are the same size bulbs so they'll fit. Can't make any claims on how it'll work. Just be warned those are fiddly ones to get to, you can get to them with the face still attached, it just takes some tweezers or needle nose pliers to twist out the socket and get at the bulb.
I'm very confused, or that's the strangest looking LED install on a gauge cluster I've seen yet.
It's just the pic, if you check that youtube clip I posted it's me fiddling with the dimmer switch. I had them dimmed all the way down when I took that first pic. With regard to that question though, they are illuminated by the top down lights which are these wee little bulbs. Those could be upgraded to LEDs as well.
I didn't because it looks how I want it to right now, but if you swapped those two out for some brighter LEDs you'd definitely get more light on the needles, though it might cast unwanted glare on the gauges. Like little spot lights due to it being a bit more directional.
91 auto RT 283k miles
When I got to the part of pulling the bulb holders, the plastic, both apart of the dash and holder, had become so brittle with age that I had to use super glue gel in the final install to make this work. Hopefully letting other high mileage car owners out there to be extra careful with the plastic!
Yeah and that brittleness can also come with territory as well. Is yours a colorado original or did it come from a hotter climate?