How to remove/install a radiator
well i figure this probably wasnt the easiest way to do this, but it got the job done, and saved me about $200 from getting it done elsewhere
Car:
1989 RT4WD civic wagon, automatic transmission
tools needed:
10mm wrench/ratchet/socket
pliers/vice grips
drain pan
first you'll need to remove the plastic covers underneath the car, there are 2 of them, one on each side. a few of the bolts are plastic, and a few of mine were messed up, thats why i needed the vice grips. also just to warn you, if its rained recently, you may get a face full of gross water.
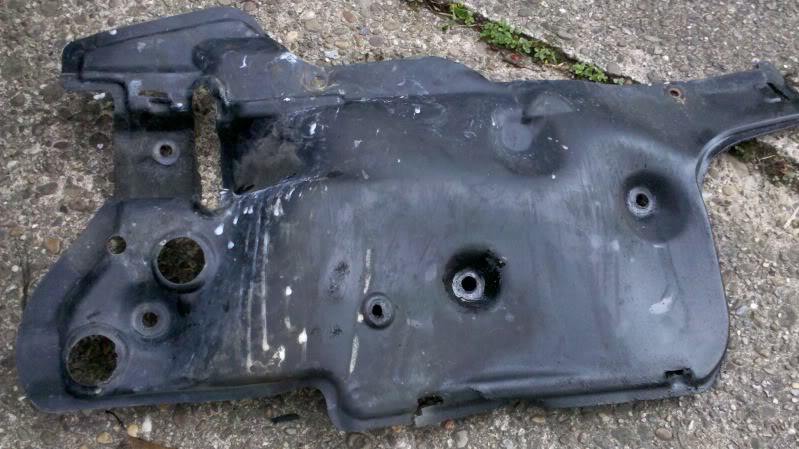
you can see here a general idea of where the bolts holding it up on.
once you got that out of the way, you can drain the coolant, just pop the cap off the radiator and unscrew this little thing on the passenger's side of the radiator
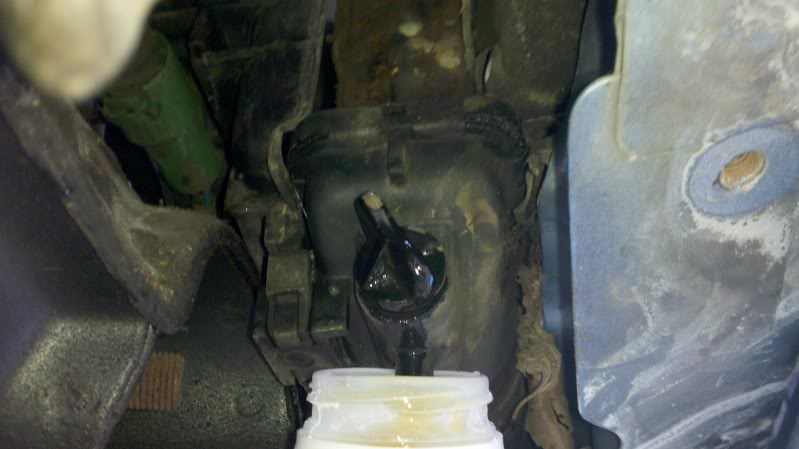
also while you're down there, unplug the green plug you see in the picture, its the connector for the fan, which you'll be taking out shortly.
next thing i ended up doing was basically unbolting everything up top, the 2 supports on the side (you can see one is off already), the shroud from the intake, and the bolts from the fan, basically everything there.
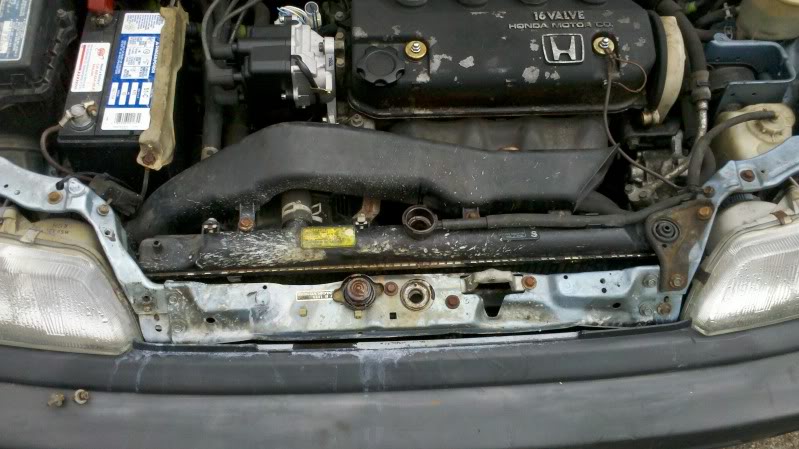
now its time to undo the top hose, hose from the overflow tank, and get that fan out.
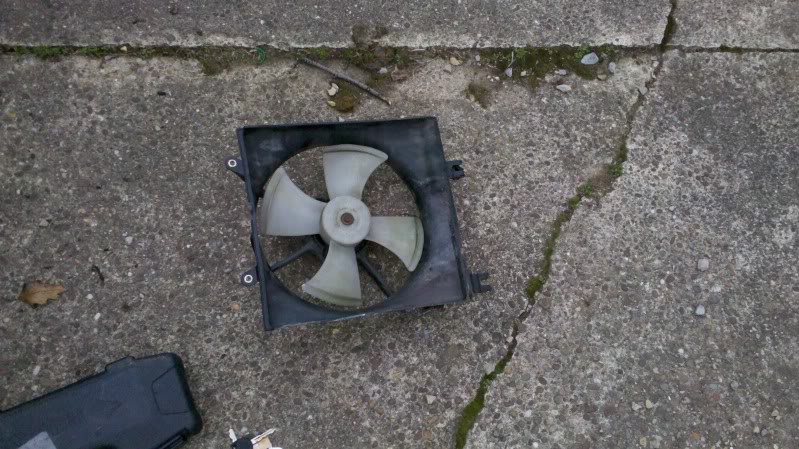
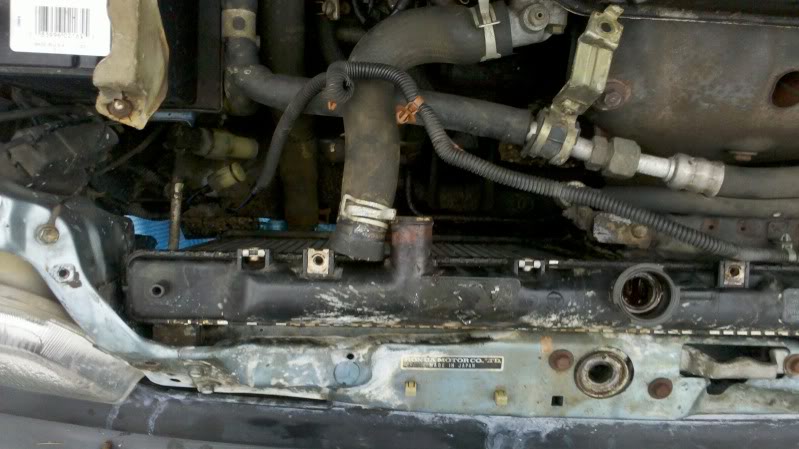
the fan is only held in by the two bolts up top, and press in kind of clips that with a little bit of muscle came out. in the second picture you can see the 2 orange clips that are used to keep the wires attached to the fan, and they are a real PITA to get out.
once the fan is out, you can disconnect the lower hose, and this fitting as well
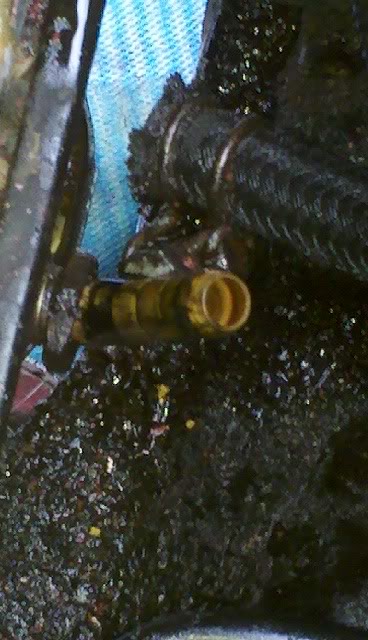
a word of warning though, the clamps i had on mine probably have never been touched before, and mine actually snapped on me, they're used on the lower hoses
next step was to get the other side opened up. this is probably what took me the longest time, since its really crammed in there.
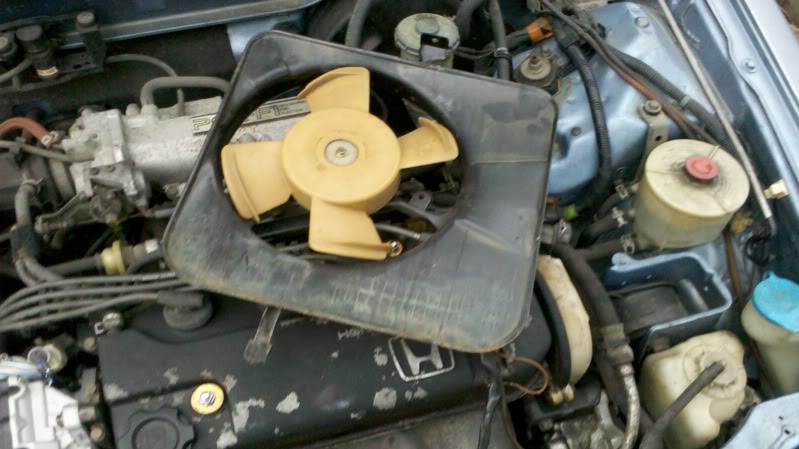
there are 2 electrical connectors on the back of it, and a bracket on the left side you need to take off, or in my case, i wasnt able to get the connector off, but since i was replacing the radiator anyways, just kind of bent some fins on it to snake it out. i believe it was only held on by a bolt and another press in fitting on the bottom.
there is another brass fitting on the bottom here on this side as well, but i found that since the rail going across the bottom cant be removed easily with the radiator still in the car, it was easier to just disconnect the upper hose, pull the radiator out, and swap it over outside of the car.
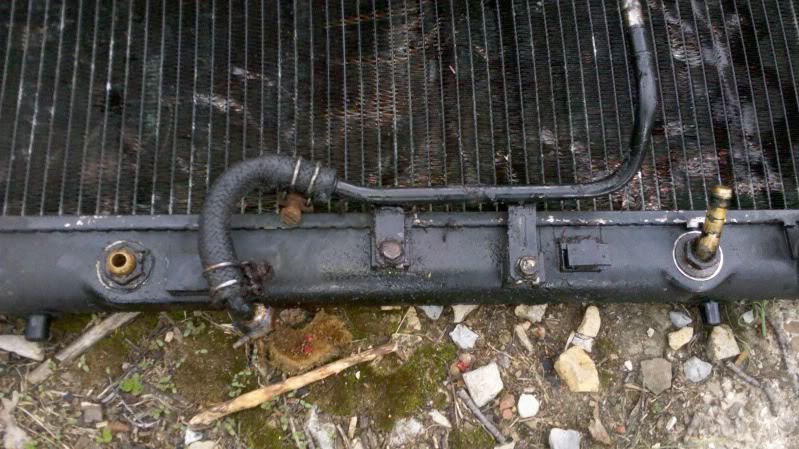
and there you go, putting the new one back in is essentially the same thing in reverse, then follow the proper fill procedure with coolant then you're set, and honestly took less than half the time it took for me to pull this out, just be warned that if you dont clamp everything down, be prepared to clean up a LOT of fluids when you start it up.
Car:
1989 RT4WD civic wagon, automatic transmission
tools needed:
10mm wrench/ratchet/socket
pliers/vice grips
drain pan
first you'll need to remove the plastic covers underneath the car, there are 2 of them, one on each side. a few of the bolts are plastic, and a few of mine were messed up, thats why i needed the vice grips. also just to warn you, if its rained recently, you may get a face full of gross water.

you can see here a general idea of where the bolts holding it up on.
once you got that out of the way, you can drain the coolant, just pop the cap off the radiator and unscrew this little thing on the passenger's side of the radiator

also while you're down there, unplug the green plug you see in the picture, its the connector for the fan, which you'll be taking out shortly.
next thing i ended up doing was basically unbolting everything up top, the 2 supports on the side (you can see one is off already), the shroud from the intake, and the bolts from the fan, basically everything there.

now its time to undo the top hose, hose from the overflow tank, and get that fan out.


the fan is only held in by the two bolts up top, and press in kind of clips that with a little bit of muscle came out. in the second picture you can see the 2 orange clips that are used to keep the wires attached to the fan, and they are a real PITA to get out.
once the fan is out, you can disconnect the lower hose, and this fitting as well

a word of warning though, the clamps i had on mine probably have never been touched before, and mine actually snapped on me, they're used on the lower hoses
next step was to get the other side opened up. this is probably what took me the longest time, since its really crammed in there.

there are 2 electrical connectors on the back of it, and a bracket on the left side you need to take off, or in my case, i wasnt able to get the connector off, but since i was replacing the radiator anyways, just kind of bent some fins on it to snake it out. i believe it was only held on by a bolt and another press in fitting on the bottom.
there is another brass fitting on the bottom here on this side as well, but i found that since the rail going across the bottom cant be removed easily with the radiator still in the car, it was easier to just disconnect the upper hose, pull the radiator out, and swap it over outside of the car.

and there you go, putting the new one back in is essentially the same thing in reverse, then follow the proper fill procedure with coolant then you're set, and honestly took less than half the time it took for me to pull this out, just be warned that if you dont clamp everything down, be prepared to clean up a LOT of fluids when you start it up.
Comments