Alternator Installation
 greenteagod
Moderator
greenteagod
Moderator
So the old alternator was giving up the ghost. Flickering battery light when coming to a stop and a horrendous noise that sounded of a chorus comprised of a thousand strangled hamsters.

So with the alternator belt being the one closest to the engine (save for the timing belt) it's a good idea to give all three belts a good inspection and replace them as needed since they'll all be off the vehicle. I'd not replaced mine yet so with no documentation on previous work done, replaced they will be.
First things first, disconnect the positive from the battery. As I had just installed the and fuse I was able to just disconnect at the fuse and not have to deal with resetting the clock and radio.
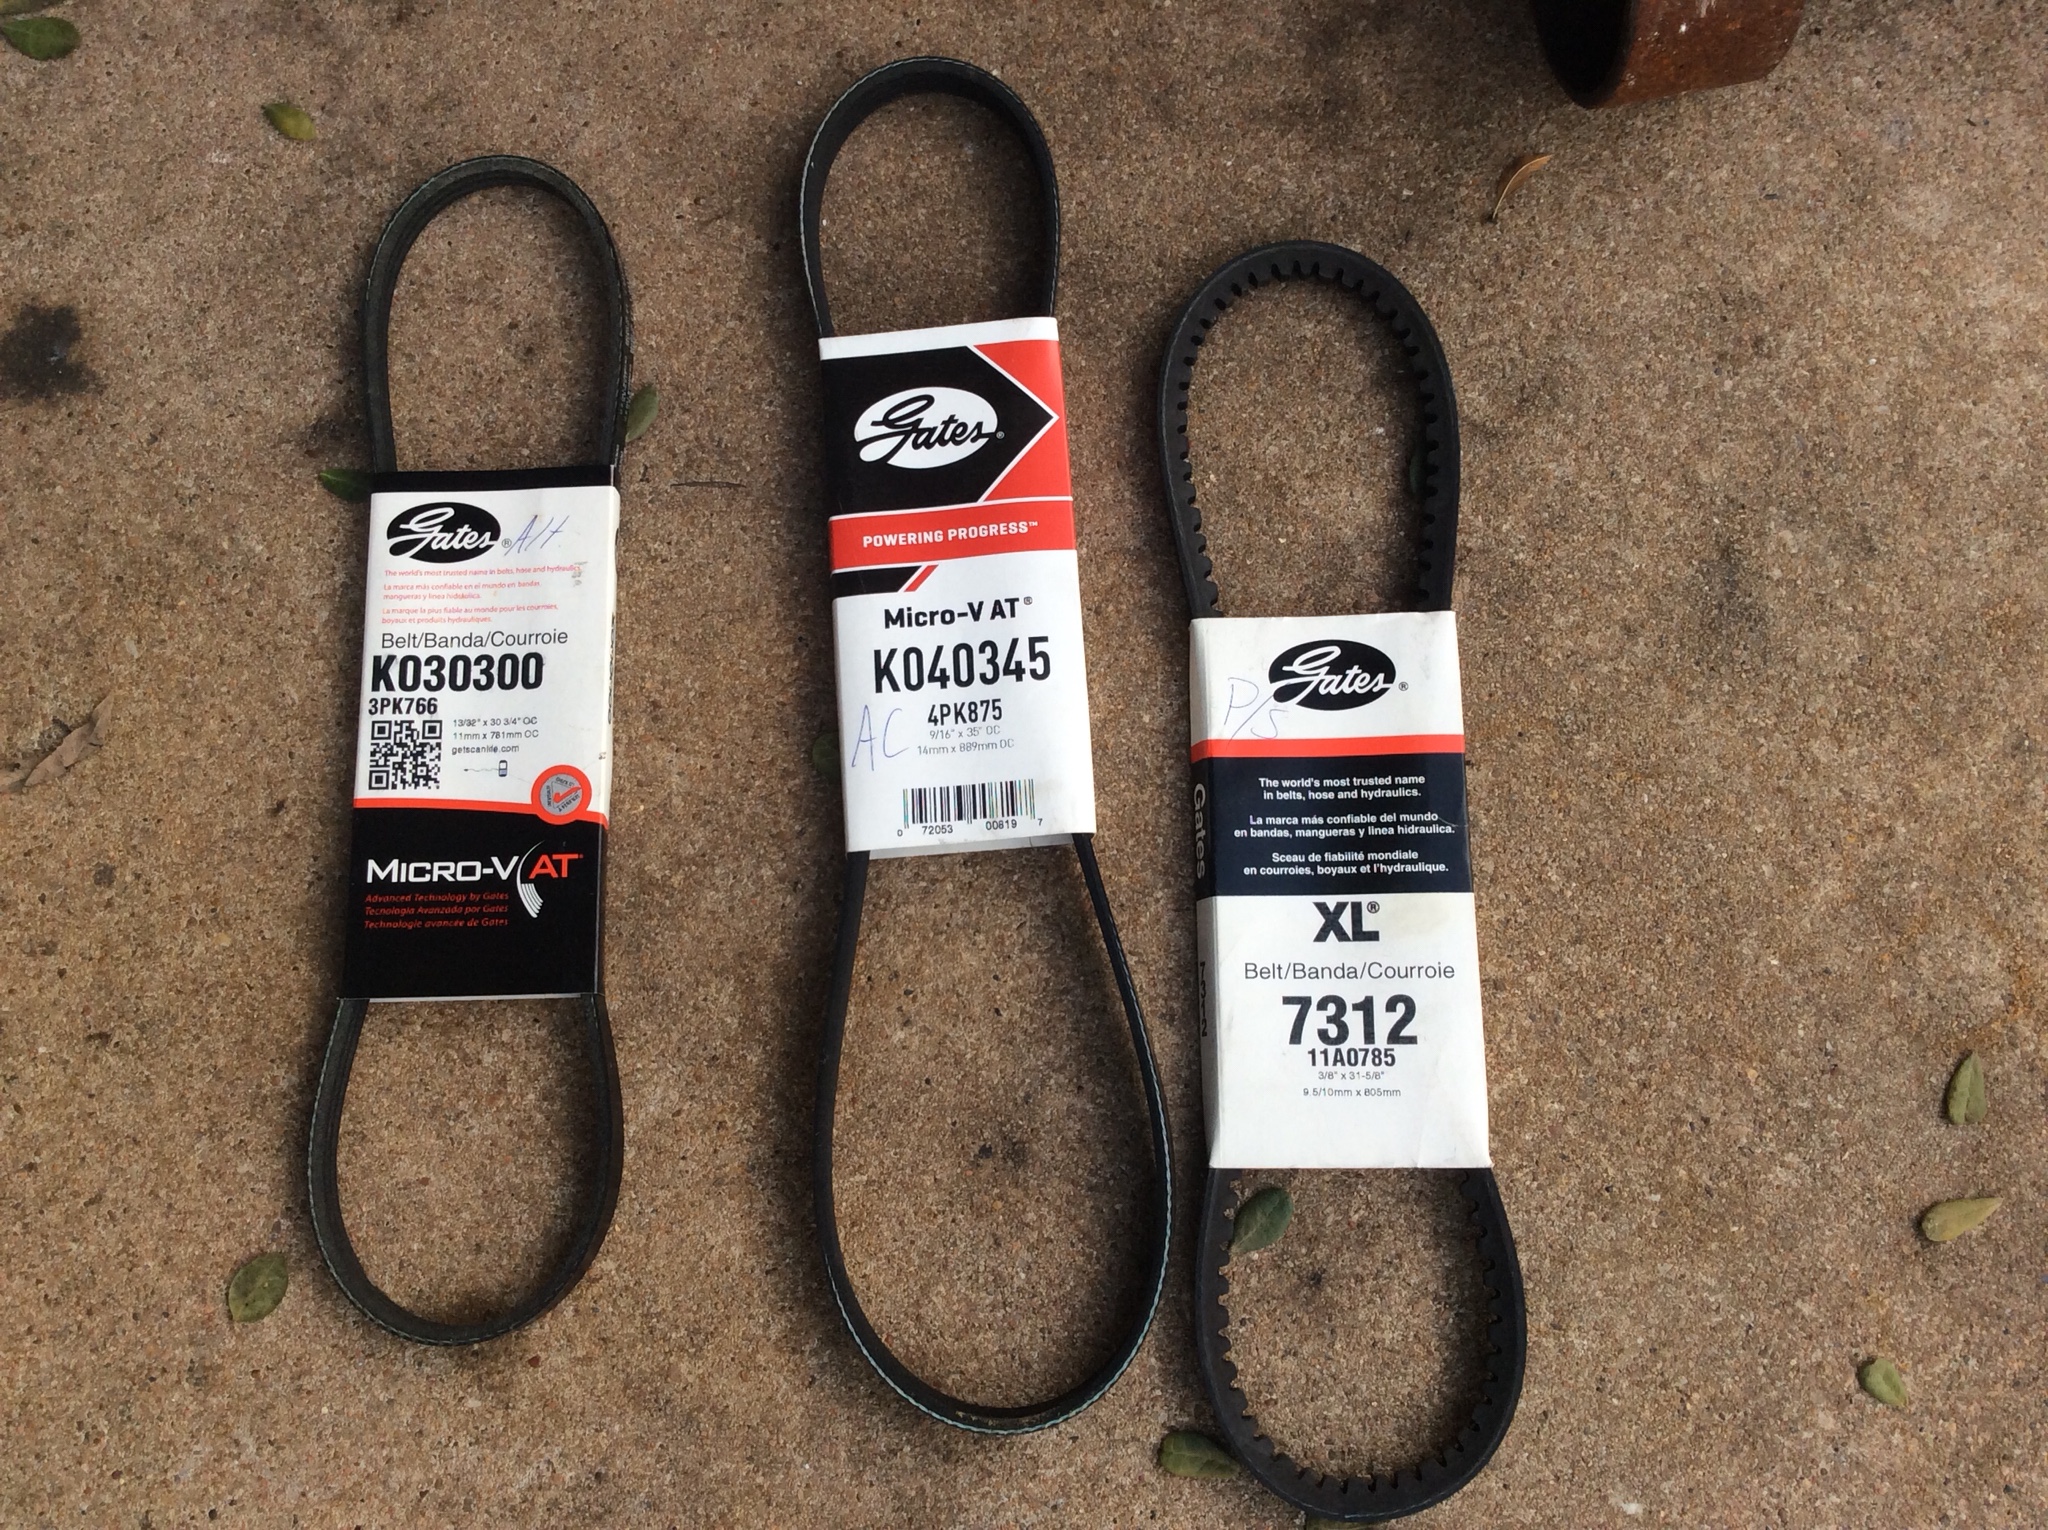
These are the three you will need, just for reference. Also you'll need a 10, 12, 14mm wrench, ratcheting is beneficial here. You will also need a 10mm socket with an extension to get at the a/c tensioner.
Starting furthest out with the power steering pump. Loosen the adjustment bolt below it.
Then you loosen this bolt and it takes the tension off the power steering belt.
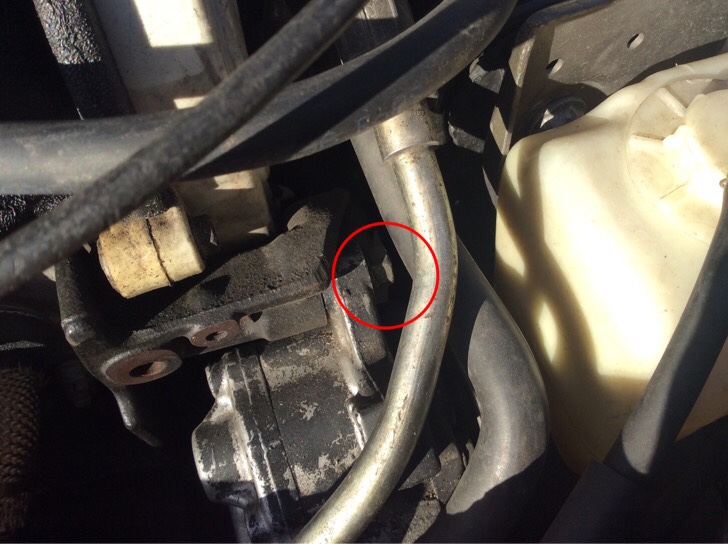
Next up, loosen the bolt on the a/c tensioner.
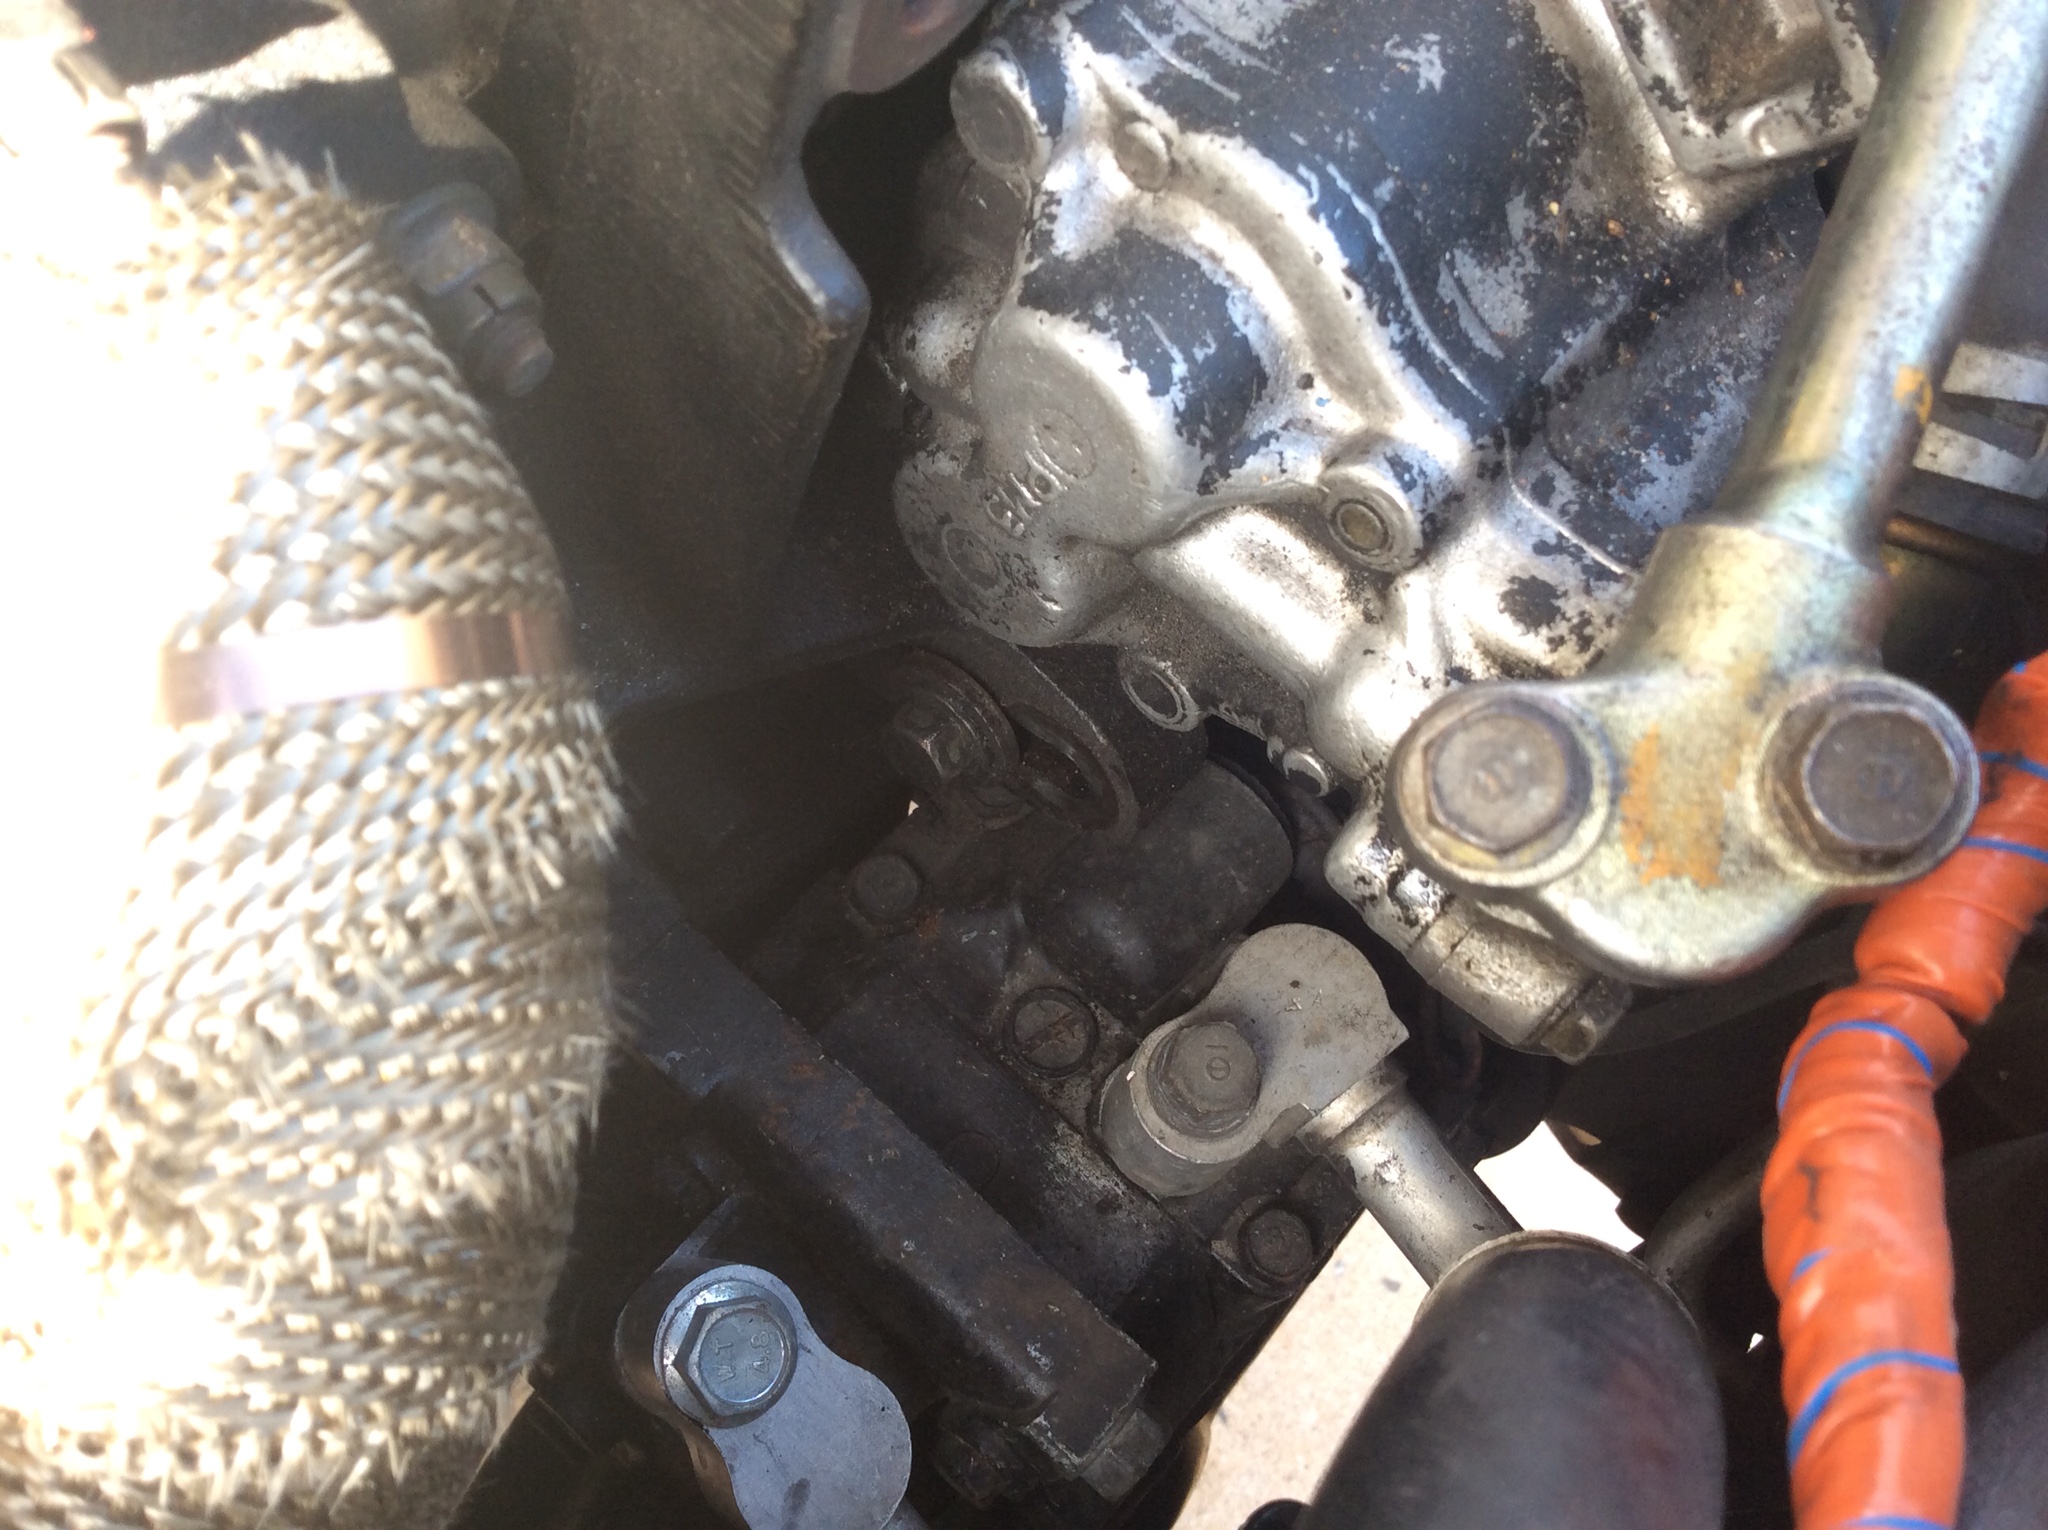
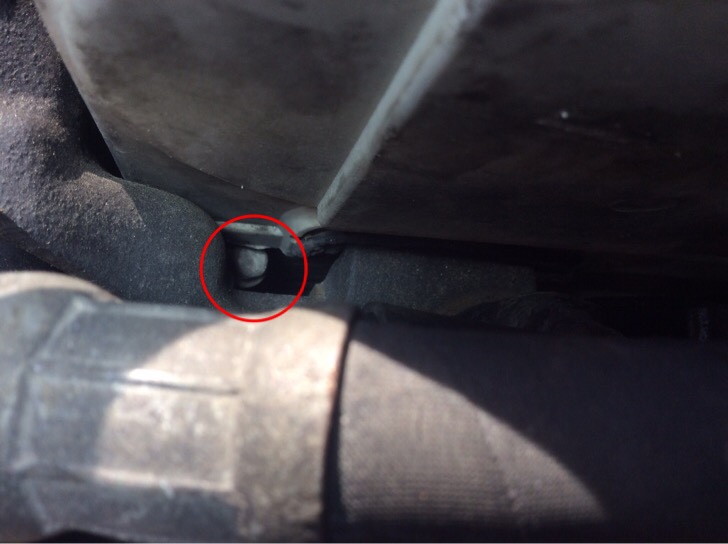
Then loosen the adjustment bolt, it's a little hidden, but there is a gap that allows you to get at it and the timing cover flexes enough to move out of the way. Sorry for the lack of focus, it's was hard to get that shot with the iPad in one hand and a flashlight in the other to get the bolt lit.
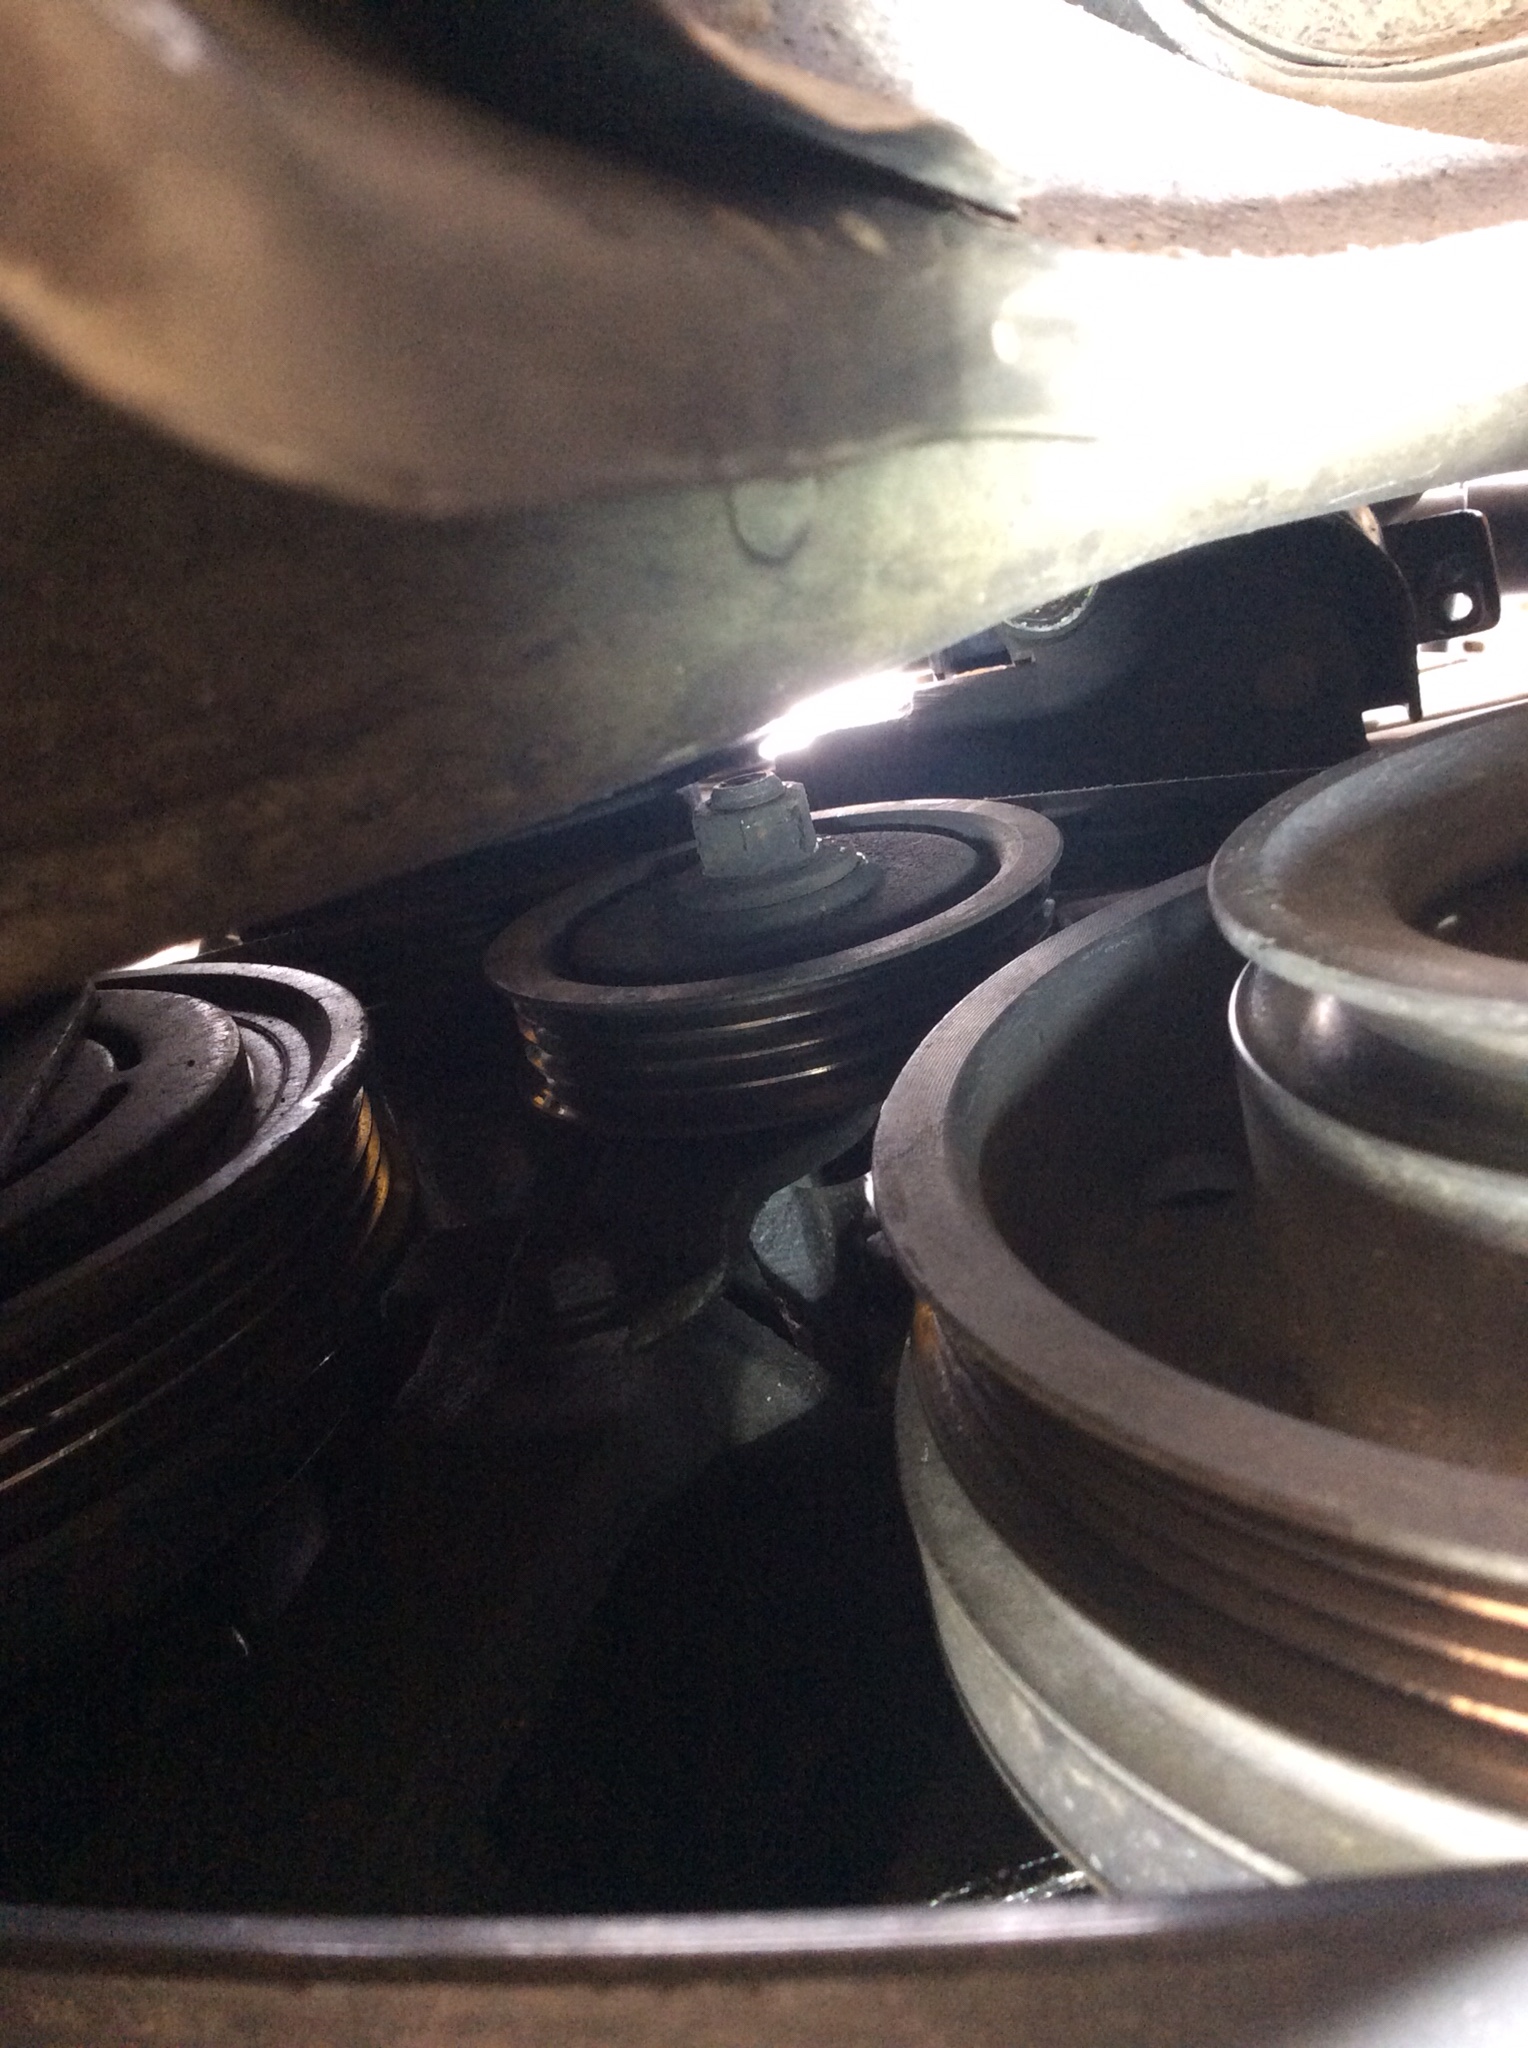
Once that is done the belt pops off, and then we are left with the alternator to contend with.
First thing here will be removing the adjustment bolt entirely. In the future, I may replace the whole bracket assembly with a heim style adjuster, still debating that.
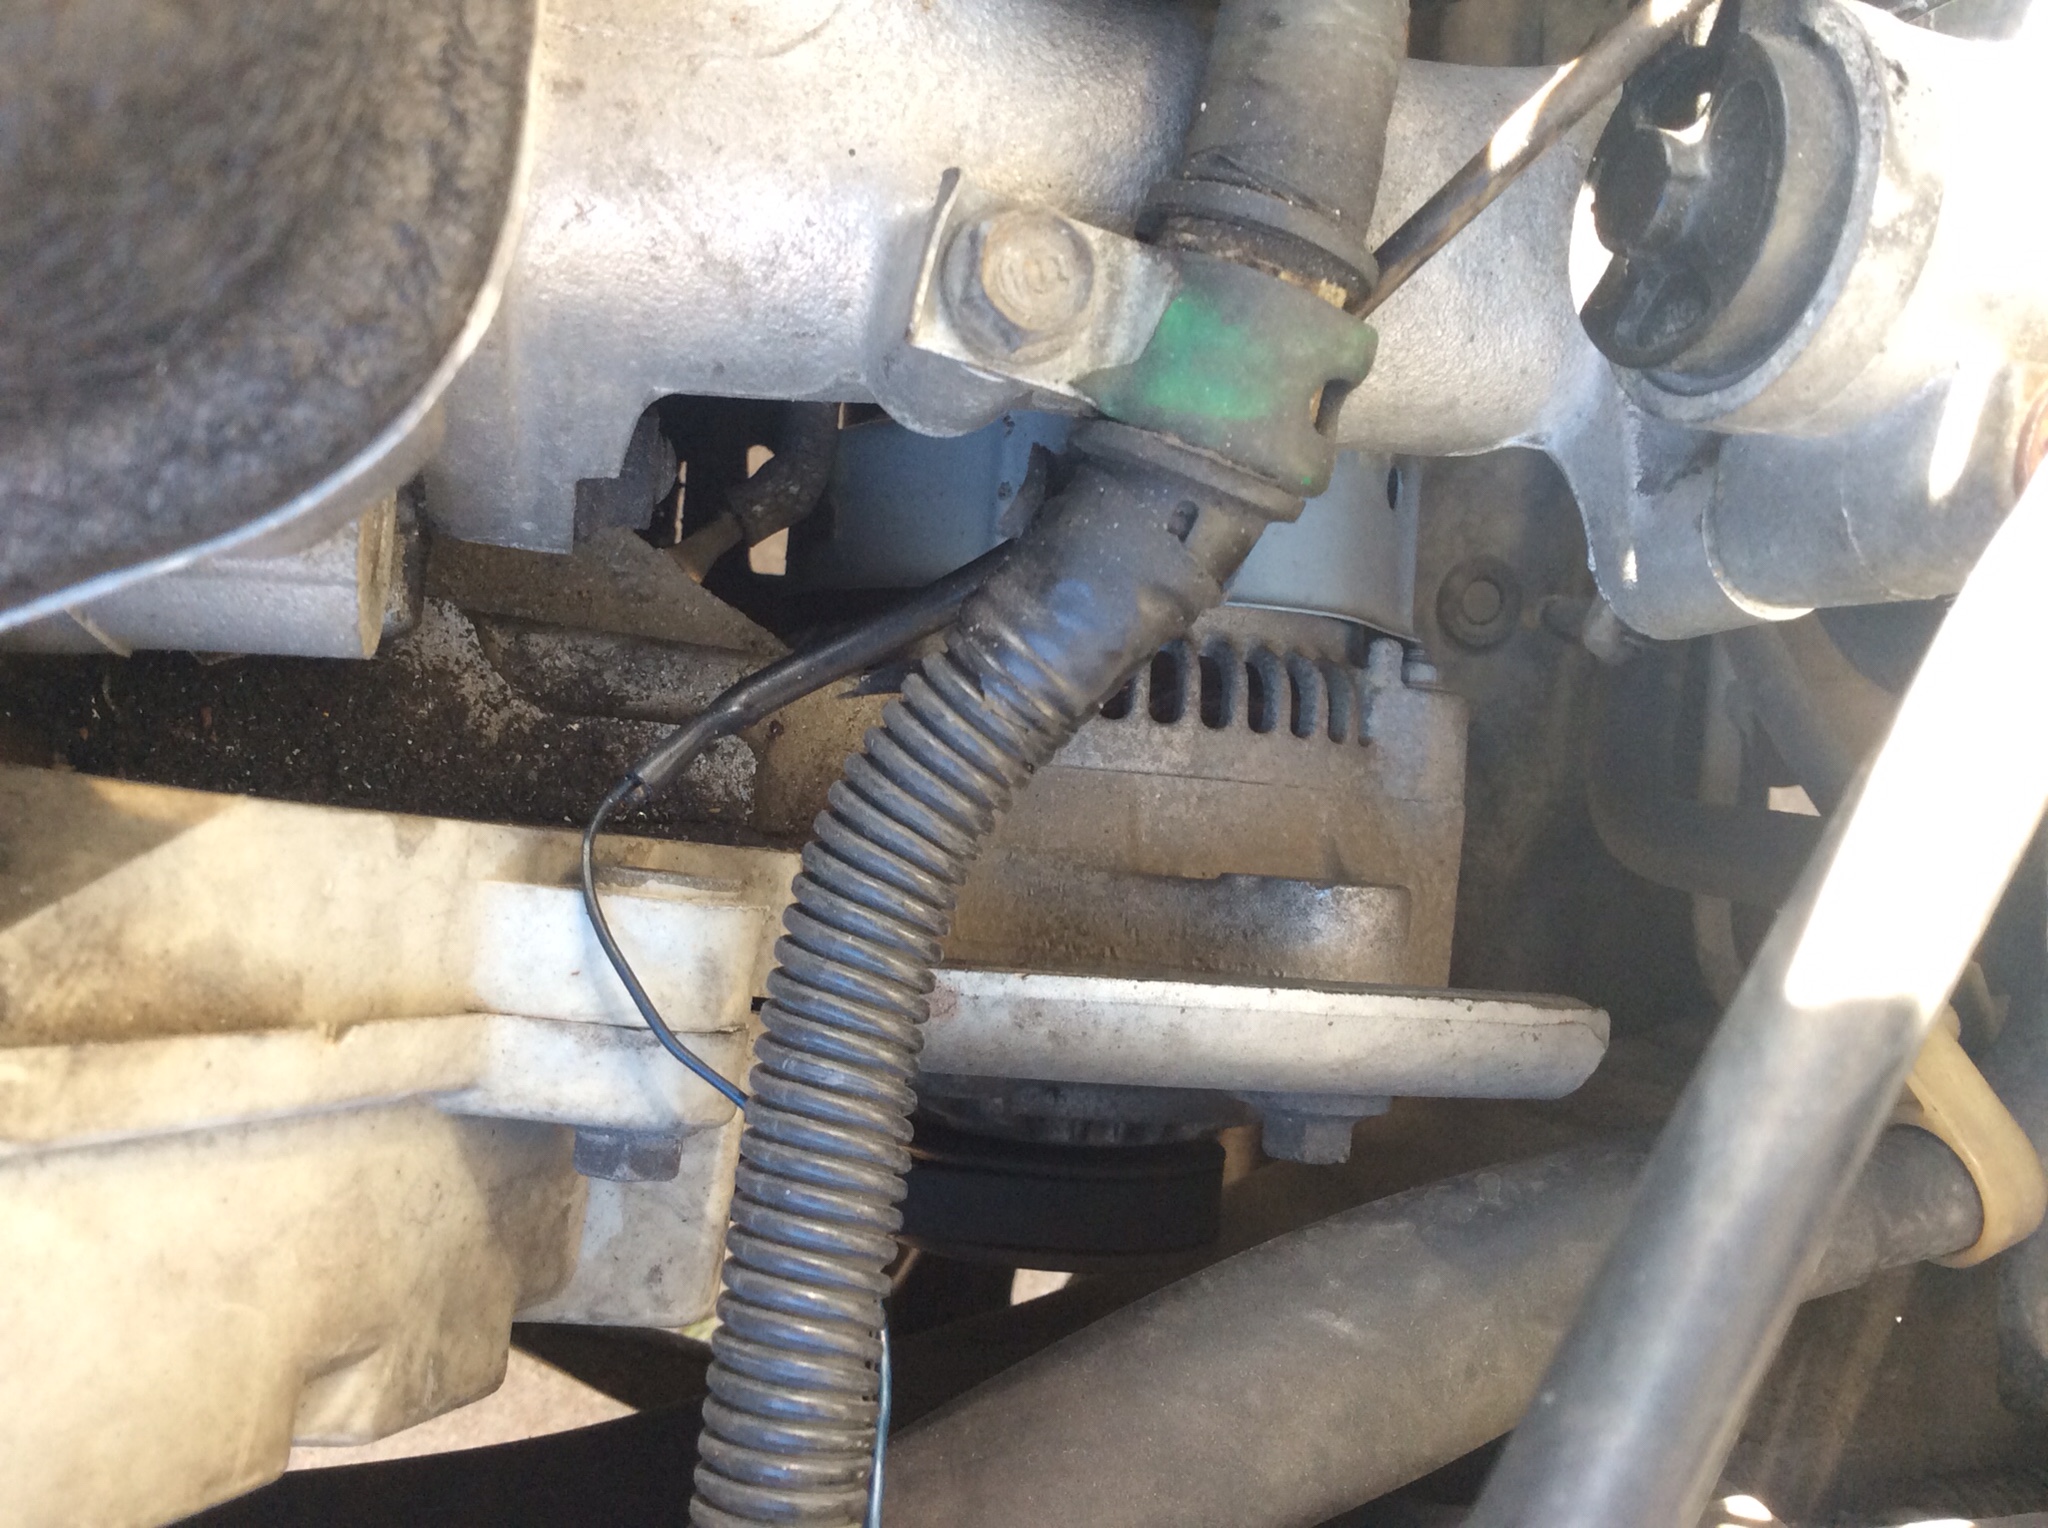
Then we remove the 14mm nut from the back of the pivot rod and free up the alternator itself. I didn't take pictures of it, but undo the power wire from the alternator with the 10mm nut on it, and of course unplug the big green plug from the back of the alternator.
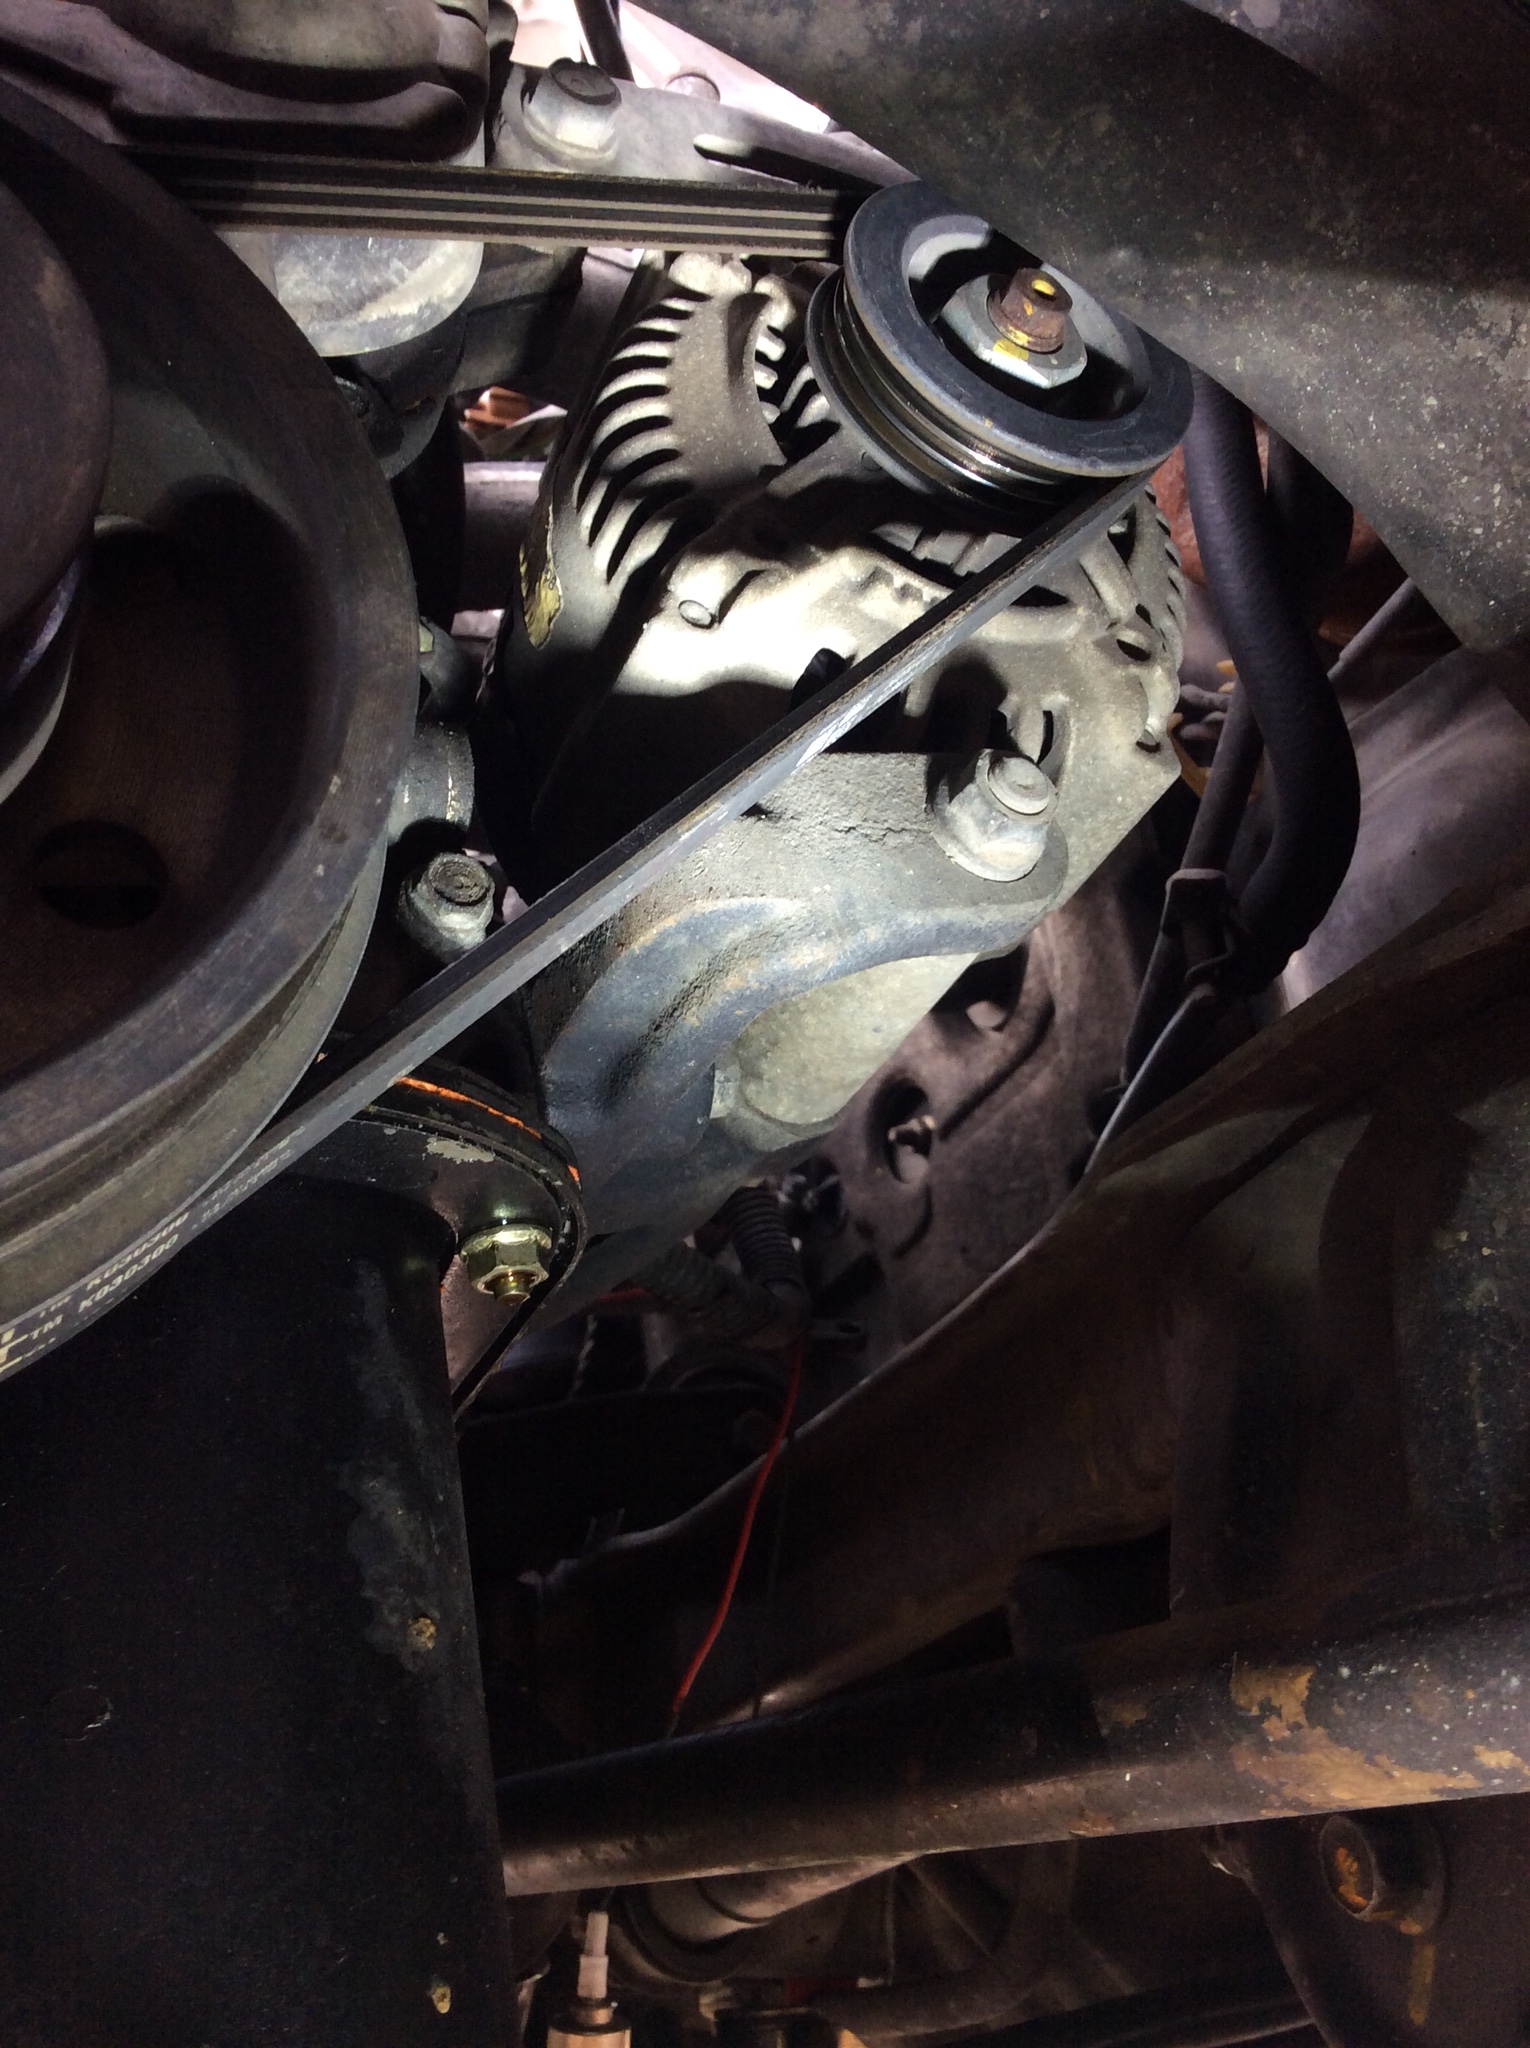
With the alternator free there are a few ways to jenga the damn thing out of there. My first attempt I turned the alternator like so.
I then turned the wheels all the way to the left to give me a bit more clearance, and it dropped on out. I'll be damned through if it would go back in with as much ease though, so on to my recommended method. If someone has a better way, please chime in with it.
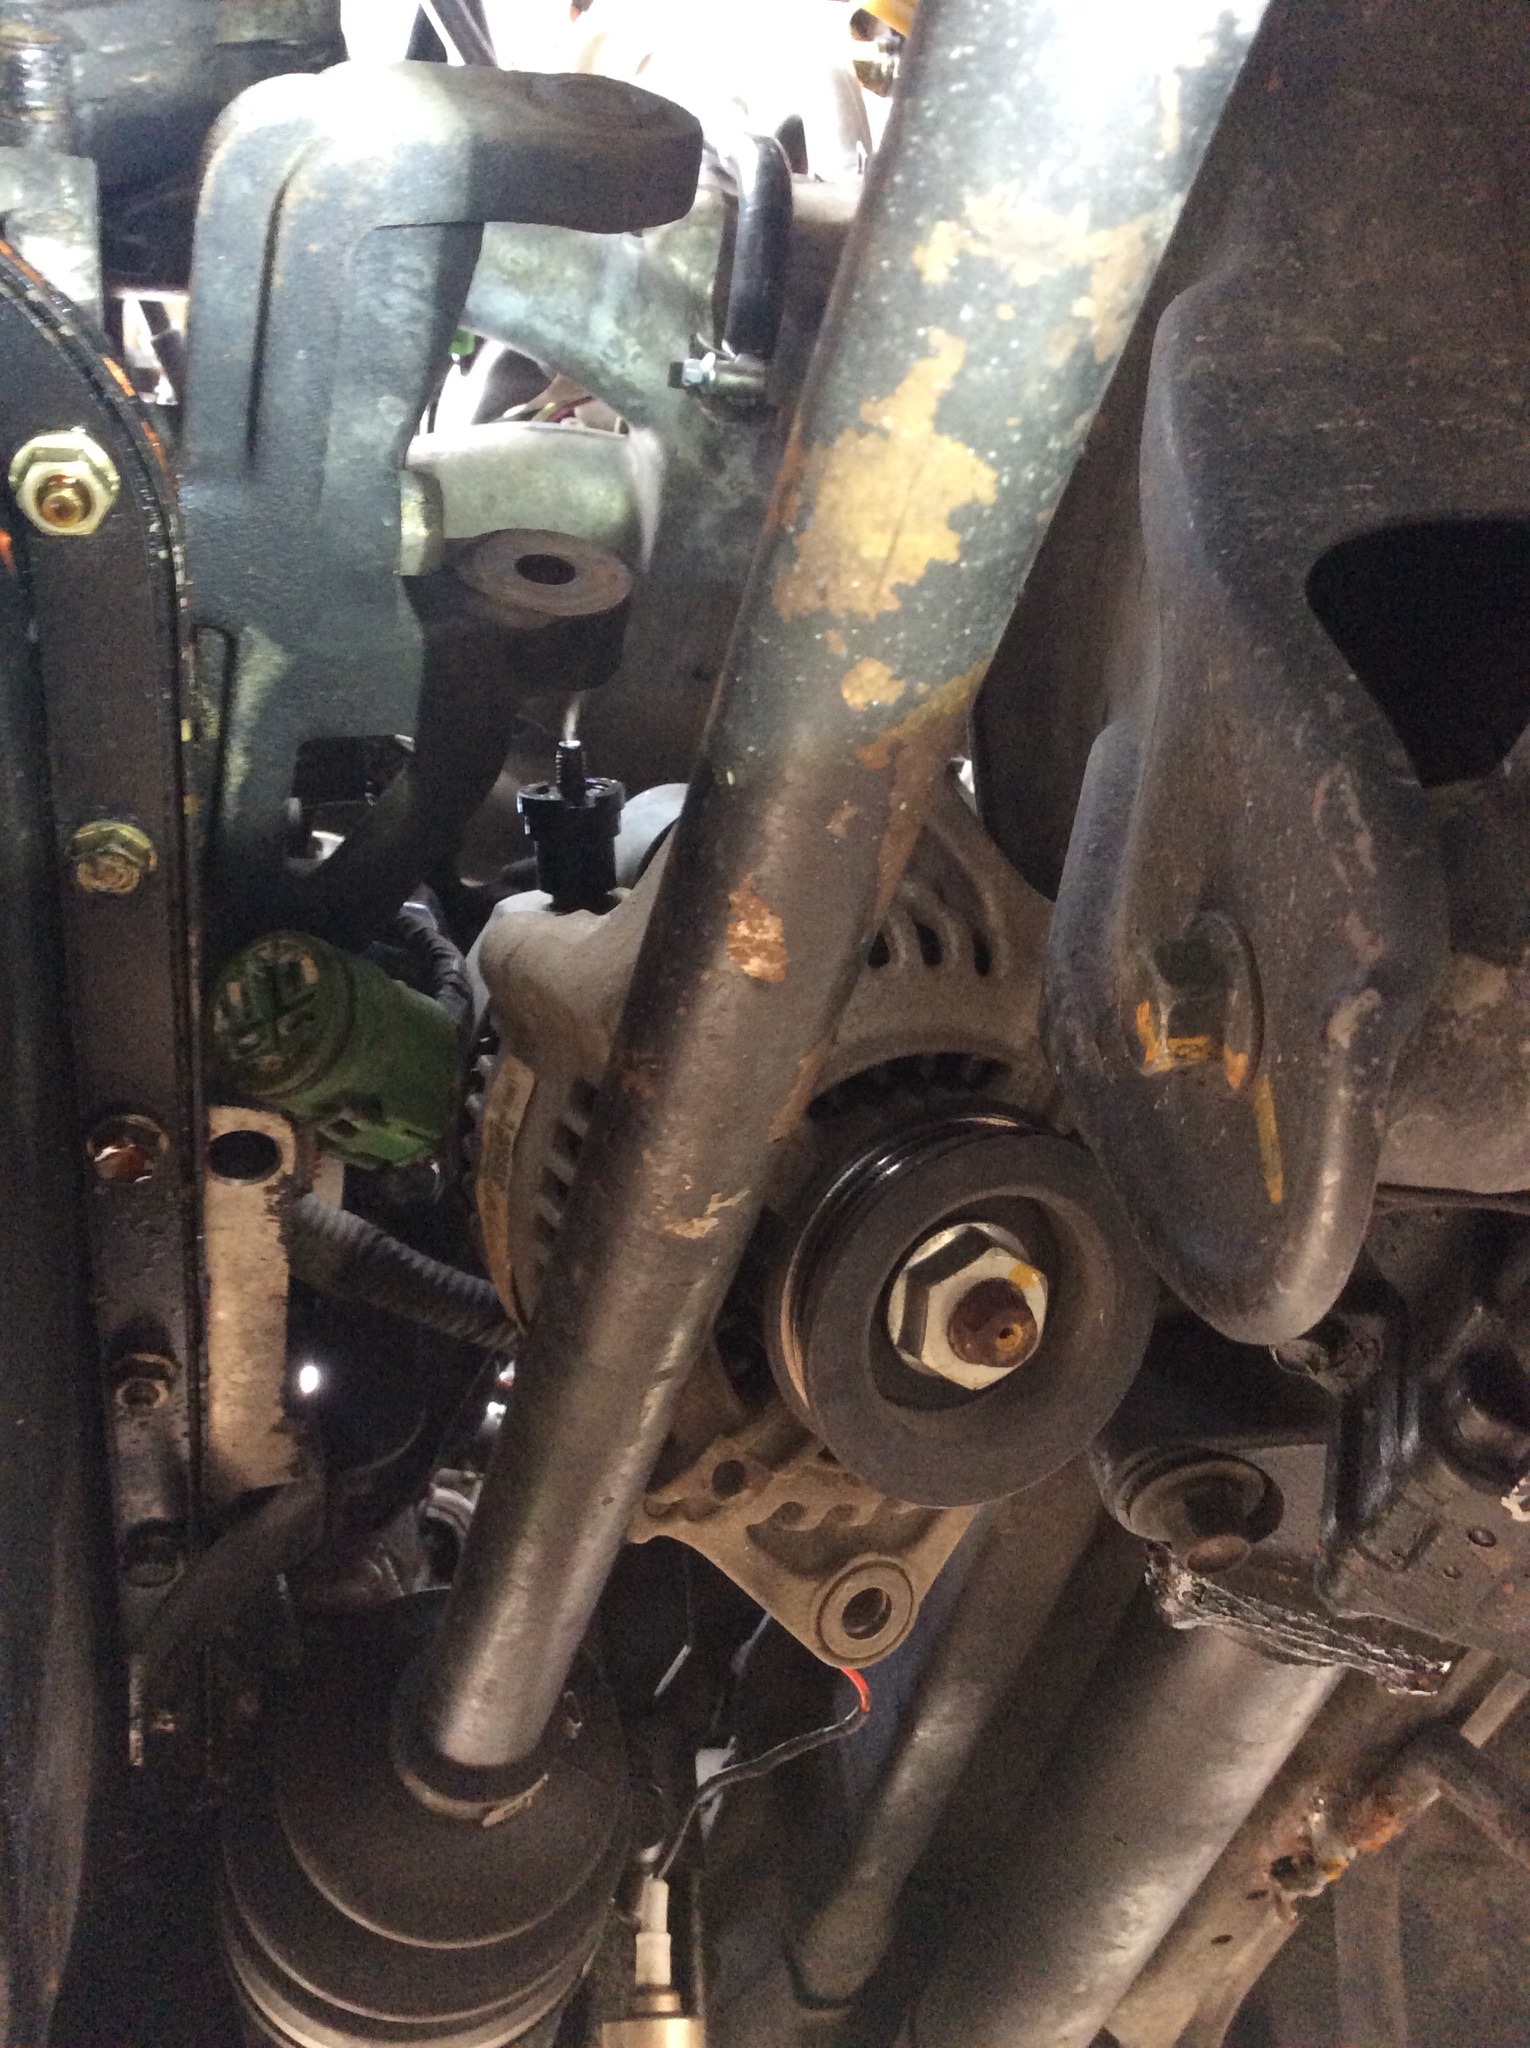
What you want to do is remove the left bolt from the alternator bracket, and then loosen the one on the right, just enough that the bracket swings down out of the way.
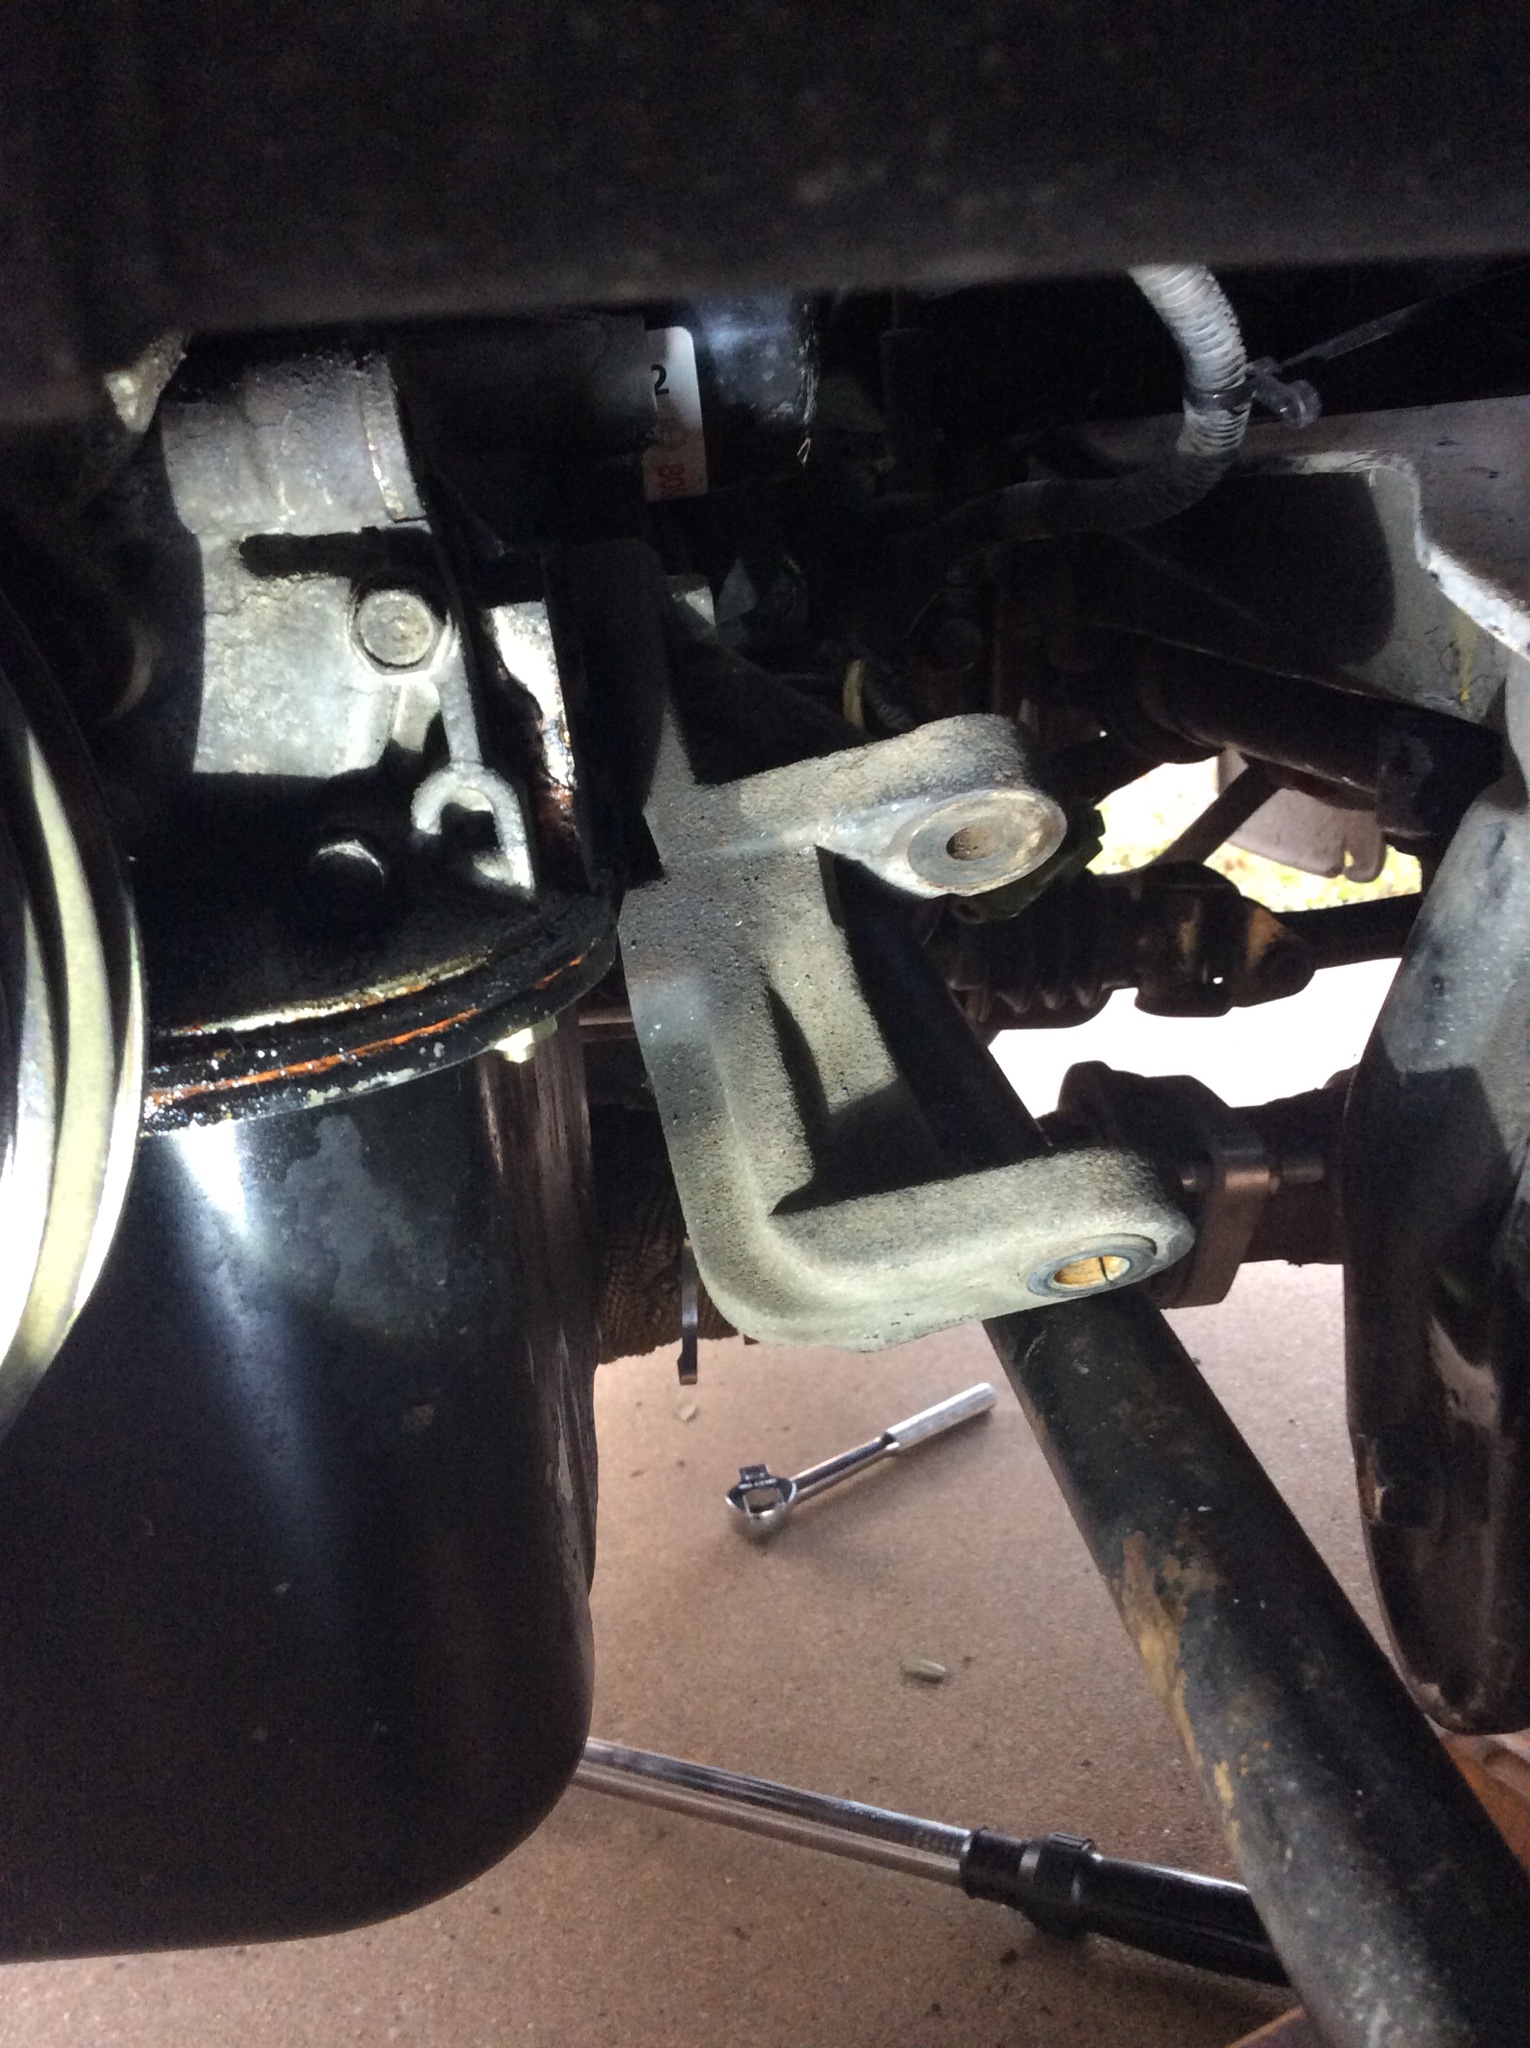
With that lowered there and the wheel turned all the way out, you have a nice open window to get the new alternator in.
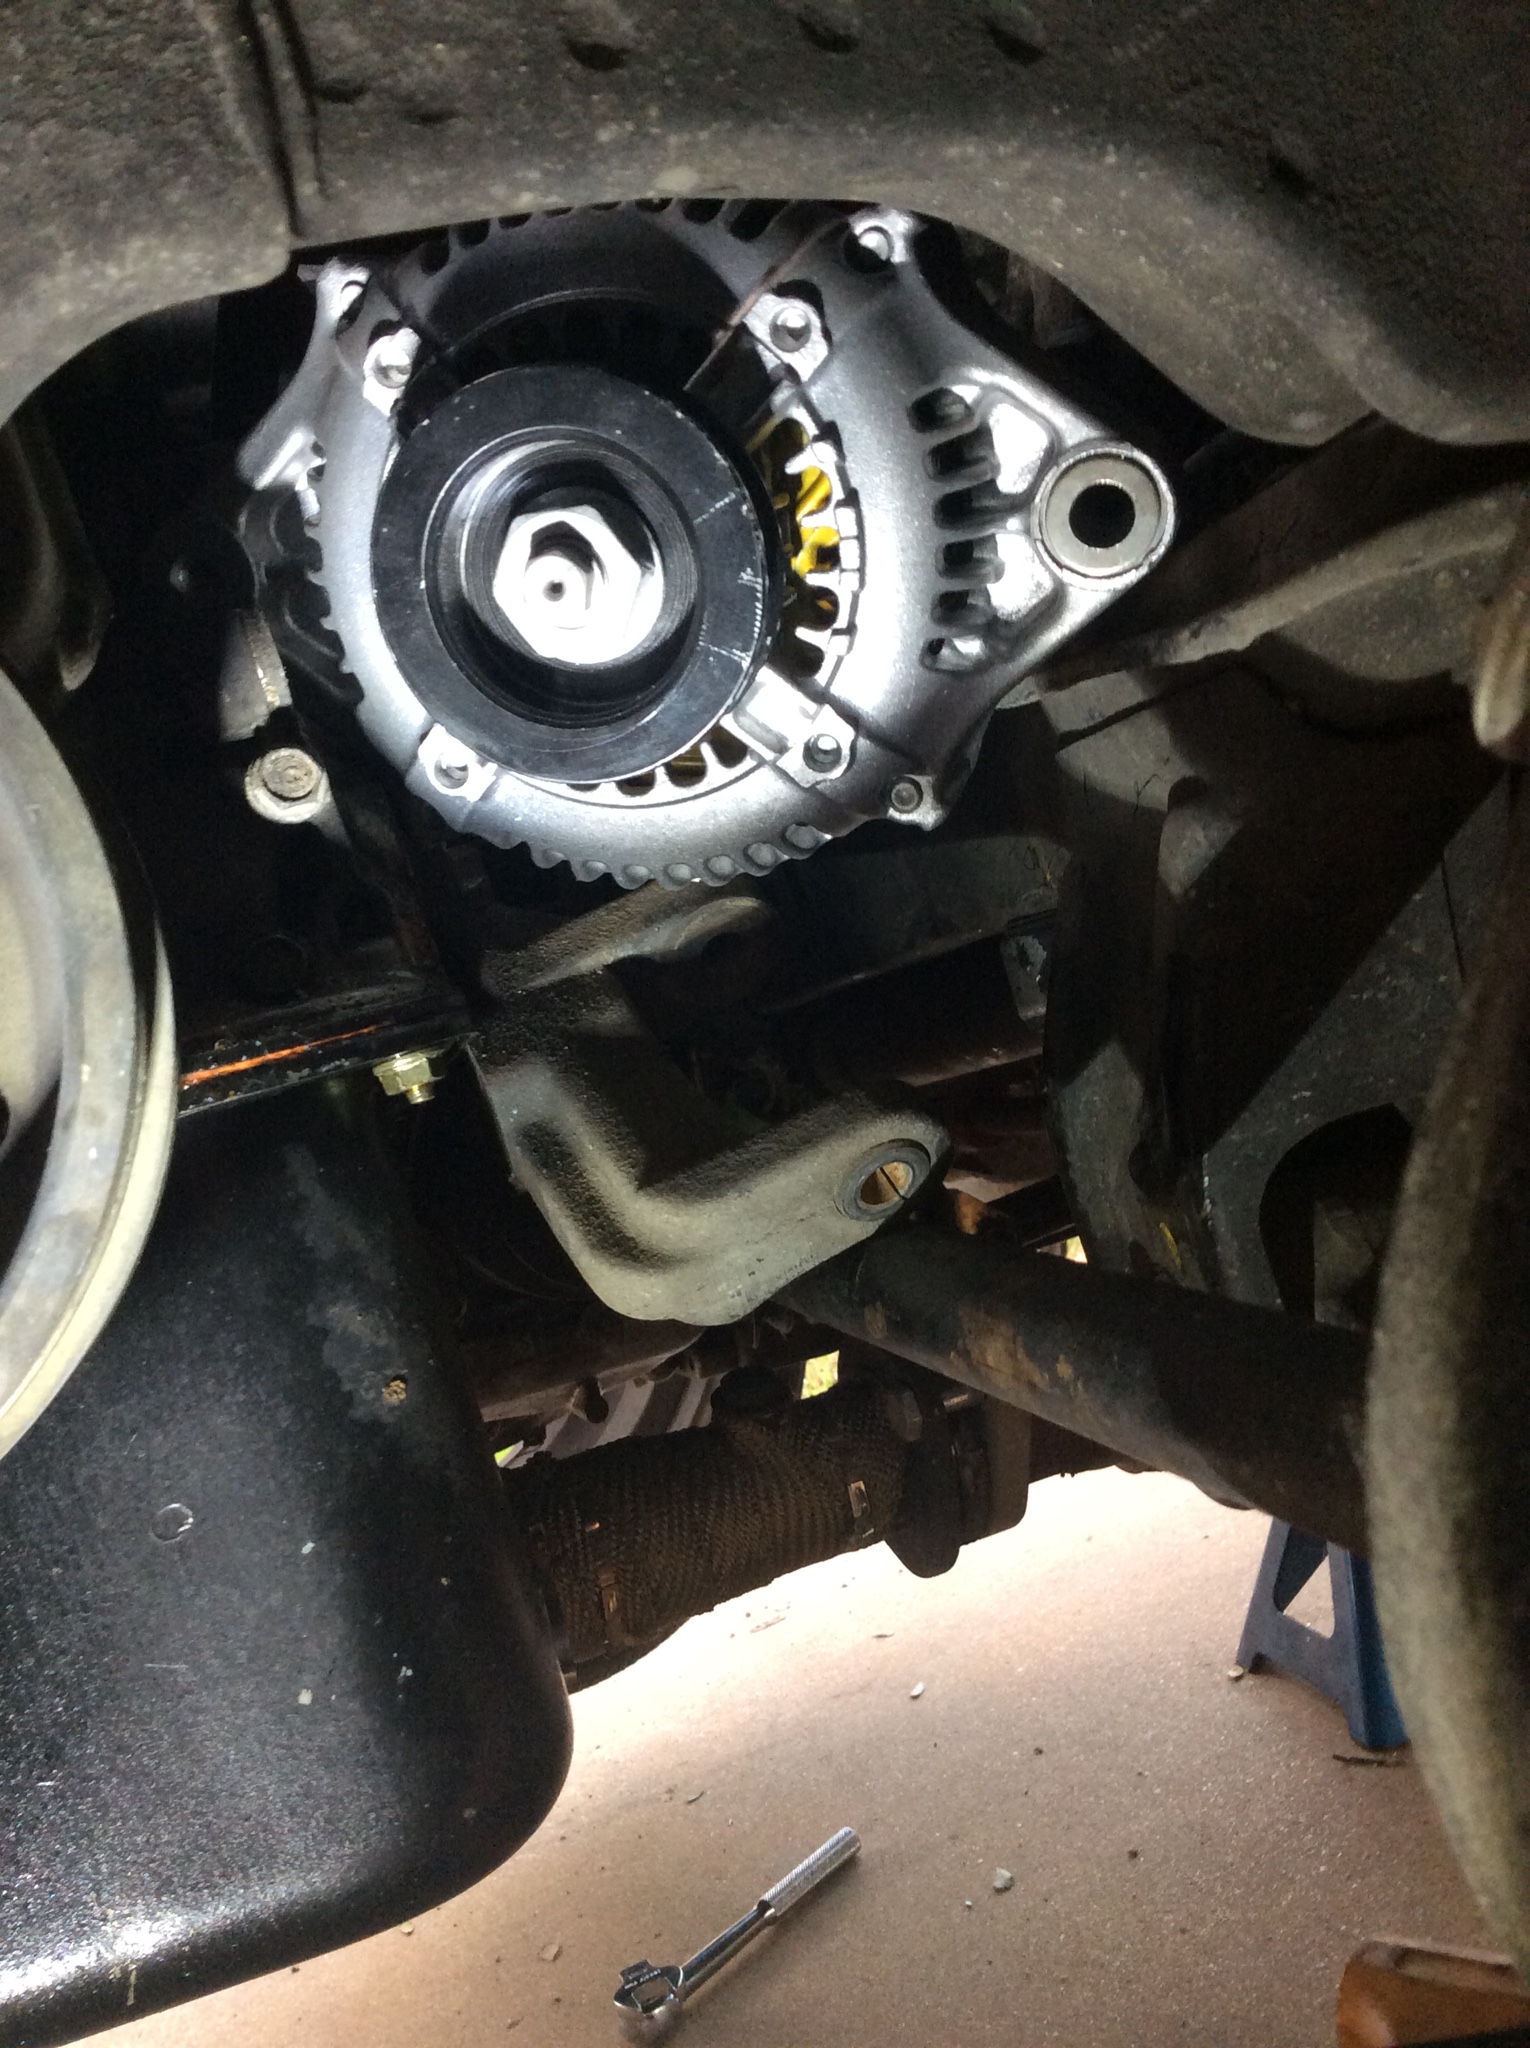
I was able to place it up on the oil filter to give myself enough room to get the bracket back in place without having to fight with the alternator itself.
So with that done, installation is exactly the same as disassembly in reverse.
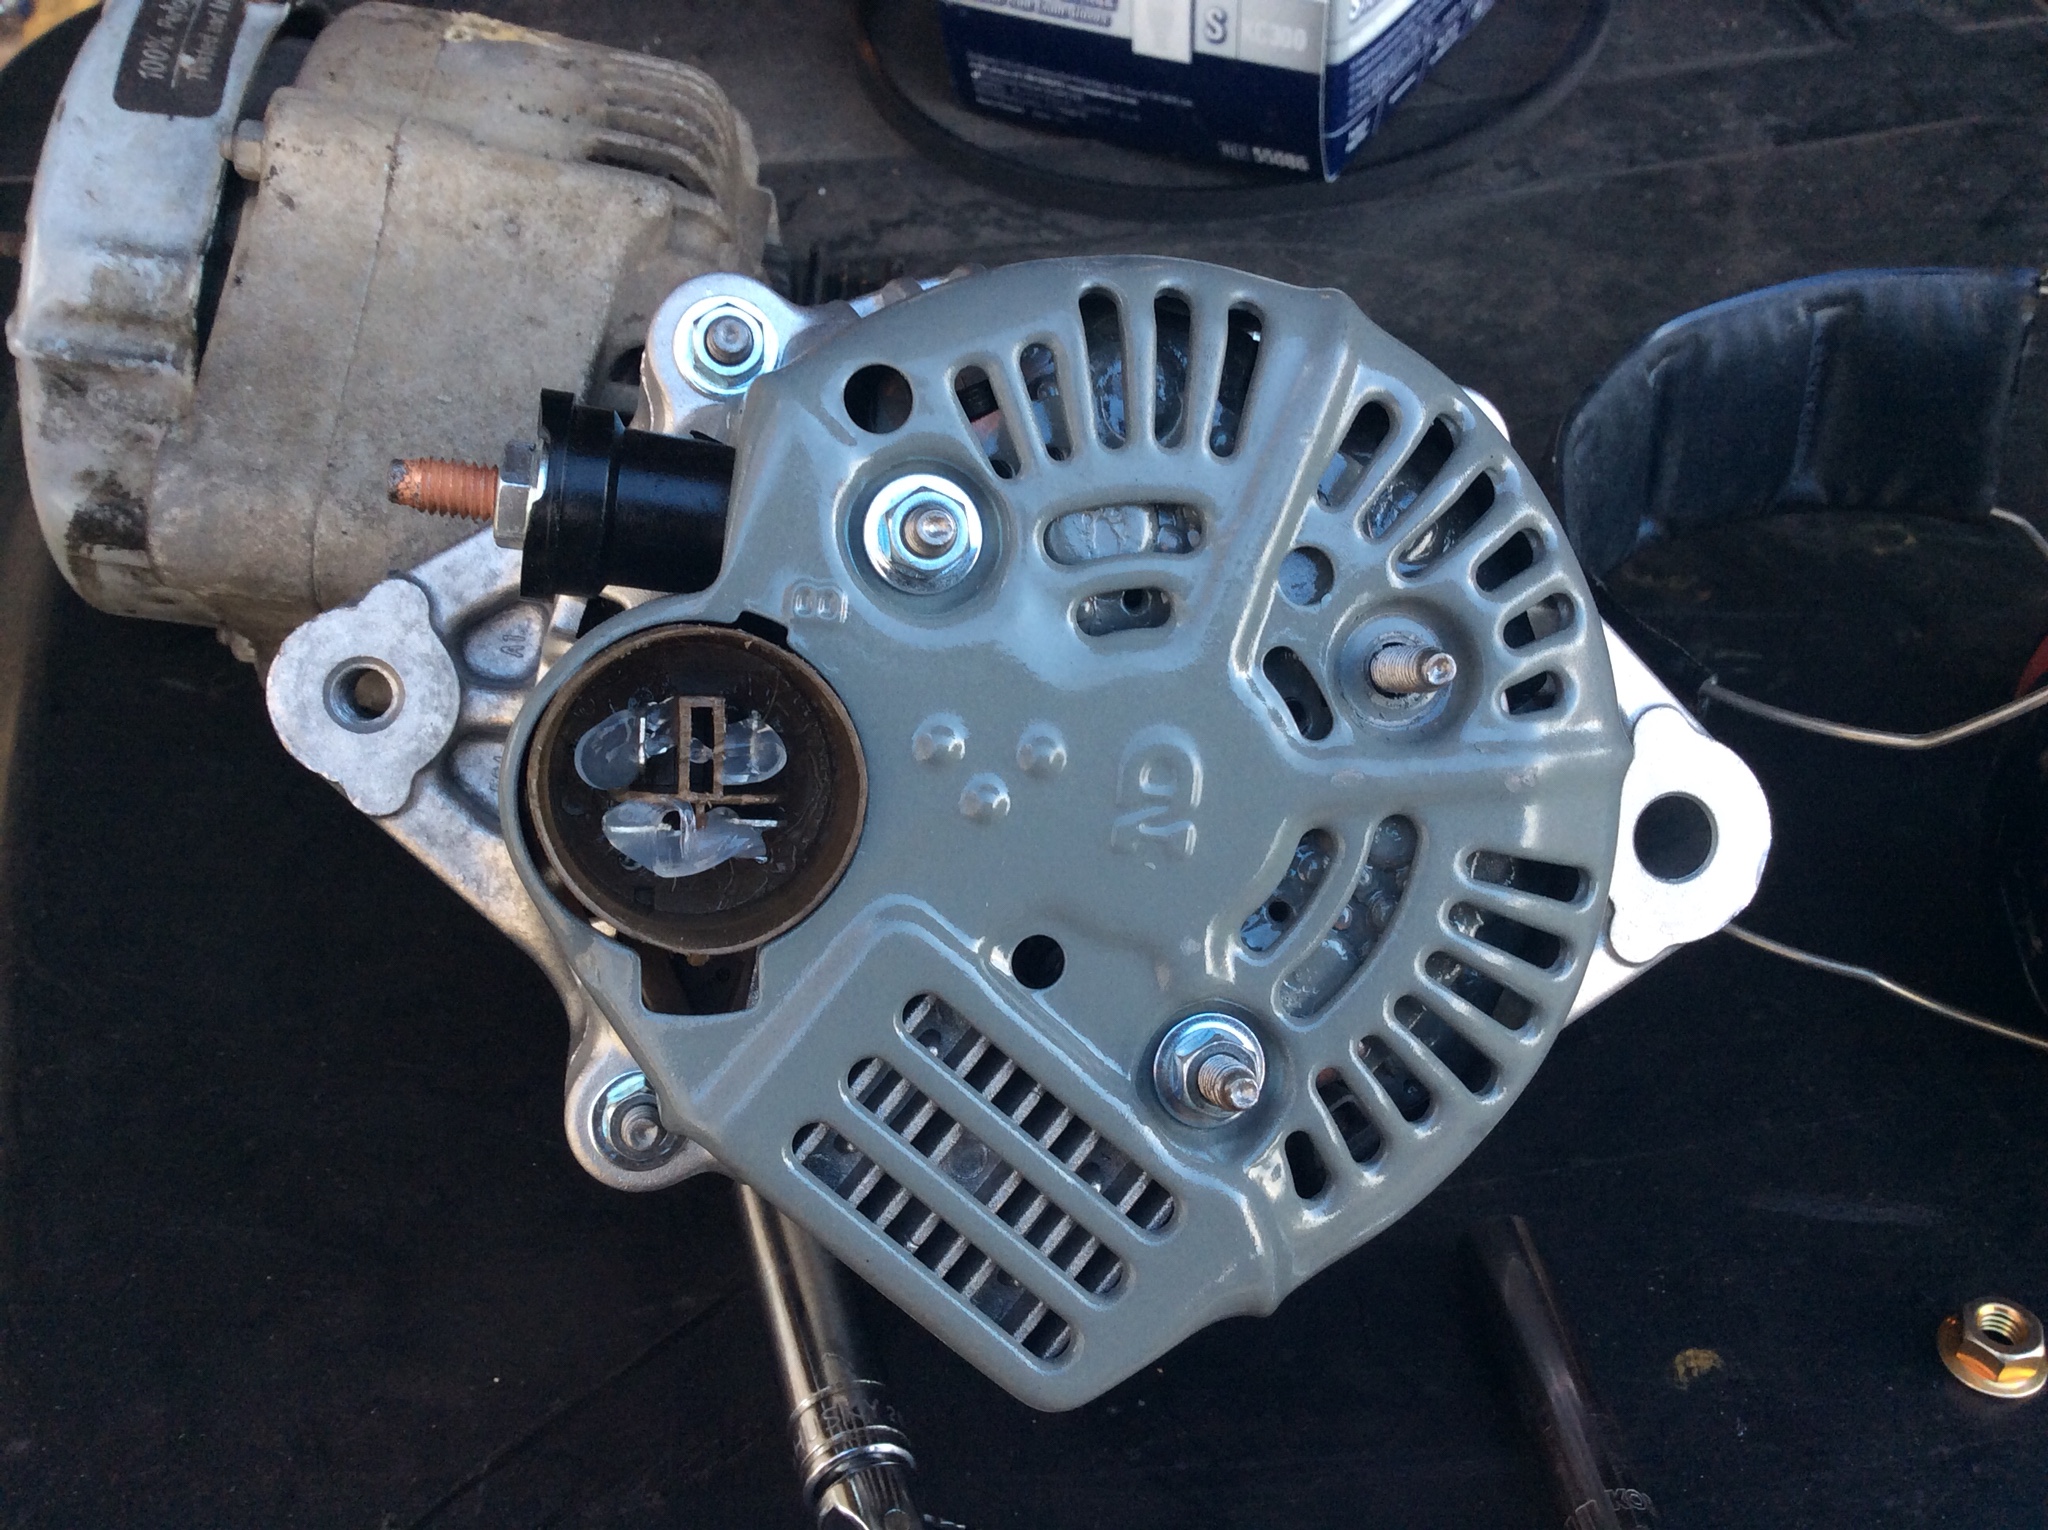
One more step I am going to do and this will reference my big 3 wire upgrade is the turning of that into the big 4 by pulling a big ground off of the back of the alternator itself.
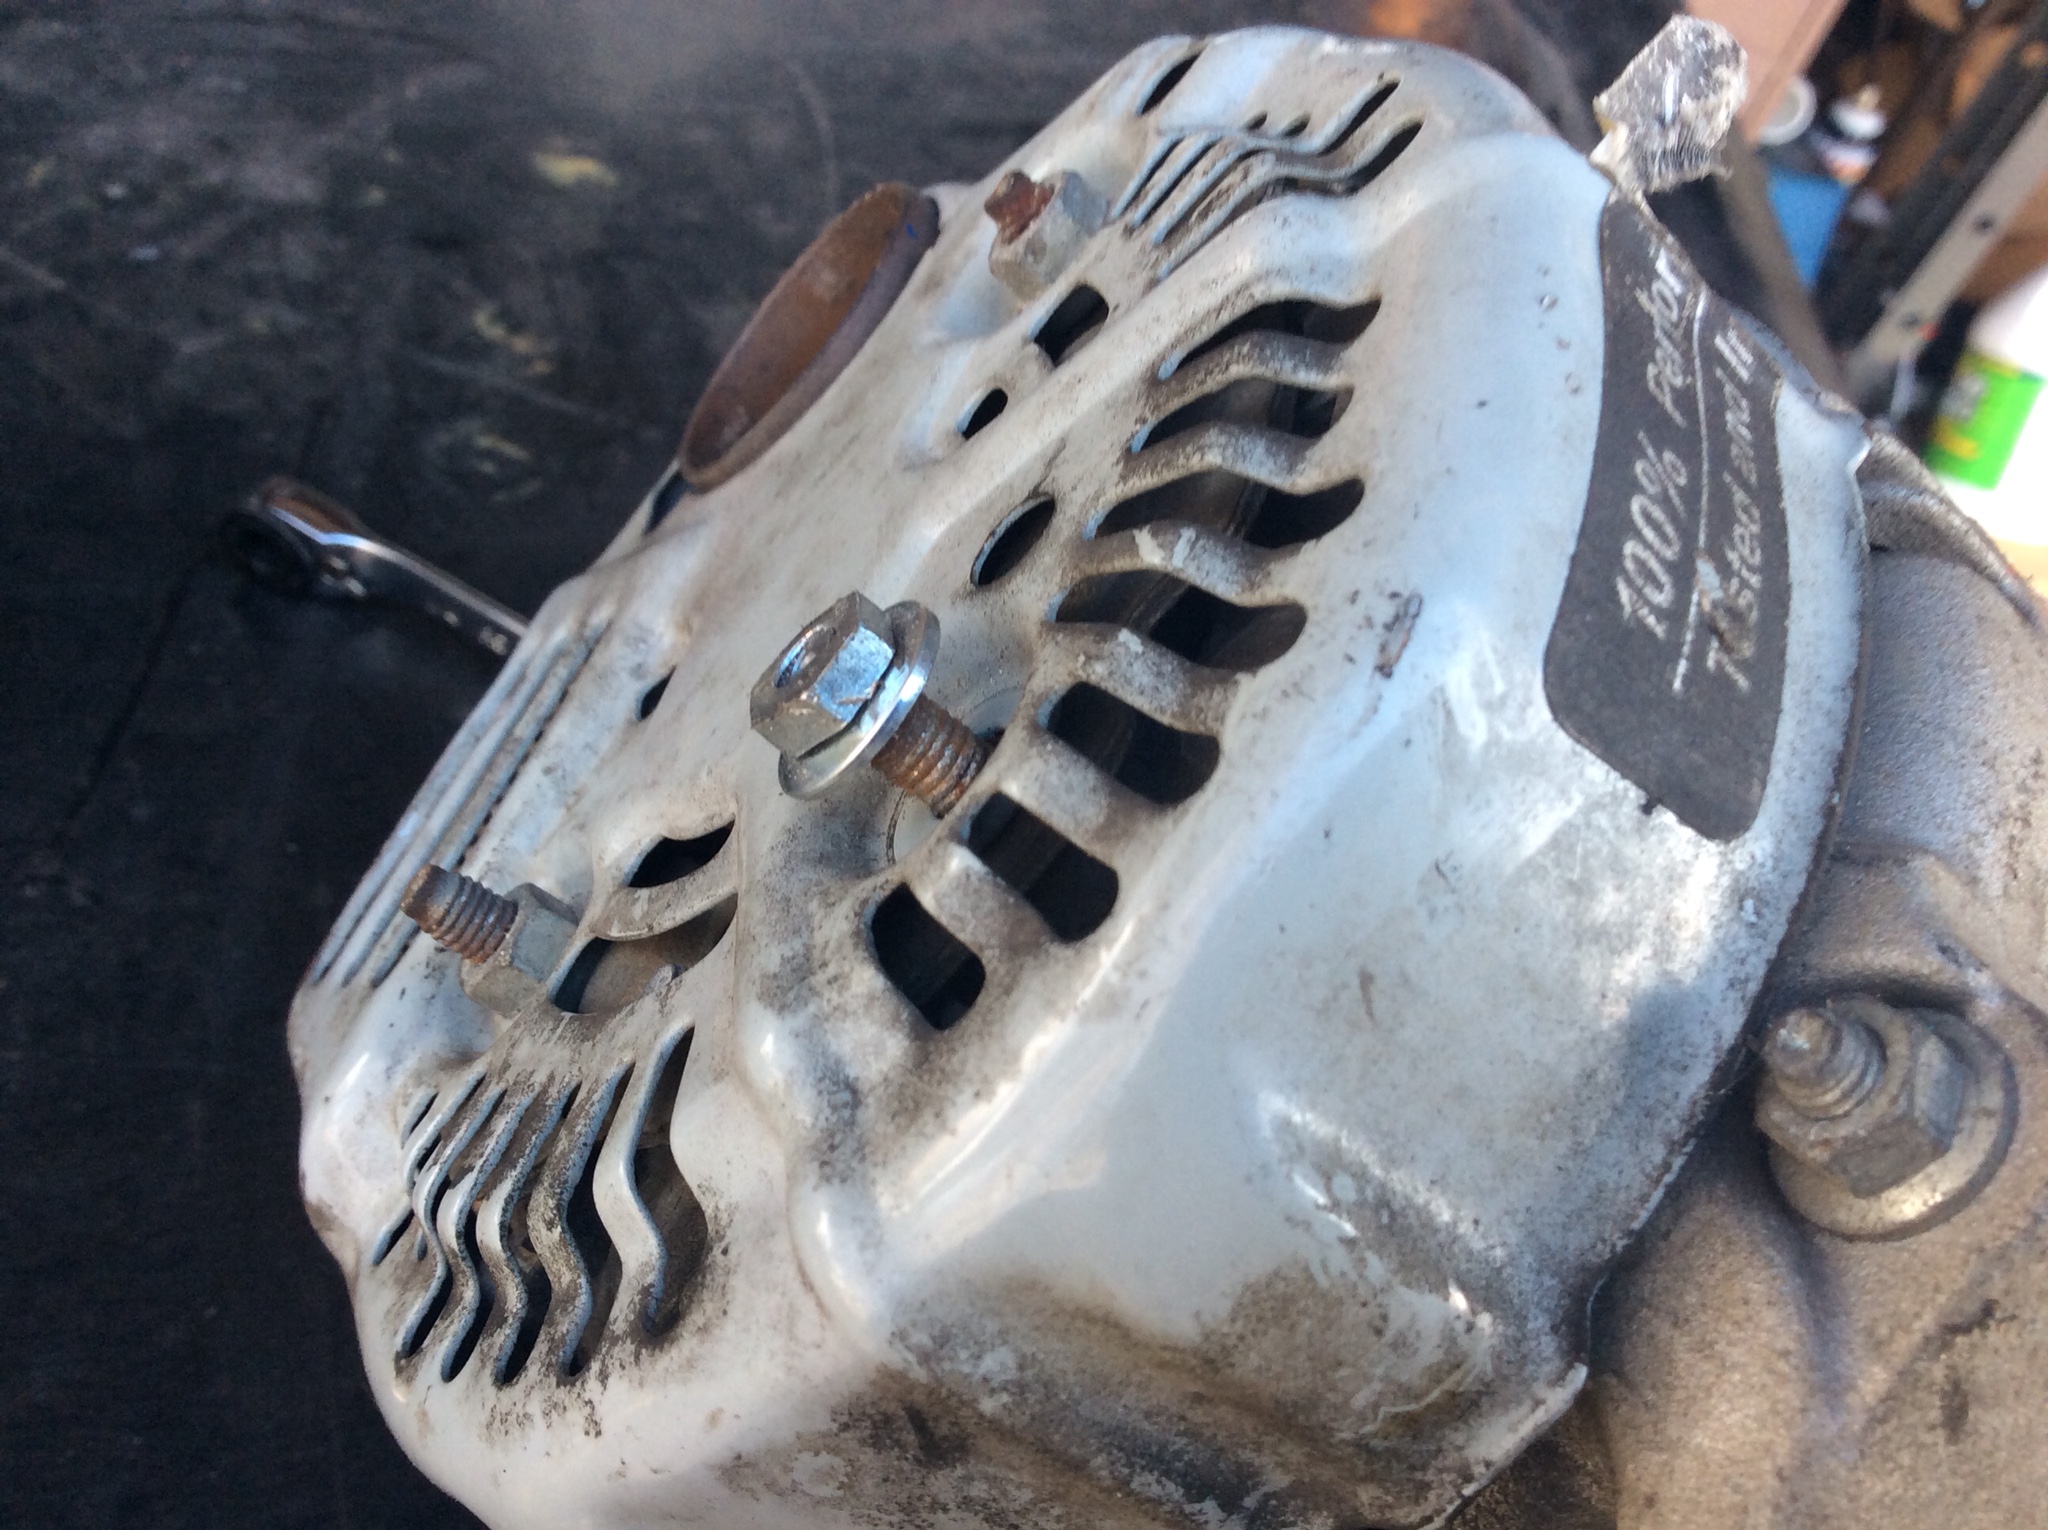
I took one of the nuts from the back of the new alternator and ground it down a bit on the post of the old alternator.
Grinding it down will give me the few more threads I need to get the ground wire on there and get another nut on top of that. This is a ground that runs through the rectifier on the back of the alternator so this is the best spot to get a ground. This is of course an extra step that isn't needed if you are just replacing the alternator, but as I upgraded to a 170 amp alternator from the stock 60 or whatever it is, new wires all around will make the juice flow just that much sweeter.
Cheers.
So with the alternator belt being the one closest to the engine (save for the timing belt) it's a good idea to give all three belts a good inspection and replace them as needed since they'll all be off the vehicle. I'd not replaced mine yet so with no documentation on previous work done, replaced they will be.
First things first, disconnect the positive from the battery. As I had just installed the and fuse I was able to just disconnect at the fuse and not have to deal with resetting the clock and radio.

These are the three you will need, just for reference. Also you'll need a 10, 12, 14mm wrench, ratcheting is beneficial here. You will also need a 10mm socket with an extension to get at the a/c tensioner.
Starting furthest out with the power steering pump. Loosen the adjustment bolt below it.

Then you loosen this bolt and it takes the tension off the power steering belt.

Next up, loosen the bolt on the a/c tensioner.

Then loosen the adjustment bolt, it's a little hidden, but there is a gap that allows you to get at it and the timing cover flexes enough to move out of the way. Sorry for the lack of focus, it's was hard to get that shot with the iPad in one hand and a flashlight in the other to get the bolt lit.

Once that is done the belt pops off, and then we are left with the alternator to contend with.
First thing here will be removing the adjustment bolt entirely. In the future, I may replace the whole bracket assembly with a heim style adjuster, still debating that.

Then we remove the 14mm nut from the back of the pivot rod and free up the alternator itself. I didn't take pictures of it, but undo the power wire from the alternator with the 10mm nut on it, and of course unplug the big green plug from the back of the alternator.

With the alternator free there are a few ways to jenga the damn thing out of there. My first attempt I turned the alternator like so.

I then turned the wheels all the way to the left to give me a bit more clearance, and it dropped on out. I'll be damned through if it would go back in with as much ease though, so on to my recommended method. If someone has a better way, please chime in with it.
What you want to do is remove the left bolt from the alternator bracket, and then loosen the one on the right, just enough that the bracket swings down out of the way.

With that lowered there and the wheel turned all the way out, you have a nice open window to get the new alternator in.
I was able to place it up on the oil filter to give myself enough room to get the bracket back in place without having to fight with the alternator itself.

So with that done, installation is exactly the same as disassembly in reverse.
One more step I am going to do and this will reference my big 3 wire upgrade is the turning of that into the big 4 by pulling a big ground off of the back of the alternator itself.
I took one of the nuts from the back of the new alternator and ground it down a bit on the post of the old alternator.

Grinding it down will give me the few more threads I need to get the ground wire on there and get another nut on top of that. This is a ground that runs through the rectifier on the back of the alternator so this is the best spot to get a ground. This is of course an extra step that isn't needed if you are just replacing the alternator, but as I upgraded to a 170 amp alternator from the stock 60 or whatever it is, new wires all around will make the juice flow just that much sweeter.

Cheers.
Comments
Yeah, it didn't come with any springs. The previous one that was on there had none and cracked like a mofo. Right behind that though is a 16" flex pipe, so I figure it's all right.
A couple other people have made that comment as well. Not sure what it was, it was never an auto. It does have a motor swap but it was manual from the get go. Guess maybe it was an option at the dealer? It also has an old school cruise control unit, though all the wiring was cut when the previous however many owners did a swap, so now it's just a thing that lights up on the dash. Oh well.
2 bolts and its done!!