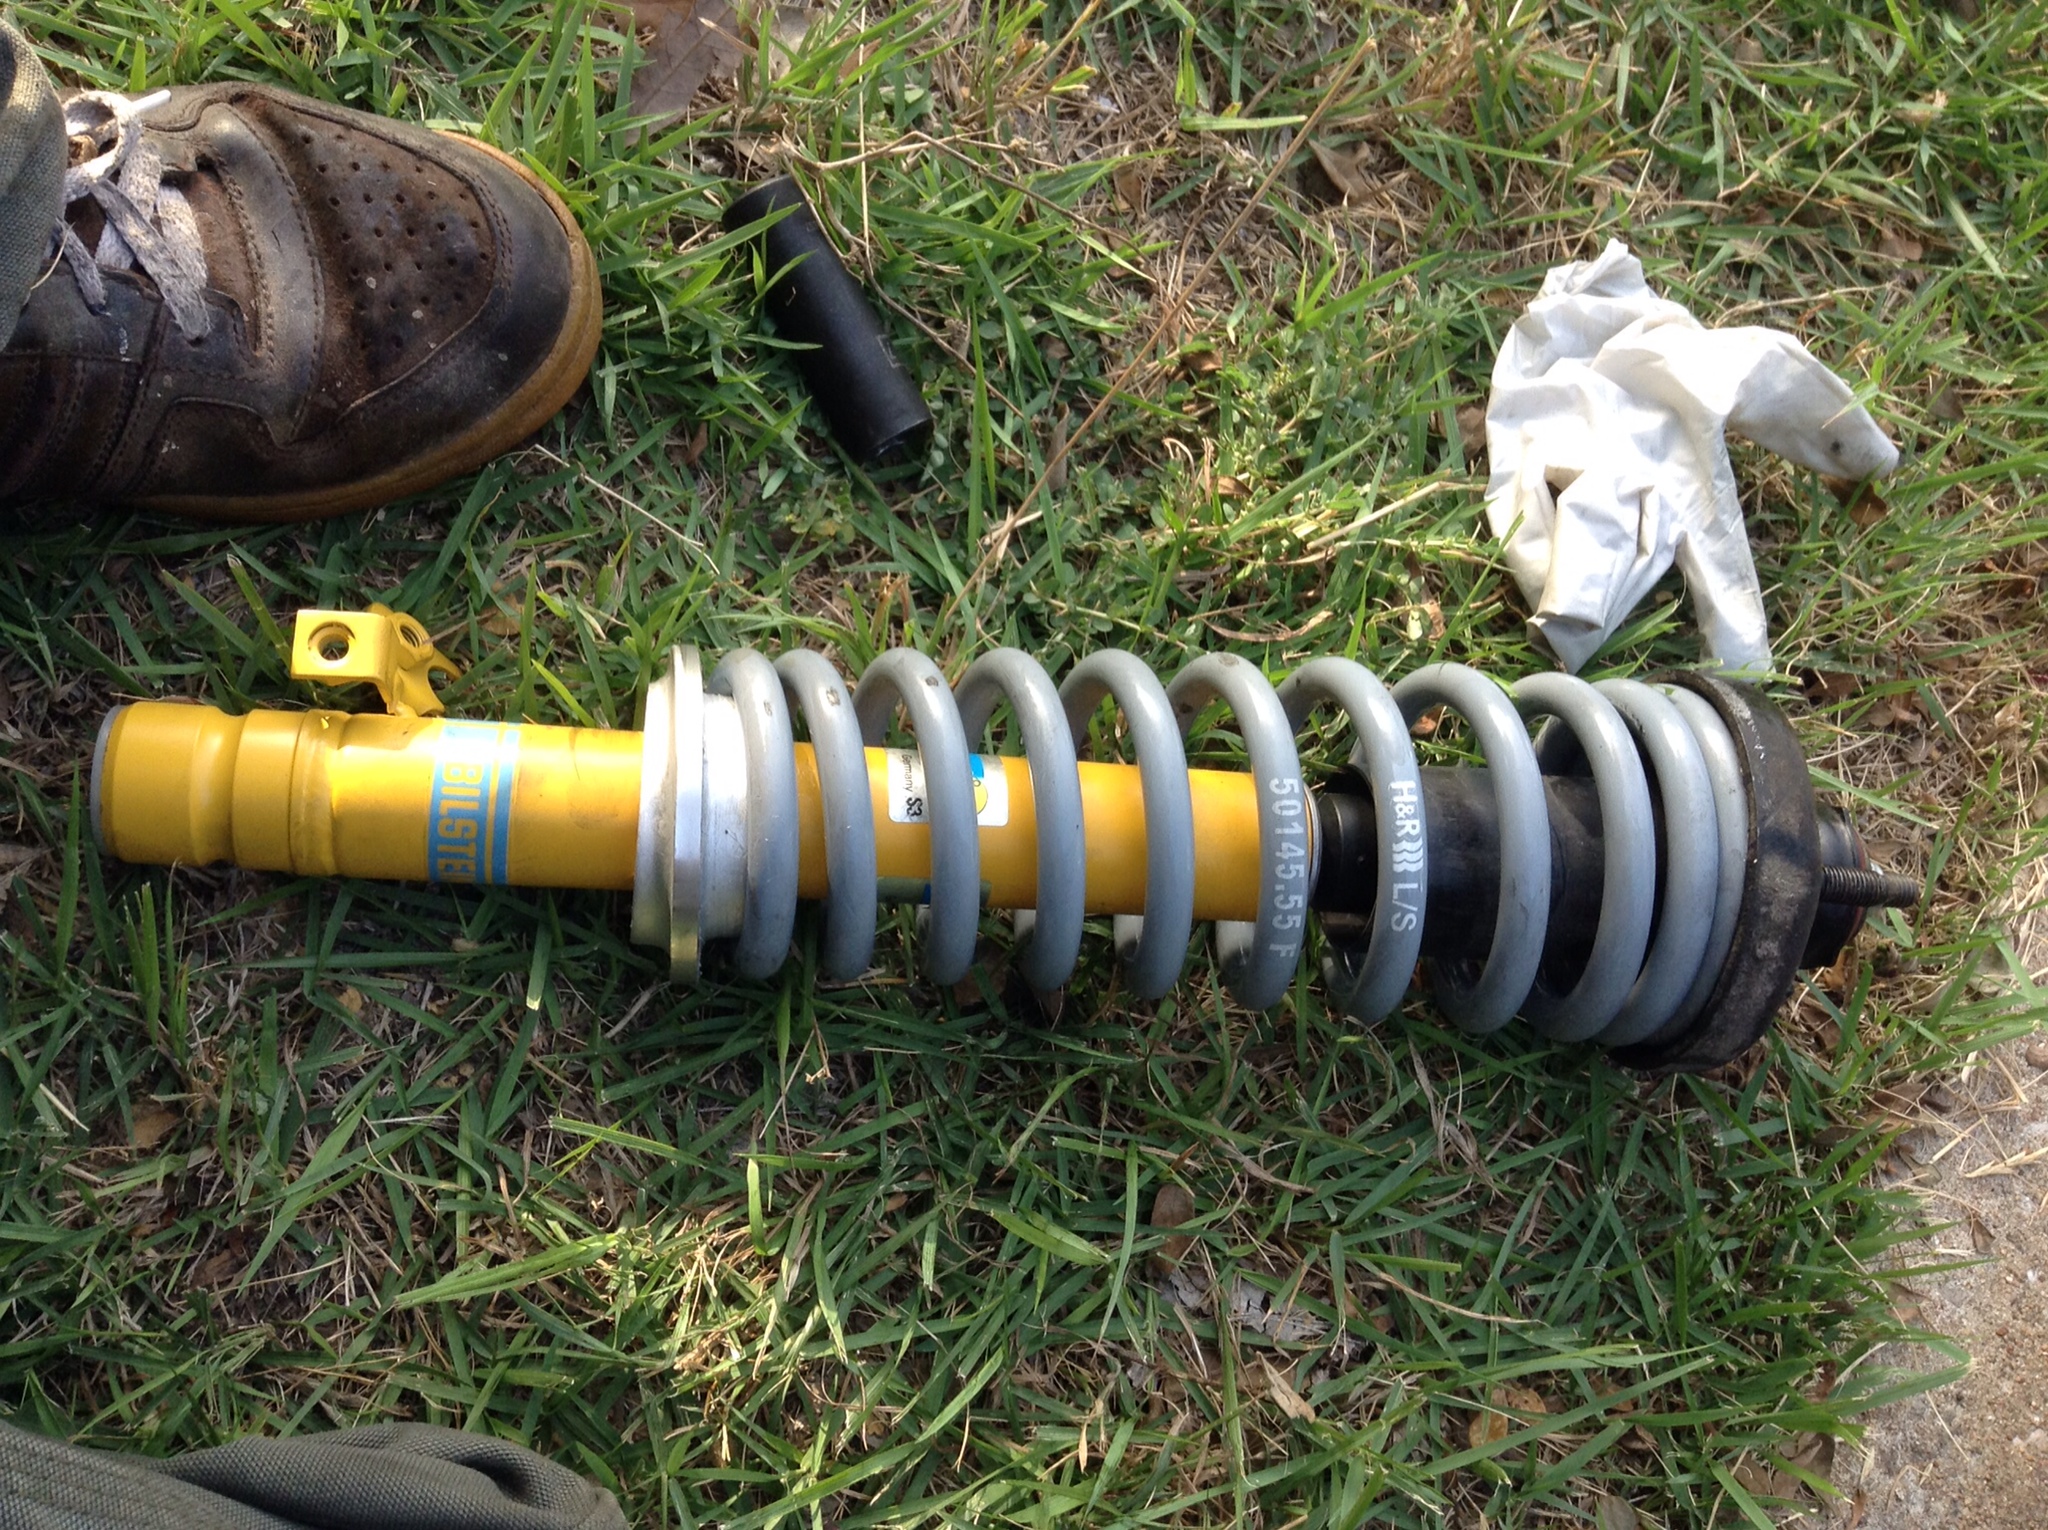
Front struts Bilstein/H&R combo
 greenteagod
Moderator
greenteagod
Moderator
The continuation of the suspension work. This time sorting out the front.
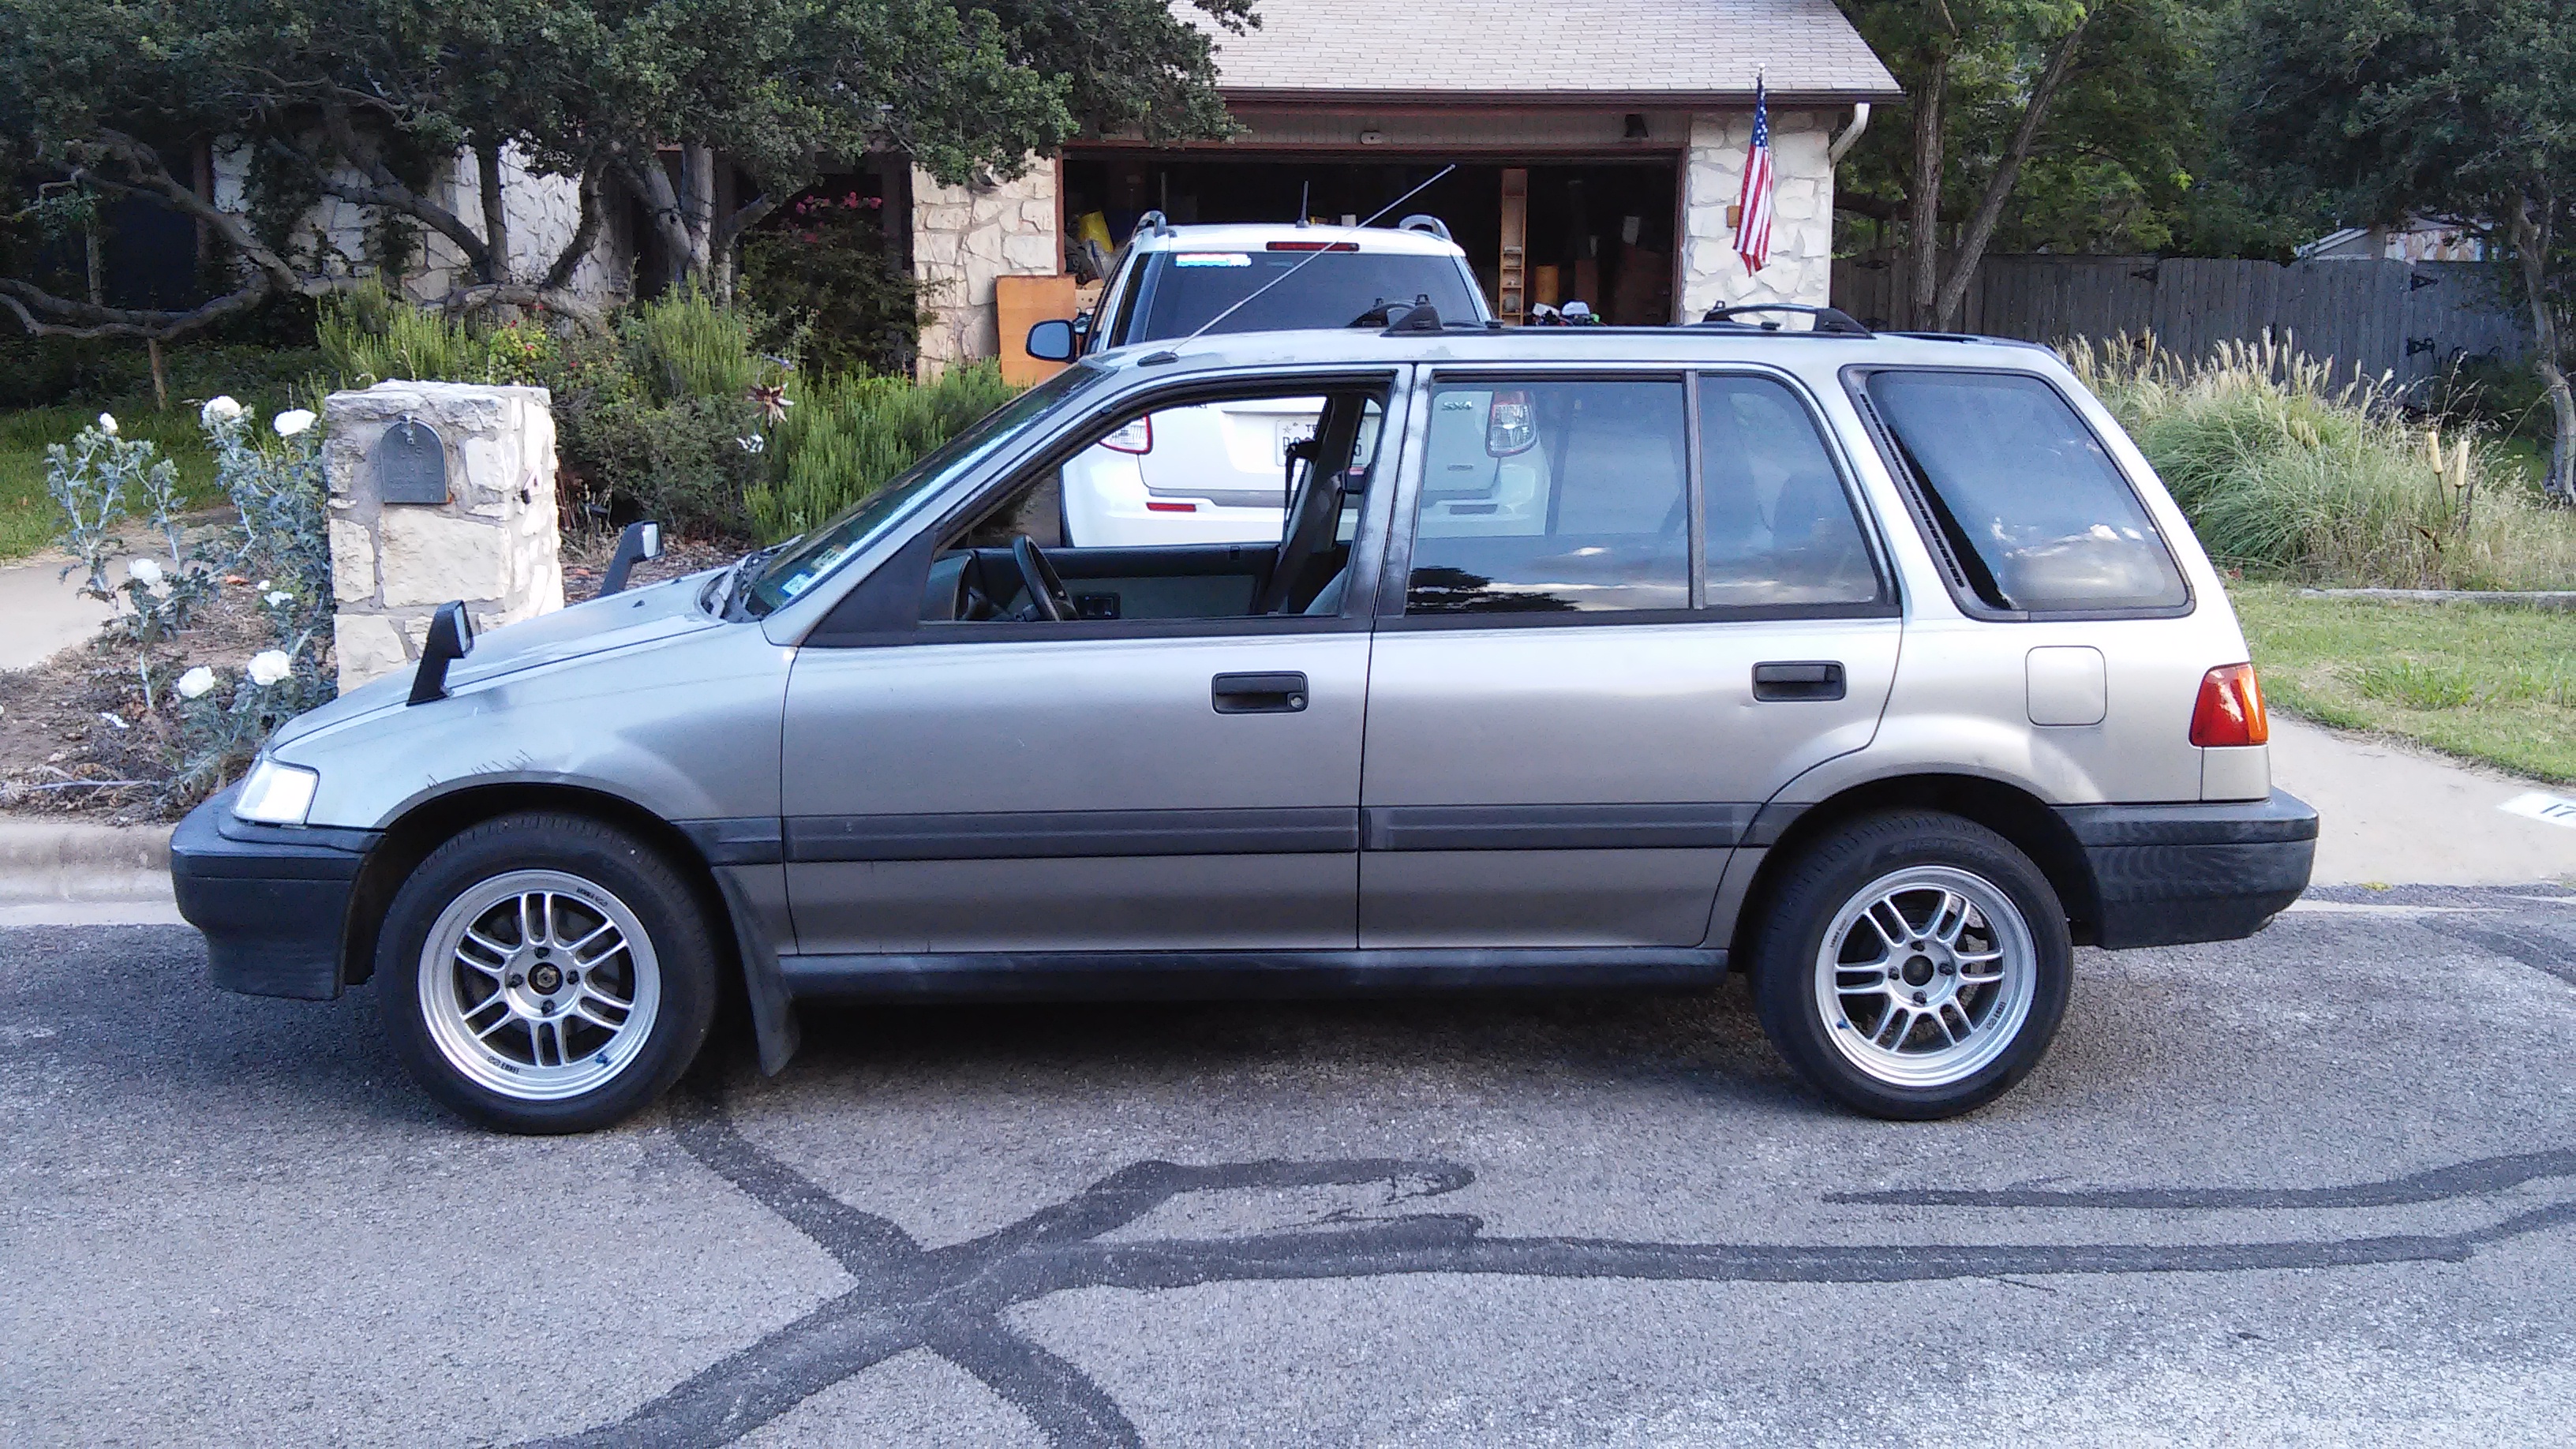
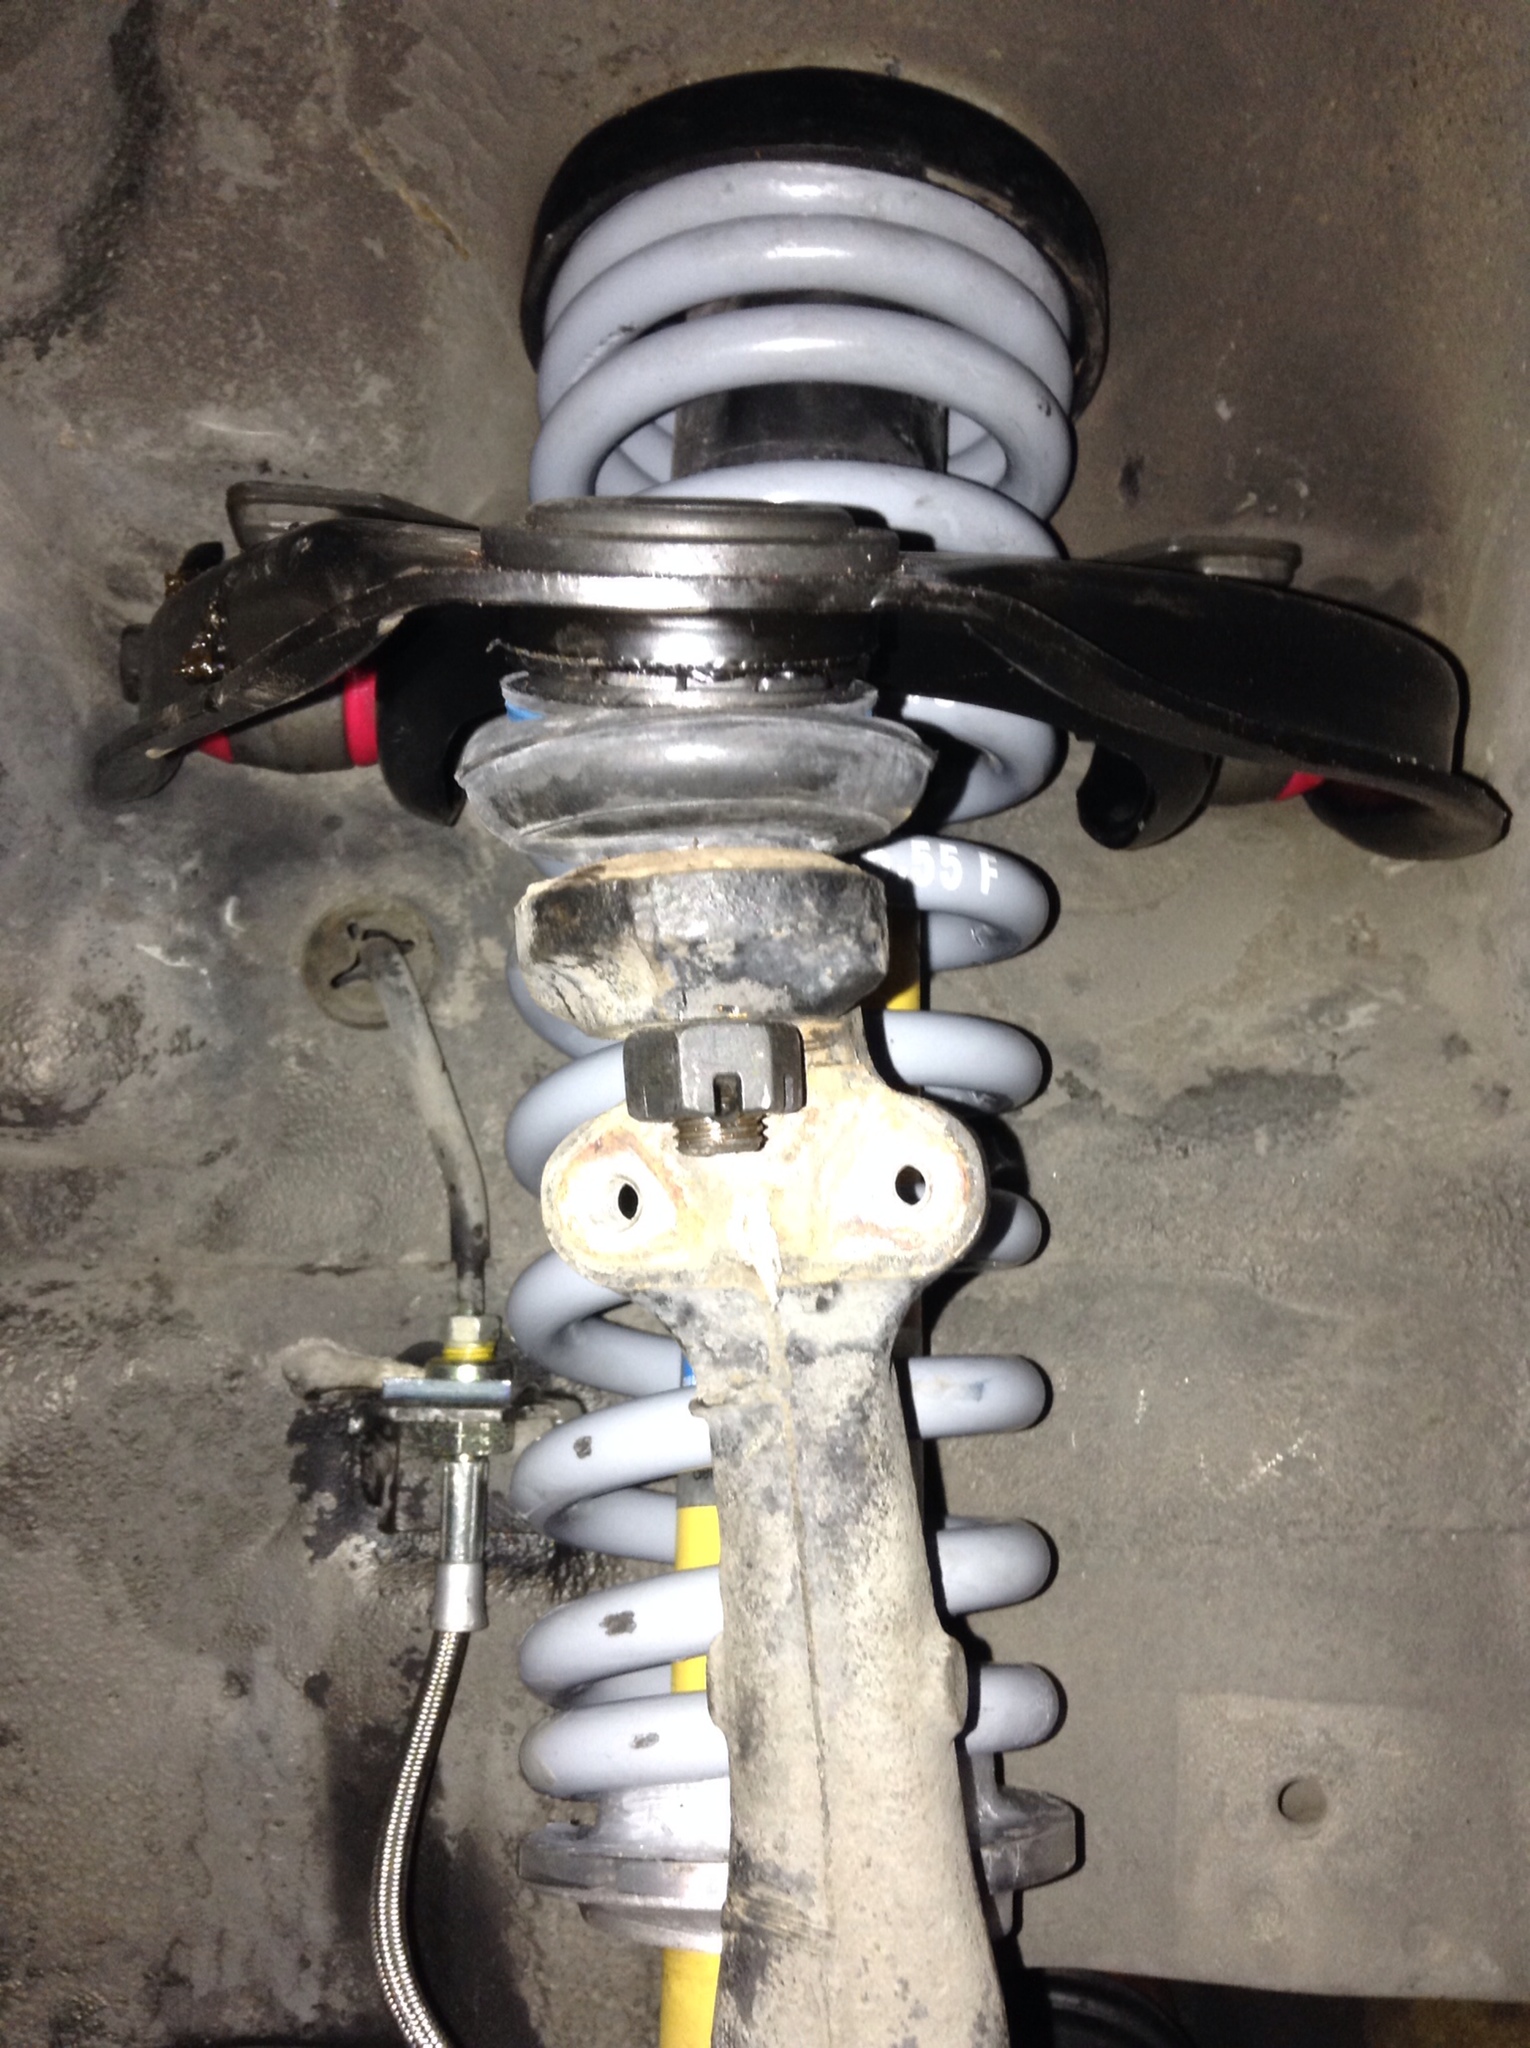
Here's a final shot of it, showing how it sits with the new suspension. I'm loving it, the ride is nice and firm but not bouncy or harsh. I see plenty of lowered civics around that they hit any imperfection in the road it looks like the suspension is made from bouncy balls. Anyway, drastic improvement, well worth the time and money.
Finally done with it, so let's just get right in to the write up while I still have the energy.
I've installed new struts, springs, upper control arm with polyurethane bushings, and the brake line as well.
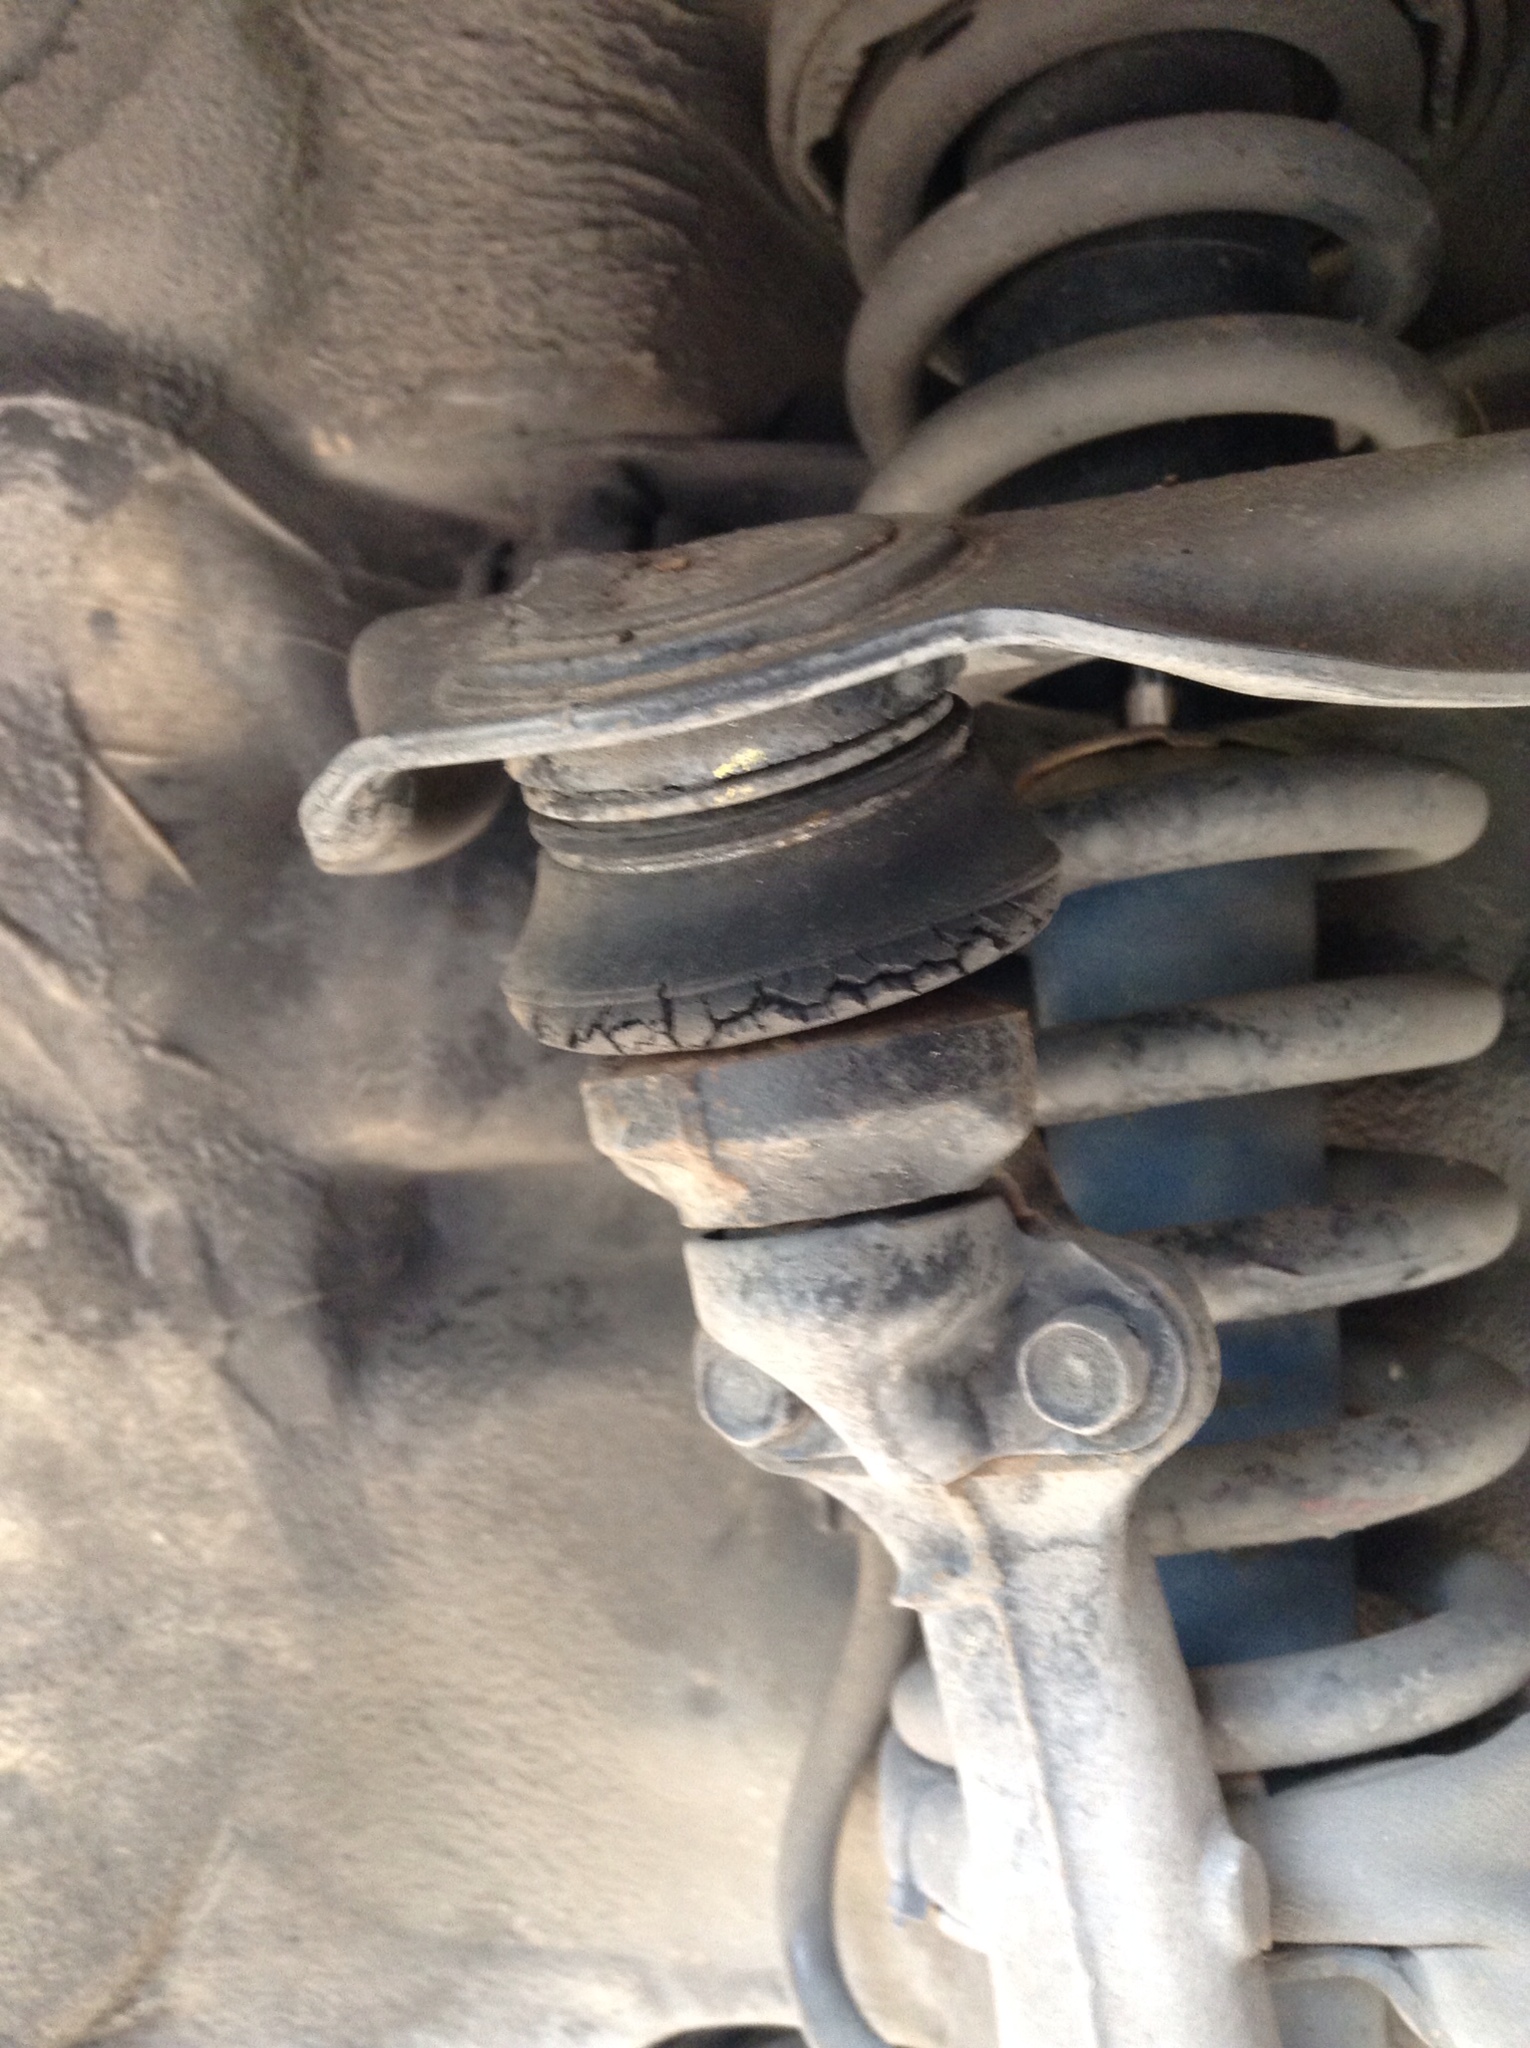
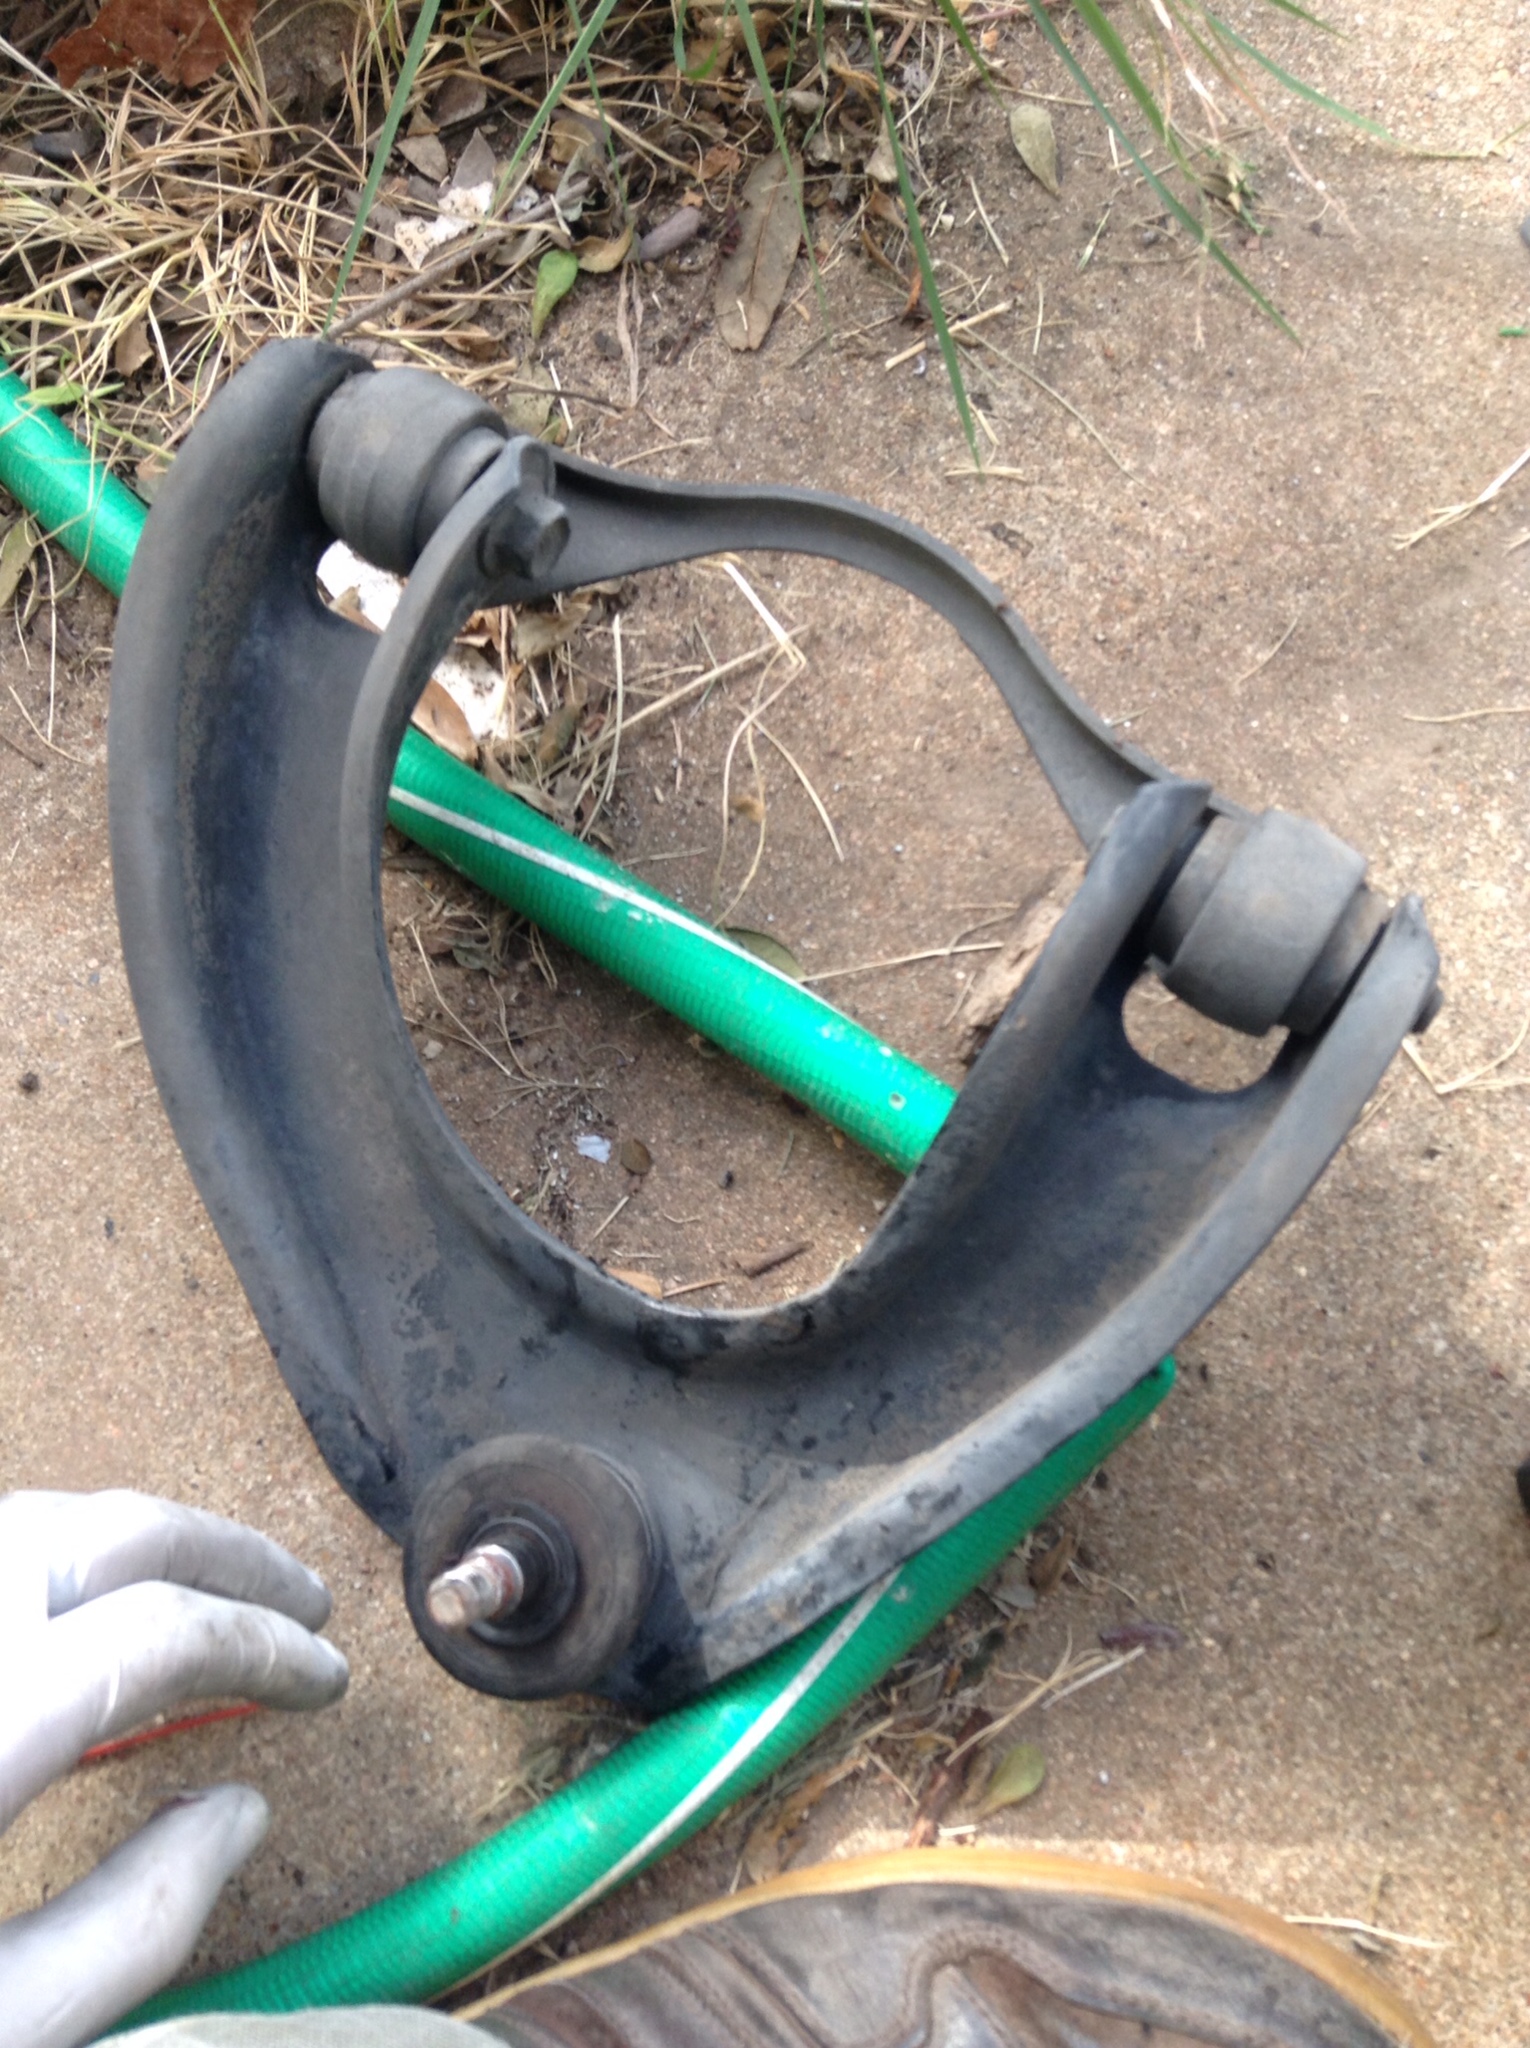
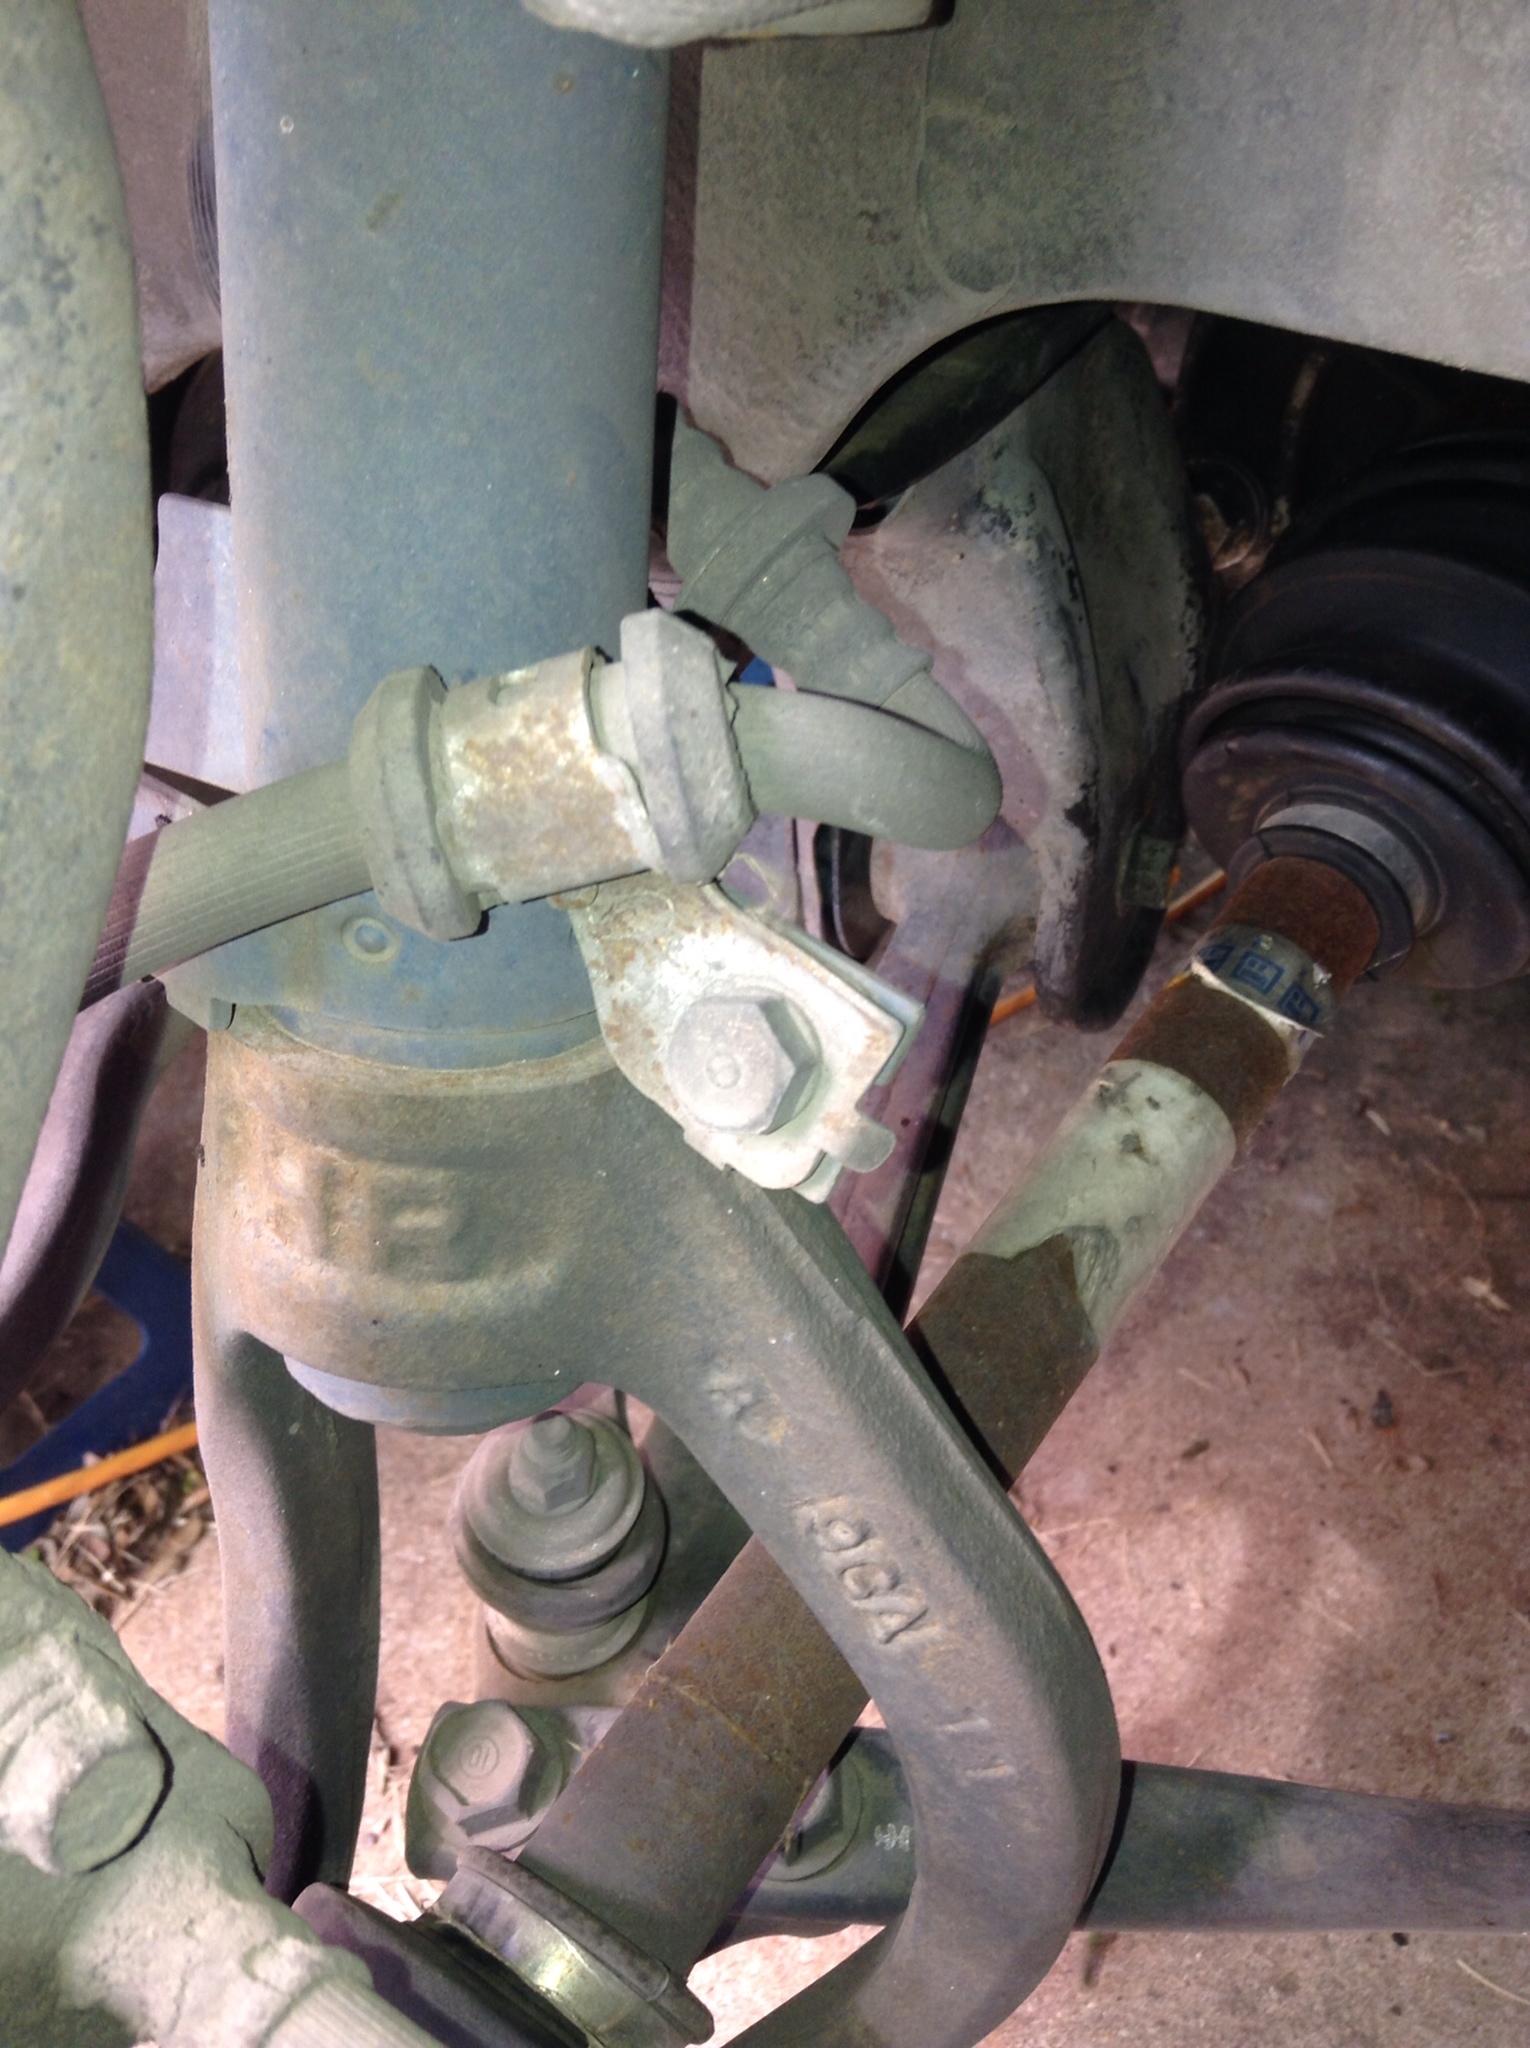
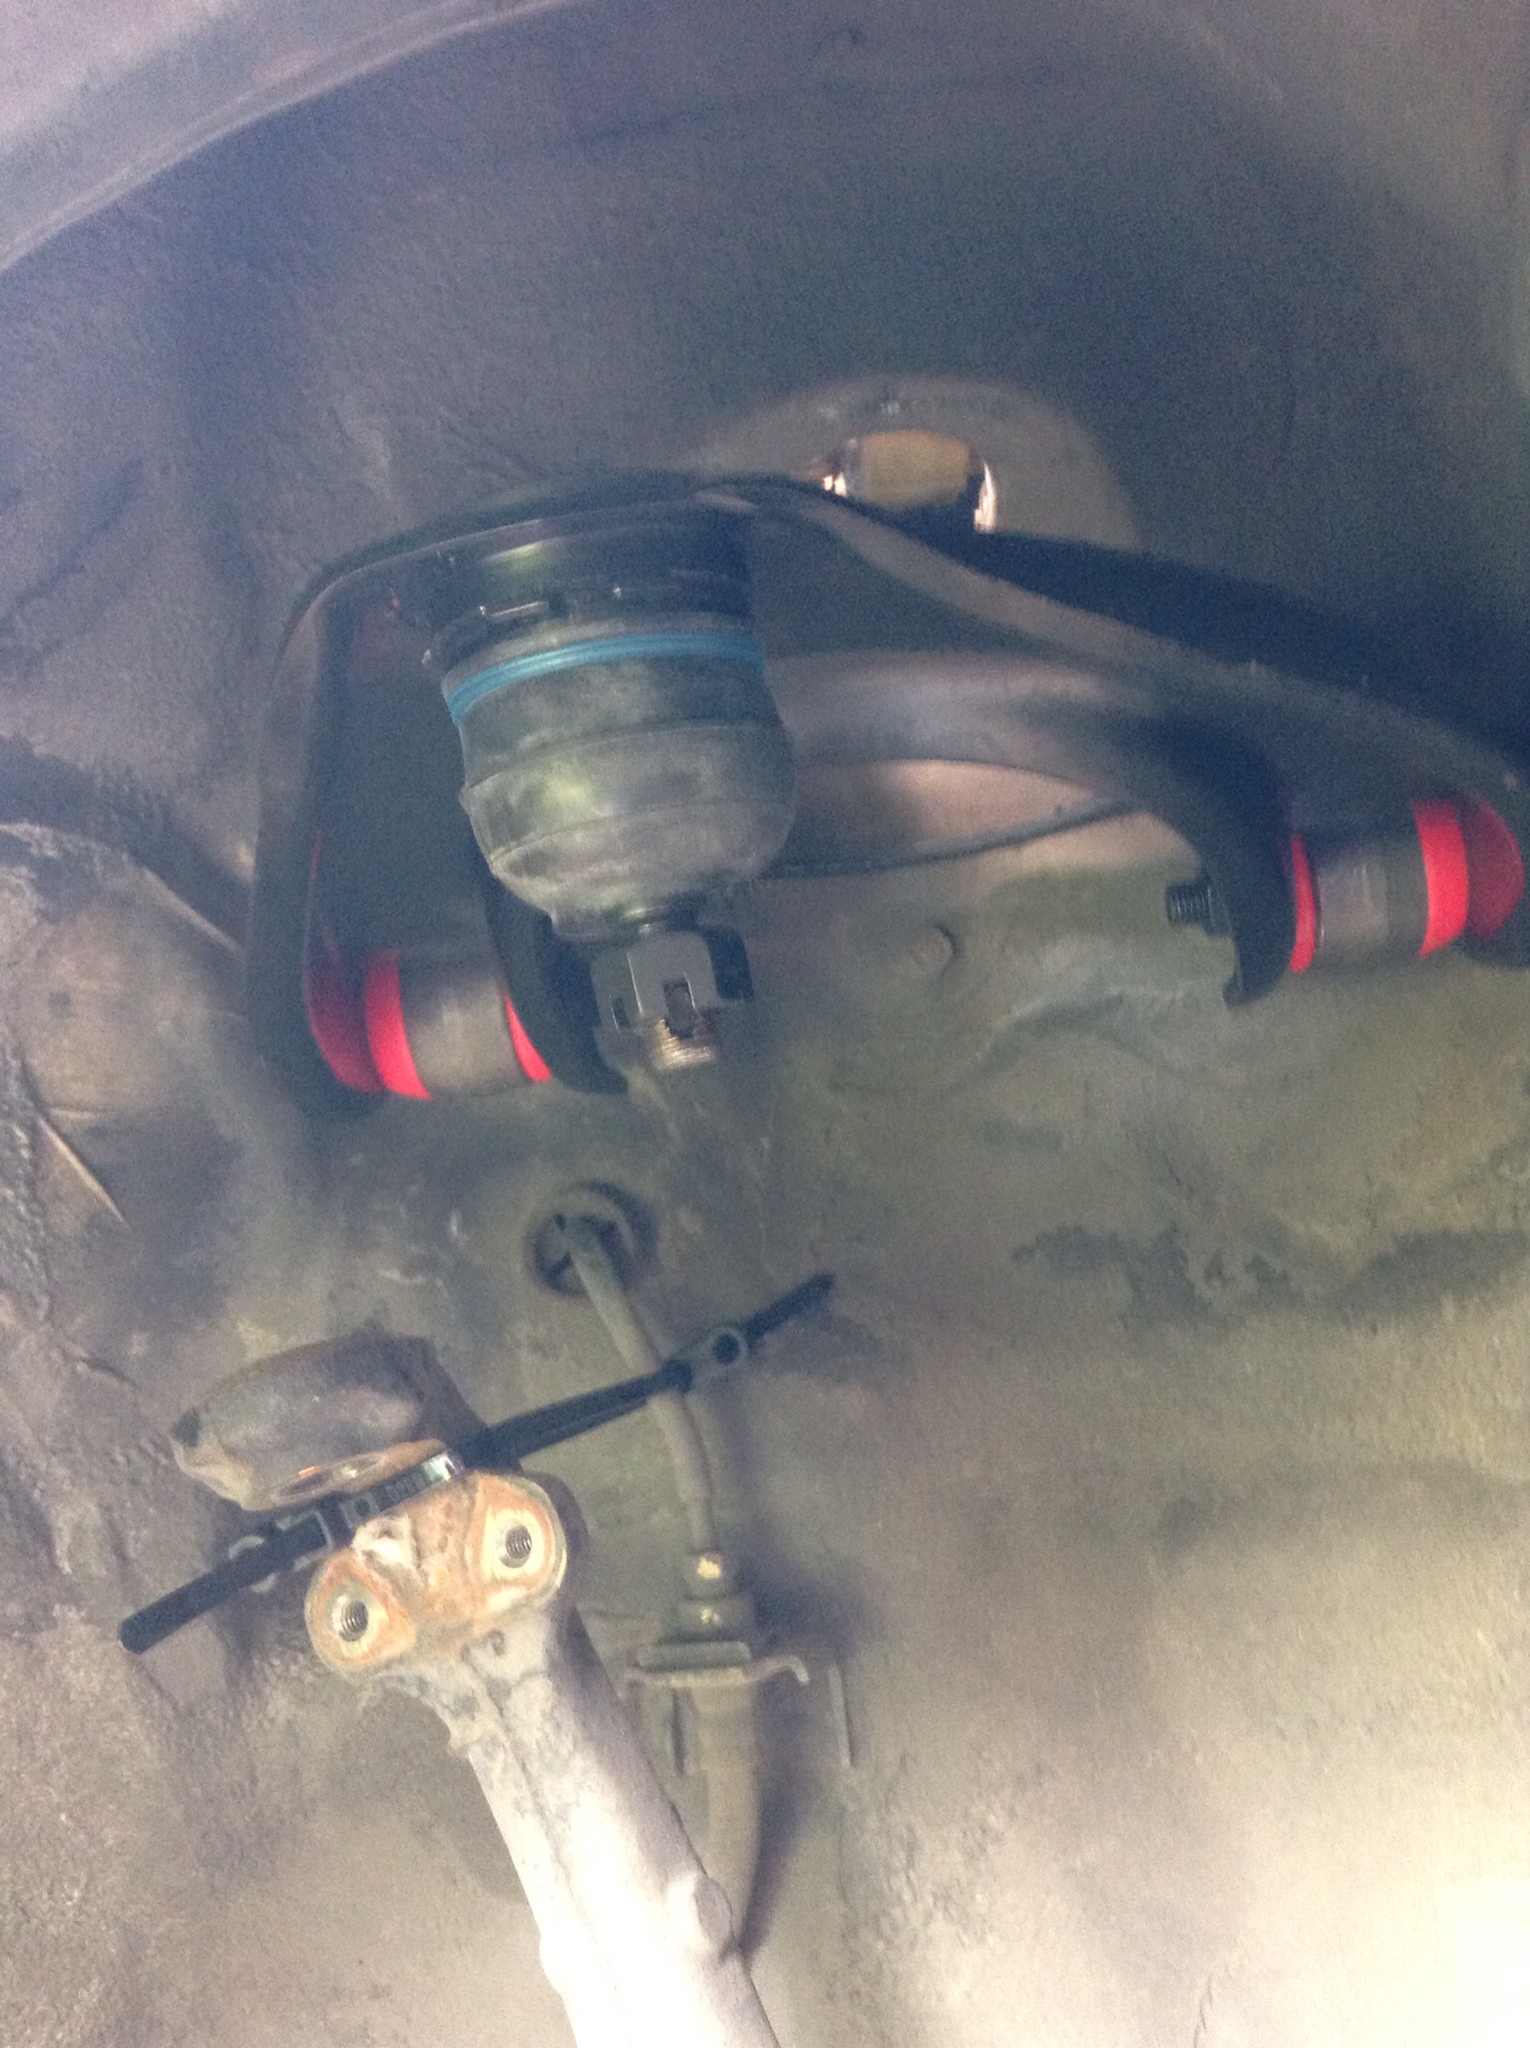
If your upper control arm ball joint looks like this, probably best to replace it considering you can get the entire arm setup for a very reasonable price. If you're in there it's going to be very easy to get to anyway so might as well.
Simple things first, remove the wheel, jack up the front end, and put a jack stand under the lower control arm to hold things.
Remove the two bolts holding the cover plate over the castle nut on the ball joint in the front upper control arm.
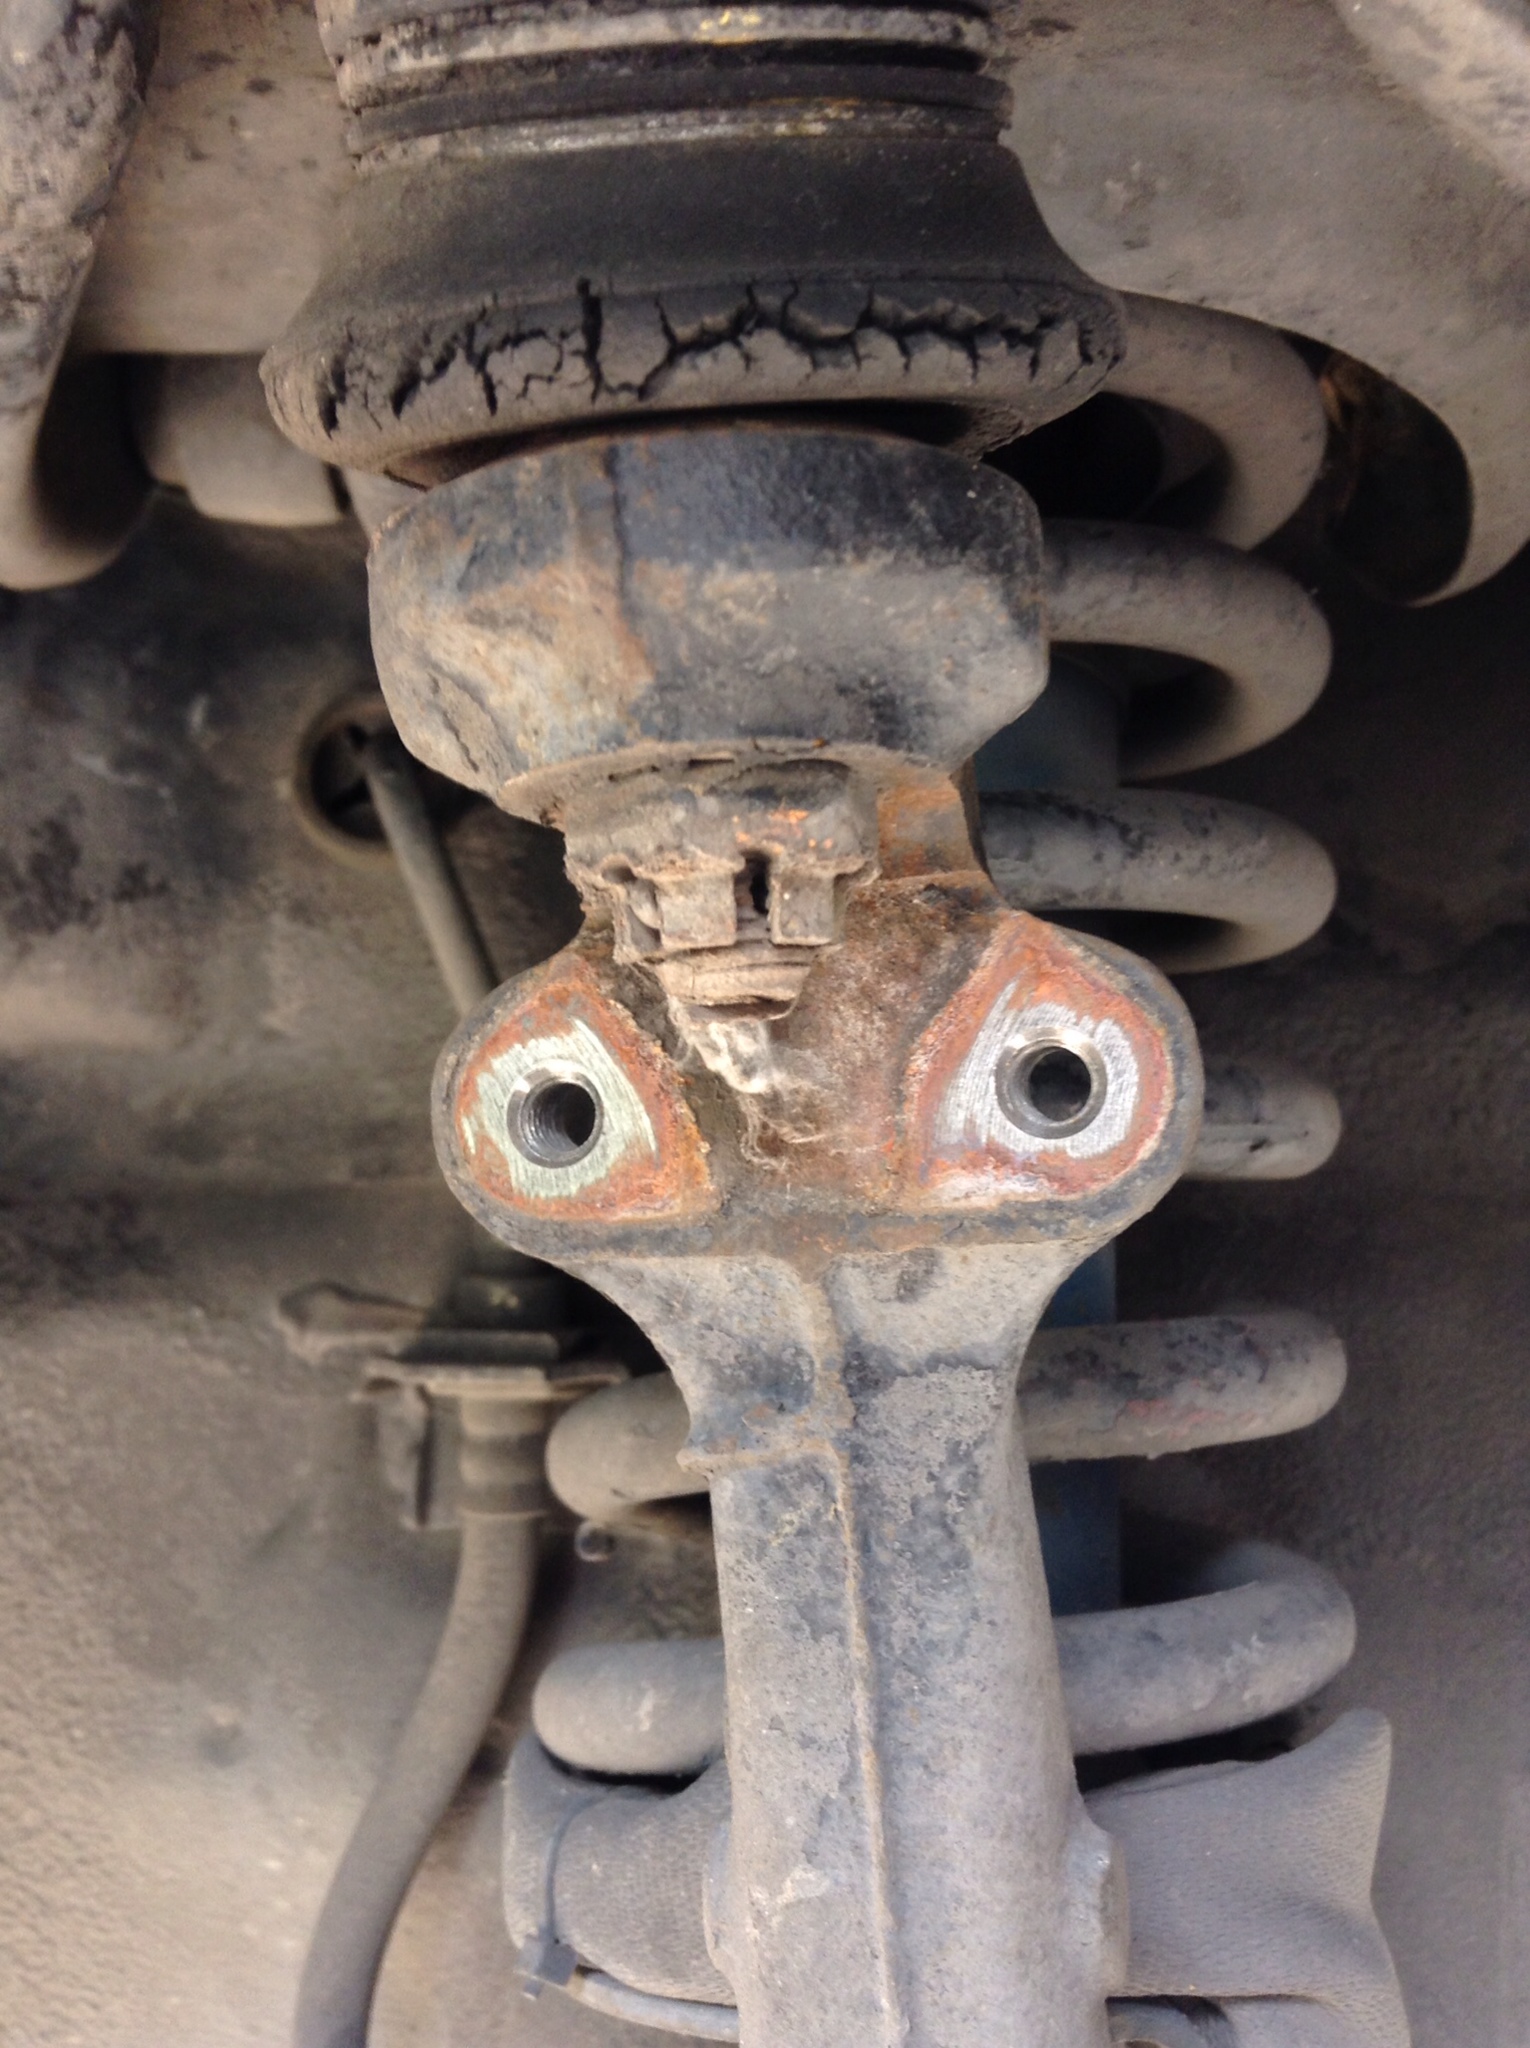
Remove the castle nut and pop the ball joint. These things can pop with some force, which is why it's good to keep the jack stand underneath so it's not hanging way down when you get it to pop. That makes it spring back all the more and will make you have a not nice day if any tender bits are in the way.
Back in the engine bay, remove the nuts holding the upper control arm in place. For the drivers side see are easy to get to. Passenger side, the fuse box is in the way.
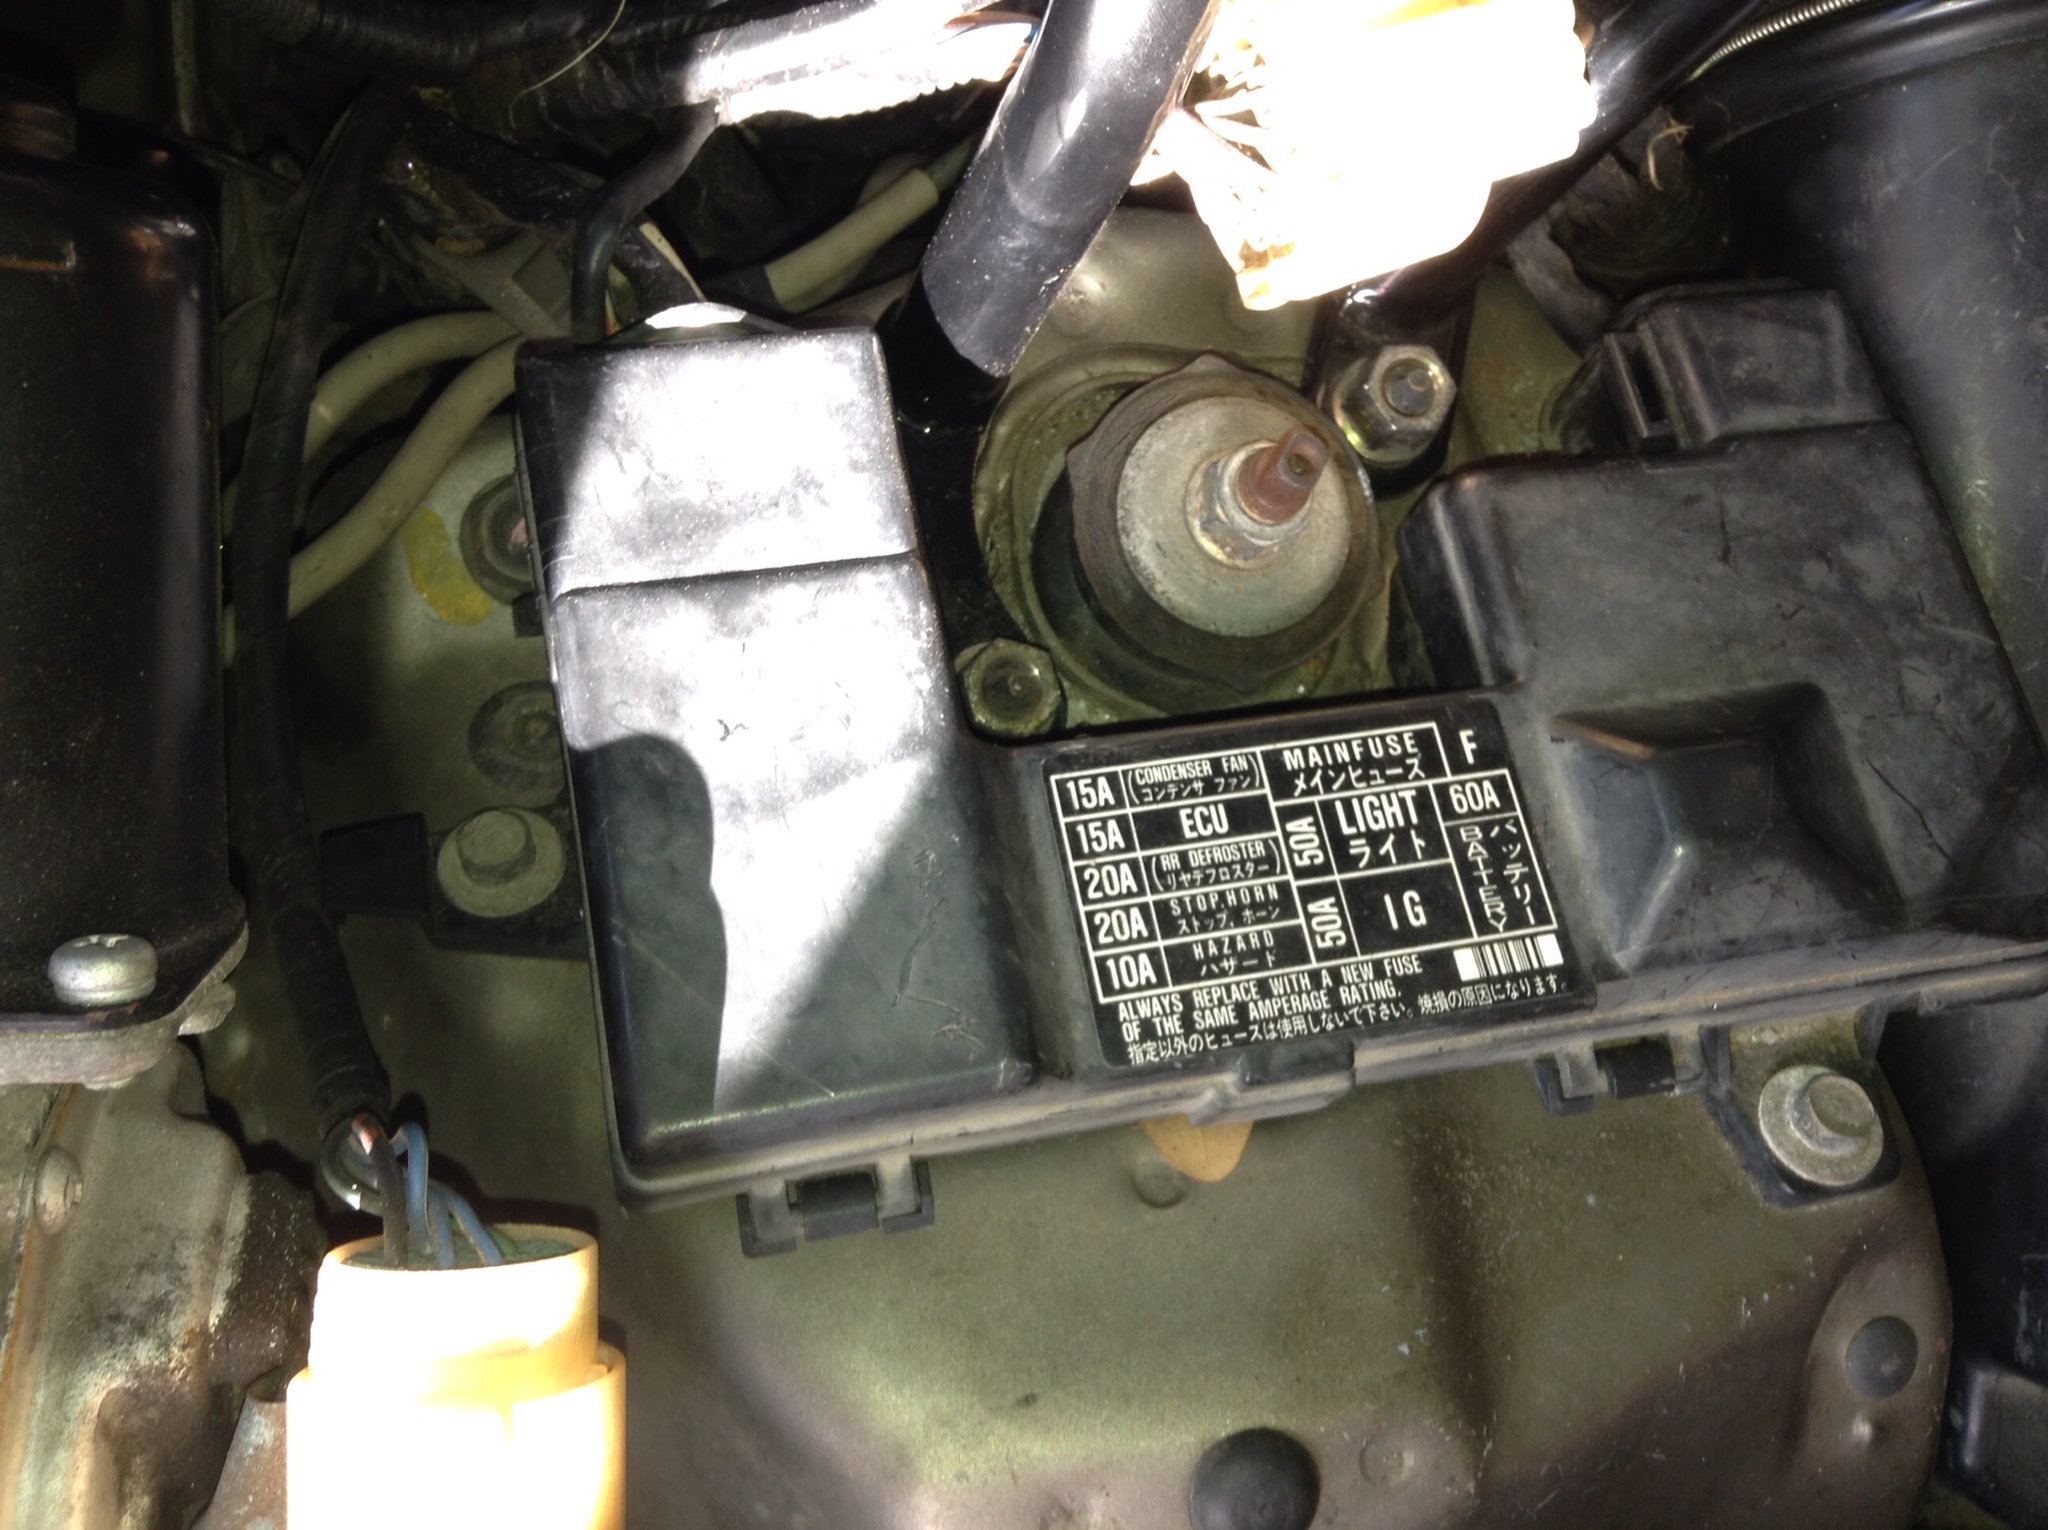
Just two 10mm bolts holding this in place, then you can flip it up and get to the control arm nuts.
Bam arm is out. Now if you're replacing the bushings in your new control arm, good luck to you buddy. I don't have a press so getting the old bushings out sucked. Do it however you can.
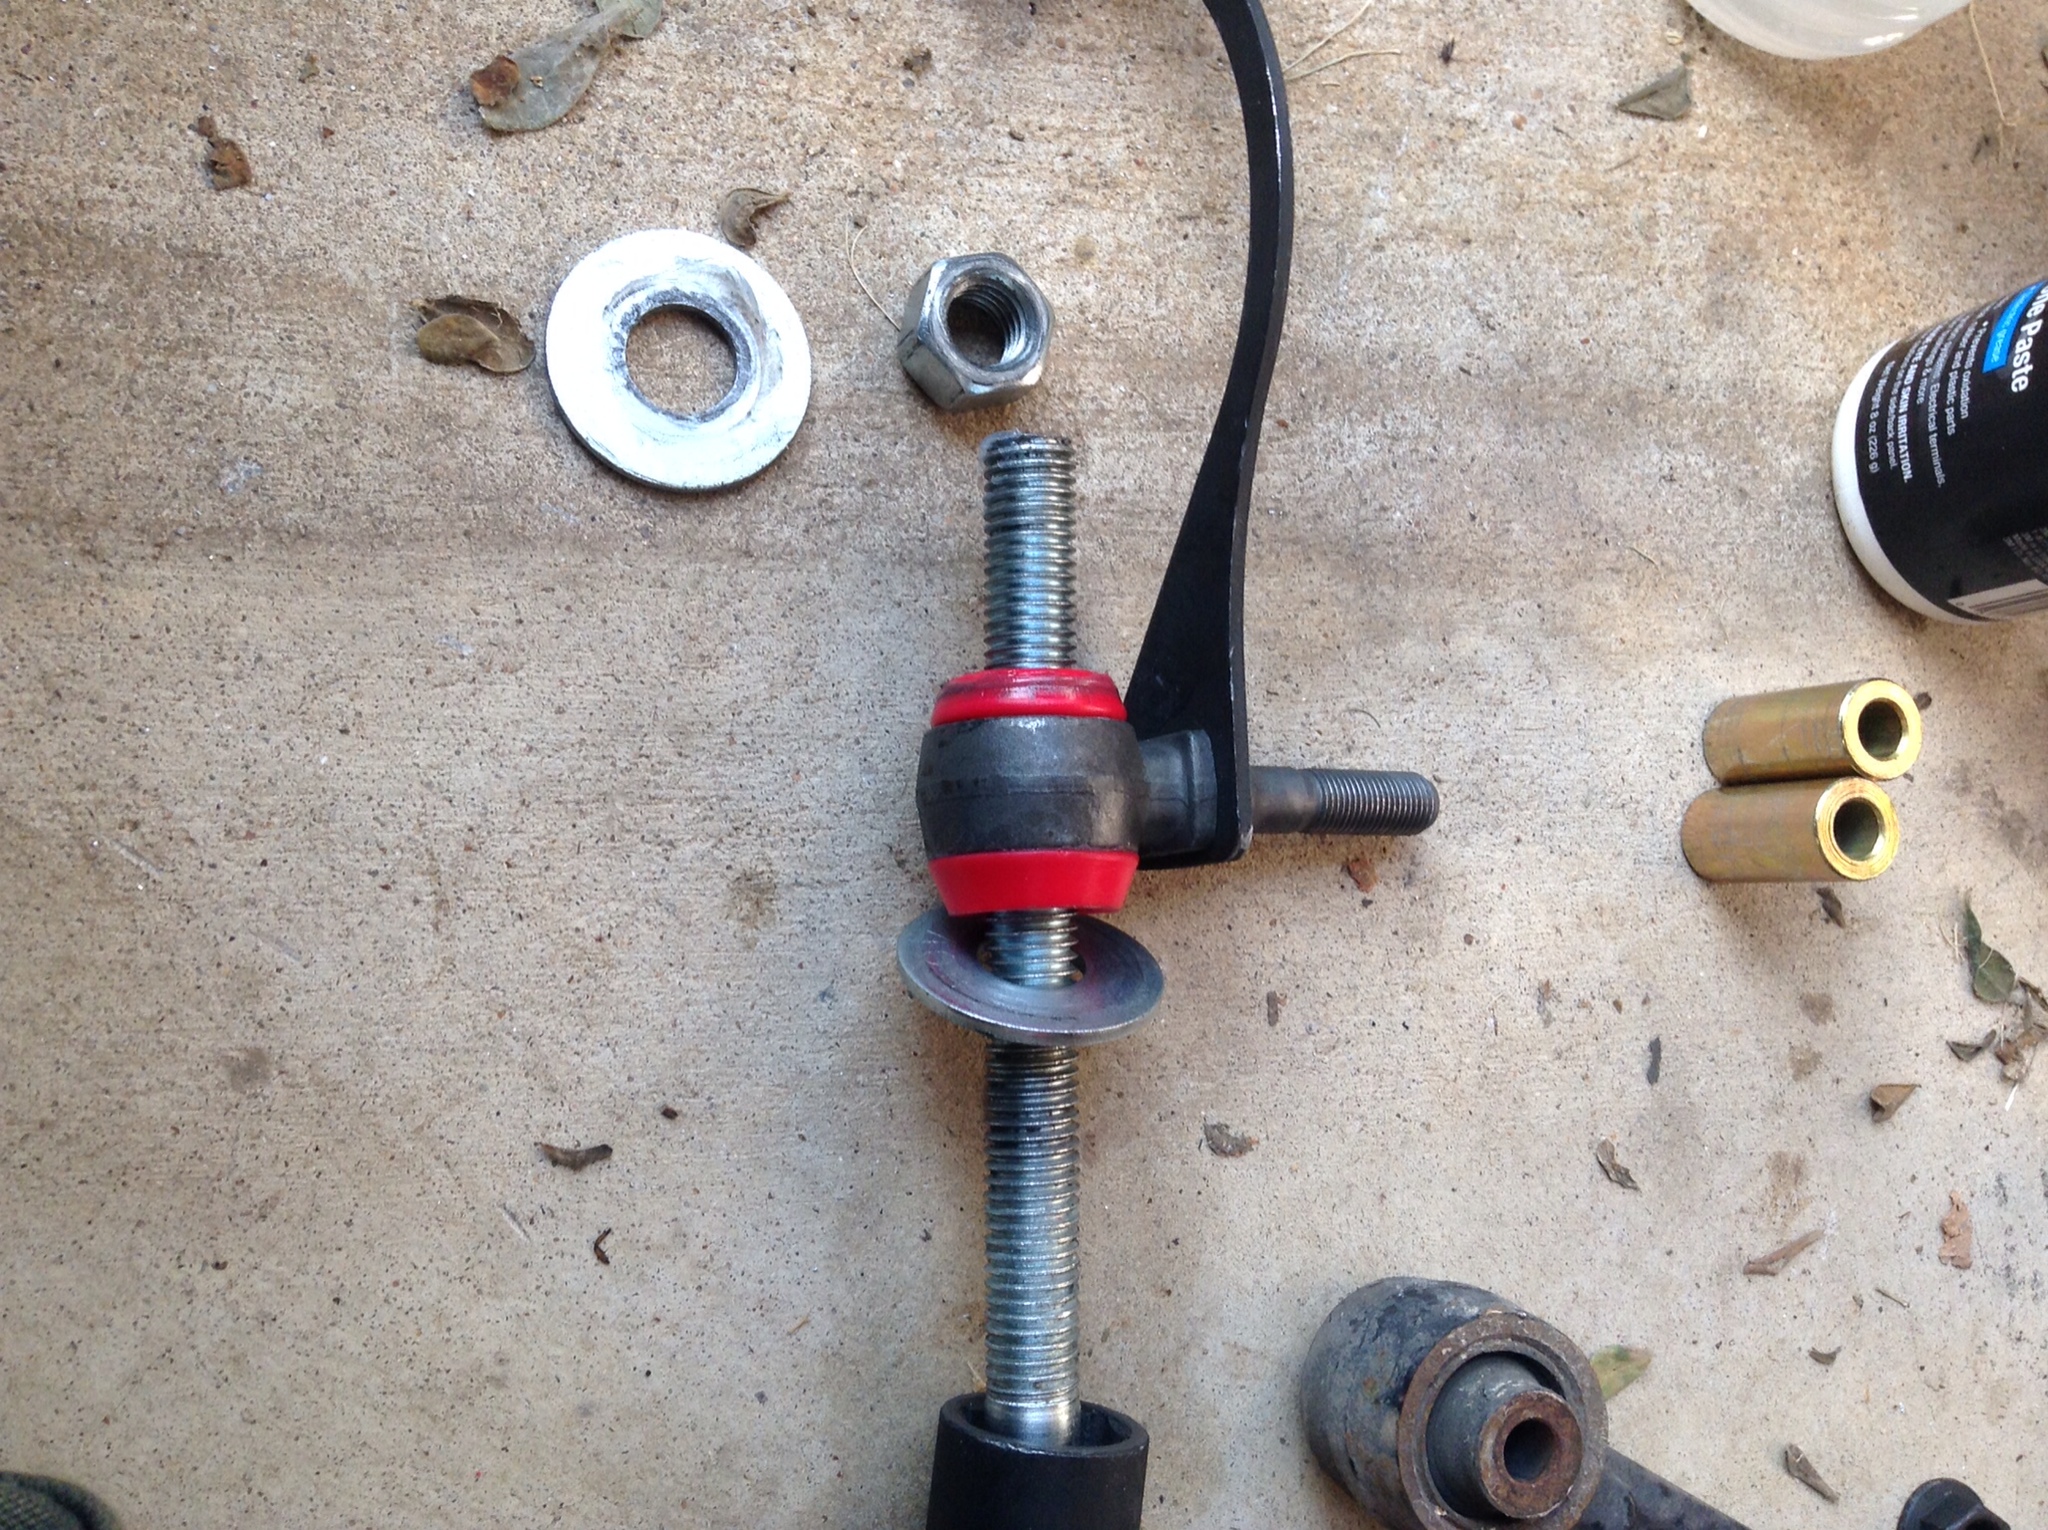
Pressing the poly bushings back in is easy enough with the good old nut and bolt with some washers.
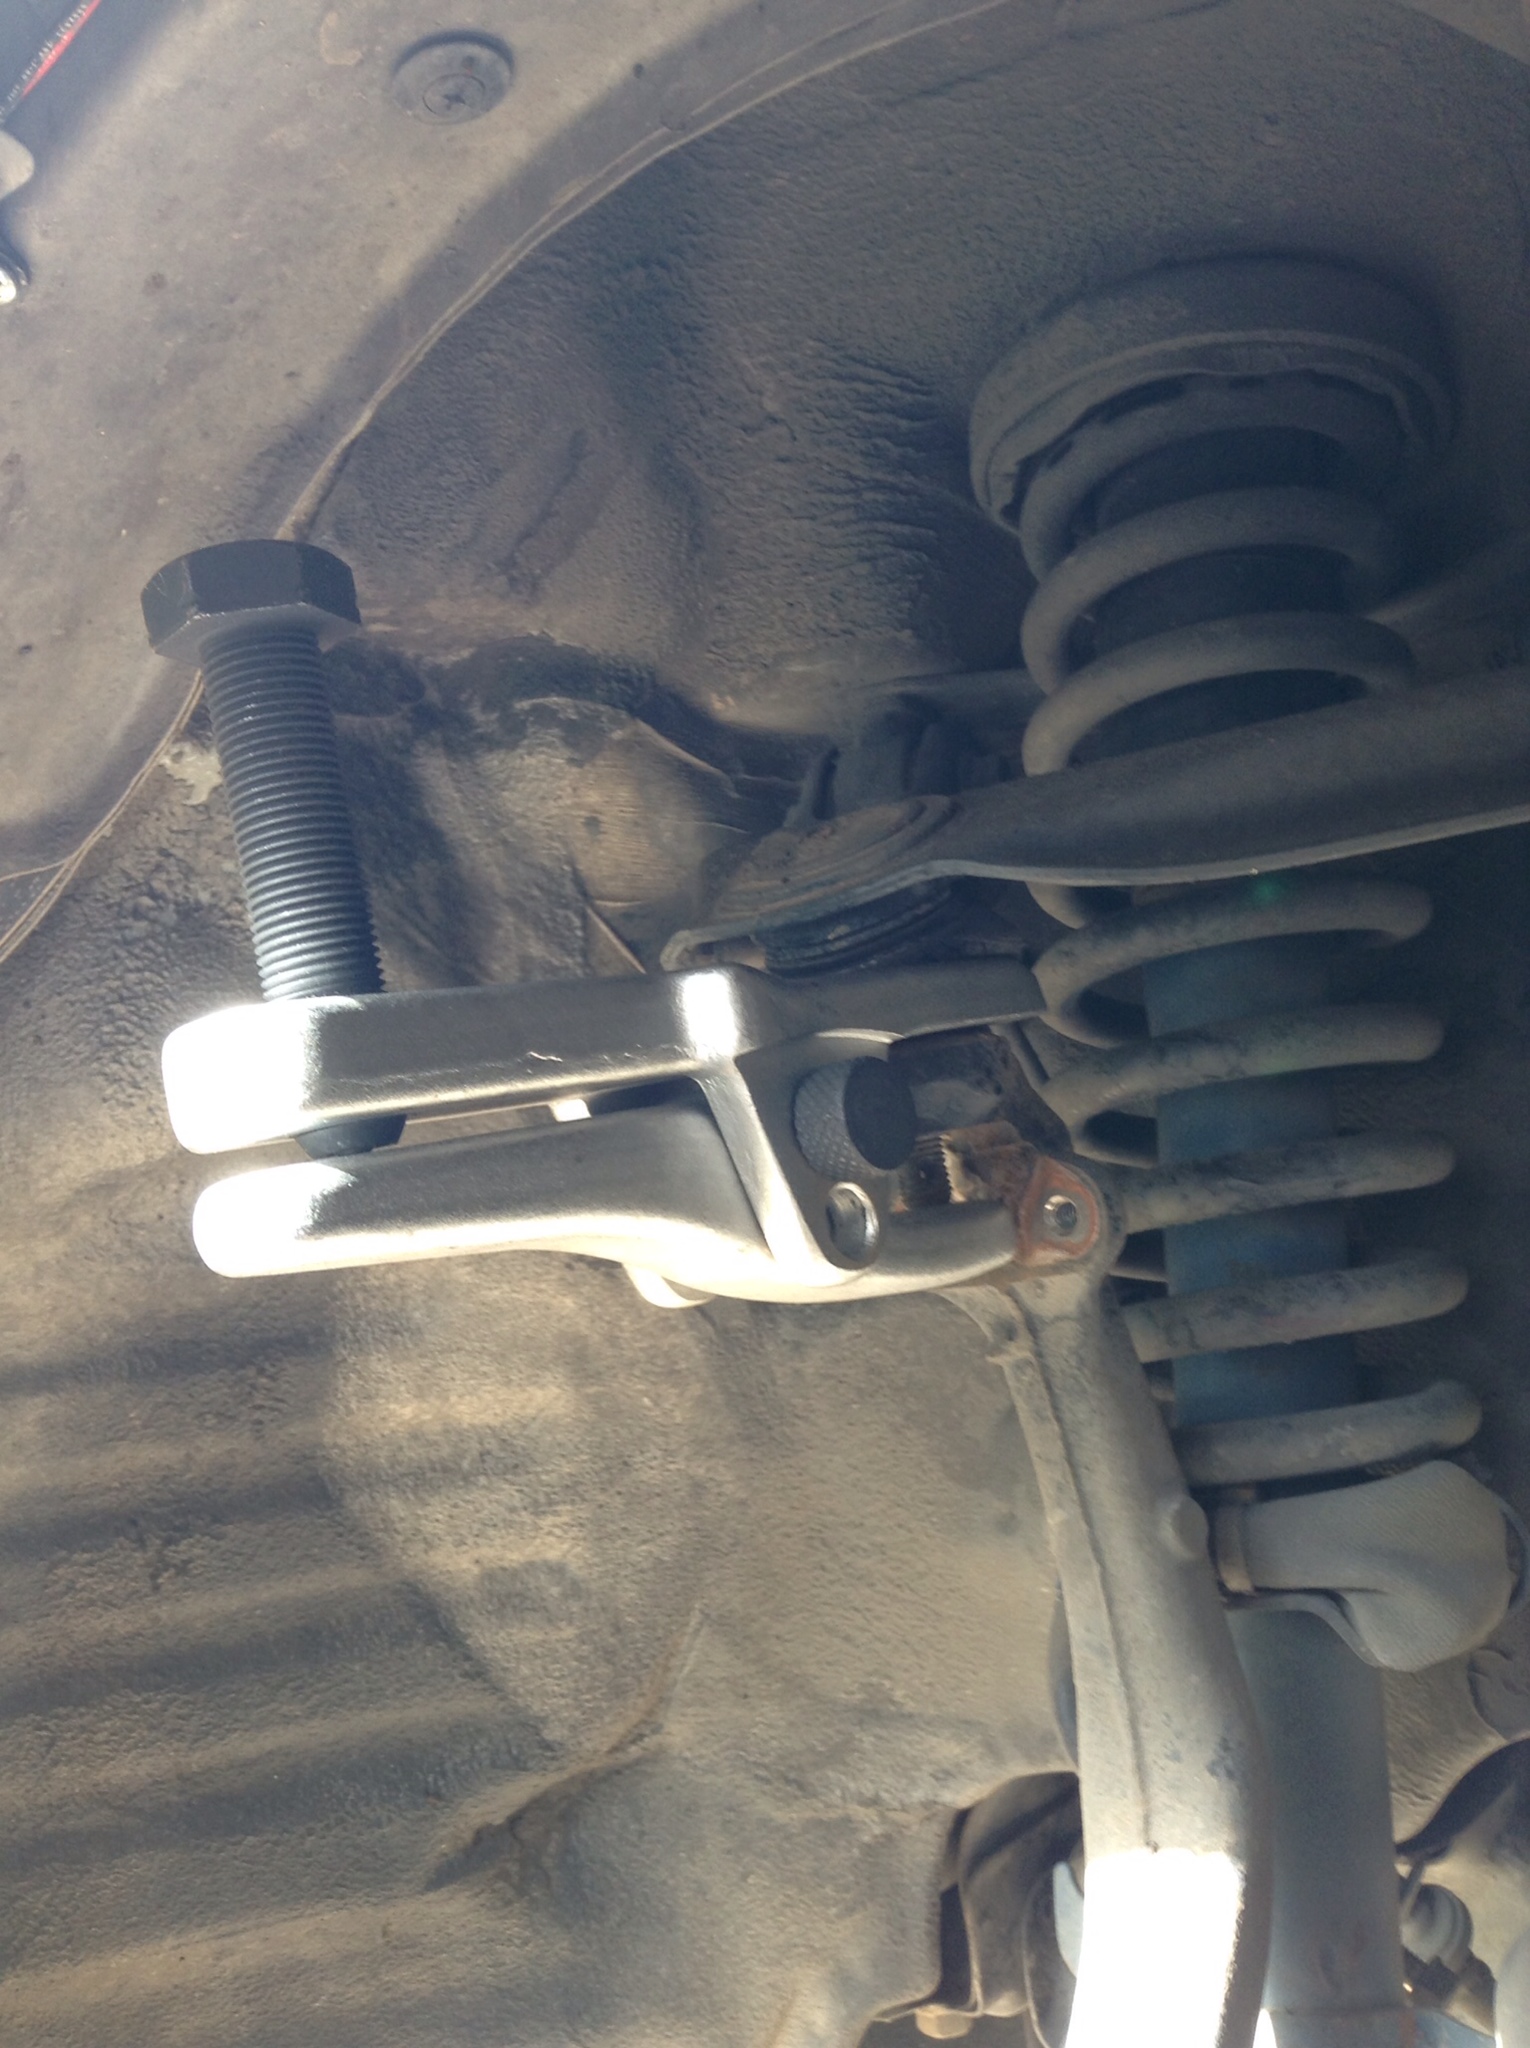
On with the strut. I found the easiest way to get it out, since you're dealing with an axle as well is to remove the fork at the bottom of the strut first. Be careful here, both of mine had some thread locker on them and it chewed up some threads, I had to run an oversized bolt in one to get it to clamp back down. Just something to watch out for.
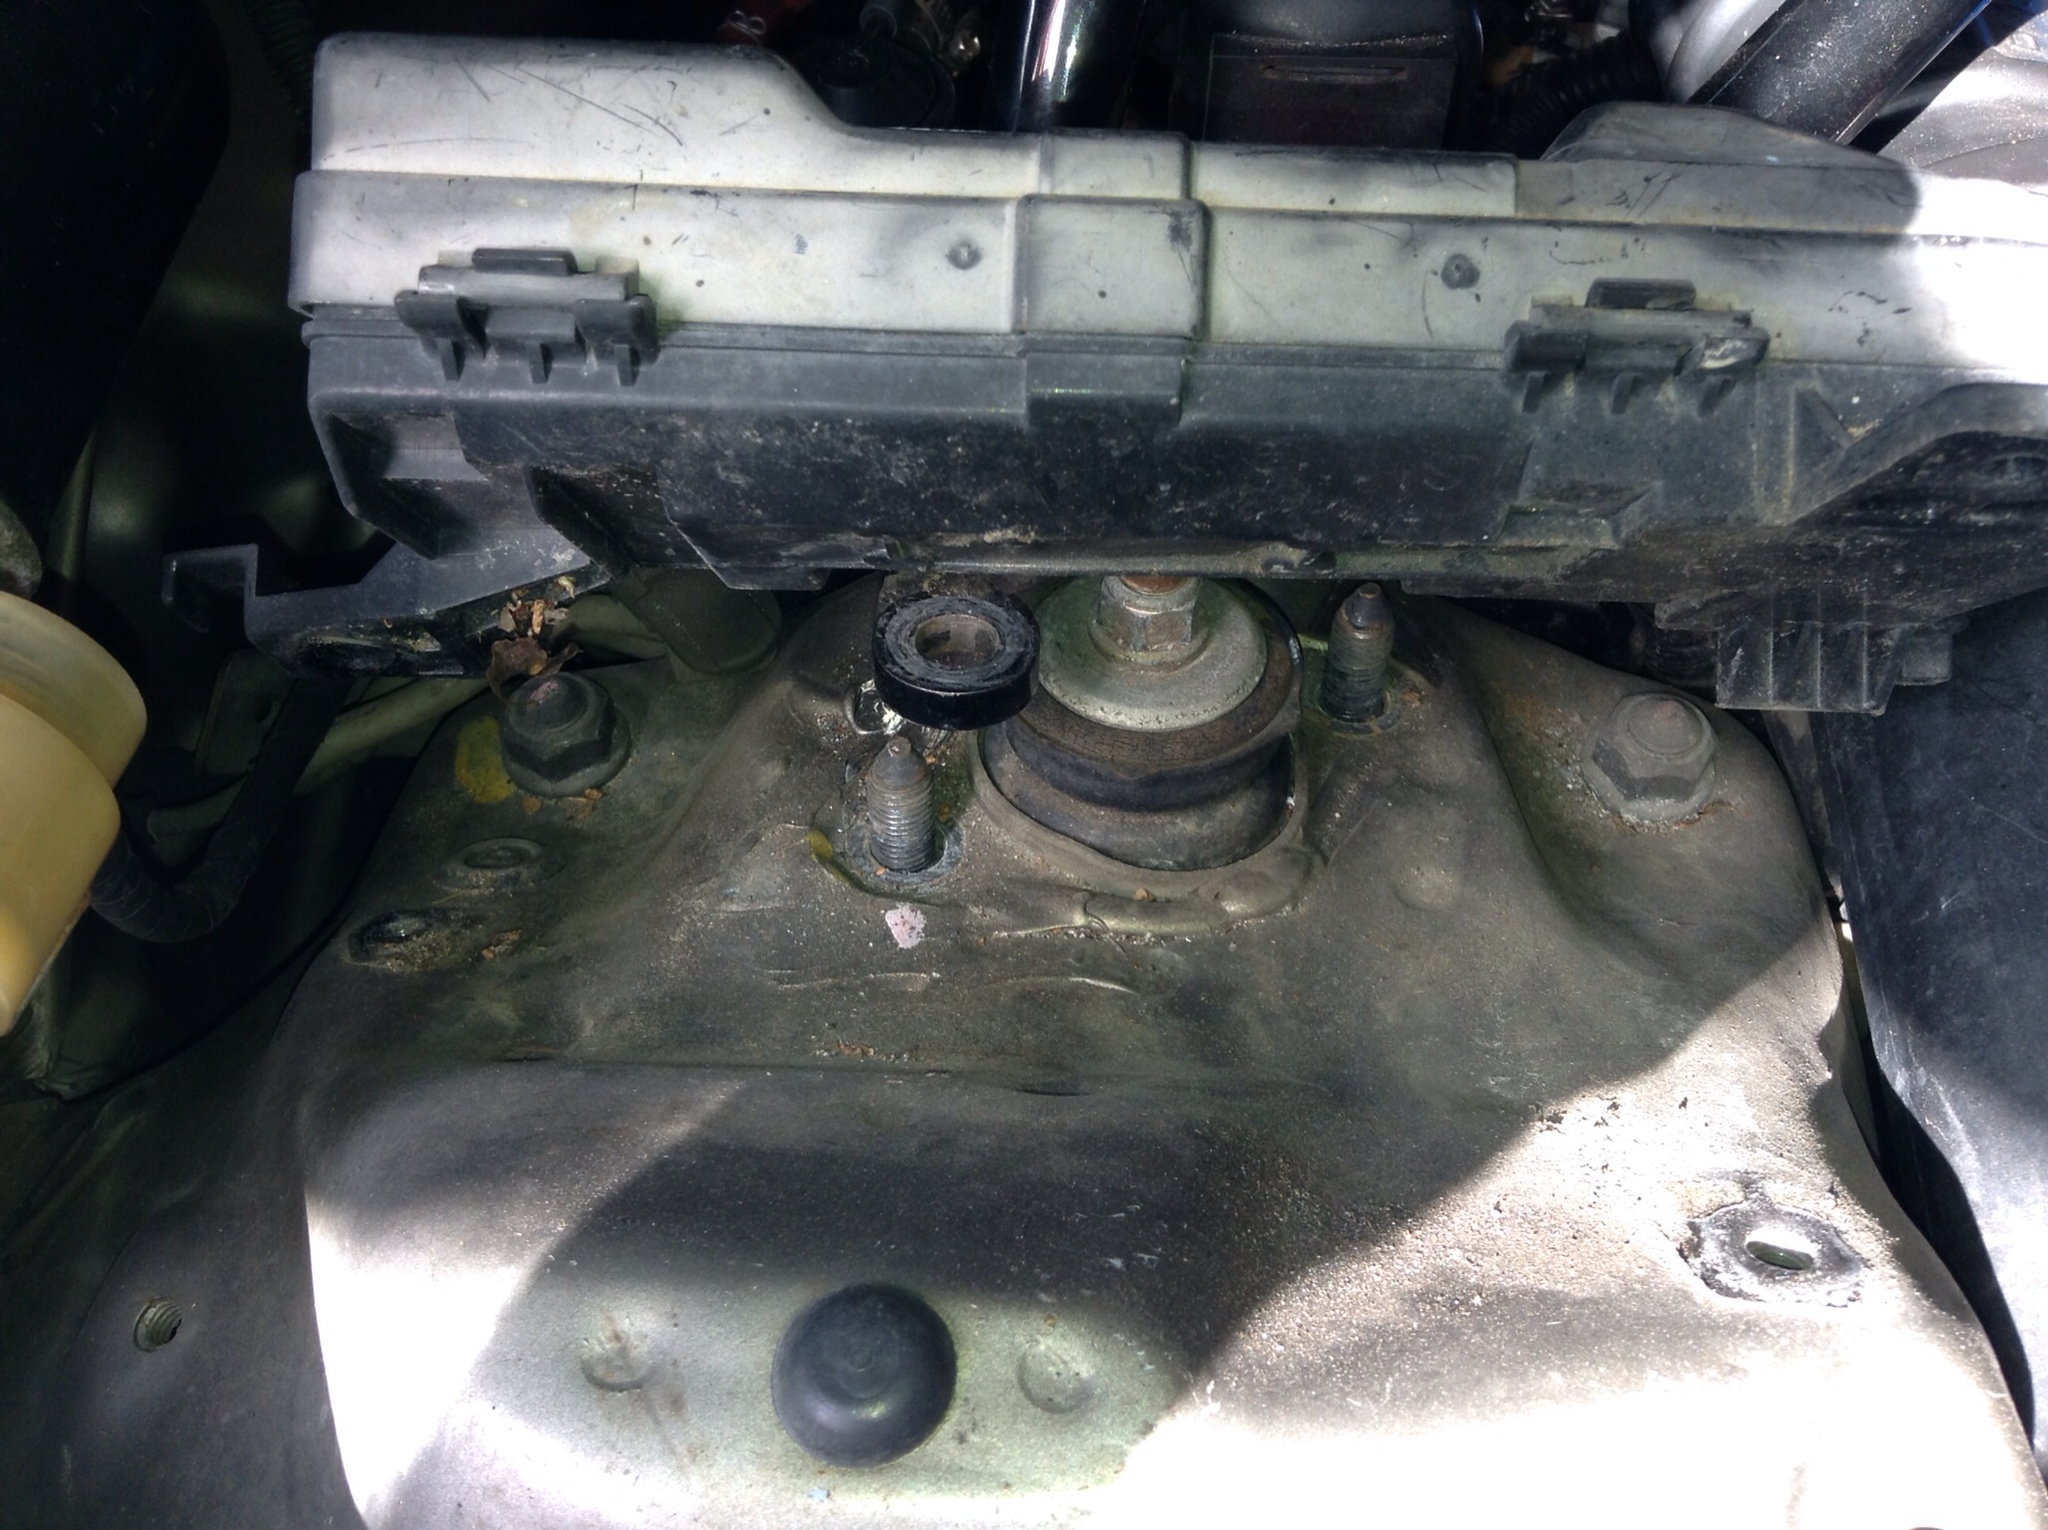
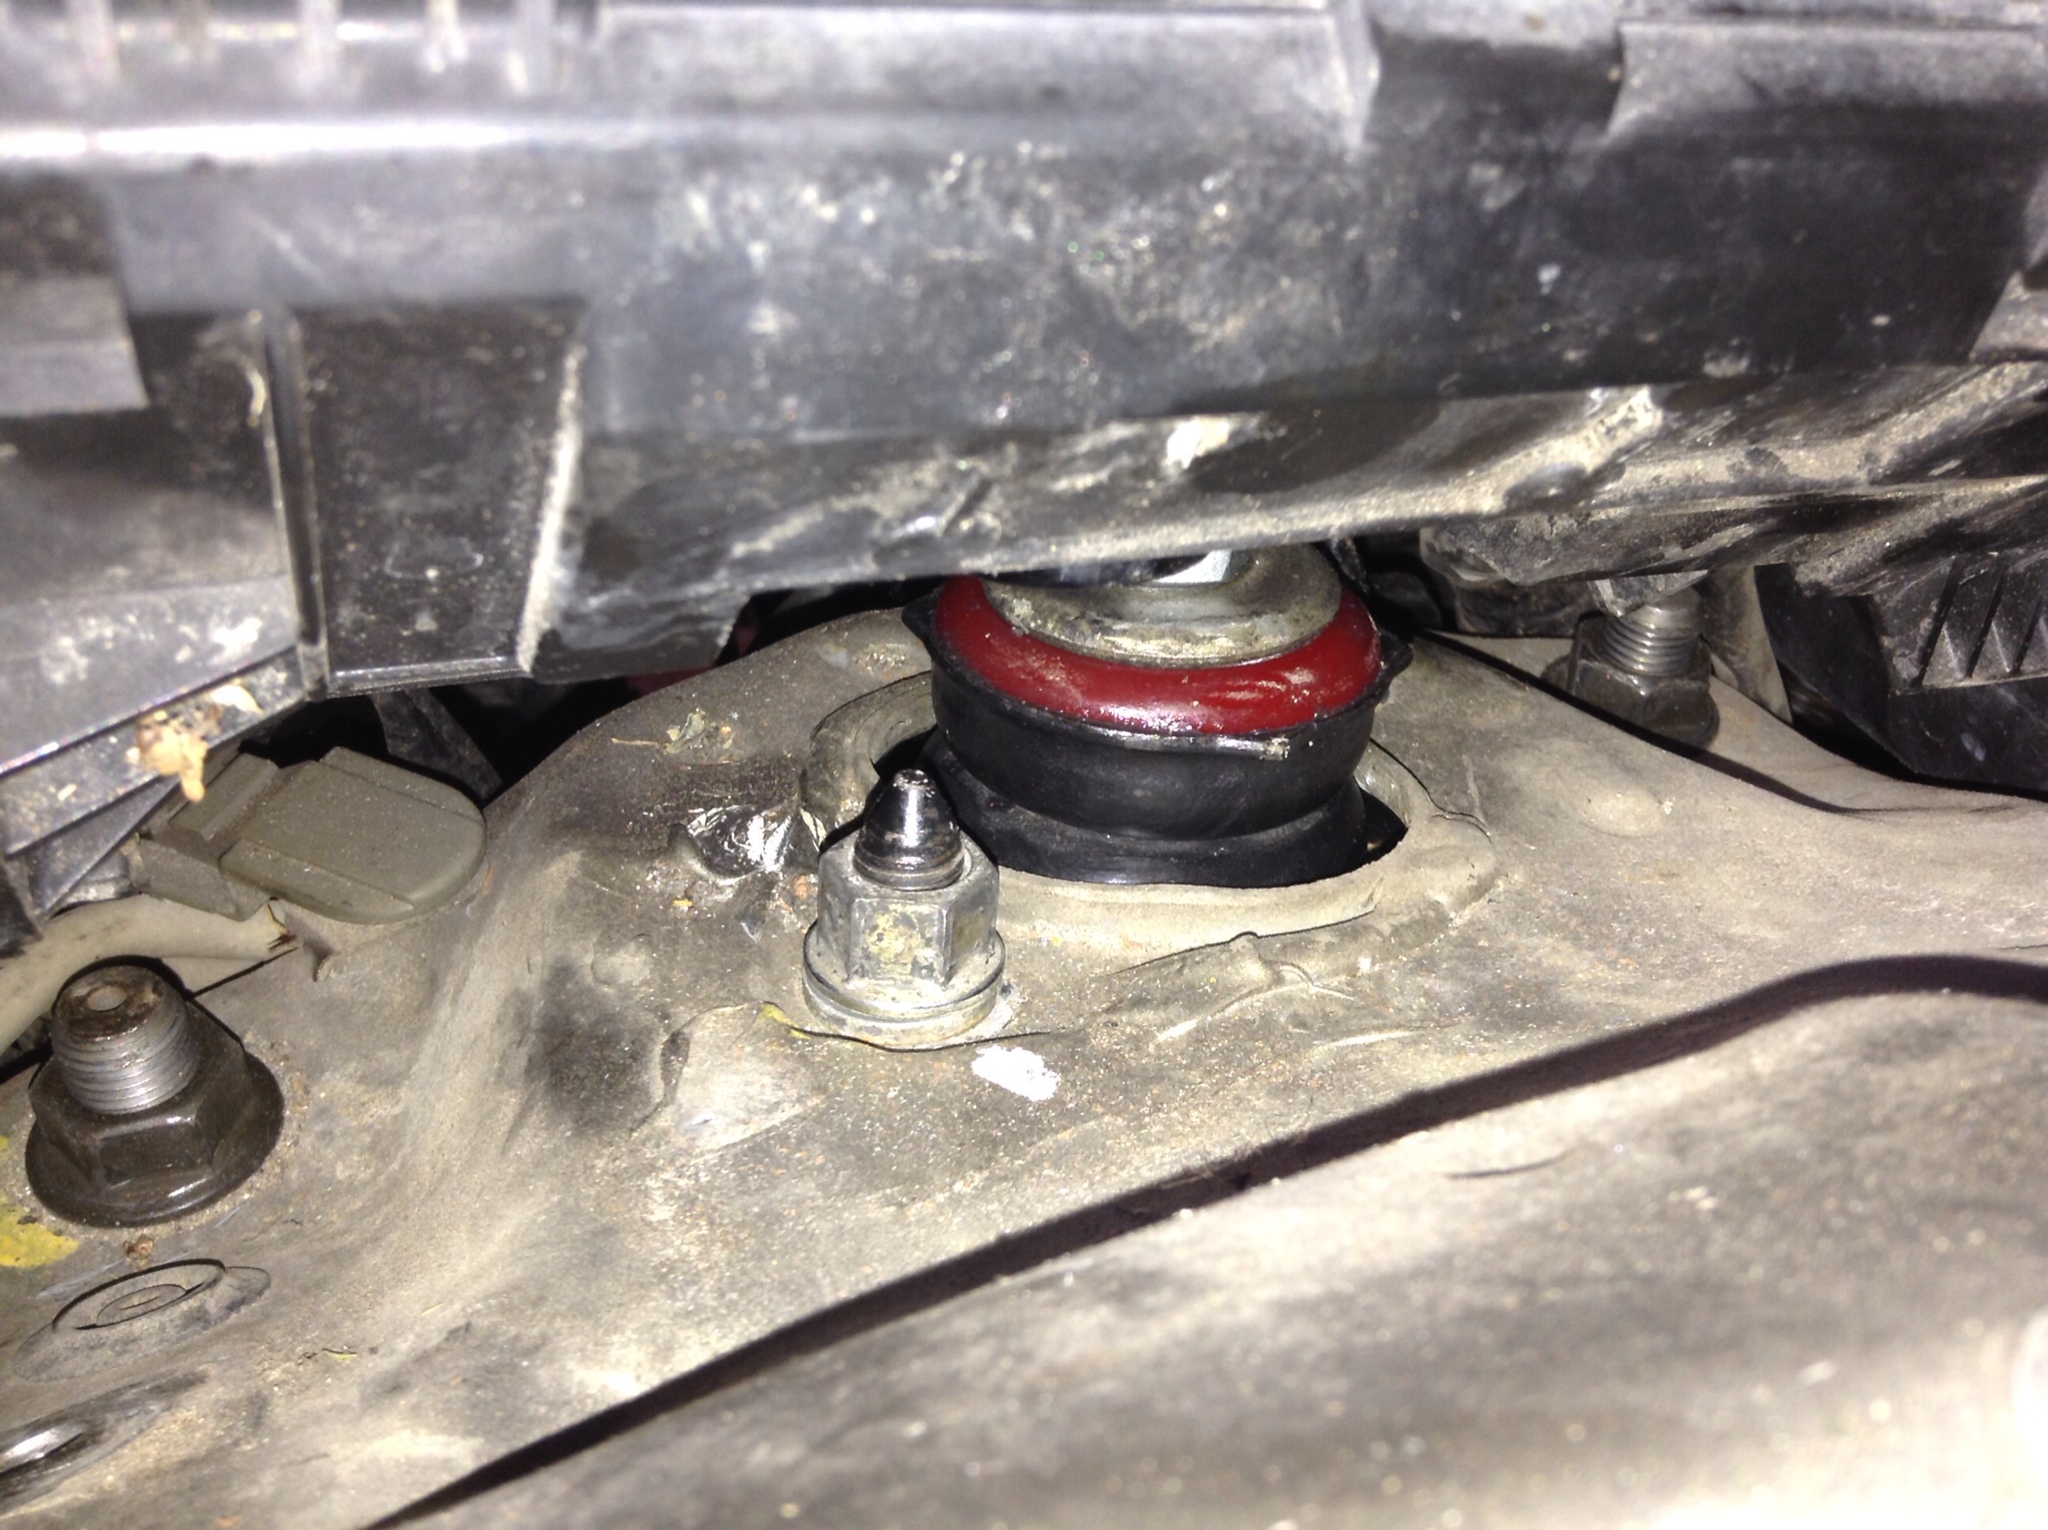
Once that is out we can go back into the engine bay and undo the two 14mm nuts holding the top hat and strut/spring assembly in place.

Disassemble the strut and spring however you like. Shoot the strut across the driveway if you're feeling brave and have an impact.
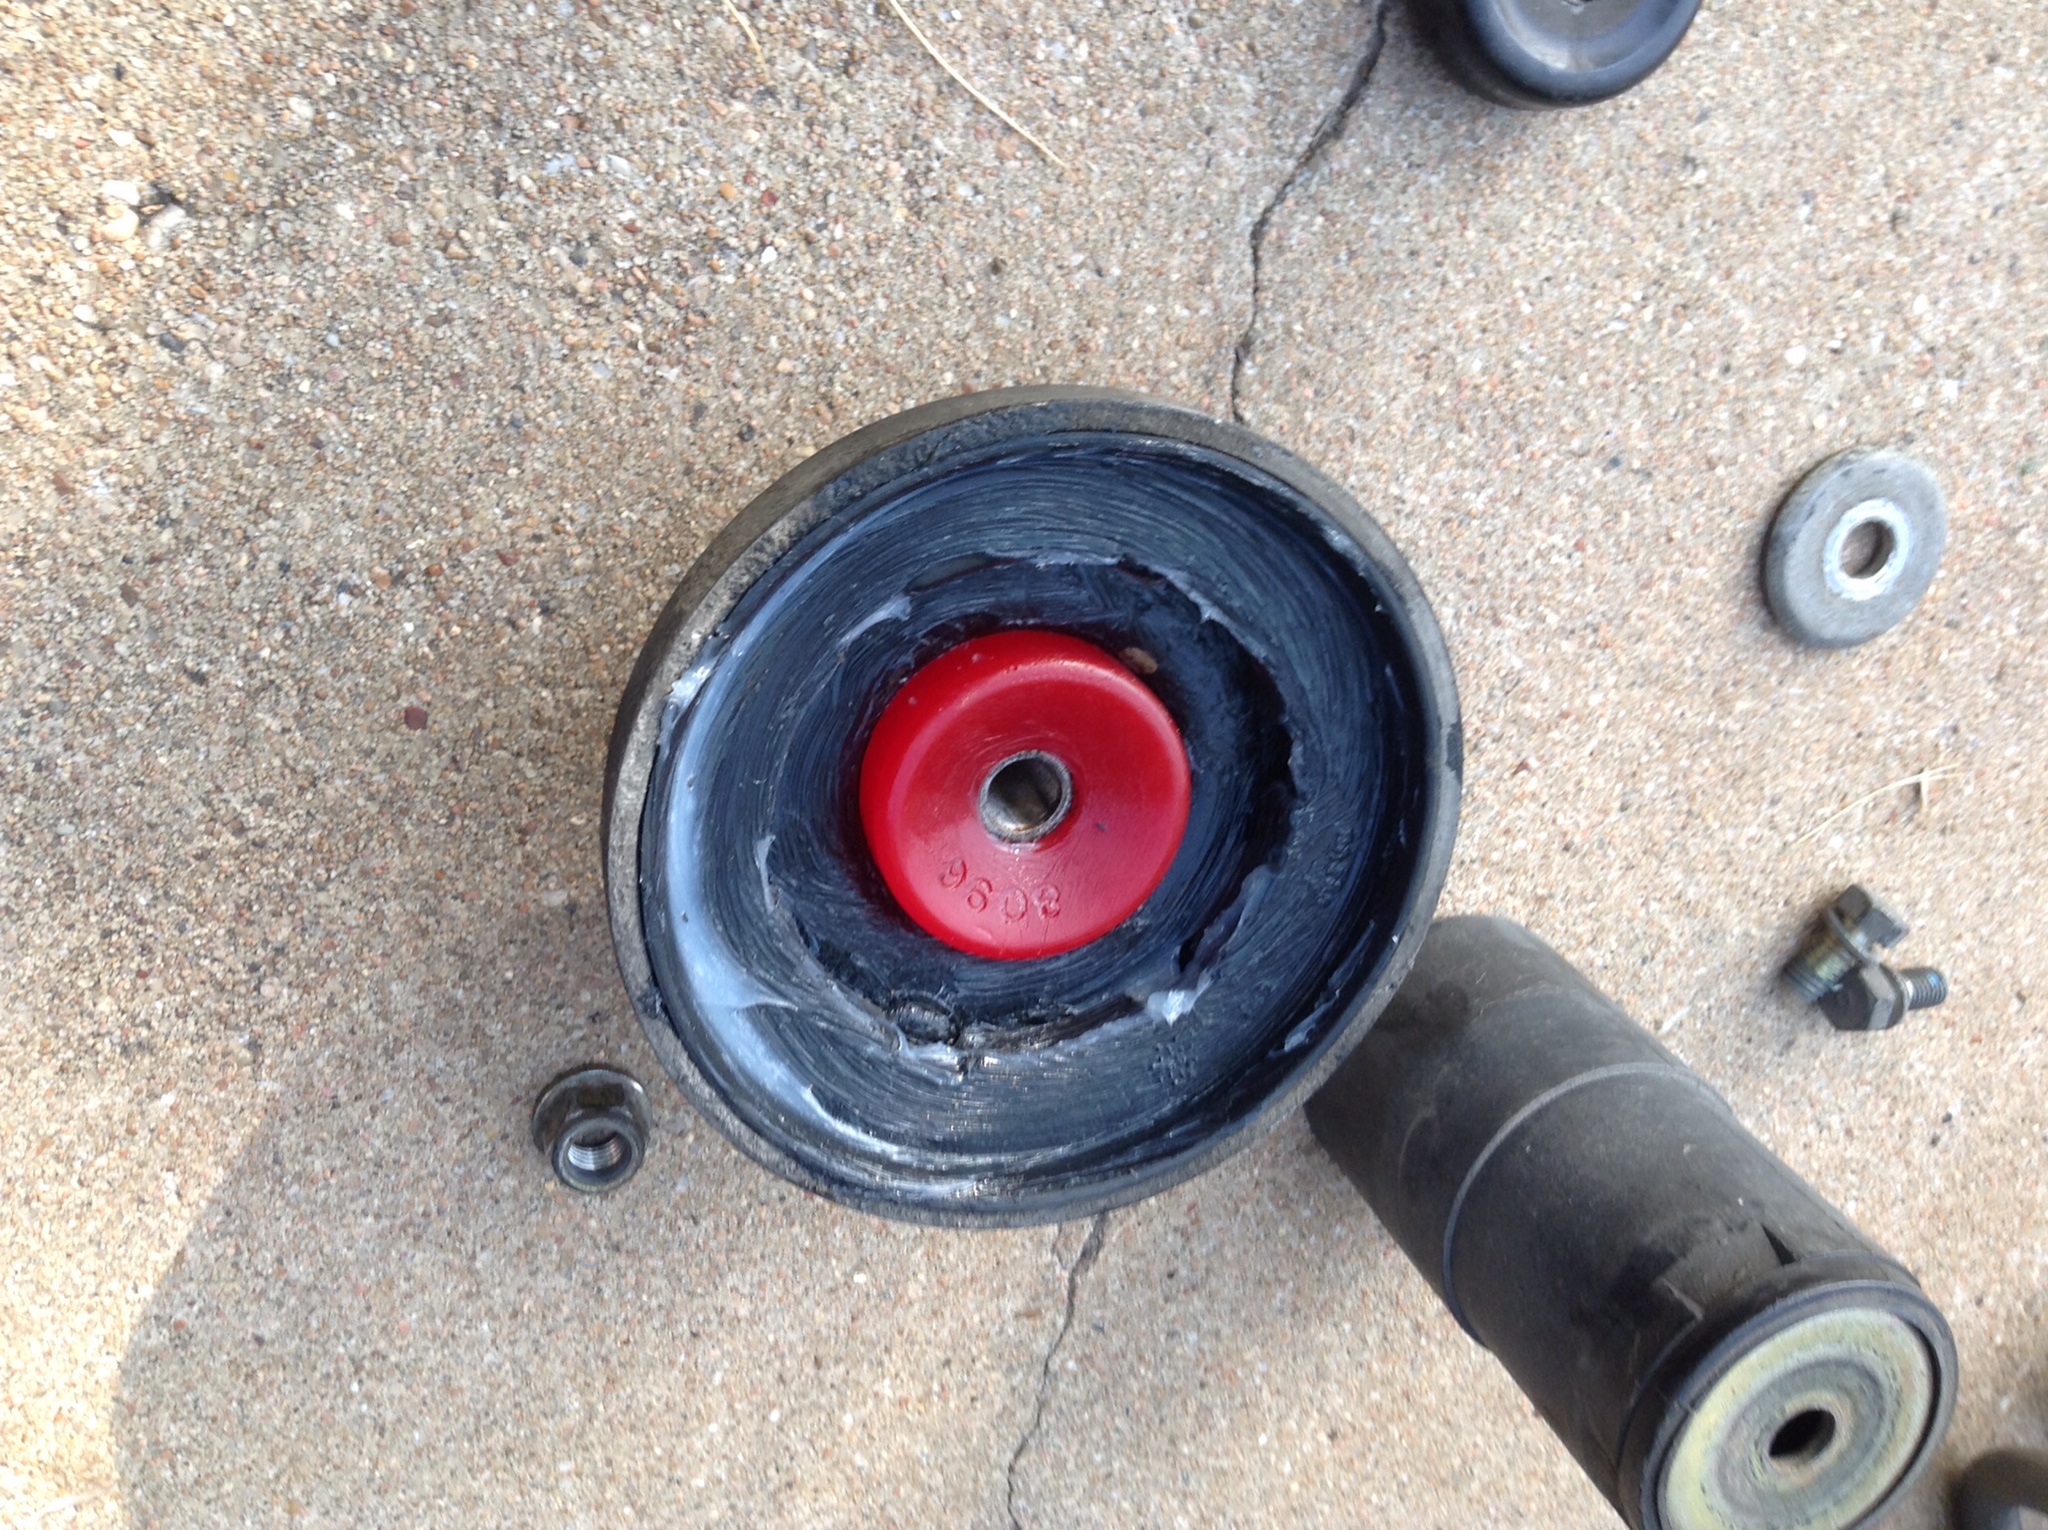
Below we have the top hat a new rubber for the spring seat and the new poly bushings, as well as the dust cover.
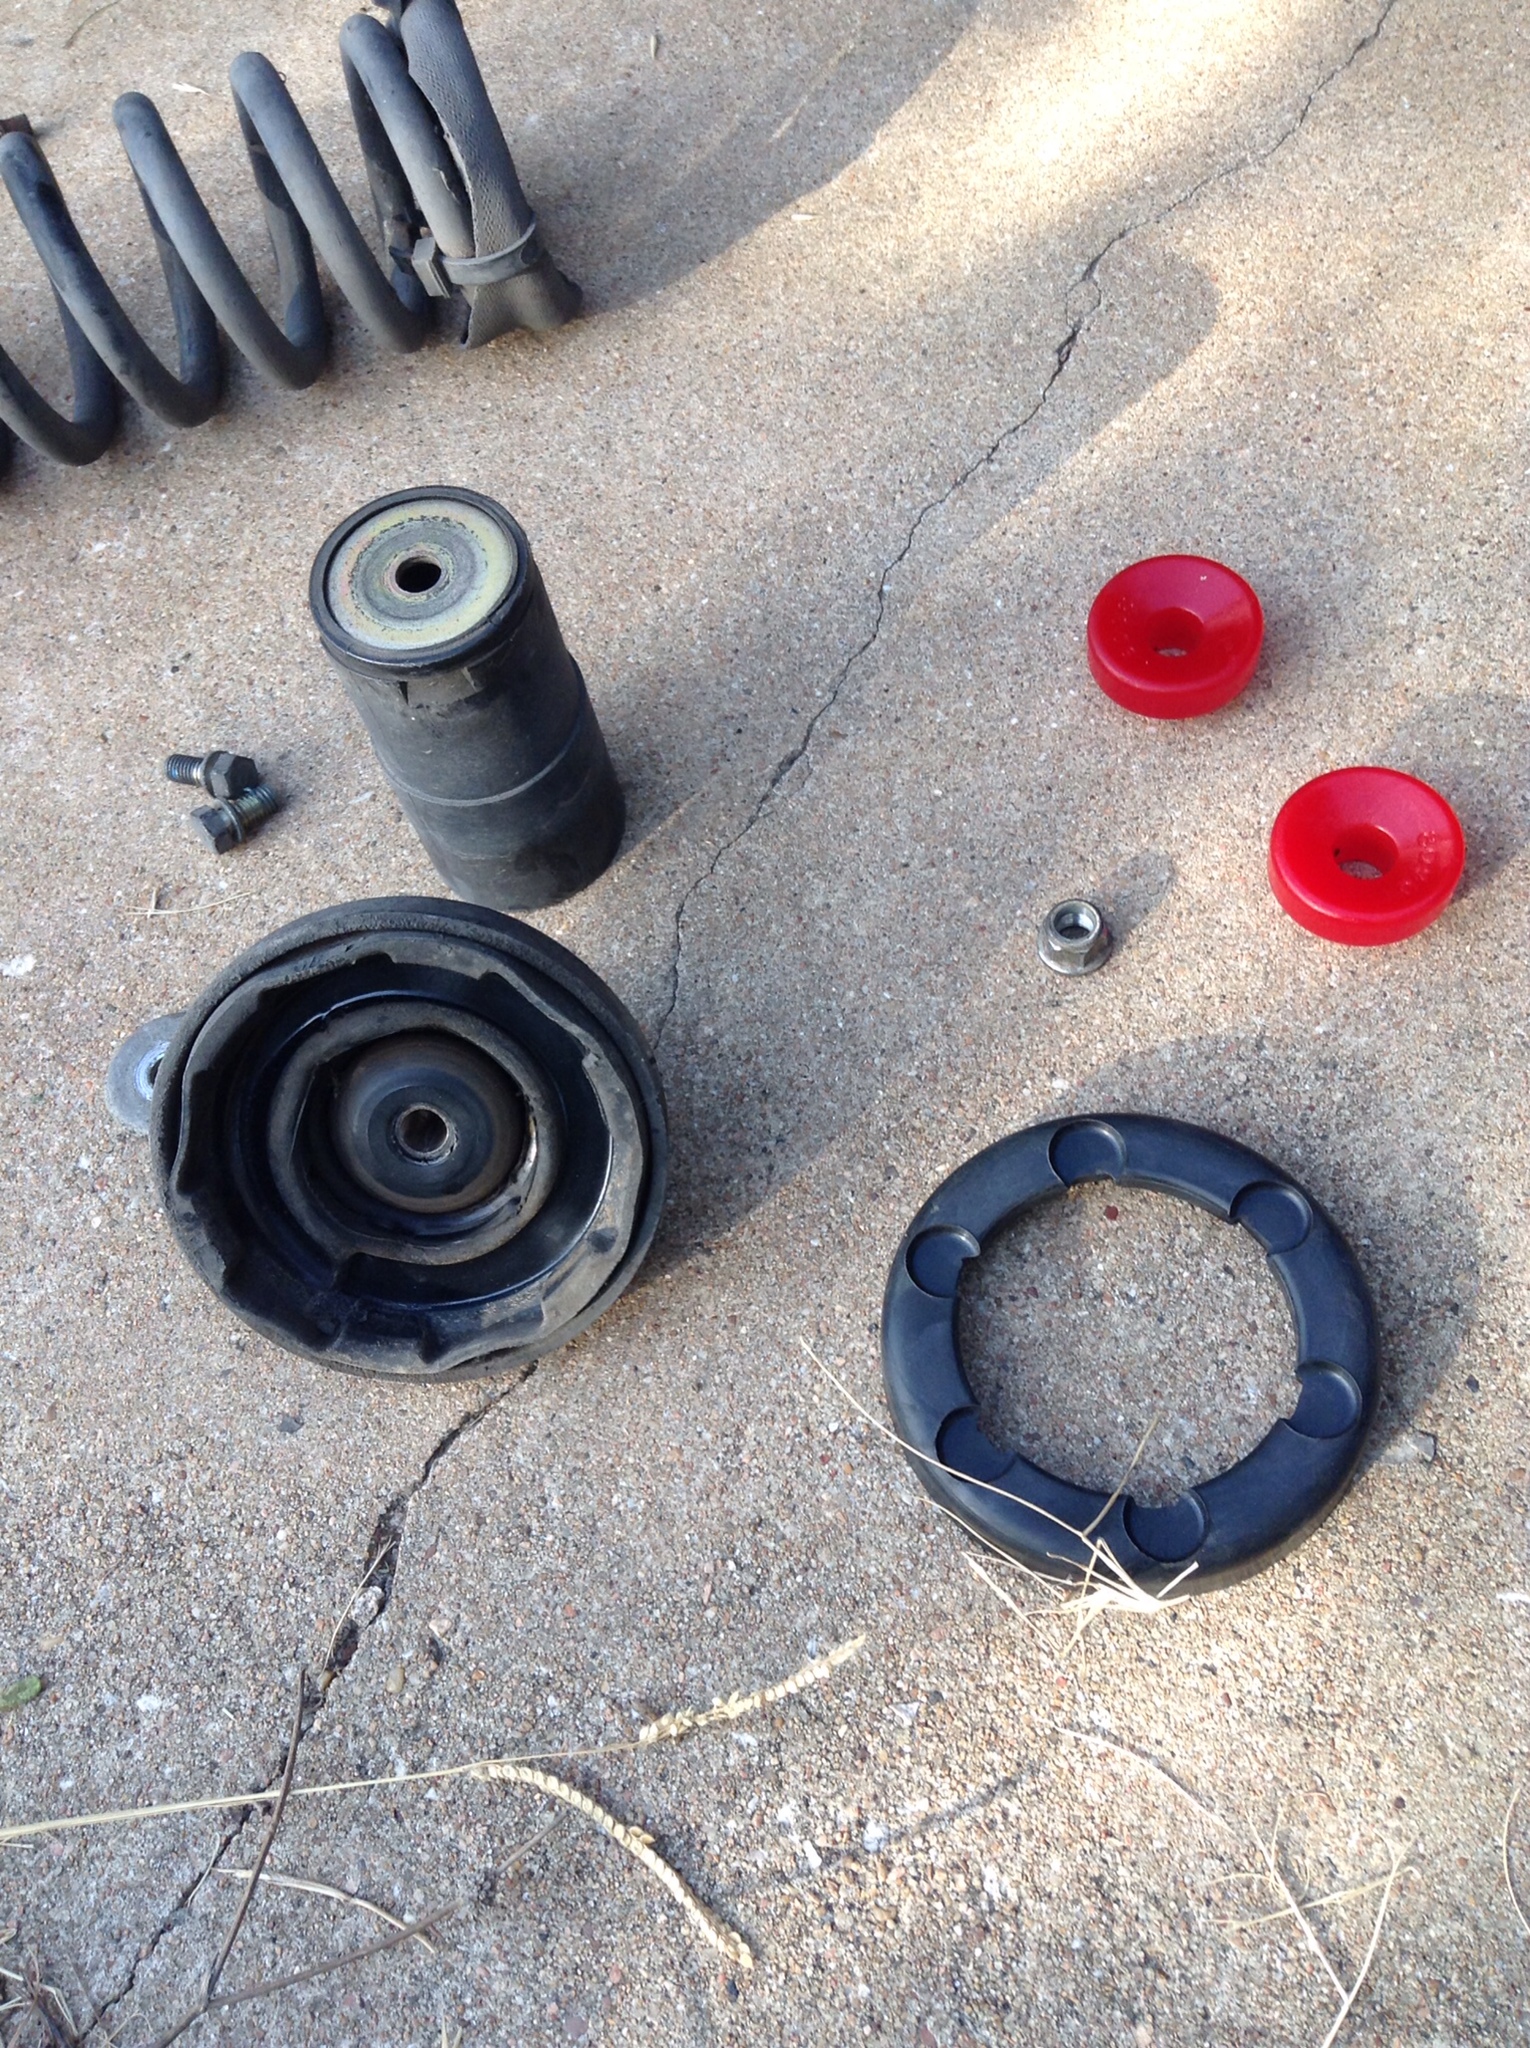
The new bushings will go in here and on the top side as well. You will notice that I applied a liberal amount of silicone to the spring seat. This was a recommendation I came across from watching Eric the Car Guy. Check him out on YouTube if you're not familiar.
Use a spring compressor, throw it on there and get your top hat on, and you're ready to go out on the town. No.
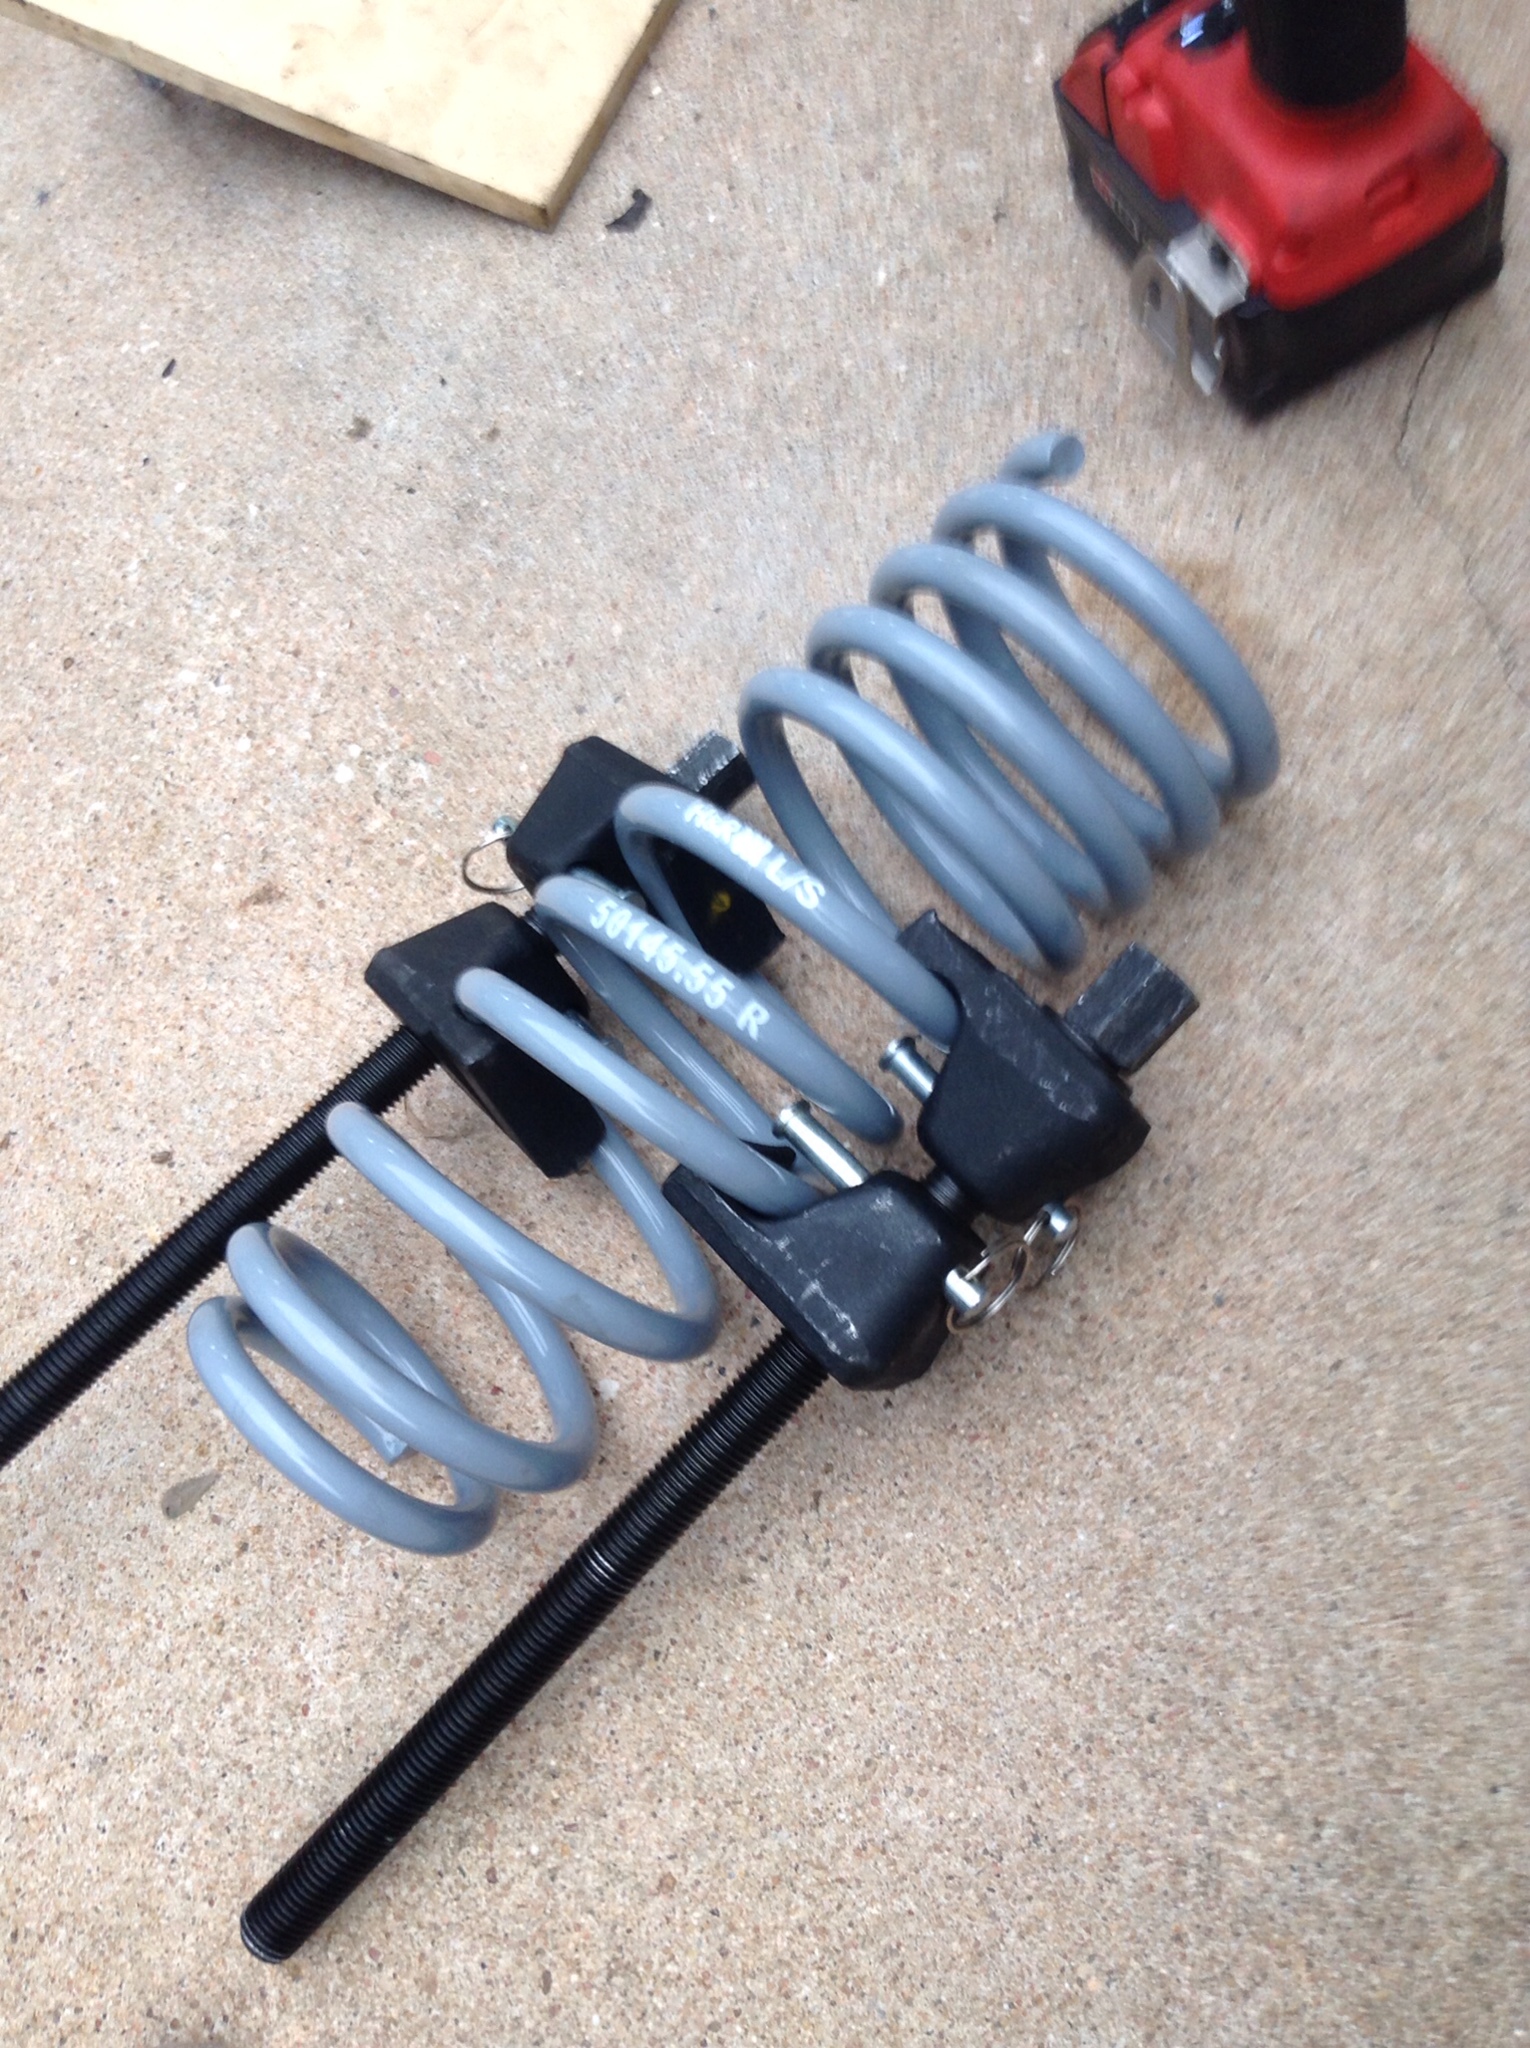
Rear spring, but just a photo for reference for using the spring compressor
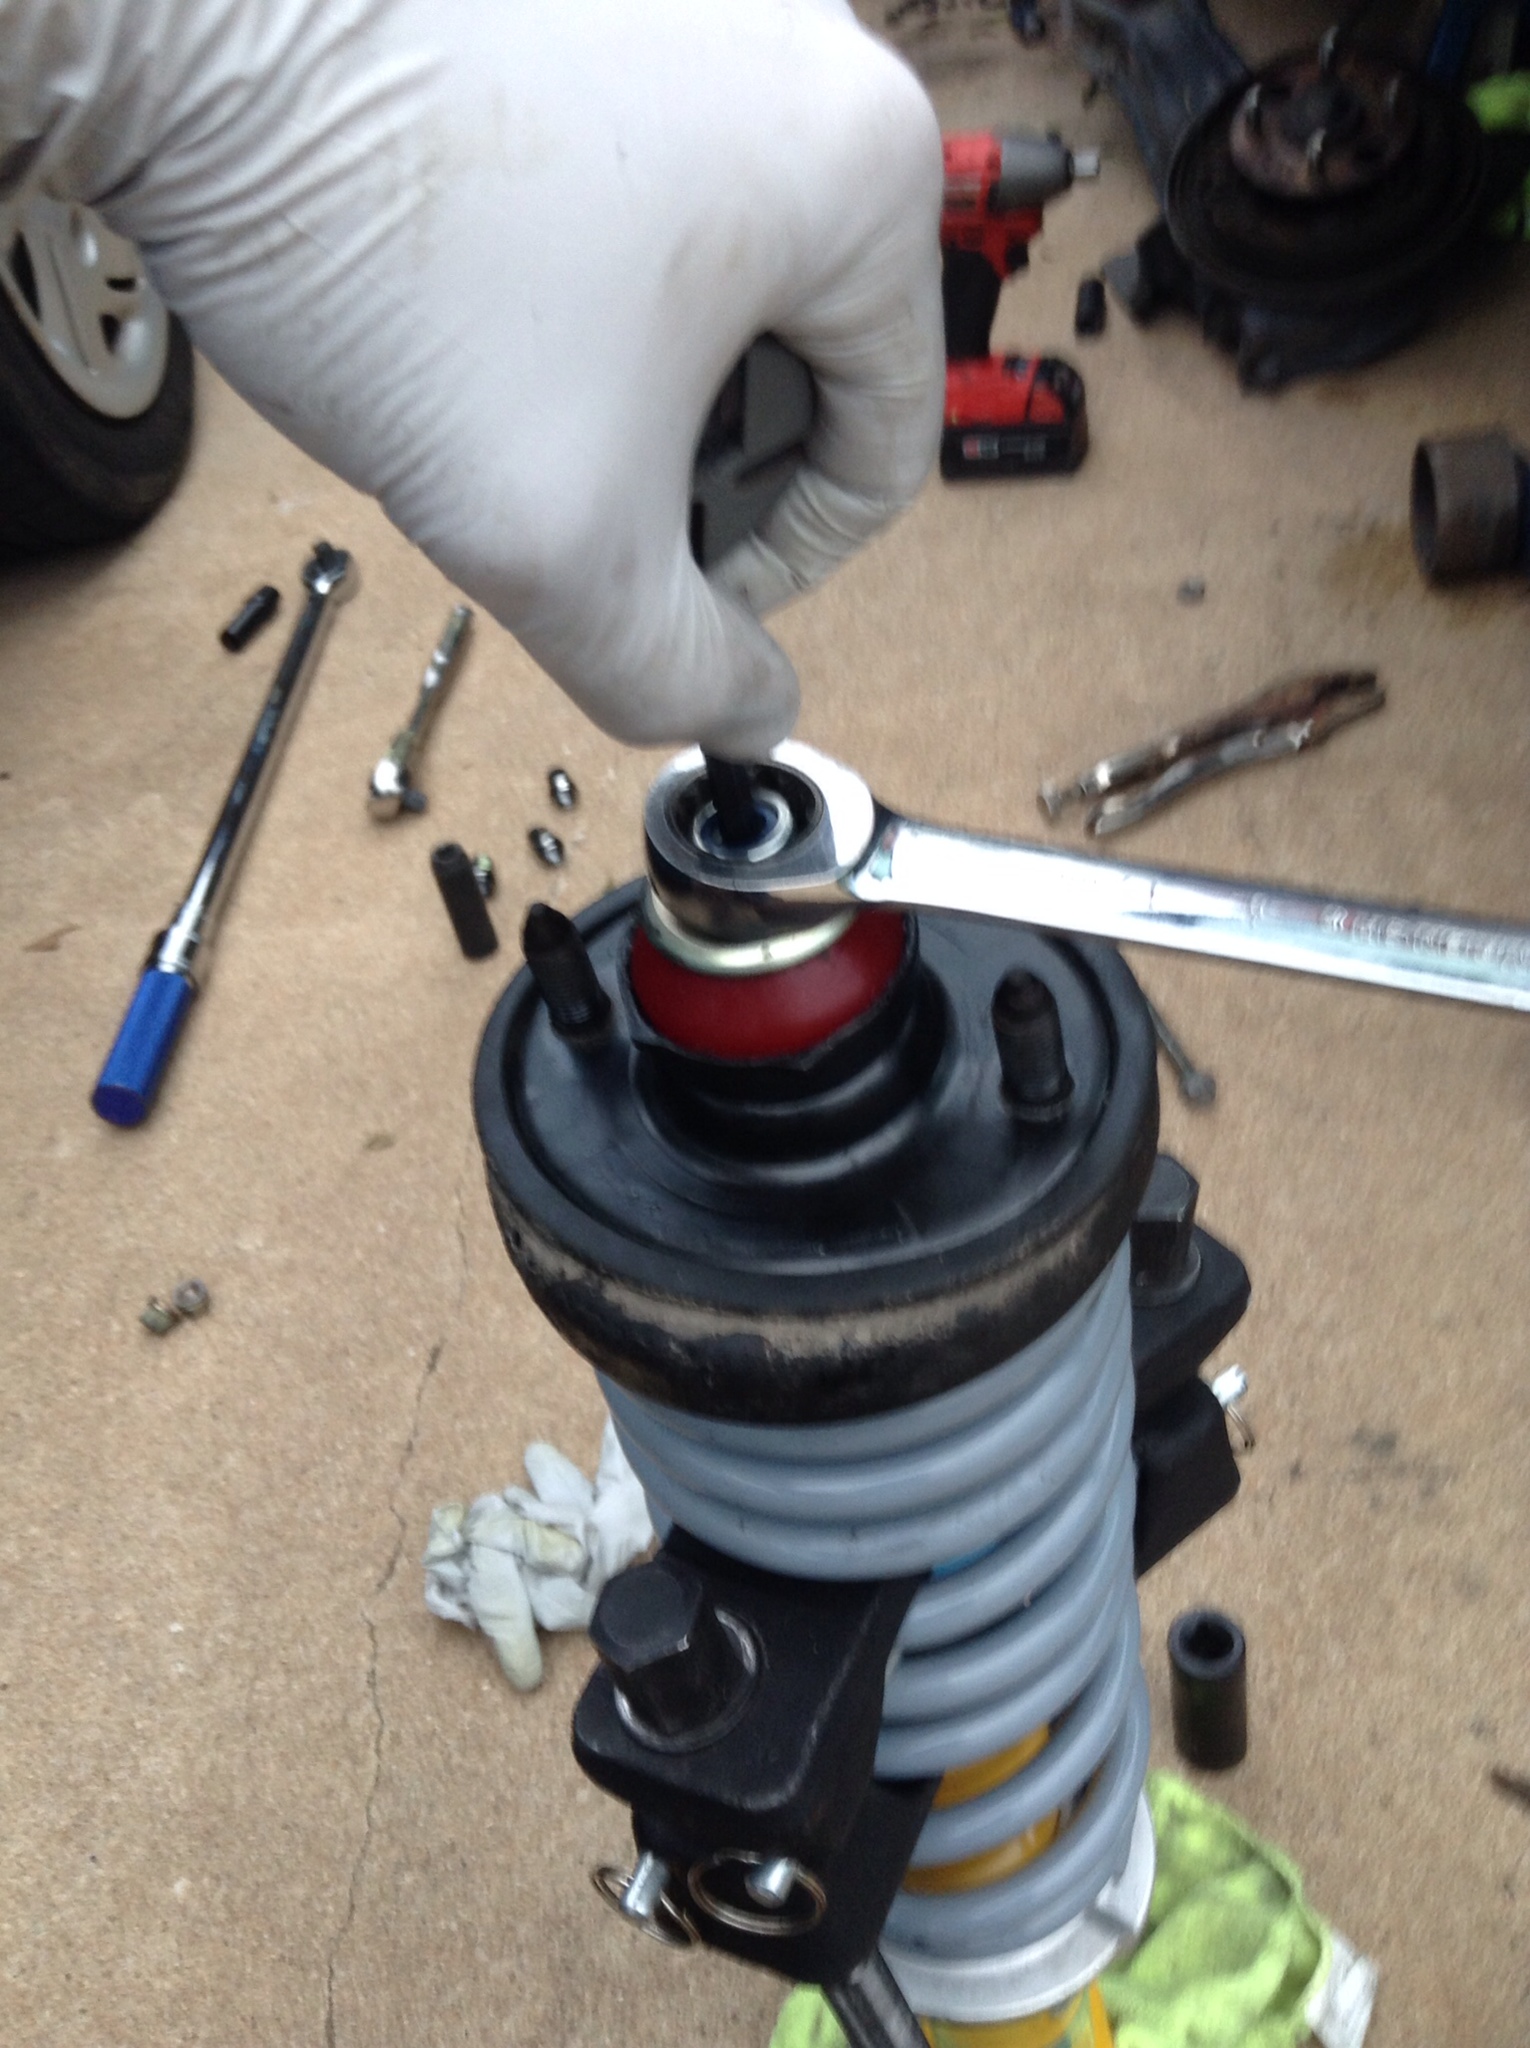
And getting the top hat together. Again another pic of the rear strut, but method is the same for the fronts.
Before we put the strut assembly back in let's get the control arm back in place since it's all wide open under there.
Easy enough. You can bolt back down your fuse box as well.
Don't install the fork back on the strut just yet, put the strut in first. I found it gave me more wiggle room.
Now here is where putting all that silicone in the spring seat comes in handy. I was about 80 degrees off on the rotation of the strut. So I was able to give it a good twist to get it lined up. Then I could proceed with installing the fork.
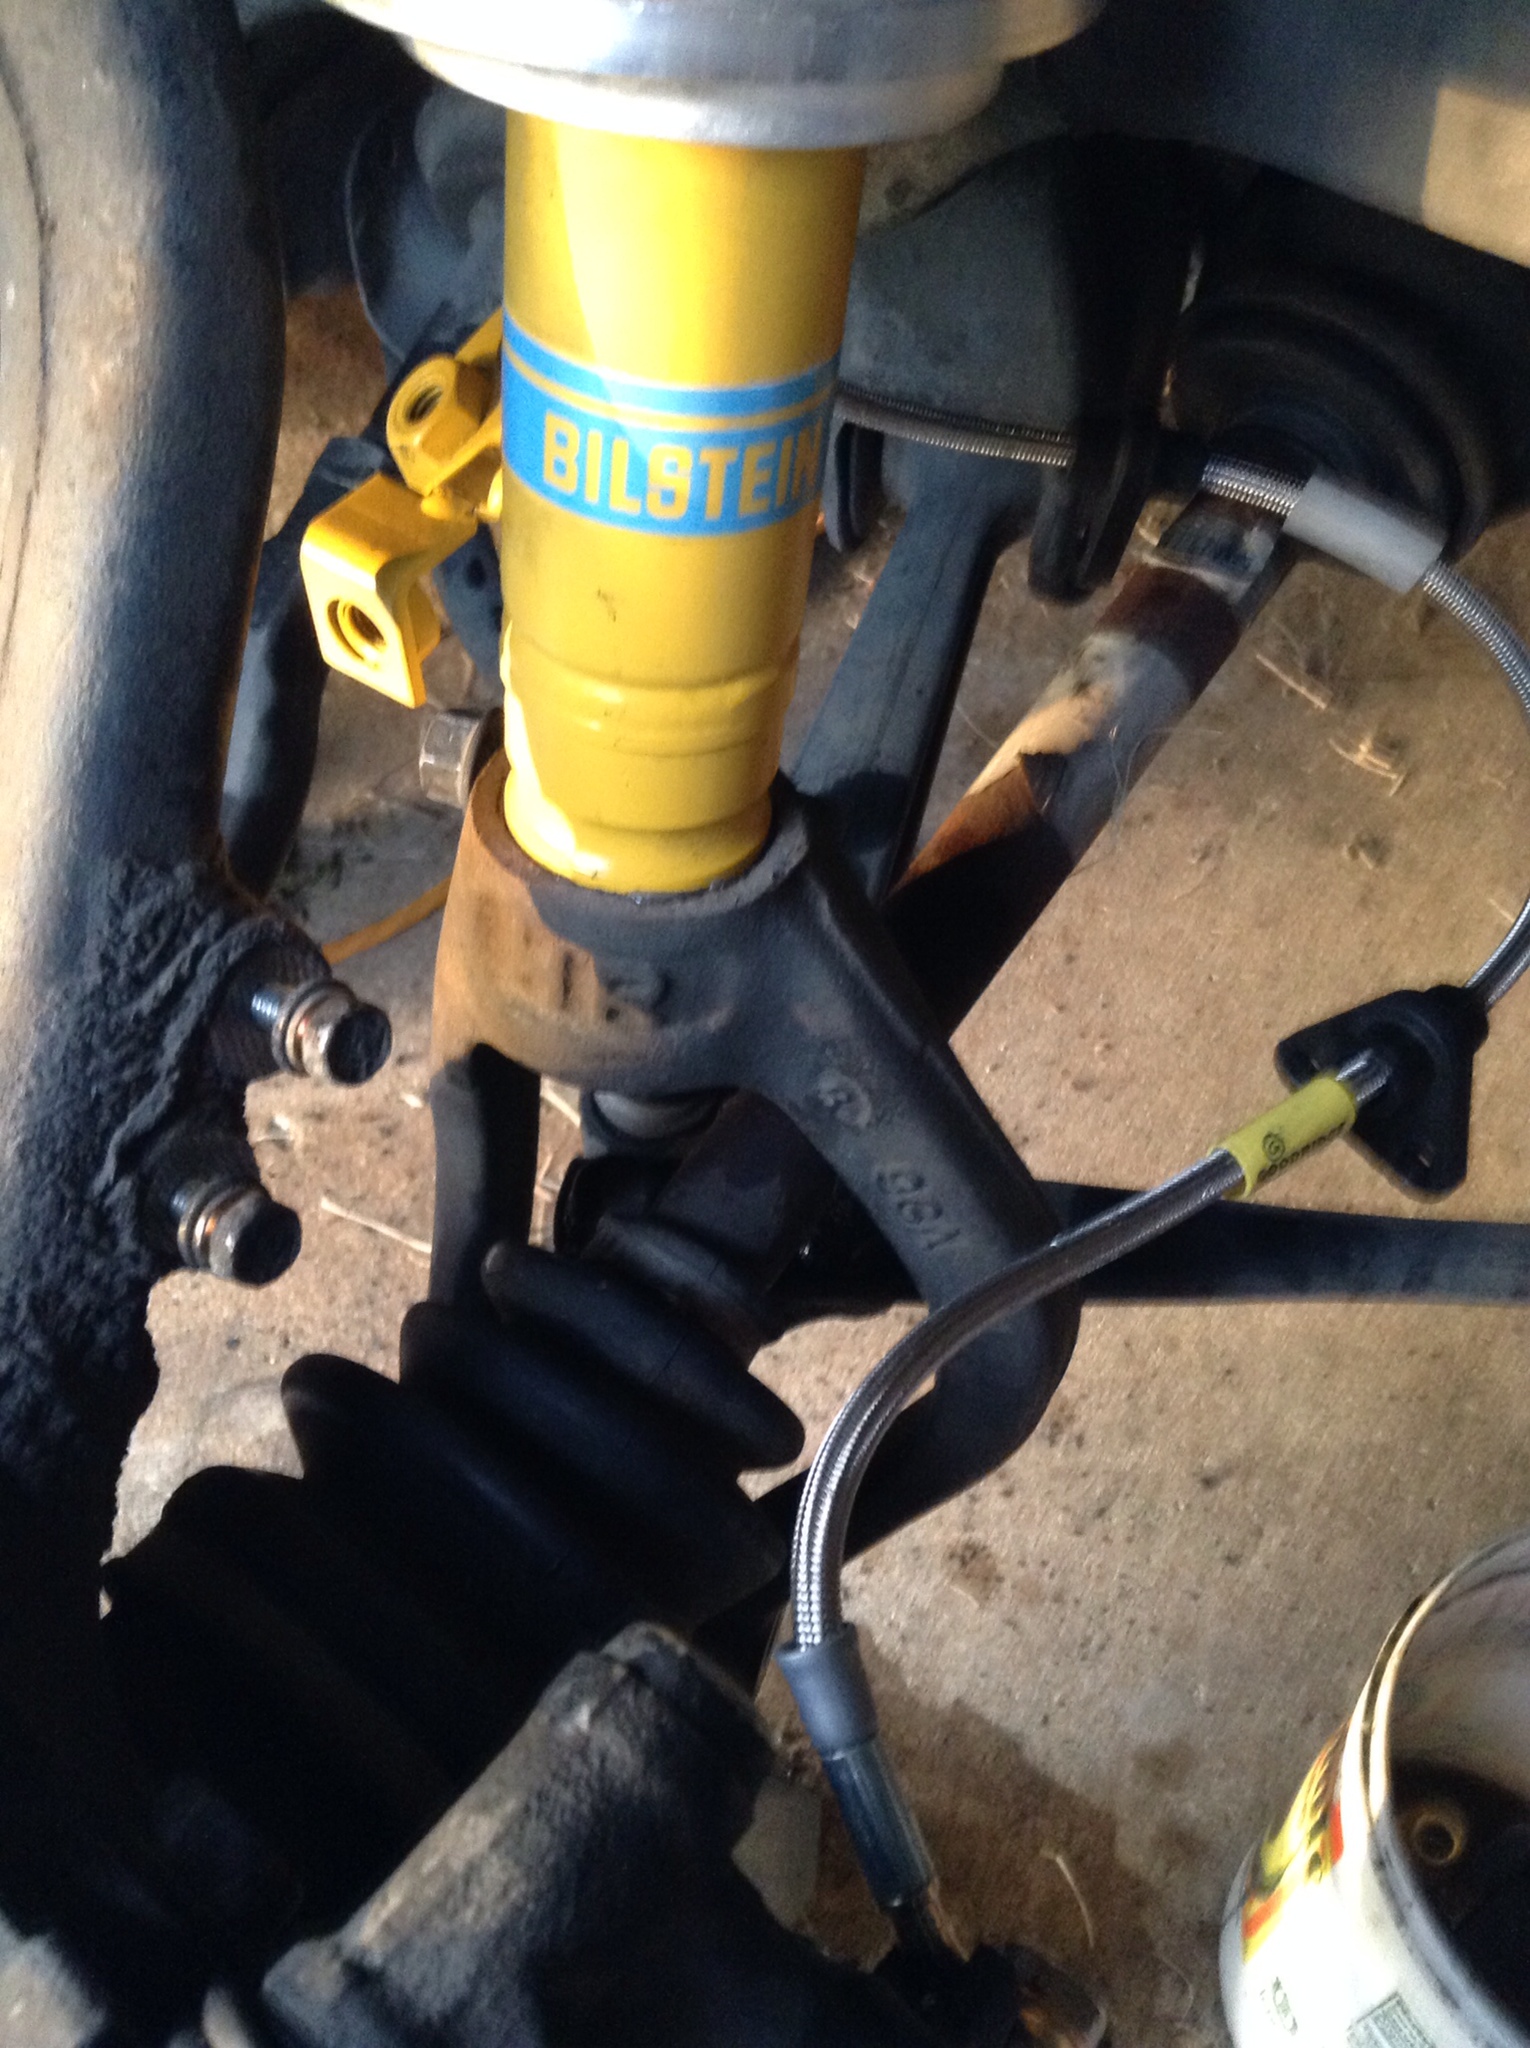
Apologies for the super blurry pic, I will get a better one. You can see of there is a tab that fits in the slot of the fork. Get that fully seated in there.
Now let's get the control arm back together as well.
Past this it's just more disassembly in reverse. Torque things to spec, cotter pin the castle nuts if you haven't already. Wheel back on, and you should be good to go.
Along the way I did the brake lines as you probably saw. I didn't do any real write up of that as it's pretty basic stuff. Just something to do while I was in there.
All in all it was an awesome learning experience. I've never worked on suspension before and this was pretty straight forward. I love my little wagon. The suspension itself transformed the car. It's tolerable to drive and actually feels stable now. I like the setup of the H&R springs with the bilstein struts. German made quality and it gives me stock ride height. Granted these steps could apply to coil overs or whatever else you like, but I'm a huge fan of this setup.
As always, if there's anything I missed or any questions, just let me know and I'll be sure to update. With that I'll close. I'm exhausted!
Here's a final shot of it, showing how it sits with the new suspension. I'm loving it, the ride is nice and firm but not bouncy or harsh. I see plenty of lowered civics around that they hit any imperfection in the road it looks like the suspension is made from bouncy balls. Anyway, drastic improvement, well worth the time and money.
Finally done with it, so let's just get right in to the write up while I still have the energy.
I've installed new struts, springs, upper control arm with polyurethane bushings, and the brake line as well.
If your upper control arm ball joint looks like this, probably best to replace it considering you can get the entire arm setup for a very reasonable price. If you're in there it's going to be very easy to get to anyway so might as well.

Simple things first, remove the wheel, jack up the front end, and put a jack stand under the lower control arm to hold things.
Remove the two bolts holding the cover plate over the castle nut on the ball joint in the front upper control arm.

Remove the castle nut and pop the ball joint. These things can pop with some force, which is why it's good to keep the jack stand underneath so it's not hanging way down when you get it to pop. That makes it spring back all the more and will make you have a not nice day if any tender bits are in the way.

Back in the engine bay, remove the nuts holding the upper control arm in place. For the drivers side see are easy to get to. Passenger side, the fuse box is in the way.

Just two 10mm bolts holding this in place, then you can flip it up and get to the control arm nuts.

Bam arm is out. Now if you're replacing the bushings in your new control arm, good luck to you buddy. I don't have a press so getting the old bushings out sucked. Do it however you can.

Pressing the poly bushings back in is easy enough with the good old nut and bolt with some washers.

On with the strut. I found the easiest way to get it out, since you're dealing with an axle as well is to remove the fork at the bottom of the strut first. Be careful here, both of mine had some thread locker on them and it chewed up some threads, I had to run an oversized bolt in one to get it to clamp back down. Just something to watch out for.

Once that is out we can go back into the engine bay and undo the two 14mm nuts holding the top hat and strut/spring assembly in place.
Disassemble the strut and spring however you like. Shoot the strut across the driveway if you're feeling brave and have an impact.
Below we have the top hat a new rubber for the spring seat and the new poly bushings, as well as the dust cover.

The new bushings will go in here and on the top side as well. You will notice that I applied a liberal amount of silicone to the spring seat. This was a recommendation I came across from watching Eric the Car Guy. Check him out on YouTube if you're not familiar.

Use a spring compressor, throw it on there and get your top hat on, and you're ready to go out on the town. No.

Rear spring, but just a photo for reference for using the spring compressor

And getting the top hat together. Again another pic of the rear strut, but method is the same for the fronts.

Before we put the strut assembly back in let's get the control arm back in place since it's all wide open under there.

Easy enough. You can bolt back down your fuse box as well.
Don't install the fork back on the strut just yet, put the strut in first. I found it gave me more wiggle room.

Now here is where putting all that silicone in the spring seat comes in handy. I was about 80 degrees off on the rotation of the strut. So I was able to give it a good twist to get it lined up. Then I could proceed with installing the fork.

Apologies for the super blurry pic, I will get a better one. You can see of there is a tab that fits in the slot of the fork. Get that fully seated in there.

Now let's get the control arm back together as well.

Past this it's just more disassembly in reverse. Torque things to spec, cotter pin the castle nuts if you haven't already. Wheel back on, and you should be good to go.
Along the way I did the brake lines as you probably saw. I didn't do any real write up of that as it's pretty basic stuff. Just something to do while I was in there.
All in all it was an awesome learning experience. I've never worked on suspension before and this was pretty straight forward. I love my little wagon. The suspension itself transformed the car. It's tolerable to drive and actually feels stable now. I like the setup of the H&R springs with the bilstein struts. German made quality and it gives me stock ride height. Granted these steps could apply to coil overs or whatever else you like, but I'm a huge fan of this setup.
As always, if there's anything I missed or any questions, just let me know and I'll be sure to update. With that I'll close. I'm exhausted!
Comments
When I put H&R OE Sports on my EF Hatch, it lowered it a lot more than your wagon. Even my wagon on stock springs looks almost lower than yours. Did you use springs or struts from an Integra or something?
I could have gone with the lowering springs and it would be dropped an inch lower than it is now, but I like where it sits.