Seat cover/foam replacement 88-89 civic to 90-91 civic.
 greenteagod
Moderator
greenteagod
Moderator
This covers swapping foam and the cover from an 88-89 over to the frame of a 90-91 civic wagon. This is for the front seats, and can also apply to same year swaps. Also it might just come in handy for taking the seat apart if you're going to be repairing the foam.
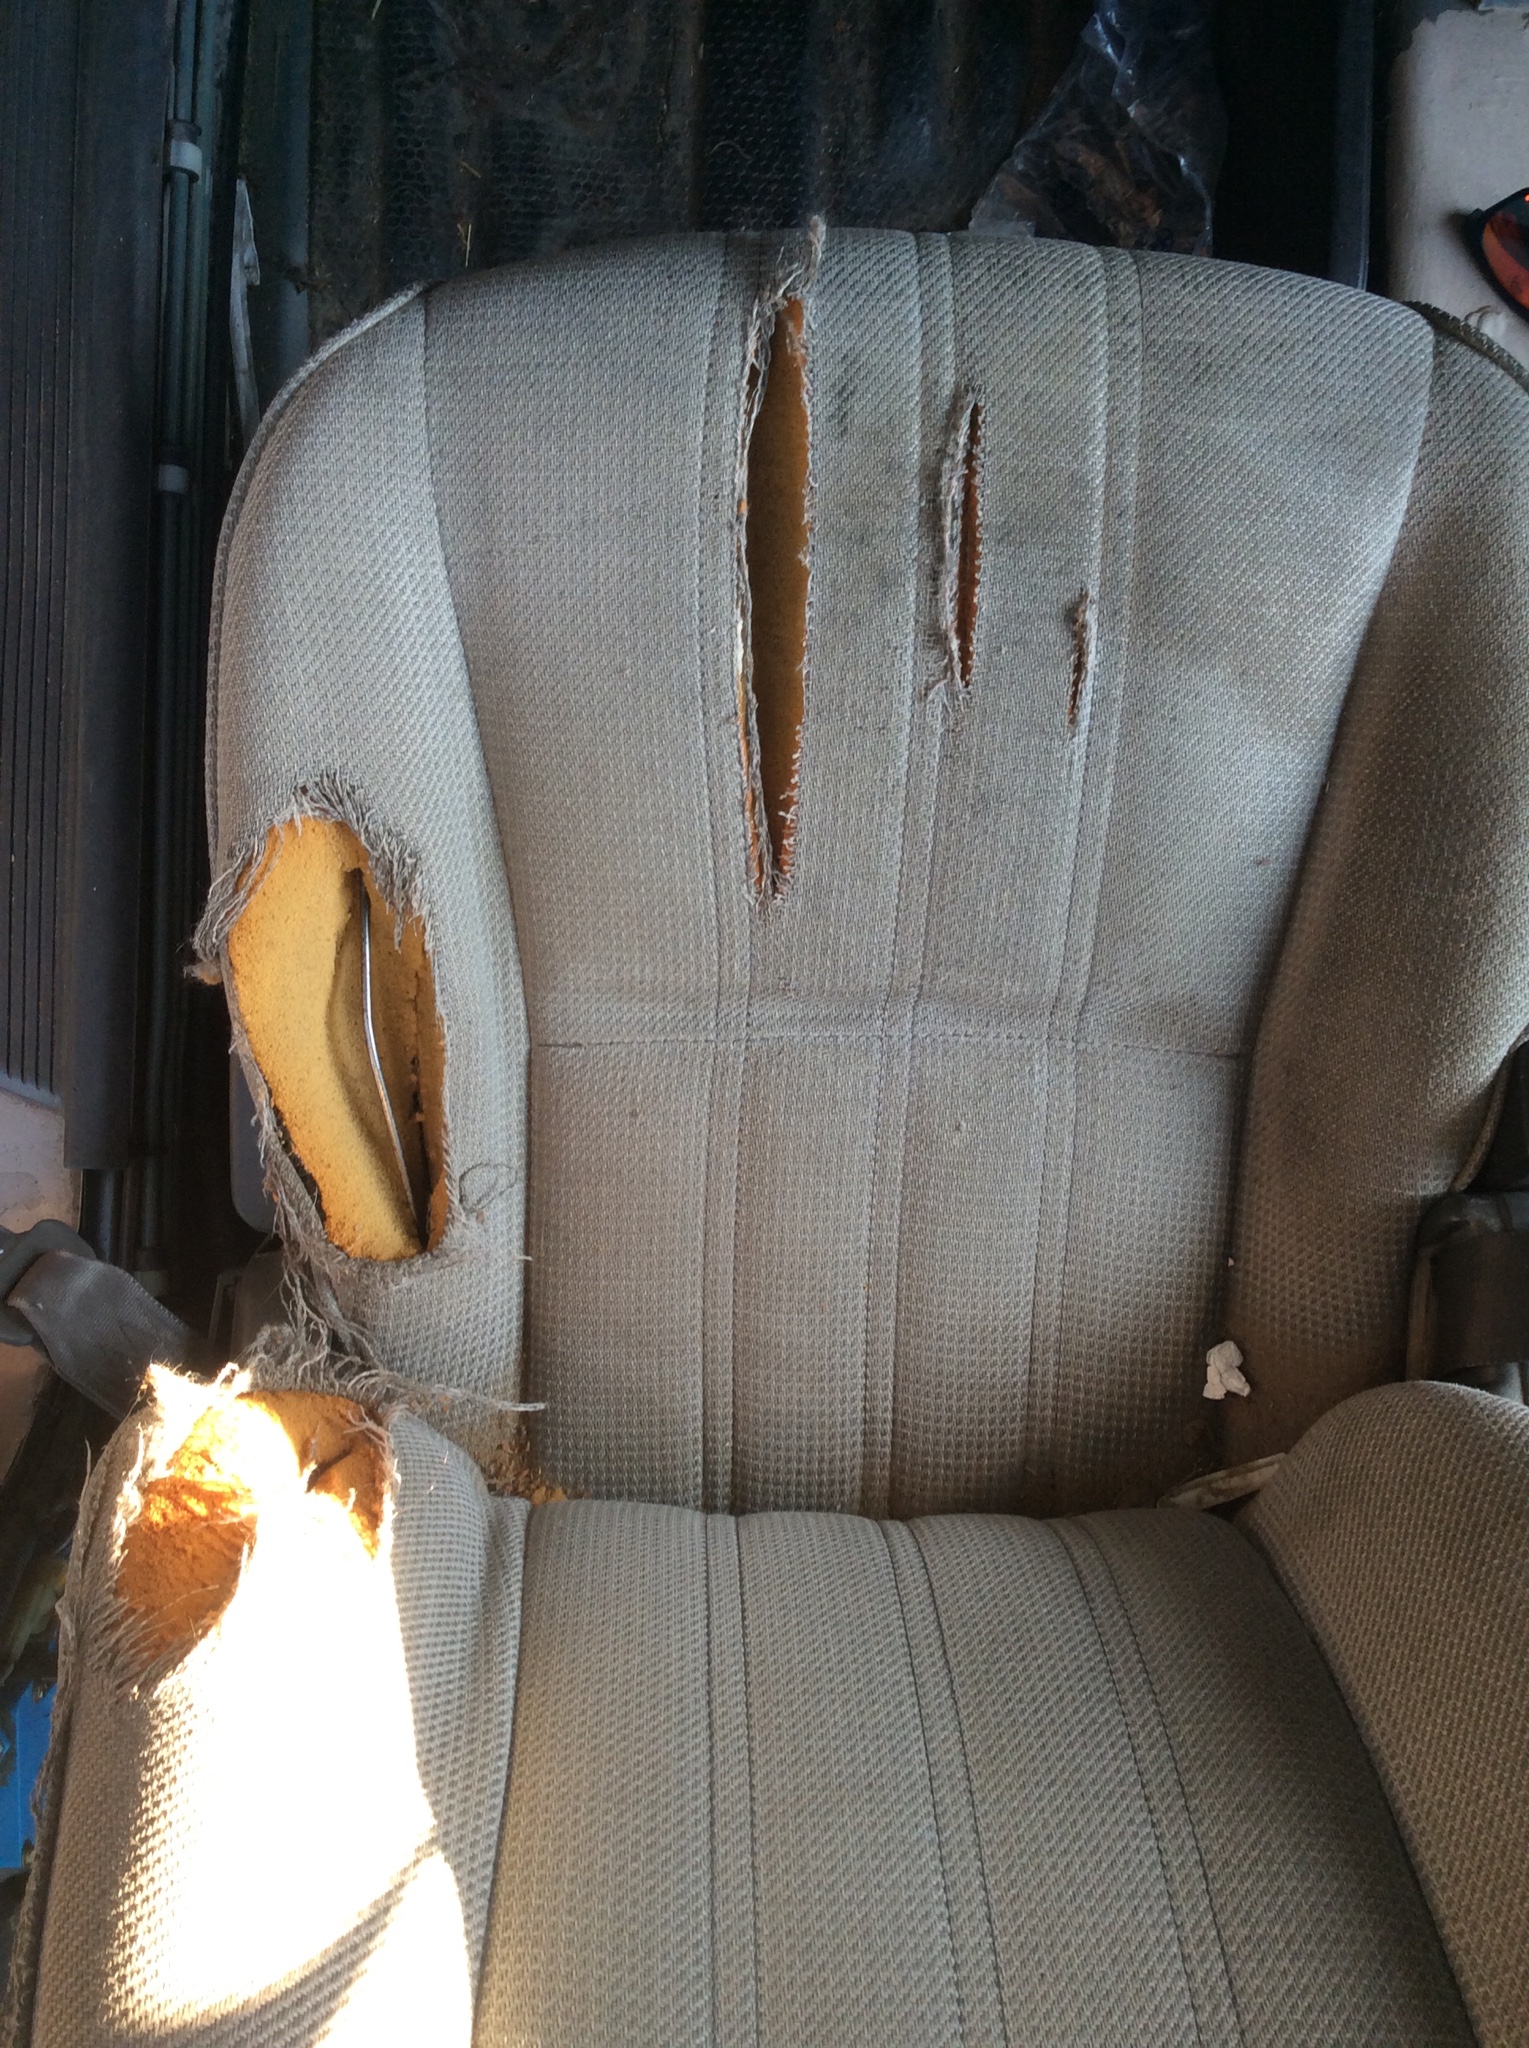
The grossness that I was sitting on before.
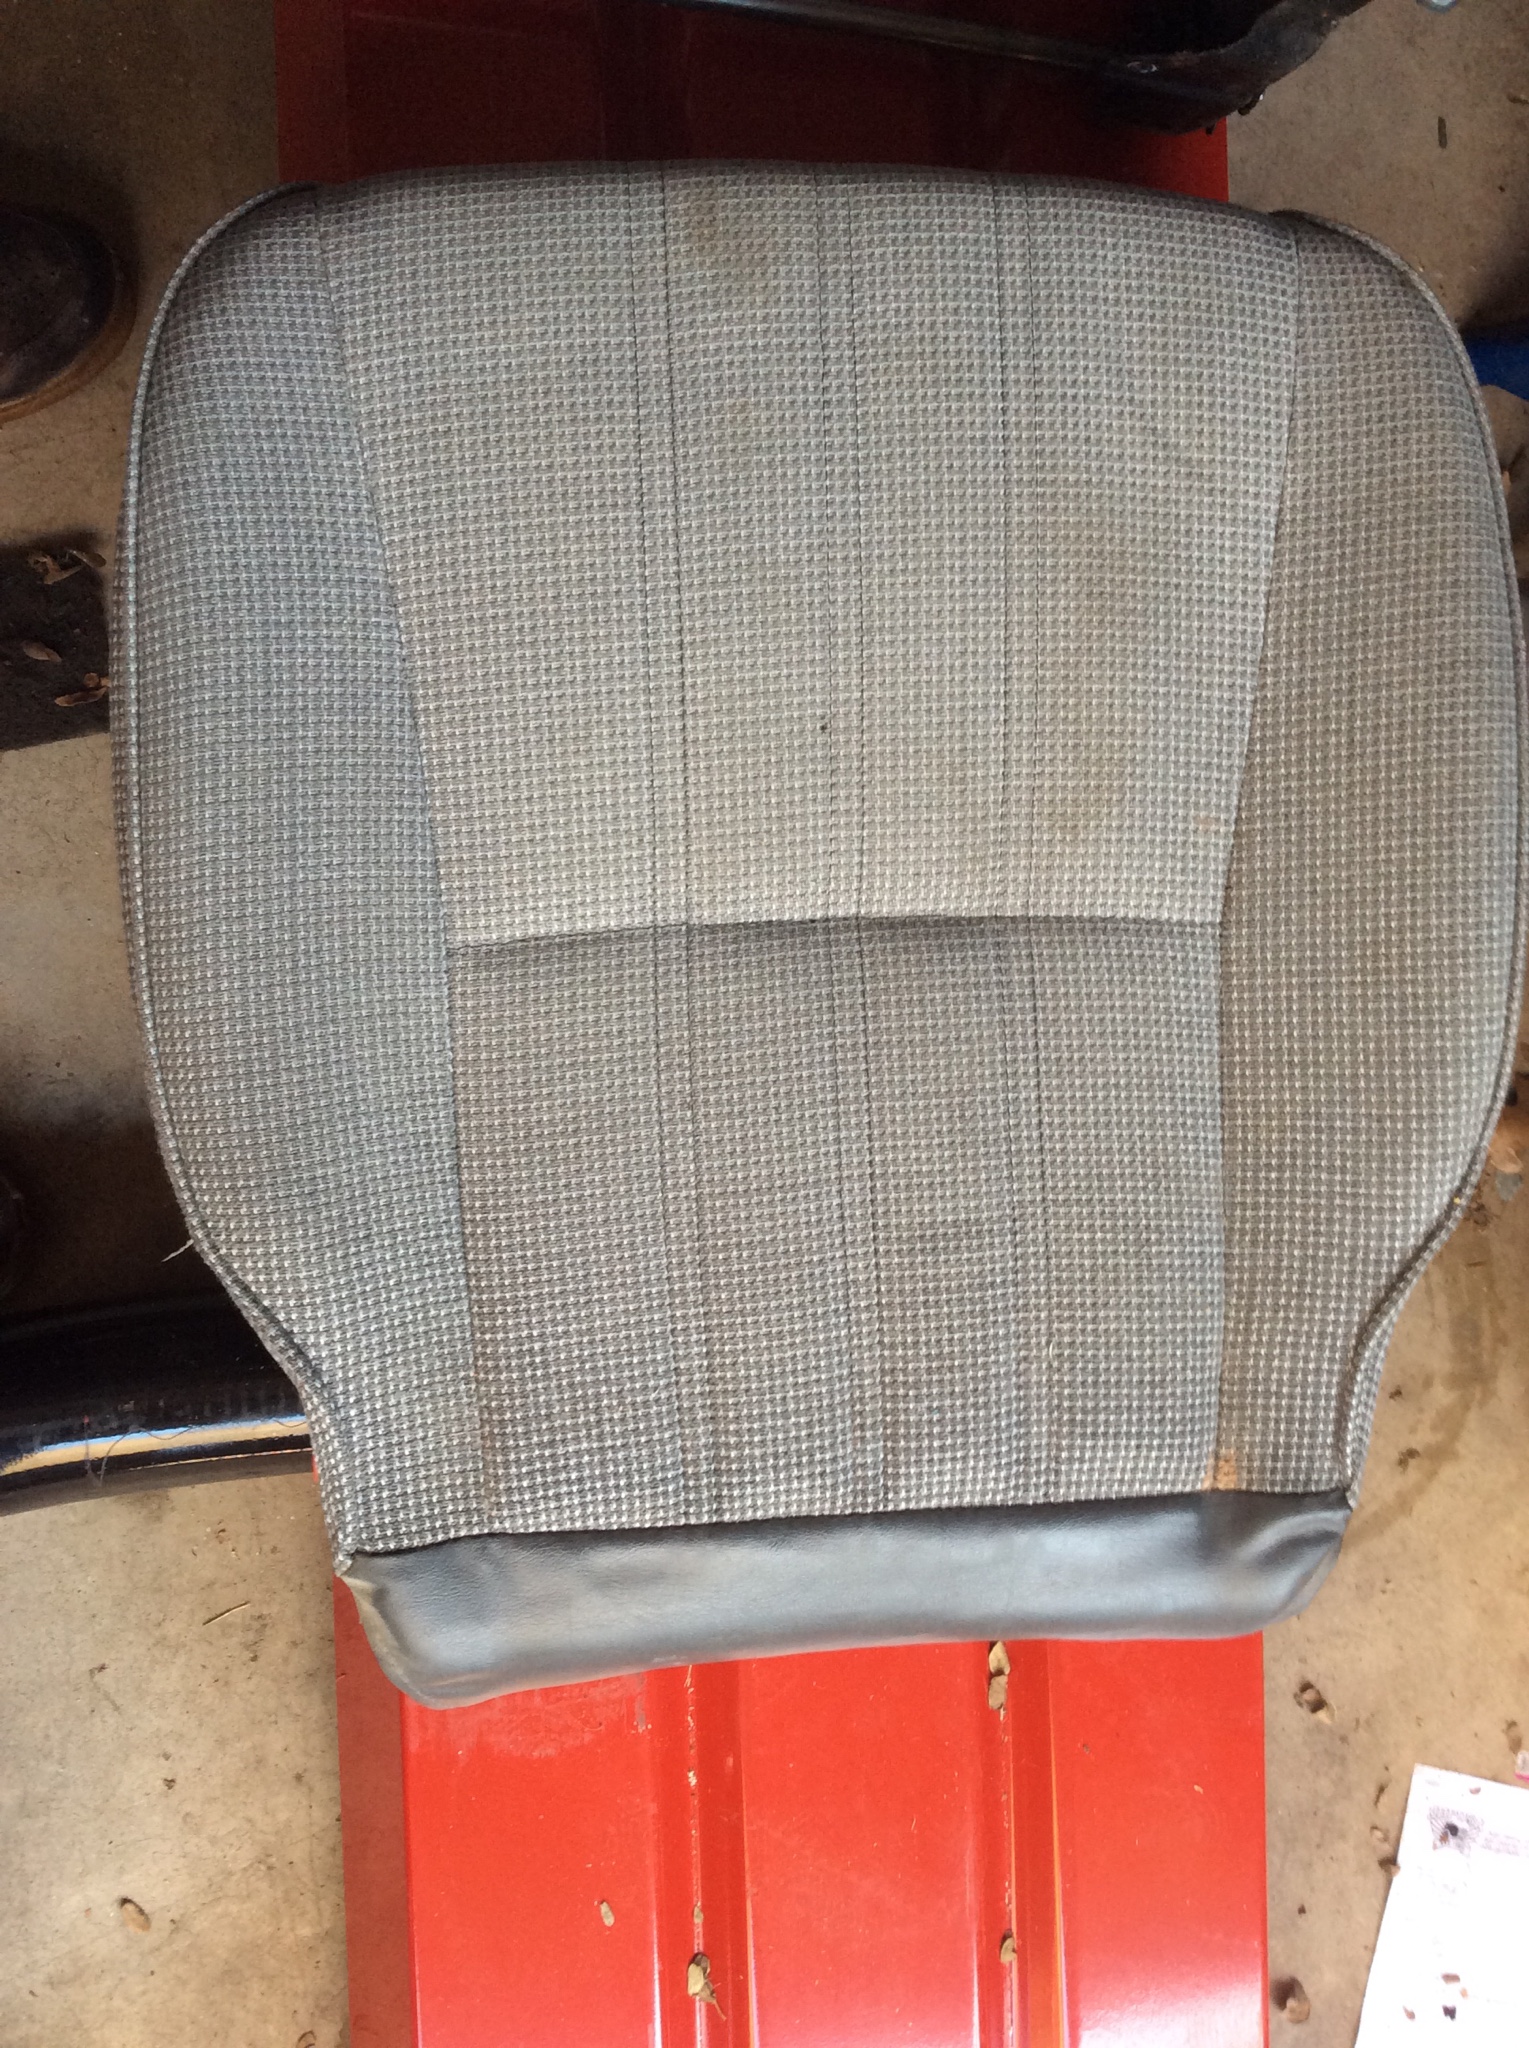
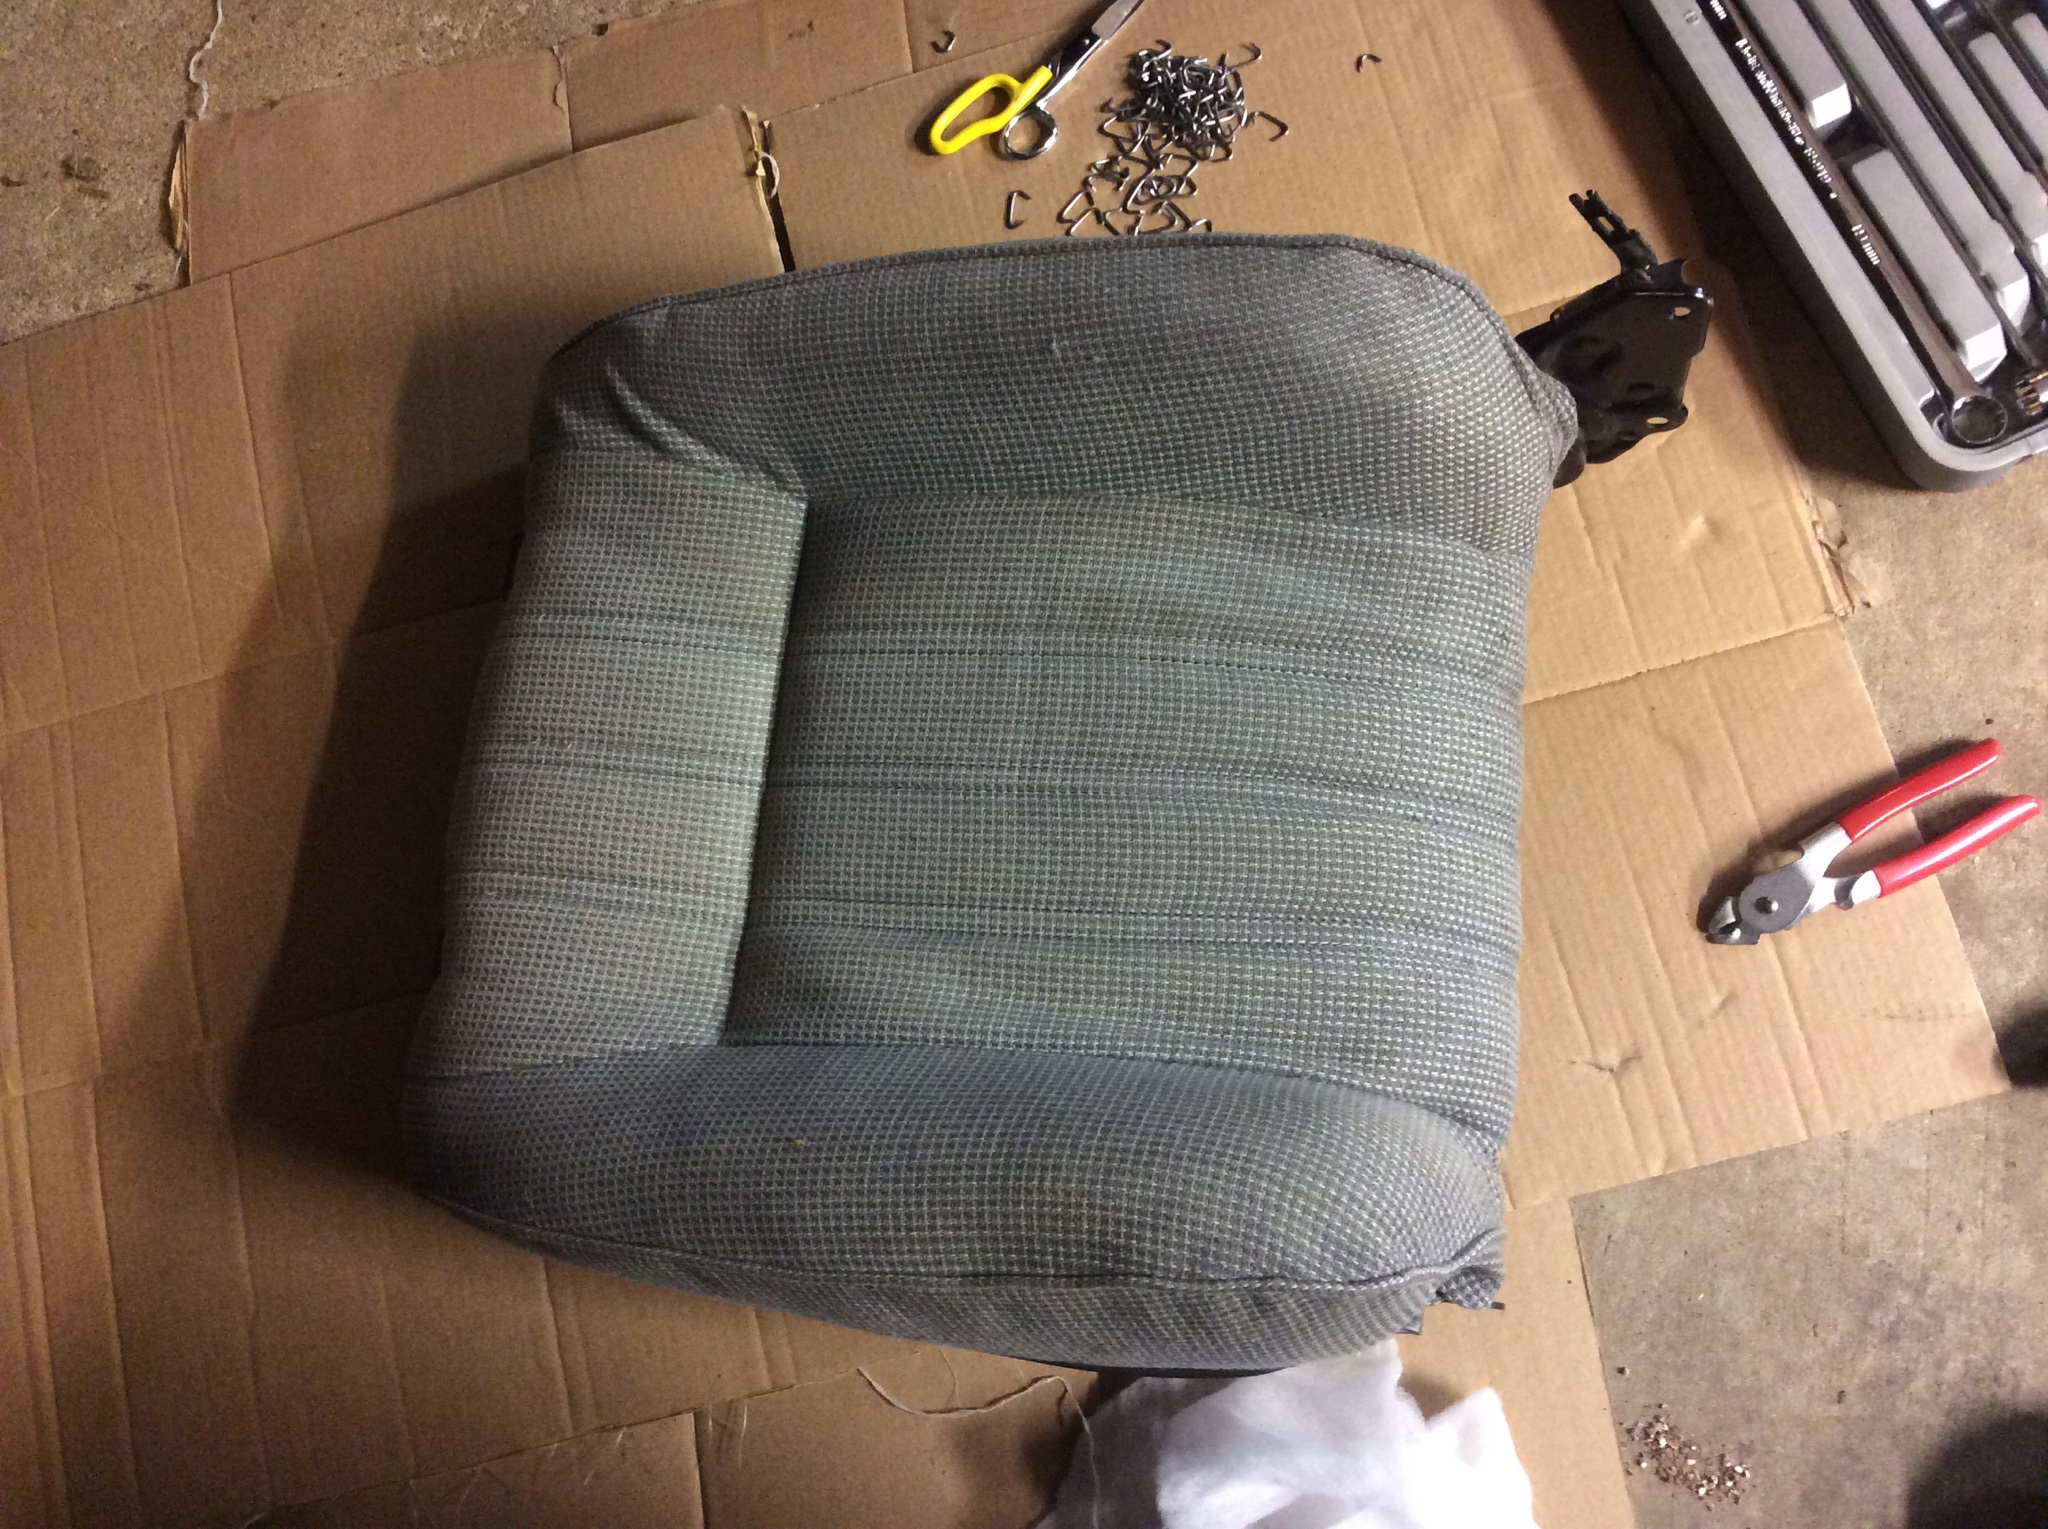
And what I'm swapping over to. Yes they need cleaned, but thankfully no tears.

A few things to call out when changing the foam over between the model years like this. It's not going to be perfect, though there are some things you can do to help it look nicer. The foam for the 88-89 was not designed with the built in auto seat belts, so they will be pressing into the foam, they still work though. The frame structure and seat pan is different, thus the need for this swap to begin with, but bars in different places. Hog ring mount points are also different, but you can stretch things around to work.
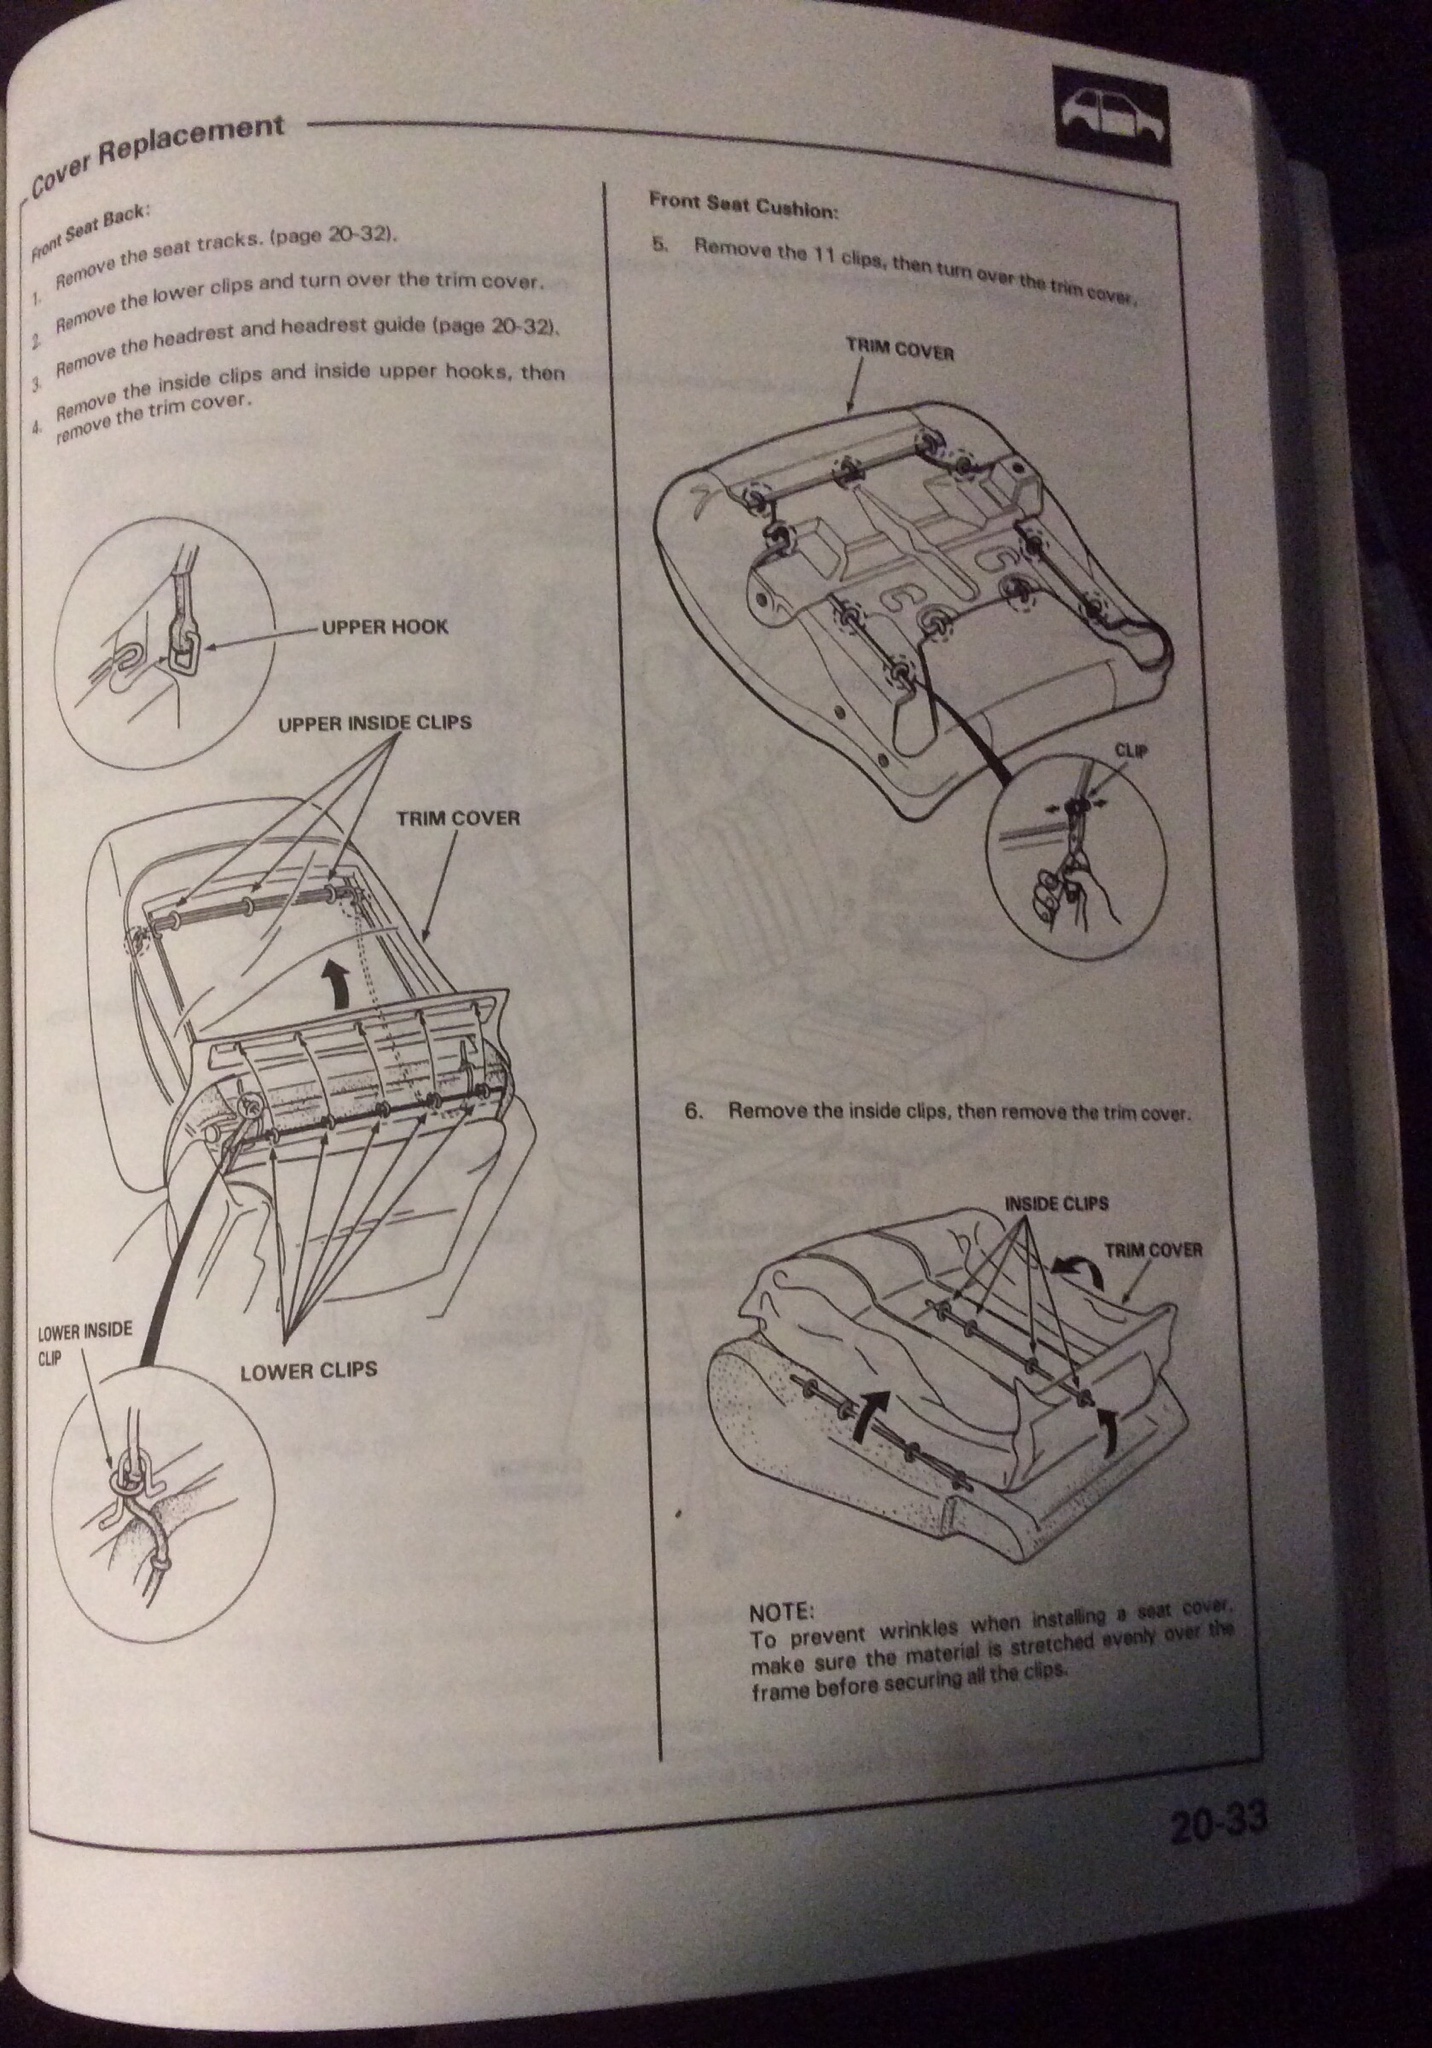
Removing the bottom foaming very straight forward. These references from the service manual will help.
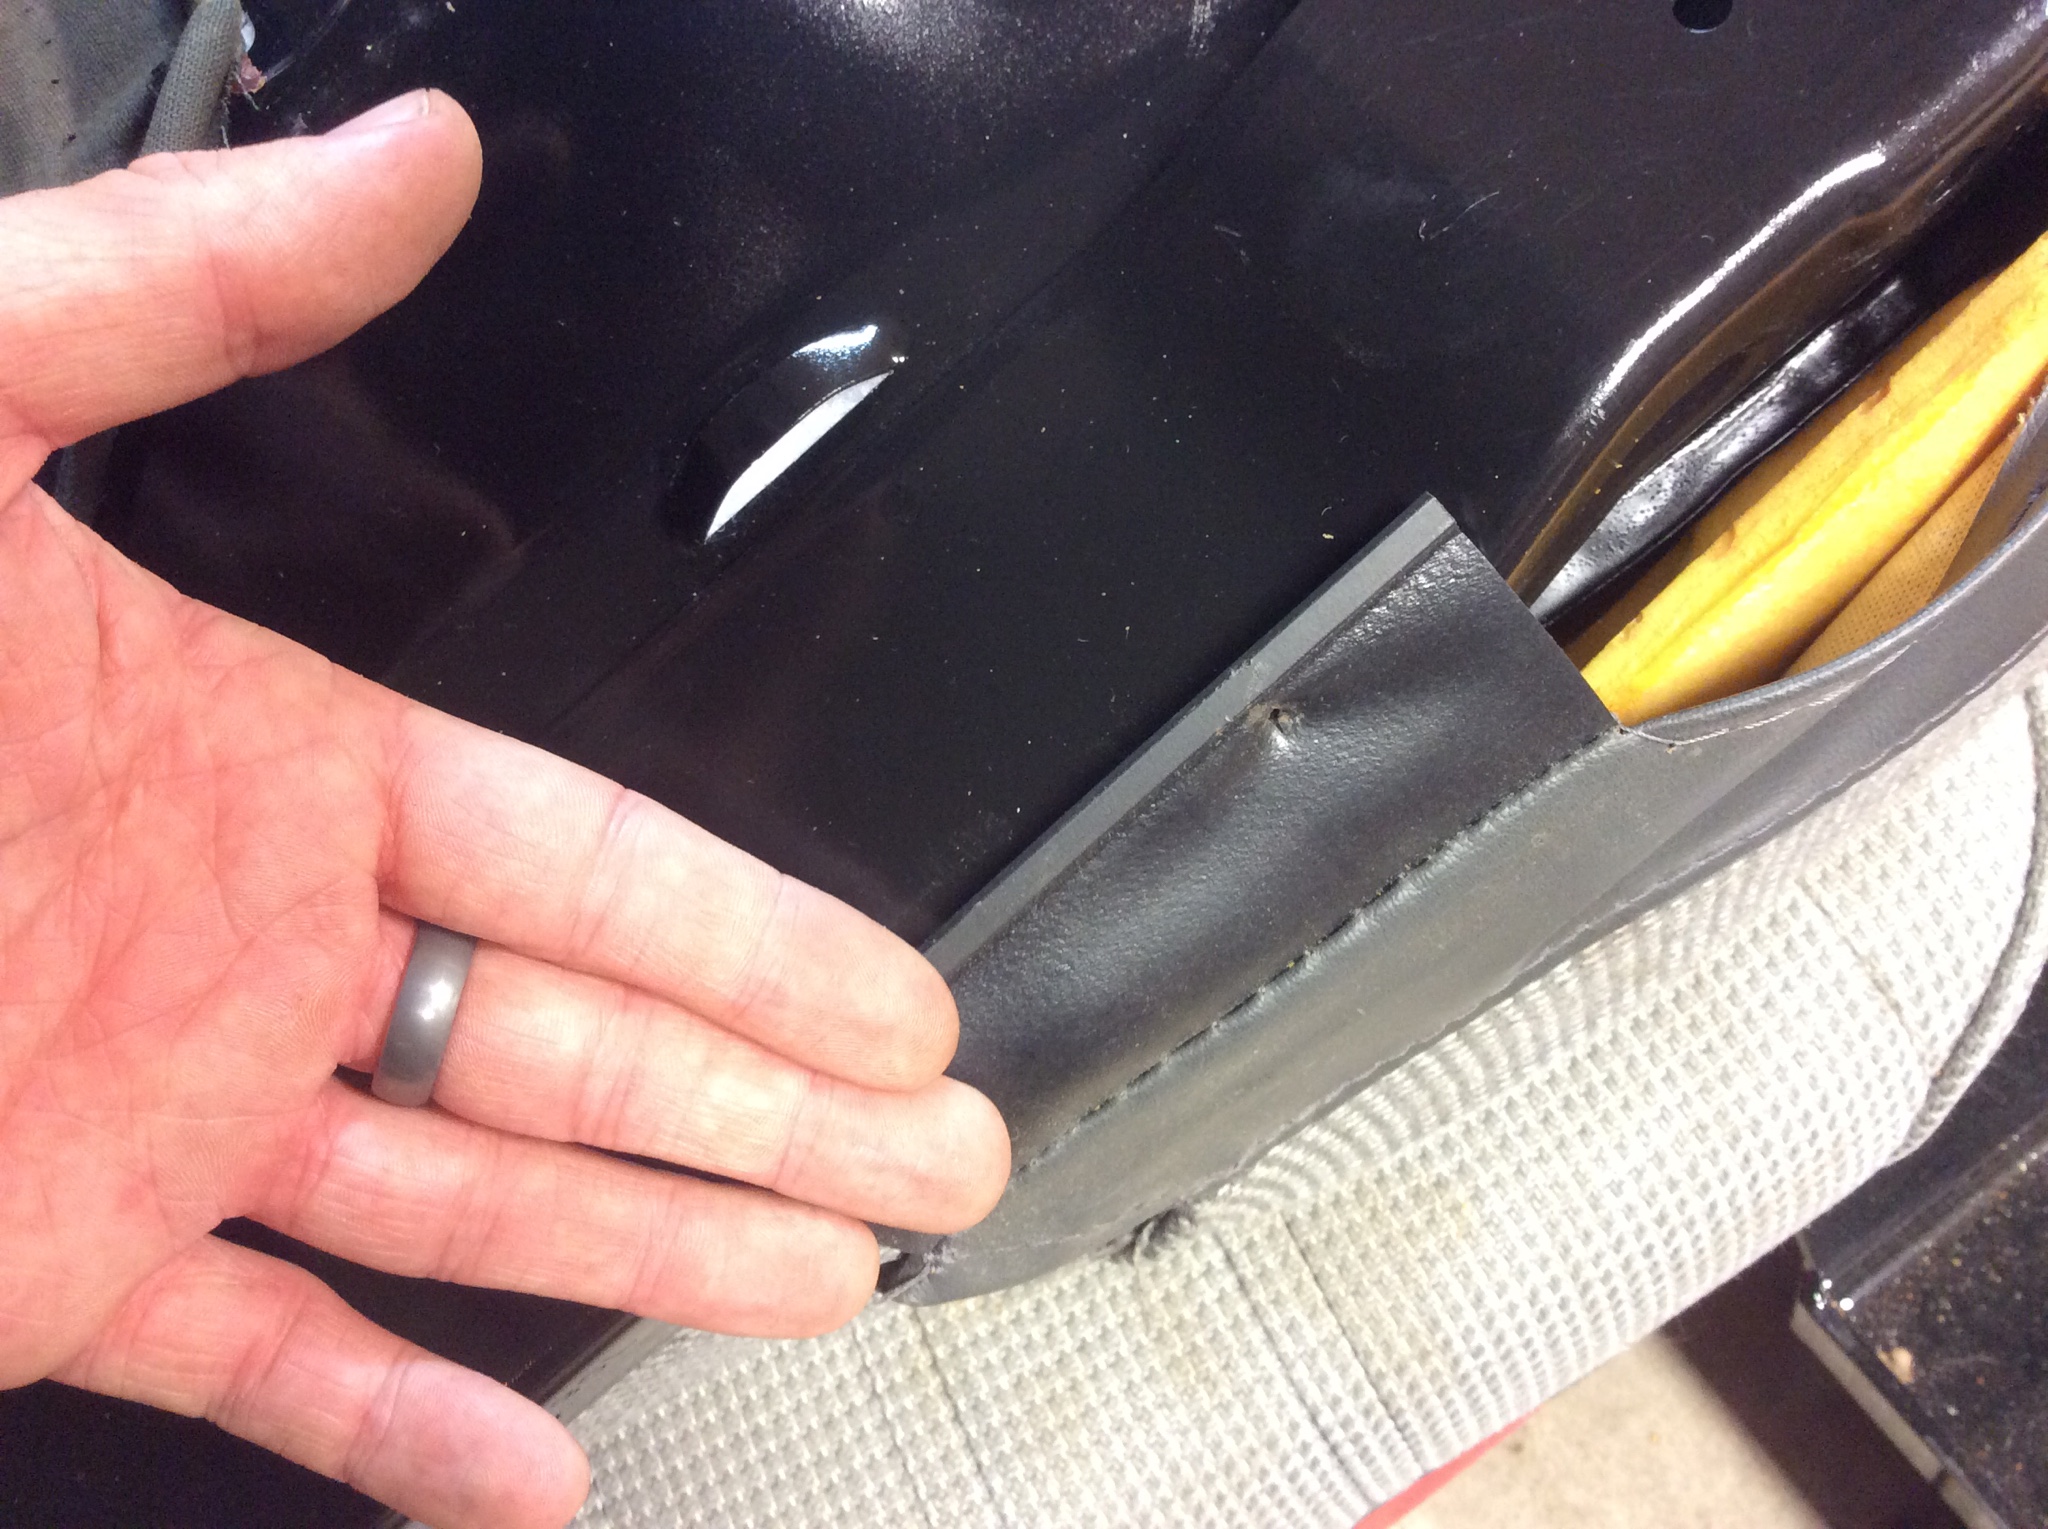
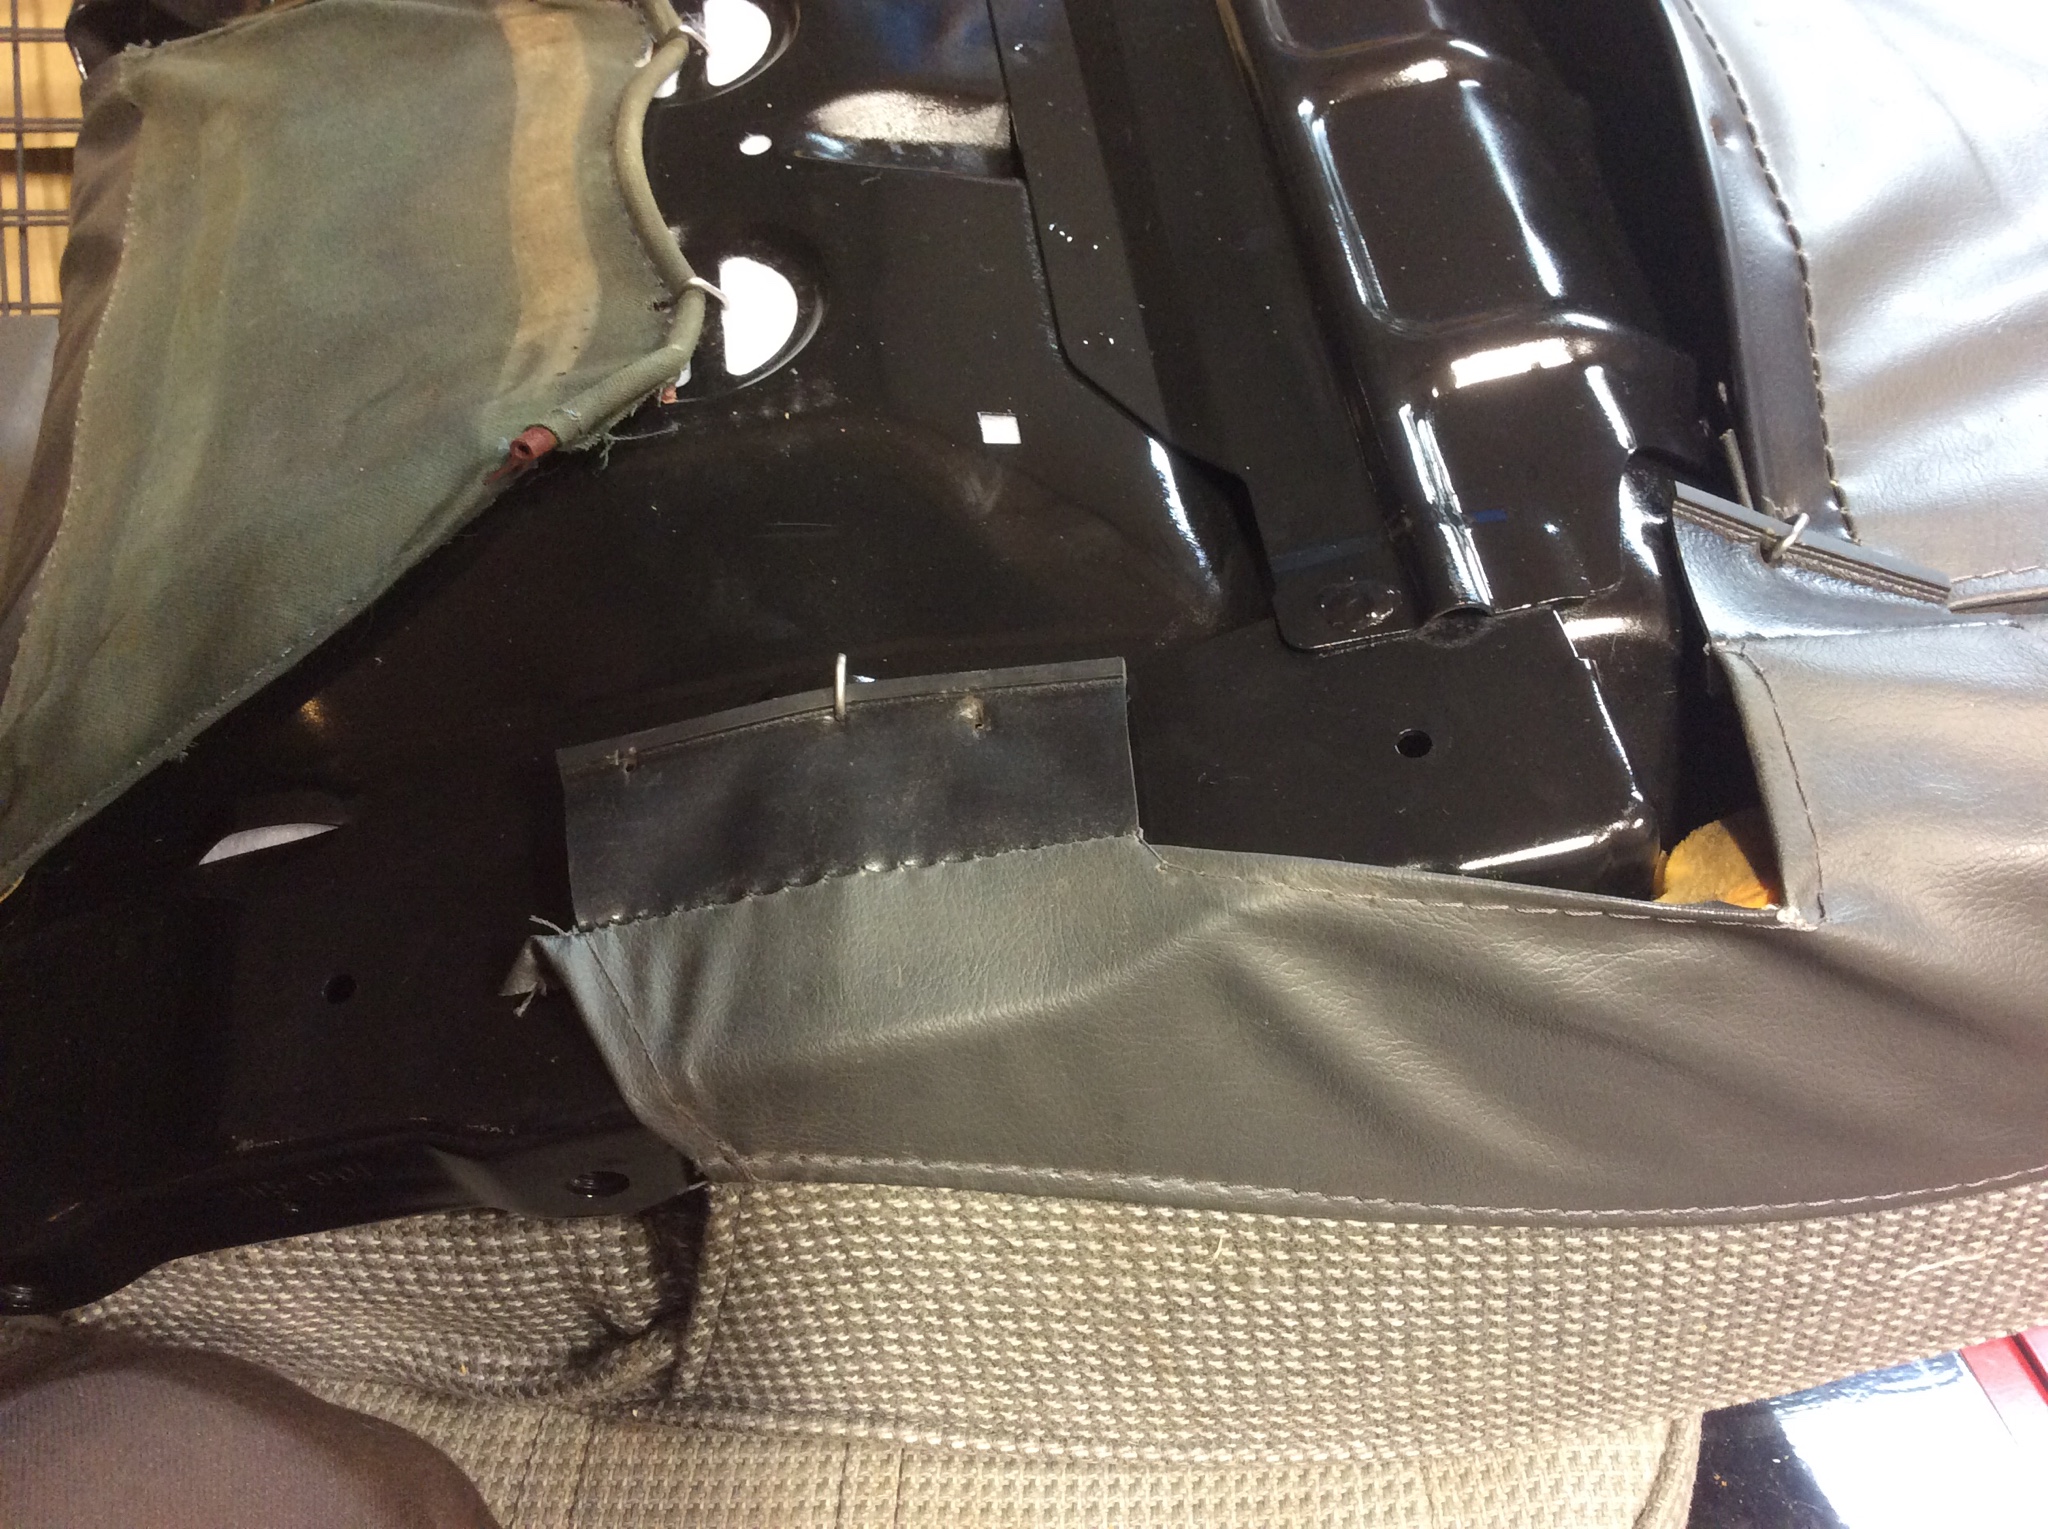
There are going to be several hog rings around. You just cut those in half and pull them out. There is then a retaining bit of plastic that is clipped around three tabs on the seat pan. Pull it forward off the tabs and then you can lift up and the cover and foam should come off.
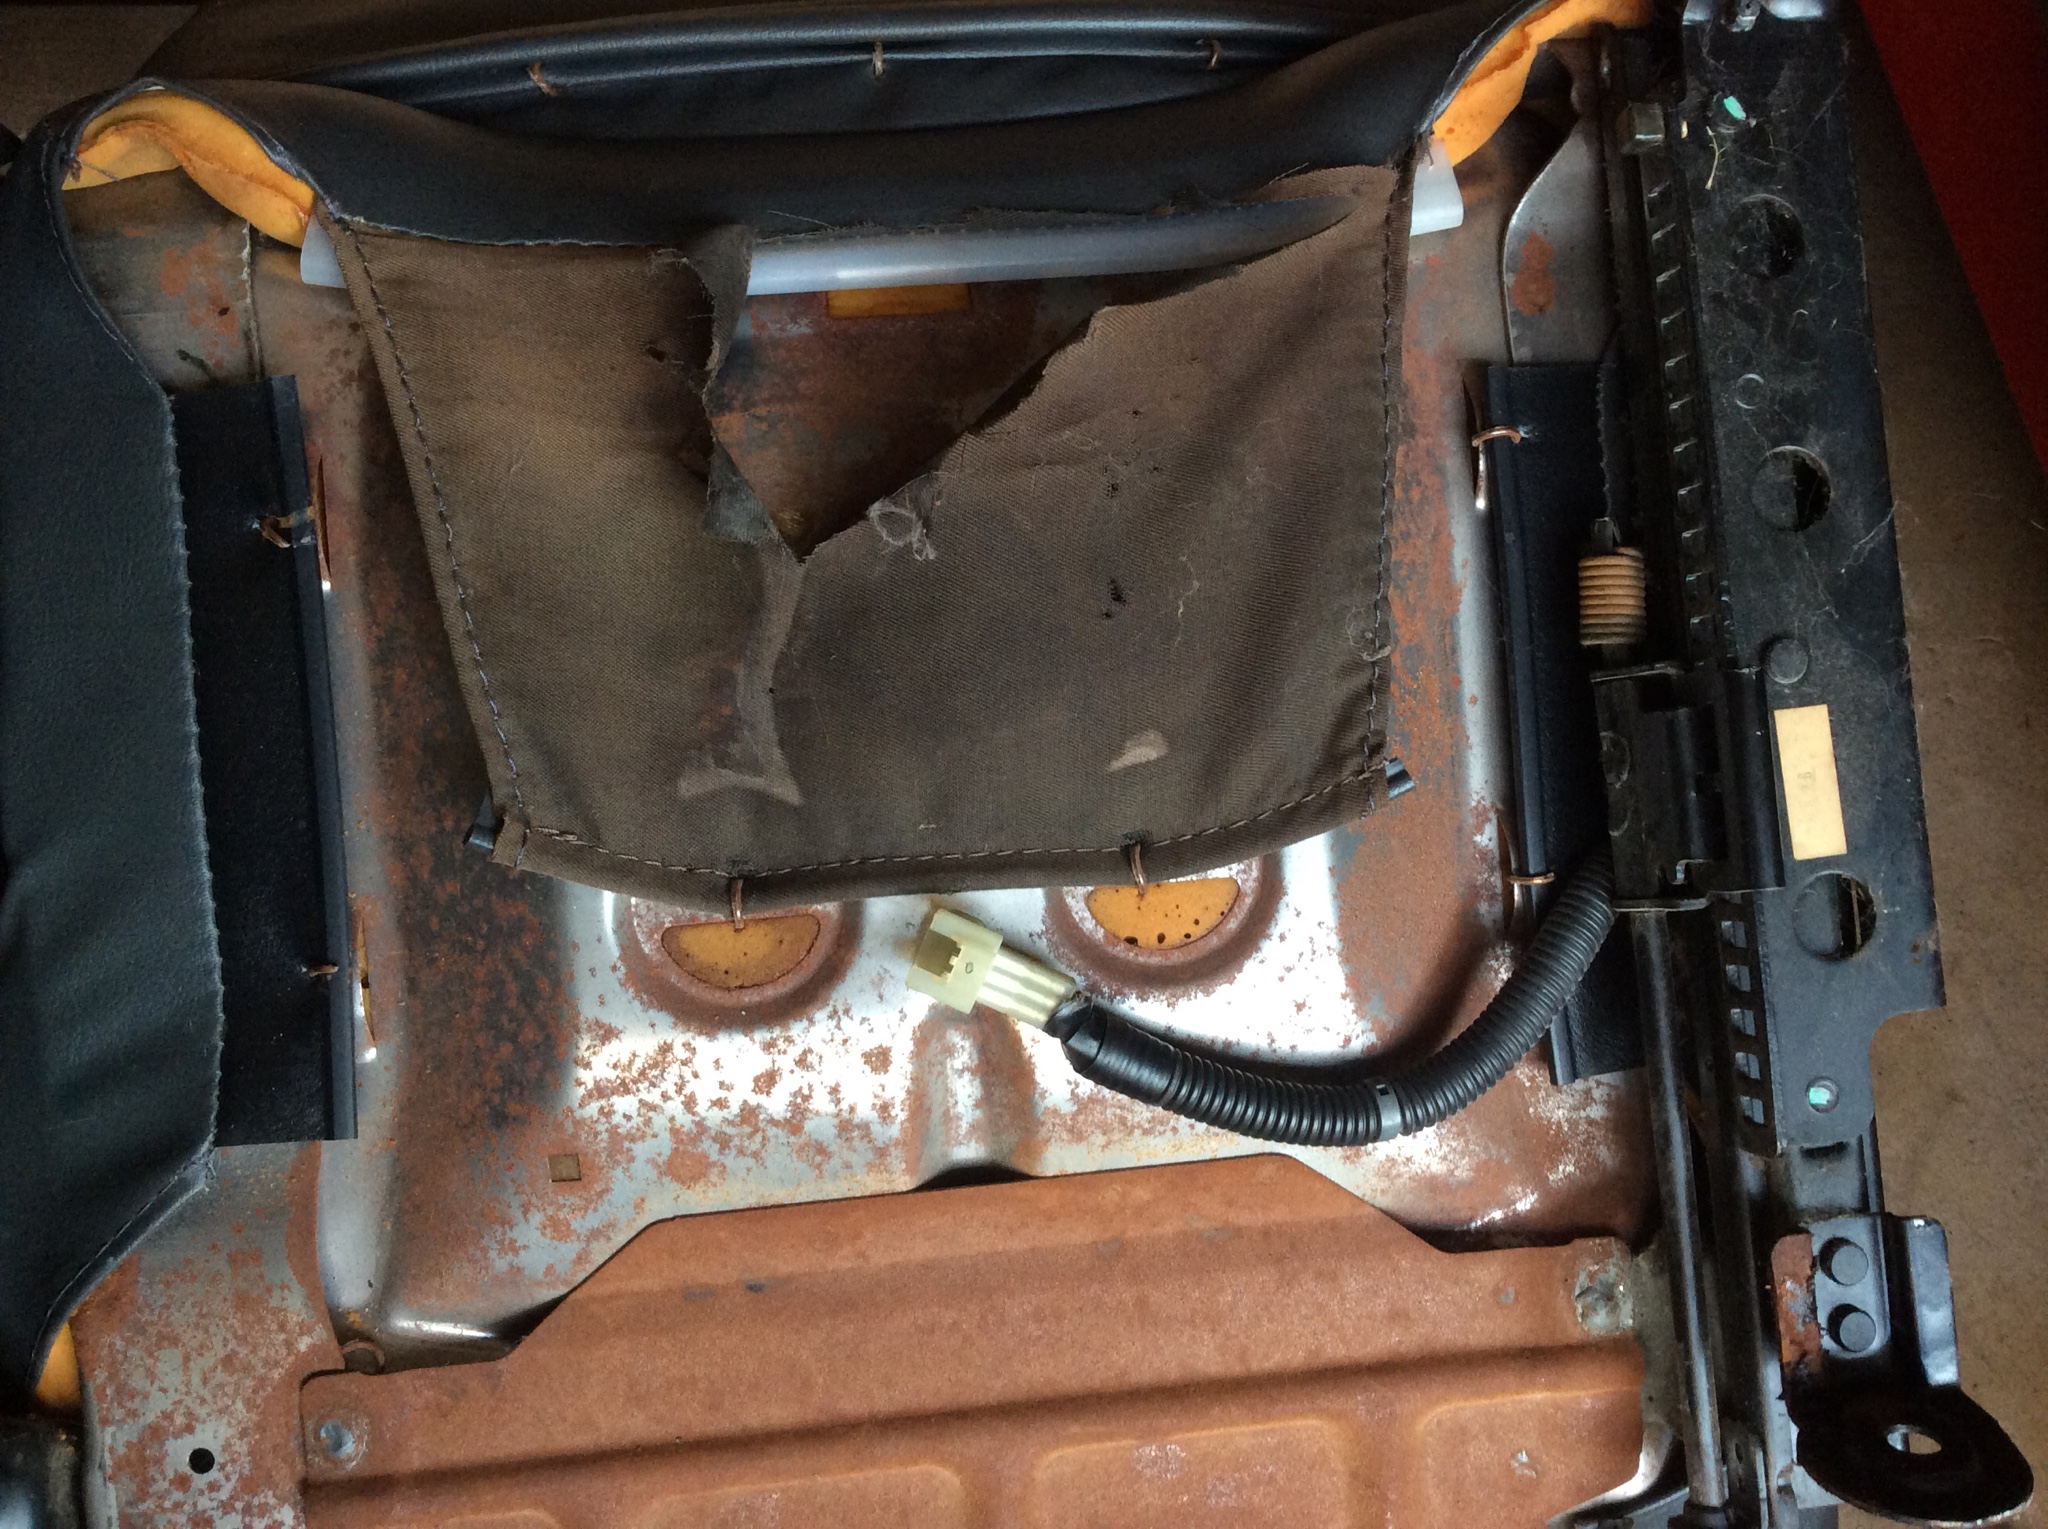
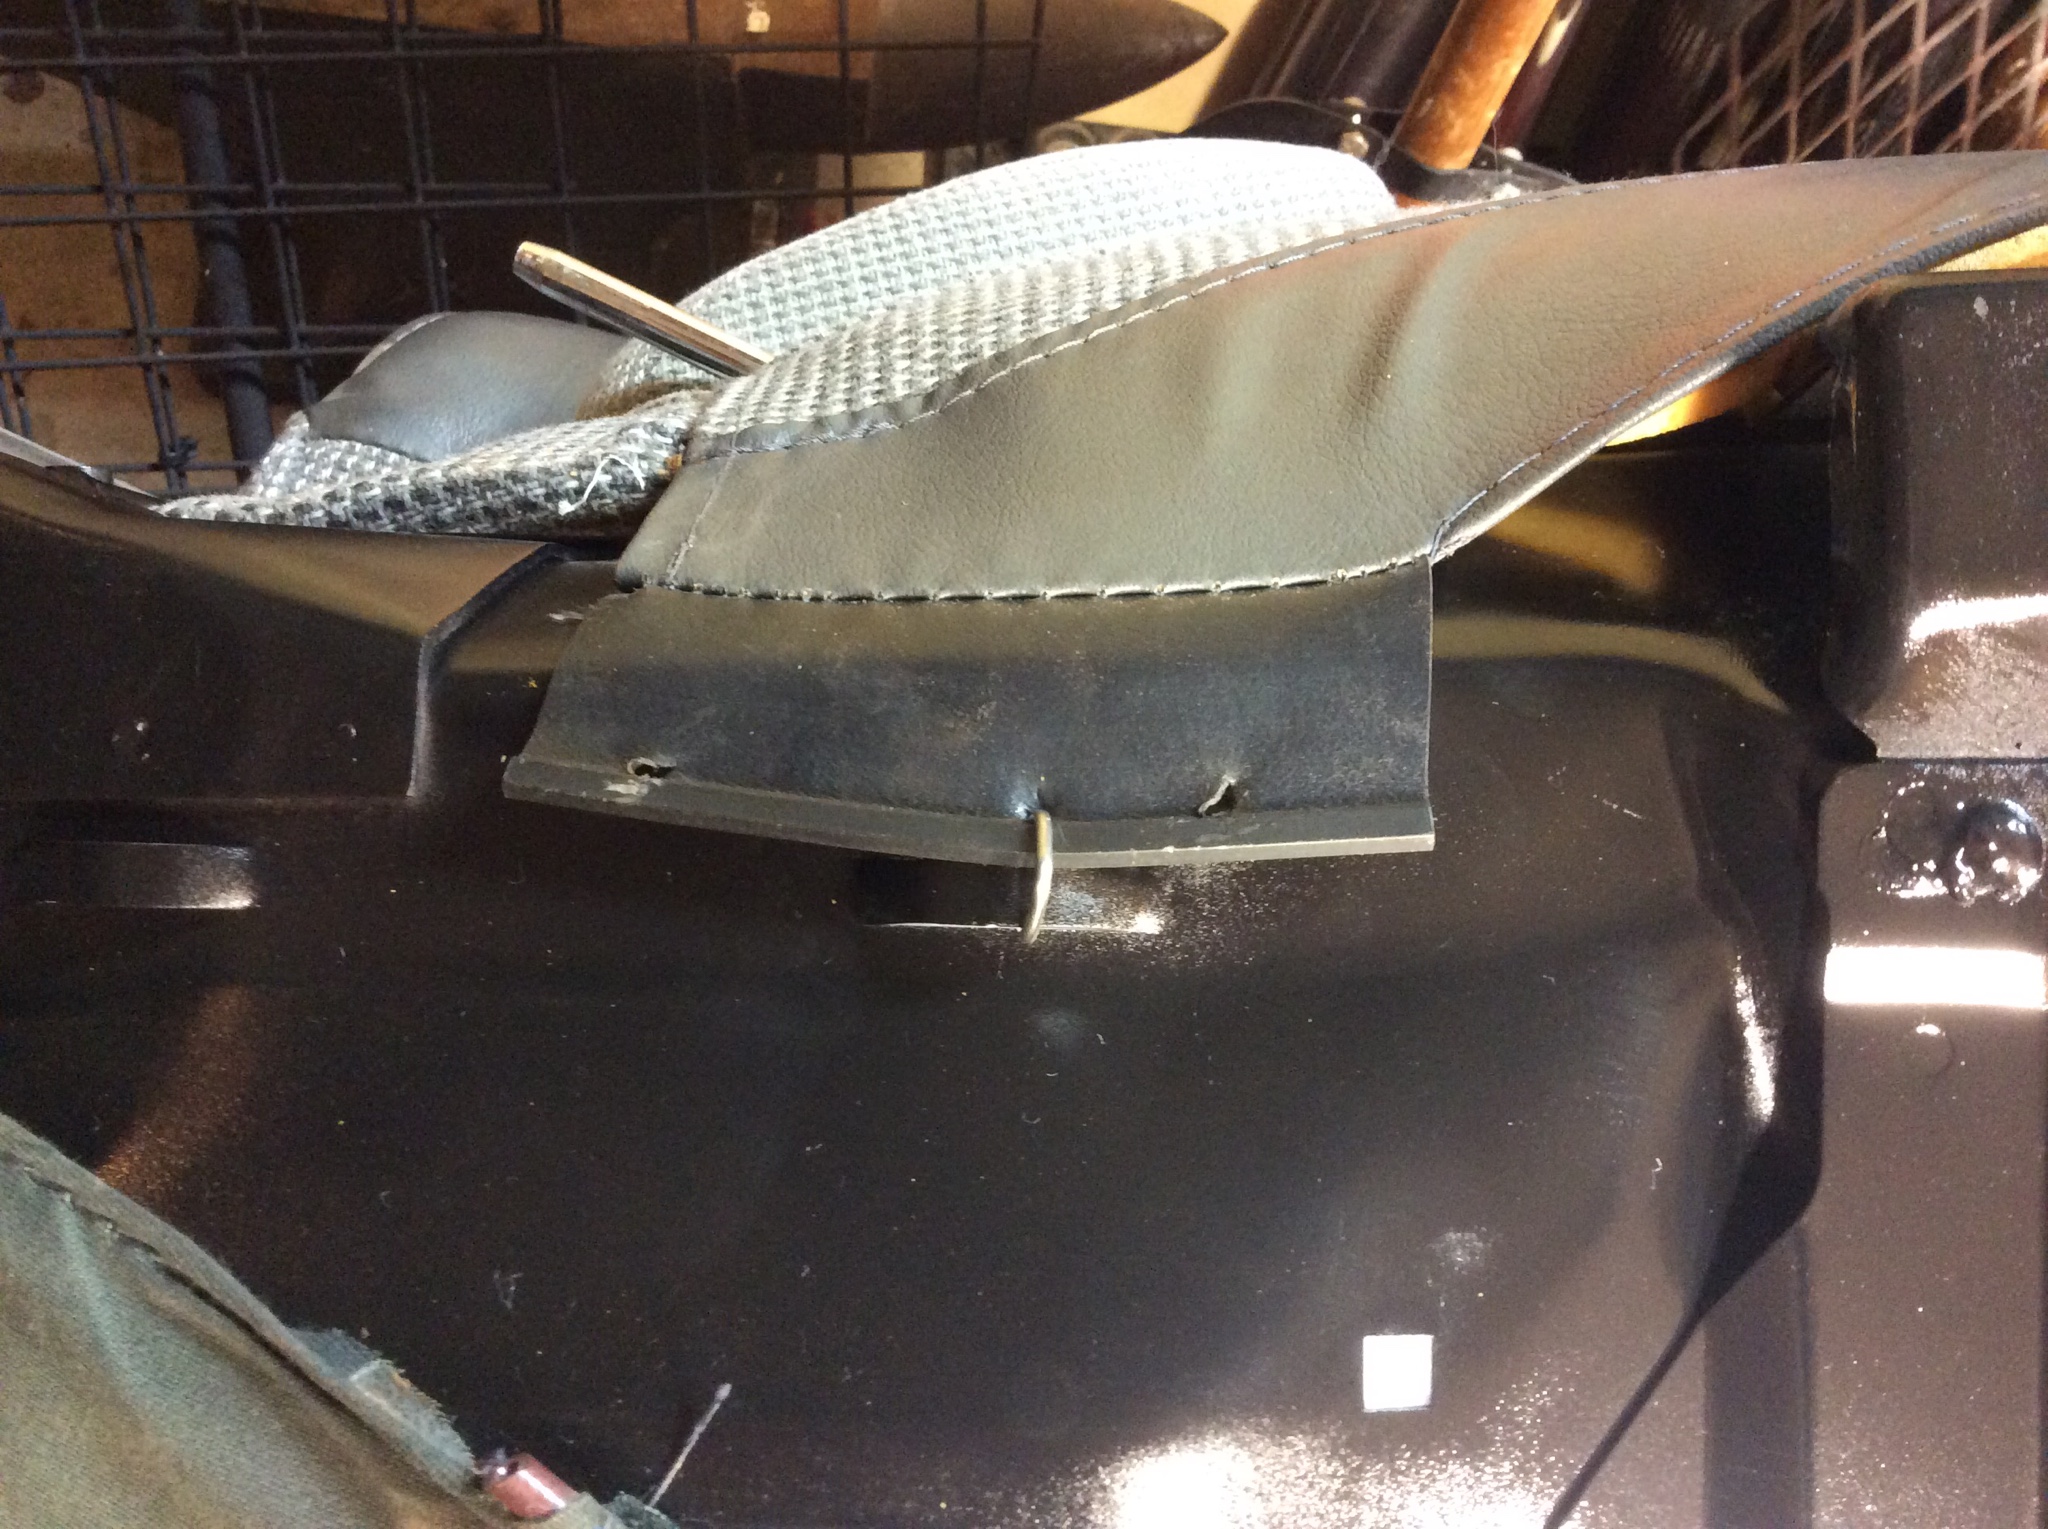
You can make it out in the picture below. This is my old seat. This fabric flap is hog ringed in place the white plastic you can see under the torn away fabric is what is latched onto the tabs of the seat pan.
Also since in this case I wasn't taking the bottom cover off of the foam itself I did not bother with cutting the embedded hog rings.
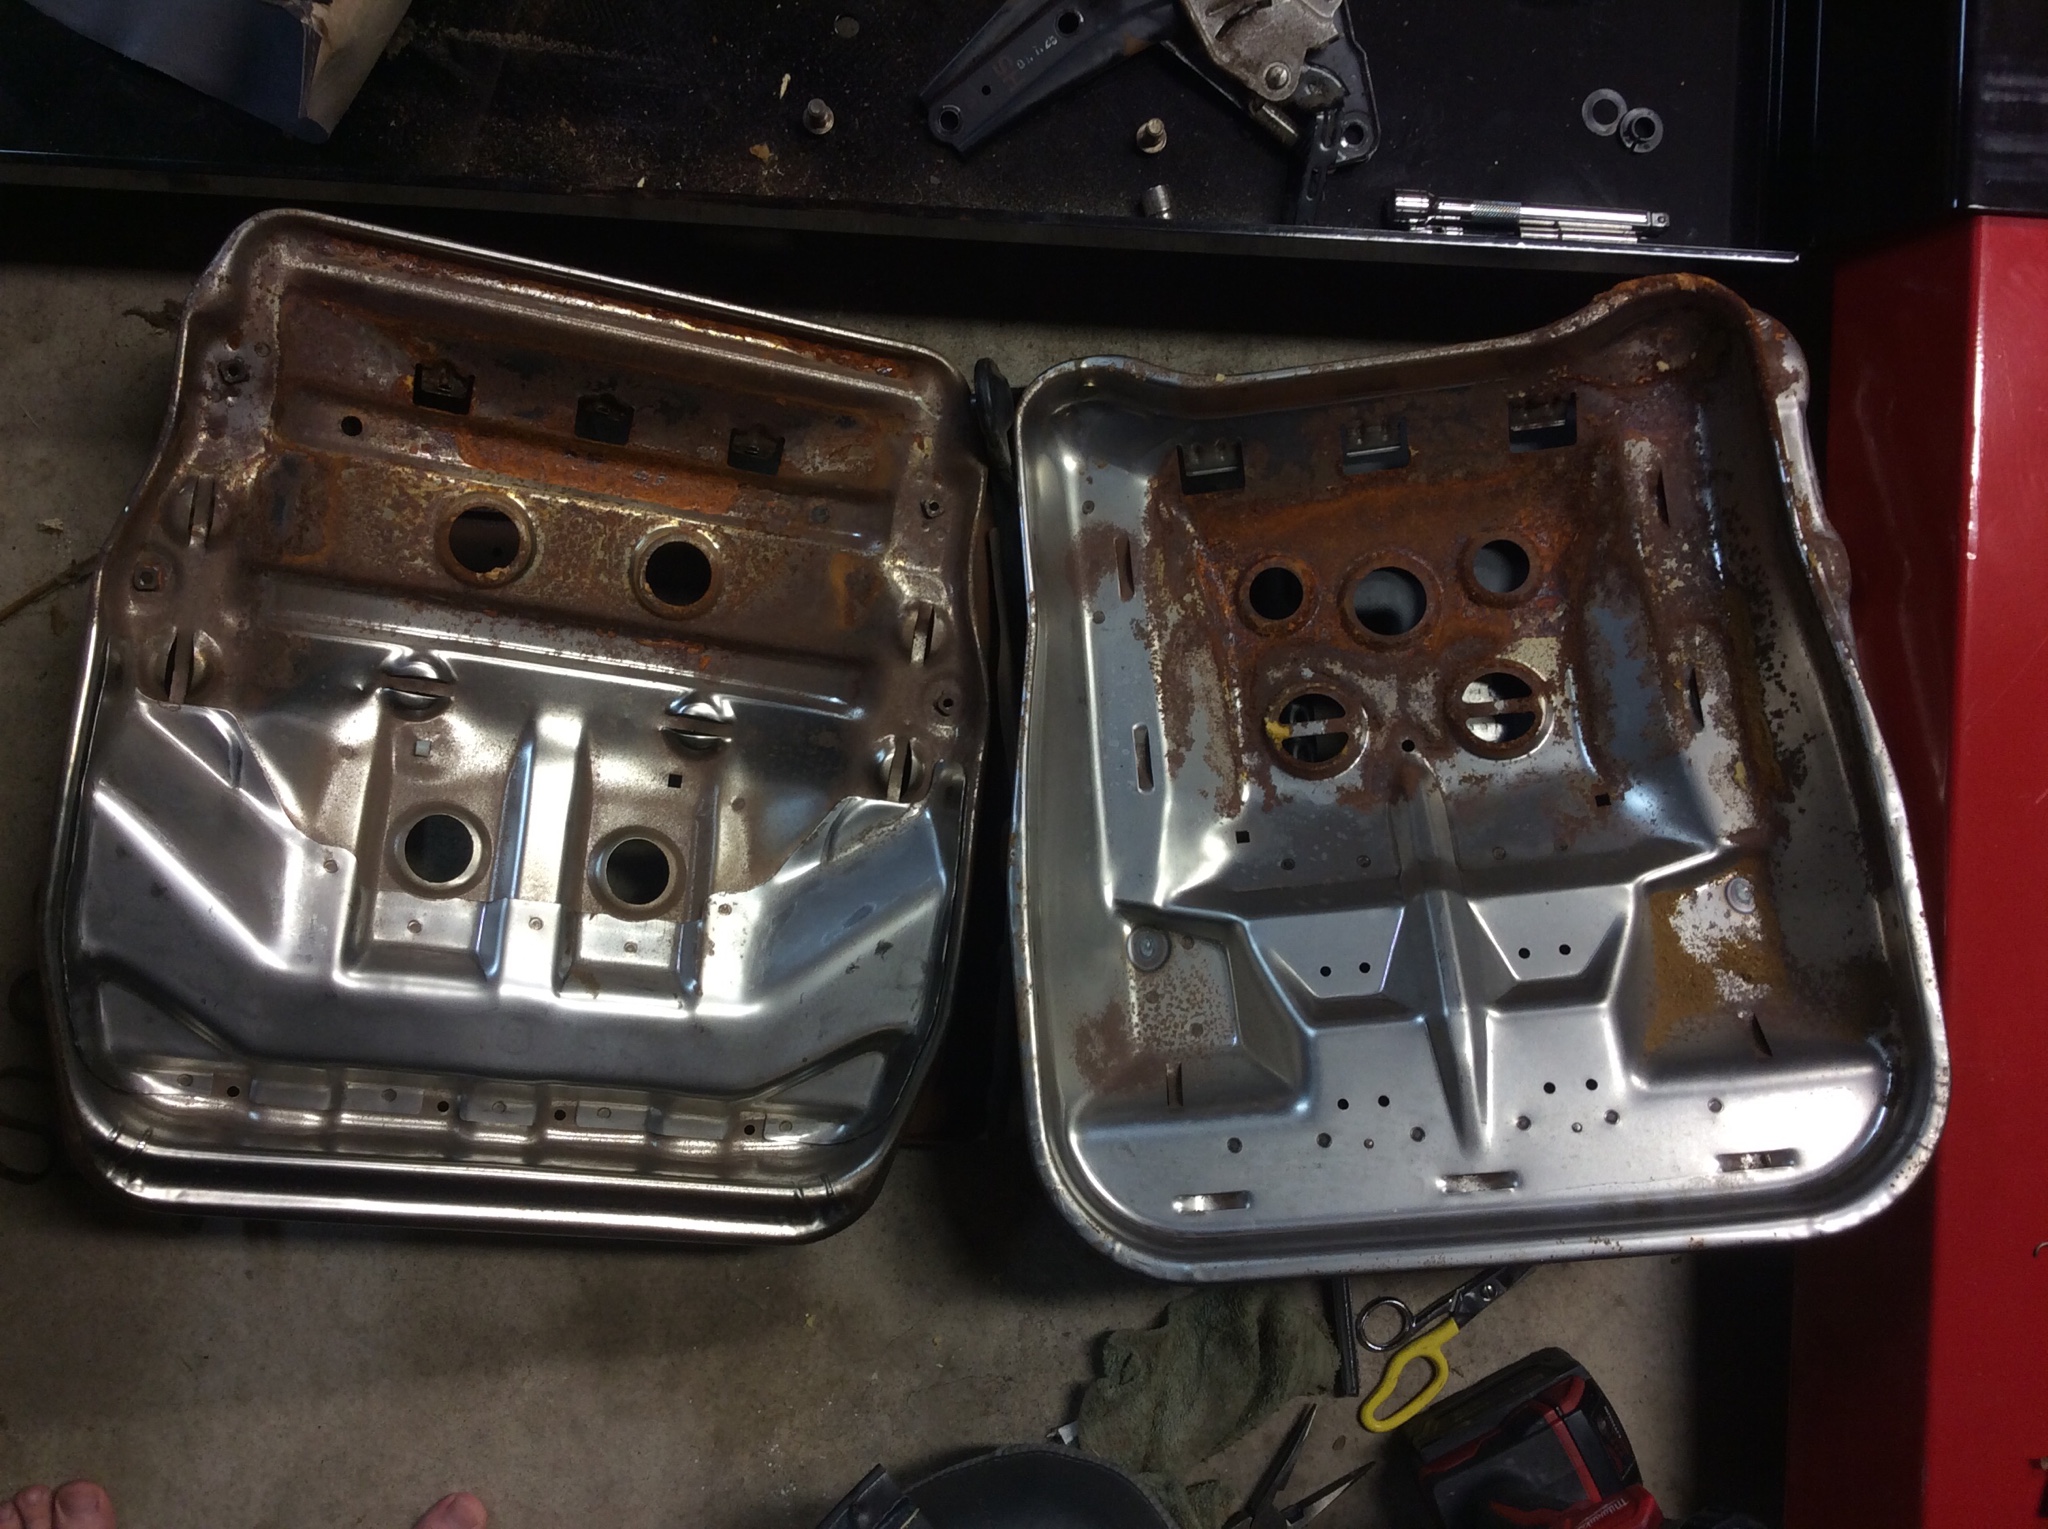
Here are the two seat pans, you can see they are fairly different. And on the other side the rail mount points are totally different. 88-89 has four bolts on the bottom. 90-91 has three on the bottom and three on the sides.
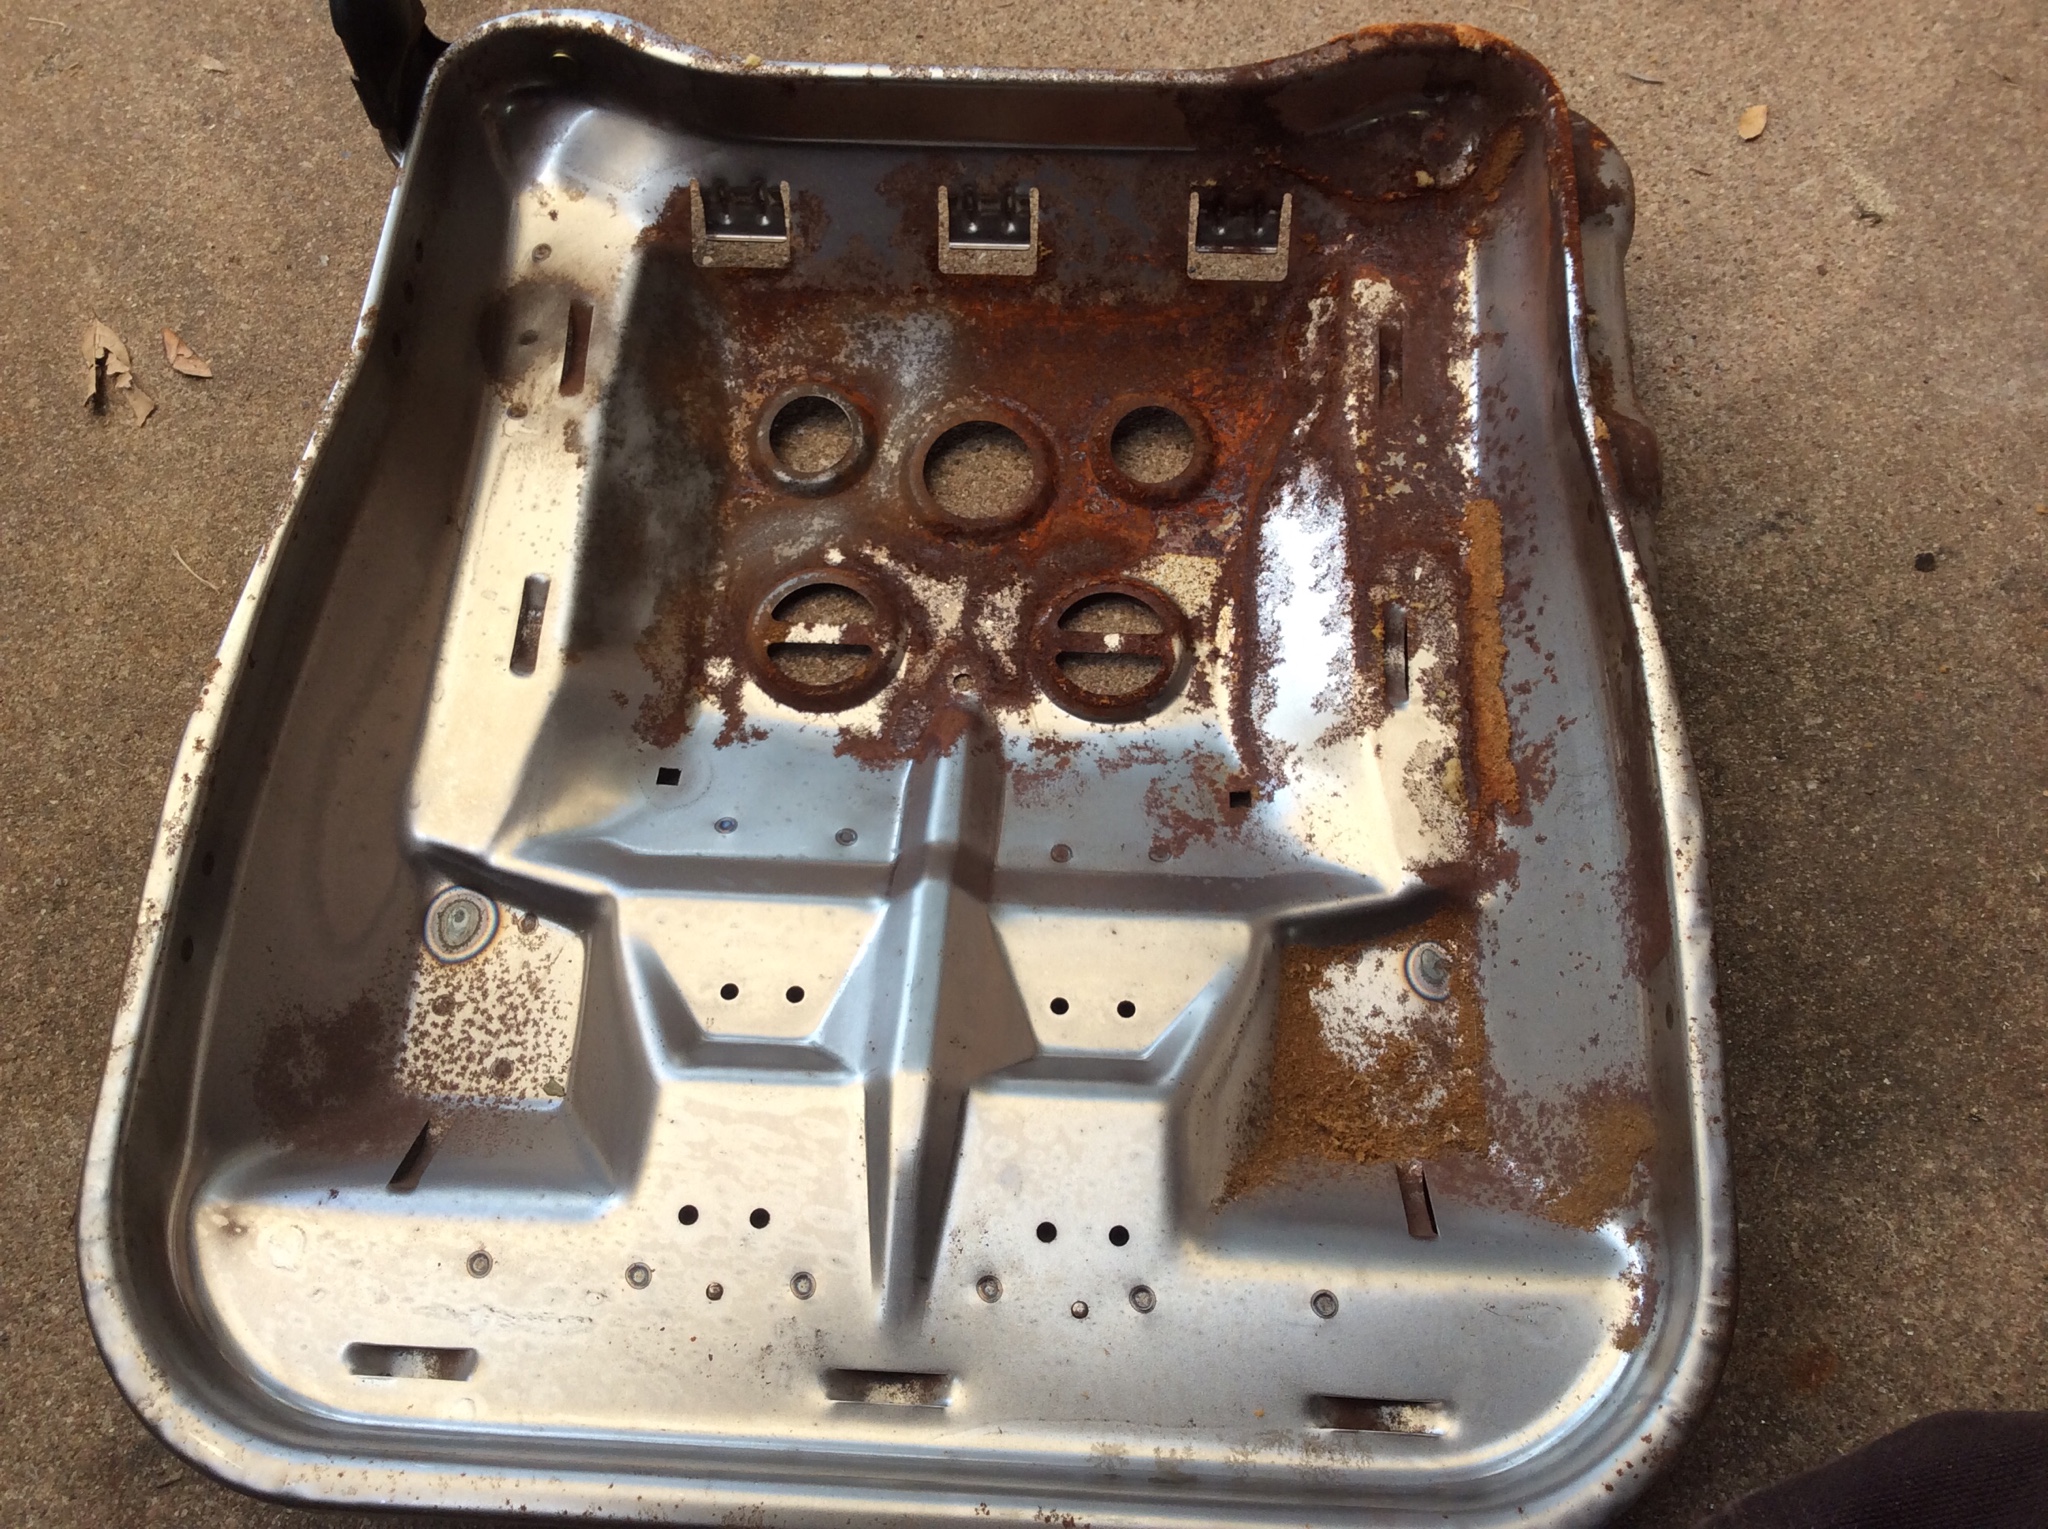
So since this is the gnarly shit we are working with, I decided to go at it with a wire wheel. I wanted to make sure the pan was fully painted.
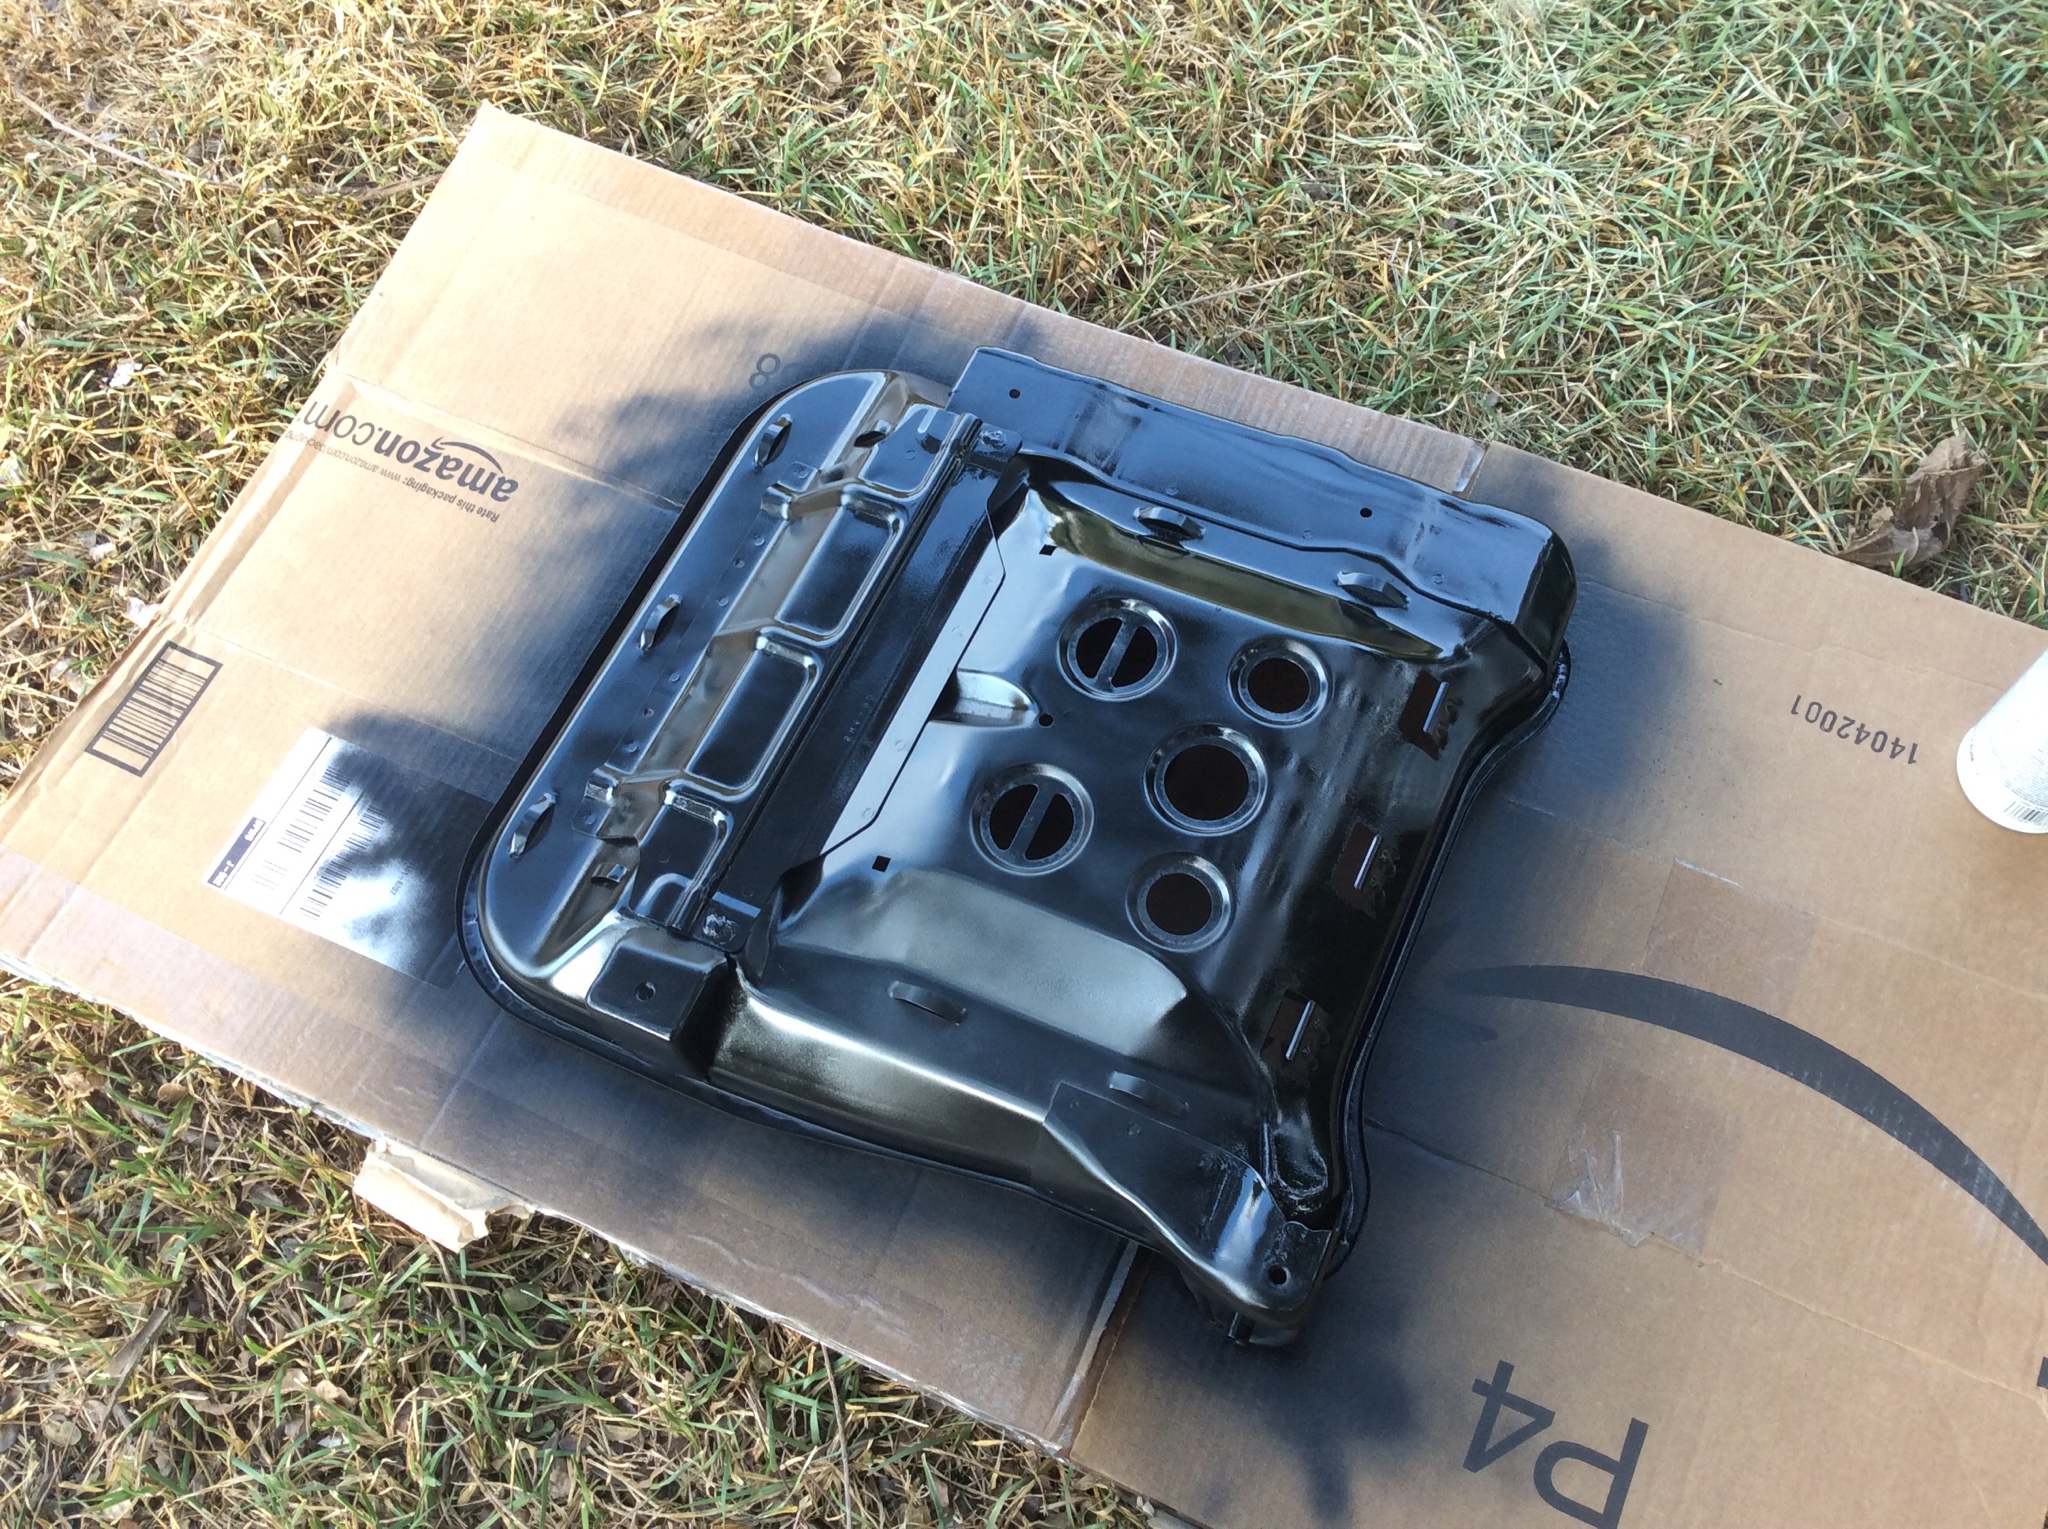
Good coat of semigloss black rustoleum.
Displeased
With both sides painted, time to fit the replacement foam onto the pan. You can see the center mount points for the hog rings on the front of the seat are not at all in the same place. They are a couple inches forward. Unfortunately that means I'll have to cut some slots to get the hog rings through. For now though the two at the sides hold just fine.

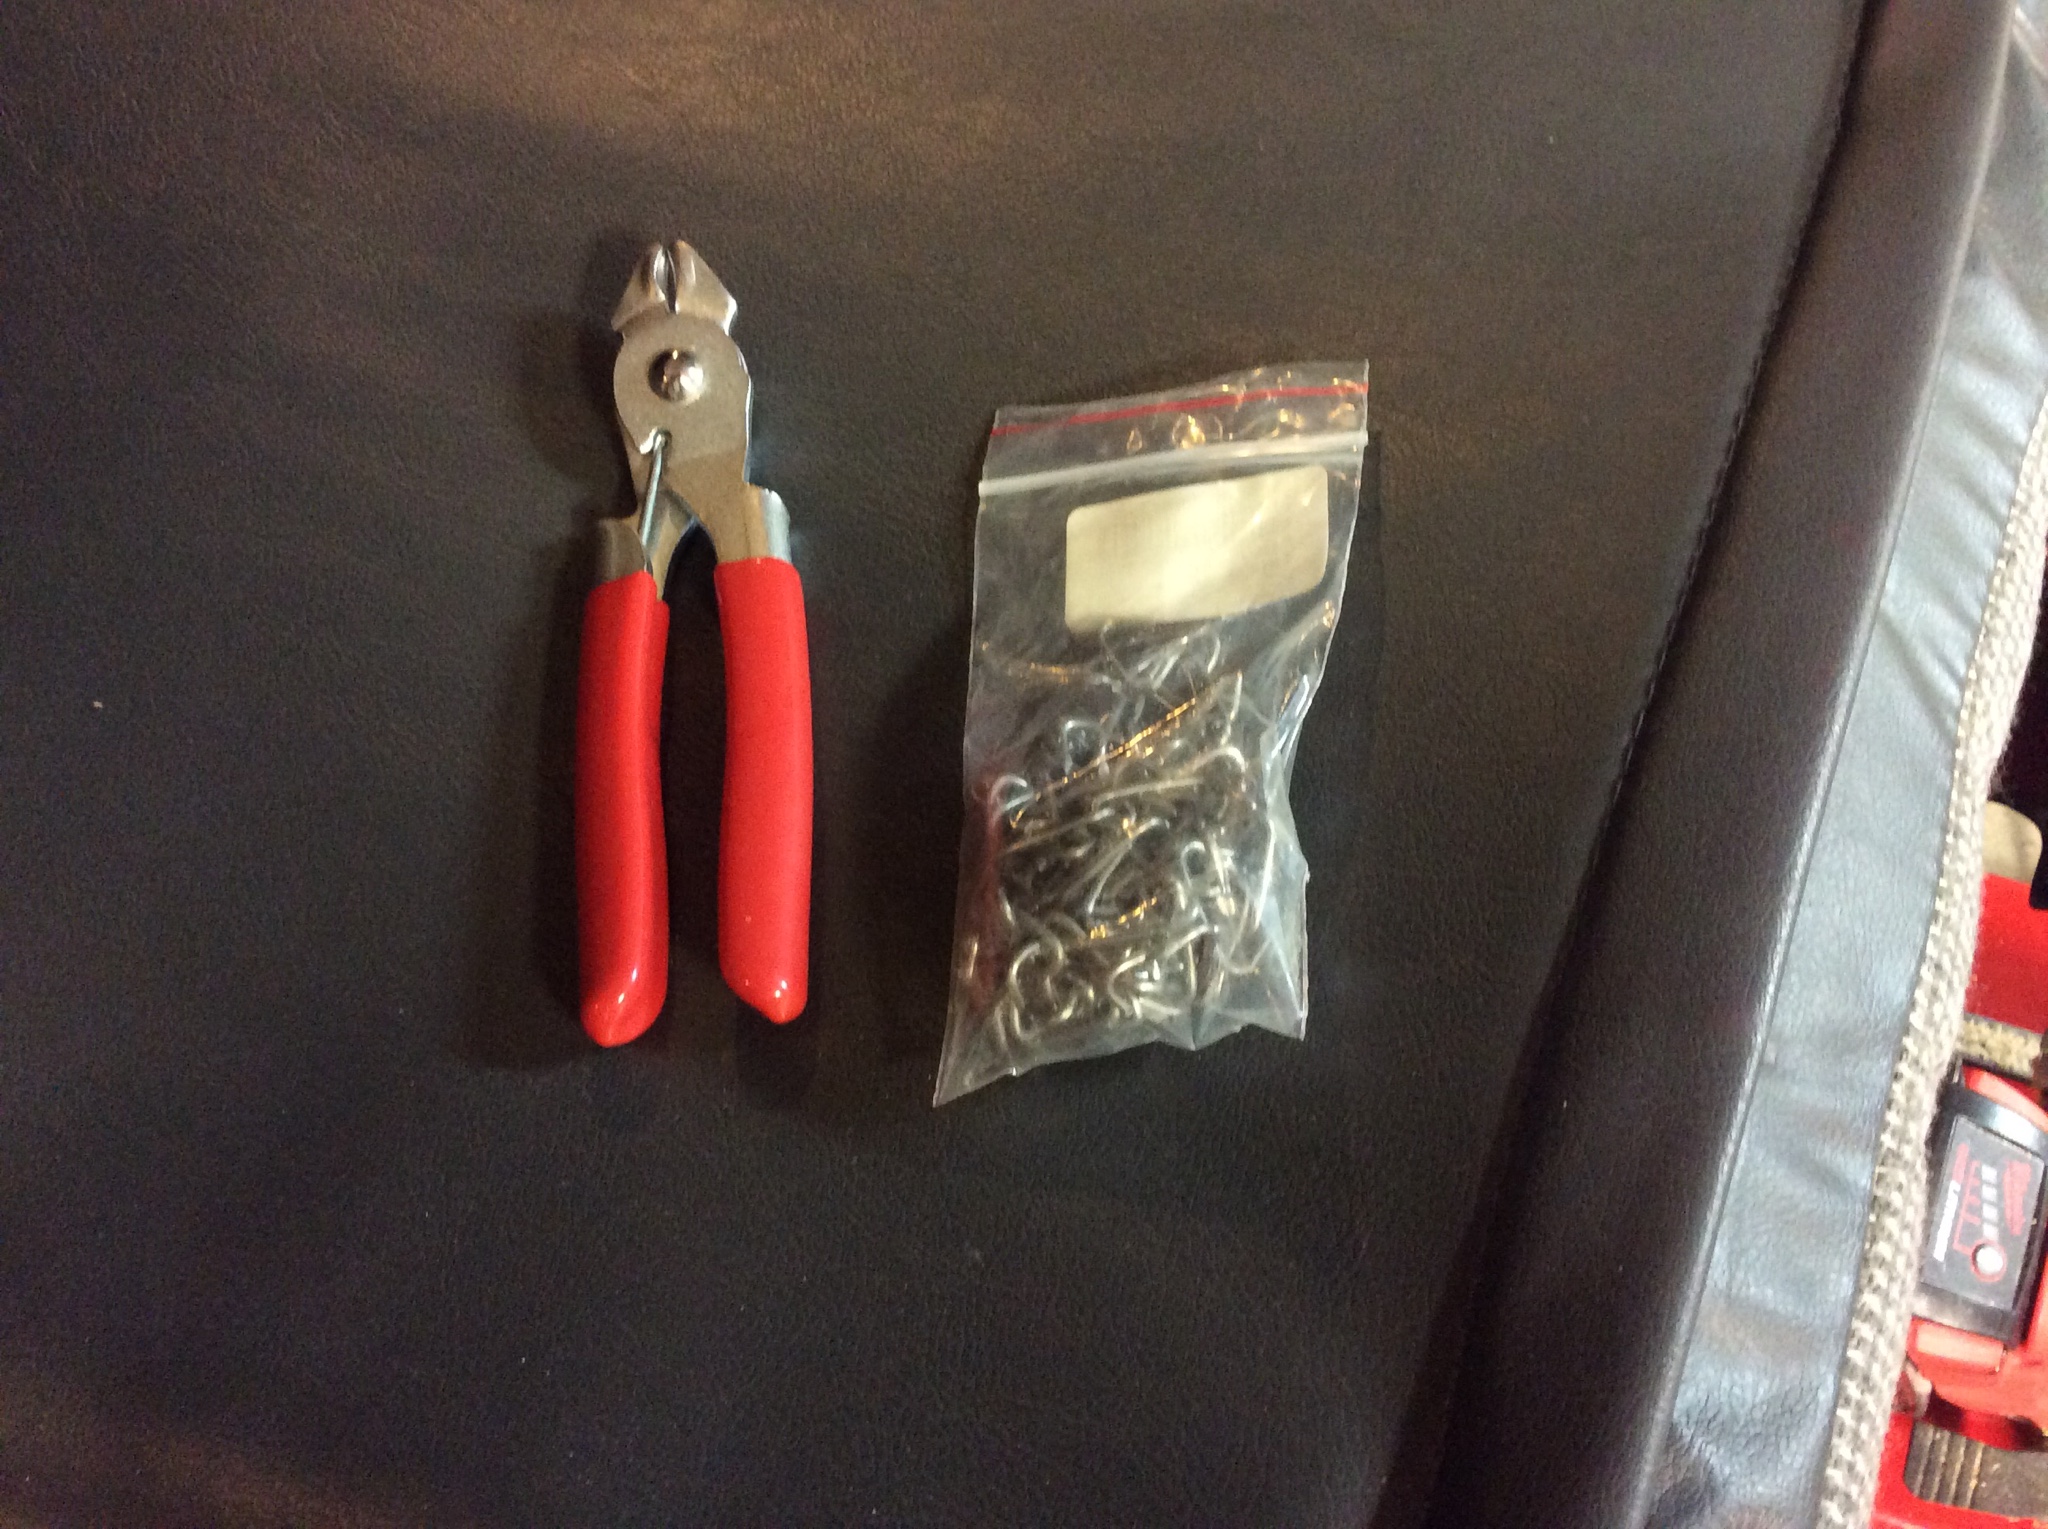
Hog rings and hog ring pliers. They can be acquired cheaply enough that I'd not even consider using regular pliers on these unless I was in an absolute bind.
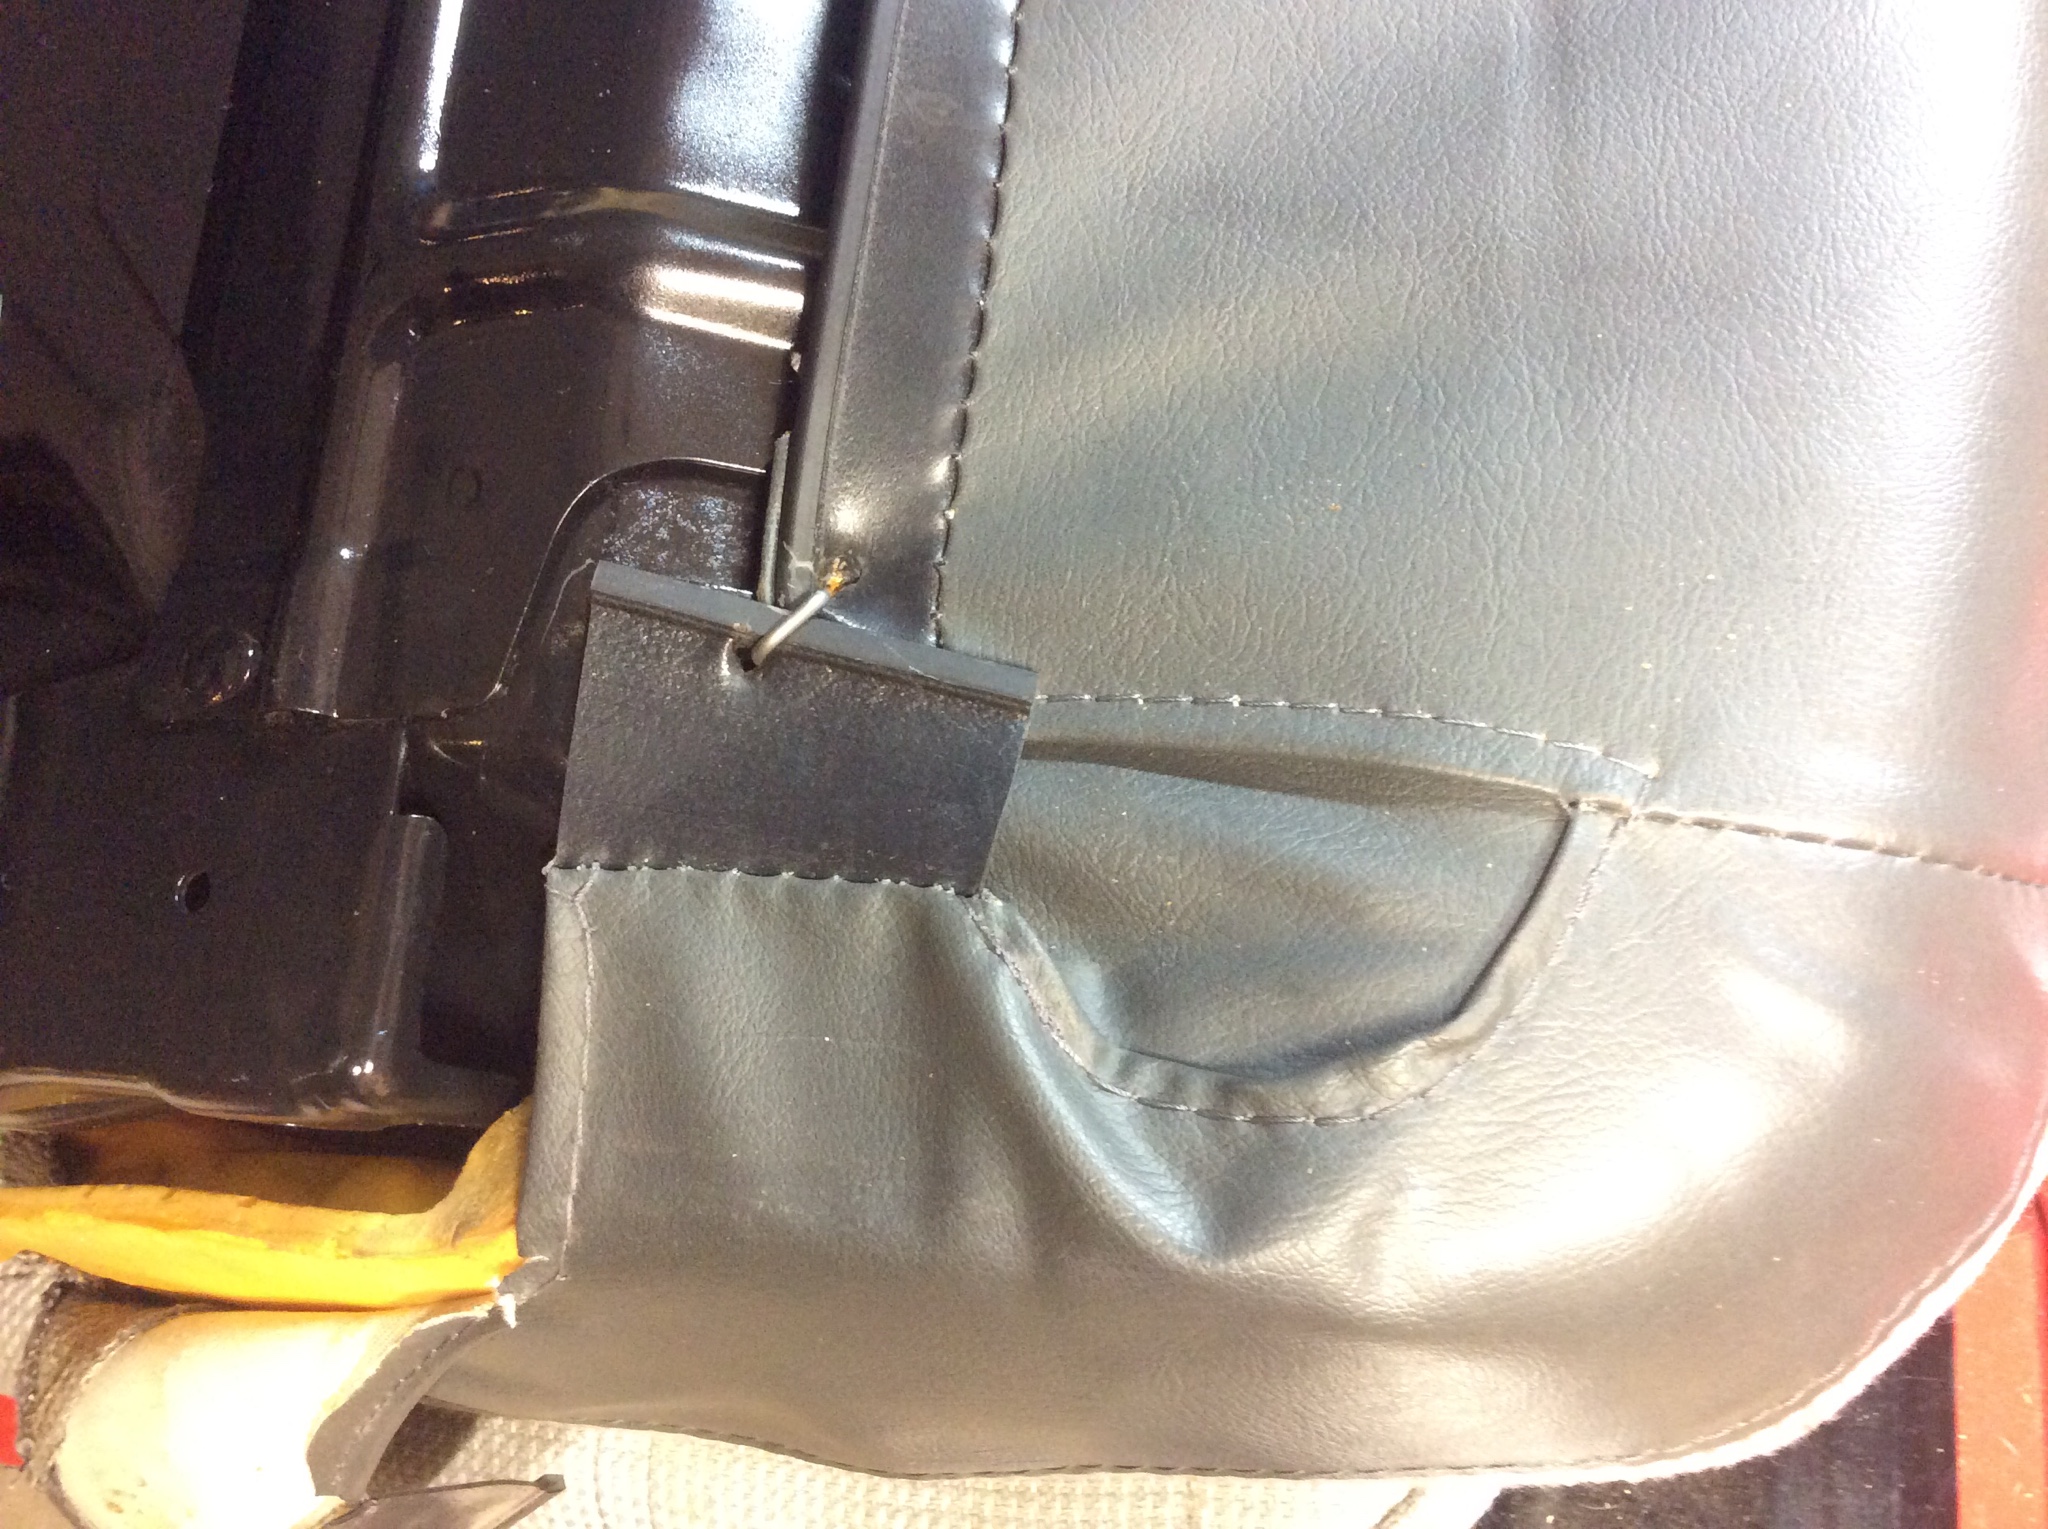
This actually goes through three layers. Two of the plastic and a bit of vinyl under there as well. Just get it through the existing holds, put one of the tines of the ring under the loop on the pan and squeeze.
Hook the plastic bit that was mentioned before, on the tabs of the pan, and pull the fabric flap in place. Hog ring it too.
Get the side flaps too. You can see that two rings were used before but the position of the covers only allows for one right now, future modifications can take care of this.
One side required a lot of stretching as it didn't come close to the ring mount.
This led to a wrinkle, but I'll deal with that for now.
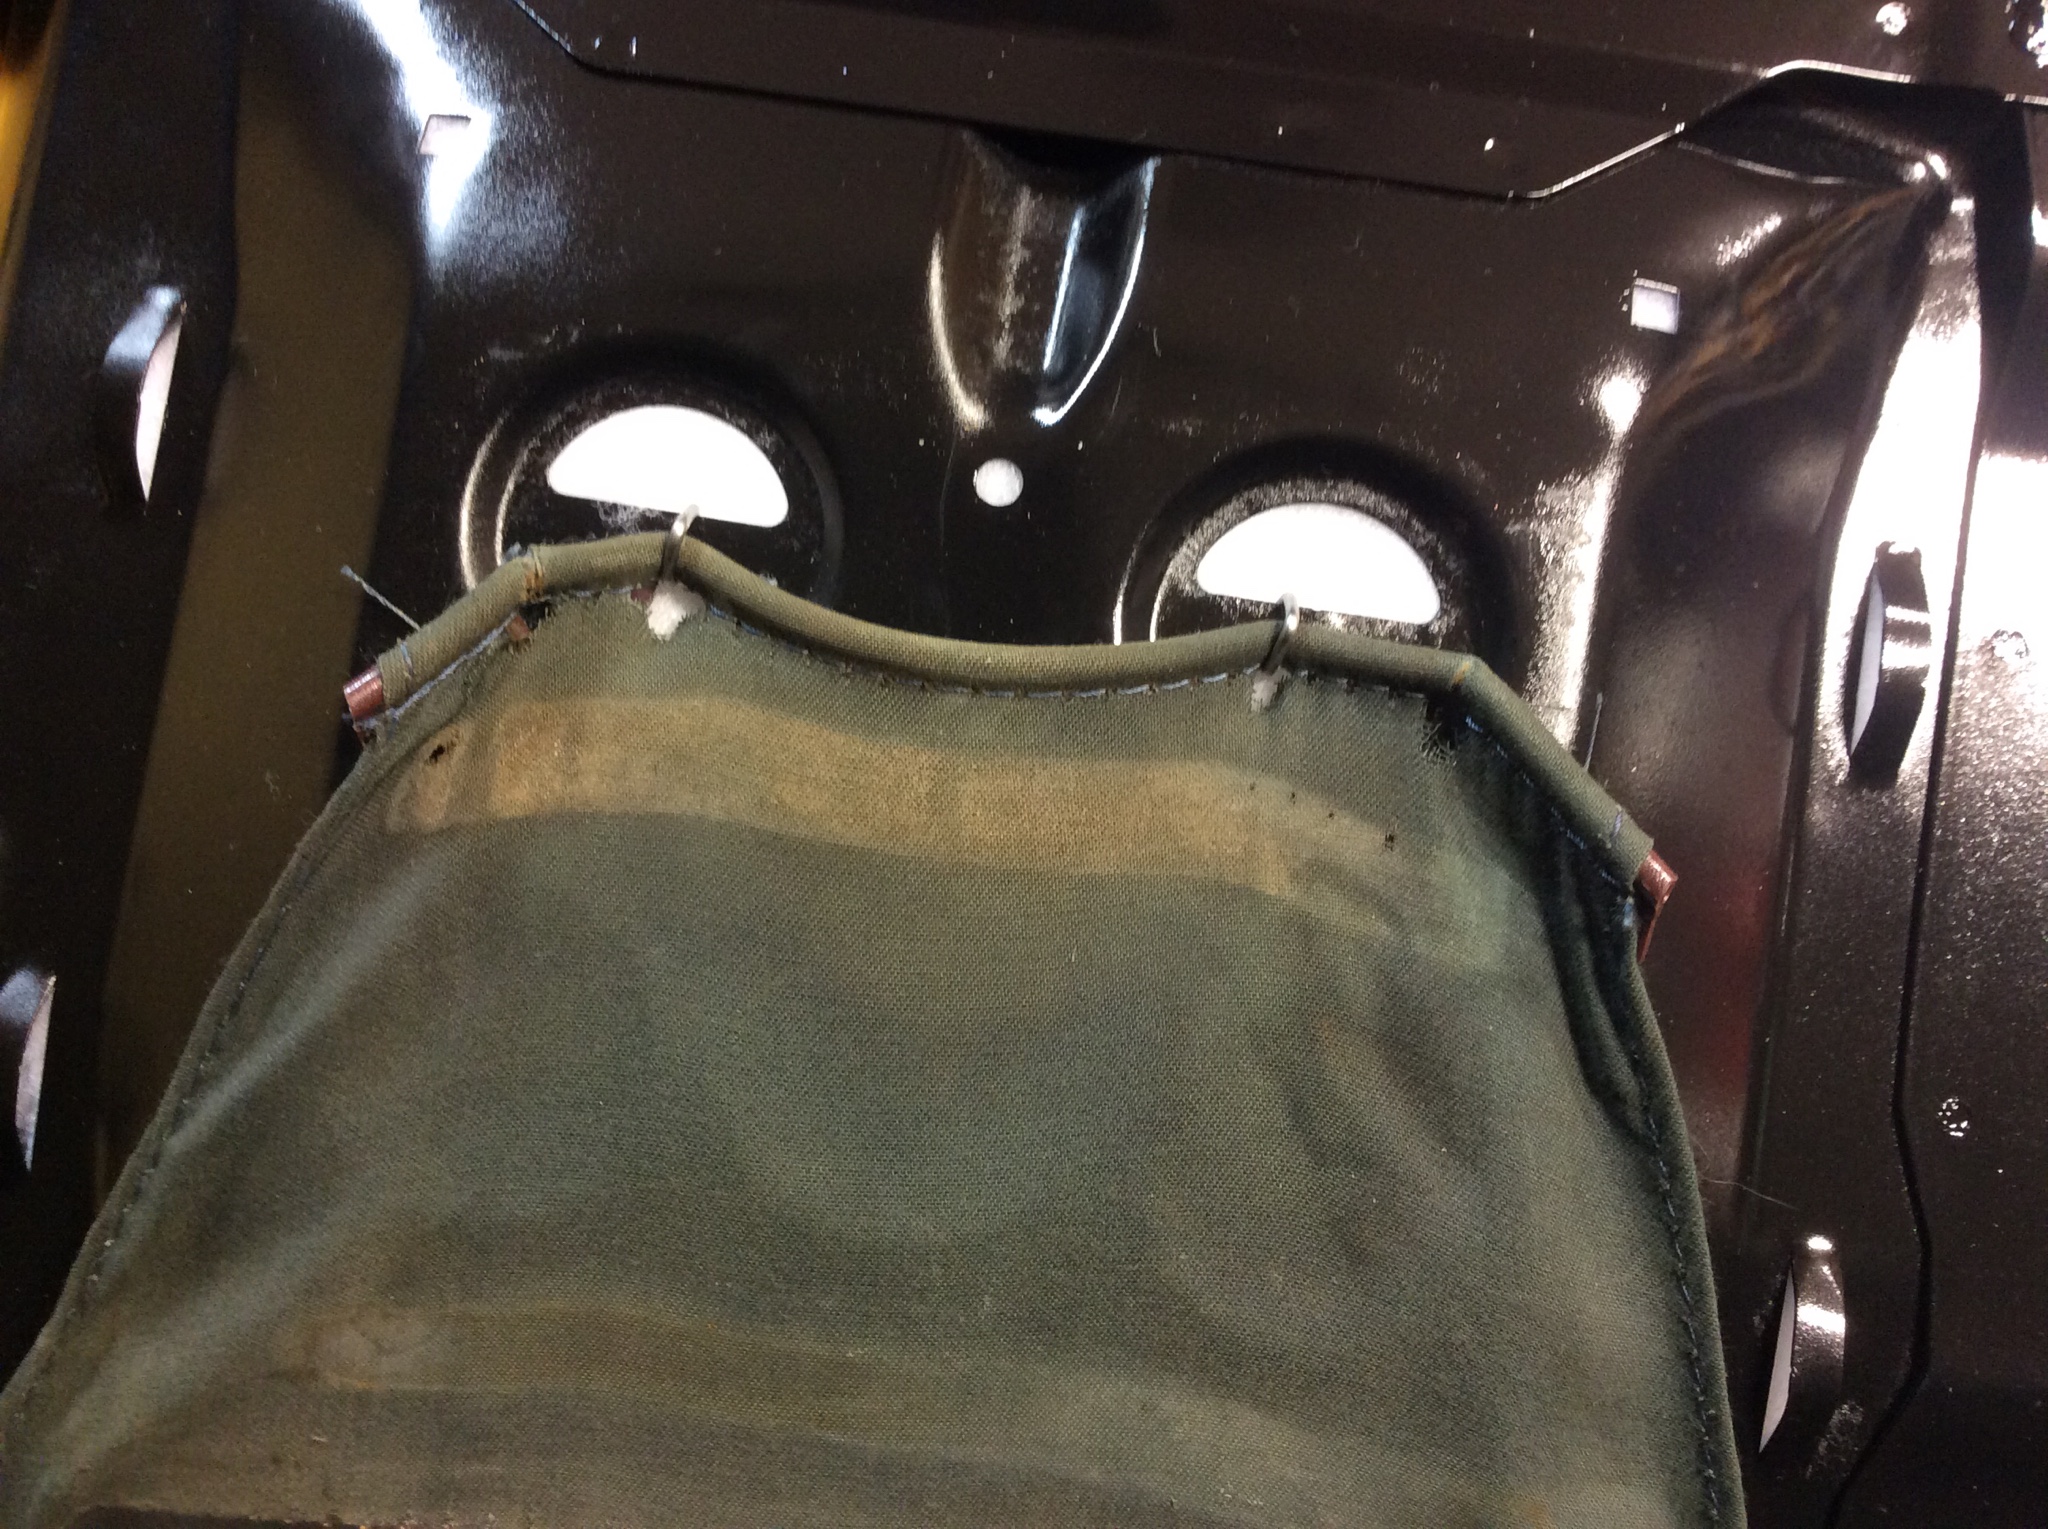
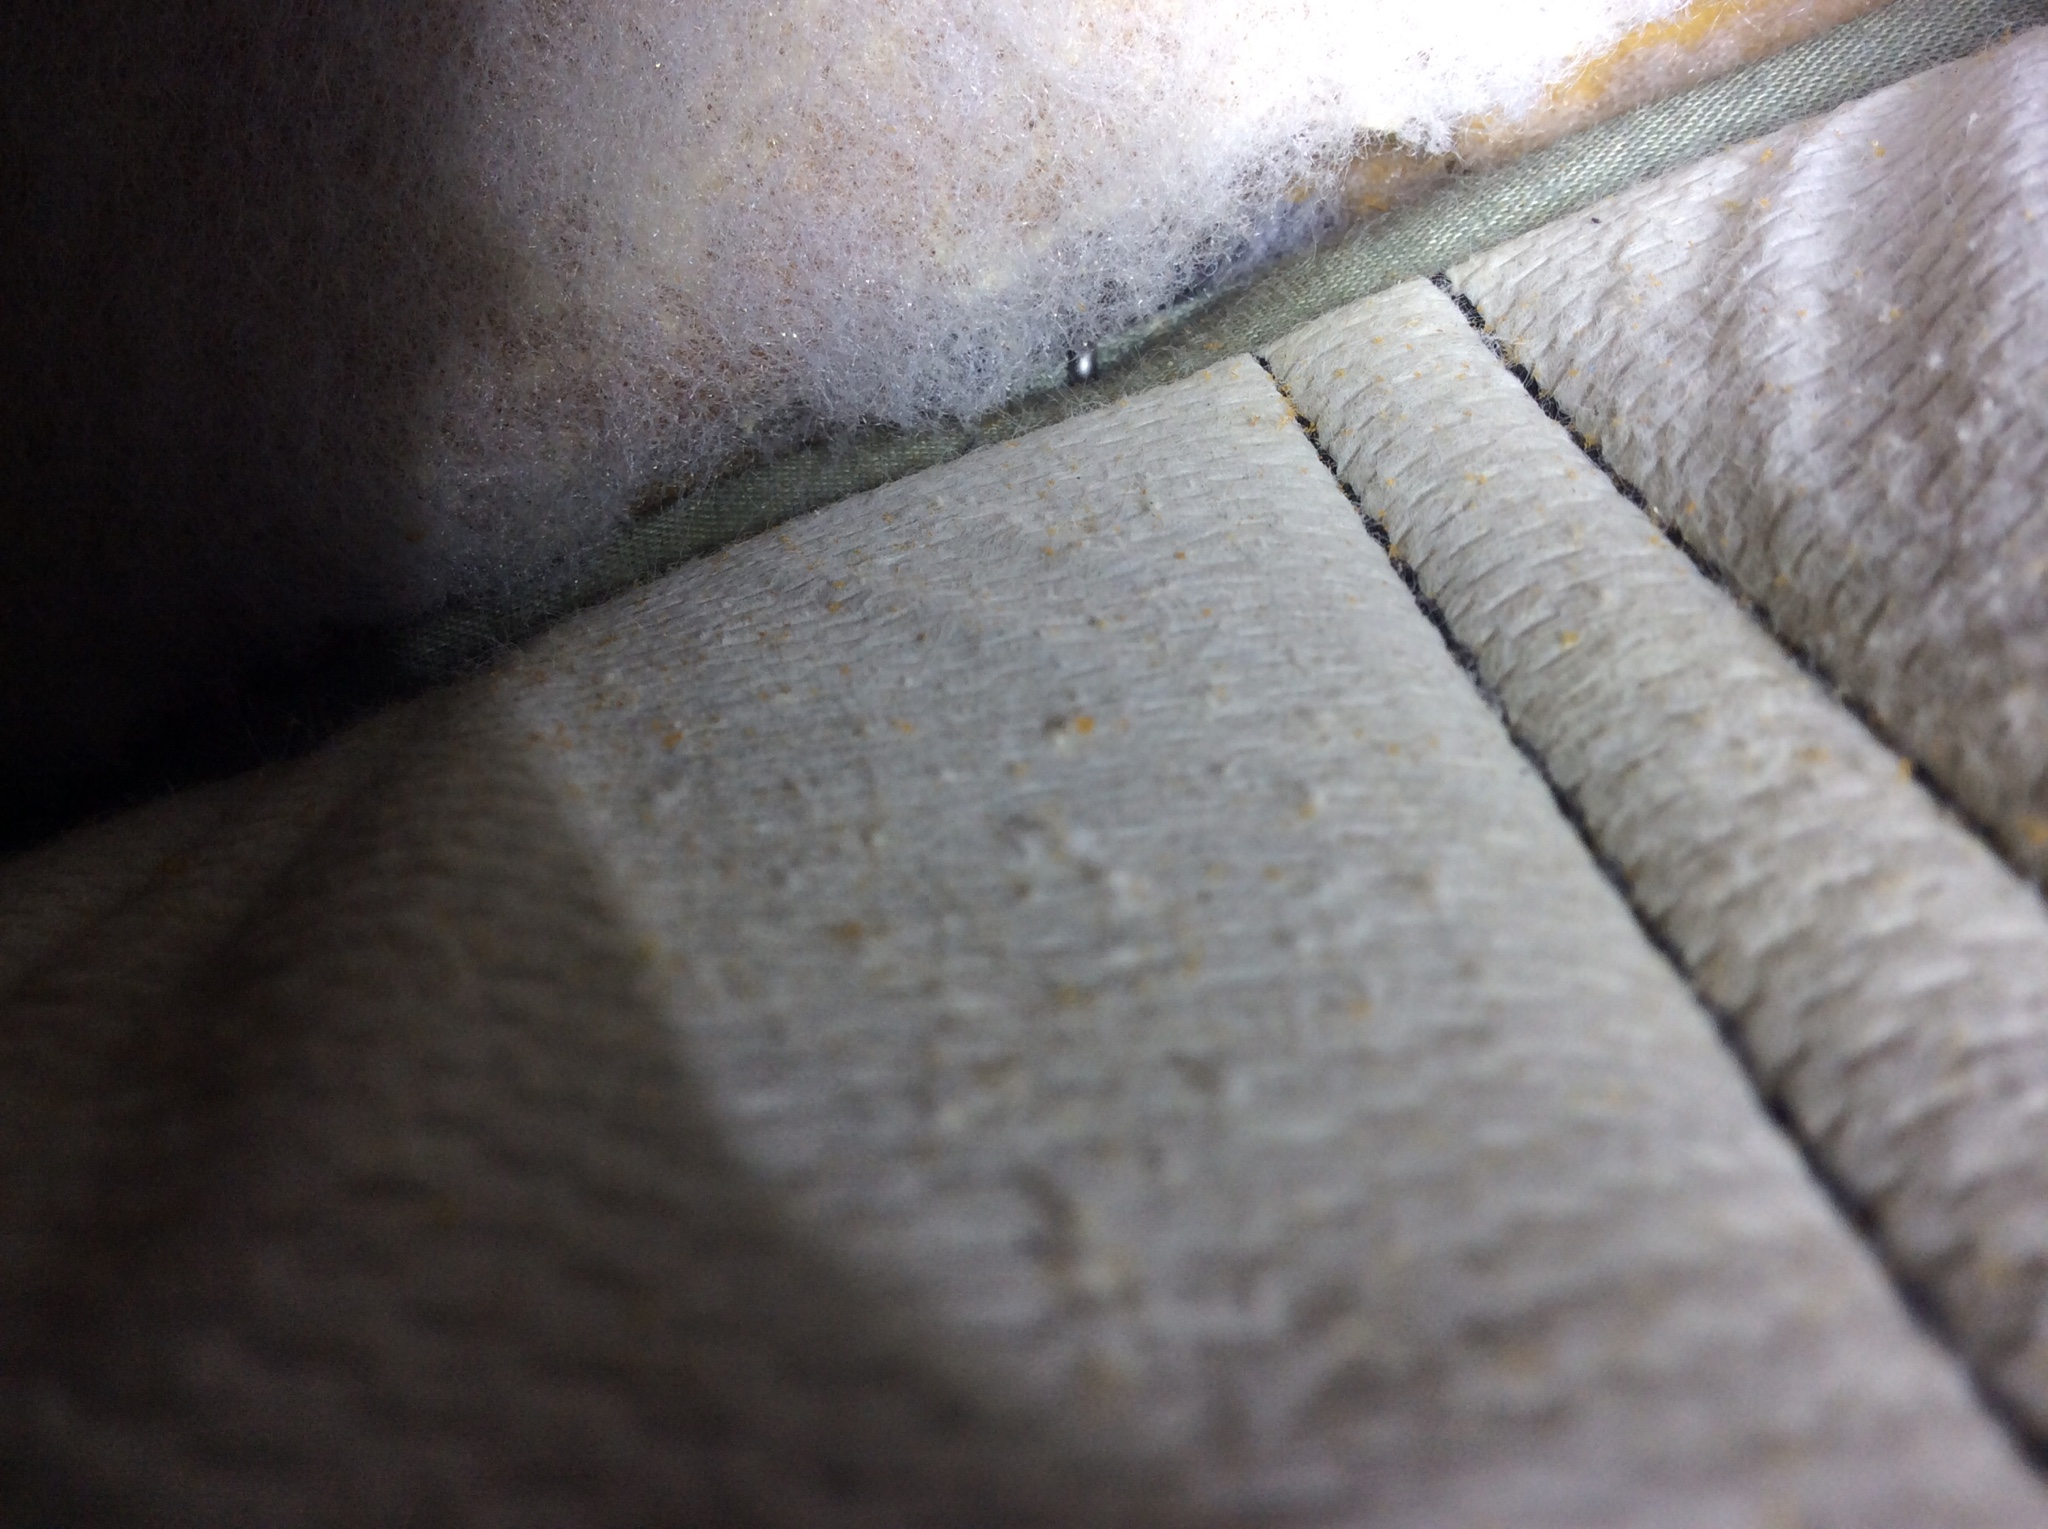
Now for the top. Follow the reference from the fsm photos above, but here is a shot of the rings to cut, also another difference to note, there is a bar that the back of the bottom seat wraps around. This doesn't exist on the 90-91 seats.
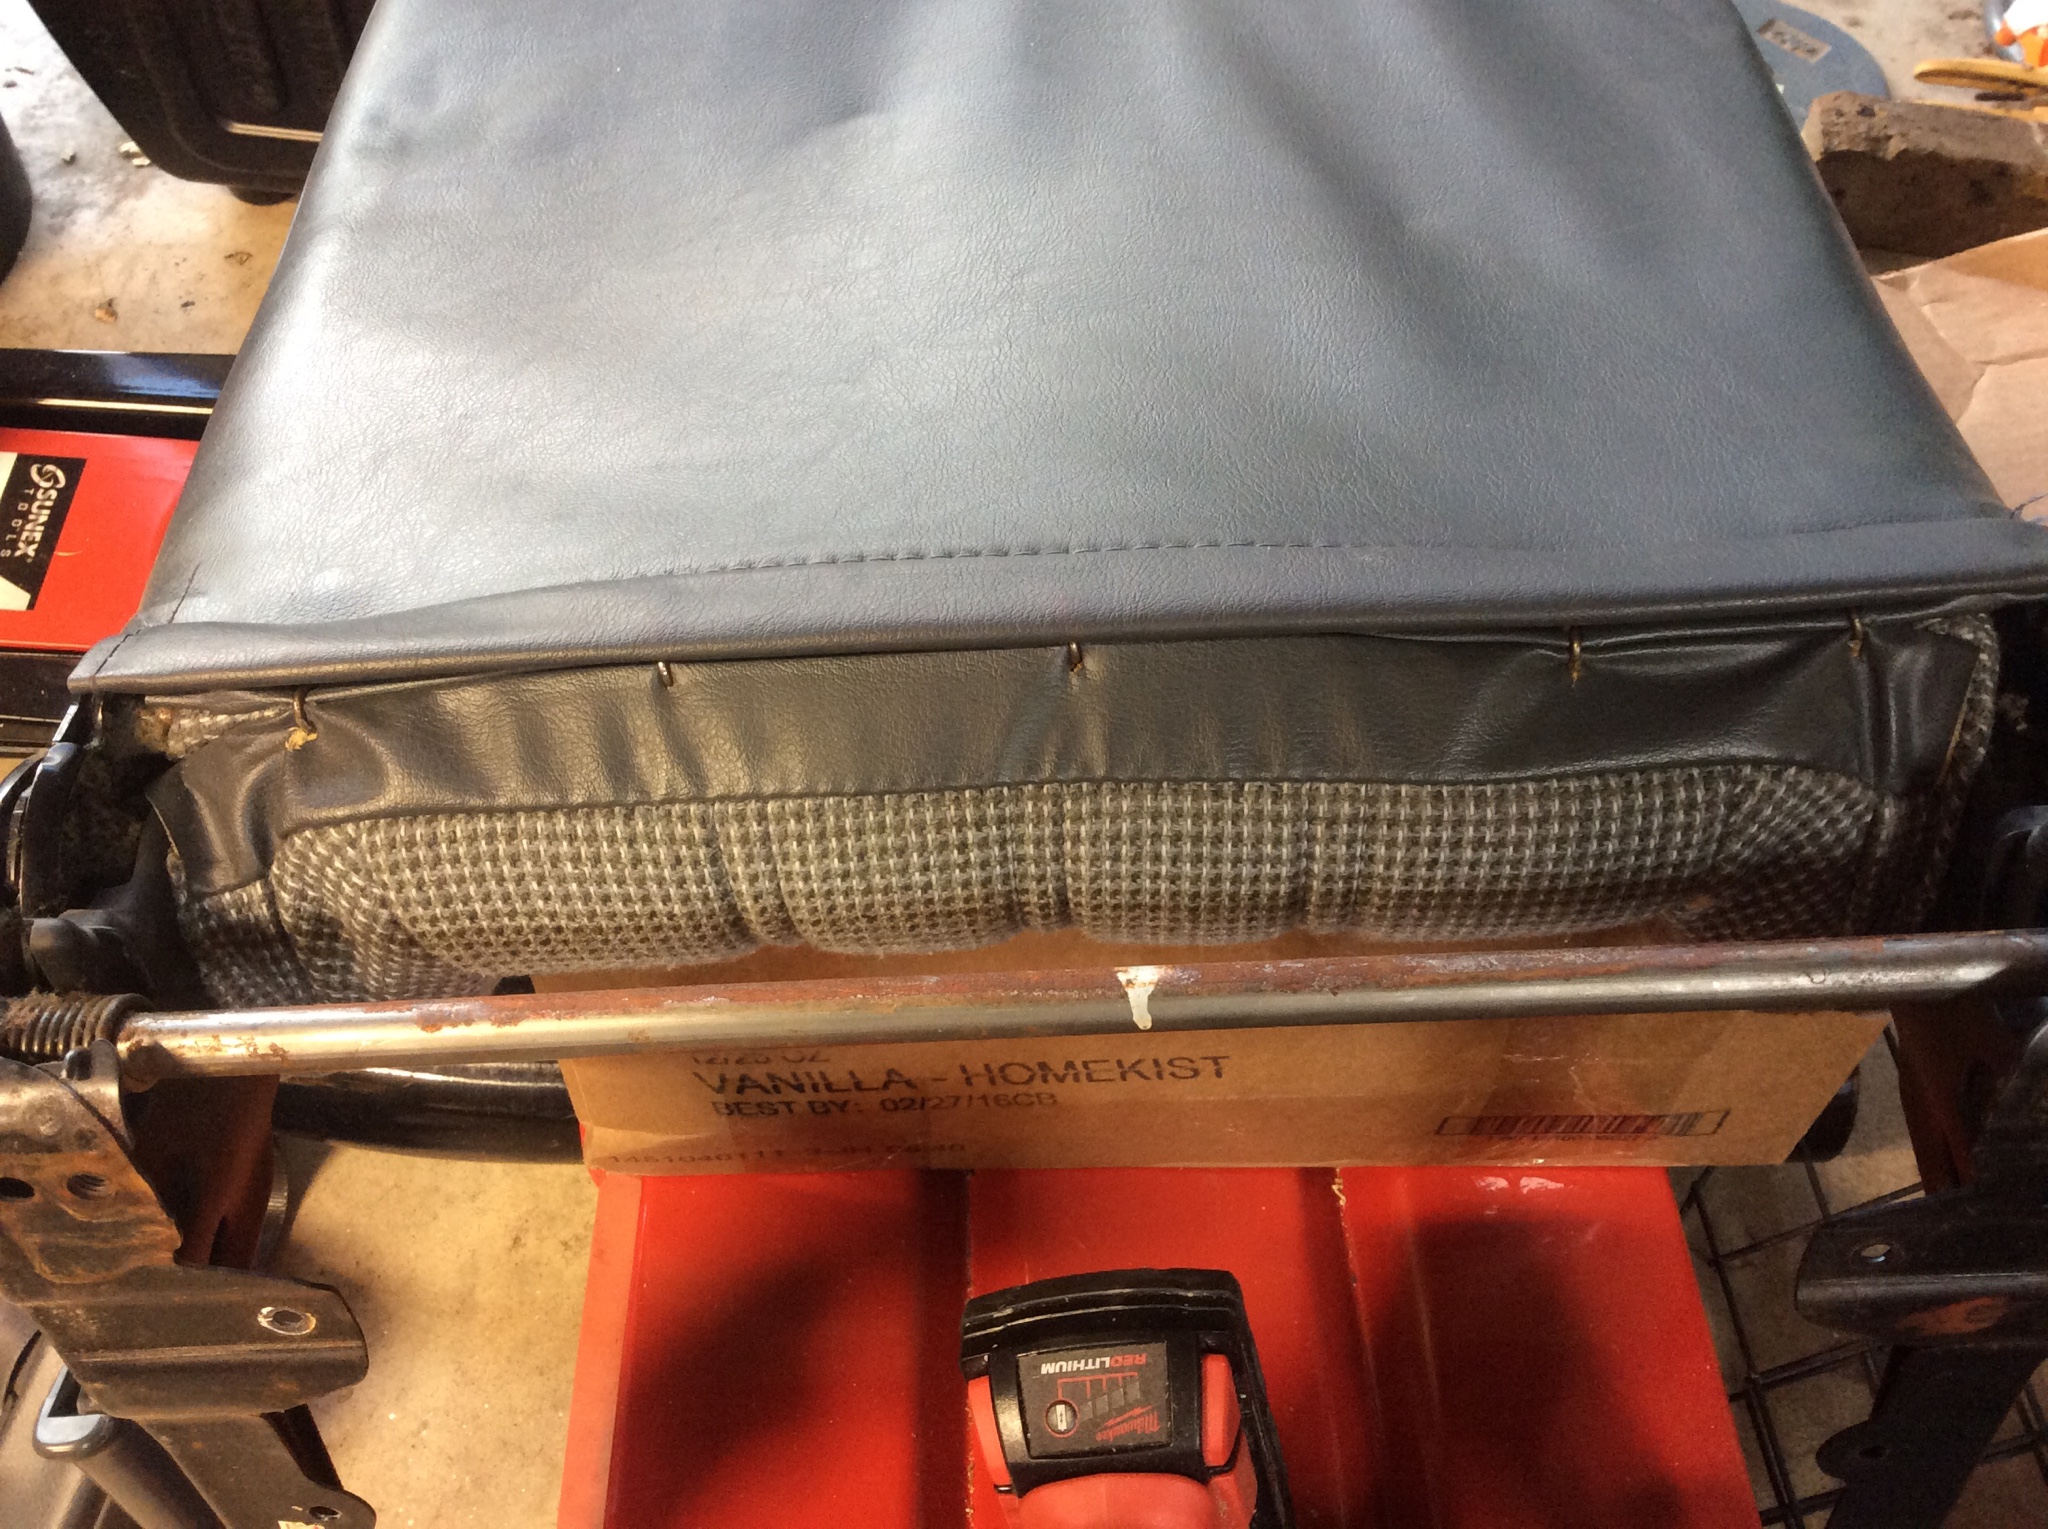
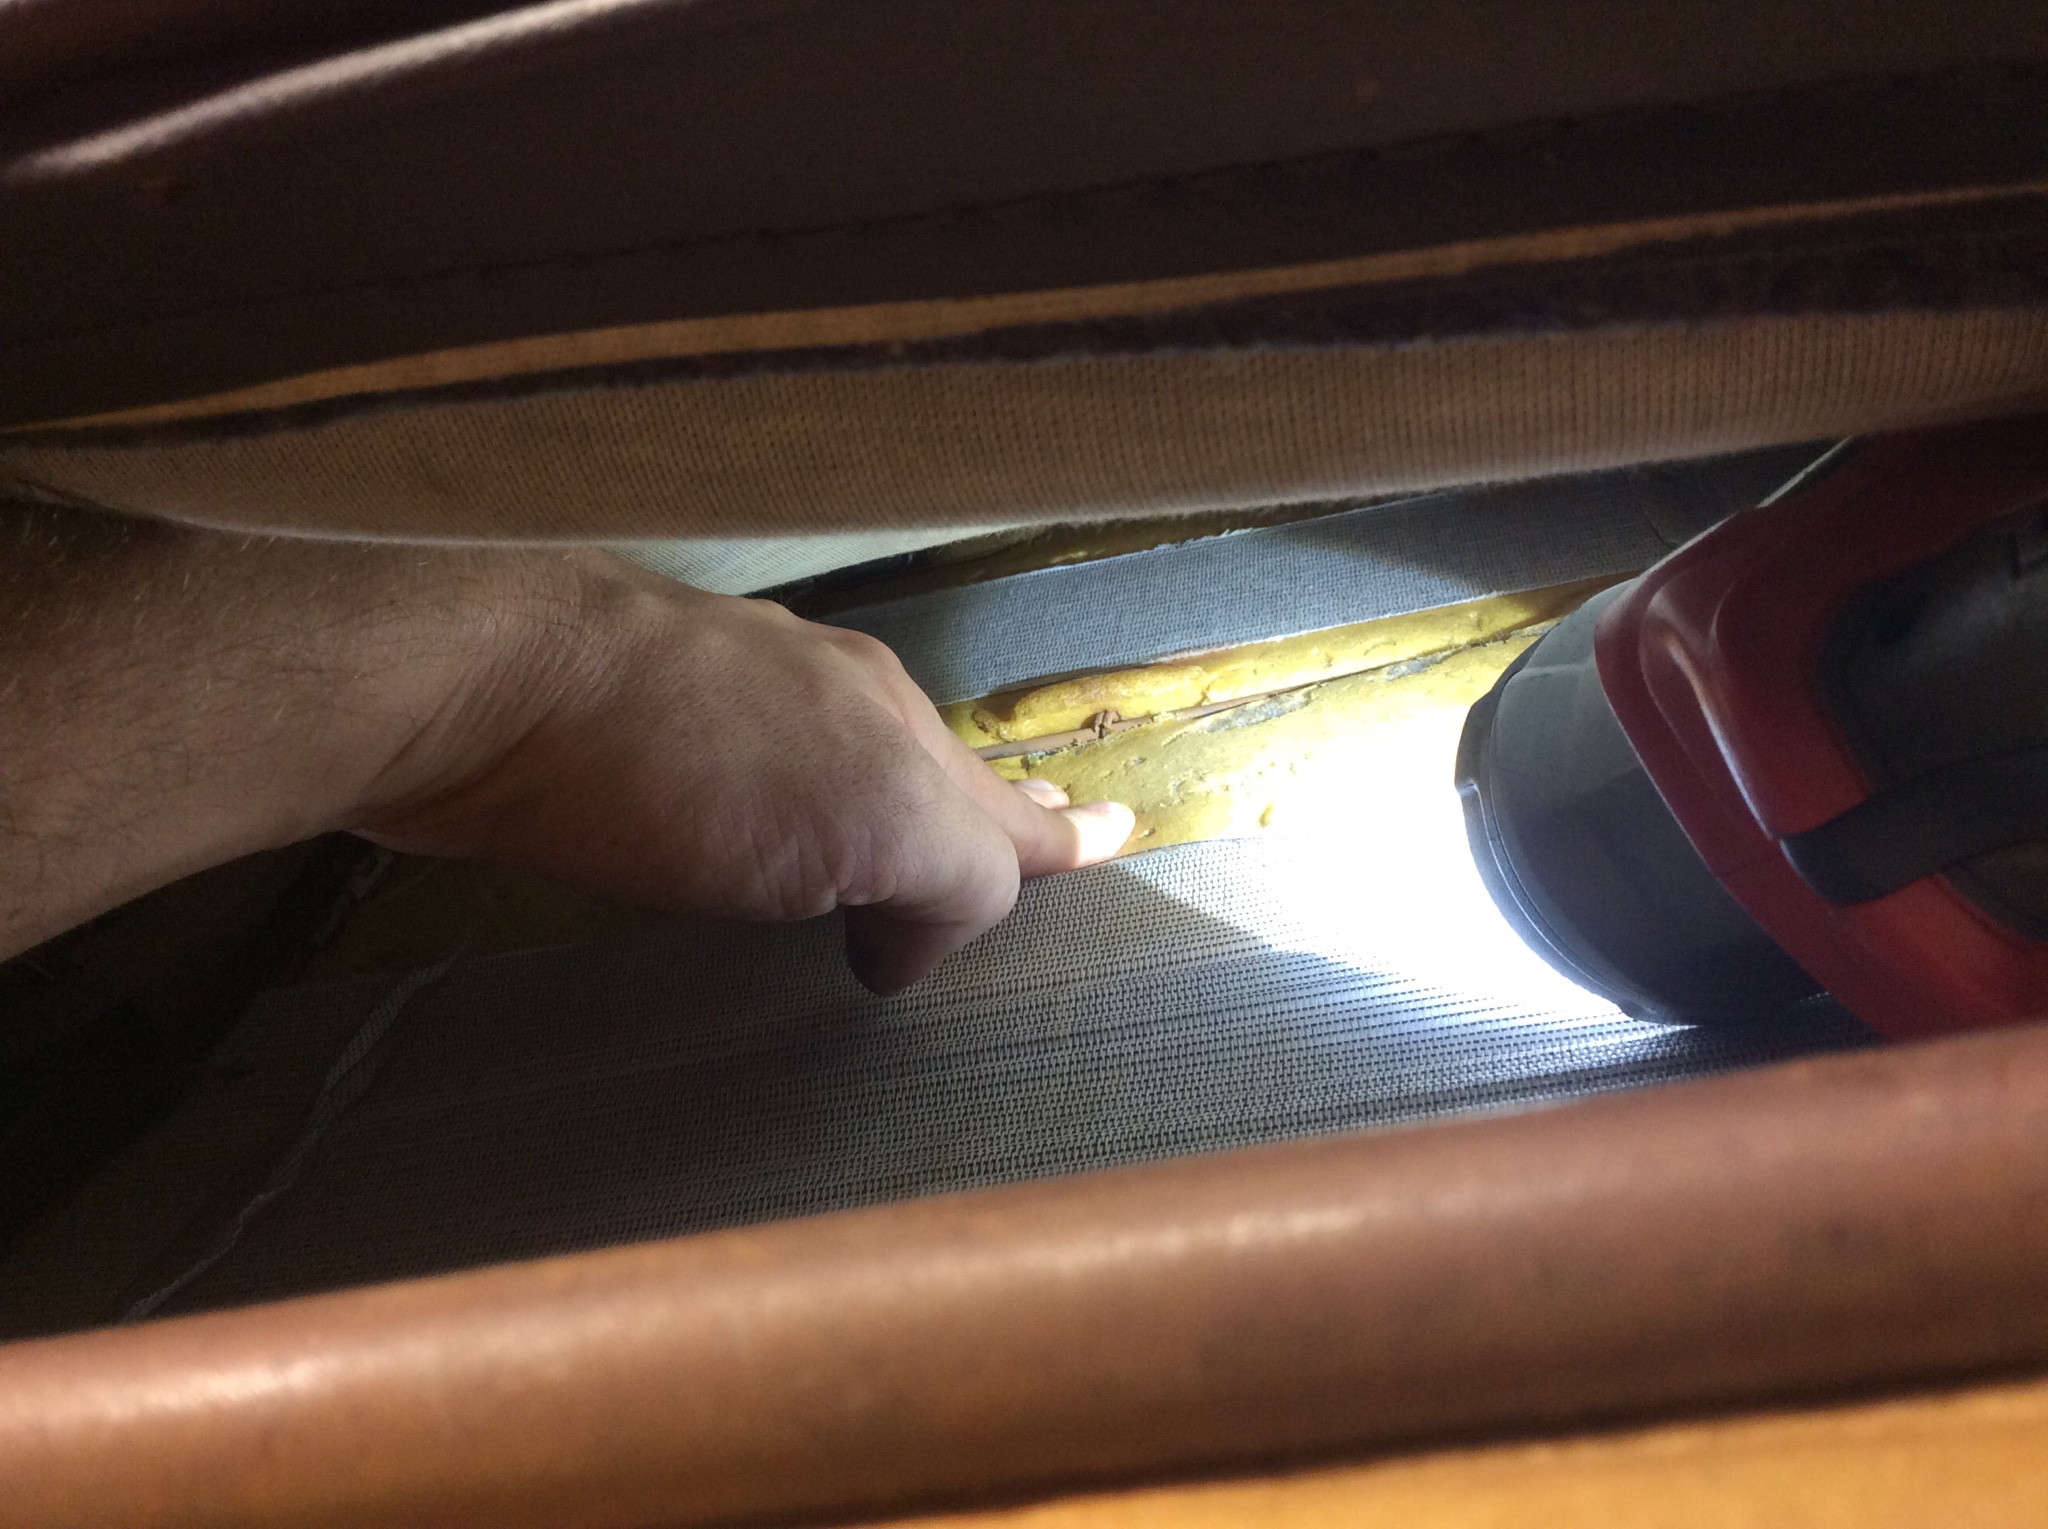
You will want to roll the cover up as you work your way. This lets you get to the higher up rings without having to reach way up in there.
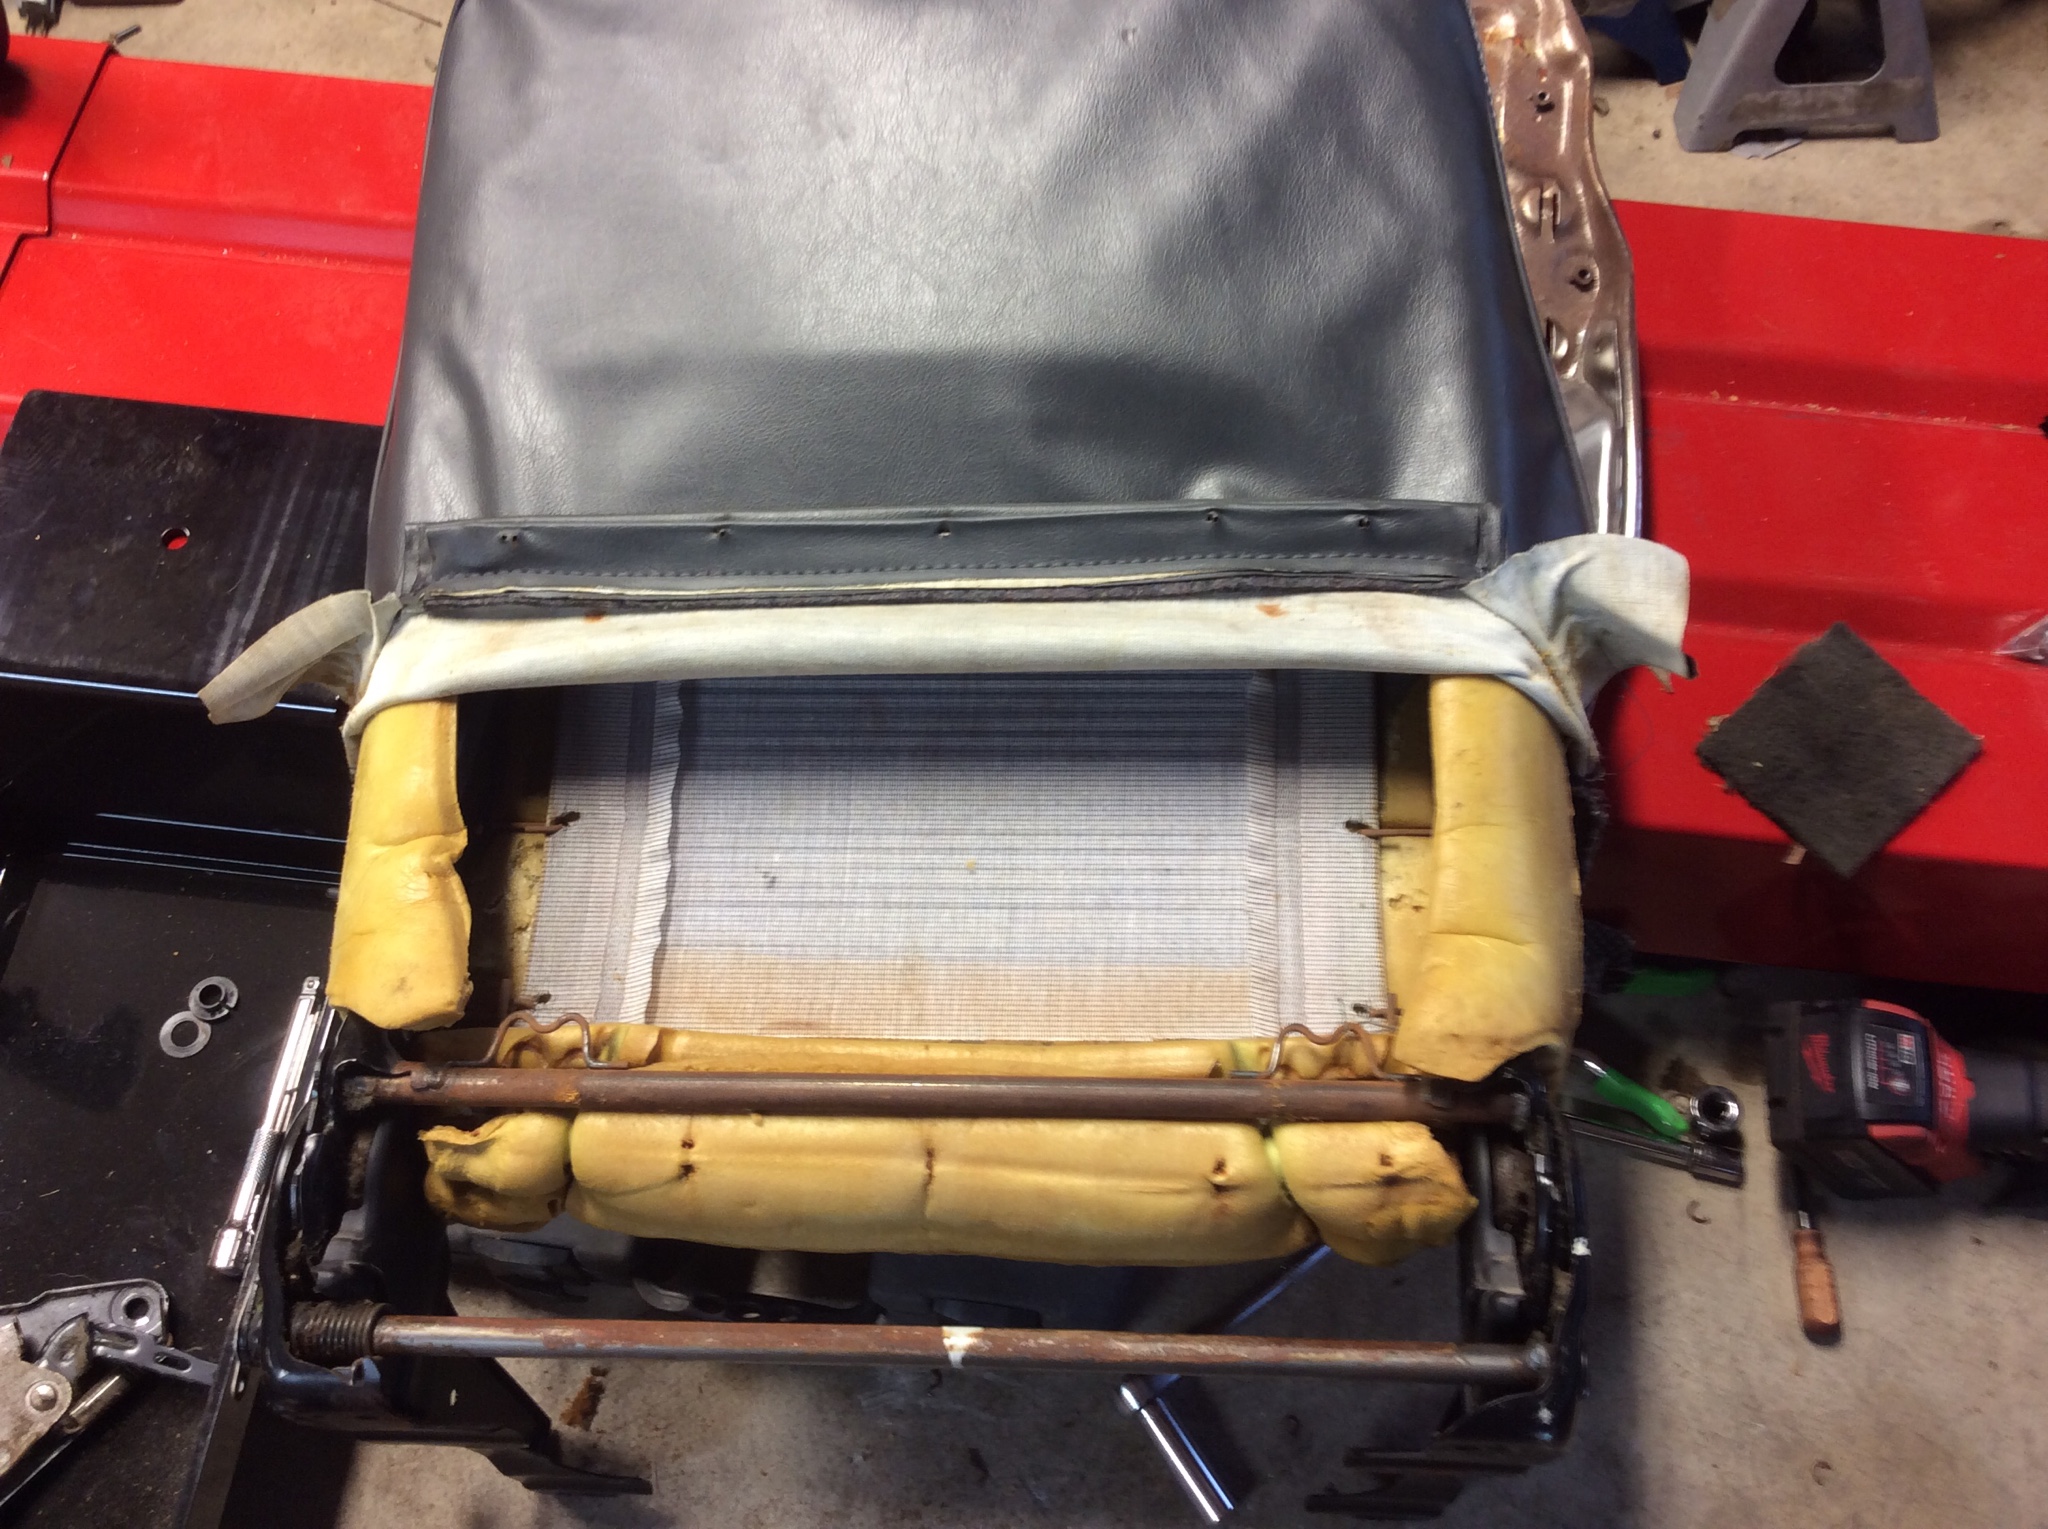
Trying to find them without rolling the cover up like this is a major pain and could cause damage to the cover. For reference, here is where they are. There is a bar that gets hog ringed onto the spring back support.
You will also want to pull the head rest guides out. One has a screw in it, you can slide the button over to expose the screw. You may also need to reach inside the seat and squeeze the barbed ends of the guides together to get them to pass back through their mounting holes. It was too tricky getting a shot inside like that so just reference the guide again.
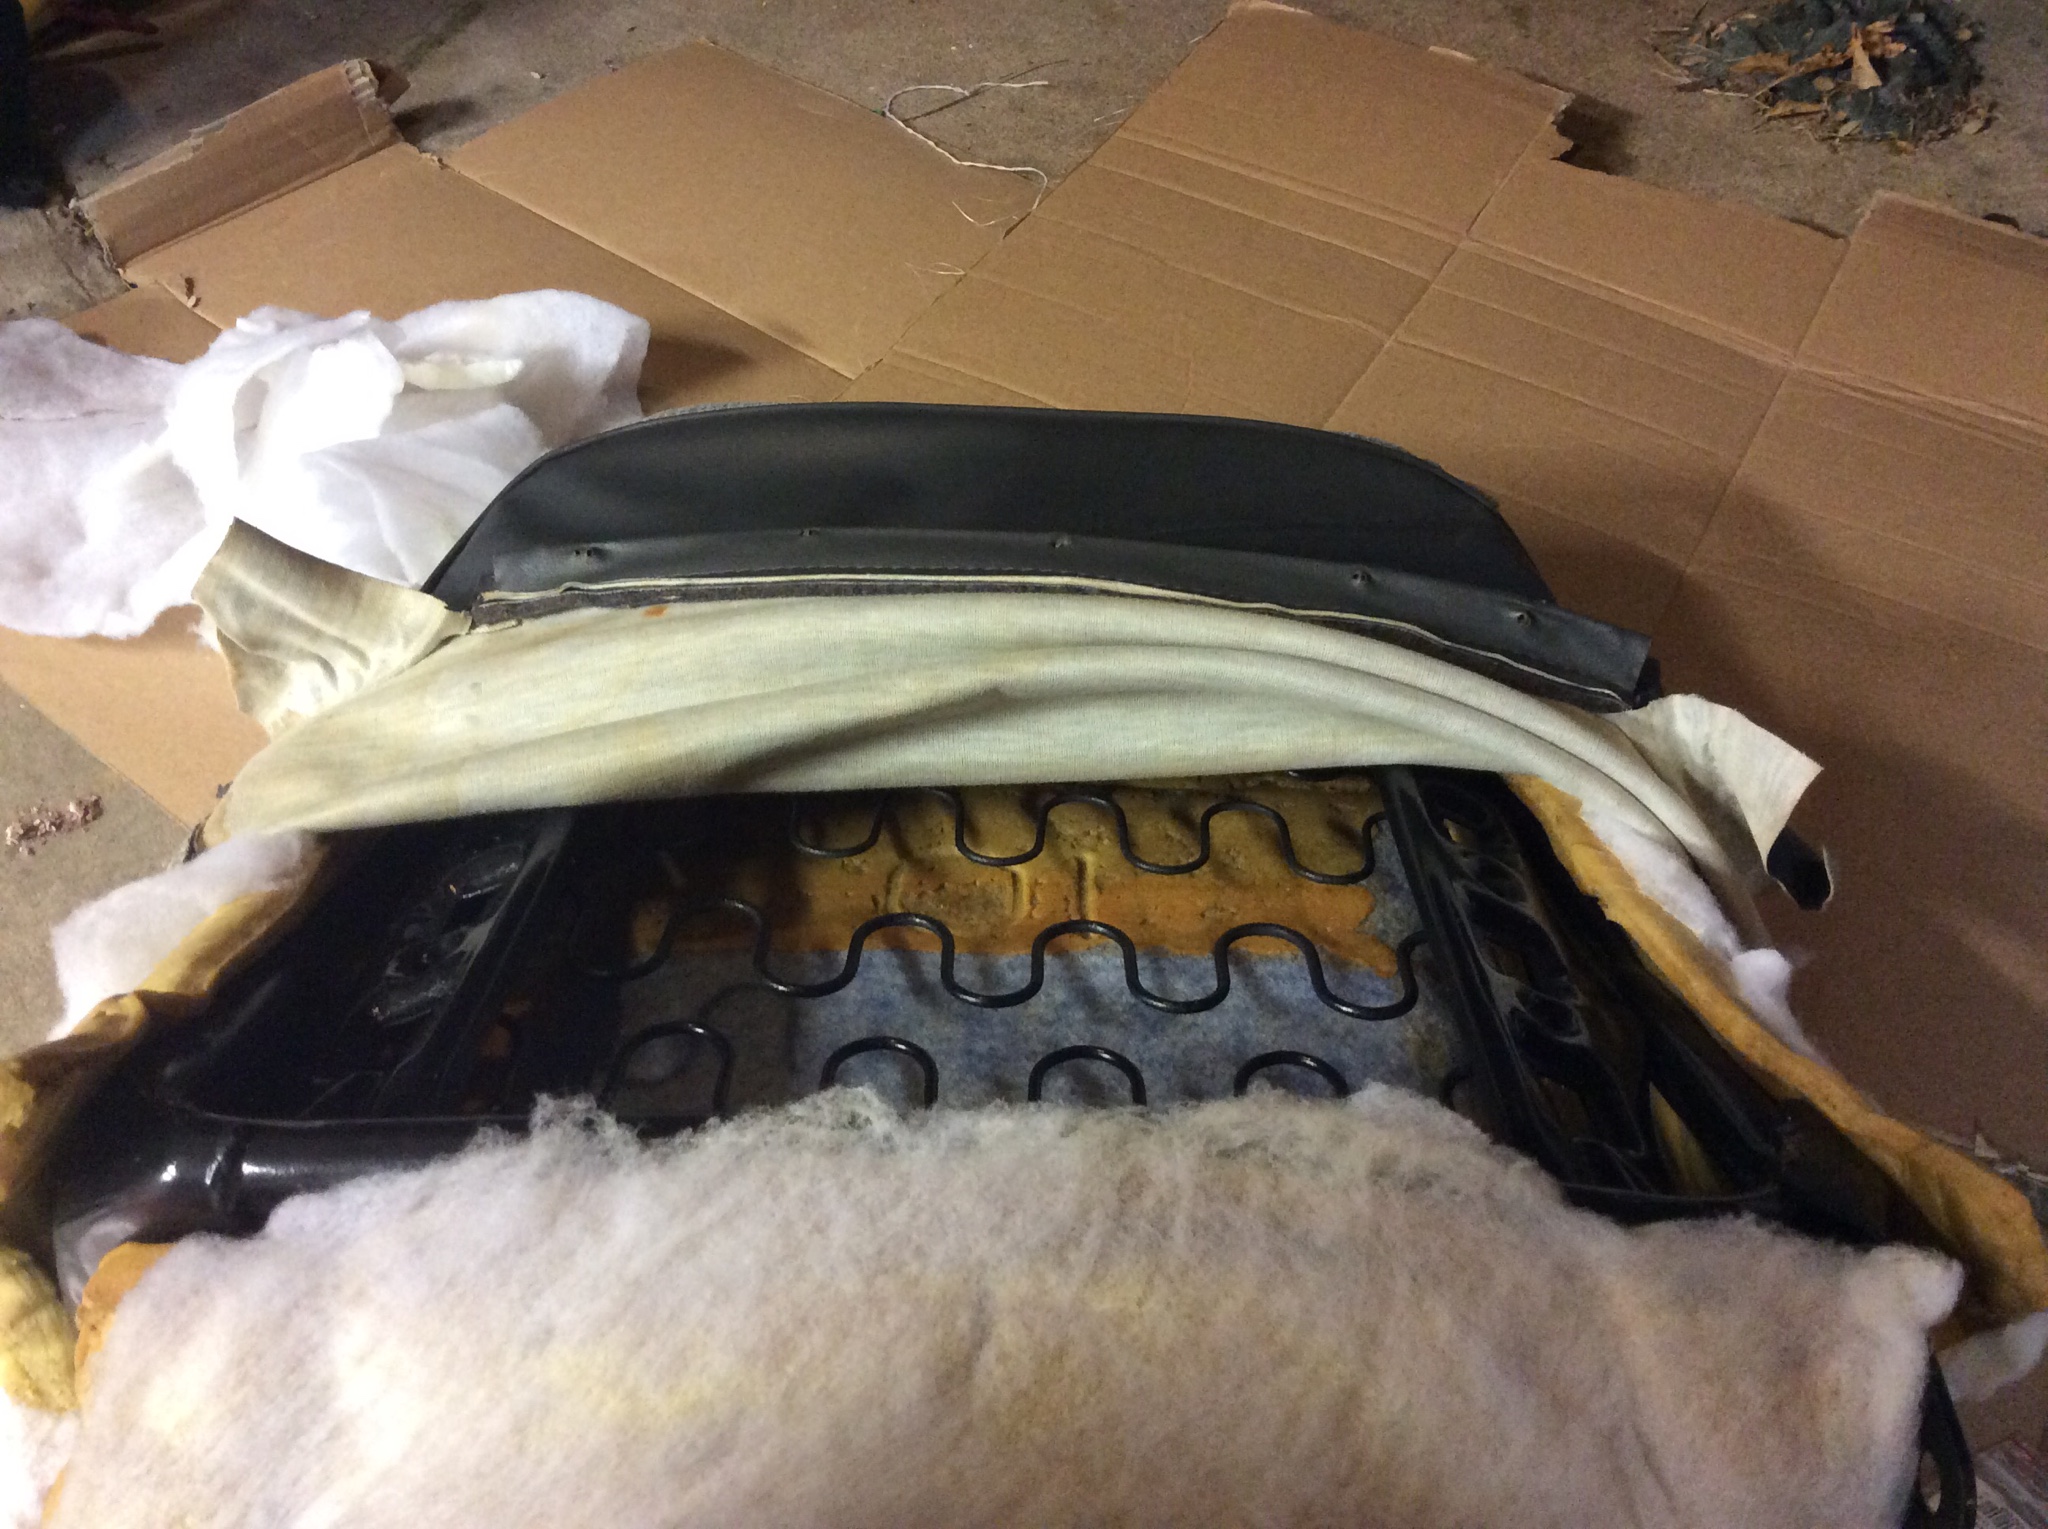
I used some spray adhesive to attach some batting to the seat back. I also used a steamer to help puff up the foam a bit too.

Now it's just sort of the reversal of the above steps. Squeeze the foam down onto the frame. You'll probably need to work at it a bit go get it seated well. Since the frame is different it might not fit just exactly right, but it will be close. I did notice that with the foam from the older seats on the newer frame the bolsters feel a lot closer together. Which is fine for me since I'm of smaller frame, but for any big guys out there, just keep that in mind.
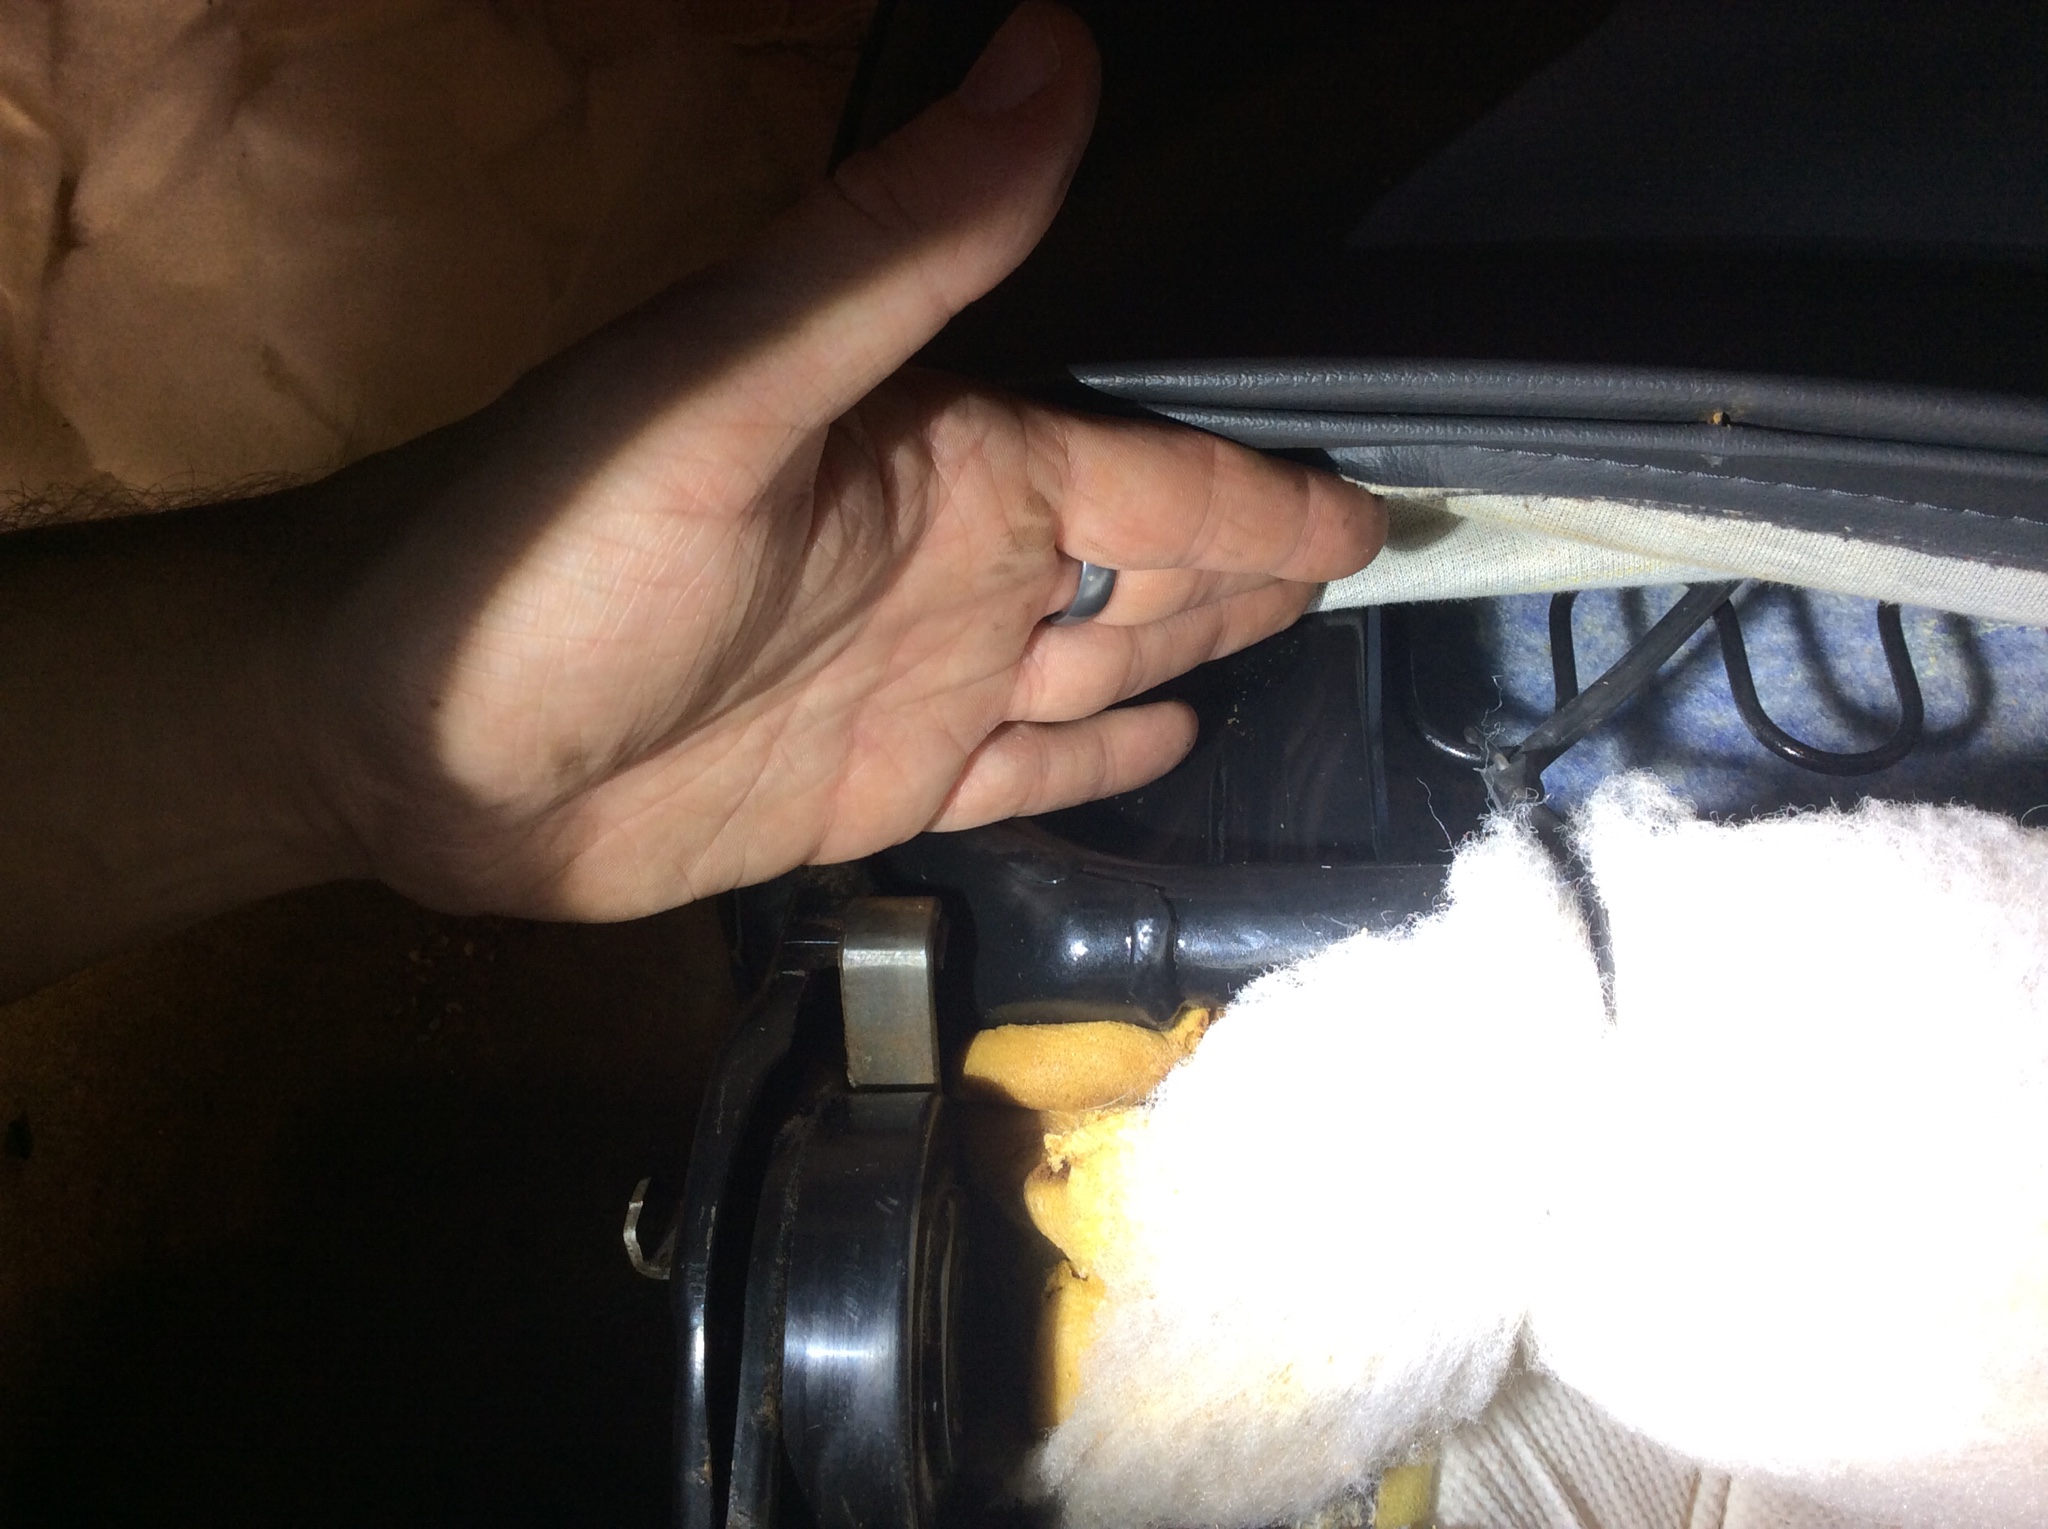
Hog ring the bar in place again. This took me some fiddling. I found it best to use one hand to press the center through to the support springs and then ring it from the center and work my way outward.
You'll have these two rubber lines that help tuck in the fabric at the side of the bolsters, stretch and hook these on the spring backs as well. I have some wrinkles in the front I might need to pull these tighter and hook them on the second spring up vs the first.
And here is the cover on. I'm no upholstery guy and this is my first time doing this. It turned out decent but still needs some work. I've since worked a couple more wrinkles out, and will likely give it another going over before I install the seats.
I'll get a final pic of the seat posted tomorrow with it all assembled. It's much much better. Than what I had before, that's for sure.
The grossness that I was sitting on before.

And what I'm swapping over to. Yes they need cleaned, but thankfully no tears.


A few things to call out when changing the foam over between the model years like this. It's not going to be perfect, though there are some things you can do to help it look nicer. The foam for the 88-89 was not designed with the built in auto seat belts, so they will be pressing into the foam, they still work though. The frame structure and seat pan is different, thus the need for this swap to begin with, but bars in different places. Hog ring mount points are also different, but you can stretch things around to work.
Removing the bottom foaming very straight forward. These references from the service manual will help.

There are going to be several hog rings around. You just cut those in half and pull them out. There is then a retaining bit of plastic that is clipped around three tabs on the seat pan. Pull it forward off the tabs and then you can lift up and the cover and foam should come off.
You can make it out in the picture below. This is my old seat. This fabric flap is hog ringed in place the white plastic you can see under the torn away fabric is what is latched onto the tabs of the seat pan.

Also since in this case I wasn't taking the bottom cover off of the foam itself I did not bother with cutting the embedded hog rings.
Here are the two seat pans, you can see they are fairly different. And on the other side the rail mount points are totally different. 88-89 has four bolts on the bottom. 90-91 has three on the bottom and three on the sides.

So since this is the gnarly shit we are working with, I decided to go at it with a wire wheel. I wanted to make sure the pan was fully painted.

Good coat of semigloss black rustoleum.

Displeased

With both sides painted, time to fit the replacement foam onto the pan. You can see the center mount points for the hog rings on the front of the seat are not at all in the same place. They are a couple inches forward. Unfortunately that means I'll have to cut some slots to get the hog rings through. For now though the two at the sides hold just fine.

Hog rings and hog ring pliers. They can be acquired cheaply enough that I'd not even consider using regular pliers on these unless I was in an absolute bind.

This actually goes through three layers. Two of the plastic and a bit of vinyl under there as well. Just get it through the existing holds, put one of the tines of the ring under the loop on the pan and squeeze.

Hook the plastic bit that was mentioned before, on the tabs of the pan, and pull the fabric flap in place. Hog ring it too.

Get the side flaps too. You can see that two rings were used before but the position of the covers only allows for one right now, future modifications can take care of this.

One side required a lot of stretching as it didn't come close to the ring mount.

This led to a wrinkle, but I'll deal with that for now.

Now for the top. Follow the reference from the fsm photos above, but here is a shot of the rings to cut, also another difference to note, there is a bar that the back of the bottom seat wraps around. This doesn't exist on the 90-91 seats.

You will want to roll the cover up as you work your way. This lets you get to the higher up rings without having to reach way up in there.

Trying to find them without rolling the cover up like this is a major pain and could cause damage to the cover. For reference, here is where they are. There is a bar that gets hog ringed onto the spring back support.

You will also want to pull the head rest guides out. One has a screw in it, you can slide the button over to expose the screw. You may also need to reach inside the seat and squeeze the barbed ends of the guides together to get them to pass back through their mounting holes. It was too tricky getting a shot inside like that so just reference the guide again.
I used some spray adhesive to attach some batting to the seat back. I also used a steamer to help puff up the foam a bit too.

Now it's just sort of the reversal of the above steps. Squeeze the foam down onto the frame. You'll probably need to work at it a bit go get it seated well. Since the frame is different it might not fit just exactly right, but it will be close. I did notice that with the foam from the older seats on the newer frame the bolsters feel a lot closer together. Which is fine for me since I'm of smaller frame, but for any big guys out there, just keep that in mind.
Hog ring the bar in place again. This took me some fiddling. I found it best to use one hand to press the center through to the support springs and then ring it from the center and work my way outward.


You'll have these two rubber lines that help tuck in the fabric at the side of the bolsters, stretch and hook these on the spring backs as well. I have some wrinkles in the front I might need to pull these tighter and hook them on the second spring up vs the first.

And here is the cover on. I'm no upholstery guy and this is my first time doing this. It turned out decent but still needs some work. I've since worked a couple more wrinkles out, and will likely give it another going over before I install the seats.

I'll get a final pic of the seat posted tomorrow with it all assembled. It's much much better. Than what I had before, that's for sure.
Comments
I've done this a few times, as well, but without pictures. I'm about due again - the last nice set of wagon fabric I could find is disintegrating...
If you can't find decent wagon seat upholstery, sedan/hatch/CRX seat covers work, too but the headrest holes are different. It won't be perfect but it's cheap.
Two things to consider:
1 = I used zip ties instead of hog rings when I put the seats back together. I have no hog rings or pliers.
2 = I ran the "new" seat covers through the clothes washer. Helps with the gross-ness.
Though that said, I do wish I'd have given them the full cleaning before I fully reassembled the seat. Oh well =D
I'm still wanting to get some fresh upholstery done, with the fabrics I found. What I'd really love to find is a stitch pattern. I have a good number of friends with upholstery businesses, and the girlfriend is pretty fair with a sewing machine. I can even bodge together some stuff if needed. But it would be awesome to have a pattern to reproduce some actual covers in a decent fabric. But that's yet another project I probably won't tackle any time soon.
anyone know is a passenger seat from a 91 will fit on a drivers seat from 88?